To raise young birds, you need a specially equipped place - a brooder for chickens. This is a box, cage or fenced corner in a room with a heated floor. After all, chickens need warmth, light, and air. There it is necessary to provide for the organization of feeding the young animals. Cleaning the floor from waste products is also an important stage of care. This process should be simple. After all, chickens growing among the litter peck at it and get sick. This could lead to their death.
- 1. Air must flow into them.
- 2. Sunlight is essential for the health of young animals.
- 3. Temperature conditions are very important: it is necessary to maintain a certain temperature in the cage depending on the age of the chicks.
- 4. Large concentrations of individuals should not be allowed in one compartment: chickens, huddled together, trample the weak ones.
- 5. Daily floor cleaning bird droppings- the procedure is mandatory. To simplify this process is the task of the master.
- 6. Providing convenient feeders and drinkers for chickens is an important part of the work on equipping a place for raising young animals.
- carton boxes;
- old aquariums, terrariums;
- old bedside tables;
- wooden manger boxes;
- heated wooden cages with trays and doors;
- multi-storey heated cages with trays and doors for keeping large quantity young animals
- the inability to clear the floor of droppings, which is why the smell of ammonia in the room where the chicken coop is located not only causes trouble for the poultry farmer, but also harms the pets;
- high fire hazard;
- poor heat retention inside, so when heating with electricity, costs are high;
- cardboard warping due to indoor humidity;
- inconvenience when keeping a large number of chickens: when placing boxes on top of each other, the chicks suffocate; when using shelves, caring for the young becomes very difficult.
- 1. Glass is easy to clean.
- 2. The design of aquariums and terrariums is rigid.
- 3. The material of such a brooder is more durable than cardboard, while careful use more durable than wood.
- 4. The walls transmit light well.
- 5. Thermal insulation is high, which ensures energy savings for heating.
- it is difficult to ensure good air flow;
- glass is fragile.
- windows are cut out in the doors (or the inner plywood part of the doors in kitchen tables is removed);
- stuff tulle and plastic mosquito nets onto the windows, metal grill with small cells;
- a heating element (for example, an incandescent lamp) is attached to the upper surface;
- a thermostat sensor is attached closer to the floor (just above the chickens’ heads) to avoid overheating of the chickens;
- according to the instructions attached to the thermostat, it is connected to a heating element and a switch;
- the bottom board of the bedside table is removed;
- instead, a fine metal grid is pulled over it;
- A tray is installed under the brooder, which can be easily pulled out for cleaning.
- plywood sheet;
- slats for fastening parts of the frame, decorating a door with a mesh, constructing rails for a pallet;
- door latch;
- hinged door hinges;
- door mesh;
- metal floor grating;
- nails;
- hammer;
- saw.
Show all
Brooder for chickens: purpose, features
Often, a poultry farmer needs to raise young animals without the participation of a hen in the process. Then you need to create for chickens the necessary conditions for growth, healthy image life.
Chick brooders must meet the following requirements:
Methods for making a place to keep chickens:
Each option has its advantages and disadvantages.
Carton boxes
The simplest and cheap option keeping chickens. The place where the brood is kept is made of waste material. Anyone can make such a nursery for broiler or quail chicks with their own hands: no drawings or special skills are required. It is enough to figure out how to heat the chickens, and the “room” itself is already ready.

Chick brooder made from cardboard boxes
Another advantage of using cardboard boxes for raising young birds is that they do not need to be stored until next year.
Disadvantages of using cardboard boxes:
Cardboard boxes are used for short-term replacement of stationary heated cages or when keeping a small number of chickens.

Aquariums and terrariums
The use of glass containers for keeping young birds is possible. Even if a crack has appeared in the wall of the aquarium, it has become unsuitable for its intended purpose; it can be given a second life in the form of a house for chicks.

Brooder for aquarium chickens
Advantages of choice:
The disadvantages of glass poultry houses are:

Boxes made of plywood or boards
Wooden structures in the form of boxes without a top - mangers - are easy to make if the craftsman is familiar with working with a hammer, nails and a saw. Typically, a brooder of this type is put together in the shape of a pencil case.

Wooden brooder nursery
While the chicks are small, the top is left open. Then, as the chicks grow, they try to jump out - a net is required to cover the brooder. Use solid roof not recommended: air flow is difficult, there is no access to sunlight.
If there are holes in the brooder roof and using heat sensors connected to the heating system, you can cover the brooders with tight lids at night to save energy costs. And chicks without light reduce their activity and become quiet.
Such mangers are inconvenient when cleaning the floor from waste products. Chickens need to be moved to another place during harvesting, which can result in loss of time for the caretaker, nervous stress young animals, searching for boxes for temporary housing of chicks.
From old bedside tables, kitchen tables
If there is unnecessary furniture left in the house, it can be used as a brooder frame.

Brooder from an old bedside table
To improve the design:
You can put slats on the side walls from below. They will serve as rails for the pallet. This will make cleaning the brooder more comfortable.

Brooder tray for collecting bird droppings
A double floor in a poultry “house” will save chickens from poisoning and reduce the mortality rate of young animals. The droppings instantly fall down. The chicks do not have the opportunity to peck it.
Heated brooders are usually installed indoors. Poultry farmers use them during the first period of life of chickens or if a brood appears in early spring when it's still cold outside. In warm weather outdoors use other cages for walking young animals, without additional heating.
Wooden brooders with trays and doors
The design of this structure is the same as in the version described above - “Bird houses from old bedside tables, kitchen tables"Only the master makes the walls here himself. To make a heated cage, you will need a drawing.

Drawing for making a brooder frame for chickens
The sizes can be arbitrary. Here we offer the optimal 30 heads of young birds for keeping. This design is suitable for indoors and outdoors. IN home version heating of the chicks is used; when outdoors, they do without it.

Wooden chicken brooder
You can complete the job according to the instructions in a few hours. The main thing is to have everything you need on hand:
First, the side and back walls are cut out of plywood.

Side walls of the brooder
On the sides and the rear wall along the bottom, slats are stuffed: for the grate and pallet rails.

Ready-made side walls for the brooder
Vertical slats play the role of stiffeners.

Now the side and back walls need to be knocked together.
It is important to ensure that the points of the nails do not protrude anywhere. Even small nicks can cost chicks their lives.

The master can design the front wall-door at his discretion with two or single doors. Depending on this, hinges are placed on the door.

DIY chicken brooder is ready
After this, you can stretch the mesh over the door, securing it to the overall structure. You need to stuff a metal grid at the bottom. The roof is optional - home brooders can do without it.
The pallet is cut to size, and slats are stuffed around the edges to ensure that the litter is collected without the possibility of it falling out on the floor. The brooder frame is ready, all that remains is to install the feeder and drinker inside, install the thermostat sensor and heating.
We are glad to welcome you, dear readers and guests of the site! Anyone who decides to buy chickens that are a few days old is faced with the problem of how to keep them, because they can die in the first month of life. Lack of warmth, drinking, food, care will lead to the death of the chicks. The solution is a DIY chicken brooder. The design will help preserve offspring.
To save on your purchase finished brooder, you can make a home for “newborns” with your own hands, it’s not difficult, having minimal skills and necessary materials. 2 - 3 evenings are enough and a cozy nest is ready. This construction will be discussed today. Photos and videos will help you visually navigate.
What is a brooder
When encountering this term for the first time, everyone has a different picture in their head. A brooder is a box, box, perhaps a room, equipped for raising chicks in the first weeks of life. The “device” performs the function of a mother hen, warming the baby and providing food. Later, the young animals move to the chicken coop; how to build one is described in the article: “”.
It’s easy to make a brooder yourself, understanding its main functions and the sequence of construction stages. Knowing the principles, you can even make a product from cardboard boxes.
What are the requirements for a brooder?
The requirements consist of factors affecting the growth of a healthy bird and the convenience for the poultry farmer to “maintain” the chicken house.
Non-slip floor.
Dry floor, otherwise the chicks will get sick.
It would be ideal to equip a tray for feces under the floor.
Control humidity levels.
Do not overheat the equipped room with heat lamps.
The heating source should not come into contact with the plumage of the young animals; maintain distances from the ceiling to the floor.
Good, well-designed ventilation will minimize mortality in growing flocks.
How to make a brooder
Reasoning and debate about the correct ratio of the size and number of chicks in the “nursery” are ambiguous.
Having clearly thought through the construction plan, even in a space of 100 x 50 x 50 (length * height * width), it is possible to house up to fifty chickens. More quails will fit. There is no need to crowd broiler chickens to avoid “walking on their heads.” There is no specific advice on how to house chickens - each poultry farmer is guided by his own vision of raising future workers.
Important! Brooder sizes may vary. Our option is not the only one. Clearly calculate the parameters when drawing a drawing - this is the key to an accurate, reliable home for chickens.
What materials and tools are needed to build a brooder?

- Plywood, sheet 1 cm thick, 150 cm width and height (1 piece).
- Rail with a cross section of 15 x 50 mm.
- Four loops.
- Galvanized mesh, cells 1 cm x 1 cm, size 50 x 100 cm (1 pc.).
- Plaster mesh to make doors.
- Tin sheet, oilcloth or plastic base– future feces collection tray.
- Nails, screws.
- Cable of required length.
- Dimmer.
- Infrared lamp power 60 W or regular 40 W.
- Light reflector.
- Cartridge.
- Fork (1).
- Hammer.
- Hacksaw.
- Drill.
- Screwdriver.
- Screwdriver.
- Roulette.
- Pencil.
Another tool if necessary.
How to assemble a brooder
We cut a main piece of 50*150 cm from a standard plywood sheet (150 by 150 cm).

We cut a part of 150 x 100 cm into three identical pieces of 1 m x 0.5 m (future roof, pallet, back wall).
We cut the side walls from 50*150 cm pieces, measuring 50 (W) x 50 (H).
We assemble the walls. It is more convenient to first knock down the frame from the slats.
Then we make a frame, using a lath to place it under the product. Approximately 98.0 x 49.0 cm. 1 m x 0.5 m plywood for the bottom of the brooder. We check the accuracy of the calculations and nail them down.
The previous step is making the pallet. Covering it with oilcloth makes it easier to clean up feces.

We place the pallet in the designated place, fill the slats a little higher - floor holders.
We make a frame, as for a pallet, and nail a mesh (galvanized) along the bottom. Cover it with newspaper for a couple of days, the chickens will be warmer.
We knock together both doors, take the slats and pull them over them plaster mesh. 45.0*31.0 – approximate size.
We put together a frame from a lath, fasten it with nails to the front side of the construction site, and hang the doors on the frame using hinges.
We cut in the latches, if desired.
We cut a hole in the ceiling for the cable to exit.
We pull the cable inside, attaching a socket.

We attach the dimmer and plug to the opposite end of the wire.
If desired, attach the thermometer to the back panel.
Attention: It is better to use infrared lamps, they heat better than regular ones.
The DIY chicken brooder is almost ready. We screw the lamp into the socket, use a reflector - “a place in the sun”. The building area is heated by light unevenly. Reflectors increase the heat under the lamp, keeping the chicks warm under it. If it’s hot, they’ll move to another part where it’s cooler. We equip the “nursery” with a drinking bowl and feeding trough. The brooder is ready!

If you breed a lot of chickens, make two more of the same buildings and combine them on top of each other, assembling a frame. The design will allow you to keep quons, cockerels of different ages, various types. Painting the chicken house as desired.

You can even make a brooder out of an old bedside table. Properly equipping it with everything necessary, you can accommodate more than 50 chicks (quails, broilers, ducks). The design can be made multi-level by installing cabinets on top of each other. Device a lot single use: It's worth trying once.
Drawings, photos of the stages of brooder construction


Tell us in the comments how you made your own chicken brooder. Share this article with like-minded people on in social networks. Don't miss out on what's new in the chicken world.
Good luck, chicken lovers!
These methods are cheap. But they are good only when there are few chickens or you have not yet decided whether you should engage in poultry farming. If the answer is yes, then you will agree that it is much more convenient to spend time and money once, but get a clean and neat permanent installation.
Which one is better to choose - ready-made or homemade?
So, it’s decided - we need a brooder. Where can I get it? The first option is to buy. We go online and study the issue. As a result, we obtain the following information.
Ready-made brooders
Stores have a wide range of these products. Can be ordered with delivery and assembly. There would be money. For example, you can buy this one.
Its dimensions:
- width - 1.07 m,
- depth - 0.53 m,
- height - 0.52 m.
It has a pull-out plastic tray. The height of its sides is 5 cm. The fact that the tray for accumulating litter is made of material that is not subject to corrosion is very good. It will be easier to clean.
Frame - moisture resistant plywood, size 20 mm. The material is painted with a varnish that is safe for bird health.
The floor is galvanized welded mesh with cell size 25x12.5 mm. Since the brooder is universal (you can raise not only chickens in it, but also ducklings and quails), the kit includes an additional floor liner. Cell size - 5x5 mm. It is intended for smaller birds or until the chickens are older.
The brooder is heated by an infrared lamp, which is turned on via a dimmer. It allows you to smoothly change the heating of the lamp, which must be done as the chickens grow older.
Brooder design is not required additional frame when forming multi-tier batteries. You can simply put them on top of each other and you will get a product like this.

One section of such a battery costs 7,450 rubles. But that's not all the costs. Feeders and drinkers are not included in the package. And you can’t keep a bird without them.
As you can see the price is decent. For half a square meter of space that the brooder will occupy, you will have to pay a tidy sum. Moreover, chickens need it for a maximum of one and a half months.
Homemade
So is it worth spending that kind of money? Our chickens do not lay golden eggs. And if, when keeping chickens in cages, it makes sense to buy ready product(you can read about this in this article), then you don’t have to do this for chickens. This is the place where they are kept temporarily, not permanently.
Looking at the photographs of the finished brooder, you can understand that this is a fairly simple product. If you have the skill, a screwdriver, a jigsaw and available materials, it is quite possible to do it yourself.
Many craftsmen even adapt old furniture. For example, various bedside tables or playpens, or plastic containers. But the latest products are good only for one-time use and with a small number of chicks. And frankly speaking, they are no different in beauty.
Making a homemade brooder
If you need to place up to 60 chickens in a brooder, then you can build it according to this design.
- Width - 1000 mm,
- Depth - 600 mm,
- Height - 450 mm.
A brooder of this size can comfortably accommodate 100 quails or 40 ducklings.
Appearance A brooder with a cut out segment is shown in the figure.

The numbers in the figure mean the following:
- Steel frame.
- Removable floor in the form metal mesh.
- Pull-out tray.
- Front folding wall.
- Rear blank wall.
- Roof.
- Sidewall.
- Carbolite ceiling cartridge E-27.
- Infrared heater ceramic IOT/75 60 W, having screw base E-27.

To make the frame, take a corner of 25x25x4 mm.
Taken for the floor steel mesh with a cell size of 10x10 mm. It is attached to the frame screw connection. This mesh size does not injure the chicks’ legs and at the same time does not allow droppings to accumulate in the brooder. Through these cells, excrement spills freely into the tray. It is possible to remove the mesh for washing and cleaning.
The excrement tray is made of thin steel - 1.0 mm. The appearance of the frame with the tray extended is shown in the figure.

Moisture-resistant plywood (10 mm) was used to make the brooder body. It is attached to the frame with self-tapping screws.
Infrared lamps are attached to the ceiling. The required degree of heating of the lamps is regulated using a thermostat located on the front folding wall.
There is a plexiglass window in the front wall-door. The door itself can be fixed at the desired angle for ventilation and cleaning of the brooder.
For feeding, you can use standard hopper or tray feeders. And for drinking, nipple drinkers with drip eliminators. Depending on the type of drinker and feeder chosen, they are installed inside or outside the house.
You can make such a device yourself. Chickens are kept in it for up to one and a half months. They are then transferred to adult cages or free range. True, if you make a brooder according to this scheme, it will not turn out cheap. But any process must be approached creatively.
conclusions
There is no need to blindly copy what you see. You need to choose what suits you. This means that before you start construction, do the following.
- Decide what size brooder your chickens will need - single or multi-tiered.
- Conduct an audit. Maybe you recently did a renovation and you have some building materials left over. These remnants will adjust the dimensions of the future product.
- Make a drawing. Think about where to place it and which ones are best to use.
- drinking bowls,
- lighting lamps,
- Do you need an additional heater and humidifier?
- Will you use an automatic thermostat or limit yourself to the manual method?
- Calculate your expenses.
When farming and raising poultry, many people choose chickens; they are the most unpretentious and require less money and time. The natural process of breeding offspring is ensured by laying hens. But many types of meat chickens have lost their instincts and are unable to reproduce. Therefore, most often, farmers hatch chicks in an incubator or buy day-old chicks from poultry farms. These kids need special care during the first month of life. In order for the chicks to be warm and comfortable, they must be kept in a special room called a brooder. A house for small chickens can be bought in a store, but in order to save money, it is worth making a brooder for chickens with your own hands.

Many new chicken breeders often try to place their chicks in large cardboard boxes. This method may be suitable for keeping chicks for a while, but for permanent keeping it is better to make a special brooder for chickens with your own hands. The design of the brooder must meet certain requirements:
- must provide access to fresh air;
- support desired temperature and light mode;
- provide the opportunity to deliver food and water to the chicks without disturbing them;
- quick to clean, ideally there should be a tray where the feces will fall, so that you can pull it out and wash it without disturbing the chickens.
Another one important detail What needs to be taken into account when designing a brooder is its capacity. A cramped room will provoke the occurrence of diseases and mortality of livestock, so the size of the structure must be determined based on the number of chicks. Professionals advise making a nursery from several compartments. They can be arranged in a row and separated by a wall or above each other in several tiers. In any case, this will allow you to keep the chicks in small batches or separate the birds different ages.
Advice! The dimensions of the structure should be planned based on 30 broilers 1 square meter premises, if laying hens are raised, then the same area can accommodate 5 more chicks.
The optimal dimensions of a brooder are: a façade 100 centimeters long, a wall height of 30 centimeters and a depth of 50 centimeters into the structure; in addition, it is necessary to take into account 10 centimeters between the excrement collector and the bottom of the brooder on which the chickens walk. This design accommodates 15 chicks and provides the best warmth and maintains the desired balance of heat and humidity. If it is necessary to raise a larger population, several similar cells are made, from which a large aviary for keeping birds is constructed. Moreover, you can place it both in a barn and at home. Moreover, if you make a multi-story brooder for chickens with your own hands, it will significantly save space.
Materials and tools

Making an aviary for small chickens is a responsible matter; it should not only be warm and comfortable for the chicks, but also made of materials suitable for such a design.
Let's look at some types of materials from which you can build a brooder with your own hands, and also evaluate their compliance with standards.
- First view - thick cardboard. This is one of the most inexpensive brooder bases, but it has many disadvantages. Firstly, it does not retain heat; secondly, it is short-lived and not suitable for the floor, as it will quickly soften and become deformed under the influence of feces.
- You can build an aviary from fiberboard , he may become the best option for building a single-tier brooder. This material is easy to clean and disinfect. The only downside is that the fragility of plywood sheets does not allow the construction of multi-story enclosures that save space.
- Chipboard structures unsuitable for raising chickens. They are not moisture-resistant and contain substances that can harm broiler chicks.
- You can build a brooder from plastic. This material is one of the most expensive and very easy to care for. However, there are several points that should be considered negative. Plastic does not allow air to pass through, there is a chance of greenhouse effect. And also by heating the brooder, you can get evaporation of harmful substances.
Advice! The best option To build an enclosure with your own hands, use homemade panels consisting of several layers. For example, fiberboard sheets, between which there is pressed foam or cardboard to insulate the structure.
In addition, it should be remembered that the front part of the nursery structure must have a door to accommodate the chicks. And also open full review aviary. A net will work well for this, but in this case it is important to place the brooder in a draft-free area.
List of required tools:
- screwdriver;
- jigsaw or hacksaw for wood;
- wire cutters and pliers;
- pencil and tape measure for marking;
- self-tapping screws
In addition, you need to decide in advance on the schemes according to which the enclosure will be built and prepare drawings. This will help you design the room more accurately and make the DIY construction process easier.
What should be implemented in a brooder

Despite the fact that the aviary for small broilers is quite simple design, which is wooden box with a mesh floor and doors, as well as a hole for the heating wire, some requirements for organizing its space must be observed.
As mentioned earlier, the brooder should be quite spacious. The dimensions must correspond to the number of birds. It is important to consider that a month-old chick is much larger than a day-old chick, and growing birds will require more and more space. In a cramped room, the chicks will begin to get sick and die.
Another important point in organizing space is the floor. It must be of a lattice type so that the waste of the raised offspring falls through and accumulates in the pan. At the same time, the cells should not be large so that the chicks do not fall through. Optimal size grid cells 1 centimeter. The tray must be freely pulled out and cleaned, because hygiene is one of the most important components proper cultivation healthy birds.
The brooder must be equipped with feeders and drinkers. If opportunities allow, you can organize automatic feeding feed and water, if not, then you should make sure that the food is supplied without disturbing the chicks with your hands. This will minimize stressful situations and not harm the health of the children. It is important to consider that chicks will regularly knock over loose plates and try to avoid this. The chick feeder should be firmly in place.
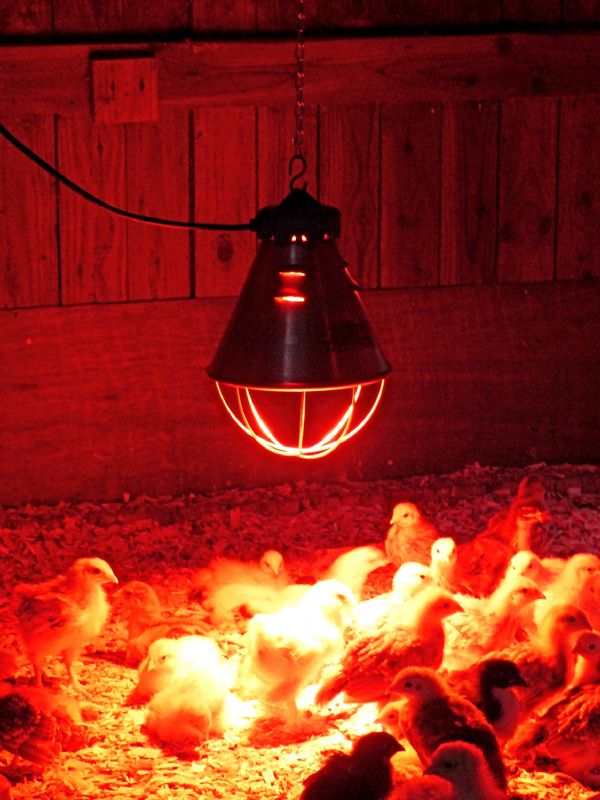
The enclosure must be well heated, so it is important to provide for mounting lamps and holes for wires. Infrared lamps are best for heating. The distance from the floor will regulate the degree of heating. In this case, it is worth using not one, but at least two lamps at the same time, this will avoid unpleasant consequences if one of them burns out.
Making a brooder

Once the material has been selected, the tool has been prepared, and all the details have been thought out, you can begin to create an enclosure with your own hands.
- In order to assemble the box itself, you need to accurately mark and cut out the side walls, back wall and ceiling from the selected material. These are the parts of the structure that will be solid.
- You need to cut holes in the ceiling for the wire that will power the heating lamp. To the bottom of the side walls you need to attach slats that will act as runners for the pallet.
- Now you can fasten the walls and ceiling together using self-tapping screws and bars. Then fasten the bottom frame and secure the mesh to it. It is important to remember that the distance between the bottom and the pallet should be about 10 cm. Attach the floor.
- The doors should also be made from the mesh that was used to make the floor. To do this, you need to prepare the door frame and attach the mesh to them. The doors themselves are attached to regular piano hinges. If necessary, they are equipped with a latch or other locking device.
At this point, the production of the box is completed, you only need to install heating lamps into it and secure the feeders in the intended places. It is better if they are located on the edge near the doors in order to quickly and safely fill them with food.
This is one of the most simple options enclosures that you can make yourself. It implements the basic design idea, based on which an inventive poultry farmer can design his own brooder that meets his needs. In addition to the usual heating with lamps, you can organize water heating of the brooder.
The first two weeks of life, chicks need constant lighting; throughout the entire month of life, it is necessary to warm up the room, gradually reducing temperature regime. Food and drink should be brought into the enclosure frequently and should be present almost constantly in the feeder. All these points must be taken into account when designing a brooder.
Raising chickens is not a troublesome and profitable activity, but it is important to invest in the development of these birds in the first month of their life. Having made a good brooder with your own hands once, you can use it again and again, raising new batches of birds.
Do you hatch chickens using an incubator and then struggle for a long time heating them? Then why not make your own brooder for chickens? There is nothing complicated here, the main thing is to understand the principle and you can safely get to work. An example of such a structure is given later in the article, and photos, videos and drawings will help you understand the design features in more detail.
What is this brooder?
A chick brooder is a box, box, or part of a room that is designed to house chicks during the first weeks of their lives. This design should completely replace the mother hen for babies and perform her heating functions. It is not difficult to make such a structure with your own hands. The main thing is to understand general principle work and take into account all the basic requirements. If everything is taken into account, then you can make a brooder from any available materials, even from cardboard boxes.
The main requirements include the following:
- The floor must always be dry, otherwise the chicks will get sick.
- The floor should not be slippery.
- If possible, a tray should be provided under the floor for excrement.
- The structure should be well ventilated, but there should be no drafts.
- High humidity should be avoided in the brooder.
- The heating source should not overheat the chicks.
- It is advisable to arrange the heating source so that the chicks do not have direct access to it.
Now let's take a closer look at the features of this design with drawings, photos and videos. To begin with, we will give approximate dimensions and materials that can be used in making them yourself.
Dimensions
Each poultry farmer has his own brooder size for chickens. It all depends on what material he uses. You can also easily equip an old bedside table or even an aquarium for similar needs. But in our article, the structure will be made of plywood sheets 1.5x1.5 m. The approximate final size of the brooder for chickens will be 100 cm in length, 50 cm in width and 50 cm in height. Photos of this design are given at the end of the article.
You can easily keep 50 or more chickens here. The quantity does not depend on whether it is broilers or not. If everything is done correctly and everything is taken into account design features, then in the first weeks of life you can keep here both laying hens, broilers, ducks and even quails. As they say, I made it once with my own hands and for all occasions. Then, if you wish, you can make several more of the same cases yourself and stack them one on top of the other. This way you can create a brooder with your own hands in the form of a battery, where you can keep quite a few chicks.
We make it ourselves
It is not yet possible to talk about how many chickens you will keep in a structure you made yourself. If you arrange everything correctly, you can place 50 or more chicken chicks in a structure with dimensions of 100x50x50 cm (LxHxW). More quail babies can fit here, but preferably more than 50 broilers. do not place to avoid crushing. But these are only recommendations and it is not necessary to adhere to them, because each poultry farmer has his own nuances.
Materials and tools
- plywood sheet 150x150x1 cm (HxWxT) – 1 pc.;
- rail with a section of 50x15 mm;
- loops – 4 pcs.;
- galvanized mesh with a cell of 10x10 mm, size 1x0.5 m - 1 pc.;
- plaster mesh for doors;
- plastic panels, oilcloth or sheet of tin for the drip tray;
- nails or screws;
- a piece of cable of the length you need;
- cartridge;
- Dimmer;
- regular lamp 40 or 60 W (infrared lamp) – 1 pc.;
- reflector;
- fork – 1 pc.;
- screwdriver;
- screwdriver;
- drill;
- hammer;
- hacksaw;
- roulette;
- pencil;
- other tools if necessary.
Manufacturing
- Take 1 sheet of plywood standard sizes 1.5x1.5 m and 1 cm thick. We saw off a piece of 50x150 cm on one side.
- We cut the remaining piece of 100x150 cm into 3 equal parts of 100x50 cm. This will be the top of the brooder for chickens, the back wall and the bottom of the tray.
- We saw off the side walls from a piece of 50x150 cm. Their size is 50x50 cm.
- We fasten the walls together. If desired, you can make a frame from the slats to make it easier to assemble.
- Now we make a frame from the slats so that it fits under the structure, the approximate dimensions of the frame are 98x49 cm. The bottom of the frame will be the remaining sheet of plywood measuring 100x50 cm. We adjust it to the dimensions and nail it.
- Thus, it turned out to be a tray for excrement. Now we take a piece of oilcloth and line our tray with it to make it easier to remove feces.
- We install the pallet. Above it we attach slats to the side walls on which the floor will be supported.
- For the floor we make a similar frame, the bottom of which will be made of galvanized mesh. In the first days, it is better to lay newspaper on the floor, this will keep the chickens much warmer.
- Next you need to make 2 doors. Their approximate dimensions are 45x31 cm. We make the doors from lath and sew them with plaster mesh.
- We make a frame from the slats on the front wall and hang it on it using the door hinges.
- If necessary, we install latches.
- Now we make a hole in the ceiling for the cable.
- We thread the cable and install the cartridge.
- On the other side we attach a dimmer and a plug.
- Additionally, you can allocate space on the back wall for a thermometer.
- All that remains is to screw in the light bulb and place the feeders and drinkers. It is advisable to place a reflector on the light bulb, so the chickens and broilers will not be able to reach it, and they will have a space with higher and lower temperatures. When the kids are cold, they will sit under the reflector, and when they are hot, they will go to the other, cooler end of the structure.
At this stage, the construction of a brooder with your own hands is completed. Additionally, if desired, it can also be painted. You can also make a frame and make 2 more similar structures. Then we put all three brooders on the frame and get a convenient and spacious battery in which you can keep chickens and broilers of different ages. You can look at the given or similar example in more detail in the drawings, photos and videos.
Photo gallery
Video “Brooder for chickens, broilers and quails”