Even the cheapest metal tiles can look much better than luxury roofing materials. 90% of success lies in the quality of installation of this material, making the right choice"accessories" and bold design solutions. Now we will look at how to make the roof of your dreams and lay the tiles so that “the boss does not swear.” We present to your attention detailed instructions and analysis of difficult moments.
Types of metal tiles and coatings
When obvious corrosion of the material appears, many people blame the poor quality of the metal tiles, but almost all manufacturers make them the same thickness, and the grade of steel is also the same. It's all about the coating, which can be disposable or last for years. Before scolding a supplier who sold a “low-quality” product, let’s try to figure out what to cover the roof with and what polymers are used to protect the metal.
- (PE) polyester. The material can be considered universal, it is suitable for most climate zones, can withstand very high temperatures in summer, and is not afraid of wild frosts in winter. Corrosion resistance is very high. The polyester-based mixture occupies the middle price range. Spray thickness is 25 microns.
- Matte polyester. The thickness is 35 microns, due to which metal roofing looks much more expensive and more beautiful. The matte surface imitates natural materials. The attractive texture is not corrosive (moderate resistance) and can withstand +120C. Bending of the material is allowed down to -10C. polyurethane coating . If funds allow you to purchase such building material, then it is better to give preference to it. A layer of 50 microns protects against corrosion by almost 100%, suppresses 25 dB of sound, and absorbs hail and raindrops. It will be very cozy and quiet under such metal tiles. Withstands from +150 degrees to -90C. Ultraviolet radiation does not affect the polymer in any way, so it would be beneficial to cover the roof with metal tiles with a polyurethane coating if you need to do it once and for a long time.
- Pastizol. A fairly “old” generation of materials that were developed 30 years ago for coating metal used in a highly corrosive environment. The polymer has an excellent appearance, has been used for at least 20 years and can create strong competition with all modern analogues. It is inexpensive, easy to use, and does not fade over time.
- Granite. Yes, there can also be stones on the roof and this is considered an excellent coating. Essentially polyurethane and fine granite chips mix 50/50, which gives many advantages: enormous resistance to mechanical damage, protection from ultraviolet radiation, temperature changes. Perhaps it best metal tiles, but there is only one drawback - high price.
- Aluminum-zinc coating. The composition of this surface is as old as Yorkshire bridges. 44% zinc, 54% aluminum and 2% silicon. Tile roofing has a coating of only 20 microns, the average service life is 25 years. The cost is below average.
Before buying building materials and installing a metal tile roof, you should inquire about the type of polymer coating of stainless steel, because you can overpay money for unnecessary properties. If you have a residential second floor or want to make an attic comfortable for living, then pay attention to the thickness and softness of the coating.
IMPORTANT: polyurethane, which is included in many suspensions, muffles sound and absorbs shocks; the living space will be much quieter. But if the second floor is non-residential, it would be better to save money and install regular metal tiles, the price of which is 30-40% less.
Advantages and disadvantages of a metal roof
Not everything is a roof that is on top of a building. Each coating has its own pros and cons, but before you cover the roof, you need to get to know your “enemy” better. Let's start with the significant advantages of metal tiles:
- Economical. And just before you start throwing tomatoes at me, installing metal roofing will cost much less than most other roofing options. You save on lathing, building materials, workers, and on purchasing the roofing material itself. And if you also consider that the useful life of a roof is about 50 years, then the savings are obvious.
- Light weight metal tiles per 1 m 2. It is much lighter than most building materials. Depending on the type of coating, 1 m2 of metal tiles weighs from 3.6 kg to 5.2 kg. Polyurethane polymers lighten the structure, and the zinc coating adds almost 1 kg per square meter. You can only find out exactly how much metal tiles weigh from the supplier, since the thickness of the metal also varies (0.3-1.2 mm)
- Corrosion resistance. It is very difficult to wait until the roof becomes covered with rust, since this occurs no less than 25 years after the start of operation. It is not afraid of ultraviolet radiation, moisture, or temperature changes, unlike roofing felt, for example, which is unpredictable and insidious.
- Fire safety. The metal does not burn and does not emit volatile substances when heated and that says it all. If you are looking for a heat-resistant material, tiles are ideal for this and comply with all SNiPs, which ECO roofing made from reeds, straw and other miracle materials of the “Middle Ages” cannot boast of.
- Solid look. Many people consider metal roofs to be aesthetically pleasing and neat, but the taste and color... An objective advantage is the ability to create complex geometric designs and perform a variety of installations of metal tiles with your own hands, which is limited only by your imagination.
There are also disadvantages to roofing made from metal tiles; there is no way around them. Of course, for many they may not seem significant at all, but they still exist and can ruin your mood after purchasing and installing metal tiles on your home. Let's take a closer look at these fly in the ointment in a big cauldron of honey:
- Very noisy during hail or rain. Of course, you can move to the first floor or put earplugs in your ears during bad weather, but this technique is not suitable for everyone. Whatever the coating of the metal tile, the manufacturer, the thickness of the metal, nothing will help. The noise will be quite loud.
- A lot of waste during installation complex roofs from metal tiles. Despite the low cost of the material, it is a pity to throw it away when it is necessary to create complex geometric shapes.
- Slippery. Working and moving on the roof is difficult and quite dangerous; it’s better not to try your luck again.
Many builders are attracted by the simple installation of metal roofing, because constructing such structures is quite easy, quick and interesting. It is practical, popular and cost-effective, regardless of the type of structure being built. Next, we will look at the process of making a roof from metal tiles with our own hands and key points, which will help you do everything right the first time and not spend extra money.
Installation of a metal roof and calculation of materials
Do you like to draw? No? But you have to. This work can be done with a pen and one sheet of paper; it will take about 30 minutes to calculate the fastening of the metal tiles and that’s it Consumables. It is worth considering that the working area of the sheets will be 8-12% less than the total area, so you must immediately add this amount of material to the calculations.
First you need to measure the length of the roof slope, from the very bottom to the ridge, you also need to take into account the canopy (10-15 centimeters). Everything is simple here, we write down the number of required whole sheets of metal tiles and subtract small overlaps (10 centimeters is enough). The number of rows is also easy to calculate. We divide the length of the roof by the width of the working area of the sheet, that is, subtract 15 centimeters of overlap from it. If your roof is not too large and you can get by with 1 sheet of metal tile on the slope, then the overlap is not taken into account, of course.
Calculate exact amount sheets of metal tiles will now not be difficult. The size of the building material can vary, from 60 cm to 10-12 meters, so it is better to select the most suitable length to avoid large residues. Don’t forget to add to the total cost and list all the “accessories”, which include the ridge, a water collector around the entire perimeter, valleys and snow holders.
In addition, you will need: wooden blocks 50x50 mm, boards 50x100 mm, board 50x100 mm for the perimeter of the cornice, short and long screws, vapor barrier film, waterproofing and insulation of your choice (let's look at an example mineral wool).
Installation of waterproofing and vapor barrier under metal tiles
Before laying the tiles, everything must be carefully insulated from condensation and moisture. This is necessary to prevent corrosion of the insulating material, maintain high temperature in the attic without the appearance of moisture. However, we can agree that it’s as simple as that and that’s all. Let's look at the step-by-step isolation instructions.
STEP 1: installation of waterproofing. We climb onto the outer part of the roof and lower the rolls along the rafters from the ridge to the eaves protective material. The overlap should be left at least 150 mm; it is better not to use staples, but to use special adhesive tape (if you don’t have the money for this, you can take regular double-sided tape - it will do). The sagging at the cornice is 2-3 centimeters. 
STEP 2: insert insulation. A short instruction on how to fit in something that can’t be squeezed in: cut out rectangular pieces of mineral wool (ecowool or other miracle material that you think of installing) 5 centimeters wider than the distance between the rafters. We squeeze the rectangle a little, with a slight movement of the hand (legs, head or other parts of the body) we push it towards seat. Due to its elasticity, it is clamped between the rafters and hangs there. Similarly, we fix the roof insulation between all the rafters. 
STEP 3: We attach the steam insulator. No matter what type of roofing you are installing, including metal tiles, you will definitely need instructions for installing vapor insulation. We go from the inside of the roof and arm ourselves with a stapler. You can buy a special construction staple thrower or confiscate your child's educational paper stapler - it will be enough. Nail it to the rafter with a bracket every 20 centimeters. This layer is required and without it the insulation will pick up moisture., having lost its insulating properties. 
You should end up with a kind of pie, where there will be 2 layers (vapor barrier and waterproofing) and a filling in the form of insulation inside. It would be best to carry out this work in the absence of wind, since it may slightly disrupt your plans and you will have to redo the work several times. The film is not very strong and a strong gust of wind can simply tear it off the rafters.
Please note that most waterproofing and vapor barriers are made directional, that is, they cannot be laid on any side. They should let air out and keep moisture out. If installed incorrectly, all the water will accumulate on the insulation and all your efforts will be as useful as a laptop for Indians.
Lathing and counter-lattice for metal tiles
The roofing material requires a “foundation” on which it will be installed - wooden sheathing. It consists of wooden blocks 50x50 mm, which are nailed vertically to the rafters (forming air cushion between metal tiles and waterproofing) and boards 30x100 mm, which are packed every 60 centimeters across the rafters. The first board from the eaves will be slightly thicker - 50x100 mm, since the load on it is much greater. The ridge is covered with 2 boards on both sides without a gap. 
The instructions for installing metal tiles involve installing a cornice strip, which protects against strong gusts of wind and prevents moisture from entering the sheathing. It is better to nail it with galvanized nails in a staggered pattern (1 stroke - 30 cm), since this part is subject to severe corrosion. Soak the board in a protective suspension. This work must be done after installing the drain in order to insert the edge of the board into it and not interfere with the gutter supports. 
Around “problem areas” such as corners, valleys, joints, chimneys, the sheathing is nailed solid board, and it is screwed to the butt corners of the slope with screws into the bottom valley board. The overlap there is at least 100 mm (it is better to do up to 150 mm so that the board does not break off under load). In fact, it's simple - everything is intuitive. When building a roof, “grooves” are created into which the boards will fit perfectly; the main thing is to work with a level when installing the rafters so that they are perfectly level or to properly level the sheathing. 
Installation of sheathing under metal tiles is the most difficult and critical stage of work, but screwing the roofing material is very simple work. Even a not very experienced migrant worker can do it after studying the manual.
Another useful tip: before attaching the roofing material, you need to lay the lower valley on the board insulation material, preferably self-adhesive (based on polyurethane, for example). It will reduce the “wind noise” under the roof and increase the overall absorption of sound that will come from rain or hail.
Installing metal tiles with your own hands - step-by-step instructions
Now let's move on to the pleasant and creative process - screwing the metal tiles to the sheathing. This can be done from any side of the roof, as convenient for you. Consider a simple step by step installation metal tiles, which are used on most construction sites.
STEP 1: delete protective film from the metal tile, take the first sheet and align it exactly along the edge of the cornice, making an overlap of 5-6 centimeters. We fix it with a screw (screw it directly into the metal) at the level of a thick board that runs along our perimeter. We check the evenness of the sheet using a tape measure, which we use to measure the distance from the edge of the metal tile to the eaves strip. 
STEP 2: We lay the second sheet higher, make an overlap of at least 4-5 centimeters and screw it along the top point of the wave at the level of the sheathing. 2 screws on different sides of the sheet will be enough. When several sheets are already “tacked”, you need to check the evenness of their laying and screw everything to the sheathing. 
STEP 3: we lay the remaining “blocks” of 2-3 or more sheets (depending on the length of the metal tile itself), leave a 50-60 mm overlap and screw everything into the joint to the sheathing. Do not forget to level the first sheet - it is the most important and determines the evenness of the entire structure. It is better to do measurements of subsequent sheets and trimming with a grinder on the ground - it’s more convenient. The last and first row is also aligned along the pediment. 
STEP 4: we install end strips that protect from rain and wind; they must be screwed with long screws to the rafters of the house and the sheathing that runs along the edge. The end strip is not always wooden. When installing a metal tile roof with your own hands, you don’t have to skimp on the little things and use PVC strips or other plastic compounds that do not corrode and better protect the wood from moisture. 
Installing a flat ridge. The joint of the metal tile sheets at the top does not need to be very level, since the ridge will hide everything. It is screwed on each side to the last strip of secondary sheathing. It is recommended to install a polyurethane gasket between the metal and the roof so that the structure is securely fixed, does not make unnecessary sounds and does not increase air circulation. 
Chimney finishing. Here you need to use L-shaped elements. In a brick smoker, using a grinder, a 2-3 centimeter cut is cut, into which 1 edge of the fastening goes, and the other edge simply goes down onto the metal tile. The laying and installation of tiles can be considered complete; all that remains is to screw in all the fittings and snow catchers. There is nothing complicated about fastening; the main thing is to align everything well and rely not only on your keen eye, but also on the readings of the building level.
And by tradition, we offer installation of metal tiles on video, because no matter how many times you read, it will be much clearer to watch:
Laying the roof on the roof and installing the drainage system is the final stage of building the frame of the house, depending on weather conditions. All further work on arrangement interior spaces can be performed at any time of the year and in any weather, which greatly simplifies and speeds up the construction process. Roofing work is carried out on high altitude, this creates additional difficulties and requires unconditional compliance with safety regulations.
The roof covering is carried out in the most difficult conditions, maximum care and caution is required. The roof is one of the most important elements of any building or structure. That's why you should put metal tiles on your roof experienced builders not only theoretically knowing all the intricacies of work production, but also having solid practical experience.

The fact is that life is much more complicated than any book; none of them can foresee all the problems that arise during roofing works situations. This article will give practical advice and discuss in detail step-by-step instruction, the knowledge gained will help you independently accept right decisions to solve various problems.
Working at height is dangerous; it is highly undesirable to be distracted by faulty tools. Before starting work, you need to check their technical condition and replace cutting elements etc. Professionals strongly advise buying a special carpenter's belt. It has many different pockets and securing devices hand tools and hardware, they are always at hand, attention is not diverted to searches, time is not wasted.
Coating technology requires preparing the following tools:

Important. It is strongly recommended that, at the same time as purchasing metal tiles, you purchase a can of the same paint. It is necessary for painting cut areas, scratches on the surface of sheets and other minor mechanical damage roofs.
Prices for metal tiles
Metal tiles
Preparatory activities
To ensure that unforeseen situations do not arise during the work, the process does not slow down and the quality of the roof does not deteriorate, all your actions need to be thought through and divided into several stages.
The first stage is delivery of materials
It is necessary to measure the dimensions of the roof slopes, calculate the number and length of valleys and ridges, and draw a drainage diagram. Based on these data, store employees, using a special program, will calculate the optimal quantity of each element and hardware and calculate the amount. It is not necessary to order the material immediately; you can make such calculations in several trading enterprises and, based on the available information, choose for yourself the most suitable option. You should immediately agree on the delivery of the roof; the length of the car body must be no less than the length of the metal tile sheets.


Practical advice. If such a car is expensive or difficult to find, then you can nail long boards to the short body. Roofing can also be transported over short distances using such adapted vehicles.
Immediately select a site for storing materials, level its surface, and, if necessary, make a temporary canopy.
The second stage is the manufacture of fixtures
You must have at least three devices; they significantly speed up the process of installing metal tiles and increase work safety.
| Name of device | Purpose and brief description |
|---|---|
| Used during installation of cornice strips and drainage system. At the top it has two special legs that rest against the wall of the house. Due to this design, the possibility of damage to the overhang of the tiles is eliminated, and the gutter does not bend. The ladder is lightweight and can be moved to a new location without any problems if technologically necessary. |
| They not only make installation work much easier, but also make it safe. On two-story houses Scaffolding must be installed and have special handrails for support. Can be homemade or factory-made, there are a large number of scaffolding manufacturing options, a specific one should be selected taking into account individual conditions. |
| Externally similar to wooden stairs, in the upper part there are special hooks for fixing to the roof ridge. Allows you to move along the installed roof without damaging it. It makes the process of screwing in self-tapping screws, bypassing chimneys, and sealing joints much easier. This device is considered mandatory according to safety requirements. |
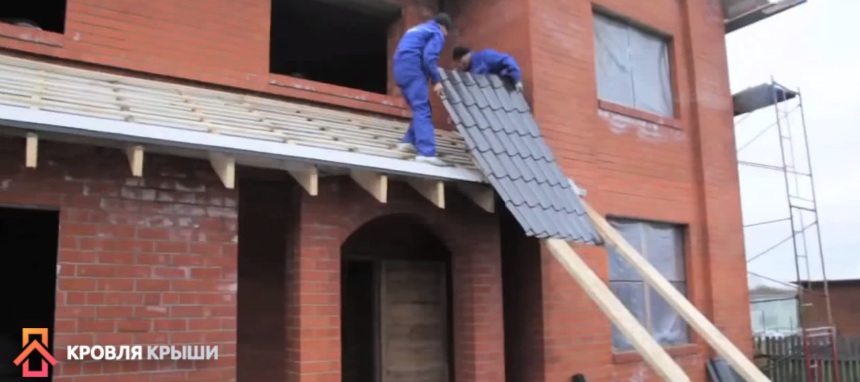
| The simplest device. It is enough to fasten together two parallel boards of the required length. The device is used to feed sheets of metal tiles onto the roof of a house. |


You need to work in shoes with soft and non-slip soles; clothing should be loose, not interfere with movements, and without hanging parts.

The third stage is checking the dimensions of the rafter system
It is not too late to eliminate the problems of the rafter system. First you need to make sure that the slopes gable roof rectangular. This is done simply, you need to measure two diagonals, if they are the same, everything is normal. If there is a difference, then the defect must be eliminated. Triangular slopes should have the shape of isosceles triangles, check the location of the vertex, its projection should be located exactly in the middle.

At the same time, you need to take measurements of the distance between the sheathing slats. These parameters depend on the type of metal tile.


Stage four - roofing work
You should only start with careful preparation. You need to check the weather forecast and choose sunny days. This is especially important if you plan to make a warm roof. Mineral wool gets wet quickly and takes a very long time to dry. If a problem occurs with insulation already laid between the rafters, it will have to be removed. This not only takes a long time, but can also cause mechanical damage to the insulation.

Metal tiles for last years has become one of the most used roofing materials. Such roofs can be seen not only on residential buildings, but also on big stores, warehouses, government institutions and commercial offices.
The material received well-deserved respect due to the optimal ratio of quality and cost. This refers not only to the price of metal tiles, but also to the cost of roofing work and periodic roof maintenance.

Metal tiles are a material with a good combination of quality and price
Any type of rafter system can be covered with metal tiles, but simple gable systems are better. The simpler the rafter system, the less the amount of unproductive waste. If on a gable slope it does not exceed 2–3%, then on a four-slope slope it can increase to 6–10%, and on a complex hip slope to 15–18%. It is recommended to cover complex roofs with piece or flexible materials.

All roofing work is divided into several stages, the implementation of each of them guarantees the tightness, strength and reliability of the roof.
| Stage of work execution | Description |
|---|---|
| Most important stage, mistakes made on preparatory stage, have extremely Negative consequences. You need to choose the right type of roof; metal tiles are not suitable for everyone. the best option. Next, issues related to the arrangement of temporary storage sites are being resolved. building materials. It is recommended to find out long-term weather forecasts and choose a favorable period for work, and decide on the number of roofers or assistants. It is very difficult to cover the roof of a house with metal tiles alone. Such work will certainly have defects and errors, which will cause serious problems during the operation of the building. |
| If problems with the rafter system are not detected and corrected before the start of roofing work, then in the future you will have to waste a lot of time to eliminate them. In addition, this may affect appearance roof, it will be asymmetrical, with different slopes and sizes of slopes. The rafter system should be checked for parallelism of all sides, horizontal and vertical position of its elements. You should immediately pay attention to the sheathing. In ridges and valleys it must be continuous; the distance of the first strip from the eaves must correspond to the characteristics of the metal tile profile. If there are chimneys, ventilation pipes and other engineering elements, then the lathing must take into account the technology of the selected sealing method. |
| Metal tiles are classified depending on the thickness of the sheet steel, the mass of zinc per square meter, the thickness of the finishing polymer coatings and their physical characteristics. It's clean technical specifications, affecting installation technology, tightness and durability of the roof. As for the design properties, they do not affect the installation process. There is a large selection of metal tiles available, all of them have slight differences in installation. But there is universal advice - the lower the resistance parameters of the sheets to mechanical loads, the stronger the sheathing should be, the smaller the spacing of the slats and more reliable fastening self-tapping screws. Bending resistance values depend on the thickness of the metal sheet and the geometry of the profile. You need to buy roofing coverings along with a full list of fasteners and additional elements. There is a big difference between warm and cold roofs, be sure to take this into account when purchasing necessary materials and work planning. |
| Tools must be in good working order and complete. It is recommended to carefully check their condition, adjust, sharpen or buy new cutting elements. It is highly recommended to buy an installer’s belt; it costs little, but brings significant benefits. During installation work The master has everything at hand, he does not need to be distracted by searching for hardware or tools. This not only increases the speed of roof covering, but also improves the safety of working at height. It is imperative to make special stairs for the installation of cornice elements and drainage systems. If the house has two floors, it is recommended to install scaffolding. It is necessary to prepare special ladders for safe movement on the roof. |
| You should not undertake the installation of metal tiles on residential buildings if there is no practical experience execution construction work. In such cases, it is much cheaper and more reliable to contact professionals for help. If there is a concept in construction, then you need to remember the technology, study modern methods and only after that proceed with the installation of the roof. |


Regardless of the type of metal tile and the type of rafter system, the main architectural elements of the roof are finished according to the same algorithm.
Let's consider installation on some roof elements; the technologies are universal.
Cornice strip
It is used to perform two tasks:
- protection of the under-roof space from slanting rain. Protects the rafter system and sheathing from getting wet;
- improves the appearance of the roof, hides the wooden structural elements.

Important. The thickness of the first batten of the sheathing should exceed the thickness of the others, the difference corresponds to the height of the metal tile step. The fact is that it is in this place that the first row of screws will be screwed in, and it is higher than the other fixation points. The sheet must have a stop; for this, the height of the first rail is increased.
Another nuance - the distance between the first and second lathing strips should be 28 cm, between the rest 35 cm. This is due to the characteristics of the profiles and their linear dimensions. The strip for the cornice is attached to the first rail with self-tapping screws.
Prices for curtain rods
Cornice strip
Lower (drainage) and upper valley
Quite complex elements of the roof, this is where leaks most often appear. What is the difference between lower and upper valleys? The first ensures water drainage and guarantees the tightness of the roof. The second plays only a decorative role, covers uneven cuts and additional elements fixation.
- Lower valley. The sheathing should be a continuous width of ≈ 20 cm on each side of the junction. To increase the tightness before installation metal element In valleys, flexible bituminous materials can be used for additional waterproofing. Water is discharged to cornice strip, from which it falls directly into the gutter. The valley is fixed with flat-head screws or special metal strips.
- Upper valley. Decorative element, covers uneven cuts of tiles. Screwed with self-tapping screws to the wave crests. The color of the metal element must exactly match the color of the roof covering.

You need to work on valleys very carefully; the appearance of leaks in these places has extremely negative consequences. They are difficult to notice - the unit is of complex design, water can long time be invisible on visible side roofs, and at this time wooden structures get wet and become rotten.
Chimney lines
In the classic version, they must have two hydraulic protections: the lower one flexible materials, draining water onto a long galvanized metal plate connected to the gutter and the top. The second simultaneously performs protection and decorative function. Metal strips are installed in chimneys in grooves; water from the strip falls onto the metal tiles.

Pipe passages
Junction strips
They are installed at the junction of the roof with vertical brick structures and in areas where slopes bend. They look like metal strips bent at an obtuse or acute angle; the material used is the same as metal tiles. The planks are fixed to the ridges of the sheets; in some cases, a rubber or foam seal can be used to seal large gaps between the slopes.


Horse
It has various geometric shapes, from a simple bent metal sheet to a convex round one. Screwed on with long self-tapping screws; the dimensions of the hardware should be 2–3 cm greater than the height of the coating wave. There are options for special universal fixation elements with a ridge bar for ventilation.


Prices for different types of roofing ridges
Roofing ridge
They can be tubular, lattice and lamellar. They are used to prevent avalanche-like snow falling from the roof, during which there is a high probability of damaging the gutter or injuring people.
The strongest tubular and lattice ones are fixed to the sheathing of the rafter system.

Plate ones are screwed to the ridges of metal tiles and cannot withstand heavy loads.

The decision to install snow guards is made taking into account the angle of inclination of the roof slopes and the climatic zone of the building's location.
Prices for snow guards
Snow guard
- Lifting sheets onto the roof. The length of the sheets can exceed six meters; they should be lifted very carefully, not to be broken or dropped. To lift, you need to prepare a special structure and only use it to convey it to the roof using ropes. It is not recommended to work in windy weather - large profiled sheets have significant windage, and it is very difficult to hold them in your hands. Especially when working at heights and in awkward positions.

- Moving on the roof. You must work in shoes with soft soles and anti-slip coating. Step only into the deflection. If you need to reach while tightening the screws, it is recommended to prepare a wooden ladder. It increases the contact area and eliminates the possibility of deformation of the metal sheet. In addition, the ladder can be securely fastened, which improves work safety and meets safety requirements.

- Installation of sheets. Alignment should be done along the eaves line, overhang within five centimeters.

Fixation is performed only in a deflection to the sheathing. Only some additional elements are screwed to the waves. Fastening sheets through one longitudinal wave and every second transverse wave. If the sheets are very thin, and the region is characterized by strong winds, then it is recommended to increase the number of fixation points. The same should be done at junctions or overhangs. General rule– there should be about ten screws per square meter.

- Eat sheet laying schemes in one, two or more rows and on triangular slopes. Specific solution is accepted at the stage of ordering the roof and depends on the size and geometry of the slopes.

Once you have an idea of the installation technology, the tools and equipment have been prepared, and the materials have been purchased, you can begin to cover the roof.
Prices for metal tiles
Metal tiles
Step-by-step instructions for installing metal tiles
You need to lift the tiles onto the roof along inclined guides from wide boards. One person at the bottom pushes, and two people at the top accept.
It is strictly forbidden to lift sheets with a rope attached to a wire in the hole. Even light gusts of wind can rock it and injure workers. It is very difficult to stop a swinging sheet; in any case, it will suffer mechanical damage.

You can cut metal with elastic tools with carbide teeth (quickly and efficiently) or with hand-held metal scissors (slowly, difficultly and crookedly).


It is prohibited to use a grinder with an abrasive disc for these purposes; as a result of friction, the metal becomes very hot and all anti-corrosion coatings are destroyed.

Important. Metal shavings should be removed from the surface immediately with a soft brush. If this is not done, then outer covering Scratches will appear and will have to be painted over. To touch up scratches you need to use special paint.


Step 1. If you have a warm roof, then you should start by installing vapor barrier and windproof films. The first protects the insulation from the penetration of steam from attic spaces. The second does not interfere with the removal of moisture from mineral wool and does not allow condensation to enter from metal sheets back to the insulation. In addition, it prevents blowing out warm air made of mineral wool, which improves the thermal protection parameters of the roof.


Fixed with a stapler from the inside of the attic. The overlap is at least 10 cm, be sure to use double-sided tape for gluing.


Particular care must be taken in finishing the outlets of chimneys and other engineering communications. But no matter how carefully it is sealed, steam will still get into it a little. To remove moisture, a second film is used, which is fixed to rafter system With outside after installation of the insulating layer.

