Interior decoration of the house with painted clapboard
Wood, as you know, is a universal material and remains so, regardless of its scope of use and processing options. Particularly relevant is the use of wood in construction, in particular in cladding walls inside the house. Thanks to this material, you can create a favorable microclimate, comfort and beautiful interior in your home.
Application
More and more residents of private houses are choosing the interior of walls made of lining inside the house. This is explained not only by the comfort and magnificent beauty of the interior, which are achieved through the use of wood, but also due to the presence of certain properties that the lining has.
Among them:
- Excellent sound insulation;
- The surface does not require further leveling;
- A wonderful aroma of wood that will appeal to all residents;
- Biological features and high environmental friendliness of the tree;
- Different methods of laying lining, as well as its different widths and others, allow you to visually change the proportions of the space.
Let's say a few words about the properties of lining to change space:
- To begin with, it is worth noting that any decorative lining for interior decoration is made of wooden panels, the width of which is usually 8.8 cm, this in turn is the standard working size. The length of the slats will vary (from 1 to 6 meters), their variation depends on the dimensions of the room and installation methods. Before purchasing sheathing material, it is necessary to make accurate preliminary measurements;
- Another important point is the method of laying the slats on the walls. They can be located vertically or horizontally. The horizontal position expands the space of the room, while the vertical laying increases the height of the room.
Classification by variety
The classification of lining directly depends on quality indicators, according to which the material is usually divided into 4 grades, which, in turn, determines the price of the product.

In this case, it is not worth saving, but buying too expensive lining may turn out to be a pointless waste of money. The most common type on sale is 4: “Extra”, followed by grades “A”, “B” and “C”.

It is difficult to imagine a type of wood from which it would be impossible to make lining, and the quality of the finishing material will directly depend on the type used.
The following types of wood are usually used in the Russian construction market:
- Pine;
- Birch;
- Larch;
- Ash and other options.
However, when approaching the choice of the type of wood from which the lining is made, one point should be taken into account - all of the above types of wood are suitable for interior finishing with lining of a house.
Important! It is worth taking into account some physical characteristics of the species, for example, coniferous varieties are not suitable for decorating a bathhouse, since at elevated temperatures the resin will begin to release from this material.
Step-by-step finishing with clapboard
If you want to learn in detail how to sheathe the inside of a house with clapboards, you should study the step-by-step algorithm of the work process. It is not difficult to carry out this procedure with your own hands; a special video and instructions will help you, which will tell you step by step how to carry out wall cladding.

The initial stage is the choice of the method of lining arrangement, horizontal or vertical. The choice in this case should be dictated by the size of the room and the taste of the owner. For a vertical arrangement, the slatted frame is located horizontally, the opposite arrangement is for horizontal laying of the lining.

You must first prepare the slats (or buy them); you can cut boards for them, the width of which is from 25 to 30 mm. A prerequisite is that the material must be dry.
Frame installation

The main condition for installing the frame is to align it in one plane. The first rail for horizontal installation should be installed strictly vertically, using a plumb line. The rail can be secured using self-tapping screws or regular nails.

We move to the opposite corner, where the installation of a similar rail is required; several nylon threads are pulled between them to create a single plane. Then, along these threads, all frame elements are installed.
Tip: The distance between the slats is strictly maintained in the range of 50 to 60 centimeters; the lathing after installation requires treatment with an antiseptic.

Fastening the lining
The main rule for placing horizontal type lining is that the groove should be down and the tenon up. This will prevent moisture from entering the groove if it forms on the walls. After all, the accumulation of moisture in the grooves will lead to loss of appearance of the cladding, as well as to the formation of mold, which is hazardous to health.

The lining can be assembled both from the ceiling and from below, from the floor; this moment is dictated solely by the desire of the owner. However, it is advisable to leave the lining in the room where it will be installed for a day so that the wood can adapt to future conditions.
You can attach the slats to the frame using nails driven into the groove part; here you should definitely use a tool such as a hammer (photo), or use a large nail.

The rear wall of the groove requires special attention; it is important that it does not crack during installation. Moreover, a small gap (1-2 mm) is allowed between the elements; this will allow you to adjust the shape of the lining in case of deformation of the wood due to high humidity in the room. In the photo there is a ceiling plinth that hides all the irregularities. The assortment of stores is very voluminous
Sometimes the lining is simply varnished if this room does not differ in any conditions. If we are talking about the walls of a bathhouse or sauna, you will need to use protective equipment that can not only prevent the negative effects of moisture, but also protect against temperature changes.

Finally
When wondering how to clapboard the inside of a house, it is not at all necessary to resort to the services of specialists. You can do this work yourself using our guide.
For the soul a feeling of coziness and peace, for the body - a state of comfort, and for health - an environmentally friendly atmosphere, all this is given to the premises by wall decoration with wood paneling. As an option for wall cladding, you can use plastic lining, laminate, MDF panels and other materials for finishing walls of artificial origin. However, even with a pattern matching the texture of wood, they will not be able to create the effect of a home, and organically “finish” the walls only in offices.
Basic information
The experience of several generations of carpenters and finishers gives a clear understanding of the fact that covering walls with clapboards with your own hands requires not only skillful handling of the tool, but also knowledge about the material with which you have to work, and how to properly cover walls and partitions with it.
Lining belongs to the finishing raw materials of the seamless group, which is achieved by the presence of special connections (locks) between each component part of the cladding. According to the place of application, the material is divided into interior and exterior finishing. The lining is made from hardwood or resin-containing wood, as well as from artificially developed polymer products.
In this article we will talk about a narrow segment of finishing material - lining made from wood raw materials for interior finishing use. It is made from deciduous trees such as linden, oak, ash, larch; coniferous trees are dominated by spruce and pine, less often, as a very expensive and valuable species, Siberian cedar.
Cheapness and ease of processing and installation have brought pine cladding boards to first place in popularity and prevalence.
Classification parameters
The lining is classified according to the type of locking connection, grade and profile section.
Based on the type of connection, the facing board is divided into “end” and “ridge” locks. The end boards are connected using the “tongue and groove” method, and the ridge boards using the “quarter” method. These two types of connecting nodes allow the final result to obtain a seamless wall covering with clapboard.
The grade class determines the quality of processing and appearance of the facing material and has the following gradations:
- “Extra” is made from dried wood and has a uniform surface without flaws;
- “A-class” - the normalized presence of knots is set at 1 piece. by 1.5 m in length;
- “B-class” - no more than 4 defects are allowed per 1.5 m linear length;
- “C-class” - the number of knots is not standardized, the presence of resin stains and cracks on the front surface is allowed;
- “D-class” is a low-grade material with chips, cracks, holes from fallen knots, etc. on the front side. defects.

According to the profile cross-section and the depth of the tongue-and-groove lock, wall lining is divided into the following types:
- “Simple” - undergoes double-sided grinding of surfaces, is the ancestor of the “Eurostandard”, but with a smaller locking depth, the cross-section is rectangular, hence the corresponding name;
- “Standard”, “Eurostandard” or “Eurolining” - characterized by 4-sided sanding, can be used not only for wall cladding, but also for finishing ceilings;
- “Softline” - wide lining for walls with rounded edges;
- “American” - in the mounted position it simulates overlapping planks, thanks to the security of the lock, the groove of which is made in the thick part of the lining, it is applicable for cladding external walls;
- “Block house” is one of the varieties of cladding materials of the “lining” type, imitates the appearance of laid round logs, which creates the appearance of the wall of a wooden house, is used for cladding the walls of buildings, but can also be mounted inside a large area;
- “Finka” - has an oval cut, a more noble design in appearance compared to the “Block House”; focused on interior finishing work;
- “Landhouse” is a continuation of the “Eurostandard” class, the plank has a profiled cut and a shaped front part, suitable for interior cladding with clapboard;
- “Wave” is a decorative relief cladding board that can be easily combined with lining of other profiles thanks to a unified lock.

Materials, tools and equipment
Before starting such repair work as finishing walls with clapboard, it is necessary to collect all the tools that will be used in the process of installing the cladding, as well as the materials to be installed. Ultimately, the list of required accessories will look like this:
- vapor barrier (polyethylene, roofing felt, foil) and insulation (based on mineral wool);
- bars (for example, 20 by 40 mm, as the most acceptable size and therefore widely used for all types of facing boards) and the lining itself;
- driving screws 60 mm long and a dowel 6 mm, this is the case when the load-bearing wall is brick or concrete; if the wall is wooden, then wood screws 5.5 mm long are needed;
- special stainless steel nails with a standard size of 2 by 40 mm for fastening the clapboard strip “into the tongue” or a set of clamps with wood screws 15 mm long, a hammer, a construction or furniture stapler for fastening the vapor barrier to the slats;
- a jigsaw or a hacksaw for wood with a miter box (a special device for cutting at angles of 90 and 45 degrees);
- a screwdriver with a Phillips head for self-tapping screws and a set of wood drills (if you have a powerful professional screwdriver, you can skip the drill), as well as a hammer drill and a Pobedit drill with a diameter that matches the diameter of the dowels for driving screws;
- moisture-repellent and antiseptic impregnations for processing bars and lining, colorless primer for wood, as well as colorless varnish with a water base, which does not emit an unpleasant odor and emphasizes the texture of the wood.
It is advisable to make a list of the necessary tools in advance, select them and put them away so that they are always “at hand”, this saves time, and then forcing the wall out of the lining does not interrupt the search for the necessary equipment.
Preparing the wall surface
Before covering the walls with clapboard and proceeding directly to the installation of the facing strip, the walls must first be prepared and ensure their hydro-, steam- and thermal insulation.
The surface of the walls is cleaned of dirt and dust. In a closed and poorly ventilated room where installation work will be carried out, it is best to use a vacuum cleaner for these purposes. Dust can also be removed from small surfaces with a household vacuum cleaner if an industrial vacuum cleaner is not available.
Brick and concrete walls are treated with water-repellent and antiseptic impregnation to prevent the appearance of fungal colonies under the facing surface and mold. Walls built from wood are additionally treated with antipyrite and antibacterial compounds. The former increase the fire resistance of the walls (the wood does not ignite, but smolders), and the latter create conditions in the internal fibers of the wood that prevent the proliferation of pests, their larvae, as well as bacteria that destroy the structure of the tree.
Waterproofing (hydrobarrier) is installed on unfinished walls of houses built of wood, for example, from a log house. Brick or concrete walls do not need additional waterproofing and the first protective layer for them is a vapor barrier, especially for walls whose outer part faces the street. The vapor barrier layer (it can be polyethylene, roofing felt or foil) is attached to planks pre-mounted on the wall with a thickness of at least 15 mm and a width of 30 mm. When installing planks under the vapor barrier, use a level and level the landing plane, then the lining of the walls with clapboard will not be interrupted for its leveling. The installation orientation of the planks depends on the position in which - horizontal or vertical - the lining will be installed.
The orientation of the vapor barrier installation strips is important, since the grating mesh will be installed on them, onto which the clapboard strips will be directly attached. For example, if the lining goes in a vertical direction, then the sheathing bars are attached in a horizontal position, and the vapor barrier strips in a vertical position and vice versa.
The vapor barrier is fastened using a construction or furniture stapler, without being stretched too much, so as not to crack during temperature changes, but without sagging areas where condensation can accumulate.
Mounting methods
The lining is not critical in installation to the building material from which the walls are made. It easily attaches to brick, concrete, slag and foam block walls, as well as to wooden surfaces. The only difference is in the set of tools and fasteners. In practice, there are 5 ways to reliably install internal coverings from facing strips on walls, which can be carried out even by non-professionals with minimal carpentry skills.
A day before the start of work, the lining is brought into the room where installation will be carried out. This is done so that the wood has time to adapt to the climate in the room and acquires the ambient temperature throughout its entire thickness.

When installing the facing strip horizontally, the bottom lining is laid first with the tongue down, towards the floor. When laying cladding strips vertically, the leftmost one is first secured with a tongue and groove to the wall.
Method 1. Fastening is carried out using a special fastener called a “kleimer”. In its sole, which is adjacent to the block, there are 3 holes made - two oblong at the edges and one round in the center.
The next plank to be installed is inserted with a tongue and groove into the groove of the previous mounted lining and the gaps are adjusted.
You should not press the planks tightly together, as if moisture gets into the joint, the wood can swell and push the entire cladding structure away from the wall.
Place clamps on the internal grooves of the installed strip and screw in two side screws (the use of nails is allowed), then use a hammer to adjust the gaps in the places where the clamps are installed and screw in the central screw, thereby fixing the strip in its place.
Walls sheathed using clamps are characterized by perfect seams and a long service life.
Method 2. Before sheathing, a hole is drilled in the plank with a diameter equal to half the diameter of the wood screws used. Using a screwdriver, the self-tapping screw is driven into the board to such a depth that its head enters the wood a couple of millimeters. The hole made by the cap is sealed with a pin made of the same type of wood from which the lining is made. The pin is ground to the level of the front part of the board, but so that it does not protrude or sink into the body of the lining. This method is most often used when covering walls in saunas and baths.
Method 3. Fixation occurs by driving a nail into the lower cut of the groove at an angle of 45 degrees. The nail head is adjusted to the depth of insertion into the body of the plank, at which it will not interfere with the free entry of the tongue of the next plank into the tongue groove, using a metal rod with a diameter equal to the size of the nail head.
Method 4. It is used on linings of the “Simple”, “Peasant”, “Kolkhoznitsa” types and those that have “ridge” locks. In the lower plane of the ridge groove, a hole is drilled 2 times smaller than the diameter of the wood screw that will be used for fastening. The next operation is to chamfer the hole for the screw head. Using a screwdriver, the self-tapping screw is screwed in to such a depth that its head fits completely into the chamfer and does not interfere with the installation of the next part.
Method 5. Fastening is carried out with brackets driven at an angle of 45 degrees into the lower cut of the groove. The operation is performed using a construction stapler, preferably an electric one, since a mechanical one can, when pressed, change the angle of entry of the staple into the tree.
You can follow step by step how to properly cover walls with clapboard by watching the video:
Completion of work
The final touch of the work will be the installation of skirting boards, slopes and corners to hide the gaps at the joints and between the floor and the lining, just as trimming would not have been done, but they will always be there. Depending on the relief of the front part of the lining, the entire facing mass is sanded either using a grinder (if the front part of the plank is smooth) or manually using 150-grit sandpaper.
The next steps will be removing dust and applying a primer. The primer must dry completely (the packaging indicates the time frame for complete drying of the composition), after which sanding occurs again.
The last step to obtaining the finished lining from the lining will be its two-layer varnish coating.
By performing all the steps in a clear sequence, you can achieve a perfectly smooth coating that will last for many years.
Today it is fashionable to replace plastic finishing elements with wooden options, which gives the home comfort and warmth. The technology of wall cladding with wood has been known for a long time, but remains relevant to this day. Today we’ll figure out whether covering walls with clapboard with your own hands is so difficult, and whether it can be done without outside help.
What nuances should be taken into account when working with lining
Lining is a board of different thicknesses, which is made from different types of wood. This material got its name because of the place where it was first used. These are carriages on trains, the inner walls of which were lined with small slats of wood. Today it is fashionable to cover the walls in a bathhouse with clapboard, as well as in a sauna or gazebo.

It is necessary to take into account that decorating walls with clapboard yourself requires a thorough, balanced approach. Please pay attention to the following details:
- Packed boards should be stored horizontally on a backing.
- The humidity of the storage room should be within normal limits.
- Storage should not be allowed when the packaging is exposed to direct sunlight.
- It is important to pay attention to the expiration dates indicated on the packaging.

- The cost of 1 m2 of forced linden wood, which perfectly tolerates temperature changes and high humidity, costs 500 rubles, and to cover the walls in the main rooms at the dacha, on average, you can spend a smaller amount - 300 rubles per m2. Important! The price of the material directly depends on the quality of the wood.
On a note! Wall lining is purchased with a reserve equal to ten percent of the total area. It must be remembered that the width of each element is measured by the internal depth, so you need to subtract 10-12 mm from the groove depth.

Processing of lining material
After the purchase, the question becomes, how to cover the walls with clapboard yourself so that the coating is wear-resistant and beautiful? The primary task is proper pre-treatment, because the manufacturer does not carry out any manipulations with the wood. The following actions must be taken:
- Products made from pine needles need to be degreased. To do this, it is better to wash the board with a 25% acetone solution. After this, wipe with a cloth soaked in water and dry.

- All damage, even the most minor, should be repaired with a wood putty mixture. It can be bought at any hardware store.

- If you need to change the shade, you can use stain or other professional impregnations that will preserve the beautiful texture of the wood.

What is needed to prepare walls for lining
There are two main options for making a wall with clapboard: glue and frame. Note that the first will require you to have a perfectly flat surface. That is why the second method, which involves erecting a sheathing, is preferable. Among the advantages of this method is the creation of additional space for insulating the room.
In order to fix the lining on the wall, you need:
- Tools. In this particular case, you should prepare a drill with different attachments, a plumb line (level), pliers, a hammer, a handsaw or a jigsaw.
- Slats for constructing the frame. Solid wooden beams with a cross section of 30*60 mm are suitable for these purposes. At the same stage, the substrates used to level the surfaces are prepared.
- Fastening materials: dowels, screws, nails, clamps, and, if necessary, hangers for the frame.
Important! Even if the frame fastening method is used, preliminary preparation of the working surfaces is required. The procedure is simple; all decorative elements are removed from the wall, and defects are erased. After this, additional priming is carried out.

How to create a sheathing for fastening lining
Preparing walls for lining is the most scrupulous process. You will have to tinker with creating a special design. General recommendations:
- Treat the timber with fireproof impregnation and antifungal agents.
- Make sure that the slats are positioned strictly perpendicular to the decorative boards.

- It is necessary to maintain a uniform distance between the slats, the step of which is 40-50 cm.

- It is necessary to leave a distance between the floor and ceiling. This recommendation is especially relevant for wooden houses that are constantly subject to shrinkage.
- The evenness of the installation of the frame must be carefully checked; plumb lines and a level are used for this.

- If a space forms between the lath and the wall, it must be filled with prepared dies.
Important! The construction of sheathing makes it possible to equip the walls with an additional insulating layer. The insulation is fixed between the resulting racks.
Which fixation option should I choose?
It is important to decide on the method of fixing the board materials. You can sheathe a wall using several methods:
- Through view of fasteners. This is the simplest solution that does not require much effort. The idea is that the screws are screwed directly through the front side. This method involves applying markings so that the fastening points are located on the same line. In addition, holes are drilled on the carriage board in advance, which will prevent the wood from deteriorating and cracking. When screwing in the screws, make sure that their heads are completely recessed into the wood. This can be easily achieved if you pre-drill out a place for the head with a large-caliber drill. The resulting holes are masked with special eraser plugs or filled with putty. Among the disadvantages, this method significantly disrupts the external aesthetic appeal of the coating.

- The lining can be attached to the wall using decorative nails. Their hats were initially decorated to match the color of the material.

- Hidden nails without heads would be an excellent option. The peculiarity is that such nails can only be driven at an angle of 80 degrees. This will make it possible to hide those areas that have been violated.
- If you have a professional stapler on your farm, you can use staples for fastening.

Important! You should not buy a manual tool for driving staples, which is sold on every corner, since its use does not provide reliable fixation.
- For the smallest thickness of the carriage board, clamps are used. The main advantage is that the fastenings are invisible.

The method of attaching the lining to the wall is selected individually, based on the specific situation. But we note that recently it is the clamps that have become the most popular.
The process of fastening the lining
Before sheathing the walls, the material is brought into the room and left for two days. This manipulation is essential for the tree to fully acclimatize.
Important! If you rush and skip this stage, there is a high probability that the structure will warp.
All work must be carried out at positive air temperatures, and the optimal humidity is at least 60%.

The essence of the technique:
- Most often, installation is carried out in a horizontal position, so install the first plank at the bottom so that its tongue (groove) faces upward.
- As in wallpapering, fixing should begin from a corner that is located away from the entrance to the room.

- Check the board thoroughly with a level, taking into account the horizontal and vertical surface.
- The first board is fastened, and the rest are then grooved and then fixed with clamps. be careful with the first and last elements, it is better to secure them with screws.

- After finishing, you need to decorate the walls with baseboards and corners, or you can paint the lining walls with stain or varnish the surface.

Experience guarantees completion of finishing work within a day, even including installation of the frame. Natural materials will give the room comfort and warmth, will last a long time, and will preserve its beauty.
Video: Do-it-yourself lining installation
Cladding surfaces with clapboard is carried out in several interconnected stages, each of which requires a special approach. Careful implementation of all technological procedures is a guarantee that it will be possible to obtain a reliable coating with excellent properties and environmental friendliness. The material is ideal for any type of work.
Lining is a board (of different thicknesses) that is made from various types of wood. The material got its name because of its original place of use. Namely, train cars, the internal surfaces of which were lined with small wooden slats, which created an excellent microclimate. Currently, wood products are returning to their former popularity, which decreased slightly when plastic and MDF options began to appear.
 The modern construction market offers a wide range of types of lining
 It is necessary to take into account that covering walls with clapboard with your own hands requires a balanced approach. Therefore, it is important to pay attention to the product at the stage of its purchase. Pay attention to the following points:
- Correct storage of purchased goods. Packages must be stored horizontally on a support.
- The humidity level of the warehouse should be within normal limits.
- It is not allowed to place the product in an open space, exposed to sunlight.
You should also pay attention to the expiration date on the label.
 All information about the storage and shelf life of the lining must be indicated on the packaging of the material
This precaution is necessary in order to mitigate possible risks. The fact is that work with the lining is carried out only after they are completely convinced that the material meets all standards.
On a note! You should purchase the product with the required reserve, which is equal to ten percent. To obtain the exact number of elements, preliminary calculations are carried out, and a diagram is drawn up. It is important to consider that the width of each fragment is measured according to the internal depth. That is, it is necessary to subtract the depth of the groove (10-12 mm).
 It is necessary to purchase material with a margin of 10%
 Material processing
After purchasing the required number of products and fasteners, the question immediately arises: how to properly cover the walls with clapboard? But this is not a priority task. You need to know that the material needs pre-processing, because no actions other than manufacturing are performed in production. Therefore, the following manipulations are performed:
- Coniferous wood types require complete degreasing. All resin stains are removed. The boards are washed well with acetone (a 25% solution is required). Next, wipe thoroughly with rags previously soaked in water. After all actions, the products are dried.
- To obtain the same surface shade, each fragment is treated with a pre-prepared mixture. It consists of hydrogen peroxide and acid (oxalic). The solution is prepared based on the type of wood.
- All damage, even minor ones, are repaired with putty. It is better to choose a mixture for wood. You can buy it at the store or prepare it yourself.
- If it is necessary to change the shade, then use stain or other special impregnations that preserve the texture of the wood.
 Processing the lining allows you to extend its service life and change the color of the material
 Of course, you can find products that will be pre-treated, but their cost will be significantly yours.
On a note! Pre-treatment cannot be skipped. This would be a gross violation of the technology of covering surfaces with clapboards.
There are two main options for covering the surface with clapboard: adhesive and frame. The first requires a perfectly flat plane. Therefore, the preferred method is the construction of a sheathing. In addition, it allows you to create additional space for insulating the room.
 The construction of the frame provides additional opportunities for insulating the room
 To attach the lining to the wall you will need:
- Tool. In this case, you need to prepare: a drill with various attachments, a level (plumb bob), a hammer, pliers, an electric jigsaw or a hand saw.
- Slats for the frame. A solid wooden beam with a cross-section of 30*60 mm is ideal for this purpose. The substrates are immediately prepared. They are used to level racks.
On a note! If the surface has a significant slope, then setting up a wooden beam will be a rather complicated procedure. In this case, a metal profile is used.
- Fasteners: self-tapping screws, dowels, nails, clamps; if required, additional elements for the frame (suspensions).
You should know that before covering with clapboard, even if the frame method is used, preliminary preparation of the surface is required. The procedure is simple; the old decorative layer is removed, and all defects are well covered. Additionally, priming is carried out.
Creating a sheathing
The lathing is carefully attached to the wall. The order of placement of the slats is determined by the selected laying scheme of the lining.
 Scheme for creating sheathing for lining
- The timber is treated with fire-resistant impregnation and protection against mold. Wood paneling assumes that the wall will be dry.
- The slats should be perpendicular to the decorative boards.
- A uniform distance is established between the slats, the step of which is 40-50 cm.
- Be sure to leave a gap between the ceiling and floor. This is especially important for wooden houses that are subject to constant shrinkage.
- The evenness of installation of the frame for cladding with wooden lining is carefully checked. To do this, use a building level and plumb lines.
- If an empty space is formed between the wall and the lath, then it is filled with prepared dies.
 The empty space between the slats and the wall is filled with wooden dies
 On a note! Lathing makes it possible to finish the walls with an additional layer of insulation. It is fixed directly between the posts.
Selecting a fixation option
Immediately determine the method of fixation. After all, paneling can be done using different methods:

 Installing the lining on clamps allows you to make the fastenings invisible
 The necessary fasteners are selected based on the specific situation. Currently, clamps are becoming increasingly popular.
Fastening decorative material
Fastening the lining begins with the material being brought into the room and left for two days. This time is necessary for the product to fully acclimatize. If installation is carried out immediately, then there is a high probability that the elements will begin to warp - the structure will become deformed. Work is carried out only at positive temperatures and humidity, which is at least 60%.
 The lining is first brought into the room and left for two days.
 The general technique is:
- Often, boards are installed horizontally. Therefore, the first element is installed at the bottom so that the tenon points upward.
- Fixation starts from the corner, which is located away from the main entrance to the room.
- The first board is well checked for level, the horizontal and vertical planes are taken into account. If even small deviations are allowed, they will become very noticeable when the top panel is attached.
- The first fragment is fixed. The possibility of deviations is checked again.
- Next, the following elements are installed, which are first grooved and then fixed.
But how to cover a wall with clapboard vertically? The procedure is no different from the previous version:
- The elements are placed from the far corner. The first fragment is exposed and secured.
- The following elements are inserted into the groove and fixed. It is important to check that the joint is completely connected. To do this, lightly tap the rail along the edge.
- For this method, a wider rail is used. It creates a beautiful surface with fewer joints.
If you have experience, you can finish the walls in one day (even taking into account the frame). When the installation is completely completed, decorative elements are attached: corners and baseboards. The surface is well impregnated with stain and varnished.
Exterior decoration of the house
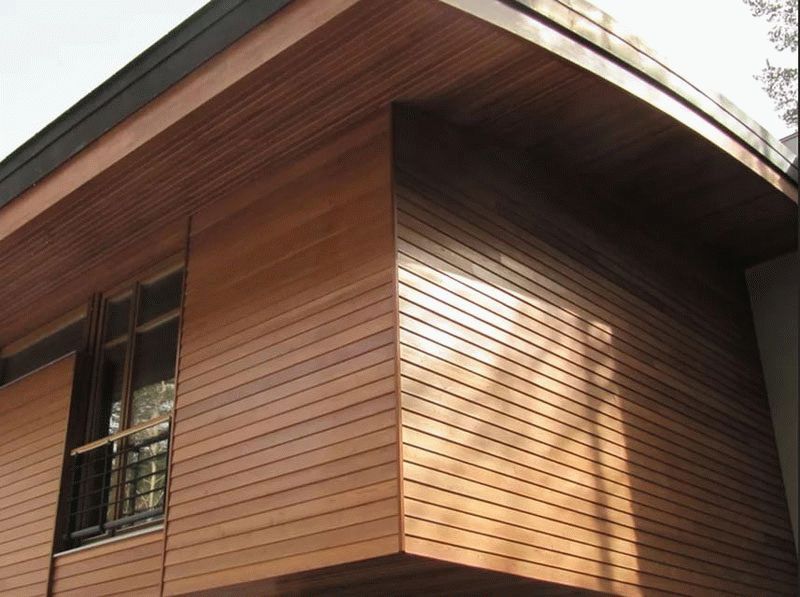 Decorating the house with clapboards on the outside
 Cladding the house with clapboards on the outside almost completely repeats the interior work. The procedure is divided into three stages: marking, installation of sheathing and cladding. But there are some nuances:
- Two racks must be installed at each corner of the house.
- Window and door openings are framed with a profile (beam).
- For the work, we use high-quality boards that do not have falling knots.
- Fixation is performed end-to-end.
- The elements are attached with the groove down. This helps prevent precipitation from accumulating.
If you understand the basic rules and study the chosen fixation method well, then the work is done quite quickly. The result will be a surface that will bring the comfort and warmth of natural wood into the interior and will delight you with its beauty for many years.
We are building a frame house! Having installed and, we proceed directly to finishing the facade. This must be done not only for the “beauty” of the house, but also to protect the wooden surfaces of the walls from exposure to atmospheric phenomena. Let's consider the technology of finishing the facade with siding.
Briefly about siding
Siding is a panel that consists of two paired “carriage boards”. Siding has several colors. Each panel is equipped with a latch lock and a perforated edge for fastening with nails or self-tapping screws.
The siding panel has the following dimensions:
- panel length is 360 cm
- panel width (the “clean” width is taken, excluding the latch lock and perforated edge) - 20 cm.
You can find detailed information about siding.
Tools needed to decorate the facade of a house with siding:
- (or screwdriver)
- (or a hacksaw for metal)
- simple pencil
- consumables (nails or wood screws).
Materials
- siding panels
- start and finish bar
- corner
- connecting strip (for connecting panels)
- wooden blocks with a section of 50×25.
Stages of work
Before you start covering the house with siding, you need to fill the surface of the walls with wooden bars (the bars are used instead of metal profiles in order to reduce the cost of finishing the facade).
Place the bars on the wall at a distance of 50 cm from each other, along the entire perimeter of the walls of the house and along the entire height. At the same time, pay attention to the fact that the block you fill must be solid - this will give rigidity to the sheathing and will not cause warping of the siding when the house settles.

Important! Siding can also be attached directly to the walls of the house; in this case, it is necessary to make holes in the connecting corners opposite each panel (for ventilation of the walls). Although this will negatively affect the appearance of the house, I still advise you to make a sheathing of wooden blocks to ensure ventilation.
- After the work on making the sheathing is completed, it is necessary to attach a starting strip at the base of the house, along the entire perimeter of the house. In order for the starting bar to be fixed level, it is necessary to control the angle of inclination during the fastening process using a building level. The quality of the result of finishing the facade of the house largely depends on how you attach the starting strip.
- Before you begin attaching the siding to the vertical posts of the sheathing frame, you need to attach a decorative profile corner to all corners of the house.
- Proceed to installing the panels on the sheathing bars. Insert the profile tenon of the panel along the entire length into the latch lock of the starting bar and carefully lift the panel up until you hear a characteristic click. A click indicates that the panel is locked.
- Screw self-tapping screws into the perforated edge of the panel - one for each frame post.
- Next, attach the second panel in the upper direction (use the same technology described above).
- Thus, continue working, building up a number of panels to the level of the finishing strip.
- When completing the finishing, connect the panels to each other using a connecting strip, which hides the joints and serves more as a decorative element than as a panel holder.