How to properly mix starting putty. The procedure for diluting putty

Subscribe
Join the “koon.ru” community!
In contact with:

When conducting construction, one way or another you will have to face the issue of putty. Topics that will be raised along with the repair are leveling the walls, priming, choosing the right materials, and how to mix putty. We have already answered some of these important questions. Now let’s look in detail at how to dilute the putty.

It’s worth noting right away that the putty is intended for:

  • leveling walls;
  • covering small cracks, holes and chips;
  • sealing walls and connections;
  • as a preliminary step before wallpapering or painting walls.

Any putty can be either in a dry state - a powder, or in an already prepared state - a mixture. In the first case, you will have to add water to the dry mixture yourself and beat very thoroughly with a mixer or by hand (which is highly not recommended). In the second case, you can only slightly dilute the solution if it seems thick (which is unlikely) and it is ready for use. You might immediately think that the first type of putty is most likely not popular - but no. It is more often used than the second one due to its cheapness and ease of transportation, transportation and storage. Everyone chooses the type of putty that suits them.

How to dilute dry putty

If you still decide to buy dry putty rather than wet, then you will need:


Related article: Practical combination of a hanger with a chair

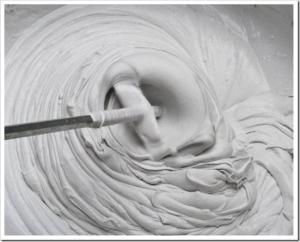
When all the ingredients and tools are ready, you can begin to perform the main task - interfering. To do this, you need to pour a certain amount of dry putty into a bucket or basin, pour the required amount of water on the floor and start mixing. During the mixing process, water must be gradually added until it is all used up. Next, the mixture should rest quietly for about 5 - 10 minutes, depending on the type of putty, and you can start using it.

Every builder will wonder how much water to use. If the mixture is purchased, the answer is clear and it is indicated on the packaging. If the mixture was produced at home, then according to the standard you will need 400 grams of water per 1 kilogram of the mixture. The consistency of the building material should be similar to thick sour cream.

The question of how to mix putty will affect any builder or home owner in one way or another - so it’s worth immediately studying exactly all the information on the topic, and then proceeding with implementation.

Features of starting and finishing solutions

To understand how to properly dilute putty, you need to make a choice of what you need. It is known that among the types of putty there are:

  1. Starting;
  2. Finish;
  3. For walls;
  4. Ceiling;
  5. Facade;
  6. For interior parts of the room

Depending on which putty is chosen, there will be an answer to the question of how to properly dilute the putty. Why does the answer depend on the type? Because each solution has its own required volume of water, its own required thickness and consistency.

For example, the first - starting - mixture is needed to level the walls; its layer can reach up to six centimeters in order to hide very large defects. Therefore, it should not be liquid; the thicker the mixture, the better it will fit into the recesses and the faster it will dry later. But don't overdo it.

Related article: Installing wall panels in the bathroom

It is also very important how the master will apply the plaster to the wall. If this is a manual method, then the solution must be thicker. If you plan to automate the process, then you should get an airless spraying machine and spatulas of different sizes - preferably 45 centimeters, 60 centimeters, 80 centimeters and 1 meter. When applied to the wall automatically, the mixture should be slightly thinner than when applied manually.

The finishing putty should be more liquid, since we will apply it very thinly. In the final version, the question of how to dilute the putty is very often not raised, since many people prefer to take it already diluted, right in the bucket.

I would like to provide some tips so that the question of how to dilute putty does not remain unknown:

  • It is worth taking into account that the proportion of dry solution and water is different for each mixture. Carefully read all instructions, all requirements and under no circumstances ignore them.
  • Before applying the solution, the wall must be clean, dry, free from fungus or mold. It must be pre-treated with a primer, also diluted with water.
  • every time after using the tools, clean them and wash them, and throw away the excess mixture, it is not intended for storage.
  • get a respirator for working with dry solution - this will ensure safe work.
  • If you decide to buy a large spatula so that the cherished task progresses faster, take care of a small spatula, it is easy to “throw” the resulting solution onto a large device.
  • Do not mix too much solution at one time. Analyze how much building material you can use at a time and use exactly that amount. Don’t skimp on the solution – it’s better to put in more and remove the excess.
  • if there are large potholes in the wall, it is better to immediately cover them separately and bring the surface to a more or less even layer. And then deal with the complete leveling of the surfaces of the room.

Before starting decorative finishing, you should level the walls and correct all existing flaws. The process of eliminating defects should be given special attention, because in the future the quality of the repairs will depend on it. The aesthetics and attractiveness of the interior depend on the correct geometry of the room. Correctly executed puttying will allow you to avoid problems caused by the curvature of the walls. In this article we will get acquainted with different types of mixtures and learn how to properly dilute putty.

Types of putty and features of their dilution Today you can easily purchase both ready-made and dry mixtures that require dilution. The first ones go on sale in special containers. The second ones are packaged in durable paper bags. Putty that does not require mixing is sold at a higher price, so it is advisable to buy it only for a small amount of work.

Let's figure out what types of mixtures are available to the consumer and how much time is needed to mix them. So, today the following compositions are available to consumers:

  1. Oil-based adhesive products. The main advantage of this product is its moisture resistance. The putty can be used in rooms with high humidity levels. Suitable for application to wooden and metal objects. Protects them from rotting and rust.
  2. Gypsum compositions. Putty is made from a gypsum cement base and is the most popular product used for most finishing work.
  3. Water-dispersible agents. Putty creates an ideal surface, with its characteristic smoothness and strength.
  4. Acrylic multifunctional products. The product has proven itself well for leveling surfaces and removing cracks from old coatings. Facade mixtures are moisture resistant and are indispensable for outdoor work.
  5. PVA-based putty is a universal product with an antifungal effect.

Attention! A properly diluted mixture avoids cracks on the surface.

When working with the composition, you need to know how to dilute the putty and comply with certain conditions:

  • Follow the instructions on the packaging, taking into account the required proportions. Products must be mixed in accordance with the indicators recommended by the manufacturer;
  • Do not use over old coating;
  • For good adhesion, use a suitable primer;
  • After treating with a primer, leave the surface for 6 hours, and only after this time have passed, start working;
  • The surface must be puttied in two layers;
  • The first layer should dry during the day, then you need to apply finishing putty for the walls;
  • Do not attempt to decorate the walls if the topcoat has not dried. Wait 24 hours and only after that apply wallpaper.

Important! The consistency of the putty directly depends on the type of work for which it is intended - starting or finishing finishing.

The putty must be mixed in accordance with the instructions on the packaging. Do not dilute the composition in advance and in large volumes, its excess will quickly harden. The optimal amount of solution will be used within 30 minutes after settling. Please note that the prepared mixture, which is in the swelling stage, does not allow the addition of liquid.

The drying speed of the putty is directly dependent on its thickness and the temperature of the room. The warmer the room, the faster the solution will dry.

The composition can be mixed either manually or using electrical appliances. The most suitable rotation speed for a mixer or drill with an attachment is up to 600 rpm.

As a rule, putty is diluted in accordance with the standard scheme, which assumes a ratio of 25 kg of mixture and 10 liters of water. However, other options provided by the manufacturer are also possible.

Breeding

The finished putty should be plastic and pliable. Pay attention to the homogeneity of the mass. It is not allowed to contain impurities, lumps or other defects.

The consistency of the mixture should not be too thick or liquid. Let's figure out how to prepare a putty mixture using a mixer and manually, and also learn about the proportions in which the components should be used.

Without mixer

So, let's try to prepare the mixture without using electrical appliances:

  1. In order to dilute gypsum putty using the manual method, you will need a clean construction bucket. Before mixing the solution, make sure that the container is thoroughly dry.
  2. At the next stage, you need to pour dry powder into the container.

    Attention! If you first pour water and then add putty, the mass will form lumps, which are quite difficult to get rid of.

  3. There are some features of diluting gypsum putty. In order to prepare a high-quality solution, you need 7 trowels of the composition, dilute with a small amount of liquid and mix the components thoroughly.
  4. Next, you need to add the rest of the powder into the container and add a certain amount of water. Then bring the mixture to a homogeneous consistency of the desired thickness.
  5. After the above manipulations, the plaster should remain swelling for 3 minutes.

When carrying out work on finishing various surfaces, a material such as putty is often used. With its help, you can level the walls and prepare them for subsequent painting and wallpapering. You just need to know how to dilute putty correctly. During preparation, it is necessary to take into account some details, such as the type of putty, as well as for what work it can be used. You should also take into account the ratio of the dry mixture and water, as this may affect the quality of the work performed.

Types of putty

The construction market offers a huge selection of putty materials. They are sold ready to use or dry. To prepare dry putty, you should take into account its base and how to properly dilute the putty. Its scope of application and method of preparation depend on this.

Gypsum-based putty

This putty is used for indoor work. It is snow-white. The product cannot be used in areas with high air humidity. The putty is intended only for finishing the surfaces of dry rooms with heating. It can be used in the bedroom, hall, hallway and rarely in the kitchen.

The mixture is applied to the walls before wallpapering or painting, taking into account the rules indicating how to dilute gypsum putty.

Cement based putty

With this, you can eliminate all unevenness, differences and various cracks by applying the product to the surface of the wall. It is suitable for work in any room - both dry and high humidity. Cement putty can also be used to finish the facades of buildings made of concrete, brick and stone.

In the store you can purchase a dry mixture of cement putty in special packaging or a ready-made solution. has a number of disadvantages: when drying, shrinkage occurs, and the applied thick layer of the mixture may crack. It is sold in a special plastic container.

As for the dry mixture, you should know that it has a cement base. The required consistency is achieved by kneading. The putty has good adhesion and excellent strength (when completely dry, cracks do not appear). But this is only if it is properly prepared and applied to the surface.

Polymer-based putty

This putty is used for finishing indoors only. It has high elasticity, strength and durability. These qualities are achieved due to the polymers contained in the putty.

Dry is used for starting and finishing work. The starting putty mixture is highly durable. It is used during primary processing to level surfaces and seal cracks.

The finishing putty has fine grains. Thanks to them, the finished and sanded wall will have a smooth and perfectly flat surface. The mixture should be applied in a thin layer.

They also produce polymer universal putty, ready for use. It can be used both for starting and finishing work, on surfaces without any special defects.

Taking into account all the features and proportions, you should know how to mix putty for walls and other surfaces on different substrates.

Features of diluting putty

As in any business, there are certain features. You should know before you figure out how to dilute putty: the proportions must correspond to the type of product. There are several types of it:

  • for starting work;
  • for finishing work;
  • for wall decoration;
  • for processing ceilings;
  • for finishing facades;
  • for indoor work.

The answer to the question of how to dilute the putty will depend on what type of putty will be used during the work. After all, a certain type of solution requires a fixed amount of water. It should be of the required thickness and consistency.

  • When using 1 kg of dry gypsum mixture (for example, Fugenfüller putty), you need to take 0.8 liters of water.
  • When using cement putty, 0.37 - 0.42 liters of water are needed per 1 kg of dry mixture, and 7.4-8.4 liters of water should be used for 20 kg.
  • How to dilute putty for walls? The proportions for the dry polymer mixture are as follows: about 10 liters of water are needed for 25 kg.

Starting putty is used to hide defects of different sizes, the applied layer can be 6 cm. For this reason, the solution should not be liquid, since it is easier to fill in the depressions with a thick mixture, and the surface will be dry faster.

The method of applying putty to the wall also affects the thickness of the solution. It should be thicker if applied by hand. When working with an airless spray machine, the solution must be in a liquid state.

When answering the question of how to dilute finishing putty, you need to know its required consistency. When using, keep in mind that it must be applied in a thin layer. Therefore, the solution should not be too thick.

Preparation of putty mixture mechanically

The process of preparing the finishing putty is not too complicated. Before diluting the putty, it must be mixed with clean water at room temperature.

In order for the putty solution to be of high quality, water should be added to the dry mixture in small doses. For more efficient mixing, use a special tool - a construction mixer. Kneading can also be done with an electric drill with a special attachment, the power of which must be at least 1.5 kW. But it is best to use a drill with a high number of revolutions. The tool kit of professional specialists often includes a universal-purpose construction mixer. It is used only for preparing the putty mixture.

At the beginning of kneading, the tool speed should be low. Gradually deepening the whisk, you should expand the kneading area. When the mixture acquires a more uniform consistency, you can increase the number of revolutions. After stopping kneading for a few minutes, you need to continue the process again. You need to stir for about 10 minutes. This way you can get a uniform consistency of the putty. When mixing, the speed of the mixer or drill should not be high, because unnecessary air will get into the putty. Because of this, bubbles may appear when applying the putty mixture to the surface to be treated.

Preparing the mixture manually

If it is not possible to purchase a special tool, then the solution can be prepared manually using a spatula. You just have to tinker a little with this solution. In this way, you can prepare putty for starting work, since there are no special requirements for it.

The prepared mixture should be used within 40 minutes. If the putty has not been applied during this time, it will inevitably thicken. You should not add water to the thickened mixture, as this will only worsen the quality. It is better to throw it away and prepare a new one. Further work cannot be carried out with such putty.

To prepare the next portion of the mixture, the bucket used must be thoroughly washed so that no fragments of the old composition remain. Thickened particles, once added to a new batch, will significantly reduce its working efficiency. For example, it may thicken faster. Clean, rust-free water is used for mixing.

To mix the putty, you must use a household bucket (galvanized, plastic or enameled). Do not use basins or other containers that have rounded corners at the bottom. By placing the drill attachment in a bucket of water, you can clean it of putty residues by twisting it in different directions. To do this, use the reverse function. To allow water to drain from the nozzle, you must place the drill on the bucket in a horizontal position.

Features of applying the putty mixture

Having applied the first layer of the mixture to the surface of the wall, there is no need to rush to apply the next one, as it can curl up, tear off the initial layer and increase the drying time. You need to wait for the first layer to dry. Therefore, it is impossible to prime wet putty. It is also not recommended to add a primer to the mixture when diluting dry putty.

Overdrying the first layer can also adversely affect the quality of finishing work. You should not use heating devices or artificially raise the temperature in the room - the putty can quickly dry out and crack.

By adhering to these rules and requirements, you can find out exactly how to mix putty for walls and other surfaces.

Anton Tsugunov

Reading time: 3 minutes

Putty is a building substance in the form of a paste intended for leveling ceilings and walls before further finishing. It contains film-forming elements, coloring pigments and fillers that have the properties of filling and eliminating cracks, as well as leveling uneven surfaces. To accurately level the surfaces in the room where repairs are being carried out, it is first of all important to know how to dilute the putty and maintain the correct mixing proportions. In addition, you must be able to use putty correctly, know the methods and technology of its preparation, mixing features (consistency density), important rules for using and working with this mixture, and also understand the types of putty.

Types of putty

  • Putties prepared for use. Sold ready-made in plastic buckets. The peculiarity of this substance is its short shelf life.
  • Dry mixture - intended for mixing. Sold in bags and is the most common use. The advantage of dry mixtures is their low and affordable price, convenient transportation, the ability to prepare any degree of viscosity you need, as well as a long shelf life. The disadvantage of dry types of materials is that the resulting mass must be applied to the surface as soon as possible after mixing to prevent it from hardening.

Types of Binder

  • Cement. Putty with a cement base is characterized by high water resistance, and it is intended for use in rooms with high levels of humidity. The disadvantage of this substance is precipitation after application to the surface, after which it is necessary to apply an additional layer. Also, this type hardens relatively slowly, which is why small microcracks may appear.
  • Polymer. This type is the best and highest quality coating, but due to the high price, fakes are often found.
  • Plaster. This species does not settle. It can be applied in a thin layer. The disadvantage of this type of substance is the fear of temperature and moisture changes.
  1. Capacity. To knead, you need a capacious plastic bucket or any conveniently shaped container. If there is no plastic container, you can use any galvanized or enameled container. But a plastic container is best suited, as it is very convenient to knead in it.
  2. Next, you need to prepare clean water at room temperature without debris, dust and rust.
  3. In order to dilute the mixture efficiently, the best option is to use a drill with an attachment. The drill should have a soft start mode so as not to splash the room, and rotation in both directions. The ideal speed for stirring the mixture would be 600 rpm, which will help mix well and saturate the mixture with air bubbles. If you don’t have such a drill, you can rent one from a supermarket or a tool supply company for any period of time you need. If drill options are not possible, you can stir by hand, but this is a very labor-intensive process.
  4. You will also need a paint brush, a container of water and a small spatula.
  5. A container of water intended for washing the drill attachment.

How to dilute putty, step-by-step instructions

  1. It is necessary to fill the mixing container with water in the amount indicated on the packaging.
  2. Next, you need to wet the walls of the container, as they should be wet.
  3. Pour putty into the water in the amount according to the instructions.
  4. The mixture should remain in water without stirring for 5 minutes, it should become limp.
  5. Next, you can begin the stirring process. If necessary, add additional mixture or water.
  6. Wash off any unused putty from the edges of the bucket. This can be done with a spatula or brush. Stir further, moving the nozzle from the drill clockwise and counterclockwise, down and up.
  7. Pull out the drill and dip it in a container of water, turning it on at low speed to wash the attachment (if this is not done in time, the attachment will remain in the putty).
  8. The resulting consistency needs 15 minutes to brew, after which you need to add a few tablespoons of PVA glue, which will strengthen the consistency, add elasticity and softness.
  9. Mix again and you can use the resulting solution for its intended purpose.

To begin work on puttying walls, ceilings and slopes, you need to prepare a putty mixture. It's not difficult to mix. To do this you will need some tools and material, the putty mixture itself in a bag.

Initially it looks like a powder, but after adding it to water, it becomes viscous. To achieve the desired thickness of the putty, it is stirred with a mixer.

Putty is a universal material for leveling a surface, so you need to learn how to mix it correctly. Only then can the desired effect be achieved.

There are many companies in the world that produce putty. Some make it of better quality, some create economical options, but basically putty is available to everyone who makes repairs.

Depending on the composition, the putty can have different viscosities. For the starting layer, a viscous putty is needed, but not too thick. If the mixture is made liquid, it simply will not cling to the wall, it will slide and it will be impossible to work with it efficiently.

First, you need to prepare a container of water at room temperature and pour the dry mixture from the bag into the water, observing the proportions indicated on the package. Then you need to mix the capacity of the container with a mixer. It is recommended to knead for 5-10 minutes with smooth, circular movements, as well as along the entire height of the container (bucket), making up/down movements. All these actions must alternate.

After reaching the desired consistency of the material, you can begin finishing work.

How to dilute finishing putty?

Experienced craftsmen use their own methods for mixing putty. They are practically no different from putty mixtures that are mixed by inexperienced people or novice specialists, but there are features that you should be aware of and take into account when mixing the finishing putty.

To dilute the finishing putty, you must:

  1. Read the instructions on the packaging. By following these requirements, you can achieve the desired viscosity of the mixture. The finishing putty should be moderately liquid and not too thick, since a thick mixture is inconvenient to work with;
  2. For finishing putty, you need a mixer with a spiral-like attachment; you need to use it to thoroughly stir the mass in the container to the desired consistency;
  3. The finishing putty should be stirred smoothly. No lumps should form during the mixing process. To do this, make circular movements throughout the entire container. If, nevertheless, lumps have formed, you need to knead again.

The viscosity of the finishing putty should be adjusted by the master or the person doing the repair.

How to properly dilute gypsum putty?

Gypsum putty is intended for applying a rough layer under wallpaper. It has a number of properties that help to carry out high-quality apartment renovations. Gypsum putty dries quickly, so there is no need to stir it in large quantities.

To properly mix gypsum putty, you must:

  • Prepare a plastic container (an old basin, a large bowl, a five-liter bucket);
  • You need to pour several trowels of putty into the container. It depends on the area that needs to be leveled;
  • After this, you need to pour a little water and make sure that the mixture does not granulate or create lumps;
  • Mixing can be done using a trowel or spatula;
  • No other ingredients should be added to the mixture, as this may deteriorate the quality of the putty;
  • After mixing the putty and achieving the desired level of viscosity, you can begin to work.

This type of putty is widely used for work in wet areas, as it has moisture-resistant and heat-resistant properties.

Return

×
Join the “koon.ru” community!
In contact with:
I am already subscribed to the community “koon.ru”