We propose to make another smaller version of a powerful road-building machine from scraps of maple and walnut wood
Whether you're smoothing carpet piles like road-building soil or leveling a play area in a sandbox, this hard-working grader will show off your skills. E
Then the rotary blade rises and falls, and the engine driver himself will have to make the sounds of the engine.
Build the back of the tractor first
Note. After cutting out the parts and giving them their final shape, sand them sandpaper No. 220 before starting assembly.
Having secured the wooden plate to the cross-bar, make cuts in the clamp and traverse J, K according to the markings on the templates. Remove excess material between the edge cuts in several passes.
Having installed the scrap from the F/G beam at the bottom, create a parallel surface for installing clamps in order to glue the clamp and traverse J,K on top.
With the scrap underneath, drill a hole in the F/G beam through the holes in the clamp J.
3. Cut out the front axle H and drill in the center through hole with a diameter of 9 mm (Fig. 1). Take the J gusset blank you saw earlier and mill a 10mm chamfer along one edge over a 50mm section (Fig. 1c). Saw off the gussets of the specified length from the chamfered area, and set the rest of the workpiece aside.
4. Dry (without gluing) fasten the front axle H to the F/G beam, carefully aligning it. Drill and countersink a 4mm diameter mounting hole through the front axle and a 2.8mm diameter pilot hole in the beam. Glue the front axle in place and secure it with an additional screw (Fig. 1). Then glue the gussets I to the beam and front axle, aligning them at the middle of the width.
Glue the rotary plate L with right angles into the cutout of the blade M, aligning the parts along the back side.
When gluing the front arms O to the rotating block N, thread a piece of threaded rod into the holes.
Lightly tighten the nuts on the vertical arms P and make sure that the parts of the L-0 mechanism rise and fall.
5. From maple wood, cut a blank measuring 19x22x305 mm for clamp J and another one measuring 13x16x305 mm for traverse K. Make copies of the templates for the clamp and traverse and attach them with spray glue to the corresponding blanks. Make cutouts in these parts (photo C), drill holes in the places indicated on the templates, then cut along the contour band saw and final sanding. Mill with milling table 2mm chamfers on both parts as described in the Craftsman's Tip.
6. Using the scrap from sawing out the F/G beam, glue the clamp J and the traverse K to the beam (photo D), aligning them with the marks made earlier. Once the glue has dried, drill a 5mm hole through the beam (Photo E).
7. Align the F-K beam assembly at the middle of the width chassis A-E, pressed against cabin D.
Glue the beam to the chassis, secure it with an additional screw and glue the headlights into the holes of the traverse K.
The blade will rise and rotate
1. Take a blank for rotary plates L, attach it with double-sided tape to a flat carrier sheet with a length of at least 305 mm, and process it on planer up to a thickness of 6 mm. Make two copies of the turntable template and attach to the workpiece. Cut out the parts along the contour with a band saw and sand the edges. Note. One slab has rounded back corners, the other has straight corners (Fig. 2). Place both pieces together, aligning the ends and edges,
Drill a 5mm hole at the indicated location, then remove the template.
2. Cut out a blade M of the specified dimensions (Fig. 2a). Make a cutout at the top edge corresponding to the width of the rotary plate L. Glue the rotary plate with right angles to the blade (photo F).
3. Take the walnut strip previously set aside for the N turning block, saw off the block to the specified length and drill a 5mm hole in the center (Fig. 2). Glue the piece to the turntable L with rounded corners.
4. Make two copies of the templates for each lever O, P, Q, attach them with spray glue to the maple blank made earlier, cut out the parts along the contour and sand them. Drill holes in the indicated locations and mill the chamfers, then remove the templates.
Let's start assembly
1. Note. Do not apply sealant to incisal joints before starting final assembly after applying the finish. Prepare a piece of M5 threaded rod 67 mm long and use it to glue the front arms O, the rotary plate L and the rotary block N (photo G). Once the glue has dried, connect the pivot plates with a 22mm piece of threaded rod to the cap nuts (Figure 2).
2. To attach the upper arms Q to the clamp J, take an M5*76 threaded rod, washers and cap nuts (Fig. 1). Place a 67mm length of threaded rod on the I.-O blade assembly through the holes in the upper arms to position the blade under the F/G beam.
Attach the front arms O to the beam, then connect the vertical arms P with the front and upper arms using pieces of threaded rods, securing the assembly with nuts and washers (Fig. 2, photo H). Check how the assembled unit rises and falls.
H. Make 9 mm axle holes in four wheels with a diameter of 32 mm (photo I). Try on wheels with a diameter of 32 and 64 mm to the chassis A and the front axle H, inserting the axles and washers (Fig. 1). Remove the wheels and all fasteners. Paste over masking tape ends of the axles that will be glued into the holes, and apply to all parts finishing coating. (We applied three coats of semi-matte polyurethane varnish from an aerosol can with intermediate grinding abrasive sponge No. 320.)
4. Once completely dry, apply a little glue to the sides of the holes before inserting the axles into them. Reassemble the lift and turn parts by applying red locking compound to the ends of the threaded rods. Tighten the nuts so that the blade turns and lifts without much effort and remains stationary in any position.
Do-it-yourself tractor-grader - drawings

This toy came to us from Soviet Union. When, apparently, it was not easy for children to buy something special somewhere, but they still wanted entertainment. This thing is really imbued with some special spirit of that time, when they did a lot of things with their own hands and, in fact, not only did they not worry about it, but they even felt a certain superiority over those who could not do it. Although we think there were much fewer armless people than in our century, when a Chinese trinket can be bought for a couple of kopecks. However, we will not look for the truth about when it was better and what are the features of each of the times, but we will tell you about a toy - a tractor made from a spool of thread on a rubber motor.
Rubber motor toys for children
This article describes another of the toys based on a rubber motor, a universal source of energy. A rubber band twisted in advance is able to unwind and thereby provide a certain torque. In the future, this torque from the rubber band can be used to rotate the propeller, like in an airplane, which we have already talked about, or to rotate the wheel. In our case, it will be a wheel in the form of a coil. Let's talk about this in more detail now.
Reel tractor with rubber motor, toy for children
For the toy we need the following. A reel with protruding edges. This could be a spool of thread or something else. You will need a rubber band, a match, a rod, a soap or a candle, or maybe just a plastic washer.

How can all this be applied to get a self-propelled vehicle?
Initially, we make notches on the reel. They will help the edges of the reel to cling to the surface on which our tractor will ride.

Especially if it is embossed and soft. Next, we break the match so that it is no larger than the diameter of the end of the coil. We also make a washer from soap or a candle. You can use a plastic washer. In fact, such a washer will act as a sliding bearing. If you lubricate it with lithol, at least thin layer, then it will be very good. To prevent the match from turning at the end, we make a recess. You can then glue the match there using glue.

Now we assemble our tractor. Since the actual production work had ended, assembly work began. To help you better imagine how to assemble everything, look at the picture.

The rubber band is threaded through the hole in the spool and placed on the match.

On the other hand, the hole of the washer and the rod are threaded into the elastic band. That's it, the toy is ready.

Now it is enough to twist the rod several times, in any direction, and place the structure on the surface. The rod will begin to rotate until it hits the surface. Then the coil will begin to scroll. Since, after all, something must spin... releasing the energy of the twisted rubber band. The rotation of the coil will ensure that the entire structure moves along the surface, so it will move. Here's a do-it-yourself tractor toy. There are many advantages to making it. If you do it with children, you can thus develop their motor skills and learn the world, teach them to work with their hands. Of course, it will also be a plus that they will have a new toy to play with.
Homemade children's toys were always interesting. Every toy made for a child has the love and energy that was put into it during construction. It’s not for nothing that children sometimes treat seemingly unsightly toys very carefully.
Currently, there are a lot of different colorful and beautiful children's toys in stores, so homemade toys they do it very rarely. But the hidden meaning in homemade technical toy This is precisely the process of creating a toy, thinking about it, building it with your own hands using a tool. Moreover, this process takes place together with one of the parents or older brothers and sisters, especially when the children are small and cannot work with the instrument independently; this is both a game and a learning process.
Purchased educational toys(like Lego construction sets) are very good, they allow you to assemble many structures, but the weak link is that everything is assembled from ready-made bricks - we simply fasten these bricks together and get the intended structure.
In such a game, the initial elements of creativity disappear - the choice of materials, processing them by hand using all kinds of tools until the required shape is obtained, fastening by necessary means, achieving the required function.
Therefore, a homemade toy is a truly educational toy.
As children, we were forced to build our own toys and equipment for games. Many of them are undeservedly forgotten. Let's try to remember some homemade toys for boys, let them bring joy to children and their parents.
Wooden reel tractor
This tractor is interesting for boys aged 3 - 7 years. It is made from a spool of thread or, as we called it, a spool. On the wooden cheeks of the caton sharp knife recesses are carefully cut out - this is a prototype of the tread on wheels or hooks on tracks.
  Such hooks allow tractor from a reel crawl unhindered on sofas and pillows.
 The basis of the engine is rubber. Its length should be slightly longer than the coil. The best rubber is aircraft model; good rubber can be carefully pulled out of ordinary clothing elastic. Such tires give a large power reserve.
 On one side, a small nail or two is driven into the caton. The rubber band can be hooked at one end onto a nail, or you can place a piece of a match behind the nails - then the rubber motor is fixed exactly in the center, which gives an extra half meter of travel.
  To ensure that the rubber unwinds at a low speed, a sleeve made of laundry soap is placed between the support stick (or match) and the cheek of the reel.
 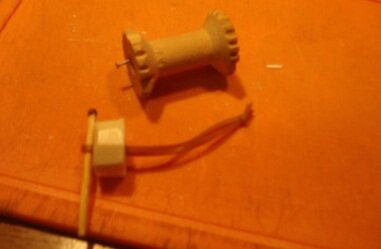 Its diameter should be slightly smaller than the diameter of the wheel (so as not to interfere with movement), and its thickness should be about a centimeter. A hole with a diameter of 4-5 mm is made in the center, and a small groove is made for the support match.
 You can make a muff from bath soap - it is a little softer, or from a candle or ski wax. How softer material clutch, the stronger it brakes and, consequently, the slower the tractor goes.
The assembly and startup of the tractor is shown in the video.
Such a tractor does not damage anything and does not make any sounds. Only the child himself growls a little when he plays.
Toy "Pinocchio with a ring"
 This toy is cut out of 4 mm plywood with a jigsaw.
 First, a design is applied to the plywood through a copy, then cut out. The edges are sanded, then everything is painted and varnished. A small hole is drilled at the end of Pinocchio’s nose and a harsh thread 50-70 cm long is tied. A ring with a diameter of 3-7 cm is tied to the end of the thread.
The ring can also be cut out of plywood or you can find a suitable ready-made one.
Holding Pinocchio's profile in your hand, you need to throw the ring up with a jerk of the thread and put it on your nose. The smaller the diameter of the ring, the more difficult it is to do this.
Several people play at once, trying to score as many successful shots as possible in a certain number of attempts.
Working model of a sailboat
While on vacation near the water in the summer, you can have great pleasure in manufacturing and launching small sailing ships. To make these, you only need to have a sharp knife with you.
 Take a suitable piece of dry wood or, even better - pine bark, which sometimes comes across on the banks of a river or lake. A knife is used to plan out the hull of a boat - a flat-bottomed boat with a sharp bow and a rounded stern.
The hull is tested for absence of roll.
Then two cuts are made in the hull - one vertical in the middle of the stern to attach the rudder and another cut with the tip of a knife right in the middle of the hull along the grain to attach the mast.
 The mast is made of a round twig, light and durable. One end of the twig is sharpened with a spatula and driven into the cut in the middle of the body with the handle of a knife.
 The rudder is cut out of a flat piece of wood with a width approximately the thickness of the boat’s hull and a length of approximately one-third of the length of the hull. The steering wheel is also hammered with a knife into a notch at the stern of the hull, and the steering wheel must be completely immersed in water.
The sail is also cut from birch bark using a knife. At the top and bottom the sails are made round holes, with the help of which the sail is carefully placed tightly onto the mast.
It is possible to equip one mast with several sails.
 Sails can be made from plastic bottles, and the body is made of foam.
 You can build a frigate by equipping the ship with three masts and a large number of sails. The main thing is that it does not turn over due to the weight of the equipment and tolerates pitching well.
After several buildings, experience comes and the ships keep their course well and gain good speed.
If you have several sailboats, you can organize a small regatta for speed and accuracy. It is very convenient when there is a shallow, enclosed body of water where you can practice launches without fear and without losing ships.
Paper airplanes
A child of 5 - 7 years old can usually easily handle scissors, and he is quite capable of building these schematic flying models of airplanes himself. The best thing paper airplanes are obtained from postcards - they have good thick paper and suitable sizes. The planes hold their shape well and fly well inside the room.
  You can cut out models of all kinds of shapes and designs, you can test a flying wing, make two stabilizers, make wings of various sweeps.
  Each form of the model has its own flight characteristics, its own flight speed and its own stability in flight.
 When building a flying model, it should be taken into account that all the lines of the aircraft must be perfectly straight, that is, the paper should not be crumpled. The folds of the papers are carefully ironed with a fingernail.
 The center of gravity of the model should be on the first third of the wing. The angle of attack of the rear wings should be within 15-20 degrees, it is selected experimentally and then obtained automatically.
 A well-gliding, low-speed model should come out of a vertical dive with an outstretched arm and smoothly land on the floor. The airplane, launched upward from the floor, makes a loop and makes a soft landing.
Gymnast on the horizontal bar
 The base of the toy is an “H”-shaped frame made of two wooden slats, fastened in the middle with a block.
 In the upper part of the frame there are two parallel threads, threaded through the holes in the hands of the gymnast figurine in the “feet up” position.
 The gymnast figurine is carved from veneer or other thin material.
 The gymnast's arms and legs are hinged to the body using a thin wire.
In the initial state, the gymnast hangs on the threads with his feet down, and the threads to his left and right are twisted 180 degrees.
If you now lightly squeeze the lower ends of the crossbar with your hand, the threads at the top will stretch and the gymnast will do a handstand. If at this moment you release the ends of the crossbar, the gymnast will, by inertia, turn over to the other side and the threads will twist again, only in the other direction.
By changing the strength and sharpness of the presses, you can get very interesting pirouettes of the gymnast.
Ship models with rubber motor
Creation boat models with rubber motor, even a very simple one, is already the process of creating technology. There are already shafts, screws and brackets, there is a lot to think about and create.The simplest ship model - wooden boat with a rubber motor.
 The hull of the boat is planed from a wooden plank, and a deckhouse is made from a suitable block or piece of foam plastic. Next we build a rubber motor.
 To operate the screw, we make a bracket with a tube for the shaft from tin (we hammer down a nail) and bend the ears for fastening. The bracket can be attached with nails or small screws.
We cut the screw out of tinned sheet metal, solder an axis from a paper clip in the middle and bend the propeller blades.
Then we put a bead on the axle as a bearing, insert the axle into the bracket and bend the hook.
We hammer a wire hook for an elastic band in front of the body. The rubber motor is made from aircraft model or fishing rubber. The number of rubber bands is selected experimentally. In the free position, the rubber motor should sag by about half the length of the rubber. The ends of the rubber can be covered with threads by inserting rope loops.
The boat's rudder blade should be positioned directly in the center of the propeller. The axis on which the rudder blade is held must ensure that the steering wheel rotates at least 45 degrees, then the model can be launched in an arc.
To make it easier to wind the rubber motor, instead of a hook in the bow of the body, you can install a bow bracket with a fixed handle.
Using a rubber motor, you can build a submarine that can dive to a depth of up to a meter or even more.
 In order for a submarine to submerge while moving, it needs depth rudders and very little positive buoyancy. Two pairs of depth rudders are also made of tin.
 To regulate buoyancy we use flat lead weights. We ensure that when afloat, only the deckhouse of the boat is visible from the water. The trim should be zero, that is, the boat should not tip down either bow or stern.
Before adjusting buoyancy, the submarine must be painted, otherwise after several launches the wood will get wet and the submarine will go under water forever.
The longer the body of a ship model with a rubber motor, the greater its power reserve. The power reserve is also affected by the quality of the lead screw.
Boomerang frame
 Being in nature, you can make a very simple boomerang in two minutes - a frame of five flat wooden slats 20-25 centimeters long.
 To do this, the slats are woven according to the drawing. The structure is held in place by bending the slats.
The frame is taken in the hand by the lower part of the central rail and thrown in a vertical position forward and slightly upward, and, like a real boomerang, it lies on its side and, making a circle, returns back.
If it hits a hard object, it falls apart. It's cool, you can collect it again.
Simple car with an electric motor
The simplest car with an electric motor has wooden frame made of plank or plywood, four wheels in pairs on two axles, no steering, direct transmission - from the engine shaft, which is covered with a rubber tube - directly to the rubber wheel of the car. The point of such a car is to feel the excitement of construction, see the dynamics and power of the electric motor, and learn the basics of electrical engineering.
 The wheels of the model are taken ready-made from a suitable toy, the axles are made from bicycle spokes. The axle mounting brackets are cut out of sheet metal and fastened with self-tapping screws or self-tapping screws.
The electric motor is attached with a bracket to the frame.
It would be better to mount the electric motor on a non-rigid elastic loop bracket, then the grip on the wheel will be more reliable.
The vehicle is powered via a double wire (from any low-voltage adapter). The batteries and the stop-forward-backward switch are assembled in any plastic box of suitable size.
You can play by simply running behind a car, or you can make a circular track and attach a wire in the center of the circle.
By developing the child’s interest, you can design a speed controller with him, steering, and then he himself will design cool drivable car models and disassemble your favorite car.
Cannon made of two cannons
The children's cannon is assembled from 2 wooden rolls.One of the ends of the first caton is planed straight, leaving the front sight, at the second end the lower edge is cut to the level of the middle, and a sight cutout is made in the upper part. This will be a gun barrel with stitching.
The second caton is used unchanged. These will be the wheels of the cannon.
You also need a piece of lath 2 cm wide and 4-6 mm thick, about one and a half lengths of the caton. This will be a kind of stop and hook for the cleaning rod.
 The most difficult part in the cannon is the ramrod. The part that pushes it should be round and fit into the barrel without friction. The length is slightly shorter than the gun barrel.
 Rear part: width - along the width of the stop, height at the top 1-2mm, height at the bottom 2-3mm, but so as not to jam when shooting. All edges in contact with the barrel shield (except for the top to avoid injury) must be steep to prevent jamming. The length of the back part is 2.5-3 cm, on the back side there is a small cutout for an elastic band. Material - birch. Pine is also suitable, but more often falls apart when shooting.
The cannon is assembled using sewing threads.
First, a rubber loop is tightly tied with threads at the ends on both sides. Then we tie the stop and immediately tie the lower caton - the wheels - across, tightly tightening the threads crosswise.
We insert the cleaning rod and put on the rubber at the back. The gun is ready.
We shoot peas or whatever we find. We cock the ramrod, hook it to the edge of the stop, load the pea, and place it in the shooting position.
Now, if you press your finger on the top of the shield, the cannon will fire.
Bow and arrows
 Bow and arrows are acceptable for playing outside the city because an arrow fired from a bow flies relatively far.
 This is not a sports bow, but a distant analogue for playing and training with its own techniques and shooting techniques.
Onions are made from flat piece willow trunk with peel or heather (juniper), which is even better. A piece of trunk 50-100 cm long is selected with the necessary rigidity so that there is enough strength to pull the bow.
The bowstring is made from strong nylon thread. the string is tied at the ends of the bow into cut grooves, and is tied in a relaxed state.
In order to tighten the bowstring, they rest one end of the bow on the ground, bend the bow with the other hand and body and wind the bowstring into the groove to the required tension. Therefore, the groove for winding the bowstring should be made deeper with a channel for tensioning.
The arrow is planed with a knife from a strip split off from a flat piece of wood, precisely split off so that the processing with the knife occurs exactly along the grain. Otherwise, the arrow will be impossible to make.
 A thick wooden tip is left in the front of the arrow in the form of a thickening, which is rounded so that the arrow cannot cause much damage.
 A shallow groove for the bowstring is cut from the back of the arrow. The shooting technique is the most common, the only thing is that with this design, the grip of the arrow shank is not a sporting one - on the bowstring, but a game grip - with two fingers on the arrow shank.
Simple toy self-propelled tank with electric motor
Using approximately the same technology as for a simple car, you can build toy self-propelled tank. It’s even more interesting to play with such a tank, because it can overcome significant obstacles. Its speed is low, so it is convenient to work with a wired remote control.
 Simple design The tank does not provide for its turns, only movement back and forth.
The design of a tank's transmission is much more complex than that of a car. A multi-stage gearbox made from gears from toy cars. You can choose a suitable ready-made gearbox, or you can assemble a simple gearbox yourself.
First you need to select the gears.
The main running gear is tightly hammered or soldered onto the axle. To fasten the gears, nails are selected required diameter and bitten to the desired length.
A suitable one is taken rectangular block strong wood species. The position of the gear adjacent to the running gear and, accordingly, the position of the bar are tried on.
Then we work separately with the block. We nail the tried-on gear into the marked place, then we try on and nail the next one.
We press the block with the gearbox against the running gear and fasten it to the tank frame with self-tapping screws.
 When hammering a small gear onto an electric motor shaft, the second end of the shaft must be rested against an anvil so as not to break the motor.
 We press the electric motor gear to the gearbox and secure it with a clamp.
We select the drive shafts and idlers of the tank from unnecessary cars.
There is a bigger problem with rollers. They can be made from playing plastic checkers.
We drill holes with a diameter of 2.5-3 mm in the centers of the checkers, connect the two checkers with their planes inward, thread a suitable material into the holes tightly piece of PVC tubes and hammer in the axle. If the dimensions are respected, everything holds up perfectly.
We glue the tracks from a strip of rubber from a bicycle inner tube; we can glue rubber lugs, or we can sew wooden ones from matches. The tracks must fit tightly onto the tank rollers. When scrolling the caterpillar, the drive roller can be rubbed with rosin.
Such tracks sometimes fall off during operation, but this can be corrected by restrictive collars on the sloths. In general, there is complete scope for modernization.
Tank superstructures can be glued together from any suitable material.
If you install a separate gearbox with an electric motor on each tank track, you will get a fully functional model. The axles of the rollers and sloths must be replaced with separate axle shafts for each side.
The control unit will also have to be modified to control two engines.