Money box- a special container where you can put money so as not to spend it in the near future. Often this is a closed container with a small hole so that money can be inserted into it. In most cases, it’s just a jar where people put change from their pockets so as not to rush around with it, and after a while, when the jar is full, they can please themselves with some kind of gift. There are many ways to make a piggy bank, and today we will talk about some of them.
Before that, we talked about it, now we’ll look at other types of piggy banks!
How to make a piggy bank with your own hands?
We have prepared for you the simplest and most quick ways, materials for which every home has, this can be cardboard box, bank or plastic bottle. The choice is yours. Let's get started!
How to make a piggy bank out of paper?
Very interesting craft, available even small child. Great idea for a variety of lessons and activities for children. By making a piggy bank, they will have a very good time and receive a useful gift.
To make such a piggy bank, print out the diagram below:

In the upper left corner you can see a diagram of the folds, this is where you need to glue it.
How to make a piggy bank from a bottle?

Everyone has unnecessary plastic bottles. Encourage your child to do original craft, learn something new and acquire a valuable thing.
Let's prepare the materials we need:
Plastic bottle.
. Stationery knife.
. Pink paint.
. Corrugated paper pink and black.
. Glue gun.
. Eyes for a pig.

1 . Take the bottle and cut it into three parts. Try to make all cuts neatly and evenly.
2 . We connect the lower and upper parts of the bottle together. The middle one can be thrown away.
4. Paint the form in pink color. It is advisable to use a spray can. Then we decorate our pig with eyes from black cardboard and cut out a nose, legs and a tail from pink materials.
Hello everyone, today I prepared a very interesting and simple homemade product for our website! This homemade product is a simple piggy bank for coins. Our piggy bank will be able to distribute coins by denomination, for example, you first threw 2 rubles into our piggy bank, then 5 rubles and 10 rubles, and each of these coins ends up in its designated place! I think I've already interested you in this! So get to work!
And so after watching the video you will probably want to read detailed description about how to make our piggy bank, but still, if someone has already gone to make a piggy bank, then our instructions will tell you in more detail how to make it!
To do this, we will need to cut out glass of a suitable size for you, a couple of flat boards that I had left after the renovation, barbecue skewers or small wooden blocks, a door hinge, a corner, and we also need to cut out something like this and make 4 small holes in it screws. Tools include hot glue and epoxy resin.


Let's get started!
Next we need to make these markings on our materials! We measure all the dimensions as shown in the pictures to make a rectangle)

We cut off all the parts that interfere with us!

And we polish it thoroughly with a needle file!

We cut the back wall to the width of our glass!

Next we need to make the side walls, bottom and top cover!


We are putting together a test version of our piggy bank and if everything is done correctly, we will transfer it to the finished material!
Oh, I almost forgot! We now need to make a miracle mechanism that will distribute our coins according to their face value, for example, if you throw 10 rubles, they end up with 10 rubles, 5 rubles with 5 rubles... and so on.
For this mechanism, we need to take kebab skewers or small wooden blocks and glue, put our piggy bank frame on the table and glue our block strictly at an angle of 20-30 degrees, and check how our coin rolls! It rolls great, now we need to make a distributor for our coins, we all know each coin has its own height. To do this, we will install height limiters!


This is how we made our coin distributor, now we can move on to designing our piggy bank so that it has at least some aesthetic appearance) and it would not be a shame to put it somewhere or something else)!
Very detailed master class on making a piggy bank from a jar using decoupage technique.
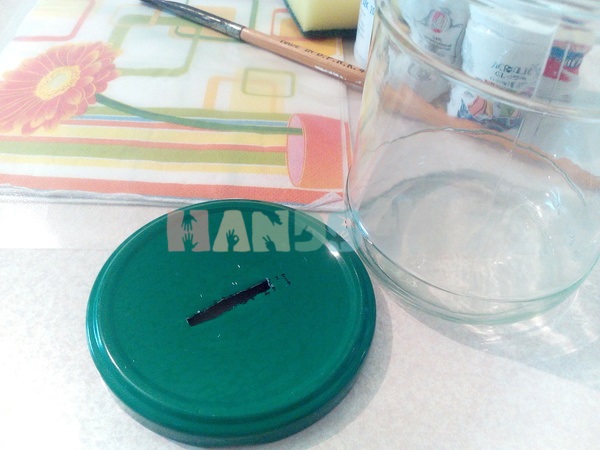
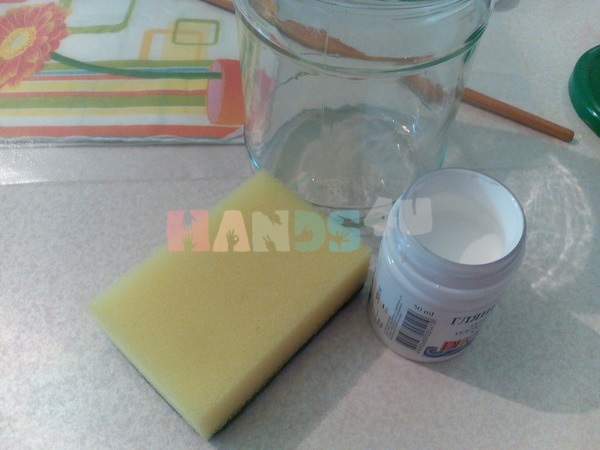
If iron money operates in the country's economy, a piggy bank is an irreplaceable thing! Of course, you can go into it paper bills fold, but it's not that interesting. You can buy a piggy bank in a store, but it is much more interesting to make it yourself using the decoupage technique. For work you will need glass jar with lid. If you don’t have a screw-on one, you can roll up a regular one. Also take white acrylic paint, sponge, PVA glue, file, spray bottle with water and a napkin with any pattern.
How to make a piggy bank from a jar with your own hands:
1. You need to wash off traces of glue from the jar, remove the label, and degrease the surface with alcohol. Make a slot in the lid for coins. It’s better to use a grinder, but an ordinary kitchen knife will do.

2. Dip a sponge into acrylic paint and apply it to the surface of the jar and lid using “smacking” movements. It is important to paint the entire surface evenly, just make sure that the layer of paint is as thin as possible, otherwise it will not dry well. If necessary, you can repeat the procedure 2 times. The main thing is to wait until the paint is completely dry each time! It is optimal to paint the jar and lid in the evening.


3. We tear out the motif we like from the napkin. It is better not to use scissors, but to carefully tear out the design, because... the torn edge is less noticeable on finished product. From the torn out drawings we separate the top colored layer. Napkins come in two or three layers. We are only interested in the one on which the drawing is applied. Be careful not to tear it.


4. Place the drawing face down on the file. Spray generously with water from a spray bottle. We dilute the PVA glue by half with water and grease the drawing with the resulting mixture. At this stage, the napkin will increase significantly in size, take this into account when gluing the pattern.


5. Apply the file with a napkin to the surface of the jar and gently press it with your fingers along the perimeter. Separate the file. The design should remain on the surface of the jar.

6. Using a dry brush, smooth the design from the center to the edges. It is important to remove all folds and air bubbles, but do not tear the napkin. If there are still any creases or air bubbles left on the surface, you can get rid of them at the next stage.

7. Let the jar dry completely. You can dry it with a hairdryer, you can leave it near the radiator, you can turn on the oven for a while, then turn it off and leave the jar there until it cools completely. The main thing is that the napkin is completely dry. If any defects remain after drying, remove them using sandpaper“zeros”.

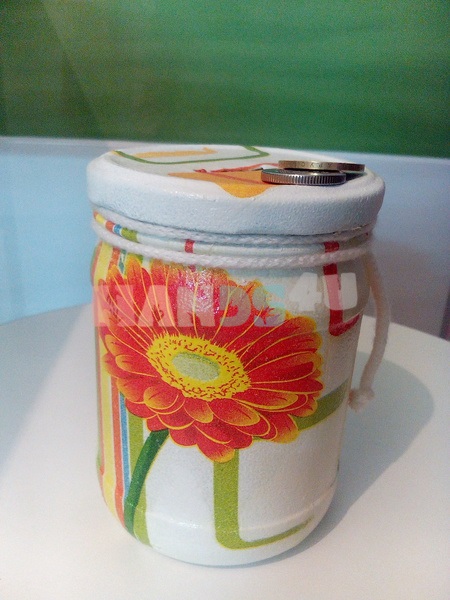
8. Cover the jar and lid acrylic varnish. You can apply 2 layers, but apply the second only after the first has completely dried. It is important.

We decorate our jar with lace. To prevent the coins from clinking too much and damaging the jar, you can put a piece at the bottom soft fabric or cardboard.


The piggy bank is ready! You can collect coins!


So, let's get to work.
For this we need:
1. Glass jar.
2. PVA glue.
3. Brush.
4. Computer wipes, can be used.
5. Acrylic paint.
6. Black color.
7. Print out the inscription: “If you don’t mind, add it; if you don’t have enough, take it.”
8. Instant coffee, water.
9. A piece of dense foam rubber.
10. Coins, small denomination.
11. Glue gun.
12. Aerosol paint “gold”.
13. Acrylic paint “gold”.
15. Yacht varnish, but glossy acrylic is also possible.

Step one:
We take our jar and thoroughly wash it from the labels. Then we cover it with computer napkins (mine are very elastic, which is good for decorating a jar, they don’t tear). We glue a napkin in the middle of the jar so that there is a flat and smooth place left for sticking the inscription. Leave until completely dry, preferably near the radiator for three to four hours.


Step two:
After the jar has dried, mix acrylic paint with black color and cover the entire jar with this black paint. Carefully, leaving no gaps. Leave again until completely dry.


Step three:
Now take a sponge and “gold” acrylic paint and lightly apply the paint to the convex areas of the jar. The paint dries very quickly. And this is what happened.


Step four:
We make an inscription on the piggy bank. You need to dilute half a teaspoon of coffee in a small amount of water. To prevent the inscription on the jar from being too white, the paper must be visually slightly aged. To do this, use your finger and lightly tap the coffee onto the piece of paper with the inscription. When the leaf is completely dry, it can be glued to the dried jar. Here our inscription is ready.

Step five:
We design the lid of the piggy bank. First, we make a slot on the lid (decide what size you need). We cover the lid with a napkin without drapery, just smoothly. When it dries well, cut out a small piece of dense foam rubber and glue it around the slot using glue gun. We paint the entire lid and foam rubber with black paint and wait for it to dry. Using a glue gun, glue coins onto the foam rubber and around it, creating something like a slide (leaving a slot). Now you need to lightly spray spray paint"gold" for coins. And then lightly, as if to stain them with black paint. That's it - the lid is ready.


Step six:
This step is final, but no less important. The brightness of our piggy bank depends on it. Using a brush, we cover our piggy bank with yacht varnish. One layer is enough, but it takes a long time to dry, about a day, and the smell needs to dissipate for another day. Or air dry it. But it is also possible to cover the piggy bank with acrylic glossy varnish. It dries faster, but you need to cover it in three or four layers. Dry thoroughly after each layer. There is practically no smell, and it will be done a little faster. But what attracts me yacht varnish- it is very durable on the product and its shine is more special. It can even be washed with detergents and a soft brush. This is what happened.


Our masterpiece is ready! I think anyone will be happy with such an unusual and original souvenir! Moreover, the inscription on the piggy bank is quite loyal and humorous. I just want to put coins there. So put a piggy bank in the hallway and you will make a profit! Thanks everyone for your attention! Wish you creative ideas and success!
Everyone knows that money is like water, today it is there, but tomorrow it is gone, that is, you also need to be able to save your money. Therefore, many people try to save at least a little in order to buy something planned or just to have funds for the future. The most common means of small savings that immediately comes to mind is the piggy bank. A piggy bank made with your own hands will become much more valuable and closer to your heart.
In childhood, every person probably had such a treasured jar or figurine with a slot in which we put our savings, and then fingered it with trepidation to hear the jingle of money, dreaming of spending it on making our cherished wishes come true. Today we’ll talk about how piggy banks can still be useful, consider common manufacturing ideas, and also, with the help of a master class, we’ll learn how to make a piggy bank with your own hands.
How else can a piggy bank be useful?
A piggy bank is primarily a place to store funds, but in addition to its main purpose, it can be a wonderful gift for a birthday or any other occasion. Making your own money box can be a way to bring a parent and child closer together during the process of making it. This is also an excellent gift for a wedding, which will come in handy directly at the celebration: guests will put their monetary gifts in it.
The main advantage of doing it yourself is that you can make a piggy bank the way you want, from improvised or specially purchased materials, large or small, bright or inconspicuous, fragile or durable, etc.
When making a piggy bank with your own hands, it is important to remember the main points:
- entrails;
- external design;
- the level of difficulty of subsequent extraction of money from it.
Before you begin the main process, you need to think through all the above factors yourself, design, prepare necessary materials and tools, as well as learn how you can turn your idea into reality useful item. Most simple options is a piggy bank made with your own hands from bottles, cans, cardboard and a plastic ball. All this can be transformed beyond recognition.
Common piggy bank ideas
How to make a piggy bank with your own hands? Today there are a lot of interesting offers various levels difficulties. Let's look at the most popular of them.
For those who don’t have time for creativity, you can use the so-called express option: roll up any bottle of your choice with a machine or close it with a plastic cap with a slot, depending on the long-term goals of yours.

Of course, a plastic bottle will look more aesthetically pleasing. This option can easily be called the most popular, since the manufacturing means are very affordable and the process itself is simple. There is a whole field for imagination here, both in the process itself and in subsequent decoration.
The birdhouse piggy bank will also become very original version storage, and very durable. By using wooden materials can be easily created a real masterpiece art, coloring it to match the interior of the room, adding any decorations at your discretion.
For those for whom the moment of extracting money with noise and fragments is important, we can offer a piggy bank made of plaster. This option cannot be called quite simple, since it will require some skill.
Master class on making a piggy bank from a jar
To make a piggy bank in the form of a bag of gold, you will need the following materials:
- 0.5 liter jar, preferably of a non-standard shape;
- lightning;
- "gold" coins;
- a piece of fabric;
- paper napkins;
- glue;
- spray can with gold paint.
We take the jar and turn it upside down on the table, after which we smear it with PVA glue. Without allowing the glue to dry, cover the surface more than half with a napkin. It shouldn't be exactly like that. Glue it with superglue unzipped zipper horizontally, or with a slope to the side. Using the same product, we glue gold-colored coins, but in such a way that it gives the impression that they are spilling out of the jar. After everything has dried well, wrap the jar in a cloth, having previously greased it a little more, except for the zipper with coins, with PVA glue. We process the lid in the same way, but not forgetting about the edges, which must be clean so that the lid can then be twisted/unscrewed freely.