Flower lovers are sometimes so keen on growing them that there is little space on the windowsill, and they have to come up with alternative options. Buying shelves and racks in a store is expensive for many. In addition, they do not always correspond to the dimensions of the pot and do not fit into the overall design. We will help you solve this problem. We will design smooth and asymmetrical wall shelves, racks and shelves with stands, pots for pots that match your idea and capabilities.
Wall rack on ropes made of wooden blocks
To assemble the shelving frame, prepare wooden beams. The thickness of the tree does not matter, and the length will depend on the scale of the structure, the total number and size of pots, and the availability of free space on the wall. Therefore, before constructing a rack, calculate the number of pots you need to place and select the size of the shelves. As an example, let’s look at a three-tier rack with shelves 35 cm long and 85 cm high.
To make a structure, in addition to wooden beams, you will need:
- wood putty;
- sandpaper or grinding wheel;
- paint and varnish for wood;
- thick twine or rope for hanging;
- metal hook for wall mounting;
- self-tapping screws
Among the tools for work, an electric or hand saw, drill, and screwdriver are also useful. The first step is preparing the bars. We measure and saw off the beams of the required size for the shelves and side slats. The width of the side strips should correspond to the width of the shelf. After cutting, we mask defects on the wood (chips, cracks, scratches) with a special putty and sand the surface (sandpaper or a grinding tool with an attachment).
The wood became even and smooth. Now we make holes in the side edges of the shelves with a drill. We fasten them to the side strips using self-tapping screws and a screwdriver. If necessary, we attach beam limiters to the front of the shelf. When the rack is assembled, we paint it in the chosen color. If you want to add an aging effect: run sandpaper over the dried paint. After this step, be sure to coat the wood with matte or glossy varnish to extend its service life and increase its resistance to moisture.
We drill a hole on both sides of the top of the side planks and pull a rope or twine through them. To prevent the end of the rope from splitting when threading through the hole, cover it with tape, masking tape, or art tape. We leave pieces of rope on the back of the planks and tighten them into a tight knot. We drill a hole in the wall, attach a strong metal hook and hang the rack that you made with your own hands on a rope. Arrange the flowers and enjoy.
Mini pendant with round stands
An original idea for placing flowers is a hanging shelf with stands for pots. In addition to the unusual design, the advantage of the design is that water leaking through the drainage holes does not spoil the wood, but ends up in a pot with a plant located on the lower tier. Under the last tier with a pot, it is enough to place a bucket or flowerpot with a voluminous flower. To make a wall hanging you will need a minimum set of tools and materials:
- wooden blanks;
- rope for hanging the structure;
- saw and jigsaw for cutting an even circle;
- metal ring and hook for fastening;
- roulette;
- dye;
- cardboard (piece of plywood) for the template;
- marker.
We measure the required size of wooden blanks, turn the pot upside down and draw its diameter. We retreat 2 cm from the upper and side points of the circle, draw lines and saw off a square blank. We do the same with the rest of the forms. Making a template for cutting out the stand. Cut out a circle from cardboard or a piece of plywood that is 2 cm smaller than the diameter of the top of the pot. We apply the template to the middle of the wooden blank and draw a shape according to the template. We fasten the squares at the corners, using a wood jigsaw to cut out the inner circle. We drill 4 holes at equal distances in the corners of the workpiece.

To create contrast, you can paint the shelves and rope in different colors, giving the structure additional strength. Select the distance between the shelves individually depending on the size of the flowers. The optimal distance would be 30 cm. We thread a rope through each hole and tie a knot under them, fixing the position of the shelf in one place. The last step is to leave about 30 cm of rope for fastening to the wall, tie them together to form a loop, and thread a metal ring through it. We hang the hanging shelf on a wall holder.
The second version of a hanging flower bed with flower stands
If you have a lot of plants, then pay attention to a multi-tiered flower bed on ropes. The principle of its assembly is similar to the previous version, but there are some nuances. We prepare the following set of tools and materials:
- a circular saw;
- wood crown suitable for the diameter of the pot;
- screwdriver or drill;
- planed boards or moisture-resistant plywood sheets;
- twisted rope;
- plastic grips for fixing shelves.
We take the boards, draw a central longitudinal line and mark the centers of future holes for flower pots, taking into account intervals of at least 5 cm. It is most convenient to work with a crown with a diameter of 10–12 cm. You can choose a crown with a larger diameter, the main thing is that the pot does not fall through and is caught by the rim over the edge of the stand.
If you don't have a crown, use a wood jigsaw. The edges with a jigsaw are uneven, so they will have to be sanded. After you make circles for the pots, drill holes for the rope on both sides, bottom and top, retreating 2.5–3 cm from the edge of the shelf. The diameter of the holes should be equal to the thickness of the rope.

We prepared the holes, thread the rope through them, starting from the bottom shelf and moving up. We leave the interval between the shelves approximately 25–30 cm, and tie knots under each hole. Then we hang the rack on the chosen place and level it. Since the structure is voluminous and the load after filling with pots will be large, we additionally fix the nodes at the holes with two or even three plastic wire grips. We attract them and firmly fix the structure at the measured height. Such a hanging flowerbed on ropes can be hung both indoors and outside on the sunny side of the house. It is mobile, easily removed and moved to another place.
Wall shelf with straps - the simplest design for the home
If you're looking for something simpler, design strapped flower shelves. Such a shelf will accommodate flowers that do not require sun in the apartment. When installing a shelf in your backyard, you can also add sun-loving plants. To make such a design you will need a simple set of materials:
- wooden boards;
- a pair of leather belts;
- dowel-screws and self-tapping screws.
We cut boards of suitable sizes. The more massive and wider the shelf, the greater the amount of load and color it can withstand. After cutting, we sand the sharp edges with coarse sandpaper or a grinder with a grinding wheel. To increase the strength and wear resistance of wood, we treat it with stain and varnish.

We select leather belts. Their length will depend on the size and number of shelves. For example, if the width of the shelf is 15 cm, and the distance from the hole to the wall is 25 cm, the length of the belt is 70 cm. For fastening, we use old leather belts, first checking them for serious abrasions and tears. We drill holes in the places where they are attached to the shelves and in the wall. We hammer dowel screws into the wall, fold the straps and fix them to the shelf with self-tapping screws, using a screwdriver or screwdriver. The wall shelf with straps is ready. We recommend placing small flowers on it, and leaving large ones for multi-tiered racks.
Shelf with brushing - revealing the texture of the wood
The main feature of brushing is the manifestation of the convex structure of the wood under the influence of fire. As a result of processing with a torch or blowtorch, the soft part of the wood burns, and the hard part appears on the surface in the form of bulges; after sanding, firing marks remain on the wood.
To construct such a shelf you will need a natural wood board and rope. The length of the shelf depends on the number of flowers; this point is calculated individually. The shelf can be left straight or given a wavy shape by marking the outline with a pencil. Choosing the second option, we go through the contour with a circular saw and give it the desired shape. Using a grinder with a grinding wheel, we trim the edges.

Next, take a blowtorch or gas torch and burn the board, observing all fire safety measures. We carry out the procedure outside, wear thick gloves, safety glasses and a respirator. After the wood becomes completely black, remove the burnt layer by sanding. The soft layer is removed, the wood becomes convex to the touch, and the wood takes on an aged appearance. Next, drill two holes on each side. We pass a rope through them and tie a strong knot at the bottom of the holes. To preserve and highlight the structure of the wood, treat it with stain and open it with varnish. Using ropes, the height of the shelf can be adjusted by tying a knot higher or lower.
Attached shelf-ladder - a universal option for all seasons of the year
A floor or wall-mounted shelf made of wood has long been part of the everyday life of summer residents and owners of private houses as a practical and universal option for placing indoor plants and more. It occupies a minimum of space and, thanks to its convenient design, can be used all year round:
- in winter it can be moved to the barn and used as a stand for household small items;
- in spring it serves as a rack for propagating seedlings;
- in summer it takes its place in the garden plot as a flower stand in the fresh air;
- In the fall it is convenient to dry crops in it before preparing for winter.
To construct a bookcase and organize a flower stand, you will need a standard set of tools: a wood jigsaw, a drill, a saw, a screwdriver. Materials for assembling the structure: edged boards, plywood, chipboard, stain or paint, antiseptic, varnish and a set of screws.

The most labor-intensive process – production of trapezoidal bowls for plants. Their depth allows you to place ready-made flowers in pots or fill the hole with soil and plant seedlings in them. An alternative replacement for shelf bowls is to install flat shelves. For the side parts of the bowl, use boards 2–2.5 cm thick. We make the bottom of the trapezoidal bowl from chipboard or thick plywood. The quantity and length of the bowl is adjusted depending on the number of flower pots. This rule also applies to the length of the stand. We advise you to calculate and make a plan in advance so as not to get confused.
The optimal ratio of the number of shelves or trapezoidal bowls per shelf height of 1.5–1.6 m is 4–5 pieces.
We make the support strips for the shelf from edged boards with a thickness of at least 5 cm. To ensure the stability of the structure, we assemble it with a slope of 15°. Once collected, it will rest against a wall or fence. Don't forget about the inclined cuts at the bottom and top of the supports. After preparing the supports, we attach bowls or shelves to them, securing them on the sides with self-tapping screws. We ensure that equal spacing is maintained between stands. If you do not plan to remove the bookcase for the winter, then do not use support strips, but immediately attach the bowls or shelves to the wall.
Practical shelving made of plastic window sills
If, after renovation, an old window sill is lying idle in the garage, do not rush to throw it away. Design a convenient rack for indoor flowers. In addition to the standard 3.9 m plastic window sill, you will also need 3 nickel-plated or galvanized pipes as vertical posts, 2 brackets for mounting to the wall and 9 flanges.
We cut the plastic window sill into 3 equal parts of 1.3 m each. We mark the location of the holes for the pipes, which will serve as vertical posts. We place two pipes on the sides and one in the middle for balance and structural strength. The holes for the pipes on the outside and inside of the plastic shelves should match if they are placed together. We cut pipes of the same length, insert them into the holes made, and fix them with screws and flanges. We fasten the rack to the floor in the same way. To further increase the strength of the structure, we attach the side posts to the wall using brackets and screws.
When it comes to choosing a gift for the woman he loves, the first thing a man associates with jewelry or various elements of women’s clothing. But for some reason, the fact that many representatives of the fair sex really like to plant indoor flowers and take care of them in every possible way is not taken into account. Therefore, the idea of original flower shelves would be quite appropriate. The information below will tell you about simple ways to make flower shelves yourself.
Plywood flower shelves
If you have a large piece of plywood lying around in your workshop and you want to please your significant other, you can easily make shelves for flowers with your own hands from the material. Ordinary inexpensive plywood with a certain thickness will become a quite convenient structure on which you can display flower pots. A little imagination will turn such a shelf into an original design solution.
Tools
To create a flower shelf, you should prepare the following tools:
- a sheet of plywood of such a size that it is convenient to cut out all the necessary elements;
- a pair of nickel-plated or galvanized pipes of small diameter (the quantity is calculated as 2 pieces per shelf);
- paint or any type of wood varnish; electric jigsaw;
- drill with a convenient attachment for drilling holes for mounting pipes;
- construction tape and sanding sheet of paper.
Manufacturing
Shelf manufacturing process:
- After carefully examining the installation location of the flower rack, you need to choose the appropriate size for the shelves.
- Based on the established measurements, make drawings of the shelves on a sheet of plywood. When choosing the shape of the shelf, you can move away from standard straight lines and complement the image of the structure with interesting curves of different depths. The main thing is that the general appearance of the rack fits organically into the interior of the room.
- When cutting out the intended parts with an electric jigsaw, you need to carefully monitor all the contours of the elements.
- Holes for pipe installation are marked on the topmost workpiece.
- The cut shelf blanks are placed on top of each other and holes of a certain diameter are carefully drilled for installing pipe supports.
- Plywood blanks are cleaned with an emery sheet. It is necessary to carefully process the end parts of the shelves.
- Next comes the stage of coating the finished shelving elements with paint or varnish. This procedure must be repeated several times to form an even and dense layer of the applied substance.
- Installation of the finished rack to the wall is carried out as follows. Specially designed brackets are attached to the backs of the top and bottom shelves. Holes are drilled in the wall according to the marks made. Rack shelves are fixed to the wall with self-tapping screws inserted into the holes of the brackets. It is necessary to thoroughly check the suspended structure for strength.
Wooden rack
The dimensions of wooden flower shelves can be 60 cm in length, 23 cm in width, 70 cm in height. In this model, 3 shelves for flowers are selected.
- Thin strips are quite suitable for making shelves. Since each shelf will consist of certain elements, it is necessary to cut 18 such thin blanks. The length of each element should be 60 cm. And from the bars you can make stands for a flower rack.
- Wooden blocks measuring 20x20 mm are selected and cut every 70 cm in the amount of 4 pieces.
- Elements of the future structure, 23 cm in length, are cut out of the cut bars using an electric jigsaw.
- Two racks are laid parallel to each other on the work table and marks are made in the places where the shelves will be future fastened. An important point here will be to determine the required distance between the shelves, as this will affect the ability to install flowers of different heights there.
- At the next stage, 3 wooden shelves for flowers are installed, each of which consists of 6 planks. The shelves are connected to the end part with nails driven into bars 23 cm long. The length of each nail is 2.5 cm. When installation is complete, all uneven edges must be sanded.
- When installing the shelves, you need to position the entire structure so that the master can comfortably hold the rack and hammer in nails at the same time.
- The finished product is treated with paint or furniture varnish in several layers.

Shelves for flowers made of wood and metal
The entire structure is held together using metal posts connected to each other by a welded jumper. This gives extra strength to the entire wall flower shelf. Wooden blocks will serve as stands.
- If the entire structure will be attached to the wall, then it is necessary to acquire metal rods with a cross section of 1 cm. And to install the finished structure, corners are mounted on the floor. Based on the chosen location for installing the rack, the dimensions of the shelves themselves are determined. After this, the metal racks are welded. With the length and width of the side contours being 90 and 20 cm, respectively, it is possible to install 4 shelves with a distance of 30 cm from each other. These dimensions are suitable for compact flower pots with small leaves of plants planted there. And the location of the top shelf allows you to install flowerpots with flowers of any height.
- The metal struts of the structure are connected using welded rods. This method of fastening will provide an additional metal base for the plane of the shelves themselves and will make the entire rack more reliable.
- Metal strapping is used in 4 tiers. Paint is applied to the finished welded elements to match the interior.
- Wooden planks 25x15 mm are sawn along the length of the shelves 60 cm. The finished elements are laid parallel on a flat surface and connected to each other with wooden blocks 20 cm long.
- The wood-metal shelf is mounted to the wall using self-tapping screws. The distance between the fastening marks should not be less than 50 cm. To ensure that the metal frame is located on the wall parallel to the floor, a building level is used.
This will make it possible to lay the shelf strips evenly. The final stage will be painting the wooden elements of the finished flower shelf.

Flower rack made of plastic window sill
Based on the very name of the design, the main component of such a creation will be a plastic window sill 3 m 90 cm long. You will also need 3 pipes in nickel-plated or galvanized form, 9 flange fasteners and 2 brackets.
- Each window sill is cut crosswise into three pieces, each 1.3 m long. Thus, we get our shelves.
- In each shelf, 3 holes are drilled for future metal racks. The location of the holes will be the vertices of an isosceles triangle, that is, one at each end closer to the back side and one in the middle near the front edge. The locations of the holes in all shelves should not be aligned.
- Measure and cut 3 pipes of the same length. The structure is fastened with tightening screws for the flanges.
- Fixed to the floor using the same elements. The role of lower fastenings for metal racks is performed by flanges and screws. And with the help of brackets mounted into the wall, the upper ends of the two pipes are fixed.
Corner shelves
Necessary supplies and materials to complete the work:
- Chipboard sheet.
- Metal pipes with nickel or galvanized coating.
- There are sufficient screws and flanges.
Manufacturing process of corner shelves:
- The structure is assembled in complete analogy with the previous work. All planned elements for the manufacture of triangular shelves are cut out with an electric jigsaw.
- Marks are applied to each workpiece for cutting holes for metal racks. Such holes are drilled in three places. This process is duplicated for each shelf.
- All elements are connected to each other using flanges and screws. The position of the rack is fixed using brackets built into the wall, which are placed on the upper parts of the pipes.
- And at the last stage of the work, it remains to choose a color suitable for the overall interior for painting the structure.

Glass flower rack
The very original design of such a rack is achieved through the use of different glass and the use of LED lighting. Rays of light penetrating between the flowerpots magically illuminate the flowers from below, creating an overall radiant picture. To make such a rack you need 6 glass shelves and a pair of wooden slats.
- The thickness of the glass must be at least 5 mm. The glass selected is tempered type.
- The support strips for the shelves are made in wooden style. Based on the cross-section of such planks, grooves are selected. Glass shelves are fixed in them. The grooves must be as strong and reliable as possible, since they hold all the elements of the glass flower rack.
- When choosing much smaller sizes of structural elements, it is better to use such a device not for flowerpots, but for displaying a variety of small-sized figurines and souvenirs. It will be more reliable to make the bottom shelf in wood.
- Glass structures are used for growing flowers on the windowsill. The rack does not absorb much light and is compactly placed in the window opening.

Video
In this video, the master will show you how to make a shelf for flowers on the windowsill from an old cabinet. Simple, convenient, looks beautiful.
What lovers of indoor flowers can come up with in order to place their favorites more comfortably at home - capricious violets, spreading monsteras and variegated dieffenbachias. After all, if there are a lot of flowers, then placing them so that they do not block the light from each other can sometimes be problematic. Before you make a flower rack, decide on the place where it will be placed: against the wall, in the corner or on the windowsill itself.
Racks for indoor flowers
Flower rack made of plywood in 6 hours
DIY wooden flower rack in 3 hours
Rack-shelf for flowers made of metal and wooden slats
Window sill flower shelf
Corner flower rack
Glass flower rack
Plasterboard shelves for flowers
Racks for indoor flowers
A flower rack can be made of wood, metal, plastic, or plasterboard. The glass flower rack looks very good. But in this case, you need to take into account the thickness of the glass and whether you can cut the glass yourself or is it better to contact a glass workshop. Often they use everything that is at hand, combining different types of materials. It all depends on what tools the master owns and what materials the mistress of the flower kingdom has chosen.
Flower rack made of plywood in 6 hours

Let's say you have a sheet of plywood on hand. Quite durable and not too expensive material, which in just a few hours can turn into an elegant flower shelf if you have a jigsaw and know how to use it to cut smooth lines on wood.
What do you need? Materials: plywood - 1 sheet, nickel-plated pipe - 2 pcs., fastenings for shelves - 2 for each shelf, varnish or paint, fastening tools. Tools: jigsaw, drill, sandpaper, tape measure.
Manufacturing technology: 
1. We think over the dimensions of the shelves: we measure the place for which it is intended.
2. According to the measurements, we draw future shelves on a sheet of plywood. Moreover, their configuration can be either the simplest (rectangular shelves with rounded corners) or with all kinds of waves, the number and depth of which depends on you.
3. After marking, the shelves are cut out of plywood.
4. Stack the blanks on top of each other and mark the distance where the hole for the pipe will be located. It is important that this point coincides exactly on all workpieces.
5. In two places on each workpiece, make a hole for a nickel-plated pipe.
6. The workpieces are sanded with sandpaper (especially the ends).
7. We coat the shelves with furniture varnish, preferably several times.
8. We pass a nickel-plated pipe through the holes, securing it near each shelf. It is important to ensure that the shelves are placed parallel to each other and perpendicular to the tubes.
9. The next stage is mounting to the wall. These can be special brackets that are attached to the back of the top and bottom shelves and to the wall. Here it is important to correctly mark the wall and use a drill to drill holes into which the screws will be screwed. The size and strength of the fastening tool determines whether the shelf will not fall under the weight of flower pots.
DIY wooden flower rack in 3 hours
Dimensions of the proposed rack: 23 cm wide, 60 cm long and 70 cm high. Total – 3 shelves.
Materials: wooden planks (dimensions 3.5x0.5 cm, length - 2m) - 6 pieces, planks, dimensions 2x2 cm, length - 2m - 2 pieces, nails (sizes 25 and 40).
Tools: tape measure, regular hammer, wood saw.
Thin strips will be used to make the shelves themselves, and 2x2 strips will be used to make racks for the shelves.
Manufacturing technology:
1. We mark thin planks into pieces 60 cm long, and then saw them. We get 18 planks.
2. Mark the 2x2 cm strips by 70 cm and cut them. We get 4 racks.
3. From the remains of the 2x2 cm planks, we cut out 2 bars of 23 cm each.
4. We take 2 racks, lay them parallel to each other on the floor and mark the places for future fastening of the shelves. They must be measured accurately. The distance between the shelves depends on the height of the flowers you plan to place on the inner shelves.
6. You will need help to assemble the entire structure. One holds the racks with shelves, the other fixes the structure with nails (size 40).
7. The finished product is varnished or painted.
Rack-shelf for flowers made of metal and wooden slats

This shelf will serve as a durable wall structure. After all, its racks are welded from metal.
To do this, take metal rods with a diameter of 7-10 mm or a corner (if the rack will be on the floor) and weld a similar structure, the dimensions of which depend on the wishes and availability of space for the shelf. If the side bases are 90x20 cm, this will allow you to place 4 shelves at a distance of 30 cm from each other. This is very convenient for placing both low-growing and hanging flowers. Tall flowers can be placed on the top shelf.
During the welding process, both fastenings are provided on the upper inner edge of the structure and crossbars for placing shelves. There will be 4 of them in total. Then, when the structure is ready, it can be painted.
In parallel, strips 0.50-0.60 cm long are cut out of 2.5x1.5 cm bars. You will need 20 planks. Then they are laid out parallel to each other face down and knocked down with the same strips, but short - 20 cm each.
The next step is to place the metal structure on the wall. To do this, use molly if the wall is made of plasterboard, and ordinary self-tapping screws for other types of walls. It is important to correctly measure the attachment points of the bases for the shelves. They must be in a parallel plane. Otherwise, the shelves will not lie flat on the crossbars. So, the distance between the fasteners is 50-55 cm. The shelves are laid on the placed metal supports. The entire wooden-metal structure can be painted, or wooden shelves can be varnished, and metal shelves can be painted to match the rest of the room.
Window sill flower shelf
To do this, you will need a plastic window sill 3.90 m long, nickel-plated pipes (3 pcs.), fastenings (flange) - 3 for each shelf, brackets - 2 pcs. 
Manufacturing technology:


Manufacturing technology:
1. An ordinary window sill is cut into 1.3 m pieces.
2. In the resulting blanks, 3 holes are made at equal distances: 2 along the edges at the back wall and 1 in the center at the front.
3. The pipes are cut to the required height. The entire structure is held together using flanges and screws.
4. The lower edge of the pipes is attached to the floor using the same flanges in 3 places. Brackets are placed on the upper edge of two pipes located near the wall and are also attached to the wall using screws.
Corner flower rack
This design is most easily made from chipboard and the same nickel-plated pipes. You will only need 3 pipes of the length you need, several identical shelves cut with a jigsaw according to a pattern (triangular shape) and the number of flanges and screws corresponding to the number of shelves. Everything is assembled using the technologies mentioned above. Measure seven times and cut once. At the top, the shelf is attached to the walls using brackets. To fix it, just place the brackets on the two outer corners.
Glass flower rack

This device is convenient because if you place a backlight on top, the light will penetrate all the shelves. You can make such a glass shelf using two wooden slats and 6 glasses. Of course, the material of the shelves is tempered glass with a thickness of at least 5 mm. Vertical slats can be made of wood. The size of the groove that is made for fastening the glass, and, accordingly, the strength of their fastening depends on their thickness. For shelves about 20 cm thick, the grooves should be about 10 cm. This means that the thickness of the slats should be no less than 20 cm. There may be other proportions, but they are more suitable for placing souvenirs and various small items on such shelves. Flowerpots weigh a lot, and if there are several of them, pressure is created on the entire structure. In the design described above, one of the shelves below can be replaced with a wooden one. 
Plasterboard shelves for flowers
Many shelving and shelving options are available in plasterboard. These can be either niches in the wall or regular shelves. In both the first and second cases, a frame is built, which is covered with plasterboard. From a decorative point of view, such a design is very advantageous, but from a practical point of view, it is not. Flowers are water and it is impossible to guarantee 100% that moisture will not get on the material, which will deteriorate from it. Therefore, one option is to attach glass shelves to the plasterboard frame. This design will look very advantageous with lighting.
As you can see, there are so many options for flower racks. The photos clearly demonstrate that there are no limits to human imagination. Whatever material the craftsman gets his hands on, it can make durable and beautiful flower racks.
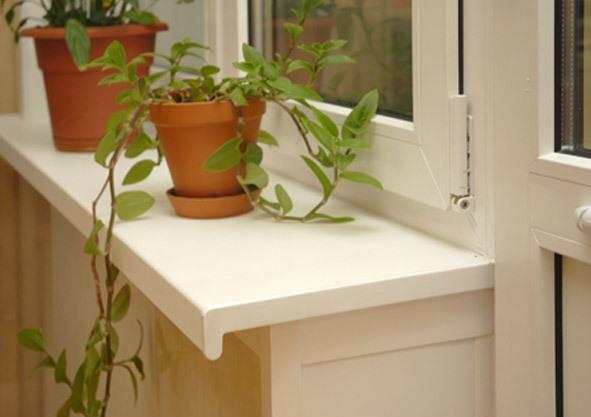
Shelves for flowers on the wall allow you to optimally place indoor plants, and their original appearance can decorate any interior. For many people, growing flowers at home is an exciting hobby, and therefore a home greenhouse requires a special approach. Despite all the beauty of plants, their accumulation does not always cause delight, but beautiful placement on walls, shelves or in a window opening pleases the eye. Elegant shelves for flowers themselves provide an attractive design for the entire apartment, and you can make them yourself using your maximum imagination.
The essence of the problem
Everyone is familiar with the classic version - flowers in the window, on the windowsill. Of course, it has a right to exist, especially since such placement is well suited for the plants themselves. However, you can diversify the interior of the room with the help of indoor flowers by distributing plants throughout the room. Various types of stands will help with this.
In addition to the window sill, you can place house plants anywhere, even hanging them from the ceiling. For this purpose, there are many designs of devices based on various principles. The most popular varieties have become wall shelves, racks, hanging systems, floor flowerpots, decorative flower stands for windowsills, etc.
Which version of flower stands to choose depends on many factors, but most importantly, on the preferences of the owner. In general, you should take into account the chosen style of the overall design of the room, the variety of plants, the size of the room, lighting (including natural light), the purpose of the room, the requirements for caring for plants (in particular, the possibility of watering). Floral devices must be securely fastened, have sufficient strength and accessibility for flower care. The main task is to create comfort and aesthetic perception.

A huge assortment of ready-made shelves and racks gives you the opportunity to choose them, but only your own creativity allows you to realize your own ideas and optimally use the space. The question of how to make a flower shelf with your own hands can be solved quite simply. It can be made from a variety of materials (plywood, chipboard, board, plastic, glass, metal) and available materials. It is important to give the product an aesthetic appearance, do the work carefully and then securely fasten the structure.
Wall shelves
One of the most common options is a shelf for flowers on the wall. It can have different designs and be made from different materials. It is important that the shelf does not have too much mass, but at the same time allows you to stably place a flower pot on it. The dimensions and design depend on the number of pots installed. Excessive clutter is unlikely to improve perception. Rarely is a stand made for 1 flower. The most common placement is from 2 to 5 plants.
The simplest design involves 1 platform with decorative restrictions on the sides. You can make a shelf in the form of several parallel shelves with single side walls. The most popular are structures consisting of several platforms at different levels, and they can have the same or different lengths, partially overlap each other or be directed in different directions.

How can you combine horizontal areas into a single composition? There are several options:
- Common sidewalls: parallel horizontal platforms are attached to 2 vertical sidewalls. Sidewalls can be made of solid slabs (boards), individual slats or openwork elements.
- On wall strips or panels. In this case, a panel or several slats are attached to the wall surface, on which shelves are fixed perpendicular to the wall at different levels and in different patterns.
- Rod connection: shelves are strung on metal or wood rods.
- Intermediate elements. The following varieties can be noted:
- a common panel from which shelves extend in different directions at different levels;
- small panels for attaching 2 nearest shelves at different levels, which makes it possible to form a branched pattern of their arrangement on the wall.
The shelf area can have different shapes. The most common configurations are rectangle, square, circle, oval, segment or sector of a circle. The shelf can be given any original, complex shape, which is determined by the owner’s imagination and interior design. They are most appropriate when using ultra-modern styles.
Required Tools
When making flower shelves with your own hands, you will need a tool, the choice of which will depend on the material used. The most frequently needed tool is:
- Bulgarian;
- electric drill;
- screwdriver;
- Grinder;
- milling cutter;
- jigsaw;
- plane;
- hacksaw;
- hacksaw for metal;
- scissors;
- screwdriver;
- pliers;
- clamp;
- hammer;
- mallet;
- chisel.
Manufacturing process
The specifics of making shelves depends on the selected material:
- Wooden shelves. Wood is considered one of the most technologically advanced materials that can be easily processed. The structural elements can be connected to each other using screws, using a tongue-and-groove system with gluing, or using metal corners. Natural wood has an attractive texture and therefore does not require additional cladding. During production, it is enough to treat the boards well and coat them with varnish. To emphasize the structure, impregnating and tinting materials are used. When using cheap or used wood, the shelves are painted.
- Chipboard. This common material requires a special approach. First of all, at a minimum, the front end of the shelf must be covered with decorative film, or even better, the entire panel must be covered. The connection of adjacent chipboard parts is made using a dowel (chopik). To do this, holes are drilled at the end of the shelf into which cylindrical dowels are attached with glue. Similar holes are made on the joined element. The joint is secured with adhesive.
- Plywood. Most often it is mounted on wooden slats. The thickness of the plywood is chosen to be at least 10 mm. A jigsaw is used to give the desired shape.
- Glass. Glass shelves look very modern. You can attach them to the wall using brackets. The glass plane is freely installed in a wooden or metal frame, and pressed on top with a flower pot.
The sides of the shelves give a special decorative effect if they are made accordingly. The simplest option for sidewalls or intermediate common elements is a board or chipboard of the required size. Fastening the entire shelf to the wall, as a rule, is carried out precisely on these parts, for which metal strips with holes for anchor connections are fixed on top (for reliability and below).

The openwork design of the sidewalls gives the shelves a special sophistication. For this purpose, metal rods and wires are used, bent to form a specific pattern. Often, load-bearing parts are made of several slats or strips with decorative recesses.
Fastening shelves to the wall can be achieved in several ways. The most common are dowels. To do this, holes are drilled in the wall into which appropriate plastic or wooden parts are inserted. The shelves are screwed to them with screws (self-tapping screws). Another common method is brackets. They are first firmly fixed to the surface using dowels or anchors, after which the shelves are mounted.
Corner shelves
A specific type of wall shelves are the corner varieties. Placing indoor plants in the corners of the room allows you to optimally use all the space in the room. For this design, the shelf configuration in the form of a quarter circle is most suitable. For the simplest shelf, a T-shaped bracket is fixed in the corner, onto which a shelf made of the above materials is installed.
A more complex, but attractive option involves a system of several shelves, some of them extending from the corner in different directions along the wall. For example, the following design is in demand: 2 corner shelves, and between them ordinary wall stands extend in both directions. It is possible to make a shelf in the form of a corner. To do this, 2 platforms are fastened at right angles, the side ends are rounded.
Hanging structures
Hanging flower shelves look good in niches or window openings. From a practical point of view, systems designed for zoning space are of interest. In this case, shelves with flowers suspended at different heights provide the creation of a conditional wall that visually delimits the room.

Hanging structures can hang from the ceiling on cords, macrame, cables, or decorated slats. They can be hung using brackets attached to the wall. When zoning the room, a frame is built with a horizontal jumper, on which the cables for the shelves are secured. The shelves themselves can be made from any of the materials mentioned above. Glass varieties are popular.
Hanging shelves in the window opening help free up the surface of the window sill. To do this, a hole is drilled in the upper beam of the opening and an anchor is secured to secure the retaining elements. Such a shelf can be made for 1 flower pot, and then the top is fastened at 1 point. If an elongated flower stand is planned, then 2 or 4 anchors are installed.
Flower racks
The flower rack is designed to be installed on the floor with the possibility of maximum and optimal placement of flower pots. Unlike furniture items, a flower rack should not “kill” with its capitality, i.e. should not shade flowering plants. For example, the following constructions can be given:
- Wooden corner type rack. On a rectangular base 50-60 cm long and 30-40 cm wide, a vertical stand 80-100 cm high and 10-15 cm wide is fixed on 2 adjacent sides. The stands are secured on top with a wooden plate. Between the base and the top plate, 2-3 shelves of a size similar to the base are mounted at different levels. Attachment to one rack should be alternated: if the bottom shelf is installed with the long side, then the next one with the short side.
- Rack made of plastic and metal. 3-4 shelves of the original configuration are cut out of plastic with a thickness of at least 10 mm. They are installed on a chrome-plated or nickel-plated metal pipe with a diameter of 2-3 cm. As shelves, you can use a plastic window sill, which is cut into pieces 30-40 cm long. Such rectangular shelves are attached at different levels.
Shelves for flowers will help you optimally use the space of the room and decorate the interior. You can make them yourself from different materials, choosing the design that is most suitable for a particular room.
Fans of indoor floriculture often face the problem of lack of space for their pets. Keeping pots on the windowsill is not always convenient; placing them on the table is also not a suitable option. In this case, wall shelves become a real salvation. Making them yourself will take several hours of your time, but your flowers will have a permanent and comfortable place to live.
To make flower shelves with your own hands, a variety of materials are suitable. They can be made from metal and wood, plastic and drywall, glass and other durable materials. It is also important that the shelves on the wall fit into the interior and suit the conditions of the room.

- Drywall- used in the case when a shelf on the wall is going to be made in the form of a niche, and it becomes part of the overall design of the room.
- Tree- this is a classic option, which is easy to work with and will last a long time at normal room humidity.
- Chipboard- resistant to humidity, deformation and temperature changes, easy to use and in an affordable price category.
- Metal- needs painting to protect the material from corrosion. In addition, to work with it you need a welding machine.
- Plastic- its advantages are affordability and resistance to mold formation; it is ideal for placing a shelf on a balcony or loggia.
- Glass- provides good light transmission, which can be extremely important for certain types of flowers.
- Plywood- a moisture-resistant material that, with some skill, can be given into a wide variety of shapes with your own hands.


If one material is not enough to build a rack with your own hands, they can be combined. For example, make shelves for flowers, alternating plastic and glass or wood.
Plywood shelf
If you have several sheets of plywood lying around the house, and you know how to make smooth lines with a jigsaw, in one evening you can turn this material into elegant flower shelves with your own hands. To make such a structure, in addition to plywood you will need:
- two galvanized or nickel-plated pipes;
- fastenings for shelves and screws;
- paint or varnish;
- jigsaw;
- sandpaper;
- drill;
- tape measure and pencil.

Work order:
- Measurements are taken of the area for which the shelves are intended and a design drawing is created.
- The dimensions are transferred to a sheet of plywood; if desired, the cut can be decorated with curly edges.
- Using a jigsaw, plywood shelves are cut out according to the design.
- The edges of the workpieces are sanded with sandpaper.
- Holes for the pipe are cut on each workpiece.
- The parts are coated with paint or furniture varnish.
- Through the holes, the shelves are threaded onto the pipes parallel to each other, secured near each plywood board.
- Make holes in the wall to which the shelves will be attached using self-tapping screws.
How to make a decorative shelf from plywood (video)
Plastic rack
Window sills have become a fairly common place for flowers. But since keeping flowers by the window is not always convenient, an original solution would be to make a rack for them with your own hands from the same plastic window sills.

To work you will need:
- plastic window sill 3.9 m long;
- three galvanized or nickel-plated pipes;
- 9 flanges for mounting;
- 2 brackets.
Work order:
- The window sill is cut into 3 equal parts.
- 3 holes are drilled into the blanks with the diameter of the pipe section: 1 at the front wall in the center, 2 at the rear along the edges.
- The pipes are cut to the height of the future rack.
- Window sills are placed on the pipes, securing each shelf with flanges at the required height.
- The structure is attached with flanges to the floor.
- Brackets are placed on the upper ends of the pipes, which are fastened to the wall with screws.
Glass shelves
If you have DIY skills with a glass cutter, making a glass flower rack will not take much time. But when there is suitable material, but there is no one to cut it, a workshop will help out. All you have to do is provide the necessary measurements and at home assemble with your own hands a structure from wooden slats on which the shelves will be supported.
It is important that the glass is tempered, at least 0.5 cm thick. This fragile material must withstand significant loads from the pressure of flower pots.

To work you will need:
- glass cutter;
- hacksaw;
- 6 glasses;
- 8 iron corners;
- 2 wooden slats or boards.
Work order:
- Cut glass shelves to the required sizes.
- Grooves with a depth of at least ½ of the width of the glass shelf are cut into wooden slats.
- The slats are attached to the wall with self-tapping screws at the corners at the top and bottom of the rack on both sides of the wooden board.
- Glass shelves are inserted into the grooves.
Wooden rack
Wood is a pliable and relatively soft material. With just a saw, a hammer and a few nails, it’s easy to make corner flower shelves from a few scraps of board or a full-fledged shelving unit for the entire wall.
.jpg)
To work you will need:
- 2 bars 2 m long with a cross section of 20×20 mm;
- 6 wooden planks 2 m long with a section of 35×5 mm;
- nails 40 and 25 mm;
- sandpaper;
- hammer;
- saw;
- roulette.
Work order:
- The planks are cut 60 cm long.
- The bars are cut into 4 pieces of 70 cm and 6 pieces of 20 cm.
- The cut areas are sanded with sandpaper.
- 4 racks will be made from long bars.
- Short bars are nailed to the ends of the racks on which the shelves will be supported.
- Planks are laid on the bars and secured with nails for structural strength.
- If desired, the rack is painted and varnished - this will protect the wood from deformation and rotting.
Making a shelf for flowers (video)
Conclusion
A little effort - and your home will have a functional, exclusive little thing that will not only provide your flower pots with a convenient location, but will also become a source of pride for the owner. You just have to use your imagination and set aside a few hours of your free time for this.