Sections of the article:
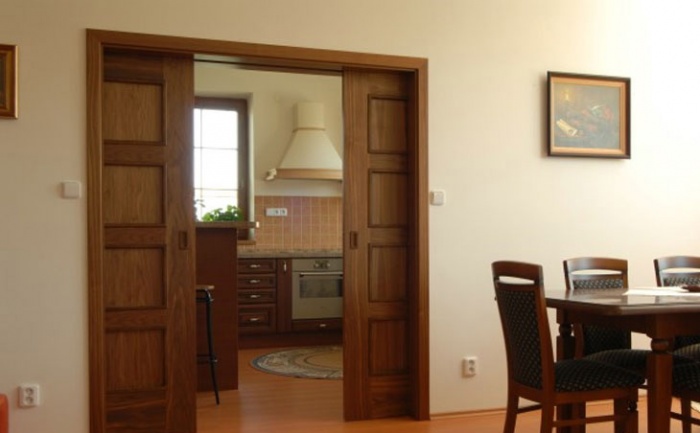
Sliding doors can be a very good solution for those looking to make the most of the living space of a house or apartment. The advantages of such doors are quite obvious, since in addition to the fact that sliding doors save space and allow you to make any room visually wider and larger, they can also bring something new and unexpected into the interior. That is why so many people are interested in how to install sliding interior doors with their own hands. It should be noted that this procedure is not as complicated as it might seem at first glance, in our article we will describe the entire installation process step by step.
Preparing for the installation process
Usually, the kit already contains everything you need that may be required to install the doors. However, some people prefer to independently choose the elements of interior doors and sliding systems, such as fittings, in order to achieve a special style and design from the purchased doors.
 It is important to consider the placement of the structure.
 In order for the installation of sliding interior doors to be successful, you should be well prepared for this. The preparation consists in determining on which side of the doorway the sliding system will be mounted.
In order to choose the best option, you should analyze your everyday behavior. Study carefully and remember how you move around your house or apartment. In this case, everything should be taken into account: your way to the farthest rooms, any features of the daily route through the apartment that are known only to you. Usually sliding doors are placed on the side of the room you enter, as this is more correct from an aesthetic point of view, but this decision is not justified in all cases.
The space occupied by the sliding door leaf cannot be occupied by furniture, therefore it is quite logical to assume that it is more correct to fix it from the side of the corridor, since there is usually practically no furniture in the corridor. How to install the interior sliding doors you purchased is up to you.
Installation of sliding doors
When the installation of sliding interior doors is carried out without anyone's help, especially with your own hands, the first step is to apply the necessary marks on the wall, which will help when fixing the guide. If you are securing the bottom rail, then sinking it into the floor is a very good option.
Of course, it is best if this moment was thought out even in the process of creating the flooring, since in this case there will be significantly fewer problems with the installation of the lower guide.
Next, we proceed to the installation of the upper guide, its installation is carried out at a level that exceeds the height of the door leaf by about 15-20 mm. The installation of the guides should be taken very carefully, the evenness of their installation should always be checked with a level, this is a very important point, so if you install the lower guide not completely horizontally, then over time this can lead to the fact that the system installed by us will begin to shift towards the inclination. which will complicate the operation of the entire sliding mechanism.
 Fastening the top rail.
 A very important point is competently calibrated dimensions: for example, the length of the guide should be the same as two widths of the door leaf, plus about 4-5 cm for the stock.
You can fix the upper rail with brackets, but when the sliding interior doors are very massive, then the upper rail is installed using a wooden bar, which should be attached to the wall, and the rail must be attached to it.
We work with the door leaf, fix the holders and fittings
In order for the further installation of the interior sliding doors you purchased to be successful on your own (for a better understanding of the process, we recommend that you study the numerous video materials on our website), we proceed to work with the door leaf. First of all, we fix the staples on the door leaf, they are necessary for the door leaf to be held on roller carriages. We fix the brackets according to the instructions, in order to find the place of their placement, we retreat 1 cm from the edges of the upper end of the door. It is best in this case to use a holder in the form of a clip, the only exception is if you are installing an accordion sliding door. Another exception is all-glass doors, in which case special rubber holders in the form of clips are used.
 Accordion door.
 We repeat that the installation of a sliding interior door will be much more understandable after watching the video in this article, because it is better to see once than hear (read) a hundred times.
Install the door leaf
After the door leaf is ready for installation, and the guide is fixed, proceed to the installation of the door leaf itself. At this stage of installing sliding interior doors, you should call an assistant, since you cannot cope here on your own. The role of the assistant is that he must hold the door leaf, and in the meantime, you must wind the carriages into the groove of the guide. If you have done this and the door leaf normally "sits", then feel free to move on to the next stage.
Installation of limiters and closers
Stoppers are necessary in order to prevent the carriages with rollers from falling out of the guide. In this case, it is very important to pay attention to how the restraints are distributed, especially if you are installing a folding or multi-section door. In most cases, plugs are used as stops, which are made taking into account the shape of the guide, as well as pin-shaped stops, which are inserted in certain places on the guide to accomplish their task.


Also, with regard to the stoppers: it is better to choose stoppers with special stops, which are made of soft plastic or rubber. Such stops can deprive you of various unpleasant sounds when the doors are operating, and also significantly extend the service life of the sliding system.
Since most of the installation steps have already been completed, now the question of how to install do-it-yourself interior sliding doors purchased in a store is becoming more and more obvious.
We fix the extensions and platbands
The further installation of sliding interior doors with your own hands implies the fastening of such elements of the system as extensions and platbands. Platbands perform a protective function, they protect the mechanism from dust and debris, and are also necessary in order to make the structure more pleasant to look at.
In order to continue the installation of sliding interior doors with your own hands (again, at this stage, we recommend that you first study the video and photo materials on the topic), you should screw special brackets to the wall, on which the platbands will be attached.
Also, the platbands can be attached using special latches that are attached to the rail.
This option may be preferable if you want no traces of fasteners left on the outer part of the door.
Such a process as installing a sliding interior door with your own hands would not be complete without a limiting structure against which the door would rest at the moment when it is closed. A wooden beam can act as such a limiting structure, but for this it must have a special finish. Also, a special profile can be used as such a structure, usually it can be purchased along with fittings.
 Various door handles.
 It is necessary to install such a structure strictly vertically; for this purpose, a plumb line can be used. In the profile itself there should be a counterpart of the locking mechanism for the door lock. The installation process of this very counterpart must be performed after the system has been adjusted and installed along the rail.
As you can see, sliding interior doors are quite easy to install on their own and their installation is not as complicated as it might seem at first glance.
Final check and adjustment of the entire structure
Since we have already installed all the guides and checked everything carefully, the door adjustment should be done to a greater extent to obtain a visual effect, that is, position the door the way you like best and in the form in which it best suits the surrounding interior.
It is very good if the door leaf tightly and reliably adheres to the structure that limits it. You should also check the movement of the door: it should move strictly parallel to the floor, without any bends or irregularities. But such bends and irregularities simply should not occur if you have thoroughly checked everything before using special devices. To achieve a good result, you can safely improvise with the door setting, because most of the problems with its functioning are easily eliminated.
Installation of sliding interior doors will be much easier to learn if the manufacturer's instructions were not thrown away along with the packaging from the set of doors, but carefully studied, because each manufacturer has its own characteristics that go beyond what is described in the article.
An interior element such as sliding interior doors can be an excellent solution for the interior, and their installation will not be a big problem when studying the relevant materials (photos, videos and this article) for its implementation.
In small rooms, every meter of usable area counts. This is why many homeowners are replacing swing doors with swing doors. Installing sliding doors with your own hands is quite simple. However, the mechanism for such a construction costs almost as much as the canvas. Such expenses are justified if it takes up too much space, in other cases it is better to install a swing model.
Sliding sliding doors have very low sound insulation, since they do not fit tightly to the wall. Much better conceal the noise of the structure installed in the pencil case. However, they do not achieve the soundproofing of the swing door.
Types of sliding doors
Sliding structures differ in the type of movable mechanism. On this basis, they are divided into rail and suspended. Each model has its own pros and cons.
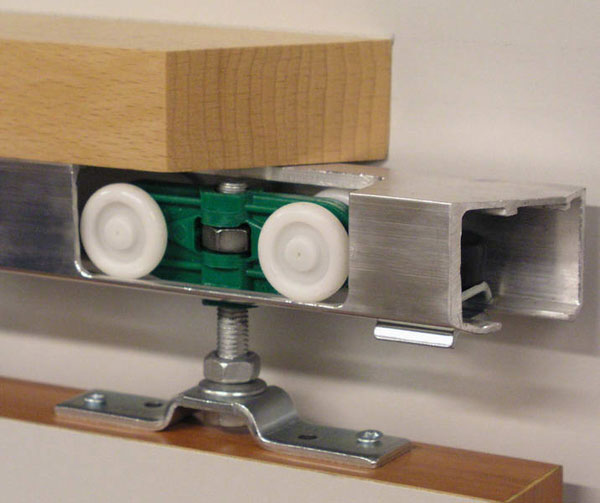
Suspended model on top rail
The suspension mechanism consists of a square profile with a groove, inside of which there are two curved strips. The rollers attached to the product ride on these slats. The rail is made of metal, just like the rollers. But they have rubber or plastic pads that provide a soft and quiet ride.

When installing a sliding interior door on a rail, no devices and mechanisms are installed on the floor. All fasteners that are on the canvas are two rollers on top. They move along the groove due to special wheels. These doors are considered one of the easiest to install. Installing a sliding door includes the following steps:
- installation of profile rails;
- installation of rollers to the top of the door;
- inserting the product into the groove of the rails;
- installation of valves to restrict rail movement;
- inserting the lower roller into the groove and installing the door;
- installation of a decorative strip on the fittings.
The door fastening itself is very simple, in addition to the rollers and rails themselves, the kit includes plugs and fasteners. The product with the top rail has an extremely low sound insulation performance. Therefore, it is not recommended to use such structures in living rooms.
Sliding structures on the rail
The sliding doors have two fastening rails. Movable rollers are mounted at the top and bottom. This method of fastening makes the product very stable, so it can be shaken.
Note! Dust and debris are constantly clogged into the metal profile of the fastener, which complicates cleaning in the house.
Mounting options
Regardless of the type of fastener, the installation of sliding interior doors is:
- Compartment. The rollers are installed above the door leaf in the opening. The guides should fit snugly in the groove.
- Cassette. This option is considered the most time consuming and costly. For the product, a niche is equipped in the wall, in which a guide is placed. When opening, the canvas is pushed into the wall. Such designs are the most efficient in saving space.
- Cascading. Such designs are very popular in Asia. The model consists of 2-3 canvases. One is stationary, while the others ride on the rails and clean up behind it.

If you plan to install sliding doors with your own hands, choose a compartment design. The models are easy to assemble and highly maintainable. The main feature that is necessary for installing an interior door with your own hands is a smooth opening.
Nothing can be placed against the wall to which the base of the compartment door is moved, otherwise the movement of the canvas will be disrupted. A significant disadvantage of the models is their low sound insulation. This is due to the fact that sliding doors are installed with a gap. Without it, the canvas will scratch against the wall.

Cassette structures provide the best access to the space of the room. Soundproofing materials can be installed inside the niche, which will hide the noise. However, the installation of such a model is possible only at the stage of repair or construction. In addition, a decorative wall is assembled for the rail, and this deprives the room of useful space.
Cascade products are a modification of compartment structures. The main difference is the greater the number of guide rails. It is most difficult to install such products, since high accuracy is required. Cascading structures are classified as premium for their complexity and aesthetics.
Installation features
You can install sliding interior doors with your own hands even if you do not have specific skills. Installation instructions are included with each product. By following it, you can do all the work yourself. The assembly process is described in more detail below than in the standard instructions.

DIY sliding door installation
The opening, regardless of the design of the fasteners, the place for the structure must meet the following characteristics:
- Smooth surface of all planes. The walls of the opening should not have serious drops and flaws.
- High load-bearing capacity.
- Both the walls and the opening must be pre-finished with a leveling compound and decorative coating.
After leveling the opening, you can proceed with the installation. The first step is to attach the rollers. Depending on the manufacturer and model, the fasteners may have their own characteristics. To assemble some products, you need to step back 15-20 cm from the edge, but most often the rollers are mounted right at the edge.
To begin with, markings are made on the canvas for fasteners.
Important! Make sure that the distance from the edge to the roller is the same on both sides.

At the markup site, drill holes 1 mm less than the diameter of the fastener with a drill. After the grooves are ready, the plates are fixed. Self-tapping screws are used as fasteners, their length should be at least 75 mm. The greater the weight of the blade, the longer the fastener. Special support holders are mounted into the plates, into which the rollers are inserted. On the sides of the canvas, fasteners must be fixed with plugs.

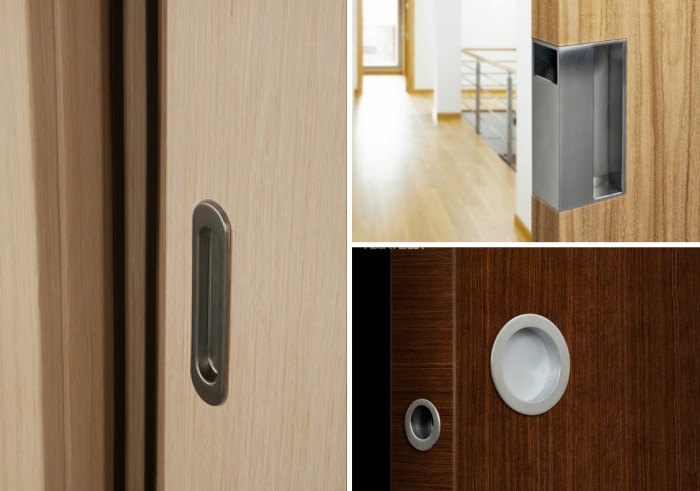
Pins are included with the rollers. The movable elements themselves are wound on them. If the model is not equipped with handles, they are purchased separately. It is recommended to mount the handles before installing the product in the opening. In a model without a groove, markings are made with a pencil and a carpentry tool is removed along the contour. Fittings are attached to the resulting hole.
Note! Only submersible fittings are suitable for sliding doors.
When the canvas is ready, the rail is attached. The easiest way is to screw the guide to the bar, and not directly into the opening. To do this, take a wooden plank of square or rectangular section with a side of 60 cm. The length of the bar should be twice the door itself and a margin of 5-10 cm. The rail is cut along the length of the bar.
The guide is screwed to the bar with self-tapping screws from 85 mm. The minimum number of fasteners is 4, the more often the better. The recommended step between the screws is 10 cm, the same distance is made from the edge of the web to the first fastener.
Next, you need to measure the height of the bar. The rail is strung onto the rollers of the canvas and the height is measured. According to this value, holes are made on the wall for fastening the guide rail. The canvas should not stand on the floor. A distance of 8-10 mm is left from the floor to the structure itself. If there are no coatings on the floor, the thickness of the floor finish is added to the value.
Level adjust the mark for mounting the bar. For this, fasteners from 12 cm are used, but anchor bolts are more reliable fasteners. Dowels are used in concrete walls.
The markings for the guide are made with a thin drill or nail. After that, holes are drilled for dowels or self-tapping screws and the timber is mounted. The final step is to insert the sliding doors into the rail. After rolling up the structure, plugs are placed on the sides of the fittings, they protect the structure from slipping.
When the door is open, a flag roller is screwed onto the floor. It regulates the movement of the web along the vertical axis.
The installation of a decorative overlay on the fastening profile will give the structure an aesthetic appearance. It is placed on finishing nails or self-tapping screws with decorative plugs. Screw the pad directly into the block.

More materials and tools will be required to install the sliding structure. If you want to know how to install sliding cassette doors, see the detailed video instruction:
Almost any canvas can be attached to a rail, and a sliding door can be designed. But in order for the system to function without failures, it is necessary to install high-quality fittings. Durable fasteners and rollers ensure a long service life of the door. Therefore, it is not worth saving on fittings.

The canvas itself can be made by yourself. The cheapest option is a bar frame with a plywood or chipboard body. A solid piece of solid wood or glued wood looks the most aesthetically pleasing in the interior. However, it will be more expensive to assemble such a product. Products from chipboard panels are pasted over with foil or laminating surface. Wooden canvases can be simply sanded and coated with protective compounds.
It is very difficult to design a roller mechanism on your own. If you do not have a special tool, including a cutter, then you will not be able to make accessories with your own hands. It is much easier and cheaper to purchase a finished product.
What motivates you when you equip your cozy nest? Striving to stand out, follow fashion trends, or just a desire to make practical use of space? If everything in the aggregate matters to you, then installing sliding doors is the optimal design solution. By choosing the type of product suitable for your interior, you will create a real oasis of home comfort, where you will want to return again and again.
Types of sliding doors
Thanks to the ingenuity and ingenuity of manufacturers, the range of sliding products is so great that even the most picky buyer will find a suitable option for himself. Products are not similar to each other in shape, design, dimensions and raw materials from which they are made.
When choosing a design, consumers pay special attention to the last distinctive feature - the material. For the production of products are used:
- wood;
- glass;
- mirror;
- plastic;
- metal.
Natural wood products are, as they say, classics of the genre. They are able to give a sophisticated look to even the simplest interior.... From time immemorial, good wood has been a symbol of wealth and luxury. The high cost of the product is justified by its durability, practicality, and beauty.
Wooden sliding doors are durable and reliable in operation
Doors made of glass, mirrors are preferable for small rooms... They visually enlarge the room, allowing you to feel much more spacious in it. When choosing these types of products, there is no need to worry about their fragility. They are made of high-strength materials that are not subject to mechanical stress.


MDF products are a budget alternative to wood... For many years they do not lose their presentable appearance and captivate with their low weight, ease of installation. A significant disadvantage is their instability to moisture. Therefore, such products are not recommended to be installed in the bathroom or toilet.
 Door systems made of MDF - an affordable analogue of wooden products
 Plastic sliding structures are no less popular among consumers. They are resistant to deformation, temperature extremes, moisture, ultraviolet rays. Doors with a protective decorative coating will serve for many years without requiring any special maintenance.
Sliding systems are also made of metal... This kind of device can be found in pawnshops, banks, jewelry stores. However, the imagination of designers is limitless, so they found ways to use such products in country houses and even apartments. At the request of customers, the metal can be decorated with drawings that give the product lightness and texture.
 Metal sliding doors can be installed in private houses
 Installation methods
Sliding systems are divided into two large classes: sliding-folding and parallel-sliding. For folding structures, the sashes do not run along the wall, but move to the side and fold in the form of an accordion or book.
In parallel-sliding systems, the canvases move along a vertical surface. The installation methods are distinguished:
- compartment doors;
- cassette or built-in;
- cascading.
Sliding doors can be single-leaf and double-leaf. The canvases move along the vertical surface along the rails in the same or different directions. Sliding structures are perfect for bedrooms, living rooms, kitchens, balconies, wardrobes.
 You can install sliding doors yourself
 Installation of this type of product is quite simple and quite within the power of a novice master. They can be installed both during repair work and after. The main requirements are a smooth opening, the ability of the wall to withstand the expected load.
Along with a huge number of advantages, this system has negative points. Given that the canvases move tightly along the wall, it is impossible to put furniture near it.
In addition, compartment products do not protect the room from sounds and smells. This is due to the design features. To prevent the flaps from touching the vertical surface, small gaps are provided on both sides.
Cassette products, like compartment ones, can be of one or two doors. The peculiarity of this model lies in the presence of a niche in the wall, where the canvases are rolled. The cassette design provides a high degree of sound insulation due to the fact that it is possible to install seals around the perimeter of the opening.
 Cassette sliding door provides high sound insulation
 If we talk about the disadvantages of cassette doors, then the most significant of them is the installation of the structure only during the repair.... The second disadvantage of the model is the installation of a false wall under the pencil case to the detriment of additional centimeters of area.
Cascade structures consist of one or more leaves and are considered a type of compartment doors. The number of guides corresponds to the number of canvases that, when opened, are collected from one side of the vertical surface.
 Cascade door - a kind of compartment doors
 The installation of this model is not easy. It includes many parts that require high precision assembly. Only experienced craftsmen can cope with this work, because there is practically no room for error.
Classification by type of mechanism
There are two large groups of devices.
Suspension system
A suspension device is called a supporting bar, to which a U-shaped guide is fixed... It is along it that the canvas or, in technical terms, the suspended door moves on rollers.
The installation of such a door assumes that the flooring remains intact. Only on the right or left side of the opening is the roller mounted from below. He drives along a groove made in the lower end of the blade. The main function of the roller is to prevent the vertical deflection of the product during movement.
 Suspension system device
 Installing the harness is easy. Installation is carried out in several steps:
- fixing the upper guide;
- installation of the roller device from above in the end part of the door;
- installation of the sash in the guide;
- fixing the limiters designed to prevent the web from going off the rails.
- making a groove in the lower end of the product, fixing the roller.
Suspended structures perform a purely symbolic role of an interior partition. They do not protect the room from odors and do not provide adequate insulation from noise.
Rail Sliding System
Rail structures are used in wardrobes, dressing rooms, bedrooms, living rooms. This type of mechanism is represented by two rails located at the top and bottom.
 The rail system is highly durable
 This design is robust. The door is firmly fixed in a vertical plane and does not allow odors and noises to pass through. The imperfection of the system is that it is difficult to clean, since the bottom rail is periodically clogged.
Having weighed all the pros and cons of each of the systems, choose the most suitable one for yourself and start the process of step-by-step installation.
Required tools and materials
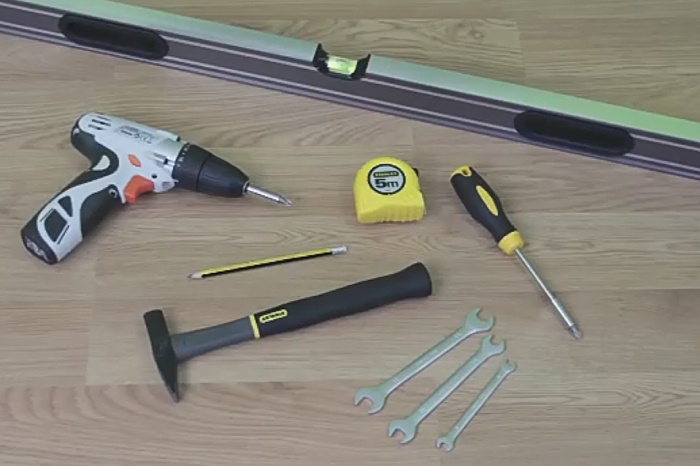
When starting the assembly of sliding structures, make sure you have the required tools and materials. To work, you need a whole set:
- electric drill or screwdriver;
- perforator, if necessary, to extract the inner layer of the wall;
- Phillips screwdriver;
- overhead strips - 2 pcs. One of them is mounted at the top, and the other is opposite the side to which the sashes open.
- anchors;
- self-tapping screws;
- handles on canvas - 2 units;
- finishing nails;
- two additions;
- the rack, to which the sash adjoins, while in the closed position;
- fittings: rollers that make up the fasteners, aluminum rails;
- canvas. To determine its dimensions, measure the height and width of the opening and add 70 mm to them from above;
- timber made of wood with a section of 50x70 mm. The length of the beam is equal to the doubled width of the sash plus 5 centimeters.
Armed with everything you need, proceed to the next block of work.
Installation instructions for sliding doors
Only a true professional can supply a multi-leaf structure, mirrored doors or large-weight products. A novice master, taking on such responsibility, is able to perform many rash actions that will subsequently cost dearly.
Therefore, if you first come across sliding structures, start with the simplest option - assembling compartment doors. If you purchase a ready-made kit, you will save a lot of time and effort. The kit contains all the components for installing the sliding system, including fittings.
Taking up work, you should be extremely careful and accurate. The whole process begins with the preparation of the opening. The quality of the installation depends on how accurately it was measured.
The height of the opening is determined in several places: measure the right, middle and left sides. Its width is measured in the same way. Then check how perpendicular and straight all sides are. In the case of installing platbands, the thickness of the vertical surface is measured in several places and in the corners of the opening.
 The opening height is measured in several places
 To avoid misses when installing do-it-yourself compartment doors, follow these instructions exactly. Break the whole process into blocks and gradually move from one to the next.
Dismantling the old door
Free the box from cashing, remove the old door leaf and door hinges, and then dismantle the box itself. However, you can leave it alone if it holds well and does not interfere with the flaps to move freely on the rails.
 At the first stage, the old door frame is dismantled.
 Opening preparation
If necessary, remove the curvature of the walls, seal cracks and cracks with putty.
The contours of the opening should be even, so make sure that no brick or drywall sticks out anywhere.
Check how parallel and horizontal the opening is from above to the floor. The maximum limit deviation is permissible up to 5 mm. This is also mandatory for the sides of the opening. Here the tolerance is maximum 0.5 cm by 2 m.
After dismantling the old box, a new one is installed. It is aligned with small wedges. Adjust the angle of the structure in relation to the flooring and vertical surface by moving or pressing in the wedges.
 Use wooden wedges to align the door frame
 Secure the box with screws. When working with a screwdriver, you must be extremely careful not to damage the product.
Installation of the upper rails
After placing the box, attach the door to the opening and mark its upper border. Repeat this action again, placing the product in the opening. This is only necessary if the floor is not very even.
 Installing the top rail
 If the line is horizontal, measure 0.7 cm from it and draw another line. A wooden beam will subsequently be installed on it. To fasten the beam, take such a number of self-tapping screws so that it fits snugly against the vertical surface.
The rail is fixed to the bottom end of the beam. At first, it is screwed on slightly on one side. To accurately determine the location of the self-tapping screw, the thickness of the leaf is divided by two and added from 0.3 to 0.5 cm, which are needed for the smooth movement of the flaps... Follow the same principle on the other side.
 Make sure the rail is straight before locking it in place.
 Before final fixing the rail, make sure that there is sufficient space between the curtain and the wall. Also pay attention to the straightness of the guide. Kinks and curvatures must not be allowed, otherwise the structure will not work properly.
Assembling carriages and installing stops
Going on to installing the rollers for sliding doors, insert the bolts into the carriages so that they protrude slightly from the hole. Run the carriages into the prepared rails and make sure they move smoothly.
 The next step is to install the carriages.
 At both ends of the guides, limiters should be installed that will not allow the web to go off the rails. When doing this, make sure that the rubber shock absorbers point inward.
We make a groove in the lower part of the door leaf
To make a recess in the bottom end of the sash, step back from its edge 1.5 cm on both sides and drill one hole each with a radius of 3.5 mm and a depth of 2 cm. Select a groove for the guide in the center between them.
 A groove for the guide is selected in the center of the sash
 The depth of the groove should be 1.8 cm, and the width should be 0.3 cm more than the width of the guide, which is a flag or a knife. Taking into account that it is not easy to make a perfectly even groove, it is recommended to mount two slats or a profile in the shape of the letter "P".
Fasteners to carriages
Moving two millimeters away from the side borders of the sash, fix the fasteners to the carriages exactly in the middle. An important point: the cutouts on the staples in the form of a semicircle must be directed towards the wall.
We hang the door leaf
You won't be able to put the door down alone, so call someone for help. Having found yourself an assistant, start performing the following actions:
- Attach the product to the rail and connect the carriage bolt on the right with the cutout on the bracket, while lifting the blade.
- Insert the end of the bolt into the adjusting nut hole with washer.
- Lightly fasten the brackets to the carriage bolts.
- We proceed to the installation of the lower rail in the groove. To do this, slide the lower part away from the vertical surface, place the blade horizontally and slide it open.
- Measure the maximum opening length and mark with a simple pencil.
- Set the gap between the flaps and the vertical surface. To do this, move the bottom of the blade and place a mark at the location of the knife. The distance should be no more than 0.5 cm.
- Remove the blade and tighten the guide to the floor from below with two self-tapping screws.
- Align the notch at the end of the curtain with the rail and hang the products without screwing the nuts all the way in.
- Adjust the clearance between the flooring and the product by tightening or loosening the adjustment bolts on the carriages.
- Secure the nuts without turning the bolts.
Decoration
To hide the rails at the top of the opening, platbands are used for decorative purposes. The lock and handle are installed at the end.
Features of installing cassette-type doors
The instructions above can be used as a guide for the installation of the guide blades. When installing this model, there is no need for decorative finishes. Instead, they additionally put a false wall.
 When installing cassette doors, a false wall is mounted
 The distance between the false wall and the vertical surface is approximately 10 cm. It is calculated based on the thickness of the sash, the gaps on both sides and the profile size.
The frame made of profiles does not require reinforcement, since most of the load falls on the wall. But if you want to give rigidity to the structure, then install wooden bars inside and fix them with self-tapping screws.
Installation of sliding doors is not a very difficult process, but it requires certain skills in the construction business. If you are not confident in your abilities, invite a better master. This way you can avoid double work in case of a mistake or save an extra pretty penny.
Sliding doors are ideal for small rooms. Such designs do not hide the space, moreover, they look very original and non-standard. In this article we will talk about the features and types of such doors, and also tell you how to install a sliding door with your own hands.
Such designs can be classified according to various criteria. For example, depending on the design features, sliding interior doors are divided into:
- cascade structures;
- radius doors;
- accordion doors;
- one-leaf, two-leaf, three-leaf doors.
Doors can also be made from different materials, the most popular are wood and glass structures. This factor is important if the system is supposed to be installed by hand. For example, for the installation of the simplest wooden door, you will need a rail with one groove, as well as two carriages with rollers. In the case of installing a glass door, you will have to stock up on a large amount of materials, namely, prepare a lot of roller mechanisms, since heavy glass exerts significant pressure on the entire structure.
With poor fixing, glass sheets risk falling and breaking, therefore it is recommended to mount them using two rails: an upper and a lower one. This method of installation will ensure good stability of the door. The sliding mechanisms themselves, in such a case, are fixed between two plates, laid from the inside with special rubber pads.
Sliding door systems are of two types:
- The hidden in-wall mechanism provides for such a functioning of the structure in which it is hidden in the wall. It is possible to mount such a door only at the stage of building the wall, since in its thickness it is necessary to provide for a gap in which the sashes will be hidden. It should be borne in mind that the thickness of the wall will increase, and this will reduce the free space in the room. But the door itself will subsequently save much more space than a conventional swing design.
- Doors with an open mechanism can be installed not only at the stage of wall construction, but also at any convenient time. In the presence of such a mechanism, the sashes will move along the wall, but for this it is necessary to provide free space on the side into which the door will open.
The external sliding mechanism allows you to use a variety of door movement options, so you can choose the most convenient way. To close a very wide doorway, it is recommended to use systems with four leaves, where the inner leaves will open towards the outer ones.
Before installing a sliding door, you should familiarize yourself with their classification by type of fixation. Depending on this characteristic, three types of structures are distinguished:
- Doors that are fixed on the top suspension.
- Structures that are attached to the lower suspension. With this method of fixing, a small threshold is obtained at the bottom, which is acceptable for wardrobes and wardrobes, but inconvenient for interior doors. The nut can be sunk into the floor, but this will require additional time and labor. But the installation of systems on the bottom suspension is the fastest and easiest process.
- Doors that are fixed in the two above ways. This type of installation is considered the most reliable and durable.
Advantages and disadvantages of sliding doors
Before installing sliding interior doors, it does not hurt to familiarize yourself with the pros and cons of such designs. First, let's take a look at the benefits:
- the advantage of sliding doors is their originality and originality, attractive and unusual appearance;
- space saving is another advantage of such systems. Furniture or other interior items cannot be placed behind an ordinary swing door, while in the presence of a sliding structure, the entire area of the room can be used effectively;
- The safety of such doors is also considered an indisputable advantage, because it is simply impossible to hit a solid corner in the dark;
- the sliding doors do not swing open from the draft.
Such designs are not without drawbacks, among which the following can be distinguished:
- complex and labor-intensive installation method;
- if the door is not mounted independently, you will have to spend money to pay for the work of the masters;
- low sound and heat insulating properties can also be attributed to disadvantages;
- if the system has a hidden in-wall mechanism, it is rather problematic to care for it. If you need to clean the space in the thickness of the wall, you just need to vacuum it with a convenient nozzle, but for minor repairs to the structure, part of the wall will have to be dismantled;
- over time, some of the rollers may deteriorate and require replacement.

Installing a sliding door
Regardless of the mechanism of action and fastening, all sliding doors consist of the same type of elements. These include guides, roller mechanisms, as well as the door leaves themselves. In addition, various decorative details, clamps, accessories are used, as well as various accessories in the form of locks and handles. The installation of a sliding system can be described step by step.
Step 1: installation of guide profiles
The first step is to apply markings to the wall in those places where the structure will subsequently be installed. Guided by this marking, guides for sliding doors are fixed on the surface. If the system has lower hangers, they can be cut into the floor to get rid of the nut. In this case, a gap will have to be made in the thickness of the floor covering, but you can foresee everything in advance and fix the guides on the concrete screed even before finishing the floor.
Important: during the installation of the profiles, be sure to check their horizontality using a building level.
The next step is to install the top guide profile. This profile should be fixed strictly above the lower one, and you can check its position using the control line. The installation height of the upper profile should be equal to the height of the door itself and take into account a small increase of 1.5-2 cm. This increase is needed to ensure gaps between the door leaf and the ceiling and floor surfaces. Please note that the guides must be mounted strictly horizontally so that the structure is level and does not move spontaneously.
As for the length of the guide profile, this indicator should be equal to double the width of the leaf and take into account an increase of 5 cm for the normal movement of the door. If a closer is provided in the system, you need to leave a margin for it.
When installing a conventional wooden structure, the profiles can be fixed with brackets, but if we are talking about a heavy glass door or solid board, it is better to additionally strengthen the system with a wooden beam. First, such a bar is mounted on the wall, and later a guide profile is fixed on it.
If the wall in the house is lined with bricks or consists of monolithic concrete, then dowels should be used as fasteners. In the case of a plasterboard wall, an additional profile must be equipped in its frame in advance, and the installation of the guide must be carried out directly on it. It is recommended to use drywall anchors in the work.

Step 2: fixing the holders and fittings
The next step in installing sliding doors is to reinforce the brackets on the canvas, which will hold the door on roller carriages. Such brackets are mounted according to the instructions and are located on the sides of the upper end. The optimal type of holders for all types of sliding systems, with the exception of the accordion design, are clamps that are attached to the sides of the door. In the case of a glass sheet, metal fasteners with rubber gaskets are used, between which the glass is fixed. These clips eliminate the need to drill holes for fasteners in the glass door.
When installing an accordion door, special brackets with a swivel roller are placed on each of its sections.
During the installation process, the door holders can also be equipped with handles and locks if required. Then, when the sliding system takes its place and is adjusted, it will be possible to install the counter mechanism of the lock. Please note that when installing hidden systems, handles and other fittings must be deepened into the thickness of the door leaf.

Step 3: hanging the door
The next step in the installation of a sliding door with your own hands is the direct installation of the door leaves. This work is best done together. One person will hold the door while the other drives the carriages into the grooves of the guide profiles. If the door serves as an interior partition and the profiles are mounted from wall to wall, the rollers for the sliding door are inserted into the groove in advance through a specially provided window. After that, the brackets-holders at the end of the web are joined with the anchor extending from the carriage.

Step 4: installing closers and restraints
So that the carriages with rollers do not fall out of the grooves of the guide profiles, you need to put stops. As such limiters, special plugs in the shape of the profile are used, as well as pins, which are installed in the guide in the indicated places.
Advice: so that the door does not make loud sounds when opening, choose limiters with rubber stops. Such parts will also prevent the moving parts of the system from deteriorating too quickly.

Step 5: installation of extrusions and platbands
Platbands on the sliding door are mounted in order to protect the mechanism from dust and various contaminants. Another function of such details is decorative. Platbands are used to give a neat look to systems with an open mechanism; they are not needed for in-wall doors.
Platbands are mounted on the wall using brackets, but you can fix them on the guide profile with special latches.

Step 6: adjusting the assembled structure
The last stage of installing a sliding door is to check the result of the work and adjust the system. If at the initial stage of installing the door, the guide profiles were fixed strictly horizontally, the canvas should be kept even and not move anywhere on its own. In this case, the adjustment process will not take much time. It will be enough to check whether the door fits snugly against the boundary structure, whether the canvas moves parallel to the floor, whether there are unnecessary gaps at the points of contact between the door and the wall. At the very end of the work, you also need to check whether the sashes move easily and freely along the guides, whether the fittings are working properly, and whether all the parts are well fixed.
Sliding doors, photo:


Sliding interior doors. Video
Installing sliding doors can be of significant benefit if the space in the room is not very large and the swing door is inconvenient. In addition, sliding structures are more practical and convenient to operate. It is not difficult to install them even on your own, so you can save a lot on calling the wizard.
Pros and cons of a sliding door
The advantages of these products include the following factors:
- Wide choice of materials and designs.
- Extensive design possibilities.
- Saving space.
- Installation of sliding doors can be done by yourself.
- Safety for children (you cannot pinch your finger with such a door).
The disadvantages are the following points:
- Weak insulation.
- You cannot move furniture to the part of the wall towards which the door is moved.
- It is necessary to monitor the rollers, not to allow them to skew.
- Higher cost compared to a classic door.
 Compartment doors. The guide is mounted on the wall above the correct opening
 Installing the sliding door mechanism
Sliding structures are divided into two types:
- Visible.
- Wall mounted.
Do-it-yourself installation of sliding doors is possible in both cases, and only the work scheme will differ.
The door mechanism can be tightly attached to the upper hanger: such a door is convenient because it does not have a threshold. Most often, just such a design is used for self-installation, since it is the least expensive financially and easy to install.
There is a possibility of fixing the canvas on the lower suspension, but this model has a significant drawback: a sill will appear on the floor. Some experts recommend combining both types of fastening, and the sill, if possible, to sink into the floor. This design will be the most reliable and durable. The probability of the door falling out of the grooves will be zero.
Advice: You can reduce the cost of installation and the product itself by installing inexpensive accessories.
If you need the door to hide when you open it, you don't have to break the wall. You can make a pocket in which the canvas will be hidden. You can do it yourself using wood or drywall.
 Installation of sliding interior doors on the upper rail
 How to install interior sliding doors with your own hands?
First you need to put a guide profile for the product. It is recommended to install a sliding-type mechanism from the inside of the room. If the door separates the corridor from the room, it is more convenient to place it on the side of the corridor, if you do not plan to put a cabinet in this place.
Do-it-yourself sliding interior doors start with labeling for future guides. They will need to be installed according to the level, otherwise the door will shift and it will be difficult to open. Before installing the sliding door, you will need to fix the fittings and the holders intended for this on its canvas. In order for the canvas to move, you will need to screw the brackets of the roller carriages to it.
 Installing the rollers
 Installation of a sliding interior door must clearly follow the instructions. It is most convenient to make a holder-clip on different sides of the doors. The handles on the door are installed at the end of the fastening of the remaining elements, but you need to select them in advance so that they do not cling to the wall. When all the guides are installed, you can start securing the canvas and adjusting it to the level. You will need another person to help you install the roller carriage into the grooves.
 Installing the handle
 In order for the door leaf to be fixed, it will be necessary to dock the bracket of the holder and the door, which moves away from the carriage. After that, limiters and closers are installed on the product: they are needed so that the canvas does not jump out of the grooves. It is recommended to choose those products, the stops of which are rubber or plastic. In this case, the door will open without loud banging on them.
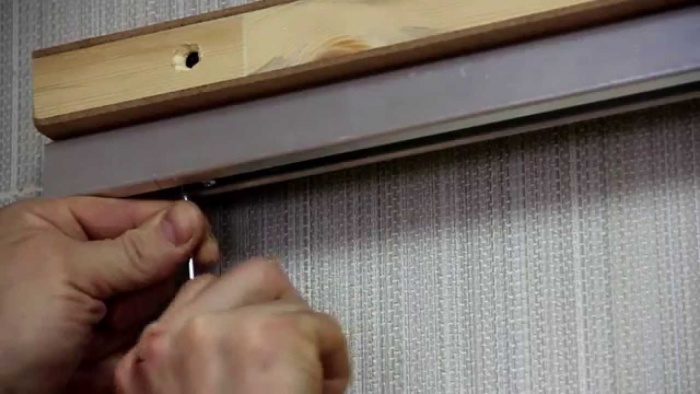
 Transferring marks to the wall using a thin drill
 After you have installed the sliding interior doors and limiters to them, you can proceed to the installation of platbands, which will hide the door opening mechanism from your eyes, and will also help protect it from dust.
To mount this element on the wall, the brackets are screwed in advance. They can also be screwed to the rail using latches.
 The decorative strip can be nailed directly to the timber
 After all the manipulations are completed, you will need to check if the doors are correctly adjusted. They should stand strictly horizontally, without blockages in any direction or distortions. Check if the door leaf fits snugly to the structure, how easy it is to open and close the door. If there are problems, you need to adjust the hardware with a screwdriver or wrench.
In order to understand how do-it-yourself sliding doors are installed, you can watch an introductory video on our website. It will help to delve deeper into the intricacies of this work.
Single or double-sided design?
Usually a single door is placed in the doorway, however, if it is very large, it makes sense to install a double-leaf system. In this case, one of the doors will move back, and the other will remain in a fixed position. If necessary, remove the retainer and open both flaps. This design is used for arches, wide doorways. She is able to decorate the interior, make it original.
 Single leaf interior sliding doors
 Making a pencil case for a sliding door
Do-it-yourself installation of sliding interior doors can include the installation of a pencil case, which you can also do yourself. It should be 15 cm wider than the door leaf. The easiest way is to place a pencil case next to the door. To do this, you need to attach a frame to the wall, which will be sheathed with plywood or drywall; decorative panels can be used. After measurements, it is necessary to calculate the pencil case so that the door can easily enter it. If the canvas is relatively light, you can use a frame made of strips or bars, they can be placed at a distance of 50 cm from each other. This design will withstand a canvas weighing no more than 80 kg. If the mass is greater, the frame is made of metal.