The bedroom is not just a place for a night's rest, but also a cozy, stylish, elegant “nest” for privacy. And such a decorative item as a beautiful bedspread gives the room even more attractiveness. With the right choice of color and fabric texture, this piece of furniture will be a great addition to your bedroom design. There are a great many options; you can, of course, purchase a decorative piece of furniture in a store, but a hand-sewn bedspread will create a warmer and more comfortable atmosphere in your bedroom. Today we will look at several variations of bedspreads and help you choose the most suitable decor item for your bedroom interior.
What to make a bedspread from?
The main criteria for choosing a material should be compatibility with curtains and the main color of the bedroom interior. The combination of the curtain pattern with the bedspread pattern is not mandatory, but the texture of these fabrics must match. For example, a light silk or openwork bedspread does not look entirely harmonious with heavy and thick curtains. In addition, the fabric for the bedspread should match the style of the setting. You can opt for a thick fabric with an interesting texture, or you can give preference to a light silk bedspread with shine.
The most popular materials for bedspreads:
- Silk. Silk bedspreads look great in a classic interior. The fabric is distinguished by its shine and beauty.
- Wool. Woolen products have different textures and weaves, so wool bedspreads can be thin and dense. They are not subject to wear, retain heat well, but easily absorb moisture. Products are made from sheep and camel wool.
- Cotton or satin. Natural material is perfect for a summer version of the product. The fabric retains its bright colors and shine for a long time.
- Fleece. The material is perfect for covering a child's bed.
- Linen. Linen products smooth out all the unevenness on the bed, but they have one drawback - they are difficult to iron perfectly.
- Velvet. A velvet product looks noble and festive. The fabric can be either with or without a printed pattern.
- Velours. Soft, velvety velor fabric looks beautiful, is easy to wash and dries quickly, unlike capricious velvet.
- Bamboo fabric. Eco-friendly fabric made from thin bamboo fibers is very elastic and does not require special care.
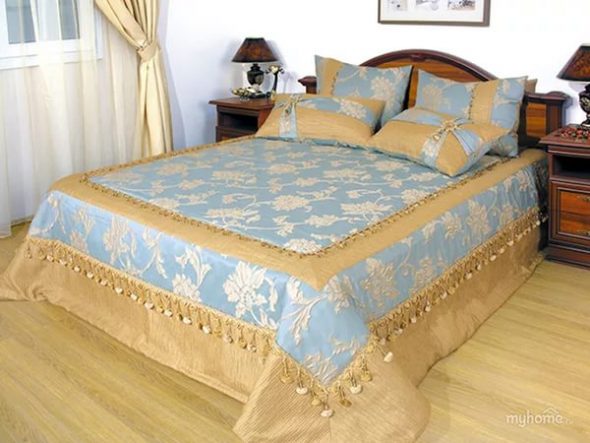
- Jacquard. The fabric has a dense weave, which gives the bedspread sufficient rigidity. The jacquard product will perfectly complement the interior, made in a single color.
- Fur. Both natural and artificial fur are used to make the bedspread. Products cannot be washed. It is better to dry clean woolen blankets. In addition, fur products are not suitable for every interior.

If you follow the rules of designers, then the bedspread should match the color of the walls, furniture and the same pattern as the curtains. However, there are more interesting solutions:
- For a classic-style interior, the colors of the curtains and bedspreads must match. If the interior is stylistically less strict, then you can make a bedspread, the pattern on which will be in harmony with the shade of the curtains. Or add a plain decorative runner to match the color of the curtains and place it on top of the bedspread.
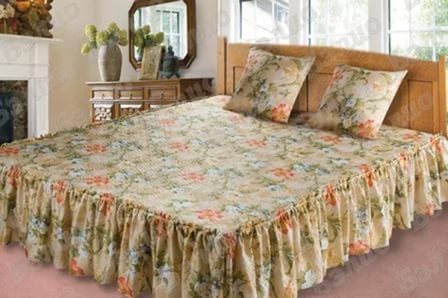
- A plaid that matches the color of the walls looks harmonious. If there are patterns or flowers on the walls, then you can choose a bedspread of the same style. For example, to match pale green walls, you can make your own bedspread from bright mint-colored fleece.
- If the bed from the furniture set has a high headboard, then a blanket to match the furniture would be appropriate.
- The color of the product can be selected to match the main color scheme of the interior. For example, if the bedroom is decorated in soft turquoise tones, then a blue or light blue blanket for the bed will be suitable for decor.
Important! Contemporary design uses the bed as a highlight and focal point in a room done in pastel, neutral tones. In this case, the color of the bedspread can be associated with a bright accessory, carpet or lampshade of a chandelier (floor lamp).
DIY bedspread made from scraps (patchwork technique)
Handicraft classes allow craftswomen to make beautiful, exclusive and useful things for the home on their own. Sewing a bedspread with your own hands is not difficult for such needlewomen; the only question is which option to choose. Below we will tell you how to sew a bedspread using the patchwork technique.
If you are constantly doing handicrafts, then there are enough pieces of fabric accumulated in the house that you can use them to make a bright and original blanket.
Pattern creation techniques
The patchwork style technique, which has several options, will help you with your work:
- Traditional technique. A single piece of fabric is created from individual pieces of fabric, selected according to texture, pattern and color. When sewing, you should make neat stitches and select scraps harmoniously, and everything else depends on the imagination of the craftswoman.
- Technique “Watercolor”. A popular technique that is based on squares, but it is much more complex than traditional sewing. The work involves a long selection of colors for the scraps, since this technique is based on the transition of shades from light to dark. Only in this case the resulting effect will resemble watercolor.
We sew a bedspread using the patchwork technique
Step-by-step instructions for making a patchwork bedspread:
- Determine the size of the product. Measure the length and width of the bed. The blanket should cover the mattress and the walls of the bed, so add 60 cm in width and 30 cm in length to the resulting dimensions.
- Select a color scheme for the product.
- Prepare the material: strips, shreds, squares of fabric. Before using the fabric, prepare it for use: soak it in hot water for 10 minutes and then rinse in clean, warm water. Iron the clean fabric thoroughly to make it easier to work with.
- Select the fabric for the back of the item. Chintz or cambric is perfect as a backing fabric.
- Prepare the following tools: scissors, thread, needles, pins, sewing machine, pencil or chalk, square ruler or square template.
Important! You can choose another pattern, such as a diamond or fabric flowers, but a square is the easiest shape for beginners.
- Once you have decided on the pattern and distributed all the details, you can start sewing the squares together. First, sew the longitudinal strips and iron the seams. Then sew the strips into one piece and iron all the seams again. You should have a finished front side.
- Place a piece of purl fabric on the table (floor) face down.
- Place padding polyester on top of the backing fabric if the bedspread will serve as a blanket. Otherwise there is no need to do this.
- Place a patchwork of squares on top of the workpiece.
- Sweep the structure or pin it together.
- Quilt the product using a sewing machine. The easiest way is to quilt a blanket in squares, since stitching any other pattern will be difficult for beginners.
- Make an edging of the product. To do this, use a strip of fabric about 8 cm wide and slightly longer than the side of the product. Fold the fabric in half, attach it to the front side of the product and sew.
- If you do not have enough pieces of fabric, then purchase the material at the store. For a double bed measuring 220x240 cm, you will need 10 m of plain fabric and 50-80 cm of fabric in different colors (maximum 8).
- If you want your hand-sewn blanket to have a three-dimensional shape, then use a sealing material in the form of padding polyester.
- If you buy specially quilted fabric, you can create a masterpiece in patchwork style from silk, satin or cotton.
Quilted bedspread
Materials
To make a bedspread you will need the following materials:
- Fabric with a beautiful pattern (cotton or satin) 280 cm wide for the top.
- Lining fabric (linen or cotton).
- Sintepon with a density above 150 g/m2 and a thickness of 3-4 mm.
- Fabric for edging.
- Threads in the color of the fabric.
- Sewing machine.
- Long ruler.
- Chalk or fabric marker.
- Scotch.
- Stitch template.

Step-by-step instruction:
- Before starting work, wash all fabrics for the future product or steam it well with an iron. This is necessary to prevent shrinkage and distortion of the finished product.
- Lay the fabric out on a clean, flat surface (the floor). It is better to take fabric for the top (upper part) of sufficient width to eliminate seams and irregularities.
- Cut a square measuring 230x230 cm from the fabric. Finish the edges of the material with an overlocker.
- From the lining fabric, assemble a slightly larger square of 240x240 cm. Finish the edges of the backing (lining) with an overlocker, and press the seam allowances.
- Take a square stitch template (23x23cm) and a long ruler. Using a marker or chalk, line the stitches on the wrong side of the facing fabric, starting from its edge.
Important! To make it convenient to work, and to prevent the fabric from shrinking or moving, secure it with tape.
- Place the lined top aside.
- Lay the lining fabric on the floor, wrong side up, and secure it with tape.
- Place synthetic padding on the lining with sheets, secure the parts with rare, loose stitches.
- Place the top on the workpiece with the lined side up.
Important! Make sure that the fabric lies flat, without creases or wrinkles.
- Connect all the parts of the bedspread using a needle and light threads. Start stitches from the center. Go through the basting first in one direction and then in the other.
- Try to make a basting without knots so that after removing the threads you do not disturb the structure of the fabric and the stitch.
- Machine stitch from the center to the edges of the product. First, lay horizontal lines, and then vertical ones, gradually filling with them all the free space of the product. For ease of use, fold the edges of the blanket towards the center and place the product along its entire length in an additional place next to the machine.
Important! Sew straight along the lined line, pulling the fabric lightly behind the sewing foot.
- Align the sides of the product using a ruler and fabric marker, and the corners using a square. Stitch as close to these lines as possible. Cut off excess fabric.
- Sew a 3cm piping around the entire perimeter of the product.
- Iron the bedspread.
Important! Use specially curved quilting pins for basting. These pins do not move or move during the sewing process.
How to make a bedspread with your own hands with a frill? Master Class
A beautiful bedspread with frills will hide all the unevenness on the edges of the product:
- For frills, it is better to choose a plain satin fabric.
- To calculate the amount of fabric, consider the shape of the mattress corners, seam allowances and the depth of the folds, however, do not forget that the finished product should not hang on the floor.
Important! The frill does not have to be cut out from a single piece of fabric; you can use pieces of fabric, but the joints and seams should be hidden deep into the fold.
To make a frill, proceed as follows:
- Take a ready-made quilted fabric for the bedspread and cut the bedspread to the size of a double bed.
- Calculate the frill pattern. Take the ribbon of the future frill and fold it into folds. Fasten the folds to 1 m length of tape. Then straighten the material, measure the length of the fabric that is needed for one meter of frill. Multiply the result by the required length to get the amount of material for the entire frill.
- Cut the required amount of fabric into four strips and sew them together.
- Fold the bottom edge of the tape and finish it with an overlocker.
- Make folds of the desired width and stitch.
- Sew the frill to the finished product.
Important! If the bed has a back, then calculate the material for the frill for three sides.
How to make a do-it-yourself blanket from pom-poms for a children's bed?
For a pompom blanket, brightly colored acrylic yarn is best. It is very soft to the touch and does not cause allergies, so it is perfect for a children's bed.
To make a blanket you will need:
- Frame corresponding to the dimensions of the future product.
- Self-tapping screws that need to be screwed in at a distance of 5 cm.
- Yarn.
- Scissors.
To make the product fluffy, you need to make many layers:
- First fasten the yarn vertically, starting with the first stud, and then gradually move to horizontal fastening of the yarn.
- It is better to mark the middle of the product with yarn of a brighter color.
- After the layers of yarn are finally formed, secure them tightly at the crossing points.
A bedspread is a powerful design technique that allows you to change the entire look of a room's interior. Choose any blanket option you like, use your imagination and create for the joy of everyone!
The interior of the bedroom should not only be conducive to sleep, but also pleasing to the eye during the daytime. How to achieve this? Take a thorough approach to the issue of bedroom decor. The choice of textiles plays a primary role here.
The most important place in the bedroom is occupied by the bed, which means its decor will attract maximum attention.
How to make a bed attractive? Place an interesting blanket on it.
A homemade bedspread will fill your bedroom with comfort and warmth.
In stores it is difficult to find a bedspread that you immediately like, that will naturally fit into the interior of the room, and that will perform the necessary functions. It is not always possible to order tailoring of textile components of the interior from an atelier. Therefore, an excellent solution to the problem would be to sew a bedspread with your own hands.
Deciding on the model, fabric, color
Sewing a bedspread is not difficult if you have basic cutting and sewing skills. After all, any simple-cut bedspread is a simple rectangle of fabric.

A baby blanket should be soft and pleasant in texture.
An ordinary piece of material of the required size must be processed in such a way as to obtain the desired result. The bedspread can be light, flowing, without lining, or thoroughly dense, with stitching. In addition, a banal rectangle can be decorated: add frills, ruffles, decorative stitching, embroidery, applique and get a unique bedspread.
The bedspread should be chosen based on personal preferences, the overall style of the room, and the purpose of this textile element.

Everyone chooses the style and design of the bedspread for themselves.
An excellent solution would be a double-sided bedspread. If the sides are made of a single fabric, then it is extremely easy to use. There will be no need to worry about which side to place it on the bed. When the turns are with different patterns, you will have the opportunity to change the look of the bedroom according to your mood, covering the bed in different ways.

Choose a fabric that will only give you a comfortable feeling during use.
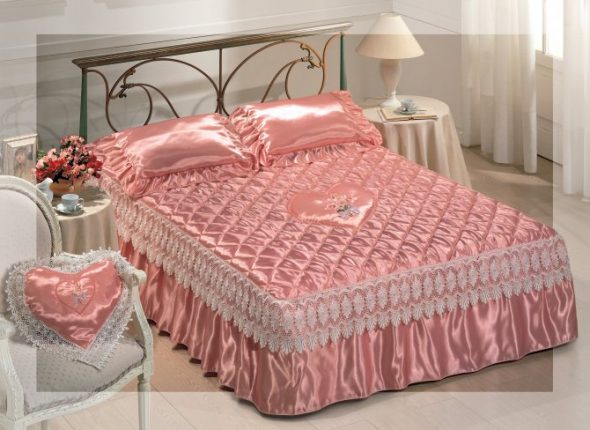
A bedspread decorated with various decors (ribbons, lace, puffs, flounces) will give the room incredible comfort and create a romantic atmosphere. At the same time, the abundance of textile components in the lower part performs a practical function - it hides the bed frame.

A silk bedspread is stylish, fashionable and sophisticated!
A bedspread made of smooth satin, silk fabric or a tapestry version will add sophistication to the room. The use of shiny fabric and gilded trim will add chic and pomp.
A thick-pile bedspread made of wool or fur will do an excellent job of providing additional insulation and will add softness and comfort to the room.
A quilted bedspread will protect you from the cold, create a homely, well-groomed environment, and an atmosphere of warmth and comfort.

Complex bedspread patterns will require more effort and skill from the seamstress.
ADVICE. For a craftswoman with minimal experience, it is better to choose no-frills bedspread models, fabrics that do not require special care in the work. An excellent option would be cotton, medium-weight blended fabrics.

The better the quality of the fabric, the more pleasant it will be to use the bedspread later.
Choosing a color
The color scheme of the product must match the style of the room, but can be seasonal, taking into account the lighting of the room and its size.
The type of fabric for the bedspread should also be selected based on seasonality.
- The bedspread should not create the impression of contrast, unless this is an intended design technique. In a small room, the bed should not be a bright spot, otherwise it can create the illusion of filling the entire space. It is better to choose a beautiful bedspread that is similar in color to the trim and surrounding objects.
- Bedroom lighting, primary and secondary colors are also of no small importance. It is preferable to dilute the gloomy atmosphere with a warm, light palette of shades. With good lighting and general warmth, it is possible to show great imagination in choosing the color of the bedspread.
- Cold shine and shimmer are only appropriate in a large room, preferably in the summer. Otherwise, the supposed chic will become an inappropriate farce.
- The diversity of the interior is facilitated by fabrics containing patterns and the use of decorative elements in the decoration of the bedspread.
- Warm colors always bring freshness and create comfort. Pastel colors can visually expand the boundaries of a room.
Heavy bedspreads are best used in large bedrooms.
Getting ready to sew
When the choice of model, type of fabric, color has been made, you need to decide what you will need in the work and how to sew a bedspread with your own hands. The first thing to consider when sewing a bedspread is the fabric consumption. To do this you need to make simple measurements.

The delicate colors of the bedspread always add lightness to the entire room!
Determining the size of the bedspread
- Using a measuring tape, you need to measure the bed in length, width, height. These measurements will help you model the size of the future bedspread and create a pattern.
- Using a regular squared notebook sheet, make a drawing on a reduced scale. This will help you visually design the bedspread model. The resulting pattern is a rectangle with a side supplemented, if necessary, with a frill of the required height. Sometimes, due to the location of the bed, height lines are not needed. For example, if there is a headboard at the bed, or its wall location.
- When constructing a drawing, we take into account the fit of the fabric and seam allowances. This will be from 3 to 5 cm. If you are planning a quilted bedspread, we display the lines of the proposed seams on the model. This method makes it possible to correct a pattern you don’t like without damaging the materials or the sewing process.

A DIY bedspread will add a lot of warmth and coziness to your room.
Calculating fabric consumption
To calculate the required amount of fabric, you need to know its width. If it is 1.4 m, then for a bedspread for a double bed you will have to cut out 2 parts of the main fabric and sew them together. This is not always acceptable for the aesthetics of the finished product. Therefore, it is advisable to take care of the required fabric width in advance.

A lot depends on the choice of the initial cut pattern; try to choose the ideal one for your bed.
It’s easy to calculate the fabric for the top of the bedspread: you need to know the length, width, and add a few extra centimeters to them. The fabric consumption for a bedspread with a frill should be taken into account with regard to folds, if they need to be laid. If they are present, the length of the strip must be additionally multiplied by 1.5.

An ideal and precisely thought out pattern for a bedspread - all you have to do is enter your values.
With a fabric width of 2.8 m, most likely, 1 length of the product will be enough. In this case, the frills should fit into the remaining width of the fabric. If the fabric is 1.4 m, then it is necessary to lay 2 lengths of the main fabric and the total length of all sides with a frill. In this case, the fabric consumption is significant, and the quality of the bedspread will suffer due to additional seams.

For sewing bedspreads, choose the fabric that will be easier for you to work with during the sewing process.
We cut and sew
Having completed the preparation of the necessary materials, we proceed to the most important task - cutting out the bedspread for sewing. The selected material directly affects the complexity of subsequent actions. With light, slippery fabrics (silk, satin), extreme caution is needed when cutting and subsequent sewing of the product. Forming the stitch will present additional difficulties.

You can decorate your bedspread with a neat frill, which will always add elegance to the appearance of your bed.
ADVICE. The presence of a complex pattern on the fabric requires precise adjustment of the elements during the cutting and sewing process. Choosing a solid color material will make your work much easier.

Patchwork quilts are becoming more and more popular every year.
The best way to cut is to fold the fabric in half so that the length of the main fabric is half along the fold line. You can set the width in the same way. Then thoroughly level the fabric and pin it together. The cutting should be carried out exclusively on a flat surface, and do not allow cutting of materials in the air.

Even a quilted bedspread can look different depending on the pattern you choose.
The frill does not have to be one-piece. You can use the resulting leftover fabric. It is important that all typesetting strips are cut in the same direction (lengthwise or crosswise).

To create a patchwork bedspread, select pieces of fabric that match each other in color and texture.
If the bedspread requires the presence of lining fabric, a synthetic padding layer, they are cut out by analogy with the main parts. In the process of stitching, they are connected into a whole blanket. If there is a pattern on the fabric, it must also be taken into account when cutting.

Bright blankets for sleeping beds will always charge you with positive energy before bed.
Next it’s time to sew all the parts together. Using a sewing machine, we connect the base of the bedspread with the frill. To do this, place the parts with the wrong side up and place seams along the edges. Do not forget to add folds if they are provided for in the model. It is easy to sew a bedspread without unnecessary details. If there is a lining or insulation, all layers must be folded evenly together, then sewn.

A patchwork quilt is best created from not very bright pieces of fabric.
ADVICE. It is better to pre-clip additional parts with pins together with the main ones, or make hand basting seams.
If there is a stitch, you should first sew its seams, then sew the main elements. If you have no experience, it is better to sew the stitches by hand first.

For a children's bedspread, you need to choose not only a pleasant color, but also high-quality natural material.
Trial version
When you don’t have enough sewing experience, taking on a responsible job is always scary. Especially if the choice fell on complex fabrics or bedspread patterns. In this case, an excellent option would be to sew a trial version yourself.

Anyone can create a beautiful bedspread with their own hands, the main thing is to charge yourself with a lot of desire.
This is a great way to create a beautiful bedspread from simpler materials, practice making even seams, laying folds, stitching, and taking into account the pattern.
ADVICE. A good training option would be a patchwork-style bedspread. This technique requires painstaking work, but it provides invaluable experience.

A children's blanket complemented with accessories-toys in the same theme.
Finished products can be used in the country house or in a children’s room. The skills of creating a bedspread with your own hands will undoubtedly come in handy in the future. The question of how to sew a bedspread will no longer arise.

Sleeping beds can be complemented with bedspreads that match the aquatic color scheme with the bed linen.
Sewing a bedspread with your own hands is not such a difficult task. This will require a little time, effort, and skills. Accurate calculation and patience guarantee a beautiful and cozy bedspread.
You just want to wrap yourself up in a large, warm, cozy quilted blanket on a cool autumn or winter evening. Thanks to the stitch mode in modern sewing machines, anyone can now sew such a blanket with their own hands, without spending a lot of time on it, as before, when each stitch was done by hand. A master class on how to make a quilted bedspread quickly and easily with your own hands using the quilting technique with step-by-step photo accompaniment will tell you how to do this.
We sew a voluminous quilted bedspread with our own hands in a master class
To make a bedspread you will need:- Double-sided cotton fabric with a beautiful pattern 280 cm wide for the top of the bedspread
- Sintepon with a density above 150g/m2, thickness 3-4 mm
- Linen or cotton fabric for lining
- Fabric for piping
- Stitch template 23x23 cm
- Long ruler
- Chalk or fabric marker
- Scotch
- Threads, needle
Before starting work, all fabrics for the future bedspread must be washed in a washing machine on the mode in which it will be washed later, or steamed well with an iron. This is done in order to prevent shrinkage and distortion of the finished product.
Due to the large size of the bedspread, it is best to work on a clean floor, carefully laying the fabric around the perimeter.

1) For the upper part of the bedspread or, as it is otherwise called, the top, double-sided cotton fabric with a beautiful pattern of rope loops is used. It is better to take fabric for the top of sufficient width in order to eliminate seams and irregularities. A square for a top measuring 230x230 cm is cut out of the fabric, the edges of which are overlaid.

2) For the backing - the lining of the bedspread, take linen or cotton fabric 150 cm wide, from which a square slightly larger in size than the top, 240x240 cm, is assembled. Iron the seam allowances in opposite directions, overlay the edges of the backing.
3) To mark the square stitch of the bedspread, take a 23x23 cm template and a long wooden ruler. Using a marker or chalk, line the stitches on the wrong side of the fabric, starting from its edge. For more convenient work, the fabric is secured with tape so that it does not move or shrink during ruling.
4) After the entire surface of the fabric is covered with identical lined squares of 23x23 cm, the top is removed to the side.
5) Take linen fabric for the backing, lay it flat on the floor with the wrong side up and secure it with tape.
6) The padding polyester is laid on the backing fabric in sheets that are connected to each other with sparse, loose stitches.
7) A cotton top is placed on top of the laid synthetic padding, with the top lined. Be sure to make sure that the fabric lies flat, without folds or creases.

8) Using light threads and a needle, temporarily connect all parts of the bedspread; it is better to start stitches from the center, first in one direction and then in the other. In the photo, the red lines show the ruling and the future stitch, and the green lines show the temporary basting. The basting is done without knots so that when removing it, the structure of the fabric of the bedspread and the stitching are not disrupted.
The process of basting stitches is long and labor-intensive, but it is necessary to create an even machine stitch without creases or wrinkles. Instead of basting with a thread and a needle, you can use special bent pins for quilting; such pins do not move or move during the sewing process, which will not affect the quality of the stitch.

9) Machine stitching starts from the center to the edges of the blanket. To do this, the edges of the bedspread are folded towards the center, the bedspread folded in this way is placed along its entire length in an additional place next to the machine. First, horizontal lines are laid, then vertical ones, alternately filling the entire space of the product.
The stitch is laid exactly along the lined line, the left hand slightly stretches the fabric behind the sewing foot, and the right hand in front of the foot.
10) The sides of the bedspread are aligned using a ruler and a fabric marker, and the corners are aligned using a square. Then a line is sewn as close to these lines as possible. Excess fabric is cut off with scissors.
11) The edges are edged with a 3cm piping made of fun, nautical-inspired striped fabric. The edges of the allowances of strips of edging fabric 10 cm wide are ironed using a cardboard template prepared in advance.
The piping is sewn along the entire perimeter of the bedspread, the bedspread is completely ironed.
That's all, the marine-themed quilted bedspread is ready, you can cover your bed with it or wrap yourself up with pleasure on a cool evening.

Video on the topic of the article
We bring to your attention several video clips on the topic of how to make a quilted bedspread with your own hands. Enjoy watching!
A bedroom is not only a place for comfortable sleep, but also just a corner in which you can retire and collect your thoughts. The room should be cozy, stylish, elegant and special. A DIY bedspread will help create such an atmosphere. The large surface of the product will reflect all the creative potential of the hostess.
The right fabric texture for a bedspread will complement the design of the entire home. Today, many companies have presented a large range of home textiles in their catalogs. Their cost is quite high. But using photographs of models, you can sew a bedspread with your own hands. To make it, home craftswomen choose all kinds of execution techniques. With a sewing machine and ordinary craft tools, you can create a real masterpiece.
A sewn bedspread for a bedroom bed should be in harmony with the interior of the entire room. To do this, you need to choose fabrics whose shades will be combined with each other.
From all the variety, it is better to choose a fabric texture that will harmonize with the curtains. Then the textile ensemble will be complete. Let's look at a detailed description of the techniques for making a bedroom bedspread with your own hands.
Patchwork
Products made in patchwork style immediately transform the room. It creates a playful, cozy, positive atmosphere. Intricate patches sewn into a single composition are often used to decorate the beds of girls and boys. The creation process can be divided into stages:
- Design project ─ first you need to develop the design of the future bedspread from scraps. You can use ready-made options, or you can create your own project;
- Prepare the details ─ you need to be extremely careful and precise in the calculations and preparation of the parts. They can be square, diamond, rectangular or have other shapes, as well as plain or colored;
- Sewing the Pieces ─ This step of the job requires patience, pins and an iron. The parts are sewn strictly according to the presented sketch of the product;
- Iron the resulting front part of the bedspread;
- Sew the front side to insulation, fleece, synthetic padding, dense material or other selected fabric;
- Stitch the resulting double layer to the main bottom fabric;
- Final finishing ─ you can use edging or other finishing material.
Even a novice craftswoman can make a bedspread using the patchwork technique with her own hands. The main thing is the ability to use a sewing machine.

Cutting the shreds

Arrange the shreds in the desired sequence

Sew the patches


Fastening the layers

With puffs
The puffed bedspread is a luxurious product. It can only be sewn by an experienced needlewoman who is capable of performing delicate and painstaking work. Puffs are folds that are created using drawn lines on the fabric. Stitches are made in the designated places, which are then pulled together. The result is interesting solutions for folds in the material. Stages of work:
- Choice of material ─ a puffed bedspread looks chic made from satin, silk or other smooth, shiny fabrics. They drape easily, and the folds on the shiny material have a luxurious look;
- Choosing a puff pattern ─ from a large number of puffs, you need to choose “yours”;
- Calculation of material ─ to make a bedspread with puffs, you need to decide on the amount of material. To do this, take the size of the fabric (50x50 mm, 100x100 mm) and make puffs, filling the entire material with them. Then a repeat measurement is made and the reduction factor is calculated. It will be needed to determine the amount of fabric per bedspread;
- Prepare front and lining fabric;
- On the wrong side of the main fabric, apply a pattern of puffs with the direction of the stitches;
- Make stitches according to the intended patterns;
- Pull the puffs;
- Fold the main and lining fabric with the wrong sides inward, and stitch the outer edges;
- Decorate the edge of the bedspread with flounces, ruffles or ruffles.

Making the markings

Connecting the lines

We pull them together

Making a few zip ties

Finished work
Quilted
A quilted bedspread with padding polyester and lining material will decorate the room and suit any style. For sewing bedspreads, it is better to use satin or silk material. You need to be careful and attentive in your work. Stages of work:
- Decide on the size of the bedspread ─ to do this, measure the width, length of the bed, as well as the height of the frill, taking into account the increases;
- Determine the size of the cells or diamonds. You need to remember ─ the smaller the pattern, the more fabric will be used for the product. Therefore, you need to make an extra increase in material on all sides of the bedspread by 5-10 cm. Excess allowances can always be cut to the desired size of the product;
- Use running stitches to follow all the intended lines, since the chalk will be erased, and it is not advisable to use a pencil for expensive and delicate fabrics;
- Place the stitch next to the basting seams;
- Finishing seams when crossing should not form an “overflow” of material. Stitch only once. For example, satin does not tolerate repeated stitching, since needle punctures will be visible on the material after the stitching is unraveled;
- Quilting the bedspread ─ on the assembled and quilted product, the final marking of the bedspread is performed, which depends on the processing of the cuts. For example, the edge can be decorated with a hem seam, bias tape, ruffles or folds;
- Cut off the strip for the frill. It is sewn separately in the form of a skirt. If the trim has folds, then you need to calculate their depth and the length of the entire frill. For example, if the length of the frill is 8 m 40 cm, then to the depth of the folds, with a width of 3 cm, you need to add 2 m 80 cm. Then sew it to the bedspread. The cut can be overlocked or processed with bias tape;
- With a frill, the product will have a finished look.
A sewing product can be ordered from a studio, but a hand-made bedspread will become the pride of every needlewoman.

Making a diagram

Spandex ready


We fasten the stitch


Cover with padding polyester

After - organza


Quilting with threads

Knitting needles
Every housewife wants her sleeping place to be beautiful and bring comfort and warmth. A knitted blanket that can be knitted or crocheted meets these requirements. The product can be made as a continuous fabric or from separate fragments, which are then combined into a single composition.
- Solid fabric ─ to make a bedspread, you can use woolen or synthetic threads of different colors. You need to start knitting with a sample that will help you make the correct calculation of the number of loops and rows for the bedspread. You just need to decide on a knitting pattern. To do this, you need to cast on 40-50 loops and knit at least 15 cm. Then apply a ruler horizontally and count how many loops are in 10 cm and how many are in 1 cm. For example, if the width of the bed is 190 cm, and in the sample the calculation shows that in 1 cm 2.5 loops, then you need to cast on 475 loops. The number of rows depends on the length of the bed. Then apply a ruler vertically and count the rows. It will become clear how many loops need to be cast on the width of the bed;
- Handkerchief square ─ the size of the square depends on the desire of the craftswoman. First you need to complete the sample, calculate the loops and rows. Decide on the size of the square.
Garter stitch knitting pattern:
- Cast on 35 loops;
- 1st row: knit facial loops;
- 2nd row: knit purl loops;
- Row 3: repeat pattern from row 1.
The square will be 12x12 cm. If the bed measures 190x200 cm, then for the bedspread you will need to knit 272 squares. A square knitted in garter stitch is the simplest type of knitting. When you combine squares knitted with knitting needles of different colors into a single fabric, you get a beautiful product.

We make stripes in any pattern

Sew the stripes

Finished work


Crochet
Crochet patterns, of which there are many on the information field, will help you decide on the choice of product. Craftswomen often use the fairy-tale “grandmother’s square” technique. Work begins with a set of chain loops (CH) from the center in a circle, and then, using lifting loops, alternate double crochets (SC) and VP. Simple motifs make the product very picturesque.
Knitting pattern for the fabulous “granny square”:
- Cast on 4 VPs, connect into a ring using a half-column;
- Make 3 lifting VPs, 2 SSNs, dial 3 VPs;
- Repeat “3 dc + 3 ch” 3 times;
- At the beginning of the row, find the 3rd loop and make a connecting loop in it;
- First row ─ repeat points 2-4;
- Cast on 3 VP lifts (this is done at the beginning of each row);
- Decide on the angle of the square. Perform a cycle ─ 3 dc + 3 ch + 3 dc;
- Side of the square ─ 3 dc under the VP of the bottom row + 2 VP.
The following rows are knitted according to this pattern. Dcs are made into the hole between the dc loops of the previous row. The square is knitted to the desired size. After finishing knitting, the edges of the squares can be tied with a contrasting thread. The number of motifs depends on the size of the product. There are several ways to connect motifs. The simplest stitch is considered to be the “loop stitch”.

How much fabric do you need?
Today, the textile industry produces a wide range of fabrics for bedspreads. They have different textures, widths, and thread weave densities.
Of the variety, the most popular types can be identified:
- Fur ─ bedspreads are made from natural and artificial material. Models are not suitable for every interior. They require special care. Sewing a bedspread video can be viewed on the Internet;
- Wool ─ made from natural wool, the bedspread is thin and warm;
- Silk ─ luxurious and airy bedspreads suitable for classic, oriental, modern styles;
- Cotton ─ natural fabric is more often used for children's bedrooms;
- Jacquard ─ fabric is used for bedrooms with plain walls. The dense weave of the threads makes the product dense and very beautiful;
- Velvet ─ the material can be smooth or have a printed pattern. Velvet products always have a luxurious and presentable appearance;
- Satin ─ a product made from this fabric will add brightness and personality to the bedroom.
Fabric consumption is determined not only by the size of the bed, but also by the technique of making the product and its finishing.
For quilting you will need:
- Atlas;
- Non-woven fabric;
- Bottom panel;
- Lining.
Let's say a standard double bed has a width of 136 cm. With a fabric width of 150 cm, you will need one length of fabric, plus an increase of 3-5 cm for processing sections. Stitch flapping may occur during stitching. And the volume of non-woven fabric requires extra centimeters. In total, a quilted bedspread will need 215 cm on the front side. The same size of fabric needs to be prepared for the bottom panel and lining. For a frill 40 cm wide, you need to multiply the perimeter of the bedspread by 2.5. Let's get the length of the frill.
For a patchwork bedspread measuring 220x240 cm, with a square size of 13x13 cm, you will need:
- 220:13=16.9 (17 pcs) ─ in width;
- 240:13=18.4 (19 pcs) ─ in length.
Total, 17x19=323 square patches. If the width of the fabric is 110 cm, then there are 63 squares per 1 m² of fabric. When cutting, it is important not to forget to set aside seam allowances of 1-1.5 cm. For internal filling, measure interlining and internal material of the same size, as well as lining fabric. If curtain fabrics are used for the base of a puffed bedspread, then their consumption does not change much. To sew a bedspread 220x240 cm you will need the following fabrics:
- 220x2.5=550 cm;
- 240x2.5=600 cm.

Required tools and equipment
Standard set of tools and equipment:
- Sewing machine;
- Overlock;
- Tape measure;
- Needles;
- Thimble;
- Sewing pins;
- Scissors;
- Iron;
- Ironing board;
- Threads;
- Chalk or textile felt-tip pen.
Some fabrics don't like re-stitching or unraveling. The success of the work depends on the correct selection of machine and hand needles. For sewing bedspreads use from No. 75 to No. 110. The needle number depends on the structure and density of the material. The bedspread looks very neat if the cuts are processed with an overlocker. It can be household and industrial. Processing can be performed on any fabrics ─ satin, silk, tapestry, jacquard, wool, as well as knitted material. If you don’t have an overlocker, you can use the hem foot or hem foot that comes with your sewing machine. Here, perhaps, is the entire list of what you will need to sew the product.
Fabric with a printed pattern will add complexity to the work. It is better to use plain material.

Master Class
How to sew a bedspread with your own hands, for example, a quilted one?
You can order the sewing of a quilted bedspread from a studio, but the cost of the work will be very high if you also count all the material that will be needed for the product. Therefore, many housewives are not afraid to do this work at home. The main thing is to know how to use a sewing machine.
Pattern drawing
Before starting work, you need to take measurements of the bed and decide on the size of the bedspread. In our version, the bed has a headboard, so the frill will go on three sides:
- Bed appearance;
- Bedspread drawing;
- Bedspread pattern.

Uncover
Before starting work, you need to decide what the quilted bedspread will be like. The master class presented in this section should help with choosing a style. To make the product we use taffeta. Additionally, you need to stock up on padding polyester and lining fabric. For the bottom layer, choose inexpensive fabric. Taffeta is a slippery material, so you need to be careful when working. The fabric is produced in widths from 1.5 m to 2.8 m. If the bed has a width of 1.6 m, then it is better to take fabric 2.8 m wide, the rest will be used for frills. The length of the frills is (2.0 + 2.0 + 1.6) x 1.5 = 8.4 m. Cutting should be done on a flat plane. The size of the padding polyester and lining fabric is equal to the front side of the bedspread.

Sewing
Before sewing a bedspread, you need to decide on a pattern that will decorate the visible surface of the product. We sew the base according to the patterns. To do this, duplicate the front fabric with thin padding polyester or non-woven fabric and sew on the base. To get a stitch pattern like in the photo you need:
- Take a sheet of paper and make a circle Ø15 cm;
- Fold the circle in half, and then in half again. You will get 4 parts (sectors);
- Expand the circle. We see that it has 4 sectors (1, 2, 3, 4);
- At the folds we draw lines with a pencil;
- We draw a line (diameter) through the central corners of sectors 1 and 3 so that it divides the sectors exactly in half;
- In sector 1, from the point of intersection of the line (diameter) and the outer point of the circle, draw inward (towards the center of the circle) R=5 cm. (R ─ radius);
- In sector 3 (opposite sector 1) we do the same;
- We cut out (concave + convex + concave + convex) parts of the pattern and get a sample of our future stitch;
- We fold all three panels ─ front, main and lining;
- We pin them together with sewing pins and baste the product blanks;
- We painstakingly transfer the stitch pattern to the front part of the bedspread;
- There will be 146 motifs on the bedspread;
- We perform the stitch;
- Align the cuts of the product;
- Baste and sew on the frill;
- We process the frill sections with an overlocker or bias tape.

Photo
Housewives who love order and comfort always show interest in beautiful and elegant bedspreads. The price of such magnificence ranges from $300 and above. Such an assessment of beauty is not always affordable for ordinary women. But I really want to decorate my favorite bed! A warm, chic blanket for sofas or beds costs a lot, but you can make a bedspread with your own hands, which will be much cheaper.
Example 1. Pattern for crocheting a bedspread.
Using your own ideas and desires, you can create a luxurious bedspread with or without frills for your favorite bed.

Example 2. Pattern for crocheting a bedspread.
Practical tips will help you understand the intricacies of innovation so that you can sew a chic bedspread for your bed with your own hands, which will become a real decoration of your favorite bedroom. With the help of some recommendations, you can create the style of your own interior, add a few refreshing notes to the design, fill your home with comfort or elegantly decorate your bed. Here are some of them:
- The fabric for the bedspread should be as durable as possible, with a decorative and protective function. The dense structure of the material will help to avoid instant abrasion and please the eye with its excellent appearance longer.
- If possible, you can purchase fabric made of silk or fur. This will be the most chic solution for the future bedspread.
- The bedspread is chosen according to the individual preferences of the hostess or the stylistic characteristics of the interior.
Cotton is a practical, allergy-free fabric. Silk is a wear-resistant material with an exquisite shine. Sometimes preference is given to synthetic fabric. It is considered more economical and practical, but nevertheless it has a number of disadvantages. These include the fact that synthetic material can cause allergies in some people, and it is also not very pleasant to touch.
The choice of material must be based on practical considerations.
For example: the fabric should not become dirty quickly. The bedspread is used daily; dust accumulation is unacceptable for bedrooms.
Step-by-step stages of work
Before you sew a bedspread yourself, you need to carefully, step by step, think through each action.

Scheme for determining the size of the bedspread.
Step one is to take measurements. A Euro-size blanket should have approximately the same dimensions as a 1.5 size sleeping blanket. Measurements are taken from the bed, adding up to 5 cm on both sides. It is easier to find out the length than the width.
The second step is cutting. You must initially cut out 3 pieces of fabric of the same size. One of them is the lining, the second is the front part, and the third is needed for the lining. The color of the lining is chosen completely randomly, at will. The tone of the gasket can be a contrasting color or match the main pattern. The main component of the gasket is padding polyester. Without it, the padding will not be dense enough, similar to a thin bed cover.
The third step is sizing. Place the lining of the fabric on a flat surface (you can use it on a bed) and secure the edges with weights. Next, put padding polyester on top of this part. It is better to do the work on the bed because it is easier to imagine what the base of the bedspread will look like.
Then you need to secure the lining part of the fabric with padding polyester. The third part of the fabric of the future bedspread should be laid out on top of equal two parts. All three equal pieces - the lining, the front part and the lining of the bedspread, should be secured at the edges with pins. You need to sweep very carefully, without pulling on the fabric. This is done so that the connected bases of all three parts do not separate. Several even lines should be laid along the center and across.
The beautiful bedspread is almost ready, just a few steps left. The fourth step in the work is the seam. It is necessary to step back 3 cm from the edge, sew the bedspread material with a simple ordinary stitch on both sides, carefully, without stretching the material. Thus, you will end up with an unfinished bedspread, which is not yet suitable for a bed due to the raw edges. Next, you should carefully stitch.

Pattern for quilting a bedspread.
Basting stitches must be removed in advance. This is done so that they do not get tangled under the hands when sewing with a needle. Then, with contrasting threads, you need to manually quilt everything in accordance with the future pattern. If the work is being done for the first time, then you should not get carried away with intricate, complex patterns; you can get by with such a simple pattern as, for example, a rhombus or an oval.
Sometimes for needlewomen who are working with a needle for the first time, stitching seems like an ordinary process. But during work, many nuances arise, which are then very difficult to correct. Inexperienced needlewomen often pull the stitches of the material tightly together. Having quilted the blanket by hand, you need to start machine stitching. An average machine sewing speed will help avoid accidental deformation of the fabric. Since at the beginning of the work an allowance of 5 cm was left, you can be sure that the bedspread will not lose significant volume, but may only shrink slightly. This is why the allowance was indented.
The fifth step is the final work process, which consists of finishing the edges. All raw edges are trimmed with scissors. But it is imperative to make a protrusion 1 cm from the laid line. It is necessary to double-check the size of the bedspread relative to the size of the bed. Using bias tape, you can step back 1 cm to align all the edges and re-stitch. Next, the edge of the bedspread must be placed on the wrong side and overcast once more. During the final work, it is necessary to bend the edges so that they are completely hidden.
Thus, the resulting edging was made from bias tape. You can sew it on a machine only if the offsets are not visible.
Attaching a frill to a bedspread

Pattern for sewing a bedspread with your own hands.
There is nothing complicated in the process of this work, since the frill serves as an additional element for the beauty and grace of the bedspread. A novice needlewoman who dreams of creating something stunning and magnificent can sew on a frill. The frill is sewn onto the bedspread from the wrong side. The blanket is placed on the front side, leaving an allowance of 1 cm. To do this, you need to prepare an additional device in advance (thick cardboard 5 cm). This is necessary in order not to lose track of the size of the frill when sewing, that is, to control the width of the ruffle. Using an additional device, it is necessary to lay the folds of the frill.
You can use an ordinary ruler instead of an additional device. Everyone performs this procedure in the way that is most convenient for them. When working, full control over the width of the ruffle is necessary, and it is necessary to lay the stitch to the width of the overcasting seam. After the frill is sewn, you need to wrap its upper part onto the front side of the bedspread. Then, gradually straightening the folds, you should apply another stitch with a machine so that the cut of the bedspread is stitched between these two stitches. There is one obligatory condition - the fabric for the future bedspread should not fray, that is, it should be as dense as possible, otherwise such a seam for a frill will not be suitable.
As a result of the work done, you will get a magnificent, elegant bedspread on both sides. Beginning needlewomen can sew their first blanket - a children's one. Since the work process is as simple as possible and does not require special skills, sewing it is quick. You can choose fabric for a children's bedspread with characters from your baby's favorite cartoons. Such beauty will give children an inexhaustible good mood!
Pillows for a new bedspread
Decorative pillows for bedspreads are always a good choice, complementing the interior of the room. They are easier to sew than a bedspread. These pillows can be used as an additional element to a sofa or for a spacious bed.
Decorative pillows are especially needed in children's rooms. Different shapes are used for pillows: oval, diamond, circle, trapezoid, etc. Children's decorative pillows can be decorated with bows, rhinestones, and buttons. Such pillows will make a child's room unique, giving it an atmosphere of warmth and comfort.