How to make a stool with your own hands, product drawings and progress of work on manufacturing a small and compact model.
Dimensions:
Height – 312 (mm)
seat size – 300 x 300 (mm)
The article outlines the principle of constructing a stool, the overall dimensions of which can vary depending on the methods of its use and application. The seating area can be made from solid laminated wood. Lengthen the legs.
When designing and manufacturing the product we will be guided by the following:
Minimum details
ease of manufacture and assembly
structural strength during operation
reliability over a long service life
attractive appearance
Specification of the dimensions of the material used (length, width, thickness):
Side wall 219 x 50 x 22 (mm)
front wall 268 x 50 x 22 (mm)
leg 300 x 40 x 40 (mm)

Seat bar 300 x 45 x 12 (mm)
How to make a stool with your own hands, order of work:
1.
Make dry wood parts according to specifications, strictly observing their dimensions, parallelism and perpendicularity of edges.
2.
Mark the center of the holes for the fasteners.
Reference.
We will use the following as fasteners:
(confirmed) – for attaching the legs to the front and side slats
– for attaching seat slats to the front and side slats
3.
Drill holes in the parts to the required depth, while strictly ensuring that the centers of the holes in the parts to be joined are on the same center line, perpendicular to the edges.
4.
Connect the legs (3) with the front (1) and side (2) strips with euroscrews.

5. Attach the seat strips (4) to the assembled frame using wood screws.

6.
Finish the product.
7.
Apply a protective decorative coating to the product.
8.
Close the Euroscrews with plastic plugs. Match the color of the plugs as closely as possible to the color of the decorative coating of the product.
9.
If necessary, install your trademark or brand on the product.

The stool is done. The design requirements have been met. You can place a bowl on it and send it under
As you know, the kitchen is the “heart” of the house, its soul. And a place that gathers all the inhabitants into a friendly company. That is why it is so important to equip the dining area with special comfort. And comfortable stools placed around the table can help with this.
Despite the fact that a stool is taken for granted, any housewife will say that good furniture gives the kitchen a special coziness, warmth and good mood to the inhabitants of the house. Therefore, the choice of chairs and stools should be approached very responsibly, taking into account the general style of the kitchen interior, color tones, and even furniture for the kitchen corner.
Modern technologies can significantly reduce the negative impact of using objects made from such “fashionable” polymer materials today (they are lighter, more fun to look at, and cheaper in cost), but no one has canceled good old wood, and comparisons with other materials unthinkable. And all because wooden furniture is environmentally friendly building material.
Another advantage of wooden furniture is that it is high quality and has a long service life. And no matter what the manufacturers of fashionable “eco-plastic” say that it is “no worse”, wood will always be in price (of course, if it is not chipboard or MDF sheets, but natural wood with antiseptic impregnations).
Third quality - impact resistance, resistance to mechanical damage(scratches, small impacts, chips). Of course, this does not mean that furniture made of natural solid wood, for example, can be hit with a hammer and nothing will happen to it. But the likelihood of noticeable deformations on the surface is quite small when compared with the same plastic furniture.
Carved wooden stools (photo)
Purchased wooden stools
pros
- The product is completely ready for use. This means that if you don’t want to bother with making seats yourself, wasting materials and your precious time, then you can buy wooden stools for the kitchen at any furniture store. They also often hold various promotions, sales, discounts, etc.
- You can also get acquainted with the assortment through catalogs of online stores - today this is very convenient, since it will immediately give you guidance both financially and in terms of delivery, and besides, almost all issues can be resolved literally without leaving home. And you can also order furniture online by filling out the required order form.
- Alternatively, you can purchase a ready-made classic stool of the simplest design and decorate it to match the overall interior of the kitchen.
Minuses
- Sometimes the product posted on the website does not match the one delivered by the delivery service. There may be discrepancies in color shades, sizes and even material (for example, instead of aspen they bring pine, instead of oak - birch, etc.). In this case, delivery, as a rule, is paid and the costs for it are not reimbursed by the manufacturer in case of refusal of purchase. Therefore, it is advisable to check the product yourself.
- As for sales, not everything is so smooth here either - often such promotions relate to furniture that has already gone out of fashion, or is a stale product. Although stools as a piece of furniture are always relevant, their design can also change and even go out of fashion. But a discount on a product most often occurs when the product comes with any defects. Therefore, before purchasing a “discounted product”, you should think about it: do you need a defective seat in the kitchen?
Creative wooden stools for the kitchen (photo)

- stool sizes— it is advisable to select seats with dimensions that will allow you to fit all the stools under the table. The most ideal size is 300-400 mm wide, 290-350 mm deep (quadrangular seats), from 300 mm in diameter for round seats. The height can vary from 400 to 500 mm.
- table shape– this must be taken into account without fail. Agree, a rectangular table is unlikely to look good against the background of round stools.
- seat type– soft or hard. Here the “model” options can be very different - who will like what. Someone selects a hard seat, changes the soft bedding every month and enjoys regularly updating the interior with minimal financial costs. But someone wants constant comfort - so the choice is in favor of seats with soft upholstery.
- upholstery type– as a rule, washable upholstery is selected (leatherette, eco-leather, fabric upholstery with soft washable pile).
If you want to buy stools with a depth of 350 mm or more, you will have to settle only on “soft” options, and all because such models do not cause discomfort when sitting at the table (this especially applies to rectangular stools) and do not “cut” into the skin.
Prices for wooden stools start from 450 rubles per piece - such price fluctuations depend on the type of wood, design, upholstery, manufacturer, type of construction and even decor.
DIY wooden stools
pros
Your own is always the best, since it is produced “for yourself”. The advantage of hand-made wooden stools is obvious: the result is a product of the “right” size, with a convenient and practical design and the simplest design. In addition, less money is spent (well, perhaps on materials for production), there is the possibility of decoration and wide scope for creativity.
You can also paint the seat or paint it a single color according to your own taste. And most importantly, such seats will always fit into any kitchen interior, since they will be manufactured “exclusively”. And you can choose the upholstery yourself, soft or simple, to match the curtains and overall kitchen furniture.
The price of wooden stools made by yourself, as a rule, is significantly lower than the market price.
Classic solid wood stool

Minuses
The disadvantage of producing wooden stools is the significant time spent on their production. This statement is more suitable for those who have practically no free time. And also for those who are not used to handling a hammer and nails. However, today in construction departments you can find anything you want - lumber, carpentry tools, and means for finishing/decorating finished stools. And following the instructions for making “seats” yourself, you can quickly learn how to make wooden stools for the kitchen.
Drawings of stools
How to make a stool from wood? Since making a classic stool yourself comes down to several stages, let’s look at each of them in general terms (using visual examples of drawings of wooden stools).
Scheme 1. On straight legs
 Material: bars measuring 60x60x400 mm - for legs (4 pcs), bars with spikes (drawbars) measuring 25x60x260 mm (4 pcs), seat - sheet of plywood measuring 300x300x10 mm (1 pc). For soft upholstery, you will need a piece of foam rubber the same size as the seat, and finishing fabric.
Tools: pencil with ruler, jigsaw, wood saw, glue, construction stapler.
The drawers are made as follows: distances of 30 mm are measured at both ends for the tenons, then the ends are filed so that the height of one tenon is 50 mm. The drawers are ready (these are the so-called connecting stiffeners for the stool).
In the leg-bars, grooves should be cut to install drawers with tenons in them (the grooves are first marked with a pencil), then the drawers and legs are fastened together. The length of one groove should be 50 mm, depth – up to 30 mm, width – 10-13 mm. The distances from the edge of the groove to the edge of the leg are 20 mm on top, 10 mm on the sides.
After preparing all the parts, their assembly begins. Before planting the drawers in the grooves, it is necessary to coat both the tenons and the grooves with PVA glue - for better bonding, and then connect tightly. For greater strength, you can secure the parts with screws. In this sequence, all the legs of the stool are connected to each other.
The frame is ready, now all that remains is to put the seat on top and secure it. A sheet of plywood is mounted on self-tapping screws.
Next comes the finishing touch - you can simply coat it with a special wood varnish in several layers, or you can paint it with water-based acrylic paint. If you want to upholster the seat with fabric or leatherette, then before fastening the plywood sheet is first upholstered, the upholstery material is attached with a stapler or glue, and then placed on the frame.
This is the simplest scheme for making a stool yourself from wooden blocks and plywood.
Scheme 2. On bending legs
The design principle is the same, with a difference in the shape of the legs. Naturally, such legs are not bent, but cut out of blocks with a jigsaw. You can shape the legs of the stool by using a stencil made of thick cardboard.
Wooden stools with curly legs in the interior (photo)

Scheme 3. From thick sheets of plywood
 This stool is notable for the fact that it is a completely prefabricated structure. First, templates are made on a sheet of thick cardboard (you can take whatman paper in A1 format), with exact dimensions applied on a scale of 1:1. Then the templates are cut out with scissors, laid on plywood (the thickness of the plywood is taken according to the principle “the thicker, the more reliable”, but we should not forget about the complexity of processing the sheets!), and outlined with a pencil.
After transferring the markings, parts of the prefabricated structure are cut out of plywood sheets, which are then assembled like a children's construction set. It's all pretty easy!
Once assembly is complete, file the ends of the legs and sand the seat again.
Decorating stools for the kitchen
The stools are already ready, but there is no finishing? Here you can play out to your heart's content, giving free rein to your imagination! You can paint the seats with legs in bright colorful colors (we use only water-based acrylic paints), or you can varnish them - such stools will look no worse than “painted” ones. You can sew original ones to match the overall style of the room.
You can develop your imagination even further and apply designs using stencils (these are sold in hardware stores and furniture decorating departments). Or you can cover the stools with fabric or wallpaper - if you have “unused excess material” left. The main thing here is imagination, inspiration and taste, so that the result pleases the owners, and such decor is in harmony with the overall interior of your kitchen!
Master class on decorating a wooden stool from Ikea (video):
A stool is one of the simplest types of furniture products. No matter what changes our life undergoes, it remains unchanged. Only the materials from which it is made change. In Soviet times, making a stool with your own hands was one of the first tasks in labor lessons. Not only boys knew carpentry. Sometimes representatives of the fair sex had to comprehend the basics of adult life and learn how to make a stool with their own hands. Modern furniture bears little resemblance to its counterparts from 50 years ago. Wooden stools of that time were rough, but durable. They fit perfectly into the interior of the kitchen, as well as other rooms. Nowadays there is a rich assortment of different types of furniture in stores, but there are also amateurs who want to learn how to make a stool with their own hands. And in our time of abundance of building materials, this will not be difficult at all.

The main parts of a stool are the seat and legs. The legs are tied at the top with drawers, and at the bottom with leggings. Having become familiar with the terms, you can start drawing. First, you need to decide on the sizes. When making a stool, it is better to start from old, but reliable models that can be found in every home. Having measured the height and other parameters, you can begin to develop a diagram. If you don’t have a sample, then for an adult stool the size of the seat side will be 300-450mm, for a child’s stool - 250-280mm. Homemade stools should be even more comfortable than store-bought ones. If only because you can choose the height according to yourself. Usually the size for adults is 420-480mm, for children - 260-280mm. You must have drawings of stools with you, whether it is a diagram from the Internet or drawn up by you. After all, eliminating defects on paper is much easier than redoing the whole job.

Materials and tools
Making a stool will require high-quality materials that have stood the test of time. In the first place, of course, is wood. Wooden stools rank first in terms of convenience and second after forged ones in terms of durability. The wood should be dried in room conditions at 20-30 degrees; you should not use kiln-dried wood, as the possibility of cracking cannot be ruled out. After air drying, the material needs to be dried at home at room temperature for about a month. It is best to take hardwood: maple, birch, beech, wenge, hemlock, mahogany. Or make legs from them, which carry the main load, and the seat from pine, spruce, MDF, chipboard or plywood.

Chipboard is one of the cheapest, but unreliable materials. It has advantages, such as moisture resistance. But when making a stool, strength is much more important, and chipboard has insufficient strength, and it is also too fragile for furniture, although there are a couple of options in which the pressure on chipboard can be reduced. But the constant release of formaldehyde resins, which make this material unsafe, unfortunately, cannot be completely eliminated.
MDF is an environmentally friendly material and quite durable. However, when making kitchen furniture with your own hands, it is better to use it in combination with hardwood, especially in the supports, that is, in fact, it is used only for the seat, or lid, as it is called in some sources.
A good substitute for wood is plywood, but then you will have to do a little magic with the design. Kitchen stools made from plywood are made from 3 parts, or from 4, so-called box-shaped. This design is now very common, especially in the furniture industry. Although it is perfect for making a stool with your own hands.

Tools are selected depending on the materials. To make wooden stools, we will need:
- roulette
- self-tapping screws
- screwdriver
- square
- jigsaw
- chisel
- emery
- wood glue

How to make a classic stool yourself
In order to make a wooden stool with your own hands, we will need material (boards, bars) and tools. If you don’t have a jigsaw and there’s no way to buy one, then we do this: we buy an inexpensive frame hacksaw for metal and direct its teeth toward you when working. So, the scheme is ready, the materials have been purchased and, if necessary, dried, the tools have been prepared - you can start. Before starting work, you can make so-called “patterns” out of paper, that is, life-size parts of the future stool cut out of paper. You don’t have to do this, whatever is more convenient for you.

Click to enlarge
We start with the legs, they will have a square section of 50x50mm. Let's cut off 4 identical parts from the block, let's say 450mm long. Then assemble a seat from a single piece or from two halves, ours is 380x380, the thickness of the board is 20 mm. Next, we cut out 4 drawers to connect the legs of the stool and 4 legs. We will also need four bars for an additional connection between the drawers and the seat. The structure is assembled according to the principle: tenon and groove, tenons are cut along the edges of the drawers, and grooves are cut on the legs of the future stool. The length of the tenon and the depth of the groove are approximately 20-25mm. We do the same with the legs, which will later be attached to the legs. You can mark the details ahead of time for clarity.
We sand it before the parts are assembled; this is both convenient and safe. We assemble all the parts at the beginning without glue, adjusting and, if necessary, filing them. Then we coat the parts one by one with glue and assemble them. We fasten the bars between the drawers with self-tapping screws to the bottom of the seat “tightly”. To do this, we will take care of the length of the fasteners in advance. I would like to say a few words about the glue that we will use to coat the grooves.
It is better to take special glue, carpentry glue. This glue has proven itself for many years. If you don’t have it, then you can take PVA, but not the stationery type for paper, but the one that is suitable for wood.
Other types
There are stools that are much easier to make than classic ones. A very common option now is a stool, consisting of four parts: a seat, two wide legs and a reinforcing crossbar (or jumper). This option should not be difficult, especially in assembly. Wood, thick plywood, and laminated chipboard are suitable for it. This structure is secured with furniture screws and glue for additional fixation. This option is very simple, but there is one subtlety: the reinforcing crossbar should be in the shape of a trapezoid with a 5mm bevel. This is necessary to make the structure more stable.

You can try your hand at making a lightweight stool. In this version, there are no side drawers and the legs are attached directly to the grooves of the seat. For this purpose, the seat cover is made of thick material. The grooves are made directly into the seat or bars are attached to it. In this case, the legs are made thicker than usual. Of course, such a stool will take much less time than a regular one.

Another type of stool is a seat and two legs arranged crosswise at an angle of 90 degrees. In this version there are no additional parts, where the design itself consists of 4 parts. In this case, we can again use wood, plywood, and pressed boards. If we settle on a wooden model, then we do the final touch after final assembly. We carefully sand the stool again, and then treat it as desired with stain, varnish or paint.
Decorating your stool
Your stool can be decorated depending on the interior items where it will be located. You can apply a design on the surface of the seat with spray paint using a stencil. Then coat the surface with varnish. Or make a bold design move and decorate a retro stool using decoupage. It’s labor-intensive, but effective, and you can involve the whole family in this interesting activity. To do this, we will need PVA stationery glue, beautiful napkins and varnish, preferably acrylic. The result will tell not only about your accuracy, but also reveal your taste. In the end, you can decorate just the seat by laying thin foam for softness. Then decorate it with beautiful fabric and decorate it with accessories to your taste. As they say, everything is in your hands!
Everyone knows the expression: “simple as a stool.” There is a fair amount of truth in it. This piece of furniture in its classic design is laconic and strict.
It is difficult to do without a stool in the kitchen and workshop, in the garage and in the bathhouse. It is needed wherever cramped conditions do not allow for larger furniture to be placed. For a home craftsman, making such a thing is the best way to gain practical skills in carpentry.
In this article we will introduce you to the varieties of wooden stools and tell you about the features of making them yourself. We hope that after this you will be able to confidently get to work and please your family with this useful piece of furniture.
Before you make a stool with your own hands, you should learn more about what carpentry masters in this area have come up with. First, let's study the sketch of a simple product and remember the names of the main parts. This will help us speak the same language using common terms.

So, a classic stool consists of a seat and four legs. The bars of the upper belt serve as a support for the seat and are called tsarg. The lower stiffening belt connecting the legs also consists of four bars called pro-legs. Through experience, the craftsmen established the optimal dimensions: height 50 cm, seat width 45 cm.
Stools made of logs, saw cuts and branches
By abandoning the legs, the seat can be made from an ordinary log. By sawing it into several logs and equipping each with a soft pad, we will get an original set for a country holiday.

The disadvantage of this solution is obvious - heavy weight, which creates inconvenience when carrying.
Here's what you can do by combining wooden legs with a massive seat made from a rounded piece of log. This unusual stool claims to be a designer find.

There are no drawers or legs here. The rigidity of the structure is ensured by a massive seat, into which four legs are embedded at 1/3 of its height.
Anyone who is good with a chainsaw can create an original piece of furniture from a log. To do this, you need to make three neat side cuts in a thick block of wood to form the legs. Having made precise markings on the scraps of one trunk, you can cut them out into a set of two stools, nested one inside the other.

Continuing the “forest theme”, let’s see what can be built from the material lying under our feet. A beautiful product can be made from thick branches, freed from bark and polished. This design has one original detail - a drawer for household items located under the seat. The lid is assembled from planed boards mounted on wooden tenons and glue.

This piece of furniture will fit perfectly into a rustic interior style, which is characterized by massive wooden beams, stairs and tables. But it is unlikely to take root in an ordinary kitchen.
Cutting a log makes a ready-made seat for a stool. By cutting three legs from thick branches into it, we get a durable and attractive structure.

Hemp and forks of trunks can be used as bases for the manufacture of original products. Sanded and topped with thick log cuts, they fit perfectly into the interior of a log cabin.

Traditional simple stools
Timeless classics live not only in the facades of buildings. Time-tested solutions are also preserved in the designs of stools. Adding smooth lines to their appearance eliminates boring angularity.
In the photo below we see the classic version. Thanks to the rounded drawers and legs, it looks quite decent. The milled grooves on the legs also improve its appearance.

Simplicity has its own charm. Designers successfully play with this quality, creating deliberately rough, brutal products. Artificially aging furniture is not an easy task. The author had to work a lot on the product, the photo of which we see below.

The category of classic “stool design” includes designs with drawers under the seat. To do this, use wide side frames and hinged lids.

Sophistication and originality
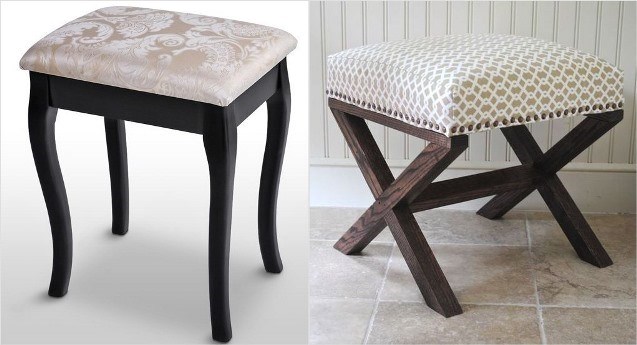
Not everyone likes the hard seat and angular shape of the stool. For fans of aesthetics and comfort, craftsmen offer elegant products with curved legs and soft upholstery.
It is difficult for a beginner to make bent curly legs. Without compromising their beauty, they can be replaced with two pairs of crossed bars connected by a crossbar. But you shouldn’t give up soft foam upholstery.
Let's ask ourselves the question: what is needed to assemble a homemade wooden stool? Four thick boards for the seat, legs and crossbar. By decorating them with carvings, we get an exquisite and high-quality product. You can use it with pleasure at home, and on occasion, make it an exhibit of an exhibition of folk crafts.

When planning to make your first “masterpiece”, do not forget about using firing, stain and varnish for decoration. Even the simplest piece of furniture acquires a noble gloss after finishing with contrast tinting.

In addition to natural wood, stools can be made from chipboard and thick plywood. This solution reduces their weight without losing strength. In the photo below we see an interesting plywood structure. Slotted holes in the seat and legs give it beauty and delicacy.

Square, round and oval seats are yesterday's carpentry art. Today, original solutions are in fashion. From these you can assemble a bench of any length and configuration. Invite your friends to visit and show them this miracle. Among them, there will probably be those who want to play with an unusual furniture “constructor”.

Bar stools
Anyone who believes that a stool must necessarily be low and nondescript is mistaken. Designers successfully prove the opposite. A little imagination and a familiar piece of furniture becomes a “fashionable thing” in the avant-garde style.

The high stool captured in the photo is a bar option. They can decorate the interior of a cafe and the decor of your own apartment. Its lower brother, made in the same style, will take its rightful place at the dining table made of Euro pallets.
These days, bar seats are popular not only in catering establishments, but also in home settings. The tradition of placing bar counters in apartments, which came from overseas, caused a real boom in these products.

A high stool is convenient not only for drinking cocktails at the bar. It can be successfully used as a stand when picking fruit.

Folding stools
There are a huge variety of them, from the simplest solutions to very complex transformers.
We present to your attention an original folding design. It consists of two rectangular frame-legs connected in the center by a metal axis. The support frames are attached to the seat with carpentry hinges. When folded, the axle moves along two slots cut into one of the legs. The seat rotates on hinges and stands upright.

Here is another version of a folding stool. His seat is made of two halves. When folded, the legs rotate around an axis and are placed in the same plane. The seat halves are pressed against them on both sides.

Fans of complex folding systems are offered an option consisting of eight pairs of lattice legs connected at the base by a common bar.

The upper ends of the legs on one side are hingedly connected to the seat, which is also made of bars. To fold the structure, take it by the lower slats and move them in the opposite direction. In this case, the lattice legs and seat bars fit into the gaps provided for them, and the stool becomes flat.
Another option is a folding stool with a “crawler” seat. Despite the simplicity of the design, it looks very original. Its two crossed legs are hinged in the center and connected at the top by a wooden segmental seat. By holding the edges, you can easily fold and unfold this stool.

DIY example
Having finished the brief overview, it's time to start the practical part. We offer you a step-by-step guide. Let's say right away that it is better for beginners to avoid tongue-and-groove joints. They require good carpentry skills and the presence of a special tool - a milling machine or, at worst, a hand router.

To work you will need several tools:
- Tape measure or ruler;
- Hand saw with fine teeth;
- Jigsaw for cutting legs and seat;
- Screwdriver for drilling holes and tightening screws;
- Belt sander for smoothing sharp edges on parts;
- PVA glue or wood glue.

Step one– using a hacksaw from a 30 mm thick planed pine board, we cut blanks for the legs and seat. If there is no board wide enough to make a solid seat, then it can be assembled from several narrow scraps. To do this, you need to mark and drill holes in their side edges for dowels. Having smeared the dowels with glue, they are inserted into the boards, assembled into a single panel and secured with carpentry clamps. After a day, you can start making the seat.
Step two– cut out the profile of one leg from thick cardboard and transfer it to all the blanks. We do the same with the seat blank.
Step three– We cut out the legs and seat with a jigsaw, and then sand their sharp edges with a grinder.
Step four— we assemble the legs in pairs, screwing self-tapping screws into their ends. We also use self-tapping screws to connect pairs of legs together. We arrange them so that they do not meet with previously twisted ones.

Step five– marking holes for dowels on the legs and seat. Having done this work, lubricate the tenons with wood glue and place the seat on the base.
Anyone who wants to simplify the work a little can refuse to fasten the seat with dowels. Instead, you can screw four screws directly through the lid into the legs from above. To ensure that they do not stand out on a flat surface, drill shallow secret nests for them in advance. After screwing, putty them with wood putty and cover the product with varnish and stain.
To make a stool with your own hands, no special skills required. This type can be carried out by a person who has no experience. In addition, this is a creative process that will require minimal costs and will bring a lot of positive emotions. You can show your imagination and make a unique stool that will delight the owners of the apartment with its appearance. You can also give it to someone as a gift. Beautiful wooden stool combines individual style and functionality.
Stages
First of all, you should prepare for the work ahead. To do this, it is necessary to highlight the main stages. First, you need to determine what material the stool will be made of. Secondly, you need to make a drawing. Next, prepare all the necessary tools that will be needed during works, and purchase material.
Material for production
The stool can be made of different materials, such as glass, metal, plastic and others. You can also combine metal and wood or metal and glass. There are many options for making stools. But at the initial stage it is recommended to start with wood. 
Stool drawing

For clarity and to simplify the work, you should make a drawing. On it you need to draw all the details from which it will be made. wooden stool, and indicate their sizes. In the drawing, all details must be indicated proportionally and a certain scale must be used. It is recommended to start with a simple stool with rectangular legs. But if you have confidence in your abilities, then, as an option, you can do DIY wooden stool using carved legs. Now in stores there are ready-made blanks for carpentry work. Therefore, it is worth taking a closer look at this assortment of products; perhaps you will find ready-made carved legs in order to use them to make DIY wooden stool. Blueprints should be supplemented with such details.
The drawing is a kind of design project for a stool. Therefore, you should draw the finished product on it, and also place separately all the details that will be needed to create this piece of furniture. Next to each part you must indicate its size and quantity. Dimensions are usually indicated in millimeters.

Tools
In order for the process of making a stool to be a pleasure and without anything distracting from the work, it is necessary to prepare the tools.
1. You will need a saw. Since the parts of the stool are small, a small tool will do. You can also use a miter saw.
2. A screwdriver is a necessary tool for assembling the stool.
3. Drill and drill bit of the right size.
4. Planer.
5. Jigsaw.
6. Self-tapping screws.
7. Ruler for measuring sizes.
8. Pencil.
9. Corner.
10. Brush for coloring.
Step-by-step instructions: how to make a stool from wood
Once the workplace and all the necessary materials and tools for future work have been prepared, you can proceed to the process of creating a stool. In order to understand how to make a stool out of wood with your own hands , at the initial stage you should follow the step-by-step instructions.
1. You should start working with the legs. You need to take and measure the length of each leg on it; it is 430 millimeters. You need to draw lines on the block using a ruler and pencil. Next, cut the block into 4 parts.
2. The next stage of work is preparing the seat of the future stool. To do this, take 2 boards 145 millimeters wide and 300 millimeters long. You can also make the seat from one piece, then you should take a wide board so that it matches its width. It is better if the seat is solid. This option will simplify the assembly process and provide the stool with greater strength.
3. Next you need to make the parts for the frame. They are made from plywood. It is necessary to cut blanks for the frame measuring 100 millimeters by 270 millimeters. We make a stool frame from plywood blanks. The plates are folded into a square, and the legs are placed in the corners of the square.
4. Then we assemble the stool. To do this, lubricate the pre-prepared holes with glue and tighten the screws.
5. Ready-made solid wood stool must be sanded using sandpaper.
6. The final stage of work is varnishing. It is better to do this in several layers. Each layer must be given time to dry and only then apply the next one.
Stool with spread legs
Those who already have some experience in carpentry can be offered to make a stool with spread legs.

1. First we make the bars. In order to avoid unevenness, you need to take 4 identical bars, set the miter saw to 5 degrees and cut them all at once.
3. Then you need to take small bars for spacers. To attach them, you need to make holes on the inside of the legs. When attaching the spacers, you should first apply glue and then screw in the bolts.
4. In the upper part of the stool you need to make holes for attaching the legs, lubricate them with glue, and then attach the legs.
6. The final stage of the work is the manufacture of the lid, it is better if it is made of a solid board.

This stool will look good with a soft seat. The process of its manufacture is also not at all complicated. Foam rubber is cut to the size of the seat and covered with fabric on top. It can be any material, for example leather, fur, velvet, etc. The color scheme can also be varied. The seat can be patterned or plain. It all depends on taste preferences and interior style. The fabric is attached to the chair using a special furniture stapler.

You can also leave the seat just wooden. In this case, it must be sanded and covered with stain and varnish or use paints for woodwork. Perhaps someone would like to paint a stool, apply a floral design or some kind of ornament. Since the manufacturing process is creative, you can use colored enamel instead of varnish or come up with other design options.
Manufacturing options
You can make the process of making a stool easier by ordering all the parts from a carpentry workshop. All you have to do on your own is to assemble everything into a single structure and start decorating. This option is more suitable for women, as it does not require much effort. Also, finished parts can be sold in specialized construction stores. At home, all that remains is to assemble the stool like a construction set and start decorating.

Decoration options
First of all, you need to know for which room the stool is being made. Depending on the stylistic orientation, you should choose its appearance. Perhaps at the carpentry stage it will be necessary to make carved legs or include some non-standard element in the design; it can also be made of wood. Much depends on the style of the interior in which this piece of furniture is supposed to be placed. For example, you can make a model with a colored fur seat for a girl’s nursery. And for a boy, a stool in a nautical or military style is suitable. There are a lot of execution options. If you don’t have enough imagination, you can look at special design publications that specialize in this area and make original chairs and stools from wood.