The efficiency and safety of a heating device that produces heat by burning a particular fuel largely depends on the parameters and condition of the chimney. Today, many companies have started producing insulated steel models, but not all users are ready to put up with them high cost and a relatively short service life. Often homeowners decide to build a chimney pipe according to traditional technology, that is, made of brick, with your own hands. To do this, you need to follow some rules and know what materials are best to use.
Strengths and weaknesses of a brick chimney
Brick chimneys can be used in any facility, be it a boiler room or a private house. With the advent of prefabricated steel sandwiches, they have become less popular, but are still widely used. This is explained by the following advantages:
- a brick chimney is cheaper than a “sandwich”;
- lasts longer: approximately 30 years;
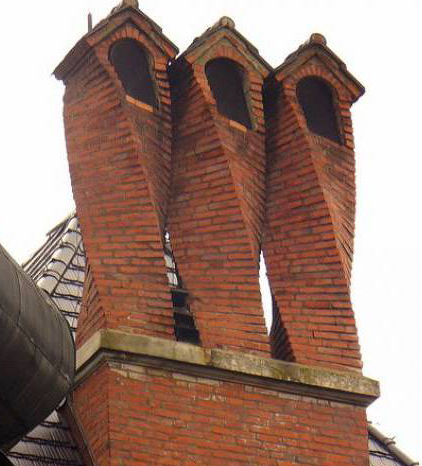
- is an important architectural element and fits perfectly visually with certain types of roofing, for example, tiles.
But this design also has plenty of disadvantages:
- In terms of complexity and duration, the construction of such a chimney is inferior to the installation of a “sandwich”, and special transport will be required to deliver the materials.
- A brick chimney has significant weight, so it must be provided with a reliable foundation.
- It has a rectangular shape in cross-section, although the most suitable is a round cross-section. Whirls form in the corners, preventing the normal flow of gases and thus worsening traction.
- The inner surface of a brick chimney, even if finished with plaster, remains rough, as a result of which it becomes covered with soot more quickly.
Unlike of stainless steel, the brick is quickly destroyed by acid condensation. The latter is formed if the temperature of the flue gases during their movement through the pipe manages to drop below 90 degrees. Therefore, when connecting a modern, economical boiler with a low-temperature exhaust or a stove operated in smoldering mode (heat generators of the Professor Butakov, Bullerjan, Breneran brands) to a brick chimney, it is necessary to line it, that is, install a stainless steel pipe inside.
Elements of a brick chimney
The design of the chimney is very simple.
The smoke exhaust duct is protected on top by a cone-shaped part - an umbrella or cap (1), which prevents precipitation, dust and small debris from getting inside. The upper element of the pipe - the head (2) - is wider than its main part. Thanks to this, it is possible to reduce the amount of moisture that gets into the lower area - the neck (3) during rain.
Above the roof there is another widening - an otter (5). Thanks to it, atmospheric moisture does not enter the gap between the chimney and the roofing (6). On the otter with the help cement mortar a slope (4) is formed, along which the water that gets onto the pipe runs off. To prevent fire of rafters (7) and sheathing (8) from contact with a hot surface chimney they are wrapped in thermal insulation material.
The section of the chimney crossing the attic space is called the riser (9). In its lower part, just at the level of the attic floor, there is another widening - fluff (10).
Note! All three widenings - head, otter and fluff - are made only due to thickening of the wall, while the cross-section of the channel always remains constant. The otter with fluff, as well as other chimney elements installed at the intersections of the roof or ceilings, are called trims.
The thick walls of the fluff protect the wooden floor elements (11) from excessive heat, which may cause them to ignite.
The chimney can be made without fluff. Then, in the area where the ceiling passes, a steel box is mounted around the pipe, which is subsequently filled with a bulk heat insulator - expanded clay, sand or vermiculite. The thickness of this layer should be 100–150 mm. But experienced users do not recommend using this cutting option: the insulating filler falls through the cracks.
The fluff is additionally lined with an effective non-flammable heat insulator (12). Previously, asbestos was used everywhere in this capacity, but after its carcinogenic properties were discovered, they are trying not to use this material. A harmless, but more expensive alternative is basalt cardboard.
The lowest section of the chimney is also called the neck (14). It has a valve (13), through which the draft can be adjusted.
Depending on the construction method, the chimney may be one of the following types:
- Mounted. The stove itself serves as the basis for this design. To support the impressive weight of the chimney, its walls must be two bricks thick.
- Root. Such a chimney stands on a separate foundation and is not part of any heat-generating installation. The smoke exhaust pipe of the stove or boiler is connected to it through a horizontal tunnel - a reversible sleeve.
- Wall. Chimneys of this type are channels in load-bearing walls. In order to save heat, they usually use interior walls, on both sides of which there are heated rooms.
In a vertical brick chimney, draft is formed naturally, that is, due to convection. A prerequisite for the formation of an upward flow is the temperature difference between the ambient air and the exhaust gases: the greater it is, the stronger the draft generated in the pipe. Therefore, for the normal functioning of the chimney, it is very important to take care of its insulation.
Calculation of basic parameters
At the design stage it is necessary to determine the height of the chimney and dimensions cross section smoke exhaust channel. The task of the calculation is to ensure optimal traction force. It should be sufficient for the furnace to receive required amount air and all combustion products were removed in full, and at the same time not too large so that the hot gases had time to give up their heat.
Height
The height of the chimney must be selected taking into account the following requirements:
- The minimum height difference between the grate and the top of the head is 5 m.
- If the roof is covered with flammable material, e.g. bitumen shingles, the chimney head should rise above it by at least 1.5 m.
- For roofs with non-combustible coating minimum distance to the top is 0.5 m.
The ridge of a pitched roof or a flat parapet in windy weather should not create support above the chimney. To do this you need to adhere to the following rules:
- if the pipe is located closer than 1.5 m in relation to the ridge or parapet, then it should rise above this element by at least 0.5 m;
- when removed from the ridge or parapet at a distance of 1.5 to 3 m, the head of the pipe can be at the same height as this element;
- at a distance of more than 3 m, the top of the head can be placed below the ridge, at the height of an inclined line drawn through it with an angle of 10 degrees relative to the horizontal.
If there is a higher building near the house, then the chimney should be erected 0.5 m above its roof.
Section dimensions
If a stove or boiler is connected to the chimney, then the cross-sectional dimensions should be determined depending on the power of the heat generator:
- up to 3.5 kW: the channel is made the size of half a brick - 140x140 mm;
- from 3.5 to 5.2 kW: 140x200 mm;
- from 5.2 to 7 kW: 200x270 mm;
- over 7 kW: in two bricks - 270x270 mm.
The power of factory-made heat generators is indicated in the passport. If the stove or boiler is homemade, you have to determine this parameter yourself. The calculation is carried out according to the formula:
W = Vt * 0.63 * * 0.8 * E / t,
- W - heat generator power, kW;
- Vt - volume of the firebox, m 3;
- 0.63 - average furnace load factor;
- 0.8 - average coefficient showing what part of the fuel burns completely;
- E - calorific value of fuel, kW*h/m3;
- T is the burning time of one fuel load, hours.
Typically, T = 1 hour is taken - approximately this is the time it takes for a portion of fuel to burn during normal combustion.
The calorific value E depends on the type of wood and its moisture content. The average values are:
- for poplar: at a humidity of 12% E - 1856 kWh/cubic meter. m, at a humidity of 25 and 50% - 1448 and 636 kW*h/m3, respectively;
- for spruce: at humidity 12, 25 and 50%, respectively, 2088, 1629 and 715 kW*h/m3;
- for pine: respectively, 2413, 1882 and 826 kW*h/m3;
- for birch: respectively, 3016, 2352 and 1033 kW*h/m3;
- for oak: respectively, 3758, 2932 and 1287 kW*h/m3.
For fireplaces, the calculation is slightly different. Here the cross-sectional area of the chimney depends on the size of the firebox window: F = k * A.
- F - cross-sectional area of the smoke exhaust duct, cm 2;
- K - proportionality coefficient, depending on the height of the chimney and the shape of its cross-section;
- A is the area of the firebox window, cm 2.
The coefficient K is equal to the following values:
- with a chimney height of 5 m: for round section- 0.112, for square - 0.124, for rectangular - 0.132;
- 6 m: 0.105, 0.116, 0.123;
- 7 m: 0.1, 0.11, 0.117;
- 8 m: 0.095, 0.105, 0.112;
- 9 m: 0.091, 0.101, 0.106;
- 10 m: 0.087, 0.097, 0.102;
- 11 m: 0.089, 0.094, 0.098.
For intermediate height values, the K coefficient can be determined using a special graph.
They tend to make the actual dimensions of the smoke exhaust duct close to the calculated ones. But they are selected taking into account the standard sizes of bricks, blocks or cylindrical parts.
Materials and tools
A brick chimney is operated under conditions of significant temperature changes, so it should be erected from the very quality bricks. Compliance with this rule will determine how safe the structure will be: if the brick does not crack, it means that poisonous gases and sparks that can cause a fire will not enter the room.
Types of bricks
The pipe is erected from solid ceramic bricks with fire-resistant properties of grades from M150 to M200. Depending on the quality, this material is divided into three grades.
First grade
When making such bricks, the temperature and holding time during firing ideally correspond to the type of clay. You can recognize it by the following signs:
- the blocks are bright red, with a possible yellowish tint;
- the body of the brick has no pores or inclusions visible to the eye;
- all edges are even and smooth, there are no crumbled areas on the edges;
- tapping with a light hammer or other metal object gives a clear and clear sound.
Second grade
Such a brick is unburned. Here are the signs that characterize it:
- the blocks have a pale orange, slightly saturated color;
- numerous pores are visible on the surface;
- the sound when tapped is dull and short;
- There may be defects on the edges and edges in the form of burrs and crumbled areas.
Brick of the 2nd grade is characterized by low heat capacity, frost resistance and density.
Third grade
- the blocks have a deep dark red color, some are almost brown;
- when tapped, the sound is too loud;
- edges and edges contain defects in the form of chips and burrs;
- the structure is porous.
Such bricks do not have frost resistance, do not retain heat and are too fragile.
The chimney should be built from first grade brick. Second-grade should not be used at all, but third-grade can be used to make foundations for free-standing pipes.
What solution is needed
The quality requirements for mortar are as high as for brick. Under any temperature, weather and mechanical influences, it must ensure the tightness of the masonry throughout its entire service life. Because the separate areas chimney work in different conditions, then different solutions are used when laying it.
If the pipe being erected is a root pipe, then its first two rows (zone No. 3), located under the floor, should be laid on a cement-sand mortar (3-4 parts of sand for 1 part of cement). To make the mixture more plastic, you can add 0.5 parts of lime to it.
The higher-lying sections of the chimney, up to and including the fluff, have an internal temperature of 355 to 400 degrees, so when constructing them, a clay-sand mortar is used. If the fluff ends under the ceiling (zone No. 8), and the cutting is made of bulk material(zone No. 9), then the use of this mixture also applies to cutting rows.
The riser, otter and neck of the chimney (zone No. 10), which do not get very hot, but are subject to wind loads, should be laid using lime mortar. The same composition can be used when constructing the head (zone No. 11), but a regular cement-sand mixture is also suitable for this area.
The clay for the solution should be medium fat. It should not have a strong odor, as this is a sign of the presence of organic impurities that cause cracks in the solution.
The absence of organic matter is also desirable for sand. This requirement is satisfied by mountain sand, as well as its cheaper replacement from ground brick scrap. The latter can be ceramic or fireclay. Since the chimney is built specifically from ceramic bricks, the same sand should be used.
In addition to the specified materials, you will need special purchased elements - a cleaning door, a valve and a cap. Gaps between brickwork and those installed in it metal products compacted using asbestos cord or basalt cardboard.
Tools
The most common tools will be used:
- Master OK;
- hammer-pick;
- plumb line
You can’t do without a building level.
Preparatory work
If a main chimney is being built, then construction work should begin with the device reinforced concrete foundation. Its minimum height is 30 cm, and the sole must be located below the freezing depth of the soil. The chimney foundation should not have a rigid connection with the foundation of the building, since both objects shrink differently.
Some craftsmen soak the brick before starting work. This makes sense, since when dry, the blocks will actively absorb water from the mortar and the masonry will be fragile. But you need to take into account that masonry made from soaked bricks takes quite a long time to dry, so choose a technique in accordance with the time of year and weather conditions- the brick must dry before the first frost.
The sand must be thoroughly cleaned of impurities by sifting through a sieve with a mesh size of 1x1 mm, and then washed. It is better to rub the clay through a sieve after soaking. The lime used must be slaked.
Solutions are prepared according to the following recipe:
- Clay-sand: mix sand, fireclay and ordinary clay in a ratio of 4:1:1.
- Limestone: sand, lime and M400 cement are combined in a ratio of 2.5: 1: 0.5.
- Cement-sand: mix sand and cement grade M400 in a ratio of 3:1 or 4:1.
The clay is soaked for 12–14 hours, stirring from time to time and adding water if necessary. Then sand is added to it. The given recipe is designed for medium-fat clay, but it is advisable to check this parameter in advance in the following way:
- Take 5 small portions of clay of the same mass.
- Sand is added to 4 portions in amounts of 10, 25, 75 and 100% of the clay volume, and one is left in its pure form. For obviously oily clay, the amount of sand in portions is 50, 100, 150 and 200%. Each of the test samples should be mixed until homogeneous, and then, by gradually adding water, turn into a solution with the consistency of a thick dough. A properly prepared mixture should not stick to your hands.
- From each portion, make several balls with a diameter of 4–5 cm and the same number of plates with a thickness of 2 to 3 cm.
- Next, they are dried for 10–12 days in a room with constant room temperature and without drafts.
The result is determined by considering the solution that satisfies two requirements as suitable for use:
- products made from it do not crack after drying (this happens with high fat content);
- Balls dropped from a height of 1 m do not crumble (this would indicate insufficient fat content).
The tested solution is prepared in sufficient volume (2-3 buckets are required for 100 bricks), and enough water is added so that the mixture slides off the trowel easily.
How to lay out a chimney with your own hands: step-by-step instructions
If the materials and tools are prepared, construction work can begin:
- Approximately two rows to the ceiling they begin to lay out the fluff. If there are several channels in the chimney, then the bricks separating them should be partially recessed into one of the outer walls.
- Lay out the first two rows especially carefully. They set the tone for the entire structure, so they must be perfectly even and strictly horizontal. If a mounted pipe is installed, then from the first rows it is built on a clay-sand mortar, which is applied in a layer 8–9 mm thick, and when the block is installed in place, it is compressed to a thickness of 6–7 mm.
- Following the order, the neck of the chimney is erected. The seams must be tied so that the masonry does not crack into separate layers.
- From the inside, the seams are rubbed with mortar (so that the inner surface of the chimney is as smooth as possible).
- The duration of the fluffing is determined taking into account the expected settlement of the structures:
With each row, the wall thickness in the fluff increases by 30–35 mm. To do this, brick plates of different thicknesses are cut. So, for example, in the 1st row of fluff, in addition to whole blocks, the number of which has increased from 5 to 6, longitudinal and transverse halves (2 pieces each) and several quarters are used. Cut bricks must be laid so that the rough cut faces into the masonry and not into the smoke exhaust duct. The row of fluff, which will be flush with the ceiling, must be isolated from wooden elements with strips of asbestos or basalt cardboard. Next, they return to the original dimensions of the chimney - this will be the first row of the riser. At this stage, using a plumb line, you need to determine the projection of the chimney onto the roof and make a hole in it for it. In waterproofing and vapor barrier films They make not a hole, but a cross-shaped incision. After this, the resulting petals are bent in such a way that the functionality of this element is not impaired. The riser is laid out row by row, trying to make it absolutely vertical (controlled by a plumb line).
Formation of an otter
The riser ends in a row that extends half its height above the bottom edge of the hole in the roof. Those that are on the level wooden rafters and sheathings must be insulated with asbestos or basalt strips.
The otter starts next. Like fluff, it gradually expands, but unevenly, and taking into account different heights edges of the hole in the roof. Next, the dimensions of the chimney return to their original values - the neck of the stove begins.
The last stage is the construction of a two-row head. The first row is made with a widening of 30–40 mm in all directions. The second row follows the usual pattern, while on the ledge of the bottom row it is laid out using concrete mortar inclined surface.
An umbrella is attached to the ledge of the head. The clearance between its bottom and the top of the head should be 150–200 mm.
If the roofing material is flammable and a solid fuel heat generator is connected to the chimney, a spark arrester (metal mesh) must be installed on the head.
The gap between the pipe and the roof must be sealed.
The “steps” of the otter are smoothed with mortar so that an inclined surface is formed, after which the entire outer part of the chimney must be treated with a waterproofing compound.
Insulation of a brick chimney
Most cheap way insulation of a chimney - coating its surface with a solution based on lime and slag. First, a reinforcing mesh is attached to the chimney, then the solution is applied layer by layer, making the mixture thicker each time. The number of layers is from 3 to 5. As a result, the coating has a thickness of 40 mm.
After the plaster dries, cracks may appear on it that need to be covered. Next, the chimney is whitewashed with a solution of chalk or lime.
More expensive, but more effective option insulation is associated with the use of basalt wool with a density of 30–50 kg/m 3. Since the walls of the chimney are flat, it is best to use this insulation in the form of hard slabs rather than soft panels (mats).
To install basalt wool on the chimney, you need to secure the metal profile frame with dowels. The insulation is placed in the frame, after which it can be fixed with a stretched nylon cord or screwed to the brickwork with special disc-shaped dowels with a large diameter head (to prevent pushing through the material).
A vapor-proof film is laid on top of the basalt wool (this heat insulator absorbs water well), and then plastered with ordinary cement-sand mortar over a reinforcing mesh or sheathed with tin (can be galvanized).
Installing the sleeve
Lining of the chimney is carried out in the following sequence:
- In the boiler or furnace connection area, the chimney masonry is dismantled to a height sufficient to install the longest part of the steel liner. This is usually a condensate trap.
- All elements of the liner (sleeve) are installed sequentially, starting from the top one. As installation progresses, the installed parts move upward, freeing up space for subsequent ones. Each element has hooks on which you can hook a rope passed through the top hole.
- After installing the liner, the space between it and the walls of the chimney is filled with non-flammable heat insulator.
At the end, the opening in the chimney is bricked again.
Chimney cleaning
A layer of soot settling inside the chimney not only reduces its cross-section, but also increases the likelihood of a fire, since it can ignite. Sometimes it is even specially burned, but this method of cleaning is very dangerous. It is more correct to remove soot using a combination of two methods:
- Mechanical involves the use of brushes and scrapers on long, extendable holders, as well as weights on a strong cord, which are passed into the chimney from above.
- Chemical: burned in the furnace along with conventional fuel special remedy, for example, “Log Chimney Sweep” (sold in hardware stores). It contains many substances - coal wax, ammonium sulfate, zinc chloride, etc. The gas released when this product burns forms a coating on the walls of the chimney that does not allow soot to subsequently stick to them.
The second method is used as a preventive measure.
Video: laying a brick pipe
At first glance, the chimney appears to be an extremely simple design. However, at every stage of its construction - from the selection of materials to the installation of thermal insulation - a balanced and deliberate approach is required. By following the recommendations of experts, you can build a durable and safe structure that will last for many years.
The chimney in a private house is most often built invisible to the eye. This can be done even at the planning stage of building a house. If there are several chimneys in the house, then they are combined into one or two devices.
Device steel chimney in a private house
The design of the chimney depends on the functional features of the devices for which they are intended. The complexity and configuration of the chimney depends on their location and power.
Types of chimneys:
- ventilation,
- gas outlets,
- smoke
Ventilation systems
Main function ventilation pipes is that they help remove polluted air masses from the room.
 Originally made brick ventilation chimney
 Ventilation ducts in mandatory should be in those places where the room is least ventilated. It is especially important to place such pipes in the kitchen area, bathroom, and toilet.
Gas exhaust systems
Gas flue pipes are used if the house uses a gas heating system. They remove combustion products outside the room, and thus ensure the safety of using the heating system. Pipes must be able to withstand a variety of exposures to harmful substances. As soon as combustion products enter the chimney, they immediately react with the moisture that is already in the pipe. As a result of this, an oxidation process occurs, which can cause destruction or internal deformation of the pipe. Also, such a chimney helps to increase draft.
 Diagram of the device and design of the flue pipe of the chimney
 Smoke pipes
Chimneys are used when heating equipment that runs on solid fuel is installed in the house - these can be stoves or fireplaces. There are most of them in the house, which is why they are often combined into one or more.
 device diagram and design of a brick chimney
 Chimney pipes
The chimney design is quite simple; it involves the use of special pipes through which polluted air or combustion products are discharged outside the room.
Pipes are:
- brick,
- metal,
- ceramic,
- polymer.
Distinctive features of a brick chimney
Despite the fact that today there is a very large number of materials that can be used to construct a chimney, brick chimneys have still been very popular for many years.
 Brick chimney
 This type of chimney has its advantages. It cannot be plastered inside, which will help save on finishing materials. It is also worth considering that the masonry of a brick chimney must have a joint of 1 cm. If it is recommended to use cement-lime or lime mortar indoors, then in the upper part of the building you can already use ordinary concrete mixture for masonry.
Advice. In order to use a brick chimney in a house, it is necessary to make a more powerful foundation for the building - brick will add extra load to the walls of the building and to its foundation.
In addition to the advantages, there are also a certain number of design disadvantages. Brick, due to its rough surface, can accumulate dirt. That is why such a pipe becomes clogged with soot very quickly.
Since combustion products exit through a brick chimney, oxygen condensate is formed, which makes the brick pipe susceptible to destruction. It happens that a piece of brick breaks off and falls into the pipe. All this can significantly narrow the chimney channel and make it difficult for air masses to escape.
To ensure a long service life of a brick chimney, it is recommended to insert an asbestos-cement pipe inside. The gap between the brick and the pipe is filled with concrete mortar.
 An example of using an asbestos cement pipe
 Ceramic structures
Ceramic pipes are ready-made structures for constructing a chimney. They are for sale modular design. Her inner tube made of acid-resistant, heat-resistant and durable ceramics.
Ceramic chimney pipes have a number of advantages and are very smooth surface. Thanks to this, soot does not accumulate on it, which is formed as a result of the passage of contaminated air masses formed during the combustion process.
 Installation of a ceramic pipe for a chimney
 Like brick chimneys, ceramic chimneys are quite heavy. It is for this reason that it is worth using a foundation for the structure.
Metal chimneys
As for metal pipes for the construction of a chimney, due to their ease of Lately began to enjoy great popularity. They also have a smooth surface, which eliminates the accumulation of soot. Accordingly, the air will flow much better.
Read also
Laying sewer pipes inside a private house and in the ground
High-quality thermal insulation is quite simple. For this purpose it is used basalt wool, which is laid inside the pipe. It will only be necessary to correctly determine the thickness of the material, since a large thickness can completely or partially block the pipe and air masses It will be very difficult to get out.
 Installation of a metal chimney pipe
 As a rule, metal chimneys are made of stainless steel, which is very resistant to all climatic, weather and other influences.
Modern chimney pipes are polymer structures. The pipe itself is very soft and has quite a small weight. The chimney will be distinguished by its practicality and durability. You can install the pipe yourself, and any beginner can handle it.
 Modern polymer chimney
 Most often used polymer pipes if the house has a gas heating system (boilers or water heaters). Such pipes can only be inserted into a chimney that is made of brick.
Types of chimneys
Today there are two types of chimney structures: a structure located inside the building and a chimney outside the house. They differ not only in the materials from which they can be constructed, but also in size and type.
 Drawings and design of internal and external chimneys in a private residential building
 Typically, brick or ceramic pipes are used to build a chimney inside a house. It is more rational to use metal chimneys outdoors, as they are resistant to temperature changes and are not exposed to moisture.
A chimney inside the house can also be made in two ways, more about this in the video
The chimney can be used in both brick and wooden building. Only chimney in wooden house must be properly constructed, as wood chars very quickly. Eat special technology construction of a chimney in a wooden building.
Construction of a chimney in a wooden house
Most often, there are several chimneys in a wooden house. But the number of such structures largely depends on the amount of equipment used in the house. The house must have a heating system with a separate chimney and may have a fireplace, which also has a separate chimney.
All chimney structures in the house must be installed on the roof of the building and made in compliance with all norms and standards.
 Chimney in a wooden house
 In order to properly build a chimney in a wooden house, you need to draw up project documentation and contact specialists in this field who can correctly draw up a chimney project.
The life safety of everyone living in the house depends on a properly built chimney, and the equipment itself will work better. The latter applies to gas heating boilers and pipes for fireplaces.
The chimney in a wooden house should only be in a vertical position. Of course, there is an exception to the rule. You can build it with a deviation that is no more than 30 degrees from the vertical position. If it is necessary to bring the pipes outside, and this cannot be done without moving the chimney pipe, then the size of such a transfer can be no more than 100 cm.
 Options for building a chimney in a wooden house made of timber
 As for the removal of the chimney on the roof of the building, it will largely depend on the type of roof and the type of roof itself.
Advice. When building a chimney on the roof, it is worth considering the direction of the wind, which is most common in this region. This is necessary due to the fact that if the chimney pipe is connected to a heating boiler, then wind masses can enter the pipe and thereby cause intermittent combustion of the fuel substance.
If there is, then the smoke exhaust pipe must be constructed with high quality. This will prevent smoke from entering the room and allow it to escape outside.
Recently, a chimney for a fireplace in a wooden house is quite complex design, which uses pipe-in-pipe technology.
The chimney itself consists of three components:
- stainless steel pipes;
- layer of thermal insulation material;
- steel pipe.
Initially, a stainless steel pipe is wrapped in thermal insulation material, which can be secured to it using wire or any other material. After that finished design inserted into a metal pipe, which will have a larger diameter than the inner one.
 Methods for installing chimney pipes in a wooden house
 In addition to this method of constructing a chimney, there is another way; a plastic stocking is used for this. Its main advantage is that it heats up very quickly and cools down quickly. It can also be used when it is necessary to make a fairly large number of chimney passages.
Unlike brick oven the design of a chimney made of this material is less complex; it does not have numerous internal channels. The pipe contains only one central passage, but its surface must be smooth and even to ensure the required traction.
Collapse
It is quite possible to lay a brick chimney on your own if you carry out the calculations correctly and purchase quality material and understand the basics of masonry.
Types of brick chimneys
There are several varieties:
- Mounted. Structurally, it is located on top of the furnace and serves as its continuation. This type of chimney is installed on sauna and conventional heating units.
- Wall-mounted. Such a pipe is mounted in the walls of a building or a capital interior space. If a wall chimney is installed near the external surfaces of the house, then it must be insulated so that condensation does not accumulate inside the duct due to strong temperature differences. This worsens draft and promotes faster collection of condensate.
- Indigenous. A brick pipe for a stove with a side outlet, it is installed next to the heating structure. It can be used simultaneously for several ovens.
Brick chimney design
The chimney in any house consists of several parts, each of them has its own purpose.
A typical and frequently used chimney consists of the following segments:
- The neck extending from the surface of the oven to the cutting (fluff). A valve is installed on it, with the help of which the fuel burning rate and traction force are regulated.
- Fluff. It is performed before each segment of the ceiling and protects against exposure to high temperatures. Its walls are made thicker than in other parts of the chimney; they must be at least 40 cm.
- Riser. This part of the pipe connects the attic and the roof.
- Otter. Her responsibilities include protecting the chimney from water, snow and dust entering the pipe riser. The pipe sector is located on the roof and is distinguished by thick walls that protect the roof sheathing from exposure to flammable materials.
- Pipe neck. It starts above the otter and is placed similar to a riser.
- The head of the pipe is an extension above the neck. A cap or umbrella is installed above it to protect the chimney duct from precipitation.

Elements of a brick pipe (chimney)
Parameter calculations
The size of the chimney for a brick stove should remain the same along its entire length; its optimal value is selected depending on the dimensions of the heating device.
Sectional size
Suitable device parameters depend on the combustion chamber and furnace power. The inner walls need to be made smooth without sagging mortar or protrusions, then they will remain clean longer.
Most often, brick chimneys of square and rectangular cross-section are used; their masonry is made of 4, 5 or 6 bricks; when calculating the cross-section, one side of the structure is multiplied by the second. The standard dimensions are considered to be: 12.5 × 25 cm. The calculation is carried out according to the internal chimney channel. The indicated parameters refer to a masonry of 4 bricks, the cross-sectional area is 156.25 cm 2.
When calculating a cross-section of five bricks, the result is a value equal to 312.5 cm 2, and with six - 625 cm 2.
When installing a brick chimney on a metal stove, you need to connect its square section to the round outlet hole of the stove. So, for a chimney cross-section with an area of 156.25 cm2, a round pipe with a diameter of 130 mm is suitable, its area is 133 cm2, the next parameter of 150 mm has a greater value than the declared one.
When calculating a circular cross-section, the required radius is taken into account, the area is calculated using the school formula:
S = π×R 2, where the number π=3.14
Knowing the diameter of the pipe, you can easily determine the desired parameter.
Calculation depending on power
The internal channel depends on the optimal ratio of pipe sizes and the power of the heating device. Among the guidelines for choosing a suitable section, the size of the opening provided for the blower door is highlighted. The pipe size should be smaller than the hole for the door.
If, when calculating, we take into account the productivity of the furnace, then we can select the cross-section from the tabular data, but they do not take into account the thickness of the seams; they range from 6 to 10 mm.
Chimney height
When calculating this parameter, you need to pay attention to the following features:
- in case of use as roofing material its highly flammable variety requires that the chimney rise above the roof by at least 1.5 meters;
- the height difference between the top point of the head and the grate should not be less than 5 meters;
- if there is a high building near the house, then the pipe should be 0.5 meters higher than its extreme point;
- on roofs with non-combustible coating, the minimum distance to the top of the pipe should be 0.5 meters.
When calculating the height of the pipe, the size of the firebox and the cross-section of the chimney are taken into account. So, if total area the combustion window is 0.35 m2, and the cross-sectional area of the channel is 0.04 m2, then a height of 7 meters is suitable for these parameters. To make calculations with other parameters, you need to establish this dependence and select the height.
The height of the chimney pipe affects the draft, so this size of a brick chimney pipe should not be less than 5 meters, otherwise turbulence may begin and all the soot will go inside the house.
How to correctly position the pipe from the roof ridge is shown in the photo below:

How to choose the “right” brick?
For laying the chimney, solid fireclay (fireproof) brick is used; its grade must be higher than 200. The externally selected material must have smooth edges and have rectangular section. The sizes may vary, but it is better to use the following: 25x12x6.5 cm.

Masonry mortar
It contains clay, sand, water and cement. The liquid is taken in its pure form, without various inclusions, that is, it cannot be taken from reservoirs and artificial ponds. The clay used should also be as clean as possible, without foreign inclusions.
Differences in solutions depending on the masonry area
For each part of the chimney, it is advisable to use a specific cement mixture:
- the pipe under the roof is erected with cement-lime or lime mortar;
- For the part of the chimney above the roof, a cement-sand composition is used.
If a brick chimney is made for metal furnace with your own hands, you should know that the thickness of the mortar layer will depend on the sand fraction; the finer it is, the neater the seams will be. 
Making the mixture
The mixture is prepared from sifted river sand and pure clay, mined from the depths of the earth at least 1.5 meters. It also needs to be sifted, and the sieve cells should not exceed 5 mm. Before mixing, the clay must be soaked in water and left for 48 hours.
After this preparation, the clay is mixed with sand in a ratio of 2 to 1, and then the whole thing is filled with water, maintaining a ratio of 1 to 4. In order for the batch to brew, it must be left for 12 hours, and then moved until a homogeneous mixture is obtained.

The cement-lime composition is prepared in almost the same way, only lime is also added to it, which is sifted through a sieve with 3 mm cells.
Chimney laying
Even if a person has never encountered brickwork before, if there is the right tools And step by step guide, he can build a chimney. But if the house is two-story or has a complex pitched roof, then it is better to entrust such a matter to professionals.
Required Tools
To build a chimney of any complexity, you will need the following tools from the list:
- roulette;
- building level;
- pickaxe hammer and its analogue with a rubber tip;
- Bulgarian;
- buckets or containers for solution;
- trowel;
- sieve;
- drill with a nozzle for stirring the solution.
Masonry technology
The arrangement of the chimney is thought out at the design stage of the heating device, perfect option, when it is also brick, but an iron stove with a brick pipe is also often found and its pipe will be made in a similar way.
The solution should be laid no thicker than 1 cm to avoid its subsequent cracking when hot air flows pass through the chimney.

Laying a brick chimney with your own hands looks like this:

Advantages and disadvantages
Brick chimneys have the following advantages:
- relative cheapness compared to modern materials used for it (now popular “sandwich” panels);
- long service life, can reach up to 30 years;
- brick chimney as an architectural element is ideally combined with many roofing materials.
But due to the fact that brick still belongs to the “old-timers” of construction, it has many disadvantages in comparison with its modern analogues:
- significant weight brick construction requires the creation of a reliable foundation;
- erecting a pipe takes longer than when using a “sandwich”;
- for a chimney, the ideal cross-section is round, and the brick is rectangular in shape; square structures are better made from it;
- The inside of the pipe, even after applying plaster, remains rough, which is why it quickly becomes covered with soot, which impairs traction.
Conclusion
Everyone can assess their own strengths, and if a person decides to independently build a brick chimney in a house or country house, then he must realize that not only the heating of the entire room, but also its safety will depend on this. After all, if you install the pipe incorrectly or make its internal part with protrusions, then all the fumes from the burnt fuel will remain in the house.
←Previous article Next article →A brick chimney requires more effort than using a metal pipe for this purpose. But this design looks much more prestigious and lasts longer. We will look at three types of brick chimneys: classic single, extended with ventilation holes and simplified. Each type has its own characteristics and advantages. The final decision is chosen by the developers, and must take into account individual characteristics baths, design preferences, financial capabilities and availability of professional skills.
For all types of brick chimneys, there are several general provisions that must be followed.

Height above roof covering. It is regulated taking into account the angle of inclination of the slopes, must ensure fire safety and prevent the draft from being blown out by air turbulence from the ridge. If the roof covering is made of non-combustible materials, then the fire height requirements can be ignored, but the chimney should be protected from turbulence. Recommended heights can be seen in the photograph.


Material of manufacture. For most chimneys you can use ordinary red brick. If you want, buy a fireproof one, but it costs much more, and you shouldn’t expect a big positive effect from its use.

We recommend using refractory bricks only for laying the top pipe, in this place the most heat gases The fact is that red brick can withstand temperatures up to +800°C without problems, and the temperature of the gases in the chimney is much lower. It is strictly forbidden to use sand-lime brick– when heated, it releases toxic substances into the air chemical compounds. This brick can only be used for exterior finishing walls

An important requirement for all bricks is that the side surfaces must be smooth. The presence of unevenness and roughness increases the deposition of soot in the smoke channel; it will have to be cleaned much more often. A large amount of soot not only impairs traction, but can also cause ignition, and this is a direct risk of fire. When laying the chimney, the internal channel must be immediately cleaned of any mortar protruding in the seams. Use a damp cloth or sponge to do this, ensuring that the internal surfaces of the canal are as smooth as possible.
Prices for fire bricks
fire brick
Masonry mortar. There are two options. Some stove makers only use clay mortar, others add a little cement to it. We are supporters of the second option; cement significantly increases the strength of the structure. But it’s your choice; both types of solutions do their job well.

Classic chimney
Let's consider structural elements classic chimney.

Bottom part
From the top of the stove to Accepts very hot gases, fireclay bricks can be used for the channel. It’s better to buy a gate valve ready-made in a store; if it’s not possible, do it yourself. Store structures are more reliable; they are made of malleable cast iron and do not deform during heating. Steel gates can become deformed as a result of steel tempering. The deformed gate jams in the grooves, making opening/closing difficult. For laying the lower part of the chimney, it is recommended to use a clay solution without adding cement.

Gate prices
Performs two tasks: it increases the resistance of the chimney to wind loads - it rests on the floor beams. In addition, the increased size of the fluff serves as fire protection for wooden structures.

Riser
Part of the chimney from the fluff to the otter. The longest section, during laying it is necessary to maintain the vertical position of all rows.

Special thickening over the roof covering. Traditional chimneys are made without using modern methods sealing the exit above the roof, the increased size of the otter prevents natural precipitation from entering the attic of the bathhouse. To improve insulation, sheets of galvanized steel can be nailed around the perimeter of the otter.

Neck and head
The length of the neck depends on the angle of inclination and type of roof; specific dimensions take into account all the features of the structure. The height of the neck affects the stability of traction, regardless of wind strength.

– decorative element chimney.

Protective cap
Prevents rain and snow from entering the smoke channel. The cap has one more function. If no one uses the sauna stove for a long time, then birds can build a nest in the channel - the chimney will have to be cleaned. To prevent such situations, it is recommended to cover the exit with a metal mesh.

We can only give approximate dimensions of each chimney element; more precise parameters must be calculated taking into account architectural features ovens and baths.
Stages of building a classic chimney
The presence of a brick chimney should be provided for during the design of the bathhouse. The stove must be made of brick and must be on a separate concrete foundation.

For most sauna stoves a channel of 250×120 mm is enough, this standard sizes red brick. To lay a chimney, you will need special bricks half the standard size; they can be bought ready-made or carefully cut with a grinder with a diamond blade.
The thickness of the solution is no more than 1 cm; the thicker the solution, the greater the risk of cracking during thermal expansion. We do not recommend making such a complex chimney for a metal stove; installing a pipe is enough for it.
Step 1. Prepare bricks, tools and mortar. Take measurements down to the gate and fluff.
Step 2. Start laying from the bottom of the chimney from the stove, check each row with a level in all four planes. After three or four rows, clean the channel of excess solution.

Practical advice. Chimney laying can be significantly accelerated. After 2-3 rows of bricks have been laid, secure ropes in them at the corners and pull them towards the ceiling. Install the ropes strictly vertically; they are used to control the position of the chimney. No more wasting time checking each row with a level.

Step 3. Attach the frame where the gate is installed. Installation of the frame should not disturb the position of the upper plane of the bricks; to do this, you need to select a recess in them that matches the dimensions of the gate frame.
Step 4. Continue laying until the fluffing begins. Calculate the number of rows that will have to be laid before the fluff comes out on required sizes. Please keep in mind that in one row the perimeter of the chimney increases by a quarter of the width of the brick. The fluff should be tightly adjacent to the ceiling beams. If they are located at a large distance from the chimney, it is necessary to make special thrust frame structures.

Step 5. Lay out the fluff according to the diagram. Keep in mind that this is only a schematic diagram; the specific number of rows of bricks to reach the maximum fluff width depends on the design of the bathhouse. No need to fluff square profile, you can lay out a rectangular one.

In the photo - fluff
Important. There should be no gaps between the ceiling beams and the fluff, otherwise the chimney will wobble under the influence of sharp gusts of wind. Oscillations will disrupt the tightness of the connection between the pipe and the roof covering, and this will certainly cause leaks. There is no need to explain what a constantly wet rafter system or attic is. No mineral wool For thermal insulation, do not lay it down; the thickness of the fluff completely prevents spontaneous combustion of wooden elements.
Step 6. Gradually, over the same number of rows, move from the fluff to the size of the chimney, pull it up to the roof.
Step 7 At the lower level of the roof, start placing the otter. This element of the chimney is more complex than the fluff; the increase in the width of the chimney should occur gradually, taking into account the slope of the slopes. To increase the stability of the structure, we strongly recommend that you embed metal plates into the otter during masonry and attach them to the rafter system.

The ends of the bricks need to be trimmed, this will reduce the size of the gap between the roofing and the otter. If you don’t want to trim, we recommend installing between the bottom of the otter and the roofing metal sheets to prevent contact with rafter system and attic precipitation.


Practical advice. For those who are building a brick chimney for the first time, we strongly advise you to lay bricks on the ground without mortar according to the diagram before laying them. This will allow you to better understand masonry technology and avoid annoying mistakes.
Important. If plastering of the chimney is not planned, then the visible part of the masonry must be done for internal or external jointing. The bricks are smooth and beautiful - unstitch the seams, appearance materials are unsatisfactory - you will have to plaster. We will talk about plastering technology a little below.
Step 8 Laying the head. A purely decorative element, increase the outer perimeter of the chimney by a quarter of a brick. The head is one row and immediately after it the finishing row. We recommend embedding it in the finishing row metal mesh from birds. Attach the protective cap to the top of the chimney with dowels.

Give it two or three days to dry, and then begin the first heating of the stove. Don’t be alarmed if at the beginning of heating there is little or no traction, over time everything will fall into place.
How to plaster the top of a brick chimney
There are two options:
- buy special metal corners in the store;
- make your own universal device.

We believe that making a universal device is much more profitable.
- Firstly, it's much cheaper.
- Secondly, it can be used when plastering door and window openings, external corners of walls, etc. d. This means that such devices will always be useful at a construction site.
- Thirdly, you can independently adjust the thickness of the plaster layer depending on the condition of the surfaces.

The device is made from pieces of wire rod or construction reinforcement Ø 6÷8 mm. The length of the fittings depends on the width of the chimney or walls. The rod must be bent in a V shape, with the center of the bend located in the middle. The ends are bent again at an angle of approximately 90°. How to use the device?
Step 1. Select even wooden slats; the length of the slats should be equal to the length of the surface. It may be shorter, but then you will have to plaster it in two steps.
Step 2. Install the slats at the corners of the chimney (or opening) and secure them with two made clamps. The clamps must securely hold the slats in the desired position.
Step 3. Depending on the condition of the chimney surface, select the thickness of the plaster layer. Try to keep it no more than 1.5 cm; if there are large protrusions, remove them.
Step 4. Using a level, install the slats in a vertical position. There should be two slats on one side of the chimney. Repeat the same operations on the opposite wall.
Step 5. Start plastering the surfaces, usually remove excess mass and level it along the installed slats. Repeat the steps on the opposite side of the chimney.
The next day, carefully remove the clamps and slats. Now straight corners the plasters will serve as guides for the rule while plastering the two remaining planes of the chimney. Simple, fast, cheap and beautiful. Don’t throw away the clamps; you can handle anything with them. external corners in buildings.

Laying a simplified chimney
We hope that you have carefully read our tips and already have an idea about laying a traditional chimney. In this case, the simplified version will not create big problems. Let us dwell on its differences and technological features.
Video - Simplified chimney
The chimney has no fluff and no otter. The fluff serves as a fixation element; since it is missing, the structure needs to be secured in a different way. We recommend making a frame around the perimeter of the chimney from a corner using threaded connections attach the frame to the chimney at ceiling level. Next, it needs to be fixed to the ceiling beams. It can be fixed with metal plates or building reinforcement, it doesn’t matter. The main thing is that the chimney does not wobble.
The otter was needed to seal the chimney outlet above the roofing. It does not wall up - do the sealing yourself. Use metal sheets for this; the specific sealing technology depends on the type of roof. We will indicate only the main general points.


- Protective aprons must be bent and inserted into a groove cut on the planes of the chimney.
- To completely prevent moisture from entering, it is highly advisable to treat all contact areas with any sealant.
- There is an opportunity - when installing the roofing, purchase factory-made chimney outlet sealing systems.
If the brick used to lay the chimney has already been used, then the internal channel must also be plastered. Special angles and straightness should not be observed; the main thing is that the surfaces are as smooth as possible.
The presence of effective ventilation in the steam room and shower is one of the important conditions for the comfort of taking water procedures. In addition, it helps to quickly dry rooms and increase the service life of all wooden structures.


It is not advisable to install a brick chimney just for the sake of smoke from the stove. In this case, you will have to make ventilation ducts in the walls. We strongly recommend that you immediately make ventilation ducts in the chimney. If the stove and chimney are placed correctly, then it becomes possible to arrange ventilation not only in the steam room, but also in the shower room. For other rooms of the bathhouse, ventilation may not be provided at all.
Installation of electric fans () or decorative grilles with adjustable blinds or dampers.
How is the installation of ventilation ducts carried out?
Step 1. Make a preliminary layout of the chimney on the ground using bricks, provide one channel for smoke and two for ventilation. In order to save money, lay the pipe from the stove aerated concrete blocks, they are much cheaper, use brick only for the smoke channel. The entire chimney made of bricks should be placed only from the opening of the ventilation ducts (under the ceiling of the steam room and shower). After opening the channels, the chimney is made only of ceramic bricks.
Prices for aerated concrete blocks
aerated concrete block
Step 2. Lay the bricks with a bandage; it is enough to make the ventilation holes around the perimeter ≈ 12 cm, which is one width and two thicknesses of a standard red solid brick.
Step 3. If, for technological reasons, the ventilation duct has to be made in the corner of the chimney, then use a grinder to trim the bricks to give them the desired shape. geometric shape. Seal the seams carefully and do not leave gaps. Violation of the tightness of the seams significantly reduces the efficiency of room ventilation.
Step 4. The recommended wall thickness between the channels is half a brick, but you can change it depending on the required distance between the ventilation and smoke channels. Every new row tie with the old one at least half a brick. Please note that the chimney dimensions are ventilation ducts increase, wind sail loads increase, therefore, it is necessary to increase its stability.
Step 5. Using the same algorithm, continue laying along the entire length of the chimney. To speed up work between the extreme corners, pull the rope and use it to control the position of the bricks. It doesn’t hurt to check the verticality of the structure from time to time. Heading is done in the usual way- with a third of the brick overhanging across the row.


Video - Laying a chimney with ventilation ducts
It is not worth making otter and fluff in such chimneys; attach the chimney to the beams and rafters using metal corners and plates.
How to calculate the diameter of the chimney channel
You can find statements that the height of the chimney cannot be less than five meters. This is not true, do not pay attention to such statements. Just imagine a bathhouse approximately two meters high, above which a chimney three meters high protrudes.
Accurate calculations are quite complex, you need to know many formulas and take into account a large number of factors: the temperature of the gases at the entrance to the chimney, the speed of the air flow, altitude, combustion rate and type of fuel, wind rose, etc. You should not engage in such complex calculations, we advise use the Swedish method. It takes into account the main indicators, based on them, calculations are made and a schedule is drawn up. As initial data, you only need to know the area of the firebox (F), the chimney (f) and its height (H). Having two parameters, you can always find out the unknown third.

For example, you know the dimensions of the firebox and chimney, you need to know its height depending on the profile configuration. Find the percentage of these parameters and use the graph to find out minimum height. Or vice versa, the height of the chimney and the area of the firebox are known, but you need to find out the area of the chimney channel. Again with the help of the simplest arithmetic operations From the graph you will find out the dimensions of the channel taking into account the cross-section configuration.

The laying of otter and fluff can be simplified by using metal plates or rods. Use them to connect the rows together, but do not allow the rods to get into the working channels.
You can come across advice not to plaster low-quality bricks, but to cover them with a special ceramic tiles. We do not recommend doing this for several reasons.

Ceramic tiles for the stove - example

- Firstly, there is a high probability that the tile will fall off, constant cyclical changes linear dimensions chimneys have an extremely negative effect on the adhesion of tiles.
- Secondly, before covering uneven surfaces, in any case, you will have to trim them. Why then do double the work for triple the money?
Important. The service life of a brick chimney largely depends on the furnace firing conditions. Red brick is very afraid of high humidity. Especially in winter, when water freezes and breaks its integrity at double speed. What should I do to prevent the brick in the chimney from being wet? Everything is very simple - the temperature of the gases at the outlet of the chimney must be at least +110°C, such conditions will prevent the appearance of condensation on the walls of the duct.
But this is where problems arise. To achieve such a smoke temperature at the outlet, you need to heat the stove very high, and this is not always possible or advisable. In addition, most modern factory stoves have a fairly high efficiency; the heat of combustion of the fuel is released in the combustion chamber, and relatively cold gases enter the chimney. This means that condensation is inevitable. By the way, condensation not only negatively affects the strength of bricks. A lot of soot sticks to the wet walls of the channel; the chimney will have to be cleaned almost after a year.

There are two ways out of this situation.
- The first is to heat the stove very high.
- The second is to insert a thin-walled alloy steel pipe into the chimney channel.
Choose which of the methods we offer suits you best.


IN
Having taken up → (the link tells how to make a stove in the country), the owner inevitably faces the question of how to make a chimney with your own hands. A chimney is needed both to remove combustion products and to create a so-called draft in the stove, an air flow created by a pressure difference that ensures fuel combustion and removal of combustion products.
Content.
1.
2.
3.
4.
5.
6.
7.
What happens in the oven?
The combustion process from a chemical point of view is a process of oxidation, in other words, the combination of substances and oxygen with the release of heat.
The result of the reaction, in addition to heat, will be the appearance of new compounds, as well as the transition of some fuel substances into gaseous form. At the same time, in accordance with the law of conservation: how many substances by weight enter into the reaction, the same amount should be “output”.
If the fuel is solid (coal, firewood, peat, etc.), the lion's share of the remaining weight will be the ash remaining in the furnace. In addition, we will get steamy water, carbon dioxide, etc.
By burning gas or liquid fuel, the output will be carbon dioxide, water vapor and a set of other gaseous compounds. There will be practically no solid residue.
A little physics
Without knowing why and how smoke moves, making a chimney for a stove with your own hands is problematic; at a minimum, it may not be effective enough.
The mechanics here are quite simple: warm air has a lower density than cold air, and therefore less weight, therefore, according to the laws of physics, it “floats”, being pushed out by the heavier one.

During this process, it gradually cools down, mixes with the surrounding air and, finally reaching the same temperature, stops.
If we let warm air through a channel limited by walls that prevents it from mixing with the surrounding air, it will cool much more slowly, especially if the chimney for the stove is made of a material that does not conduct heat well or is additionally insulated.
The longer the chimney, the greater the volume warm air in it, the more significant the power it creates. Accordingly, the pressure of the air flow - thrust - is greater.
Interference and obstacles
The formation of an area can interfere with the process of smoke exiting the firebox. high blood pressure, which will “plug” the chimney like a plug.
Cooled air in the chimney can become such an obstacle. That is why increasing the height of the chimney makes sense only up to a certain limit, beyond which each centimeter of height will not increase the draft, but decrease it.