About a year ago, a drummer I knew, with whom I often met at a rehearsal point, told me that he finally wanted to buy drums for rehearsals at home. Working out with elastic bands didn't suit him, and the acoustic drum set didn't suit his neighbors. Because he knew that I was a fan of electronic drums, so he asked me to recommend an electronic one drum kit.
During the conversation, he expressed his wishes:
- The installation must be of natural dimensions;
- Maximum realistic rebound;
- Maximum realistic sounds;
- Price up to $1000 (then about 26,000 rubles)…
If it were not for the last requirement, then I would happily offer a person some Roland TD-20 and everyone would be happy. But with a thousand dollars in your pocket, the most you could count on was a Chinese Medeli DD506 or some used Roland TD-3. Neither one nor the other met the first three requirements. After some thought, an idea came to my mind: why not make an electronic drum kit based on a regular acoustic one with your own hands?!
The general principle was chosen as follows:
Below I will describe what we did and what happened. Unfortunately, no one thought about photographs then, and then contact with the person disappeared, so I write everything from memory.
So:
1.
We used an existing cheap drum kit as a basis. Force Series DSC. Something like this: 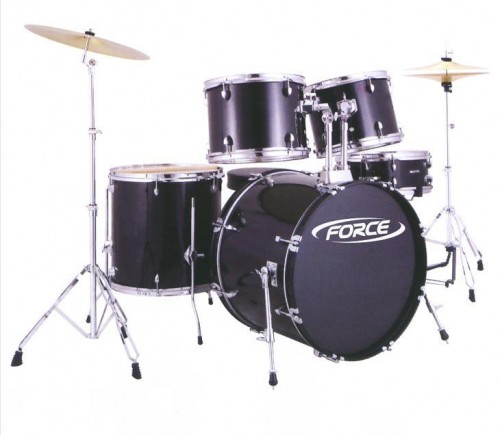
In fact, you can take any setting, the sound doesn't matter at all!
2. The old, battered plastics were immediately thrown into the trash, and mesh (Kevlar) ones were put in their place. They took plastics TDRUM as a set on Ebay. All plastics are of this type:

With shipping it cost about $90. The kit included the following plastics:
TDRUM 22″ TRIGGER MESH FELL BASS – for bass drum.
TDRUM 14″ TRIGGER MESH FELL – for snare drum
TDRUM 12″ TRIGGER MESH FELL – for tom
TDRUM 13″ TRIGGER MESH HEAD – for tom
TDRUM 16″ TRIGGER MESH FELL – for floor tom
3
. Now these plastics had to be “sounded” with something. It was immediately decided not to skimp on triggers, so we took the best that we could afford at that time - a set of triggers from DDrums: “ DDrum DDTKIT Pro acoustic trigger set“It cost about $200. 
There were cheaper options, but I didn’t want to take any risks.
Ride.
It was decided to use a 14 inch cymbal as a ride. Millenium MPS-600 14″ Stereo Cymbal Pad costing about $80. 
As I already said. I didn’t want to pay 4 times more for a similar plate from Roland.
Hi-hat.
Because If the task was to achieve maximum realism, then the pad with a control pedal as a hi-hat was immediately abandoned. Products from Roland and Yamaha were rejected due to their price. Paying $300 for one hi-hat would be an unaffordable luxury. Further searching led to a simple, elegant and cheap solution:
A special controller is placed on a standard hi-hat stand. We bought: Millenium Hi-Hat Controller Mine V2.0 — 130$
and the plate one is put on above. In our case it was the same Millennium: Millenium MPS-400 – 12″ stereo cymbal pad — 70$

The result was a fully functional hi-hat that realistically rose and fell depending on pedal input.

Crash.
As crashes we took two plates from Roland ROLAND CY-8 costing about $100 each. Analogs from Medeli are a little cheaper, but the quality of materials from Roland is higher.

5 . After the entire “physical” part of the installation was ready, it had to be connected to something. There were two options:
- or it's some cheap drum module like Medeli DD506, Roland TD-3 or similar. In this case, the installation had the opportunity to play independently of the computer, using the sounds of the drum module;
- or it is a midi interface, which costs noticeably less, but does not have its own voice at all and is virtually useless without a computer or synthesizer;
Because the installation was planned to be used exclusively for home rehearsals and recording, we unanimously agreed on option number two and bought, in general, a one-of-a-kind unit called: Alesis Trigger I|O

At a cost of about $150, it turned out to be 2 times cheaper than the cheapest drum modules. The program was included EZ Drummer Lite. However, we still replaced it with B.F.D.(there is now a second version of this, in my opinion, the best acoustic drum synthesizer for a computer).
6 . Then, the MIDI interface was connected to the computer. That's all! It was possible to play! The computer configuration was as follows: 2-core P4 (1.8Gg per core) with 2GB random access memory. In general, it quite successfully ran both Easy Drummer and then BFD, but neither the processor frequency nor the additional amount of RAM would have been superfluous.
Total costs turned out to be:
- plastic mesh – $90
- triggers - $200
- iron - $480
- MIDI interface - $150
- commutation cables - $40
$960 - and this is for a setup that sounds more than cool, much cooler than the Roland TD-20! Full size, classic appearance and realistic bounce! What else does a drummer need to be completely happy? .
Here are a couple of demos from YouTube:
Your drums will sound exactly the same!
That's all for now. Good luck!
Did you like this article? Please tell your friends about it!
“If a person has golden hands, it doesn’t matter where they come from!” (With) Russian radio
It all started with a strong desire to play the drums and practice at home, and not just at the rehearsal base. For training at home, I already had a homemade exercise machine. But knocking on rubber bands and felt without hearing “normal” sounds eventually became boring. The creative itch and engineering education pushed me to look for something else. Putting an acoustic drum set at home would be an inadequate solution. The apartment is in a panel high-rise building with all the consequences, as they say... Therefore, I settled on the option with an electronic drum kit. And I really wanted it to electronic drum kit it would feel as much like an acoustic one as possible. Option with hard drum pads was rejected immediately. But the drums with nets - it seemed very interesting!
The issue of price was also not the least of the issues. After studying the materials of various forums for drummers, I realized that it is quite possible to make the drum kit you want yourself.
Further - drum module. Which? Conditions: home use, flexibility of settings, connection to a computer and, of course, price. In the end, the choice came down to the purchase Alesis Trigger IO module and demanding self-assembly MegaDrum module. MegaDrum won.
When I first learned about MegaDrum and got acquainted with this project in detail, I can honestly say that I really liked it and aroused sincere admiration! What is especially captivating (in a good way) is Dmitry Skachkov’s reverent attitude and attention to his brainchild and the very informative forum where you can get answers to almost any questions regarding the module. Taking off my hat!
Below I will try to talk in detail and clearly about how I made my electronic drum kit and what nuances and difficulties arose in the process. Some things and solutions were not invented by me and are described on various forums. So this article (among other things) is an attempt to combine my own and others’ practical experience.

DRUM MODULE
As I indicated above, the MegaDrum module is used as a midi converter. At first I wanted to build it from scratch, but then I leaned towards purchasing the All In One v3.2 PCB 56i Kit. The kit allows you to assemble a module for an electronic drum kit with 56 inputs based on Atmega644. Yes, it was more expensive, but the advantages outweighed:
- All the details are in one package. This is important because it is not always possible to purchase everything you need at once and in one place;
- factory made two-layer printed circuit board with marked markings to facilitate installation of elements;
- already “flashed” PIC and Atmega with a protected bootloader.
All this contributed to the speedy assembly module for electronic drums and reduced the likelihood of “shoals”.
Payment was made by payment card via PayPal. After 2 weeks I received a parcel from France. The equipment and quality corresponded to what was stated (and expected too).
There were no problems during assembly. I soldered with a low-power soldering iron (25 W) with a thin tip. Solder in the form of a wire with a diameter of 1 mm with flux inside. At the end of soldering, I washed off the flux splashes using a brush and circuit board cleaner.
The soldering took about a week, because... soldered after work in the evenings, when the household emptied the kitchen. A kitchen with a hood definitely rocks!
As soon as the installation was completed, the desire immediately arose to check whether the animal was “alive.” Plugged it into USB and... It works!!! At least the system (I have WinXP SP3) recognized the device and the display showed information that it was MegaDrum and copyright D. Skachkov. Next we needed to check the inputs and buttons.
Over the weekend I went to the radio market in Kardachi. There we bought a plastic case of a suitable size, jacks, buttons (I decided not to use those in the set), additional connectors (for connecting drums and drum cymbals) and ten pieces of pieces with a diameter of 35, 27 and 20 mm. Just in case, I took it with a reserve (and as it turned out, not in vain).
Returning home, I quickly soldered the cable with a piezo and a connector. I connected MegaDrum, loaded the EZDrummer program and began to plug the jack and piezo into the module connectors one by one. I couldn’t believe it myself, but EVERYTHING worked! It seemed like it should have been, but deep down I was expecting some kind of joint. And here - assembled, connected and now you're happy!
I didn't need 56 inputs. 32 was quite enough even with plans for the future. Therefore, I put aside the board with 24 inputs. I made markings on the case and drilled holes for the connectors. For the USB connector I had to use a jigsaw to cut it out. I decided not to use midi connectors.
For drilling holes in plastic relatively large diameter(more than 5 mm) should be used feather drills for wood. This way you will get smooth and neat holes, and not torn holes.
I managed to ruin the “original” front panel of the case by mistakenly drilling holes for buttons of a larger diameter than necessary. Cursing, I thought about how to make a new one. An office that deals with outdoor advertising helped out. I drew a drawing of the panel in Adobe Illustrator and sent it to them by email. For 20 UAH ($2.5) they laser cut out a new panel from 2 mm acrylic with all the cutouts for screws, buttons and LCD. Looking ahead, I’ll say what they did to me there round blanks for acrylic drum cymbals 5 mm thick.
In the same Adobe Illustrator I made a drawing of the front panel. Printed it on photo paper and laminated it. Then I cut holes and glued them onto an acrylic panel using double-sided tape. This is what happened in the end.


At final assembly module, I still became a victim of my carelessness. I mistakenly plugged the keyboard connector into the encoder connector. After launch, I tried unsuccessfully to get to the settings using the buttons. But it doesn't work! As a result of my chaotic button presses, I turned the display contrast to zero and stopped seeing anything at all. I came to the forum to ask the age-old question “What should I do?!” The next day the joint was discovered. The connector was connected where it should be, after which everything worked. Contrast and settings have been restored. Hooray!
DRUMS
- Reels
After assembling the module, it was the turn of the drums. It was decided to make drums standard sizes, namely: bass drum and snare drum - 12 inches, toms - 10 inches. These sizes were chosen to obtain the optimal balance of the following parameters: quality of filming, the ability to install branded nets, dimensions and ease of play.
Initially I wanted to cut tubs from PVC pipes of the appropriate diameters. And very soon I realized that everything is not so simple! It was very expensive to buy pipes of such diameters and lengths of 2-2.5 m, and pipes 1 m long exist only in price lists. None of the suppliers saw them live. Those. the situation is like in the Soviet joke about toilet paper. It seems to exist, but it is impossible to buy.
Again the same question: what to do? On bourgeois forums, people solve the problem using “flexible wood”. The thing is, of course, useful, but for our region it is still exotic. It seems that a couple of companies in Kyiv have started supplying this so-called. “flexible plywood”, but the price... And bending shells from ordinary plywood at home is a real mess. In the end I decided to try making shells from fiberboard. After all, I'm not acoustic drums I was going to do it.
It was not possible to cut a fiberboard sheet evenly at home. So I went to the nearest Epicenter and bought a 2440x1220 mm fiberboard sheet with a thickness of 3.2 mm. I also ordered the sheet to be cut into strips of 1220x110 mm.
Because The thickness of the material was 3.2 mm, then when using 3 layers the wall of the shell was about 10 mm, which seemed quite sufficient to me.
I put 3 strips of fiberboard in a bath with a little warm water. After about 15 minutes the stripes began to sink. This was a signal that the fiberboard had absorbed enough water and was ready to bend.
It must be borne in mind that fiberboard strips receive various internal stresses during the drying process and become deformed. If you simply twist the strip into a roll, securing it at the edges, the result will be an egg-shaped spiral. But it won’t be possible to glue together a perfectly round tub. The strips should be dried by wrapping something around it and securing it tightly. I used 2 pans of the appropriate sizes. Larger for snare and bass drum, smaller for toms.
One by one, I rolled the strips into rolls and placed them inside the pan for a minute (so that they remember the shape a little). Then, one by one, he tightly wound them around the pan, seam to seam. I also wrapped it tightly with nylon twine on top and left it to dry for 4 days.

After 4 days, I removed the “donut” from the pan and wrapped it around the ring with twine, leaving it to dry for another 3 days.

So, the blanks for the tub are ready. Can be cut and glued. Next, I will describe the process of making a tom shell.
The first layer is the outer one. If the shell has an outer diameter of 10 inches (254 mm), then the length of the first strip should be 798 mm (L=2*Pi*R). To accurately measure the given length, I took a flexible sewing meter and, using a precision tape measure, made a mark on it (you can’t trust the divisions on a sewing meter). Having secured one end of the meter to the strip and wrapped it tightly around the workpiece, I marked the desired length. I cut off the excess with a hacksaw.
It is not necessary to calculate the exact length of the second (third) layer using a formula adjusted for the thickness of the material. It is enough to estimate the length with a small margin, and cut off the excess during the gluing process, when the actual length is clear. The “seams” of the layers should be located opposite each other.
To glue the fiberboard I used moisture-resistant B3 glue. It is similar to PVA, but becomes more rigid as it dries.
First I coated it with glue small area at the junction of the outer layer, I covered the outside and inside with pieces of the previously cut strip and clamped it with clothespins on both sides. After 30 min. I took off the clothespins and glued the right half of the ring, holding it with clothespins. I left it to dry for 40 minutes.
During gluing, it is very important to ensure that the edges of the strips do not overlap each other!
Then he took off the clothespins and cut off the excess glue from the edges with a knife. I pressed the left half of the inner strip tightly and determined how much needed to be cut so that in the future it would stick to the joint with the right one. Cut it off. Then I glued it using the method described above. I did the same with the third strip and left it to dry overnight.


The next day I sanded the sides and edges, rounding the top (under the mesh). Next, I made markings for the holes for the screws (fastening the joists and the bottom) and the connector (female jack).
Decorate the tubs with outside I decided to use a self-adhesive film “like wood”. To ensure that the film sticks well, I coated the tub with varnish on water based in 3 layers with intermediate grinding, leaving the upper part about 7 mm wide intact. Accordingly, the film was cut 7 mm wide less height tubs. The indentation is needed so that the mesh does not tear off the film when pulled. I soaked this indentation with wood varnish and sanded it. In general, I would like to note that after the fiberboard was impregnated with glue and varnish, its properties began to resemble wood.
The rest of the shells were made in exactly the same way.
- Drum hoops, bottoms and lags
Tatiana Shubenkova
Project passport
1. Educational areas, within the framework of which the project work is carried out: music, socialization, artistic creativity
2. Project participants: children of preparatory groups and their parents, teachers, music director (project leader)
3. Project deadlines: month (10/1/2015 – 10/30/2015)
4. Project type: creative
5. Problem: How to organize a children's drummer orchestra in kindergarten?
6. Project goal: Create a children's orchestra "Drummers"
7. Project objectives:For children:
Introduce the history of the appearance of the drum: what types of drums there are, how a hand drum differs from a military one, methods of performing on a hand drum (“knock”, “slap” - high-close, far-low, on a military one (long and short sounds);
Participation (playing music) in a group (orchestra of drummers)
For the music director:
Create material base from the drums, replenish the section " Percussion instruments» in the mini-museum “Rainbow of Sounds”;
To acquaint children with the structure of the drum, with ways of playing hand and military drums;
Invite educators and parents to cooperate in matters of music education for their children;
For the teacher:
Introduce children to the history of the drum (hand, military);
Teach children to compose a story based on the picture “drum” (speech development);
Making a stick for a military drum (manual labor);
Involving parents in the educational process (making drums)
For parents:
Participation in the production of drums and costumes for the “Drummers” orchestra
8. Project abstract:
Relevance of the topic. One of the important tasks of personality-oriented aesthetic education is the development of the child’s emotional responsiveness and his culture of feelings. The solution to this problem is possible in the process of developing all components of musical-aesthetic consciousness, creative activity in various types children's musical activities, including playing children's musical instruments. After all, playing children's musical instruments is one of the most favorite types of musical activities for children. It develops and realizes the musical abilities and performance capabilities of all children. Acquaintance with musical instruments gives the child the opportunity to experiment, develop Creative skills and communication skills.
Significance at the preschool level. Project " Musical instruments with your own hands. Drum”, implemented in work with children preparatory group makes it possible to integrate the content of various educational areas; realize educational activities based on the interaction between the music director and the teacher; involve children's parents in the educational process.
Significance at the family level. Involving parents in educational process; educating parents on how to make a drum at home with their own hands and spend family leisure time.
Personal orientation of children. During the implementation of the project, children will learn the history of the appearance of the drum, its structure, methods of producing sound on the drum, which will contribute to the development of their cognitive interest and form the need for playing music in an orchestra;
Educational aspect. A necessary condition The implementation of the project is to get acquainted with different drums, with the techniques of playing them, which will contribute to the formation of a musical sense of rhythm in children.
Project stages.
Stage 1 (organizational)
Collection of information about drums (hand and military);
The content and forms of interaction with educators are clarified;
The music corner in the group is being replenished: scores, cards, pictures of drums;
Materials are being developed to attract parents to the project (consultations, memo-booklet, folder-moving - recommendations)
Stage 2 (implementation)-Organizational-pedagogical and cultural-leisure forms are identified, which become a condition for the implementation of the project, and the content of the work in each of the forms is determined: excursions and classes on getting to know the drums different types, their sound, ways of playing;
The drummers' orchestra score and dance movements for the orchestra's performance are learned. A leisure scenario “Here’s a drum” is created. MK for educators “Drum” is held;
Products received during the project are formalized
Stage 3 (presentation)
Leisure activities “This is such a drum” are held (performance by the Drummers Orchestra, exhibition “Our Merry Drum”, where all participants (teachers, children and their parents) of the project present their results;
Methodological association of music directors of MDOU (exchange of experience)
Stage 4 (reflection)
Project materials are drawn up and systematized;
A self-analysis of each of the project participants is carried out: “What has changed for me during the implementation of the project”;
Ways to continue the project are being outlined (creation of other musical instruments
Project portfolio
Master class “Drum” (for educators)


Exhibition “Our Merry Drum”

Leisure “Here is such a drum” (orchestra of “Drummers”). More details in the next works

Publications on the topic:
Our kindergarten hosted a competition “Musical Instruments with Your Own Hands”. The competition was held among parents and teachers. Tools.
Federal State educational standard(hereinafter referred to as the Federal State Educational Standard) puts before teaching teams Preschool educational institutions have serious tasks. Implementation.
Soon there will be a music corner competition in our kindergarten. At a parent meeting we decided to make musical instruments with our own hands. By.
For the harmonious development of children aged one and a half to two and a half years, it is important auditory perception and a sense of rhythm. Develop and.
Good afternoon, dear colleagues! I decided to replenish my musical piggy bank with homemade musical instruments. As you know, all items...
Abstract of GCD "Musical Instruments" Musical director: Guys, today we will talk about musical instruments. On earth, everyone has a home. Fine.
A wonderful idea, according to psychologists, is to teach a child to music from the very beginning. early age. You can either purchase a drum at a toy store or make it yourself. A simple tin can and a little imagination can help you easily implement your plans.
Benefit or noise?
Many adults believe that a children's drum is of no use. It is simply a source of noise and accompanies the appearance of a headache. Nevertheless, the drum is very often entrusted to parents and their children in kindergarten to make. However, this does not happen for the additional workload of the baby and the parent on the weekend. Most often, a loud attribute is intended for performing at a matinee. And you can’t do without this.
Don't think that making this item is a waste of time. Who knows, maybe the child has acting abilities, and already in kindergarten he will decide on future profession. And such a craft will bring a lot of benefits, even if it is carried out at the request of a teacher from kindergarten.
What to make a tool from
In bulk necessary advice For making drums with your own hands at home, it is worth highlighting one not entirely serious recommendation. It is rather of a comic nature, but every joke has its own piece of truthful meaning. A homemade drum for a child can be used for something other than a matinee. It all depends on the imagination of the parents.
One has only to look around oneself, each person can notice several tin cans or packages that are unlikely to be useful. From these materials you can make a drum for playing with your hands or special sticks.

Reasons for creating crafts
This question probably worries all adults. Every parent wants to find out the reasons for such a pastime with their child. There can be several examples of reasons for such an activity:
- Getting closer to your child through joint activities.
- An exciting start to the evening for the whole family.
- Development of coordination of movements and sense of rhythm in the baby. After all, with a craft that was invented and created with your own hands, you can participate in an impromptu march.
- The baby may not easily hit the drum with sticks, but try to reproduce an interesting favorite melody from a children's song or cartoon.
- Drums played with hands can be an excellent option for keeping your little ones busy for some time. summer cottage.
- Finally, the drum can become a weapon of revenge against annoying neighbors who constantly do repairs on Sunday mornings.

It is worth considering that an act of retaliation for neighboring apartments can occur without disturbing the peace of adults. To do this, residents of an apartment with a newly minted drummer need to buy earplugs or a pair of headphones in order to muffle the noise in the room.
Plastic bucket with lid
Not every adult knows how to make a drum with their own hands from a plastic country bucket. You can colorize such a tool simple colors, it can also be covered with ordinary colored paper. It all depends on the imagination of the little master. The lid on such a bucket should fit tightly. After all, the tool will be damaged if the upper part of the tool falls off at the most inopportune moment.
A drum made from a plastic bucket can simply be held in your hands, or you can hang it around your neck. This action is very simple to perform. The material has two holes from the handle on the sides. It is through them that you need to thread an improvised strap, securing it with knots.
Sticks for similar plastic tool can be selected from available materials. This role can easily be played by pencils or old felt-tip pens that are no longer used for drawing. So, things will be given a second life and the child will be satisfied. Kitchen brushes, which every housewife has, can also make interesting sounds.
A child can try out the sound of absolutely any object in the apartment and choose the most suitable one. You should not limit the imagination of a future musician or composer. Sometimes a child needs to be given freedom of action.
Paper product
A decorative drum for a little musician can be created from plain paper or cardboard. To do this, you need to cut out two circles of the same diameter. Their size can be any. Then a strip of paper is cut out, which will become the connecting element for the top and bottom of the instrument.

The paper structure can be glued together with glue or connected with tape. You can decorate the craft using paints or pencils, paste it with various paper illustrations, stickers, cover it with bright satin fabric and sew funny pom-poms on the sides. Thus, a children's craft with their own hands will acquire its own individuality. This part of the work, undoubtedly, can be done by mother’s little assistant himself.
Almost any idea of a little dreamer can and should be brought to life. And for this it is not at all necessary to run around the shops and spend large amounts. Do-it-yourself drums will not only look unusual and original, but will also not require much time to create.
Required tools and materials
The basis of crafts for children in in this case will become a simple tin jar round shape. Among others necessary materials applies:
- hole punch for leather fabric;
- small piece of fabric bright color(can be replaced by colored paper);
- leather flap;
- glue gun;
- leatherette laces;
- glue for fabric elements;
- cotton wool
And also in the process of work it will be impossible to do without wooden sticks.
Making the tool step by step
First, you need to cut out a piece of suitable size from bright fabric and paste it over the jar. The fabric can be any. In its absence, the base is simply covered with colored paper, which is sold in any stationery store or supermarket.

A jar is placed on a piece of leather material and outlined. It is necessary to add 10 cm to the resulting diameter of the tool. Draw another circle.
Along the radius of the part, using a pencil, mark the areas where the holes will be located in the future. In any version of making a drum, make an indent of 1 cm from the edge with your own hands. Holes in the leather are made with a special hole punch.
A leatherette cord is threaded through the holes. It must subsequently be tightened tightly on one side of the jar. The same steps must be repeated when creating the bottom for making a drum with your own hands. The lace is also used for additional fixation of products diagonally. In this case, the element is threaded under the lacing, which is located at the top and bottom of the drum.
The final stage is making drum sticks by hand at home. To do this, a wooden stick is connected to a bead-knob. Glue a small cotton ball on top of the bead and wrap it with threads so that there are no empty spaces left. This is how a drumstick is made.
Instead of a total
It's so easy to create your own drums. Without a doubt, your little one will love this exciting activity. After all, a child can act as an apprentice at work. And creative activities with the whole family will not only contribute to the development of the child’s imagination, but will also have a beneficial effect on the child’s imagination and thinking. If a child strives to create things with his own hands, then this activity should be encouraged by adults, because spending time like this contributes to the development of children, strengthening various household skills, and simply brings joy.
The drum is one of the first musical instruments that became available to humanity due to its ease of manufacture. You can easily make a small drum for a child with your own hands.
Materials required for manufacturing homemade drum:
scissors
tin can with plastic lid
crimson yarn and blue colors
rubber
yellow self-adhesive paper
PVA glue
two wooden sticks
thin raspberry felt
thin felt coffee color
two foam balls
superglue in the form of a transparent gel
At the first stage of work, you need to remove the lid and cover the jar with self-adhesive paper. To do this, you need to wrap the future drum body with it, mark the shape with a pencil, and then cut out a piece of suitable size from the yellow self-adhesive tape. After this, using transparent superglue, you need to draw even diagonal lines along the entire body, alternately directed to the right and left, thereby forming a pattern of classic triangles. Raspberry yarn is placed on these lines. For greater bonding to the surface of the body, colored threads must be carefully pressed into the glue strips. Excess yarn is cut off.
The second stage of work is the drum membrane. It is made from plastic cover, suitable for this tin can. The lid must be outlined by attaching it to a piece of coffee-colored felt. Next you need to cut it out of felt smooth circle along this contour, be sure to leave an allowance of two centimeters. Then the lid should be put back on the jar, and the felt circle should be carefully glued on top using transparent superglue. You must ensure that the fabric lies smoothly and evenly on the lid. Indentations and bumps can be avoided if you lightly pull the felt onto the lid when gluing. Superglue is applied not only to the lid, but also to the top of the jar itself, not far from the lid. Then an elastic band is put on top of the resulting structure, successfully fixing the fabric and hiding the junction of the drum body with its membrane.
To complete the design, the yellow drum needs red stripes. For this purpose, crimson felt is useful, from which you need to cut strips a centimeter wide. They will be glued along the circumference of the drum, on top of the elastic, and along the bottom edge of the can.

The toy is almost ready, left final stage. Need to take wooden sticks(preferably they should be round in cross-section) and use them to make holes in the foam balls. The holes should not be through. Transparent glue is poured into the resulting holes and then sticks are inserted. Let the structure dry. The final stage of work: apply PVA glue to the foam balls. After this, you need to wrap them in blue yarn and wait for the glue to dry. The drumsticks are ready.
Watch a short video tutorial on how to make a homemade drum from a bottle.