Chapter 1: Emergency Call
Strange things are happening at the Mayak psychiatric hospital. Together with the policeman and detectives, we go there to find out everything. We go to the entrance to the hospital. Inside we see many corpses. We follow our partner, who finds a surviving but crazy doctor. We look at the surveillance camera footage to understand what happened here. After this, we are knocked out by an unknown enemy and we find ourselves captured.
Look around. When the ghost leaves, swing and grab the knife, which will help you free yourself. Sit down and wait for the butcher to leave the table. After that, sneak and take the keys. Get out of there and turn left where there will be a door. Open it with these keys and move on. At the end of the flight we will raise the alarm and the butcher will run after us, who at the end will injure our leg and activate the trap. In front of the second gate, open the grate, and then dodge the traps. We get out of the pool and go to the end of the sewer. Let's go to open door and go up the stairs to the old wing.
Press the button and move on. The butcher will chase after them through two doors. Hide from him in the closet. Wait until he breaks down the door we need and only then leave. Now you need to avoid catching his eye and get to the other wing. To do this, go behind the furniture and take a bottle there. Now throw it in the other direction so that he runs there and checks the noise. Repeat the bottle trick until you reach the checkpoint. The butcher still catches up with us and we need to run away to the elevator. Someone will open the elevator for us and help us escape.
We get out of the elevator and run to the exit of the hospital, where we are met by a policeman in a car. The escape ends with us falling into the abyss.
Chapter 2: Survivors
We come to our senses in the hospital. We pick up the newspaper clipping and the green gel. We look through the bars and see cockroaches. The nurse will open the door for us. We go to the hall and sign the paper (save). We go through the opened gate and sit down in a chair to improve our skills.
Now we actually come to our senses and get out of the burning car. We pick up the syringe that restores health and follow the bloody trail that will lead us to the dead cow. There will be a box next to it. Break it and pick up the green gel. After that, go to the ledge, where you will see a policeman who has become a cannibal. Pick up a revolver. Shoot him in the head. Go into the tent, there will be ammo and green gel.
We go into the cave and see a distraught woman who warns of a trap. We neutralize the trap and move on. By the way, the parts from the trap will be useful to us in the future. We leave the cave and see a dead enemy. We select matches next to him and burn him.
We go to the bloody door, where we see a hallucination. We select the gel and the diary. After that, we peer into the mirror and find ourselves in the hospital again. We go into the hall and read newspaper clippings about Leslie and serial killer. Exit from the hospital through a broken mirror.
We leave the house and follow the path down, where the enemy will be. We kill him secretly and burn him. We go into the house and jump out the window. Going a little further into the forest we will see how the locals are turned into zombies. Run to the house in front of the zombies and crawl under the trap. The zombies will run into the trap and explode. There will be matches, cartridges, a first aid kit and green gel in the house.
Go to the next house, where there will be two more enemies. First of all, kill the enemy with the torch, and then hit the second one with the same torch. This way you will save matches. Go further (beware of ground traps) and do the same operation with two more enemies. After that, burn the two enemies near the gate and open the gate using the lever.
There will be a bunch of monsters outside the gate. I don’t advise you to contact them, but rather immediately run to the next gate and watch the video.
Chapter 3: In the Claws of Monsters
We get out of the water. Near the mountain of corpses, use a match to move on. We go into the house (be careful, there will be explosive traps in the house that react to noise) and on the second floor we find the doctor who was with us in the ambulance. Before going to the doctor, I advise you to examine the house. There will be a lot of green gel and matches. After examining the house, go find the doctor. The doctor will ask you to smoke the lever so that it will distract most of the enemies. We turn the lever and the doctor collects most of the enemies near the house into which he runs in person. First we go to the barn, there will be a lot of gel and other items. Then we go into a separate house with traps and on the second floor we find the “Agony” crossbow. Also, don’t forget to go into the house the doctor ran into. On the second floor there will be a shotgun and you will find a doctor who climbed into the attic and thereby saved his life.
The gate cannot be opened due to the chain getting in the way. You need to cut it off with a saw. Before the battle with the boss, I recommend clearing the village of other enemies so that they do not interfere. Go to the barn. The sadist will break the gate and rush at you.
Tactics:First, we find the “Agony” crossbow and create blinding bolts for it (one bolt can be found on the tower next to the house in which the doctor is hiding). After that, during the battle with the boss, we shoot from a revolver (about 10 bullets, depending on the difficulty level), and then we blind with a crossbow, approach and make a stealth kill. Thanks to this tactic, you will receive the achievement “ Knife Beats Chainsaw / The knife is stronger than the saw.”
After defeating the boss, collect the green gel and take his chainsaw. Use a chainsaw to cut the chains and move on.
Chapter 4: The Patient
Go immediately to the house opposite. The zombie will break down the door, kill him and break open the chest with ammunition. After this, we follow the doctor and find ourselves in the house of his brother, who also came under the influence of the Lighthouse. We shoot him in the head and kill him. We look at the drawing on the table, cut the corpse and take the key. We leave the house and go to a small closet. There will be a detective's diary on the door and a mirror inside. We use it and again find ourselves in the hospital, where there will be information about the doctor’s brother. Also, the nurse will lead us to lockers that open with a key. Open any locker using the key and take the contents.
Next to the doctor's house there will be a burnt house, which is unremarkable except for a ghost running out on fire.
At the exit from the house you will see a fire and a man carrying a woman to the fire. Shoot him in the legs and save the victim. She will run away and lead us to a place where there will be green gel and crossbow harpoons. After that, go to the house opposite and go down to the basement, where Leslie will be. Before going through the red door, turn into the passage and take a shotgun and a couple of harpoons. An invisible enemy with tentacles will climb into the basement and cast a barely noticeable shadow. Shoot into the shadows and thereby you will reveal the enemy, and then it’s up to the small matter.
We follow our companions and see that there are no stairs. But Ruvik appears, scaring our companions. We follow him and see an illusion after which we will find ourselves in the pool. We get out of it and go to the door. Ruvik will appear in front of us and create several zombies. Try to thin out the ranks of zombies using traps, and then collect them in a heap and shoot them in the head (it will knock down all the zombies, leaving only one to set on fire so that the rest die). After killing all the zombies, the slurry will subside and you will be able to move on.
Walk along the corridor until you see a woman crawling out of a corpse. It is useless to shoot at her, run back to the door. She will be knocked out by a zombie, which the spider will eat. We run through the door and go down the stairs. We bend down under the traps and go into the elevator. When exiting the elevator, set the body on fire to trap the spider in it. Open the door and use sprint to run to the door.
Go down until you see Ruvik. Now run back upstairs and watch how everything is destroyed, and after that you will again find yourself in front of the door.
Chapter 5: In the Depths
Before going through the main door, I advise you to turn back and walk through the chambers. There will be some gel and ammo, as well as an invisible enemy.
After searching the chambers, go into the main door and read the detective's diary. Take a new crossbow bolt from the case, and then go into the mirror. Once in the hospital, read the newspaper clipping, and then go back and go to the end of the corridor, where the door will open. Go there and go through the hole in the wall, and then jump down into the hole in the floor.
To go further you need to find a key card. We go through the door opposite. There will be two invisible people inside. We deal with them, go into the file cabinet and pick up the key card. At the exit, another invisible man will be waiting for you. We kill him, swipe the key card and follow Ruvik, who will lead us to a room with four walls. We look into the small hole and see a boy drawing. A door will now appear. We go inside and press the first button next to the corpse (pressing the wrong button leads to the death of the hero). He will be pierced and the blood will reach the wall. We look into the next wall and go in; press the first button. We also go into the third room and press the second button. As a result, the collected blood from the three rooms will create a door through which we will go and find our partner there.
We raise our partner to his feet and leave here. In the chamber, six zombies will attack you. Don't waste ammo on them. Take it to the oil puddle and wait until most of it comes up, and then set it on fire. All attackers will be burned, and you will be able to move on.
At the end you will reach a booby-trapped door. Wait until your partner neutralizes it and follow him. We watch a cut scene among the baths. We go up the stairs and use the mirror in the toilet to get into the hospital. We read the new newspaper and open a new ward where Leslie will be. After that, he will let us go and we can return to our partner.
We open the doors to the main hall, where the second partner will be and is also trapped. Joseph will be thrown down and we will have to cover him. Shoot an explosive bolt into a large cluster of enemies, and then finish off the rest with headshots. There will be ammo, a health syringe and grenades in the hall. In the closet there will be an electric bolt, which will be useful against a large concentration of enemies. There will be several waves of enemies. Pay attention to the enemies with dynamite, kill them right away, and then move on to others. After killing the last two enemies with dynamite, the waves will stop. Now we can help Kidman.
We follow the pipes. We find ourselves in a room where there are a lot of zombies. We ignore them, run to the last camera, crawl under the gap and go upstairs to the control panel. We set the top one to 22 and the bottom one to 5 and thereby free our partner. But it’s too early to rejoice. Our partners fell underground. We jump down and go to them. We squeeze through the gap and run all the way until we reach our partners. We help shoot from zombies and are attacked by illusions that will divide our team.
We go through the door, read the diary and go into the mirror. We read the newspaper and the list of missing people. Now you can go back. Beware of traps, there are a lot of them here and they are unexpected places. At the end of the corridor a spider will attack us. Run back to the resin and set it on fire when it approaches. This will scare her away for a while. Remember closed door? Thanks to the spider, it is open. We go there and pull the lever. Now we go to the center and fight with the spider. Stock up on explosive bolts and grants. Lure her to the barrels and blow them up, then throw grenades or explosive bolts under her while she writhes in agony from the fire. After two or three of these fire traps you should kill her. You can also use ovens. On the left, go down the stairs and wait until she comes down for you, and then pull the lever. And on the right it’s the other way around; Climb first and then pull the lever. After killing her, the door will be free of liquid and you can move on. Don't forget to pick up 8000 gel from the spider.
Let's move on and watch the scene. After this, we deal with three zombies who crawled out of their bathrooms. They need to be laid on the ground, and then the shoots should be pulled out of their heads. After this operation, the device will explode, and you will be overwhelmed by memories.
Chapter 6: Not Ourselves
We wake up in the hospital and after the conversation we look at the photographs on the table. The light will turn off. Turn on the flashlight and leave the office. Go to the main mirror. After the cutscene, follow the nurse down and go to the end for another meeting with Leslie.
You will find yourself back in the real world. Run to the church where you will meet Joseph. Fight off the zombies until your partner breaks down the door. The next room will use the same tactics.
It's too early to relax. Pick up the sniper rifle, go into the room and pull the switch. After that, go upstairs and in short dashes shoot the machine gunners who will stick out of the opening cabs. Don't forget about the zombies that will run around this area and prevent you from taking out the machine gunners. After killing the main enemies, jump down and fight the butcher.
After the battle, go inside, go upstairs, burn the body and go into the elevator. Walk across the bridge, watch the cutscene, and then shoot the zombie in the head to save Joseph from execution. Go to his side along the beam, watch the cut-scene and fight off the zombies while your partner plays shaman with the gate. Run through the opened gate and you will find yourself in the market, and then in the cemetery, where Joseph will find a rifle and can cover you. At the end of the cemetery, two giant bosses will be waiting for you. Joseph will help you sort them out.
After this, go to the two horse statues and you will find yourself back in the hospital in front of the photographs. Run to the main mirror and return to real world. Walk a little further and you will find yourself in a room with a riddle. There should be corpses on altars 3,5,9, but there should be no corpse on altar number 7. After this, you can calmly pass and not die.
We get into the elevator, which will take us to the laboratory, where there will be a huge wolf. For now we don’t pay attention to him, we move on, stand on the button and find ourselves at the exit. Before leaving, that huge wolf will attack us and stun Joseph. We fight with him, after the cut-scene we run for Joseph’s glasses, ignoring the wolf. After this we go to the church, where the episode ends.
Chapter 7: Guardian
We go into the church and talk to our partner, and then watch the cut-scene. Go down into the hall and take the right passage. Kill the zombies and pull out the sign at the end. Go through the opened opening, knock down the lock at the gate and insert the sign into one of the openings.
Go to the right passage, listen to the audio recording there and turn right. Shoot the two gears and move on. There will be enemies inside, kill them and then open the gate. A little further you will find a sign. Cut it out and go through the resulting passage into the main hall.
In the left passage we close the gas valve and move on. We kill two enemies. Be careful, the hanging zombie will trigger a trap after it jumps off. After that, we go down the stairs and the hatch is closed behind us, and the gas is activated. We quickly close the first valve and run to the second, killing the zombies along the way. After that, we go down the stairs. Then just go through the rooms, clear out enemies and disarm traps. Eventually you will find the last sign. Cut it off and go out into the main hall.
Insert the last sign and go into the main entrance. Safehead is waiting for us there. Deal with the trap and move back a little so that the stakes fall. After that, run to next door, being careful of floor traps that can slow you down. Here you will meet Leslie, who again freaks out and accidentally activates the alarm. Safe Head will appear. Kill him and after that the room will be filled with gas. Run to next room and there activate the valve. After that, run into the next room and also activate the valve. All this time you will be pursued by the Safe Head, but if you do everything quickly, he will not cause any special problems.
After cutting the second valve, kill the annoying enemy and go to the next valve, which he will break. Return to the beginning, where there will be a new valve on the table. Place it in place of the damaged one and turn off the gas supply. Now run down, climb the stairs and finally kill your pursuer.
Turn left, go down the stairs and the episode will end.
Chapter 8: The grain sprouts
A simple episode. Run through the cave and ignore the monsters. Quickly turn the lever and run under the spears. After that, turn another lever and go through. You will find yourself in a room with a trap and a panel. Insert it into the door with the sad side. A little further you will be covered by another vision. Run through the hospital and at the end you will meet a doctor. After the cutscene, go to the door and run away from the huge boss. At the end you will meet Ruvik and the episode will end there.
Chapter 9: Cruel Intentions
We find ourselves in the hospital again. Look into the next cell and follow the nurse. Look at the picture, take the newspaper and go to the mirror. We will be transported to another world. Go to a private hospital and start examining it. Here Ruvik will attack us. You will understand this by the change in the picture. You need to hide, you won’t be able to kill him, and if you get too close, you’ll die.
To open the central door we need to perform three brain operations. To access the third patient, you need to find the drums from the safe (the first drum will be on the second floor of the building in the central room, the second drum will be on the second floor in the library). Now go down and turn right. Insert the reels and enter the code: 11 top, 2 bottom. There will be a second head there.
We go to the left room and kill the zombies there. There will be a brain in the room that we can operate on. After finding the reels, go down and turn right. Insert the reels and enter the code: 11 top, 2 bottom. There will be a second head for the operation. The third head will be in the fireplace. You can get there from the library. Before doing this, shoot the red light to destroy the trap and survive. After that, we crawl under the fireplace and operate on the last head.
Having operated on all the heads and looked through all the memories, we go down to the central door. Run along the corridor and see the visions. After that, run away from here. A strip with traps awaits you, and then a run along the corridor shooting locks.
Having successfully avoided the trap, you will find yourself in Ruvik's room. Open the door and enjoy the beauty of sunflowers. Go to the farm and watch the memories. The barn is on fire! Pull the lever and then the valve. Go to the platform and from there shoot the lever, and then climb out the window.
They won't let us climb out the window, so we'll have to fight. Kill ordinary zombies and try not to get close to the huge monster. After this, watch the cut-scene, walk along the long vestibule and complete the episode.
Chapter 10: Master's Tool
I advise you to look in the mirror and talk with Ruvik’s “hatred” and read the next newspaper. After that, return to the world and go down the stairs. Kill the enemy secretly and go into the room. There, go up the stairs and at the end of the corridor take the generator. Go down and insert the generator in the next room. Go through the opened doors.
Go down and go to the end. There will be a broken switch. Go through the blue door and, ignoring the zombies, take the generator. Again, ignoring the zombies, run to the room with the broken grate, crawl there (be careful, there is a trap nearby) and insert the generator. You will have to go back another way. On the way to the lever you will have two mini-bosses. Move them away from the lever and freeze them. After that, quickly run to the lever, open the gate, pull the other lever to disarm the trap, and finally pull the last lever and go through the door.
Again our friend with black hair. For now we need to run away from her. Pull the lever and crawl under the gate. After that, close the door so that she cannot run after you. A little further you will find yourself in a location with fire traps. Pull the levers and then shoot the switches on the pipes. Repeat until you reach the elevator and meet Ruvik there.
Go to the end of the corridor and meet the doctor. Watch the cutscene. We were moved to the parking lot. Travel to the hospital and talk to Ruvik's "hatred" again. Now go fight the boss. Try to use freeze and electricity bolts. After that, shoot the opened eye ( purple aura near the boss will make it clear that the eye has come out) and end the life of the boss. Collect the gel, get into the elevator and the episode is over.
Chapter 11: Reunion
Walk through the ruined city until you reach the prison yard. Kill everyone there and wait for one of the zombies to knock down the door with his friends. Ignore them and run in there, grab the keys and run, dodging bullets to the main door. Open it and run across the bridge until it collapses.
Swim to the canal and you will see water creatures. Distract them with hanging zombies and swim to the paved area. Run through the ruined city until you come across a fake Ruvik and zombies. Kill everyone and move on, after which you will move through the mirror to the hospital. Read newspapers and clippings there, and then return to the real world.
Crawl through the hole and you will find yourself at a construction site. Zombies will come out of the container in groups of 2-3. Kill them all and go into that container. Now climb up the platforms to the other side, jump down there and call the trolley. Ignoring the zombies, climb up the stairs and get into the trolley. Shoot your enemies at the legs or torso so that they fall down. There is no point in shooting in the head, since they have masks that absorb damage.
We jump off the trolley and run through the offices. After a while, you will hear the screams of Kidman, who needs help. We jump onto the red container and pay attention to the yellow door. As soon as you hear the sound and the door rises, go there quickly. After that, go up the stairs and kill the dead people who are trying to catch Kidman and the dead man on the car below so that he does not interfere with us going up in the future. Now repeat with the corpses and the door the same as last time. Once on the other side, go upstairs and save Kidman. Fight off the last of the dead and go down to the street. Go into the building opposite and watch the cut-scene.
We go down and find ourselves in a flammable zone. We secretly pass by all the enemies and turn off the valve so that we can then calmly open fire. After that, we go to the blue container (next to the place where they turned the valve), kill the enemies and take the key card. We go to the door and open it using the card. We go out into the fresh air, make our way through the ruins and meet Joseph.
Chapter 12: Trip
Shoot the healthy Arachnoid in the head to make him let go of the bus. After this you will be ambushed by zombies. Fight off the ambush (try to shoot at dynamite or a Molotov cocktail so that the snipers are also hit). After that, we shoot at the zombie with dynamite, and he will blow up the truck, and we will be able to move on. After some time, the Arachnoid will appear again. You already know the tactics.
We watch the cut-scene. Joseph was shot by one of the snipers. We run to the ambulance, ignoring most of the zombies. We take the first aid kit and return back. On the way back, a machine gunner will block the road. Kill him and take his place by starting to chop up zombies. Get on the bus, drive it and watch the cut-scene.
Chapter 13: Losses
Quite linear level. We go down from floor to floor, sometimes disarming traps and killing enemies.
At the end of the episode, we understand that Kidman wants to kill Leslie. Joseph and you will prevent this, but he will be wounded, and you will fail to God knows where.
Chapter 14: Hidden Motives
We go down the escalator. We kill Ruvik's double and a couple of zombies. Eliminate the trap and raise the gate. A little further there will be a lot of zombies in the cars, so try to eliminate them quietly or quickly run around. After a while, you will find yourself next to a strange-colored web. Set it on fire and move on.
You will find yourself in the catacombs. Run through them, ignoring the zombies. At the end you will come across an electrical trap. Wait until the awakened zombie is fried on it, and then crawl under it and pull the lever to disable the trap. Do the same with the second trap. Then read the diary and save.
After that, kill the dead man who crawled out of the grate and climb in there. There we will meet a monster, but do not shoot at it, the tentacle will take it and save us from having to waste ammo. We go further and turn left, watch your step so as not to touch the traps under water. Once in place, remove the fuse and turn off the trap. Now turn the valve and go to the place where the water left.
We go up the stairs, burn the cobwebs and go almost into the lair. We run to the end of the room and take out the fuse. The traps were turned off, and the infection swelled even more. We run to the beginning of the room and turn the valve. Now we return to the passage where there was water, but now it is gone. We run along the corridor and the tentacle of this creature grabs us. Shoot her in the face and she will let you go. We go up the stairs and solve the riddle. Go to the end and pick up another fuse so that you have exactly three of them.
The riddle is very easy. After solving it, start turning the lever and the boss will attack you. Try to use everything you have against him and don’t forget to hide behind the pillars. Sometimes the boss starts to hide. Look where the slugs are jumping at you and go to that place. The boss's face should be sticking out there. Shoot him in the face and he'll fall out of there.
After defeating the boss, return to the lever and turn it. After that, take the elevator and go upstairs. Go to the carriages, at the end of which Ruvik will meet you and take you again to the place with the baths. Remember the end of episode five? Exactly the same tactics here.
Chapter 15: The Root of Evil
We wake up in the hospital. We read the diary on the table, and then follow Leslie.
As a result, you will find yourself near the “lighthouse”. There you will meet Ruvik's memories. Eventually we will be transported to the arena. Fight off the zombies until a butcher with a rocket launcher appears in the arena. Get closer so he can pick up the saw and start running after you. After killing him, we will be able to move on, where two snipers and two dynamite men will be waiting for us. Kill them and move on to the slaughterhouse, where two safe-heads and a gradually rising water level will be waiting for us.
We go through the door and solve the puzzle. Here we need to go to the end and not get caught in the rays of light, otherwise we will be thrown back to the beginning. Somewhere in the middle there will be two levers, pull them, and then go to the end, avoiding the traps. At the end a huge saw will come out. Run away from it and don't step into the bloody puddles, otherwise they will slow you down and you will die. As a result, we find ourselves at the “lighthouse” again. We go inside and take the elevator. We watch the cut-scene and fight the boss.
First the monster will try to grab us with his hands. We run around them and find ourselves in the office. There we also run around his hands and in the end we find ourselves behind the machine gun. First we shoot at the red dots on the hands, and then we shoot at the head. After this, the monster will throw us away and we will have a bazooka in our hands. First we just shoot at the monster, and then we shoot at the head when it turns red. After the fall, take the final shot to Ruvik's head and watch the video.
Episode 1. Emergency call
Detectives Sebastian Castellanos, Joseph Oda and Julia Kidman, after another case on an urgent call, went to the Mayak psychiatric hospital. Having entered the building, we follow our partner into the observation room and find a doctor who will pronounce the name of a certain Ruvik. In recordings from surveillance cameras, an unknown person in a robe deals with the police with lightning speed and in the next second finds himself behind our back.
Having woken up, we look around and, having swayed, quickly and often pressing the shown button, we reach for the knife. We slowly creep up to the enemy and, after waiting for him to leave, we take the bunch of keys from the hook above the cutting table. Turning around, go right and unlock the door. Having climbed the stairs and stumbled upon a trap, we run forward without stopping. Having been wounded and being imprisoned, we move exactly in the center and open the floor hatch right in front of the obstacle that has appeared. Rolling down, we shift first to the left, then to the right.
Oscar Connelly.
We go up the stairs, move to another part of the sewer and get to the far right room. Having risen to the boiler room, press the button to the right of the door and continue to move forward. When the enemy appears, we will hide in the locker and wait out the threat. We get out into the corridor and, in stealth mode, go to the next doorway around the corner. Having let the enemy pass and moving away from him at a sufficient distance, we begin to run away, going around the obstacle on the left side in the next room. We get to the elevator, go up to the top floor and, going into the hall, leave the building.
The city is mired in chaos with falling skyscrapers and collapsing roads. We jump into the van and, in the company of other survivors, we get out of the city.
Episode 2. Survivors
Having woken up from a nightmare, we pick up a jar of green gel from the table and look out into the corridor through the bars on the door. Follow the nurse to the reception area and save by signing in the register. We go further along the corridor, sit on a chair and improve the only available skill.
We return to the events from the previous episode: having got out of the burning car, we are surprised to discover that all those who were with us have disappeared. From the bedside table we select a syringe that restores part of the health, and from the gurney, on the right side, a green gel. Moving along the path, we come across a box - we break it with a blow and pick up the green gel that is inside. We get to the cliff, pick up the lantern and go down. Having walked to the tent, we pick up a revolver and deal with the enemy with well-aimed shots to the head. Inside, in the corner of the tent, we will find a jar of green gel. Moving further, at the fork we turn left, pick up the green gel and continue moving along the right side. We disarm the trap by holding down the button shown. The details of the trap will later be used to make bolts for the Agony crossbow.
Having got out of the cave, we cross the territory and stumble upon a corpse, which we burn with the help of matches lying near it. You can only burn those enemies that are in a horizontal position. This is done in order to save ammunition. We go into the shack on the left side, take the green gel from the table and interact with the window to find ourselves in the hospital, where you can save (the magazine on the counter in the reception area) and improve your skills. We leave the hospital in the same way - through the mirror at the end of the corridor.
Having moved further, crouching down, we sneak up on the enemy and silently neutralize him. We go into the room, climb through the window and get to the ruins. We creep up on the enemy from the left side and, when he goes down lower and turns his back to us, we kill him. We go around the building on the left side, having previously disarmed the trap between the walls, and deal with the second enemy. Inside you can find weapon ammo, green gel and a syringe. Having walked further along the path, at the fork we go right, having first killed the enemy at the fire, going around him on the left side.
Behind the wall we wait for the enemy with a torch and deal with him as soon as he begins to move away from us. We go into the house, collect useful things in the room and break through the partition in the corridor on the right side. We use weapons to finish off the enemy. Open the box and take the key. We can also go to the next room, having first neutralized the tripwire in the corridor.

Sebastian Castellanos.
Returning to the fork, we go further and quietly deal with the enemy with a torch. We lure the enemy who is on the other side to the tripwire inside the house or to the traps near the cart. Having cleared the path, we reach the gate and interact with the mechanism on the left side, quickly and often pressing the shown button. We get to the bridge, keeping to the right and sneaking behind the walls so as not to attract the attention of the possessed. We deal with the lone enemy in front of the bridge and hastily move to the other side.
Episode 3. In the claws of monsters
Having got out onto land, we break the barrier and head towards the stairs, simultaneously collecting useful items from the tables. We go upstairs, search the hut on the right side and go into the building. Pay attention to the glowing wall booby traps - sneak up on them and neutralize them by pressing the corresponding button when the arrow is in the blue zone. We go into the room on the first floor, pick up the diary from the table and move through the mirror-portal to the hospital. We go into the reception area and follow the nurse to the storage rooms. We open the cell using the key that we found in the previous episode. We take away useful items, complete all the work in the hospital and return back.
We go up to the second floor, go to the end and find a doctor - Marcelo Jimenez. Having followed him, we will discuss the plan of action and, after waiting a little, we will turn the gate on the right side, quickly and often pressing the button shown. Going down, we prepare to “receive” two enemies. Having noticed the shooter, we’ll run into the hangar on the left side and immediately go up the stairs. We move to the other side, climb into the attic along the next ladder and, having broken the figurine on the table, we select the key that was under it. Having gone down, we exit the hangar on the other side and go right. We quickly deal with two revived enemies and the third one, which is around the corner, silently creeping up to it. We go up the stairs, go to the other end of the house and get inside through the broken window. We pull the lever on the wall as soon as the enemy goes down. In the corridor we take out a shotgun from the case, go up to the second floor and, having walked all the way along the railing, pick up the “Agony” crossbow from the chair. From the wall, to the right of the door, we remove a couple of harpoons, go out onto the balcony and silently neutralize the shooter.
Having gone down, we clear the area from enemies and return to the hangar. It is enough to approach the fence for the monster with a chainsaw to break out of captivity. He moves quite quickly, so we try not to let him out of sight and, if something happens, slow him down with shots from a shotgun or crossbow. Having won, we select a chainsaw and cut the chain of the gate mechanism.
Episode 4. Patient
Behind the open gate in front there is a shack with a mirror-portal, to the door of which a diary is attached, and a house, entering which we go into the room on the left side and find the distraught brother of Dr. Jimenez - Valerio. We fire a well-aimed shot in the head, burn the body and examine the X-ray image on the table. We interact with the corpse, make an incision along the entire body starting from the chest, and remove the key.
Following Leslie, we go into the neighboring house on the left side. We go down to the basement, overtake the patient in the last room and deal with a couple of enemies who have appeared. Following the disappearance of the stairs, the repeatedly mentioned Ruvik appears, who takes us into the sewer.

We go around the column on the right side and disarm the booby trap attached to it. Approaching the door, Ruvik will appear again and call big number enemies. We move away from the barrier and prepare to fire an explosive crossbow projectile or throw a grenade. If there is no ammunition, then we actively move around the territory and activate all kinds of traps by pulling the levers on the walls. Having finished with everyone, we pass along a long corridor and, having encountered a creeping creature, we turn around and run back all the way. Then we go through the opened door on the right side, get to the room and go down the stairs in the corner. Next, bending down, we pass under the guy wires and take the elevator down. We quickly open the door and quickly run forward. We go down the stairs until Ruvik is in front of us. Going back up, after some time the stairs will collapse and we will fall down.
Episode 5. In the Depths
In the room we select the diary from the table, use the mirror-portal and are transported to the hospital. Returning back, we move along the corridor, looking into the chambers, and shoot the invisible enemy, who can be seen by the distortions of the air. We pass through the toilet, jump down to the lower floor and, having broken the barrier, we choose into the hall. The door leading to the neighboring building is blocked, so we go to the right and clear all subsequent rooms from the invisible inhabitants of the hospital. In the service room, we select the key card from the floor, return to the locked door and move on.
Going down the stairs, we find ourselves in a square room, where, looking through the cracks in the walls, we gain access to the rooms. In the room on the right side of the stretcher we activate the left button, in the room in front - the left button and in the room behind the back - the right button. Three bloody trails will lead to the room with Joseph. Having freed and healed our partner, we slowly make our way through the common tent so as not to wake up the patients. We go down to the lower floor, wait for Joseph to clear the explosives in the passage, and, after a small skirmish, go up the stairs.
In the room on the right side there is a mirror-portal. Having got out into the hall, we find Kidman and deal with the enemies approaching from all sides, collecting useful items in between attacks. Having examined the container in which the partner is located, through the indicated passage we go in search of the control panel. Having reached it, we set 22 on the upper dial, and 5 on the lower dial. Following Joseph and Kidman, we jump down into the rift that has formed around the container. We move forward and, once again teaming up with our partners, we help them defeat the possessed.
Left alone, we go into the first room, pick up the diary from the bed and use the portal mirror. We leave the tripwire in the corridor untouched and activate it only after we attract the attention of the enemies who follow us. Having reached the outermost room, we run away along the corridor from the creeping creature that has appeared. As it turned out, she is vulnerable to fire, so at the next meeting we arm ourselves with torches, corresponding bolts for a crossbow, and also shoot down barrels of fuel and use all sorts of traps in the territory. Having won, we go to the research room, shoot three patients one by one and, while they are in a supine position, quickly disconnect each of them from the power supply.
Episode 6. Not ourselves

Julia Kidman.
In the room with cells, we look at the photographs on the table and, turning on the flashlight, we get to the mirror in the corridor. We go down the stairs following the nurse, go into the room on the far right and leave the hospital. We climb over the wall, climb the stairs and head towards the buildings on the horizon. Teaming up with Joseph, we try to escape from the possessed and cover our partner while he disarms the trap. Having destroyed two, we push the barrels closer to the window and shoot at them when the next crowd of enemies comes running. After holding out for some time, we follow Joseph down to the ground floor and again hold back the onslaught of the enemies. Next, having got out of the building, we open the case on the table and take out a sniper rifle. In the corner there is a mirror-portal leading to the hospital.
We carefully examine the dilapidated buildings, disarming the booby traps on the walls. Having gone up and crossed to the other side, they will start firing at us from the booths on the central tower. We take a convenient position opposite the booth, preferably closer to the shelter, so as not to fall under a hail of arrows, take aim in advance and fire at the enemy holed up inside as soon as the lid opens. Thus, we destroy all four booths, go down to the foot of the tower and deal with the enemy with a chainsaw. To simplify the task, we use up the red barrel of fuel by blowing it up directly next to the enemy.
We go inside, go up the stairs and, if necessary, visit the room with a mirror-portal. We burn the corpse in the elevator and rise even higher. After blowing up the bridge, we select ammunition for a sniper rifle and, with well-aimed shots, kill two enemies dragging Joseph to the guillotine. We move to our partner via an impromptu crossing and cover him until the gate is open. We get to the market, explore it and go to the cemetery.
Having visited the room with a mirror-portal, we go outside and in the distance we notice Kidman running away with an unknown person. We move forward, actively using cover, and our partner will take care of the enemies. When the thugs appear, we shoot at them with a shotgun, trying to stay at a medium distance from them. We meet with Joseph at the indicated place and, after opening the secret passage, we will suddenly find ourselves in the hospital. We leave her through the mirror-portal in the toilet between the rooms with cells.
Having woken up, we get to a room with altars and levers. We pull the levers next to the near left and far right altars to lower the “sacrifice” and with the near right one, on the contrary, to raise it. We leave the far left altar unchanged, i.e. with a victim on it. We follow the “safe path”, get to the exit and stand on the floor button on the left side. Then we go all the way to the right and engage in battle with the monster. We do not allow the enemy to disperse - we constantly suppress him with fire. If the monster is hiding in the bushes, then we run away as far as possible and prepare to dodge to the side. Having won, we take Joseph and leave the territory. However, it won’t end there: your partner dropped his glasses, which he will have to return for. However, this time you can do without a fight: just pick up the glasses highlighted in blue and quickly return back, completely avoiding collisions with enemies.
Episode 7. Guardian
Having entered the church, we follow the altar and talk to Joseph. After Ruvik's next intervention, we will find ourselves in the catacombs. Having gone downstairs, we go around the shelves with numerous candles and go upstairs. Around the corner there are several enemies, having dealt with them, we reach the next turn and scrape off the lithograph from the stone door on the left side. Having entered the room, we go to the right, go down the stairs and shoot through the castle. To the right is a room with a mirror-portal. We insert the lithograph into the structure in the center.

Joseph Oda.
We go through the opened gate on the left side, unscrew the valve, quickly and often pressing the button shown, and go down into the prison block. Having dealt with the enemies, we shoot the carcass hanging on the hook from a distance, go forward all the way and, turning left, go down the stairs. We immediately unscrew two valves, one of which is right in front of us, and the second a little further, then turn left and go down. We move along the corridors, destroying enemies and neutralizing booby traps on the walls and the only tripwire on the floor. Ultimately, we will get to the stairs, climbing which at the very end we will find a stone door with a lithograph.
We go through the opened gate on the right side, go down and turn right. When approaching the edge, we look under our feet so as not to run into a tripwire. We shoot at the two mechanisms on the other side and stand on the lowered lift. Having gone up, in the distance we will notice a carcass hanging on a hook - we shoot at it and quickly move to the other side along the lowered platform. We open the gate, deal with the enemies, go up to the stone door and remove the lithograph from it.
We insert the lithographs into the structure, go down and, freeing ourselves from the trap, move back. Then we quickly run forward right in the center, avoiding other floor traps. Having met Leslie, we let him out of the cage by shooting at the lock on the chain. We open the gate by rotating the mechanism on the right side and enter into a fight with the butcher. When running away from the enemy, do not forget to watch your feet so as not to run into a trap. Having won, we get to the first valve and do not unscrew it completely, as the butcher will appear. Having dealt with the enemy, we finish the job we started and go into the room opposite. We unscrew the next valve, being distracted by the butcher during the breaks. The third valve will turn out to be damaged not without the intervention of the enemy, so we go back and select the required element from the table in the corner. Having lowered the gas level, we go down and, having gone to the end, go up the stairs. We finally deal with the butcher, get out and get to the stairs.
Walkthrough
If you don’t know how to complete a task, find the necessary item, or defeat this or that boss in the game, then you are welcome to the section Walkthrough. Here we publish a wide variety of videos of each level, collaborating with users on YouTube.
For each walkthrough, we attach a small plot description of the game and a list of missions so that you can immediately become aware of the events described in the game. In addition, we mention the author of the walkthrough with an active link to his channel so that you can subscribe to other user broadcasts.
Information about the site
Entertainment portal database website was created specifically so that gamers and simply lovers of the virtual world are always up to date with any news from the world of the gaming industry, learning exactly what they need. For example, when the long-awaited strategy will be released, what additions to it are being created, who is publishing it, or on what platforms it will appear.
Here the user will always find interesting game posts with gameplay videos, pictures, plot details and descriptions of collectible editions. There are even publications with system requirements, video diaries and official reviews from developers. Special sections deserve special attention, in which large articles with walkthroughs, game tops and other interesting materials are published. We always try to keep up with the times, so we update the site every day, supplementing and, if possible, updating existing content. Our team also works closely with other information resources, services and forums to provide you with even more informative and most importantly interesting materials in a simple and understandable form. Always stay with us and be the first to find out the latest details about games.
Best regards, Administration.
Map fragment: 1.
Poster: 1.
Newspaper: 1.
Audio diary: 1.
Note: 1.
Castellanos' personal file: 1.
7.1. Church
The Evil Within. Walkthrough
We enter the cathedral hall. Take it from the bench on the left wall 5 matches, in the center on the left bench 2 buckshot. On a hill at the table there is 500 gel.
|
Map fragment (13/28). On a hill from the pulpit we take a map. |
We communicate with Joseph, he is again overcome by suicidal attacks due to the piercing sound. At this moment, Ruvik appears, everything around turns out to be weightless, and we fall into the dungeon.
7.2. Tomb
The Evil Within. Walkthrough
We go out into the stone hall. There are a lot of clay urns near the walls, break them and collect them random items. In the center there is a coffin with relics, on the side of it there is 2 trap parts. Installed in the left corridor mine, we neutralize it, nearby 3 rounds.
We go to the large painting, go up the stairs, there are 3 enemies walking at the top. In the left side room in the open coffin we take 1000 gel, next to 2 rifle cartridges.
At the end of the corridor we examine the wall with the image, take out old lithograph. On the right side of the table we take 7 rounds, and gel in the bins. At this time, the image from behind will open, we enter a new room. We collect items from the tables: 2 trap parts, 800 gel.
7.3. Three tiles

We go down the stairs and from afar we will see how a huge monster closes the stone gate behind itself. We break the castle, in front of us is a stone slab with three recesses, three lithographs need to be inserted into them. We insert the 1st person, this will open the passages on the left and right. To the right of the stove there is 300 gel and a room with a mirror.
Psychiatric Hospital "Mayak"
Left path. You can go to any corridor, first we go to the left, further from the mirror. There is a gas pipe on the way, turn the valve to shut it off. We find ourselves in a corridor with cameras, there are 3 two-headed enemies - Alter Ego. One is walking, the second is suspended on a rope, the third is locked in a cell, so you can deal with them one by one. It is impossible to kill them silently from behind, it is impossible to knock them down by shooting at their legs. It is better to shoot them in the head with a shotgun, and after they fall, immediately set them on fire with a match.
In the side chambers we will find 5 cartridges, 4 matches. Ahead in the room with electric chair There is 1 grenade, hidden near her mine. On the right, on a hill, we see a mechanism with a lever, press it, this will cause a slab to fall onto two enemies on the right. We go to the second chamber on the right and collect the remaining items: 3 rifle cartridges, 2 trap parts, 1 syringe, 500 gel. After this, we can go down into the round hatch on the left.
When we find ourselves below, the hatch will be closed behind us by a monster with a safe on its head - the Guardian. Poisonous gas will begin to come out of the pipes. To avoid suffocation, you need to quickly close 2 valves, time is limited. The first valve will be right in front of us, then we kill the monster in front and turn another valve. After that, let me collect the items around: 3 trap parts, 5 cartridges. We go down into the lower tunnel.
7.4. Left path
There are 3 monsters in the corridor, we can detonate a mine near them and finish off the survivors. We go out into the crypt. On the left there is a dead end where there is 500 gel and mine. On the right we turn the lifting wheel to open the grate.
There will be a stretch just around the bend, remove it. There are 3 crawling monsters here; you don’t have to waste matches on them, but trample them with your feet. At the end we turn another valve.
We go up the stairs, in the lying body we will find 1 harpoon. At the end of the corridor we take out 2nd old lithograph. The image will open and we will go back to the central hall.
7.5. Right path
From the hall we go to the right corridor, closer to the mirror. We go down to the room where there is a harmless trap with a ceiling slab with spikes. We collect here 3 trap parts, 1 syringe, 500 gel.
We go into the corridor with rails, take 7 rounds. On the way we deactivate stretching. We enter a square room where spikes are installed on the ceiling. We do not enter the dangerous room, but shoot from afar at two gears, this will cause the plate with spikes to fall. We stand on the slab and go up on it, like on an elevator. A two-headed monster will fall onto our platform, we shoot off one of its heads, and when it falls, we set it on fire.
7.6. Right path, 2nd floor
Walkthrough of the game The Evil Within

We go out into a room with a recess in the center, on the other side there is a monster hanging. Ahead we destroy the urns, behind them we climb into the low corridor. On the other side we kill the monster and spin the wheel. At this moment, 5 monsters will come out, we can test the trap in the center on them: first we lure them into the recess, then press the lever.
Secret. We go to the double doors where the monsters came from, collect 2 buckshot, 2 trap parts. There is 1 more enemy walking in the lower corridor; there are several tripwires and mines on the way. We reach a dead end where the bodies lie in a circle, we collect 1000, 500, 300, 300 gel from several bottles.
We return to the main path, turn the wheel to open the door. In a small room, 3 monsters will attack us. We quickly climb onto a hill, press the lever to lower the plate and kill the enemies.
At the end of the corridor we take out 3rd old lithograph. We go out into the central hall, insert our face into the stone slab, and go into the basement.
7.7. Obstacle course
At the end of the corridor we will see the Guardian, he will activate falling plates with spikes. The hero gets caught by one of the mines, we quickly get out. We approach the traps a second time. Now the slabs will fall behind us, and we will need to run forward. The camera view will change. You don't have to run, you can walk. The main thing is not to fall into mines with wire.
We enter a room with many safes on the floor. We find Leslie locked in a cell and free him. Beside him 1 buckshot. We spin the wheel to let Leslie pass further, he runs away.
7.8. Boss: Guardian
The Evil Within. Walkthrough

1 site. The Guardian will appear in front of us, armed with an ax and a bag of meat. We move away from him, shoot with any weapon, but it is better to use explosive bolts, or a combination of cryo-bolts, and then a sniper rifle. The keeper runs jerkily, you need to wait until he walks more quietly and attack at that moment. When we kill the enemy, the door forward will open, but he will appear there again.
2 platform. At the entrance there is 1 syringe. Here the room is gradually filled with gas. We tighten the valve on the right; we can have time to tighten it before the Guardian appears and approaches us. We run into the opened round hatch.
3 platform. We find the wheel on the right and spin it. If in the previous room we ran away without killing the Guardian, we will see through the bars how he will kill himself in order to appear in a new place near us. Here he will scatter mines behind him, we can immediately shoot at them to cause damage to him. Let's kill him again.
4 platform. We return to the first room where Leslie was locked, now there is a new corridor on the left, when we return. When we enter, we will see that the Guardian has broken the valve. We return to corner corridor, we take a spare one from the table valve. We kill the Guardian again, use the valve to deepen the pipe. The gas will completely dissipate, and we will be able to go down the inclined stairs under the pipe. The Guardian will continue to appear after death. We reach round hatch, we lock it behind us.
7.9. Cave
The Evil Within on PC
We go up to the trap with the slab. Here we will be attacked by a safe head without a body, we fight it off and throw the safe under the stove. The Guardian that appears will be flattened by a plate with spikes.
We go out into the cave. On the right at the dead end we can take 800 gel. On the left on the main path there will be 500 and 500 gel. We go down the stairs and the episode will end.
Episode 8. The grain will sprout
Number of trophies and collectibles at the location:
Map fragment: 1.
Audio diary: 1.
Note: 2.
Castellanos' personal file: 1.
8.1. Cave
Secrets of The Evil Within

There are 3 two-headed monsters wandering ahead. One of them will have a long tongue, don't come close. We collect ammunition from boxes and urns. There are several puddles of water on the ground; we can lure enemies there and shoot with electric bolts.
There is a lying monster at the door, we kick him until he gets up. We break through the boards on the way, the tunnel will lead us to a room where there are 2 more monsters. Here lie 2 buckshot. Turn the wheel to open the grille in front.
8.2. Shelling
Secrets of The Evil Within
Next you need to run along the path, which is constantly shot through with arrows from the left side. We wait for the next salvo to pass, run and hide behind a rock. At the halfway point, you can take 500 gel and another 500 gel in the boxes. We make two more dashes. At the end we squeeze through a narrow place between the rocks.
8.3. Small monsters
On the right we pass behind the rocks, take 6 rounds, 1 flash bolt. Small crawling monsters will come out of the wooden wall, we can simply trample them. Let's go back and spin the wheel. We descend into a half-flooded tunnel. On the left we break the boards, behind them at the dead end we take 3 rounds, 500 gel.
We climb over the fence, ahead is a pond with small monsters. Further on the way is 1 two-headed monster. We squeeze between the rocks.
8.4. Room with spikes
The Evil Within. How to get

We go into the room with wooden buildings. On the left we take 1 explosive bolt.
We enter narrow room with spikes, we examine the woman’s body. Nearby we find a stone slab with drawings. There's a little puzzle here: you need to choose which side to insert the tile into the door. If we make a mistake, we will die. There are drawings on both sides of the slab; on one side it is stained with blood. Since the woman died, it means she inserted the tile incorrectly and splashed blood on the wrong side. Conclusion: insert the tile with the clean side facing you.
8.5. Hospital
We run through the cave, see piercing sound waves, and find ourselves in the hospital corridor.
We reach the end of the corridor, it leads to a round room with baths. Here the doctor talks about what the hell is going on here. We are connected to a system that connects minds. When locations change abruptly, we are actually jumping from one person’s memories to others. Everyone connected to the system contributes to the memories, but another doctor named Ruvik is in charge and can easily make his own changes.
We find ourselves in an empty round room. We collect all the items here and leave.
IN narrow corridor A huge four-legged monster will chase us. The direction of the game camera will change, we run forward to the screen. At the end we will meet face to face with Ruvik.
Episode 9. Cruel Intentions

Number of trophies and collectibles at the location:
Map fragment: 3.
Poster: 1.
Newspaper: 2.
Audio diary: 1.
Note: 3.
Castellanos' personal file: 1.
9.1. Hospital
We leave our room. Together with the nurse, we approach and look at the picture above the stand with posters. It depicts a family; in the crossed-out face of the son we will see the face of Ruvik. After that, let's move back in time.
We go into the corridor with solitary cells, sound waves come from there. We find ourselves in a black and white forest and approach a sunflower. Ruvik appears here, after he disappears everything will turn into color, we can explore a new location. There is a raised bridge at the back, there you can find 500, 500 gel. At the dead end on the right there is another 500 gel.
Through the gate we enter the courtyard of a country mansion. We break several barrels and boxes along the walls. Behind the left grille of the gate there is 1000 gel, on the left at the dead end we will find 1 buckshot, on the far left bench 4 rounds.
9.2. Mansion
The Evil Within. Walkthrough. 2015
We enter the building, we see how the doctor doubles Leslie behind a door with many locks. Lies on the chair on the left 1 syringe, under the left stairs 500 gel. Under the balcony on the left there is a room with a mirror.
Returning to the mansion, we enter the adjacent open door of the dining room and take 300 gel.
We go through the inconspicuous door on the right. There will be two mines on the way, take the bottles and throw them at them to quickly defuse them. We'll find it in the kitchen on the right 4 rounds, between the shelves 1 flash bolt, 1000 gel. In the last dead-end room there is a laboratory table with a brain on it for trepanation. We listen to the audio recording, we need to stick the pin into the brain area F-7 Consent. You can see the location of the zones on the sheet at the bottom left if you hover your mouse over it (the zone is in the bottom left part of the brain, to the left of the bottom pin).
We'll see a flashback: Dr. Marcelo talking to Dr. Ruvik.
9.3. Library
Walkthrough "Evil Within"

On the way back there will be a blue flash - this means that Ruvik has appeared behind us. There is no need to run fast, otherwise he may appear in front of us, we just move away from him for 15-20 seconds. Thus, he will appear several more times in certain places of the mansion.
We don’t go into the foyer yet right door, go to the 2nd floor through the left door. Ruvik may appear here. We take it from the shelf 1 cryo bolt, on the wall mine, on the table 2 buckshot, 300 gel. We climb onto the second tier of the library, under the painting we take top dial of the safe. We remember that the picture shows 11 people with bags on their heads.
In the library we enter the side corridor, there are 2 enemies sitting near the body. There is a nearby 1 trap part. Further down the corridor mine. We enter the side door, we will find ourselves in the bedroom, there is 4 rounds.
In the next bedroom there is on the table 1 first aid kit, in the chest of drawers 2 matches, next to 500 gel. An enemy will enter the room, fight him off.
In the corridor we reach a turn. On the left are unopenable double doors, on the right there is another door, and on the side is the entrance to the bathroom. There is a bottle of 500 gel in the toilet.
When we reach the end of the corridor, millstones will appear from the double doors at the back, and we will begin to be pulled there. We aim and shoot at the red light at the top of the door. Through the door we get into another bedroom. Here the bedside tables are empty, and the large chest of drawers 1 syringe.
In the far bedroom we climb through the stone hatch in the fireplace and find ourselves in a secret laboratory room. Let's take it 1 burst bolt, 1000 gel. We examine the brain and listen to the audio recording. You need to stick the pin into the zone A-2 Fear, on the sheet below we will see its location - opposite the lower installed pin.
9.4. Top floor
Through the fireplace we return to the room, we will see the ghost of a doctor communicating with the murdered parents. Ruvik may appear here. We go further along the corridor, enter a trophy room with many screens.
Opposite lies a corpse that will come to life, next to it is 500 gel. We kill the masked enemy. Through this room we will return to the foyer through the right door.
In the foyer on the 2nd floor we enter the central double doors and find ourselves in the gallery. We take it on one table bottom dial of the safe. We remember that there is a picture hanging nearby that depicts 2 people.
9.5. Music room
The Evil Within. Walkthrough

In the foyer on the 1st floor, go through the right door and find yourself in a gallery with paintings. On the left table in the center there is 1 syringe, side 3 matches.
In the side room 2 rifle cartridges and an old woman with an ax behind the curtain. In the second side room 2 buckshots and a mine. In the far music room to the right of the piano there is 1 grenade. On the left is a picture with a safe and two dials.
Safe puzzle. On the top floor we found two dials, we insert them. You need to enter two numbers top 11, bottom 2(based on the number of people in the paintings). The door will open, revealing a third laboratory room with a brain. We need to get into the brain zone C-4 Hope(between the top two pins, slightly to the left of their middle).
When we return, we will see ghosts. Ruvik plays the piano, Doctor Marcelo came to him for funding the hospital. During the conversation, it turns out that Ruvik’s parents have disappeared, and he himself does not want to help maintain the hospital. Before this, Marcelo supplied Ruvik with patients for experiments.
9.6. Ruvik's memories
Having examined all three brains, we return to the foyer, enter the opened big door. In the endless corridor, Ruvik catches up with us. After his touch, we look at his memories.
We are in the room where little Ruvik is dissecting a pig. On the table nearby we can take 1 burst bolt. We pass along the corridor, meet the big bloody Ruvik, we run away from him into another corridor.
In front of us is a long room with spikes on the ceiling and stretched wires. On the right we can take 300 gel. The spikes lower slowly, the main thing is not to touch the wires, otherwise the ceiling will collapse instantly.
9.7. Labyrinth
Walkthrough of the game The Evil Within

We find ourselves in a corridor with mannequins. Ahead is a labyrinth with lattice walls appearing; we are being chased by the bloody Ruvik, passing through these walls. We perform the sequence of actions:
1. Here we find 2 cartridges, because there is a castle ahead that can only be broken with a shot.
2. On the right we go behind bars, shoot at a mine from afar, take 300 gel and more 2 cartridges. We shoot at another castle.
3. There are three traps on the way, turn left. We go around the next mine if there are no extra cartridges.
4. We walk along the shaft with peaks, crouch down so that we don’t get hit. We knock down the last castle on the way.
5. We run along the corridor between the mannequins, the view of the game camera will change, we run towards the screen, without saving stamina.
9.8. Barn on fire
Through the corridor we go out onto the street. We walk through the field of sunflowers to the barn. On the left you can take 3 rounds and 300 gel. On right - 2 rounds, 2 rifle rounds. We enter the barn and see memories. Here young Ruben played with his sister Laura, while local residents locked the barn and set it on fire.
On the left there are two wheel mechanisms. First, we turn the wheel against the wall to move it into the elevator. Then we turn the wheel on the side to lower it. We enter the elevator and shoot at the side wheel.
9.9. Boss: Ruvik

We are trying to get out of the burning barn through the window, but Ruvik appears and throws us back. The bloody silhouette of Ruvik himself is invulnerable, but he will constantly summon ordinary enemies, and they must be killed. There are 2 buckshots, 1 gapun, but we will get most of the ammunition from killed enemies.
After the victory, we will see how Ruvik will raise the spirit of the deceased girl. We find ourselves in the corridor, reach the room, go through the opening between the bookshelves.
|
Achievement "Honorary Reader Site" Did you like the article? In gratitude, you can like it through any social network. For you this is one click, for us it is another step up in the ranking of gaming sites. |
|
|
Achievement "Honorary Sponsor Site" For those who are especially generous, there is the opportunity to transfer money to the site’s account. In this case, you can influence the choice new topic for an article or walkthrough. money.yandex.ru/to/410011922382680 |
| + Add a comment |
On this page you will find a complete guide to completing the storyline of the game “ The Evil Within ” and tips for certain game situations.
Episode 01. Emergency call
After watching the initial video, we appear at the entrance to the hospital. We go straight to the main entrance. There is a rather creepy picture inside: a pile of mutilated corpses of hospital employees. Our partner finds a survivor, we go to him. During the conversation, he mentions a certain Ruvik. We watch the recordings of surveillance cameras in the same room... the nightmare begins.

At first it was completely unclear where we were and how we got here. However, the situation is least conducive to thinking about such things. We find ourselves in a room hung with corpses, in which a huge aborigine is walking in iron mask, and, apparently, is preparing to do the same to us. In front of us is a corpse with a knife sticking out of it. We swing, take out a knife and cut the ropes. After we freed ourselves, we see the same one in an iron mask, stuffing a corpse. We wait for him to go through the door on the left and take the keys that hang right above his workplace. We turn around and go back, to the right. At the end of the room there is a door. We unlock it using the found keys. We go up the stairs and go along the corridor. Of course, no one will notice the tripwire near the door, the trap is triggered and he, the sadist, appears. We run from him through the doors. When he slams the grate and turns on the trap, a hatch will be visible on the other side of the room. We move and climb into it. We dodge the traps and fall into the bloody pool. We climb out of it along the stairs and go through the door, she is alone here. Near the fan, turn right, jump into the water and go up the stairs again. We go straight, without turning anywhere, there is absolutely nothing in the room on the right. We reach the bars and see a passage on the right, we go in, again there is a staircase. Let's get up. Behind the bars there is a table on which lies “Note from the Boiler Room.” We pick it up, go to the door and press the red button, the door opens.
We walk along the corridors until we hear a characteristic scream. Him again. This time you need to hide in the closet. We hide, watch as the psycho destroys the entire room, and then leaves. We leave and go through the door. Next, you need to do everything quickly, in stealth mode. We run past the door on the left, turn left, turn into the first door to the left and immediately on the right there will be a passage, we go there, keeping to the left. Let's pass. We keep to the left and go along the wall to the door. We pass, at the end of the corridor there is a door on the right. Behind it is a corridor with an elevator at the other end, we move towards it, not paying attention to anything, we move. Let's look at the credits. When we take the elevator up, we find ourselves in the Hospital reception area, where we were already at the beginning of the game. We go through the door on the right. Let's watch the video. The episode is over.
Episode 02. Survivors
We appear in the ward. We take away everything that is bad and go to the door. We follow the girl and sign the document (this is such an exotic way of saving).

We go further and sit in a chair. Apparently, when we get into it, we will be taken to the menu for improving our character and abilities. Afterwards we find ourselves again near the fallen ambulance. We take the medicine and carefully examine the area, there is a lot of green gel. The right path is determined by the lighter areas of the forest and the blood on the ground. We hold on to them until we reach the killed animal, and then to the lamp. We pick it up and see a man in the distance. Later we realize that this is no longer a person. We select a revolver and kill. Don’t forget to carefully examine the area and break the boxes, they may contain something valuable. We go into the cave to the right of the tent, neutralize our first trap, move on, exit the cave. We go through training on burning defeated enemies and go to a house with a bloody door. We take the objects and see that something happened to the mirror. We approach it and click use. We find ourselves in the ward again. This way we can save ourselves, leaving paintings and improving our abilities.
We leave the house and go left. We see Leslie running away from the dead man, and he breaks through the doors. We sneak up on him and kill him. We open the door and climb out the window. Let's go further, go through the gate. Let's watch the video. Next, we secretly cut out the dead (you can do it not secretly, but this is much more difficult), and explore the house on the right. Avoid the trap located on the left side of the house. We go further along the path from which we left. You can turn onto the bridge on the left and look at the lighthouse. Next you will find a small open area with a bunch of dead people. Using a bottle, we distract the first one standing by the fire and cut him out. We go straight, past the fire along an unlit road. There will be a house with a dead man wandering around it. We kill and examine the house. There's nothing else to do here. We go back to the intersection and turn right. Beware of traps, there are plenty of them in this location. Kill the dead until their groans can no longer be heard. Explore the location, collect items and disarm all the traps you find. Next, we go to open the wooden gates, first burning the dead lying on the ground in front of them. We run in and the gate will close. A meal is taking place in this location, and it is highly not recommended to disturb the dead. We secretly walk along the right edge of the location to the bridge. Here one of the dead is blocking our path, and we won’t be able to pass through without catching his eye. So we exit the stealth mode and run headlong across the bridge. After running halfway, a cutscene will play and the episode will be completed.
Episode 03. In the claws of monsters
We climb out onto land and find ourselves at the pier. We collect items in the area and go straight to the stairs. There are matches lying there, and the path is blocked by a bunch of corpses. We burn them and move on. The passage collapses, and we find ourselves in some village. Exactly opposite the collapsed passage there is a small house. We go there and pick up everything we need. Further in this area there are two passages that will lead us to the same place. The first is the house on the left, the second is the house on the right. I advise you to go through both options in order to collect maximum equipment. In addition, in the house on the right on the ground floor there is a bloody door behind which there is a mirror where you can save your progress and improve your Hero using the green gel you found.

Beware of mines on the walls. To neutralize them, you need to sneak up on them and press the key in time; a little practice and this will not be a problem. On the second floor we find the doctor who was traveling with us in the ambulance. He says that he saw his patient Leslie run away through the gate at the other end of the village, the only problem is that you are separated from the gate by a horde of the dead. We open the iron grate using the mechanism on the right on the balcony and begin clearing the area. We act secretly, or, if our equipment allows, we can relax a little and knock heads off with a gunshot. Don't forget to take the crossbow in the last building on the left on the second floor on the chair. When you kill everyone, there will be a problem opening the gate. We need a chainsaw to cut the chain. Of course, in fact, using this tool for this purpose, in best case scenario the chain will break on the saw itself... Nevertheless, we are looking for a chainsaw, it is located in a pigsty, from where familiar growls are heard. We go there and again see the Sadist who annoyed us so much at the beginning of the game (or maybe not him, but very similar to him). We run to the chain, simultaneously shooting the fat guy until we kill him. A good remedy killing this creature is a crossbow with explosive bolts. We take a chainsaw and cut the chain. The episode is over.
Episode 04. Patient
Once again we find ourselves on a piece of location that needs to be explored. There are several houses here. On the territory with a two-story house there is a small house with a mirror. The goal of the mission is to find Leslie, he is in one of the houses on the territory. You will understand which one by the cry of “Save.” We explore the entire territory provided and find a rather interesting place.

Then we go to the desired house. We go to the basement, find Leslie and see that someone has opened the door. This is a new type of enemy. They are almost invisible, and you can recognize that they are nearby by a blurry, very faintly visible silhouette (you are unlikely to notice it if you move), if he walks through a puddle, you will also understand that he is nearby and, in fact, if he will attack you. There will be two of them. We kill both and go to the exit. But my God. There are no stairs, but there were. Madness? Madness? Not really. This is Ruvik. We follow him and find that we find ourselves in a long corridor. We empathize with the Main Character and find ourselves in a room with a pool of blood on the floor and several platforms. Here you need to thoroughly examine the room, all its traps and advantages, collect all the equipment and be ready for a fierce battle. When you're ready, go to the white illuminated door and Ruvik will raise a group of dead people from the pool, including a particularly resilient one. We take advantage of our knowledge of the situation and give eternal peace to all the unfortunate.
We go through the door where Ruvik appeared. We go into it, see the corridor and pay attention to the closed door on the right. Now we go all the way into the room. Don't rush into it. Get ready to run back, as the next enemy cannot be killed. As soon as he (or she) appears, we run to that very door and run through it, running into the wall. A dead man will jump out of the door, and the boss will rush at him. Let's quickly run there. We run along the corridor to the gate. We quickly slam them using the button on the left and burn the two corpses nearby. We collect the items and go down the stairs. The corridor again. We go around or neutralize the traps and run to the elevator. A little delay and you're done. Having descended, we jump headlong out of the elevator and break into the door on the left. The gates are lowering, and the scarecrow is behind us! Despite everything, we run to the lowering gate and slip through. Huh. They seem to have left, but it's not over yet. We go down, collecting ammunition along the way, and Ruvik will appear at the transition to the fourth landing. Do not approach him under any circumstances, he will kill you with one touch. We run to the very top, where we came from, and see that this entire structure is collapsing. We fall down and land on the wall. Yes, yes, on the wall. Ruvik has prepared many surprises for us...
Episode 05. In the Depths
The length of this episode is approximately the same as all previous episodes combined, since there are no open locations.
We appear in front of a long corridor and a bloody door. On the wall behind us is the inscription "He is watching, we cannot leave"

There is a mirror behind the door, you can save and upgrade your skills. We go along the corridor and examine all the doors on the right and left. Carefully! An invisible enemy will appear near the end of the corridor. We kill him using the pool of blood on the floor and go through the last door on the left. We get to the restroom. We go through the hole in the wall and see that the floor in this room has collapsed. We jump down and collect all the items in the room. We pass, bending down, through the boarded up door and find ourselves in a room with a closed gate and one door on the right. In order to open the gate, you will need a key card. We go through the door on the right, and again we are invisible. If there is no puddle nearby from which you can determine the location of the enemy, then one of the most effective murder weapons of this type enemies is the Crossbow. Using his sight you can determine where the enemy is.

Next we move through the chamber, examine it and approach the double door. We go into it, take a few steps and hear someone breaking in the door we just entered. Invisible again. We deal with him and go into the security room on the right. There we collect all the items and pick up the key card from the floor. We go to the locked gate. Along the way, exactly at the same place where we fought with the invisible last time, another one will appear in exactly the same way, but this time without knocking. We kill, we reach the gate and use the key card. Now the way is open. We go in and move along the corridor. Don't forget to break the cabinets using melee attacks, they contain various items. At the end of the corridor we see Ruvik, he enters the door on the left and disappears.
We go through the door, go down the stairs, through the door again, and find ourselves locked in a small square room, all the doors are gone. After a few seconds, holes will appear in the walls, and when you look through them, a door will appear to the right of each of them. It's a mystery. Each room has a corpse on the table, drawings on the walls and holes in the floor. Each riddle has two possible answers. Choose the right one - the thorns will pierce the corpse, the wrong one - you. When you pierce 3 corpses, a door will appear on the wall without a hole in the room in which Ruvik locked us. There are holes on 3 walls. We enter a room on the wall of which the body of a man with an eye instead of a head is painted. At the table with the corpse, select the left button. The spikes pierced the corpse and blood flowed towards the wall. Next, we go into the room with a huge drawing of a brain and again select the option on the left (the one that is drawn on the wall itself at the bottom right). We go to the last room with two posters on the wall, listen to the audio recording and conclude that everything indicates that we must choose the option on the right. Let's choose. The spikes pierce the last corpse, and a door will appear on the wall to which all the blood flowed. We got out, but only from one of many traps.
We pass along the corridor, go into the door and watch the video. We found our partner Joseph, and he's clearly not in in better shape. We treat our companion (your medications will not be consumed) and go through the door behind the bathroom. First we go to the right, go through the door and check all the cabinets. There will be a corpse in one of them, but it is not dangerous. We leave the room. We pay attention to the gasoline spilled on the floor and go into the room. There are a lot of dead people here. We lure them to a puddle of gasoline and set it on fire, most of it will burn, and we finish off the rest with firearms. We move through the room and find ourselves on the stairs. Before going down it, let's look into the room on the left, there is some equipment and a suspended enemy who will soon come to life, so we burn it without delay. Now we go down the stairs and wait for Joseph to clear the door. We go into the room and watch the video. There is a door in this room, behind which there is a staircase going up. We go up and see a bloody door on the right with a mirror behind it. We pass through the mirror and follow the girl. Next, spend the accumulated green gel and save the game. Having returned, we go into the door near which Joseph is standing. Here we find another partner named Kidman, but she is not in the best situation.

Kidman is trapped in a cylinder that gradually fills with water. Joseph falls down and the carnage begins. We fight off several groups of enemies until Joseph approaches the cylinder. Next, you need to act quickly, since the countdown has begun until the moment the cylinder is completely filled with water and Kidman dies. We run through the gate, which Joseph is looking at through the cylinder. Along the way we will meet two enemies with dynamite in turn. We shoot at them with a shotgun, and while they are rising, the dynamite will explode and kill them. We run through all the cameras. We run into the last one on the right and climb through the hole in the wall. To the right, up the stairs and turn off the control panel, listening to Joseph’s advice. We set 22 on the upper dial, and 5 on the lower dial. After this, the cylinder doors will open, and Kidman will be safe. But hour by hour it doesn’t get easier. The floor beneath our partners collapses and they fall down.
Now you can relax a little, take a breath, collect all the equipment that fell from the killed enemies, and explore the hall. Also, using a melee attack, you can open the gratings that we ran past on our way to the control panel. We go down into the pit. We are looking for a gap in one of the walls in the room in which we find ourselves. We climb into it and go to the end of the corridor, fighting off enemies. Walking along the corridor, do not forget to go into the room on the left, there is some equipment there. Having reached the end of the corridor, we jump into the bloody pool and pass to the other side. Having climbed onto land, you can walk back along the collapsed concrete slab over the pool and take the equipment. Next we go along the corridor hung with lamps, do not forget to go into the room on the right. Having reached the end of the corridor, we see a collapsed floor. We jump down, go forward and help our comrades fight off the dead. After the enemies are destroyed, we approach Joseph and help him lift the gate so that Kidman can crawl through and open the door for us on the other side. We go through the door and watch the video again.

We kindly end up right in front of the door with the mirror. We do our business and walk down the corridor. The passage on the left is blocked different objects, so we can’t just get there. Exactly opposite this passage there is a room with stairs down. We go down and slowly walk through the tunnel. There is a button on the floor, stepping on which activates the trap, and after a couple of meters spikes will come out from it. We calmly follow the button, wait for the trap to work, and slowly move on. We see the dead man rise, and the first thing he does when he rises is pull the lever, which reactivates the trap. Therefore, as soon as we see that he is reaching for the lever, we immediately run away from the zone of action of the trap. After we finish him off, we go up the stairs at the other end of the passage. We clear the chest, collect all the equipment and go back to the other side. When we find ourselves on the opposite side of the blocked door, we clear the tripwire right behind it. In the passage on the right, two dead men are waiting for us. We deal with them and go beyond the fence, and then through the white door. Having passed through the door, we see that hot liquid has been spilled on the floor, and we take note of this. We turn right and go into the room on the left with a red light.
Getting ready to meet the Boss. Having entered the room, this multi-armed creature, from which we fled in the previous episode, will again crawl out of the pool of blood. We run to a puddle of liquid, set it on fire and wait for the Boss to light up. Here we understand that this creature cannot stand fire. Before going through the door that the Boss broke down, we go into the room and collect equipment. We go through the door and see that the passage behind us disappears, and a solid wall appears. There is no turning back. We found ourselves in a square room in the center of which the same Boss will appear if we approach it.

We stick to the edges of the location, carefully examining the room, remembering the location of all the barrels, stoves and gas taps. The ovens can be activated with a lever. In the oven on the right, the lever is at the top, and on the left, at the bottom. There are two of them in total. The boss is quite slow, but sometimes he makes quick dashes towards us - at these moments we need to run away from him using sprint. If the Boss disappears from our field of vision, we move all the time, otherwise we risk being killed from the rear. It must be burned four times. Upon achieving victory, we will be able to go through a door that was previously inaccessible. We go through the door, walk along the corridor, and again through the door. We watch the plot insert, after which three dead people will rise from the baths. In order to kill them, we need to knock them down with a gunshot, and then pull out some foreign bodies from the back of each of them. Let's watch the video. The episode is over.
Episode 06. Not ourselves
This episode differs from the previous ones due to the serious “action”. So let's get ready to shoot like crazy!
Let's watch the video. Having appeared, we pay attention to the papers and photographs on the table. We look at them, and... something suspicious happens. We remain in pitch darkness. We turn on the flashlight and go to the mirror, which is located at the other end of the corridor, with a pumping chair. Approaching him, we see the Nurse, and we understand that the location has changed. A fork has formed in the place with the mirror. We turn right on it and go down the stairs. The silhouette of a huge man with a hammer suddenly appears, and after a split second we discover that we are in a completely different place. We go along the corridor and at the end turn right. We find Leslie, who keeps saying our name.
We find ourselves near a broken mirror in a brick building. We climb onto the boxes and climb over the wall. We climb up the stairs, collecting items and... sun, day, birdsong and a gentle sea breeze. It would seem that now nothing threatens us. But it was not there.

We walk to the gate, simultaneously examining the outbuildings on the sides of the path. As soon as we open the gate, we find our colleague Joseph lying unconscious on the lawn. After watching the video from which we learn that Kidman has disappeared, we will be attacked by a whole army of the dead. We have to run, but the doors are mined. Our task: to cover Joseph while he clears the door. We try to save ammo and not miss. We shoot straight in the head, but if the weapon does not have “critical damage” pumped up, then even from a direct hit between the eyes, the enemy will die at least from the second shot. It is better to use a shotgun against large opponents. We also try to set fire to large groups of enemies using explosive barrels. When Joseph opens the door, we give up the fight and run into it. Further down the stairs. Another door. The task is similar. When the door is open, we run into it and lock the gate. On the left we see a mirror. Now after a hard battle you can relax, level up and save the game.
Now we find ourselves in the arena. What will now happen in this place itself defines it. First of all, we open the case that lies on the table and take away the sniper rifle. Let's go left. On a hill, a dead man will come out of the building. We kill him (preferably with a sniper shot to the head, so that he does not have time to call for help). We don't go through the door. There will be another one passing right there on the steps on the right, we take it out in the same way. We go to the steps, defuse the bomb and go up into the building. Carefully. There is another bomb hanging right above these stairs, so we move carefully. We deal with all the enemies and pull the lever in the same room. We go upstairs and find that we are being fired upon. We remove the dead man who is firing from the hanging balcony, and as soon as you kill the first one and the balcony collapses, a dead man will appear in the same area below, who, using a lever, will release a pack of enemies at us, and as soon as we destroy all the dead men, he will appear again will run to pull the lever. At this moment he is vulnerable and can be easily shot with a sniper rifle. Next, we go around the location in such places that the rest of the shooters begin to fire at us from their guns and become open to fire. As soon as we destroy the other three balconies, we go to the lower entrance, into the building from which the enemies ran out. We approach and fall into a trap. Then a familiar guy with a chainsaw appears. He will require a considerable amount of ammunition to be fired at himself.

We don’t let him get close and use sprint only when it’s really necessary. We use the crossbow to immobilize the target and at these moments fill it with lead. When the enemy is killed, the gate will open. We go in and go up to the second floor. Let's save.
We need to get upstairs, and for obvious reasons the elevator is not working. We burn the corpse and enjoy the trip. Having risen, we go across the bridge and see two dead men executing a man. The clumsy Joseph, it would seem, already sees how he is cutting them into pieces, and without thinking twice, he rushed to chop the dead with an ax to his advantage, when he accidentally hits a tripwire, blows up the floor of the bridge and ends up in the place of a just beheaded man. But that’s why we are partners, to help each other. We go left to the edge of the wooden bridge and shoot the enemies with a well-aimed shot to the head. Now Joseph, as a sign of gratitude, will put a crossbar for us so that we can cross over to him.

After talking with Joseph, he goes to open the door, and our task is to cover him. It is better to stay near the wall on the left in front of the collapsed bridge and shoot enemies from there, otherwise we risk being torn into small pieces by a grenade. We run through the opened gate and find ourselves in the market. There are no enemies, and quite a lot of items. We carefully examine the market, reach the gate and find ourselves in the cemetery. We go straight, watch the video and save the game.
We return, leave the house and see Kidman being dragged somewhere. Joseph has climbed onto a hill and will cover us from above. Our task: to get to the church. We immediately take out the sniper and begin to move forward, crushing all the dead in our path. Having reached the gate, which opens with a button on the floor on only one side, we are preparing for a serious fight. We pass through the gate and see how the dead man releases the Giant, he immediately kills his liberator, grabs the first thing that comes to hand, and purposefully moves in our direction. We don't let you get close. We fire with all calibers straight at the head until he falls to his knees. We don't cease fire, and as a result he will die. But before we know it, we will be immediately attacked by a second, more ferocious, bloodthirsty and agile giant. He will break through the wall to the left of where the first one appears and rush at us. This will be much more difficult to deal with, but the principle is the same. Having killed the enemy, we pass through the broken wall (don’t forget to look to the right to the broken wall and examine the cleared area) and head to Joseph. Let's save.
We're in wolf's den, turn on the flashlight and begin to move forward. We reach a room with fouraltars. Again a riddle, but indecently simple. Our task: to lower the corpses onto the altars as depicted on the wall. There should be corpses on altars 3, 5, 9, but not on altar 7. After this, you can safely pass through the door in which there were pins.

Let's go and take the elevator. We move along the corridor to the room and go through the arch. Having advanced a little, we will see a huge mutant wolf, fortunately in a cage. We calmly find the passage to the right of the cage with him and go there to the gate. We open them using the button on the floor, go through and hear bad sounds. We ask Joseph to open the gate, when the wolf destroys the wall, rushes at Joseph, and he loses consciousness. Time for battle. We try to catch the wolf at the moment when he is thinking about what to do. We shoot with a shotgun, preferably after immobilizing it with a crossbow. When the wolf hides in the bushes, we smoke him out of there with a grenade. After the victory, we discover that Joseph cannot live without his glasses. Now our task is to pick them up and return back. We climb through the torn bars, take the glasses and climb back, ignoring the wolf. Joseph will distract him so there won't be any problems. Having returned the glasses, we go to the church and open the door. The episode is over.
Episode 07. Guardian
We're in church. After walking a few meters, Joseph sits down on a bench, we approach him and watch the video. We find ourselves in the very catacombs that we found under the church, as we could find out by studying diaries and documents. We move to a room with candles, in the center of which lies a coffin. We pass by and go through the door. We go to the picture hanging above the candle and turn left. Don't forget to break the bowls on the floor and collect the items. We go up the stairs, to the right. There are three dead people wandering around here. We deal with them using the usual methods, examine the room on the left and move further along the corridor. At the end of the corridor on the right there will be a room where you can take several items, and on the left there will be a monument from which you need to cut off a small part of it with a knife. After this is done, the wall will rise up and we will be able to pass. Let's go in. We clear the room of the items we need and go right along the corridor. Down the stairs we see a creature with a safe on its head and a large hammer. We open the gate and in the center of the room we see a large monument, in which three parts are missing. On the right there is a door with a mirror. We insert the part that we found and go look for the other two.

Passage on the left:
We go to the corridor and close the valve that cuts off the supply of poisonous gas that blocks our path. Open the door and turn left in the corridor. There are two enemies in this corridor, the rest are behind bars. We deal with them and go to the end of the corridor past the last grate on the right, while defusing the bomb on the wall on the left. At the end, we turn right, activate the trap, thereby bringing down the spiked ceiling on the three dead men in the room, and examine the room cleared of villains. We return to the end of the corridor, turn left and go down the hatch. Having gone down, we are locked and poisonous gas is released into the room. The scale fills up pretty quickly. We close the first valve, move on, kill the dead man and exactly at the end of the passage there will be a second valve. Once we shut it off, the supply of poisonous gas will stop. We turn left from the valve and go down the stairs. We walk along the passage, dealing with three dead men and defusing the bomb. At the fork, turn right and open the grate on the left. We pass along the next corridor, shooting enemies and disarming traps. At the end, open the grate again and go up the stairs at the end of the passage. At the end of the corridor on the right is a monument. We cut off a piece and again find ourselves in a hall with a fork in the passages.
Passage on the right:
We go down the stairs. In the room with spikes at the very end we see a passage on the right. We go there, and they cut off our way back. Walking along the corridor, we disarm the trap. Next we see a burning door and two mechanisms to the right and left on either side of it. Without going down, we shoot at each of them in turn. The trap is triggered, and a spiked ceiling falls in front of us. While it is below, we climb onto it and rise up. We deal with the enemies and go through the opened door. We find ourselves in a hall, in the center of which there is a mechanism with a trap. A dead man hangs near him. We kill him and go to open the grate, which is located behind the mechanism with a trap. As soon as we touch the valve, a door will open to our left, from which a couple of undead will come out. Using a trap, we deal with them and go into the passage from which they came. We neutralize the traps and, having reached the end, we will be able to pick up a considerable amount of green gel. We go back and open the grate. We pass along the corridor, neutralize the dead, turn right and see the monument. We break off a piece and again find ourselves in the large hall.
Main entrance:
Now that we have all the parts of the monument, we insert them and go down the stairs.We go through the door and fall into a trap. We free ourselves from it by pressing the corresponding button and run away from the affected area of the falling ceiling. Now our task is to overcome the corridor lined with mines and wire without hitting any of them, since the ceiling will fall behind us. Having overcome difficulties, we turn left and find Leslie. We release him from the cell and open the door using the mechanism. Let's watch the video. Now we are left alone with this nightmare with a safe on its head. Could you imagine a worse development of events?

We shoot at him until he dies, and he will die quickly. It is best to use a crossbow with mined bolts. When we kill him, we go through the opened door and realize that now everything is really bad. We take the equipment from the table and pay attention to the fact that there is a valve on the table, which we cannot take yet. We go to the right, and immediately to the right there will be one of the valves that must be closed to shut off the gas supply. We quickly run up to it and begin to spin, and at these moments we notice that the enemy we just killed is rising from the gas fog. As soon as the valve is tightened, we immediately run into the door on the left, after which Sebastian will close it himself. On the right is the valve. We twist it and see that the big guy decides to commit suicide in order to appear in the room with us. We kill him again, and the doors open. Having passed through the door, we run into the passage to the left and see how the villain breaks the valve that separates us from salvation. This is where the same valve that we saw on the table when we entered this room will come in handy.

We take it and run to fix the damage. The Guardian will always try to send us to another world and will prevent us from calmly turning the valve. We immobilize him with a crossbow, or kill him so that time appears. When the job is done, the supply of poisonous gas will completely stop, and we can go down the stairs to the left of the valve. We go down, Sebastian locks the door again. We go up the stairs and fight off the safe. After which we are satisfied with what we see and go to the end of the passage. We turn left and go along the wall. We go into the cave on the left, at the end of which there is a staircase. Let's go down. The episode is over.
Episode 08. The grain will sprout
We found ourselves in the very depths of evil. There are several dead people wandering around the cave. We give them peace and explore the area. We pass through the boarded up door, go a little further and again encounter the dead. We try not to miss, since ammunition will come across quite rarely. We lift the grate and go through. The area is being shelled at short intervals. We run to the other end of the cave, hiding behind the rocks, and climb into the gap in the wall. Before opening the gate, we explore the area and discover a new type of enemy. There is no need to waste ammunition on them, just use a melee attack, since these guys will usually appear in large numbers, and there simply won’t be enough ammunition for everyone, given that they are killed with one hit. We lift the grate and walk through the water, trampling the vile creatures along the way. Next there will be two dead people and several crawling ones. At this point, problems with ammunition may arise, but do not forget that we can craft bolts for a crossbow. Having dealt with everyone, we move through the cave and again climb into the gap. We check the sites on the left and right for presence useful items and go into a bloody room with a corpse and holes in the walls.

We examine the corpse and select a plate from the floor next to it, which must be inserted into the door. Having examined it, we conclude that it is necessary to place it with the clean side facing you, since the other side is stained with the blood of the corpse that we examined. We go through the opened door and go to the source of the impulses. Suddenly we suddenly find ourselves in the hospital. We go to the end of the corridor and talk to the doctor. After which we examine the round hall and go through the door. As soon as we enter, a terrible creature will appear that we need to escape from. We just run forward without crashing into anything. Having escaped from him, we meet Ruvik. The episode is over.
Episode 09. Cruel Intentions
This episode will be extremely informative. We learn many details from the tragic life of Ruvik and Sebastian.
We appear at the hospital and go to the reception desk. We look at the picture and notice that something has happened. We go to the far mirror, which is in the same corridor as the door to our room, and we find ourselves in the forest. A gate is visible ahead. We move towards them and see a huge mansion. We explore the area and enter it through the central entrance. We immediately see the Doctor leading Leslie through the door, which immediately closes.

In order to open it, you will need to activate three mechanisms using blood supply. To the left of the door there is a room with a mirror, which I advise you to use more often in this episode, since Ruvik can appear at any time during the passage, and you will not always be able to escape from him. In order to do this, you need to hide in closets, under sofas, under tables, etc., without being in his field of vision. First we go through the door on the right on the first floor. We examine the rooms, collect equipment, disarm traps and, having reached the end, we find a safe without two dials. We return to the main hall. Now we go to the central room on the second floor and immediately to the left we find the lower dial of the safe. Now we go to the room on the first floor on the left. We walk along it until we run into a table with a human head. We use the tool and, looking at the picture on the table, aim at the M-33 zone. The first mechanism has been launched. After starting each mechanism, the ghosts of the Doctor and Ruvik will appear in the room with us, who will have very informative conversations.
We return to the main hall. Now the only door we haven't been through yet is on the second floor on the left. We go there and find ourselves in the library. We turn left and go along the right wall until we see the stairs. We go up it, deal with two dead men and find the top dial from the safe. We return to the entrance to the library and move through the door on the right. We kill the dead who have found dinner for themselves, and move along the corridor, examining the two rooms on the left. Don't forget to defuse the bomb on the wall near the second door. At the end of the corridor, turn right and go to the end of the room, having first cleared the restroom on the right of objects. As soon as we reach the end, a trap will be triggered, which will actively pull us onto the spinning shafts. We shoot at the red light from above and disable the motor, as a result of which the shafts stop spinning. We go through the door and climb into the fireplace. Again we find ourselves in a room with our heads on the table. We use the device and aim at area A-2, again using the pattern. The second mechanism has been launched. We get out of the fireplace, leave the room and go left. We move to the boarded up door through the room and again find ourselves in the main hall.
Now we just have to open the safe in order to start the last mechanism. We go to it and select the code using the method of elimination. Most likely there is randomness here, and if not, then set 11 on the upper dial, and 2 on the lower dial.

The doors open and we find ourselves in a room with the last, third human head cut in half. Using the device and drawing, we mark in zone C-4. After the mechanism is launched, we return to the main hall and the doors open.
Ahead we see a long corridor. As soon as we enter, the doors will immediately close. We move along the corridor and see Ruvik coming towards us. Don't panic. When he catches up with us, we will be transported to his memories. We walk along the corridors and rooms until we come across a huge blood clot in the shape of a person. We run from the room along the corridor, break into the door, and the room stretches out lengthwise. We discover thin threads that we must pass by, bending down before we are pierced by spikes from the ceiling. It's not difficult, we just mentally imagine that the threads are walls that cannot be touched. We only go through obvious gaps between them; you shouldn’t poke your nose into small openings. When we go to the other end of the room, we find a mannequin and move again. We found ourselves in a location with huge heads.

We walk past them, and a blood clot appears again. Here we find ourselves in a labyrinth. We must run quickly, since the clot has the ability to pass through the bars, and we will have to write zigzags back and forth, shoot locks, explode bombs, go through spinning saws and at the same time not fall into a trap on the floor. The route is like this. Left, right, right, straight to the stop we shoot the castle, right, left, left, detonate the bomb, straight to the stop, shoot the castle, left, left, right, carefully pass the traps, left, detonate the bomb to the left, right, go to the saws and we pass in the same area with them, to the right, shoot the castle, to the left. We quickly run into the light, because the heads will close after us.
We got into the room again, but after walking along the corridor and going through the door, we find ourselves in a field with sunflowers and a barn in front.

Let's go inside and watch the ghosts. After the house catches fire, we need to get out through the window on the second floor. There are two mechanisms near the entrance on the left. We turn the one on the right, thereby dragging the lift to the edge of the second floor. Then use the mechanism on the left to lower the lift. We stand on it and shoot at the mechanism that is responsible for the rise, and rise to the second floor. We go to the window, and we are thrown back to the first floor. Another blood clot. This time we simply shoot the enemies that he will send at us until the video starts. We again find ourselves in a long red corridor. We go forward and go through the door. We find ourselves in a room in which there is a gap between the wall and bookcase. We climb in there and the closet moves. The episode is over.
Episode 10. Master's Tool
We start exactly from the same place where the previous episode ended. We go down the stairs and find ourselves in the basement of the mansion. We move straight and see a door with a mirror. We go into the passage on the right and go down the stairs again. We neutralize the trap, explore the passage on the left and go straight through the red fog to the door. Here we find ourselves in a large dark room. If you hit the trap, a carousel with huge spinning knives will turn on, and two snipers from above will fire at us. Our task: to reach the corridor on the right, disarming the traps, to where the dead man is walking with a torch. It is also advisable to kill him secretly.

Once we get into the corridor, the trap will be activated in any case. Crouching down, we pass past the windows and shoot the undead. We turn right and go up the stairs. We carry out reprisals and go to the balcony. From there you can easily kill the snipers, they are on the balcony to the right. We leave the balcony and turn left, go to the end and pick up the battery. Now we go downstairs and go straight into the hall with the carousel through the door near the stairs. We move crouched, because if we stand up for a few seconds, Sebastian’s head will be cut off. The mechanism, by the way, can be used against enemies. We go to the right, climbing over the fence, and go into the door on the wall on the right. We neutralize the enemies and go along the corridor. Be careful, there is a bomb on the left. At the end we insert the battery and see that the doors in the hall open. We pass through the spinning knives and go through the door.
Having examined the area, we go down the stairs. We pass through the lake of blood and find ourselves in a room with a closed door. In order to open it, the power supply must be restored. We go through the door on the left and clear the room of enemies. It is better to lure them out so as not to fall into a trap. When the room is cleared, in the left part of it we select the battery from the shelf. We go through the door, which is behind us on the right, and move along the corridors. There is only one way here. When we reach the last room, we notice a torn mesh. Bending down, we climb there, disarming the trap. We insert the battery, the power supply is restored, but along with it the traps come into action. Let's go back. We deal with the undead, move on and see a new type of enemy.

To kill one, you need to fire a very serious amount of ammunition at him. We wait for him to rush at us, freeze him and quickly run to pull the lever into the room from which the enemy appeared. It sets the traps in motion, i.e. they will not only work but also move, which will allow us to run under them. We run under the spinning saws on the right and wait for the next trap to trigger. We run through the door, through the door again, and wait until all three traps are triggered, having first left the room. Next, bending down, we pass to the right and go up the stairs on the right. We run through the second floor and at the end we climb into the ventilation. Having passed along it, we jump down.
In this room, two huge undead and one ordinary one await us. Dealing with them will not be easy. Let's use the situation. Next, we lift the grate using the mechanism, activate the lever, crawl under the saws and again find ourselves in the room with the door we need. Let's open it. We pass along the corridor, and we are again transported to another location.
We go straight and see the scarecrow we know so well crawling across the window (apparently, this is Ruvik’s sister, but since in all the ghosts’ dialogues we heard the name Rubin, and not Ruvik, we can’t be sure of anything). We go along the corridors and find a room with a mirror. Opening double door and we see her again. Now only a net separates us from the four-armed creature. We go around it and go down. We see the lever and pull it. At this time, the creature tears the net, and nothing else separates us. Quickly bending down, we climb through the two opening gates and run straight. There is only one way. We run past all the cameras, at the end we turn right and slam the door. We go through the door and see how the elevator descends, which, in fact, we need to get into in order to escape from the bloodthirsty creature. On the right we see a wall of fire, and on the left there is a lever, pulling which, after a while, the supply of fire will stop. We pass and see another wall of fire. Pay attention to the pipes above. We see a lever on one of them; when you shoot it, the fire will disappear.
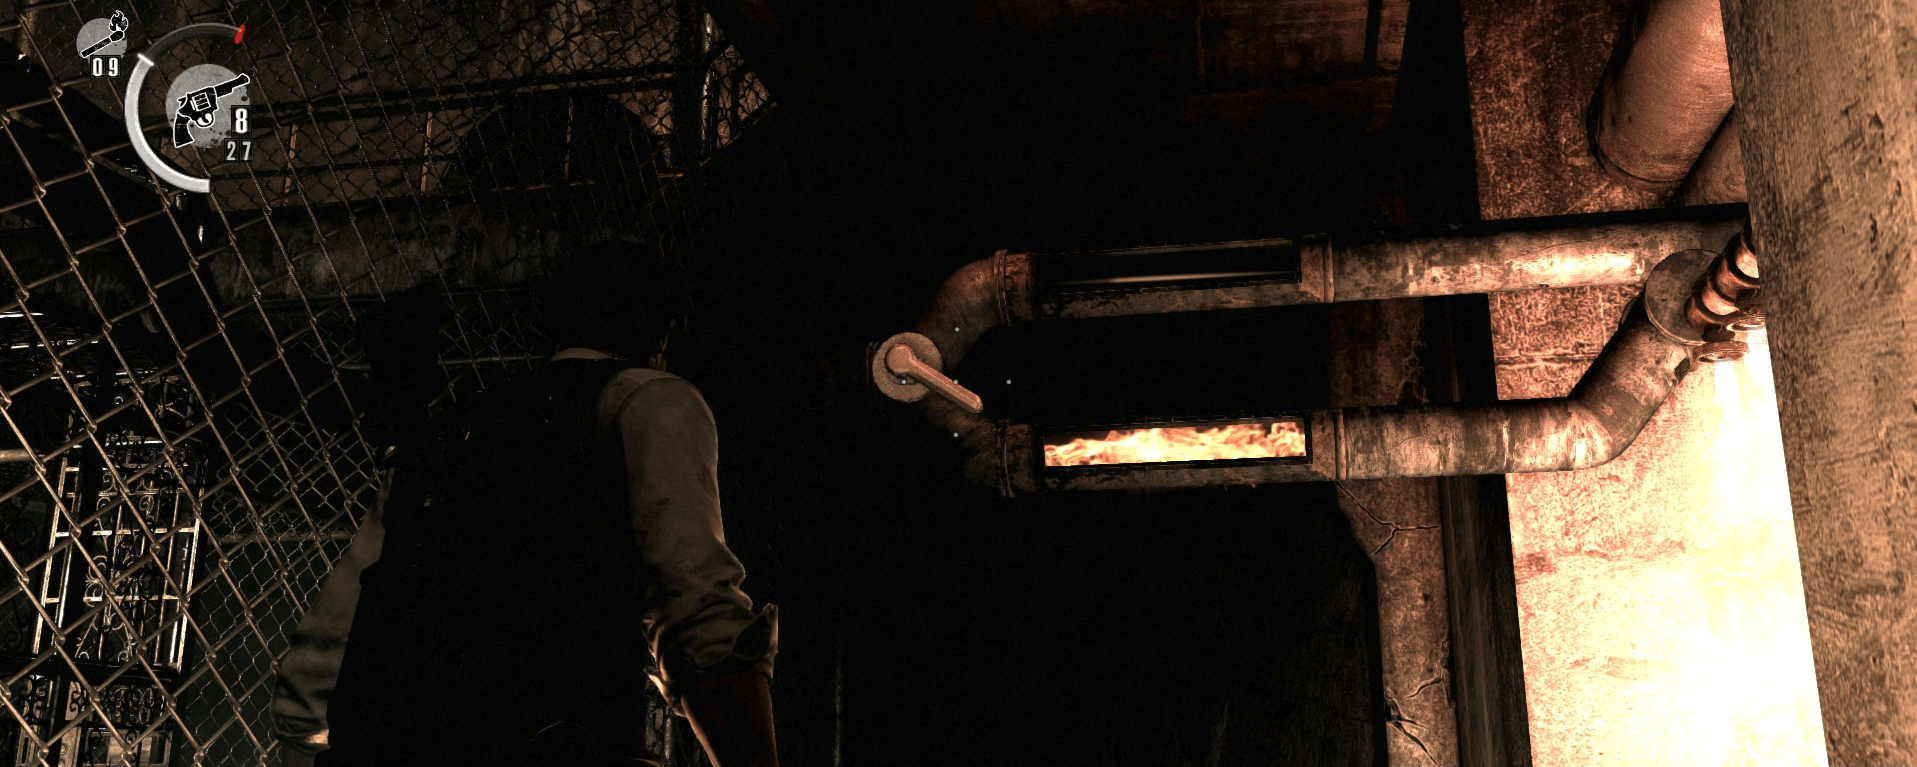
We wrap up both options for turning off the fire, namely, that by pulling the lever, the supply of fire will stop only after some time. We pass and meet the creature again. We turn left, run past the bomb to the right and see a wall of fire. We quickly activate the lever and move the creature around load-bearing structure in the same room until the supply stops. We climb up the stairs. We run to the next wall of fire and pull the lever again. We do exactly the same manipulation. We run and turn right. The doors close and a fire begins to break out in the room. We shoot at the lever from above and open the door in front of us with our hands. The creature still won't leave. Here we need to shoot at three levers. The first is on the right, the second is on the left, the third is directly next to the wall with the fire. We run and jump down. Here we need to shoot at the lever, which will stop the flow of fire, blocking the lever for us. There are also several more levers here, when you shoot them, a stream of fire will start coming out of the pipe. This can be used to buy time by setting the creature on fire. Next, we pull the lever itself, wait for the wall to go away, and run straight into the lift. We go down and find ourselves in a familiar place.
We go straight into the room that can be seen in the distance, go through the door and watch the video. We are thrown back to another location. On the right there is a door with a mirror. We go down into the mine and go into the next room. We go through the mine again and move to the door with the inscription “Exit”. We get to the parking lot, and then the boss starts chasing us. We run away from him and find ourselves on the lower level of the parking lot. Now we need to kill this creation of Ruvik's sick mind. This is the tactic. You need to hide from him, and when he uses his eye to find us, shoot right at him.

The creature will be immobilized for a few seconds, you need to shoot at all the heads that are visible, and there are 5 of these heads in total, in order to inflict maximum damage on it. When the creature’s life reaches a certain level, a red eye will appear in the center, shooting into which will again immobilize the creature, and then we finish it off with all the guns that are at hand. For killing her, we will receive 20,000 green gel, and the doors to the elevator will open. We go through them. The episode is over.
Episode 11: Reunion
The elevator falls. We find ourselves in a city in which only one hospital has survived. Everything else is crumbling right before our eyes.

We find out that Sebastian can swim. We swim to the red car on the left and follow it to land. We go right past the carousel and walk along the crumbling road to a hole in the wall with a fallen “Open” sign. We climb there and go through the door. To the right, through the door again. In the room on the right, which is in line with the door from where we left, you can find a brand new Magnum on the table in a case. We move through the opening in the wall and go right. We jump down and go along the alley. We go left, collect equipment and go into the passage. We climb over the fence behind the minibus and find ourselves in a small open area. Our task: clear it of the undead, reach the door that is located to the right of the container with the stairs, and try to open it. When we fail, the door near the minibus will open, and the undead will trample from there. We go there and pick up the keys from the ground. More ghouls and a shooter appear on the container with the ladder. He's wearing a mask, so it's useless to shoot him in the head. We take everyone out and open the doors using the keys we found.
We go around the bus on the right and go down. We go down the blue container, go past the bus, and Sebastian falls into the water. We swim to the blue pipe and discover that a monster lives in the local waters. From the video we learn that in order to distract the monster, we need to shoot at the hanging corpses, thereby throwing them into the water. We shoot at the corpse closest to us, and as soon as it falls into the water, we dive and actively swim to the other side. By the time the monster realizes what happened, we will already be on land. In the second section, the tactics are similar.

We climb up the slope and go down the red container on the left. We see familiar impulses, already guessing what will happen next. We go to the end of the street to the source of the impulses and approach the door on the right. Ruvik appears, and a creature very similar to him appears to our left and sends bloody hands emerging from the ground at us. You have to run away from them. We will also be attacked by a dozen undead, but the main task is to kill a copy of Ruvik. To do this, we make a circle to break away from the bloody hands that are trying to overtake us. Having found the enemy, we release a harpoon from a crossbow at him and burn him with a match. This is the easiest way. All enemies around us will die. The doors are open. We go through and find a mirror. Let's save.
We pass through the half-open door, bending down, and find ourselves in a location with many undead behind a cage. We jump off the ledge on the right and see how one undead uses the trolley to escape. The undead that are in the cage will appear in small groups of 2-3 from the gate below, as soon as we get close enough to them. The last two are the most dangerous, as they are armed with machine guns. After killing everyone, we can go through these very gates. We pass and go up the stairs. We go along the platforms and jump down. Next, we go up the stairs to the mechanism and call the trolley to us. We shoot the undead and go up the stairs to the trolley. We start driving to the other side. We will be accompanied by enemies on the left and right. It's best to shoot them when they are close to the edge - in this case they will fall down, and we will only waste one cartridge. It is advisable to shoot in the body and not in the head, since most of them are wearing masks. We use barrels and first of all kill enemies with Molotov cocktails. Having reached the other side, we jump off the trolley, go left, jump down and move through the pipes on the left to another building. We find a door with a mirror on the right. Let's save.
Let's move on. We pass the offices and hear Kidman's screams. We approach the opening in the wall on the left and see Kidman running from the undead. We jump onto the red container on the right. We see doors that open after a certain period of time.

We approach the edge of the container and, as soon as the doors begin to open, emitting sound signals, we jump into the water and swim through them. If we hesitate, we will be eaten alive by one of the representatives of the local fauna. We climb onto the stairs on the left and go to the edge of the platform. We kill the dead people near Kidman, so that later it will be easier and the dead man who is standing below on the car, if we don’t kill him, he will continue to bother us. We go to the stairs to the place where the pistol cartridges lay and shoot at the corpse closest to us. We rush headlong into the water, swim to the car near the floating pallets and climb onto it. Here we need to guess the moment. As soon as the door starts to open, we immediately shoot at the corpse hanging on the platform under Kidman and dive sharply into the water. We swim through the door and climb up the stairs. We go to the floor where Kidman is located and cut out all the undead in the room. Kidman will open the door and a new wave of enemies will attack. We kill everyone and go through the opened door.
Let's go down. We go out into the street and walk along the platform, listening to the dialogue of the characters. We go down the stairs and go through the door opposite. We rise and enter the building through the red door. Let's watch the video.

We pass through the door and see the inscription “flammable”. So, apply firearms will not work. We move forward, turning off the lantern. We crawl under the shelf and wait for the enemy to pass by, freeing up the passage for us. We get out of there and head to the stairs on the wall to the left. We pass to the other end of the bridge and go down. In front of us is a door that requires a key card. We go searching and find that the area is patrolled by a crowd of enemies. Our task: to secretly pass by them straight ahead and first of all close the valve, as a result of which the supply of flammable gas will stop and we will be able to open fire. After killing the enemies, we look for the map. It is located near the blue container in which the ghouls dine. We take her and go to open the gate. We go up the stairs, go out into the street and catch a glimpse of Joseph running near the building on the right. We go down the stairs and go into the alley, after running into the room with the mirror and saving the game.
We pass the alley and go up the stairs. We examine the room on the left and go to the other side, where we come across Joseph. The episode is over.
Episode 12. Trip
We talk with Joseph and find out that he no longer had seizures, this makes us understand that Ruvik has completely switched his attention to us. Joseph found transportation - a school bus. We go into it and Kidman bursts in, trying to start the bus, as she is being pursued by a huge Arachnoid, and now us. We shoot him in the head so that he gets unhooked from the bus. Kidman starts moving. We don’t waste ammunition while he’s chasing us, we won’t cause him any harm. The road is blocked by a tanker truck. We shoot the enemies until one of them drops the dynamite and blows up the tank. Let's move on. Arachnoid again. The tactics are similar. We shoot in the head until it comes unhooked. By the way, the slugs he releases drop ammunition. The arachnoid is killed against the wall, and we continue on our way.

Joseph has been shot, and by chance there is an ambulance nearby. Our task is to get to her and take the first aid kit. We walk through a dense row of cars, collecting ammunition and shooting the undead, we pick up a first aid kit, and then a military “patriot” arrives with a machine gun and opens fire on us. We go to him, taking cover behind the cars. Please note that if you stay behind the car after he fires a burst at it, you will most likely die from the car explosion. We go around the “patriot” from behind, kill the shooter and personally sit down at the machine gun. In our hands it will bring much greater benefit. We shoot a big bunch of undead and go to the bus. Here we will be allowed to take control of the transport for a while. We crush all the undead and at the end of the road we notice Ruvik.

Let's step on the gas and watch the video. The episode is over.
Episode 13. Losses
We flew off the bus and found ourselves in the building. We discover that Kidman is not with us, and we conclude that she remained on the bus. Our goal: to go down, breaking through the floors. Immediately to the right of the hole in the wall there is a mirror. We examine the floor and jump down. We see a new acid trap that takes longer to disarm than others. We pass along the corridor to the elevator shaft, shoot at the cable and go down. Joseph will not be able to follow us along this path, so we move on alone.
We go through the ventilation and again come across the Guardian. In fact, in this area you don’t have to be afraid of him, but there will be as many as two copies of Ruvik here, which are better to kill secretly. We turn left and find an enemy on the right. We wait until he comes facing us, and as soon as he turns around, we move towards him in stealth mode. Don't forget to disarm the trap, which is located just around the bend. We secretly kill him and approach the edge of the corridor, watching Ruvik’s double. As soon as he starts entering the room, we immediately move towards him and plunge the knife into his skull.

- You can jump from one balcony to another and secretly first cut out the undead, and then another copy of Ruvik.
- The second option is to go through the door into the corridor and first kill the fake Ruvik, and only then deal with the dead.
- And the last one, not the most recommended if you have problems with ammunition, is to impudently shoot all your enemies with a threatening expression on your face.
Don't forget that there are many traps on the floor. When the job is done, we neutralize the acid trap blocking the path to the stairs and move on.
We go down to the floor below. The Guardian wanders here. Having entered the corridor, we turn right, watch the Guardian and see that he is leaving. We neutralize the traps, collect equipment and neutralize the acid trap that prevents us from passing. We see rats running into the ventilation. We do the same, since rats have a very developed instinct of self-preservation. We pass through the ventilation shaft and see a bus. Kidman does not respond to Sebastian's call. We go along the left side of the destroyed building and go down until we see a door. We go in and see a closed door on the left and a door with a mirror. Let's save.
After saving, the door will open. We go into it and jump down. In the corridor we see traces of blood and an enemy with red lights. You can guess that the red lights are mines, which will naturally explode as soon as we approach the enemy. Don't try to kill him covertly. As soon as the enemy dies, another one will jump out of the first door. When the kamikazes are killed, we examine the room behind the door from which the now deceased jumped out. Next, we climb into the ventilation on the right wall at the end of the corridor. We collect our equipment and go to the kitchen. We see Joseph running away from the Guardian, and Ruvik appears, who launches small saw blades into the kitchen that move along the floor.

We pass through the kitchen, disarming traps and bypassing disks. It is advisable to move slowly and crouch, as at some points spikes will emerge from the ceiling and walls. We reach the end of the kitchen and neutralize the acid trap. We go through the door. First we go to the right, collect equipment. Then go left to the door. We find ourselves in a room with hanging carcasses. We see how Joseph escapes from the Guardian through the elevator. Now the enemy is completely focused on us. We need to kill him twice in order for the elevator to return to our floor. The best way to do this is with grenades. When the elevator doors open, we climb into it and run away from the Guardian. We collect equipment in the room and go through the door. We look out the window and see Kidman and Leslie. We pass further along the corridor, go down the stairs and go out into the street. Let's watch the video. The episode is over.
Episode 14. Hidden Motives
We appear at the entrance to the metro. We go down the escalator. We go into the room on the right, defuse the bomb and take away the items. Next we go to the men's toilet, it is located opposite this room. We are not in a hurry to go there quickly; it is recommended to throw a grenade first. If you don’t have them, then we go in, get closer to the bomb until we hear characteristic signals, and quickly run back. There is also an enemy with a crossbow, which shoots these same bombs. We clean the restroom and collect the green gel. Then again down the escalator. Ruvik's double is wandering around on the left. We deal with him and a couple more dead men. We turn right, defuse the bomb and open the gate. We find ourselves on the subway tracks.

There are a lot of undead and a doppelganger wandering around here. We flog everyone and go to the carriage. We move along it, exploding mines. We go to the end of the cars, taking away the traps. We jump into the water and go into the next one. I advise you to detonate the bombs first, preferably when the enemy is passing by. We jump off the car, after walking a little along the shaft we go into another one. We see the carriages hanging over the abyss and understand that we are there. We leave the car through the open door on the left, then through another one and see a web of mucus. We burn it with a match and move on.

Down the stairs. We kill the undead and go left. We don’t rush, we go into the room behind the net, first we neutralize the trap in the opening. We collect our equipment and go along the corridor. We go to the end, down the stairs to the right. We see that an electric field is blocking our path. You can go under the first one while crouching, and the second one must be turned off using the lever on the wall to the left. But first, burn the corpse that lies between the fields. To the right, down the stairs again, turn off the field again using the lever. We crawl under the mucus and pay attention to the grate on the left. We go to the end of the room. On the right we see a ventilation, at the end of which there is a can of green gel, and on the left there is a door with a mirror. Let's save.
We go to the grate that we noticed some time ago, and a dead man jumps out of it. We neutralize the villain and climb into the mine. We find ourselves in a flooded passage. We turn left and see how a certain claw takes away the dead man. We follow her to the right. To the right again, we collect our equipment and head to the stairs. We go slowly and carefully, because there are traps under the water, if you hit them you can cause big problems on your head, which is already completely clogged with thoughts. We reach the stairs and go up. We turn left and take the fuse from the panel. The field turns off and we can pass. We walk along the platform to the end and tighten the valve. The water is leaving, now we have a passage into the pipe that was flooded.

Having passed into it, we go up the stairs and see how the claw takes away the next dead man as soon as he pays attention to us. Up the stairs again. We pass along the corridor and turn right into the pipe. We burn the mucus and climb between the growths. We get into the room and see several electric fields, two passages on the right, one of which is flooded, and hanging dead people. They all get aggressive, so we shoot at them without hesitation. We go to the end of the tunnel and take out the fuse from the panel. The shields are turned off, and infection grows in the room. New dead people appear. We go into the passage with the valve, turn it, and the water leaves the second passage. We go down into it and walk along the corridor.
The same creature that was dragging away the dead grabs us by the leg with its claw. We shoot her right in the face, and she will let us go. We burn the mucus on the left, take the items and climb the stairs to the very top. After walking a little along the corridor, we find a room with a mirror. Let's save.
We find ourselves in a room containing a mechanism and an electrical panel. We go to the end of the corridor and take the fuse from the panel. Now we head to the main panel. As a result, we have three fuses. We place them like this: triple on the left to the red lamp, single in the middle to the blue lamp and double on the right to the green lamp.

We go to turn the mechanism, and the boss attacks us.
We fire at the creature with all guns, hiding behind the pillars. When it disappears, we look where the slugs are crawling from and shoot exactly at this place. It happens that the creature hides in the pipes above. We freeze, immobilize, blow up with grenades and generally use the entire available arsenal. Slugs will drop ammunition when killed. When the creature dies, we take the green gel and go back to turning the mechanism. We take the elevator up and find ourselves at the place where the cars hang over the abyss. We pass through them, and we are again transferred to the hospital. We perform the same operation as in episode 5. We pull out certain cords from the backs of their heads, after knocking them off their feet. And the episode ends on a similar note.
Episode 15. Root of Evil
This episode is an epilogue with a fascinating denouement, so in order not to spoil your impressions, it will do without screenshots and detailed descriptions situations.
Let's go to the hospital for Leslie. After walking through the hospital and entering the lighthouse itself, there is a room on the right where you can save. We go through the doors and enjoy the videos. When we find ourselves in Ruvik's head, our task will be to simply shoot crowds of undead until a sadist with a bazooka appears. Having come closer to him and showing him off a little with a firearm, he will take his old saw and will chase us around the location. We lead him by the nose and kill him. We go through the doors. Here, on the sides behind the fences in front of us, sit the dead. Two on the left and two on the right. On both sides there is a sniper and a demolitionist with dynamite. We remove them from the sniper rifle and go through the door. We find ourselves in the shower room. We neutralize all the traps and pull the lever, go to the door, and two Guardians attack us. We just kill them one by one, cutting circles around the shower through the passage on the right. The main thing is do not let them surround you and do not fall into the trap. The door appears again, we go through it.
Our task here is to reach the end. We pass the first zone without falling under the rays of light. We pull two levers, first on the left, then on the right. We walk along the edge of a cliff. We don't touch the bomb, the blue zone is too small, bending down won't work. We pass through the stretch marks, first keeping to the wall on the left, and when we reach the last one, turn right. We go further and again go through the stretch marks in exactly the same way, but taking into account that light passes along the perimeter. Let's run forward. A huge saw appears behind us. We run away from her into the light, running around puddles of blood. Having reached the goal, we again find ourselves at the lighthouse. We go into it and go up on the elevator. Enjoy the videos.
We need to run forward, running around the monster's paws. We run around the first and second from the right, the third and fourth from the left. We run straight and get behind the Hummer machine gun. We shoot at the limbs highlighted in red, and when we fly past the head, we shoot at it, and so on several times. When we have a bazooka in our hands, we shoot at the monster until its head is outlined in red, and only after that we shoot in the head. Then we repeat the operation. When we fall, we fire a control shot at Ruvik's head. The enemy is defeated. I think further explanation is unnecessary. Let's watch the final video. GAME OVER!
Congratulations, dear reader, on completing the game" The Evil Within". After the credits end, you will receive some very nice bonuses. Thank you for reading this walkthrough!