Have you tried cutting foam with a regular knife? It doesn’t work because the material crumbles. I'll tell you how to make a foam cutter with your own hands, and also offer three simple instructions step-by-step assembly cutters for foam and plastic.
What you need to know about cutting foam

Expanded polystyrene is a cellular material, the structure of which consists of many dense compressed bubbles. Bubbles do not respond well to mechanical deformation, as they are squeezed even sharp knife.

The only way to accurately cut such material is to use a cutting tool heated to a temperature above +100 °C. A lower heating temperature will cause the material under the cutter to sag and tear.
The heating temperature of the cutting tool above +200 °C will cause the edges of the cut to catch fire and burn.
By the way, a properly assembled thermal knife can cut not only polystyrene foam, but also extruded polystyrene foam, polyethylene and other polymer materials.
Assembling a simple cutter from a regular soldering iron

There are situations when foam plastic needs to be cut right now and there is no time to make a complex machine. It is precisely for such cases that I propose a simple way to convert a regular soldering iron into a cutter for polystyrene foam.
The instructions are very simple, and therefore the tool will be ready in 10 minutes, and maybe earlier.
| Illustration | Description of actions |
 |
We prepare materials and tools. We will need:
|
 |
We take out the standard tip. Near the tip on the body of the soldering iron there is a clamping screw. The screw must be unscrewed counterclockwise. As a result, the sting will weaken and it can be pulled out. |
 |
Bend the wire. Bend a piece of wire up to 10 cm long in half. We squeeze the bend with pliers so that the loop on the bend is as small as possible. |
 |
Cutting the wire. We measure the bent wire along the length of the standard tip and cut it with a small margin. |
 |
Installing a new tip. We insert the bent and cut wire to the required size into the soldering iron. As a result, the fold should point outward. We tighten the fixing screw and secure the wire in the soldering iron. |
 |
How to cut? We turn on the soldering iron and wait until the wire heats up. After this you can use homemade cutter as intended.
|
Assembling a hand cutter on nichrome thread

Now that you know how to make a simple thermal cutter with your own hands from a regular soldering iron, I offer instructions for assembling a manual cutter with cutting part from nichrome wire.
This cutter is as simple as a thermal cutter, but can be used for neat, figure cutting polystyrene foam
| Illustration | Description of actions |
 |
We prepare everything you need. We will need:
|
 |
Attach wooden sticks to the battery pack. Apply hot glue to the edge of the sticks. We apply the sticks to the battery pack, to those walls where the metal terminals are located. |
 |
Drill holes in the strips for the cable. With a space of 5 mm from the battery pack, in wooden sticks drill a hole. Given the small size of the sticks, the holes should be no more than 2 mm. |
 |
We bring out the wire. We pass one of the two wires from the battery pack through the first and second holes to the opposite wooden plank. |
 |
Attaching the button. We cut off a free piece of wire at a distance of 1 cm from the battery pack. We solder the button to the piece of wire, and on the other side we solder the cut piece of wire. We attach the button to the bar with hot glue and use the same hot glue to isolate the soldering areas. |
 |
Drill holes for attaching metal strips. In the upper edge of the wooden sticks we drill, at the same distance from the edge, one hole with a diameter of 3 mm. |
 |
We fasten metal strips and wires. We insert bolts into the holes in the wooden sticks to secure the metal strips. We screw the bare ends of the wires from the battery pack onto the bolts and tighten the connection. |
 |
Attaching the filament. We stretch nichrome wire into the holes along the edge of the metal strips. We fix the filament between the metal strips using a screw with a nut and washer. We cut off the excess nichrome along the edge with pliers. |
 |
A device for cutting foam plastic in operation. We install two AA batteries, press the button and cut the foam.
|
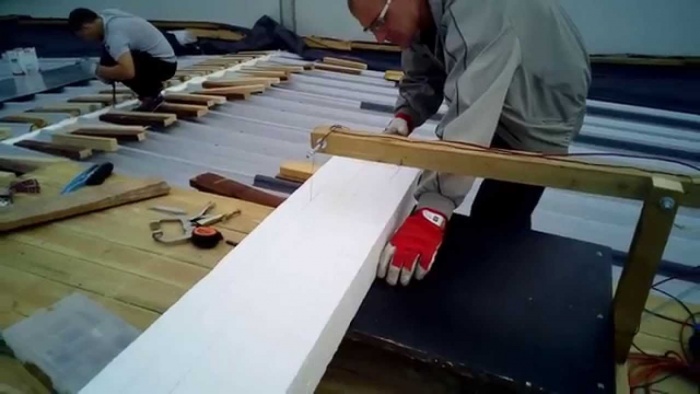
Assembling a stationary vertical cutting machine
The previous nichrome cutter was held in the hand when working. The model you will learn about now is stationary. That is, the device is stationary, and the foam will be fed manually to the filament.
| Illustration | Description of actions |
 |
Preparing materials. We will need:
|
 |
Assembling the bed. We cut out a square with dimensions of 70x70 cm from multilayer plywood. We screw a triangular piece of board in the middle of the edge of the plywood sheet. We fasten a piece of wooden blocks along two opposite edges of the plywood sheet. We fasten the pieces of timber with a 10 cm indentation from the edge. |
 |
We make fastening under the lanyard. WITH bottom side frame, between the beams with a distance of 5-7 cm from the edge, screw in a self-tapping screw 2/3 of the way. The head of the self-tapping screw can be used to hook a lanyard. |
 |
Assembling the mast stand. Using two self-tapping screws, we attach a 50×50 mm block of length 60 cm to a corner pre-fixed on the frame. |
 |
Installing a crossbar on the mast. At the top of the installed rack, from a 50x50 mm block, we attach a horizontal crossbar 50 cm long. We strengthen the installed crossbar, as shown in the photo, with a diagonal spacer along the inner corner. |
 |
We determine the point of passage of the wire on the frame. A nichrome filament will run from the top crossbar to the frame. To determine the point of its passage through the frame, we apply a square with an angle to the frame and the opposite part to the crossbar. |
 |
Drilling the bed. We mark the corresponding point on the bed. We drill according to the mark made through hole 6 mm drill. |
 |
Preparing the metal plate for the hole. We cut a rectangular plate with a side of 50 mm from millimeter steel. Mark the center of the plate and drill a through hole with a diameter of 2 mm in the center. |
 |
Installing a metal plate. We attach the plate to the frame so that the holes match. We trace the plate along the outline with a pencil. Using a chisel, we knock out the wood to the thickness of the plate. We put the plate into the recess we made and drive it in until it is flush with the surface of the plywood. |
 |
Making a crossbar for nichrome wire. Bend a nail 100 mm long in a vice into a “P” shape. We cut off the head and tip with a bolt cutter. |
 |
Installing the crossbar. On the bottom side of the frame, above the hole into which the wire will pass, we apply a bent nail and mark the legs. According to the markings, we drill holes of a suitable diameter with a depth of 5 mm. Pour a little hot glue into the holes and insert a bent nail. |
 |
We attach the end of the nichrome wire to the crossbar on the mast. To do this, screw in a screw from the edge of the crossbar, at the point located above the hole in the frame. We wrap nichrome wire around the screw. Tighten the screw so as to press the wire. |
 |
Connecting nichrome wire top bar and lanyard. We pass the free end of the wire through a hole in the metal plate in the frame. We place the wire on the nail crossbar and tie it to the loose lanyard. We scroll the lanyard until the cutting nichrome wire is stretched. |
 |
Connecting the power. In our case, we use a battery charger with parameters of 12 V and 4 A. You can use a more powerful step-down transformer and use the secondary winding in it. We connect one cable through the terminals to the bolt on the crossbar, and the second cable to the lanyard at the bottom of the frame. |
 |
Those who are planning to insulate an apartment or a newly built house with their own hands should definitely familiarize themselves with the methods by which foam plastic is cut at home, because this is one of the most popular and available ways isolation.
Foam is a foam material and is mostly air, so it is very light and easy to work with. However, you should not think that no problems arise, because besides everything, foam is a rather fragile material. Therefore, if you use electric grinder, then you shouldn’t hope for smooth edges, and besides, the entire room and area will be strewn with crumbled foam.
No matter how sharp the knife is, the material will still crumble. Of course, this is a minor defect and the sheets will be suitable for use, but cleaning will turn into a troublesome task. There is a way out of this situation; you can use a thermal knife. In this case, the edges of the material are melted and it does not crumble. But bad luck, such a device costs a lot, but in principle you can heat an ordinary knife. However, in this case you need to be very careful so as not to get burned, and the work will be significantly delayed.
For this purpose, you can use various cutting tools, for example, a grinder, only then you should use the thinnest disk. Very often, builders use a simple sharp knife. Sometimes it is advised to use a hacksaw with very fine teeth, but the latter method is very questionable. In addition, stores sell special thermal knives designed for working with foam plastic.
The thermal knife heats up to 600 °C in just 10 seconds. However, this tool is quite expensive, so it doesn’t always make sense to buy it.
The way out in many cases will be a device for cutting foam sheets, made independently. It is probably somewhat cumbersome, but if you have the necessary components, it is absolutely free and always available. And if you have to do large-scale work, for example, you have in front, which you built for your big family, then the question of how to conveniently cut foam plastic, and even a lot and quickly, will not come up throughout the entire event, no matter how long it drags on.
In order to assemble a cutter for foam plastic, you will need a tabletop, a pair of springs, M4 screws and 28 mm long stands, as well as a nichrome thread, which will act as a cutting tool. First, we make two holes in the base, press the posts into them, and cut a small groove at the base of the screw head, thanks to which the thread will be securely fixed in the given position.
When everything is assembled, we attach the string to the screws, but since it can sag during heating, it should be connected through springs, then the thread will always be in a tense position. The power source is connected to such a device using ordinary twists. This way you can make a homemade and very effective foam cutter, while spending a minimum of effort, time and money.
Trying to cut the foam yourself
Now let's talk a little about various technologies, methods and, of course, we present detailed instructions what to do and how to do it.
How to cut polystyrene yourself - step-by-step diagram
Step 1: Preparatory work
It doesn’t matter what kind of tool you are going to use - a knife, nichrome thread or other cutting devices, you still need to start with markings. So we take a ruler, a square, a tape measure, a pencil and make marks on the surface of the sheet, then we connect them into lines. In general, we draw the contours of the future section.
There are other ways you can. For example, using nichrome thread. In this case, a small current is supplied to it, which is capable of heating the string to desired temperature, and cutting is carried out carefully along the specified contour. Of course, the quality of the cut in this case will be much better, but you will have to work a little to make the machine. Therefore, this method is not always justified if you need to process only a few sheets; there is simply no point in spending time constructing a device. As you can see, it is impossible to give a definite answer as to what is better for cutting foam, it all depends on the volume and skills.
Standard construction has long since sunk into oblivion. This is noticeable when visiting areas low-rise construction. Each home is individual and unique. But every household requires insulation, if it was not provided for during the construction process. It is unlikely that foam manufacturers will produce slabs custom size for small order volumes. You'll have to cut it. But how to cut polystyrene foam when installing thermal insulation for a building with your own hands?
Foamed polystyrene foam can be easily processed by cutting. Before cutting polystyrene foam at home, you need to determine the required accuracy and cleanliness of the cut. After that select necessary device for cutting foam from the following:
- saw (hacksaw);
- string;
- thermal cutter;
There is no clear answer to the question: “What is the best way to cut?” until there is a certainty in volume and linear dimensions processed parts.
Foam plastic should not be milled due to the extremely low mechanical stability of the material.
Just cutting
When carrying out work on insulating foundations, underground communications, floors under screed, facades under plaster, special precision and evenness of the cut are not very necessary. Moreover, if the building has a simple facade configuration. In this case, you can use hand tool for cutting foam plastic: knife, hacksaw, metal string.

Their use will lead to the loss of granules at the edge of the cut and the formation of a not entirely smooth edge. The presence of a loose fit of the slabs can be leveled by filling the voids with polyurethane foam.
Straight-line cutting with a finely serrated knife is justified with a material thickness of 50 mm; a hacksaw can be used to cut insulation up to 250 mm thick. You can use a serrated kitchen knife to cut foam. We buy a hacksaw with a fine tooth at a hardware store.

For ease of use, strings for cutting foam plastic (you can use old strings, for example from a guitar, having a spiral winding) are installed at its ends wooden handles. Cut the insulation back forward movements as if they were using a two-handed saw. Large slabs can be cut by two people. In this case, the sheet to be cut must be secured.
Before cutting the foam, cutting edges needs to be processed liquid lubricant. This will create a certain comfort when working (improves gliding, reduces noise).
Curly carving on foam plastic using this tool is extremely difficult.
We use a thermal knife
Cutting polystyrene foam with your own hands using a thermal knife is justified for slab thicknesses up to 50 mm. To cut a piece of polystyrene, a hot knife is advanced with average speed, which ensures cutting quality without tearing out fragments and melting edges.

Purchasing a longer blade for this device is not entirely beneficial. At manual cutting It is impossible to make a cut strictly perpendicular to the surface. The end of the sheet will have a bevel, which is extremely inconvenient during installation. In order to better cut a thick sheet, it is necessary to cut on both sides, deepening the hot knife to half the thickness or a little more.
We make and use a thermal cutter
To cut polystyrene foam with your own hands, devices with a thin hot element are most often used. General principle The actions of any thermal cutter for foam plastic are the same.

The heated element separates the material, followed by sealing of the opened volumes. Using thermal cutters for foam plastic, we get a perfectly smooth cut, which is very important for quality work on insulation.
Purchasing a factory-made foam cutting machine is not economically feasible.
Only if you don’t decide to do this professionally and permanently. In most cases, when cutting out shaped elements is not required, you can use a homemade foam cutter.

Making a foam cutter with your own hands is quite simple and quite inexpensive. After the work is completed, it will not lie like a dead weight and take up space. It can be assembled and disassembled as needed. If there is no need, its components can be used for other purposes.
Before you make a foam cutter, you need to prepare everything you need:
- blank for work surface;
- nichrome wire;
- laboratory adjustable transformer (LATR);
Chrome-plated nichrome wire can be used without a step-down transformer, but this increases the risk of electric shock.
- electrical wire, fastening for it,
- springs for thread tension;
- adjustment mechanism.
When manufacturing and using the device, follow the rules for the design and operation of electrical installations.
To make equipment for cutting foam plastic, start by marking and trimming the working surface. Determine its geometric dimensions in accordance with the dimensions of the cut slabs. It is better if the table surface is larger than the sheet area.
We install racks (supports) with the possibility of adjustment. To do this, you may need a small device in the form of hexagonal bushings with internal thread. They will make it easier to adjust the cutting height. The cutting wire is tensioned using springs. We lay and fasten the electrical wire on different sides of the thread. We connect the other end of the cable to the LATR (if there is no LATR, it can be replaced by using an autotransformer for charging batteries car). The device is ready for use.
Cutting polystyrene foam at home should be carried out in compliance with safety measures. When heated, toxic smoke is released. Therefore, we cut out parts from foam plastic either outside, or use respiratory protection in a workplace equipped with exhaust ventilation.
Using such a device for cutting foam plastic allows you to speed up the process of preparing insulation fragments as much as possible.
We use automated systems
The delights of architectural design also require insulation. In order to preserve their expressiveness, it becomes necessary to manufacture complex elements. How to cut out such details? More affordable option- processing of insulation by milling. But milling of foam plastic is not carried out for the reason that the cutter, when rotating, tears out quite large pieces of material.
Dense polystyrene foam has higher mechanical strength and is easily milled. Anything can be made from it: a letter, a number, a graphic element of any complexity. Even a hedgehog. It is recommended to cut penoplex at high angular speeds with an average linear feed. To install the manufactured fragments on the façade, ceresite is used.
Laser cutting polystyrene foam is the most advanced technology, combining hot cutting tool and accuracy automated system. Laser cutting of foam plastic allows us to produce parts of any complexity with the highest precision with a minimum level of waste. Laser cutting of foam plastic ensures absolutely smooth surface cutting using a hot beam of directional light moving at high speed. There are no restrictions on the thickness of the material and the complexity of the element.

Selection of cutting equipment used for foam boards and for extruded polystyrene foam must be conscious. Meet technological requirements for finished products and be economically feasible.
Polystyrene foam – light, durable, good thermal insulation material, which is very easy to work with. But it has one unpleasant feature: it is usually made in the form of fairly large slabs, which during operation have to be cut into smaller pieces. No matter how sharp the knife and saw are, they will not be able to accurately cut the slab, since mechanical action destroys the structure of the foam, causing it to crumble rather than cut. Therefore, you need to use a special foam cutter for cutting.
Foam plastic, like any material, requires cutting, which is why you need a cutter.
The simplest homemade foam cutter
This type of cutter is not difficult to make with your own hands. To do this, just take the thinnest guitar string and 4-5 large batteries for an electric flashlight. Having connected all the batteries in series into a single element, you need to connect a guitar string to its ends and secure it with electrical tape, closing electric arc. Due to the electric current passing through the string, the string will heat up.

Image 1. Diagram of a cutter that allows you to cut flat sheets from a block of foam plastic.
At the point of contact with a string heated to the required temperature, the foam sheet will instantly melt, dividing into two halves, the cut of which will be fused and even. But for normal cutting, the string must be heated to a temperature of at least 120-150º. When working, it will not be difficult to determine whether the string has warmed up enough, since when cutting foam plastic, small stuck pieces will remain on the string. The longer such pieces remain, the lower the temperature of the string. But if they don’t remain on the string at all, then this means that this kind of thermal knife is heated more than necessary.
Such a primitive foam cutter can easily cut 2-3 large layers of material. But with large volumes of work, the batteries run out quickly, so in such cases a cutter powered by electricity is used.
Return to contents
Options for homemade electric foam cutters
Conventionally, such devices can be divided into groups:
- cutter for linear cutting polystyrene foam;
- cutter for shaped cutting of foam plastic;
- cutter with working metal plate.
But despite this division, all cutters have one thing in common.
To make them, you can’t do without a step-down transformer.
Such a transformer must be designed for a power of at least 100 W. Its secondary winding must be designed for a voltage of 15 V and have a winding wire cross-section of at least 1.5 mm.
Return to contents
Foam Linear Cutting Cutter
Image 2. Diagram of a vertical cutter: 1 – cutting nichrome wire, 2 – weight, 3 – frame, 4 – working surface.
Such devices are mounted from a working surface (you can use a table surface) with two vertical risers attached to it, two insulators attached to the risers, connected to two contacts connected to a step-down transformer and a nichrome thread stretched between the insulators, as well as a freely hanging thread passed through one of the risers cargo (image 1).
This foam cutter works very simply. Passing through a nichrome thread, electricity heats it up, and the suspended weight keeps the thread taut, preventing it from sagging, since when heated it stretches quite strongly. Sometimes, instead of a suspended weight, a spring attached to one of the risers is used to tension the thread.
The heated thread easily cuts the body of the moving foam, turning it into flat sheets, the thickness of which depends only on the distance from the table surface to the tensioned wire. All you need to do is maintain a uniform flow rate of foam across the table surface.
For vertical cutting of layers, a different cutter design is used, in which the cutting wire is stretched vertically (image 2). A frame, preferably welded from metal profile, but one made from wooden blocks (3) is also quite suitable.
The design of the frame provides for the presence of a holder-foot, to which a nichrome wire (1) is suspended using an insulator with a suspended load at the other end (2), passed through a hole drilled in the working surface. Since the nichrome thread will heat up, it is better to make the hole larger and insulate the wooden parts by inserting a metal hollow tube of hollow diameter into it, through the cavity of which the end of the wire with the load is brought out.
This foam cutter will not only easily cut large pieces of foam into blocks required sizes, but will also allow, if necessary, to cut squares, triangles, semicircles and other shaped holes in the material. To do this, just first draw a cutting line along the surface of the foam with a marker.
Return to contents
Cutter for shaped cutting of foam plastic
If you need to cut sheets big size or thicknesses that, due to their size, cannot be placed on the desktop, then in such cases a manual electric cutter, converted from hand jigsaw or a hacksaw, in which the cutting blade is replaced with nichrome wire.
Image 3. Diagram of a manual thermal cutter: 1 – nichrome cutting wire, 2 – screw with nut and washer, 3 – textolite handle 4-5 mm thick, 4 – electrical cord.
Such an electric cutter is not difficult to make with your own hands. At the same time, for the convenience of figure cutting, several working tools can be made different shapes(image 3). The cutting blade of a jigsaw or hacksaw is removed, and an electric wire (4) is connected to the handle (3). Although the voltage will not be too high, the handle is still the same as others metal elements, it is better to insulate at least with ordinary electrical tape. Instead of the cutting blade to the supplied electrical cable using screws and nuts with washers, a nichrome wire bent as required is attached (4).
As an option, you can also use a wood burning device or a pulse soldering iron to design such a cutter. Such a cutter will be even more convenient, since the electrical wire is initially provided for in the design of these devices. To turn these devices into an electric cutter for foam plastic, it is enough to replace the heating working tools in them with a piece of thick nichrome wire, giving it the desired shape.
Such hand-held cutters are convenient because with their help you can not only cut sheets of foam plastic, but also cut out all sorts of recesses and cavities in them, remove chamfers, in a word, not just cut foam plastic into pieces, but sculpt real works of art from it.


Polystyrene foam is a fairly practical and lightweight thermal insulation material. It is often used to create various crafts. However, in the process of working with it you have to deal with one trouble - the material is difficult to cut. Polystyrene foam is produced in the form large slabs, and to divide the panel into fragments, you will need to cut it.
Using a saw or knife for this purpose will not work. This is due to the fact that with any mechanical impact the structure of the material is destroyed. To avoid this, you will need to design a foam cutter yourself.
The simplest device for cutting foam plastic
The simplest foam cutter is easy to make with your own hands. For this purpose you will need to use the thinnest guitar string. In addition, you should prepare 5 large batteries for a regular electric flashlight. They must be connected in series. A string is connected to the ends of the device, thereby completing the electric arc. Current will flow through the string, heating it.

When using such a device, the foam sheet will split into two parts immediately after touching the string. In this case, the material will melt along the cut edges. With this processing, the cut is as smooth as possible. The string for cutting foam must be heated to a temperature of at least 120 degrees. However, it should not exceed 150 degrees.
Checking how hot the string is is quite simple. During cutting, stuck pieces remain on the edges of the material. If they are too long, the string is not heated enough. In the absence of such pieces, it can be judged that the string is overheated.

When using such a simple device, about 3 foam panels can be processed. However, it is not suitable for large volumes of work. The batteries run out pretty quickly. To extend the operating time of the cutter, you will need to build a device that runs on mains power. A few simple tips will help you understand how to make a foam cutter.
Homemade electric foam cutters
If we divide such devices into groups, they should be classified as follows:
- linear cutting device;
- thermal cutter, which is used to perform shaped cutting;
- device with a metal plate.

However, despite this classification, each device has one common element in its design. To create cutters for foam plastic, you will need to find a step-down transformer. It is necessary that this element can withstand 100 W.
Line cutting cutter
To create such devices, you should prepare a workspace. Usually a table is chosen for such purposes. Two vertical risers are attached to it. Each of them must have an insulator. It is necessary to stretch a nichrome thread between the insulators. A freely hanging load is suspended from it. The nichrome thread is connected to the contacts connected to the step-down transformer.
The operating principle is quite simple. The nichrome thread heats up when connected, which makes it easy to cut foam. Thanks to the suspended weight, the thread remains taut. A weight is necessary because when heated, the thread begins to sag.
The moving foam is cut with nichrome thread quickly and evenly. How thick the processed sheets will be depends on the height of the thread above the working surface of the table. The main thing is that the foam is fed at the same speed throughout the entire cutting period.

To cut sheets vertically, you will need to use a cutter of a different design. In it, the cutting wire is tensioned in a vertical position. In this case, the working surface is made of chipboard. You need to attach a frame to it. It is better if this element is made of a metal profile. However wooden blocks will fit well.
The frame is equipped with a paw-holder, on which the nichrome wire is suspended. A weight is attached to its end. The wire is passed through a hole made in the working surface. To prevent it from touching the wood, the hole is protected from the inside with a metal hollow tube.
When using thermal cutters, foam plastic is not only easily cut into specific blocks. From large slabs you can cut various geometric figures, such as square, semicircle, triangle. Before work, just run a marker along the surface of the slab, marking the cut line.
Shape cutter
When working with large foam sheets, using a stationary cutter will be difficult. Such panels hardly fit on the desktop. In these cases it is used hand cutter for foam plastic. This tool is often made from a jigsaw. The cutting blade in these tools should be replaced with nichrome wire.

It’s quite easy to build such an electric cutter with your own hands. To make cutting shaped elements more convenient, you can make several devices that have various shapes. First, remove the cutting blade from the jigsaw and connect the wire to the handle. The voltage will be low, but the handle and other metal parts should be insulated. Nichrome wire is connected to the cable. Nuts are used for this. The wire is bent in a certain way.
You can use a soldering iron as a cutter for shaped cutting of foam plastic. It needs to be modified a little. The device already has an electrical wire in its design. To create a foam cutter from a soldering iron, you will need to replace the element that heats up with nichrome wire.

This device is highly convenient to use. Thanks to this product, it is possible not only to cut slabs of material into smaller sheets, but also to make recesses in them.
Metal plate cutter
There is another way to convert a soldering iron into a foam cutter. To modify the tool, you simply need to replace the tip with a copper plate. Steel will also work, but it takes longer to heat up and is more difficult to sharpen. However, when correct sharpening A steel plate can be used to cut any synthetic material, including polystyrene foam.

One side of the plate must be carefully sharpened. Sharpening can be done on both sides. It is necessary that the sharpening angle is not too large. The cutting of the material is carried out not only by the blade, but also by the blade of the plate. Such a cutter has one drawback - you will have to empirically find optimal temperature heating the knife.
conclusions
Making a foam cutter with your own hands is quite simple. The methods listed above will help you understand the structure and operating principle of the foam cutter. Such devices are practical and easy to assemble. Each method has its own advantages, so home craftsmen can choose the most suitable one, depending on the available materials.