Our country is rich in forests, so wood for construction residential buildings has been used by our ancestors since ancient times. Log houses were assembled from logs, beams, carriages. Methods for joining elements at corners have been refined over centuries. One of the popular methods is claw cutting, in which the ends of the elements do not protrude beyond the corners of the log houses. When using profiled beams for log houses, only this method is used.
Advantages of the method
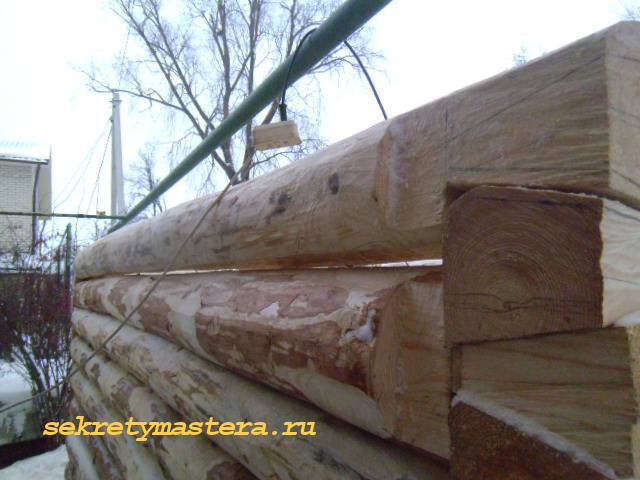
- clean corners without protruding ends of the crowns give the structures an aesthetic, attractive appearance, allowing convenient finishing of facades with the most various materials, for example, siding;
- using the entire length of a beam or log leads to material savings and cheaper construction.
Existing disadvantages
- low structural stability;
- the appearance of cracks and drying out in corner joints, which leads to insecurity from blowing. There is a need to periodically seal corners;
- the technology of cutting a log house into a paw requires qualified execution and careful marking, without experience similar works it is almost impossible to ensure proper quality.
Varieties of making jaw joints

- Direct connection. Can be one-sided or two-sided. In the first case, grooves are cut or cut at the ends of the beams to the length of the cross-section of the element and to a depth equal to half its thickness. In the second option, the grooves are selected from the top and bottom of the element to a quarter of its thickness. The crowns are fastened in the corners wooden dowels from solid tree species. Fastening occurs in holes drilled in a staggered pattern. The spikes must fit tightly into the hole, for which their diameter is chosen slightly larger than the holes themselves.
- Dovetail. The paws in such joints are made with a slight inclination. The middle part of each is fixed between the upper and lower legs in the form of a wedge. The connection turns out to be stronger and more reliable, but the most difficult to execute. Sloping surface shapes provide the structure with additional stability, but inclined surface facilitates the penetration of moisture into the corner during rain. To exclude negative consequences High-quality additional waterproofing is required.
- Connection with additional spike, called prisek. Cutting corners into a paw with such joints is more reliable than described above, but is more difficult to perform. U internal corners of the log house, a tenon is left on the top part in the form of a protrusion of about 2 cm and an area of up to a quarter of the area of the notch. A groove is hollowed out in the lower element for this protrusion. The fit of the notch into the groove should be tight without the slightest possibility of displacement of the connection. The assembly of a log house resembles the children's designer. With high-quality execution, a tight fit of the crowns without displacement is ensured.
Regardless of the method of execution, when cutting a log house into a paw with your own hands without sufficient experience in carrying out such work, it is recommended to follow the golden rule: initially, cut down to a slightly smaller size than the required size. If felling exceeds required sizes, it will be impossible to correct such an omission, and it is not difficult to fit the connection tightly, removing the excess after fitting.
Material selection
For any log houses it is recommended to use wood coniferous species natural humidity, felled in winter time, preferably from the northern regions. Pine is the cheapest, larch and cedar are more expensive, but stronger and more durable. The trunks must be even along the entire length and of the same size.
Removing bark from all sides of logs is done using special tool called skobel. You can also remove the bark with an ordinary shovel with a cut off spout and a sharpened bottom edge. It is unacceptable to remove the bark mechanically, using power tools, chainsaw attachments or grinders, since the upper layers of the main wood will be damaged along with the bark. After which the workpieces are stacked with spacers for ventilation and covered with roofing felt. Drying lasts ≥ 6 months.
The timber must be dry, without visible cracks, mechanical damage, falling knots, rot and damage by mold or fungus.
Marking when chopping a log house into a paw

It is possible to cut down quality log houses only with correct execution marking the ends of beams or logs. It is recommended to choose timber of the same section; with increasing thickness, the house will be warmer, since this reduces the number corner connections. When using logs, the element with the smallest thickness at the end is taken as a sample and the rest are adjusted according to it. In order not to work with each end individually, it is recommended to make a template from thick cardboard or plywood for chopping into a paw, which will allow marking by applying the template to each end.
Markup includes the following operations:
- careful trimming of elements;
- drawing a horizontal line along the center of the log from each end, control laser level, with a mark of its middle;
- Having attached the template, two vertical lines are drawn, spaced by the width of the template from the center, control is carried out vertically building level;
- a strong thread is stretched along the outlined lines of the cheeks of the paws, along which the longitudinal parts of the cheeks are drawn with a length equal to the diameter of the log;
- According to the markings made, the cheeks are cut out, checking the correctness with a template, which should fit tightly, but without much effort.
After cutting all the logs into a paw and carefully adjusting them, a control assembly is performed on a flat area away from the foundation, with maintenance for assembled form a few months. To ensure a tight fit of the logs at the bottom of the upper rims, a longitudinal groove, into which is placed during assembly jute tape or tow. Using an electric planer, the surface of the logs inside the log house is processed, trimming them, cutting off knot protrusions and sharp bends. Each element is subject to marking, according to which it will be possible to perform final assembly.
After this, the knot protrusions are processed with an electric planer. If there are sharp bends or protrusions on the log, then they are aligned.
Ready-made kits made of timber with cut-out paws and markings for the assembly order can be purchased at specialized bases.
Construction of a log house
Scope of work:
- Construction of the foundation. The log house is lightweight, so there is no need for massive foundation structures. Most often, columnar or shallow-depth tapes are used. Waterproofing of surfaces in contact with the ground, if necessary, installation of insulation. Backfilling with drainage soils.
- Support lower crown laid on horizontal waterproofing consisting of two layers of waterproofing. The first two elements are laid strictly parallel, the next 2 logs are laid perpendicularly on top of them. The resulting rectangle is carefully leveled using a laser level.
- Installation of the following links with a tight fit of the paw connection. Tow is used during assembly.
- After assembly is completed, longitudinal and corner seams are sealed. The wood is treated with fire retardant and antiseptic preparations.
- Finally, the corners are insulated from the inside with modern heat insulators.
After completion of assembly, the log house is kept for a year, covered from precipitation, after which the cracks are re-caulked and further work for roof installation and finishing work.
This cut logical conclusion technologies for making cuttings “into the okhryap”. We do not consider cutting “in the okhryap”, since it is not widely used when cutting round logs. Although cutting into the hole itself is not difficult. The bowls are marked on both sides of the log and chopped to 1/3 of the depth, scraping the bottom of the bowl flat. If the ends of the logs are cut into two vertical planes or the log is completely trimmed into two edges, then the cutting is simplified, the semicircular walls of the bowl disappear and it becomes possible to make straight cuts. The sawn end of the log transforms the angular binding of logs or carriages into a “toe-to-foot” notch. The end of the log, hewn into two edges, received beautiful name- "boob."
The longitudinal groove of logs during corner cuts “into the paw” can be made both from the bottom and from the top side of the log.
Before starting to make “boobs,” all the logs are inspected and the log that has the smallest thickness at the end is found. The log is placed on pads and secured with staples. Using a level or plumb line, vertical lines are drawn at the centers of the ends of the log, to which perpendiculars are drawn and two more vertical lines are drawn - the lines of plumbing the ends of the log into “boobs”. Each log will have two “logs” of equal thickness, but different heights. The side cheeks of the “boobs” located at different ends of the log must be strictly in the same plane, therefore, when marking, the log must remain motionless.
Using “blocks” you can cut all the logs going to the log house at once. The width and length of the “booties” are constant for all logs, but the height is different and depends on the diameter of the logs. The width(s) of the “logs” of all logs is made equal to 2/3–3/4 of the thickness of the thinnest cut (end), the length (L) is equal to large diameter logs
Next, on the “block” of the thinnest log, the humps are sawed and chopped off to a depth equal to the thickness of the “block” (a). That is, at the end of the log a parallelepiped is obtained, which is divided into 8 equal parts with a pencil grid. According to the diagram shown in Figure 17, a “paw” with the required slopes of the planes is marked and cut out. The “paw” is made with or without a cut. Based on the finished “paw”, plywood or cardboard templates are made. The remaining paws are made according to templates, placing them on the “boobs” of other logs, or using the irreplaceable carpentry tool “devil”.
Rice. 17. Marking a corner cut into a paw on a log
When using the “dash”, the manufacture of a log house begins with laying two frame logs (lower crown) and leveling their tops to the horizon. To level the logs into the horizon, the lower humps are trimmed with them. The top of the “feet” of the flashing logs is marked according to previously prepared templates or on a grid. There is no need to mark the bottom of the “paws”. Next, transverse logs with hewn “blocks” are laid on the side logs. The legs of the “dash” are moved apart by an amount corresponding to the design width of the longitudinal groove (see the chapter “Making a longitudinal groove”) and, without changing the position of the legs, the “foot” of the upper log is drawn. When marking, the “line” repeats the slopes of the planes of the lower “foot” and transfers them to the upper one (Fig. 18). In practice, choosing the correct width of the longitudinal groove is often neglected, so more often the “line” is simply moved apart to such a size that it can scratch the end of the “block” being cut without crawling onto the hump of the “block”. Then the log is removed and the “paw” is cut out. The top of the paw is made symmetrical to the bottom.
 rice. 18. Drawing the paw
 When laying subsequent crowns, simultaneously with marking the “foot”, mark the longitudinal groove (Fig. 19). First, a longitudinal groove is marked, then, without changing the size of the extension of the legs, the “lines” are drawn on the paw. Or vice versa, if the paw is ready, take a “line” to measure the size of the gap between the paws and transfer it to drawing the longitudinal groove.
 rice. 19. Marking the longitudinal groove of logs when chopping into the paw
 As you can see, the dimensions of the “paws” obey geometric laws and depend on the diameter of the thinnest log. If all the logs of the log house are approximately the same diameter, then you can not draw them, but use technical documentation: GOST 30974–2002 “Corner connections of wooden cobblestones and log low-rise buildings”, which regulates the sizes of paws for logs of various diameters. Make templates according to the given dimensions and cut out the “paws” according to them.
Cutting walls “in the paw” can be simple or complex. In the first case, inserted tenons are used, in the second - root tenons (Fig. 1). The technology of cutting walls “in the paw” is different in that the logs do not protrude beyond the corners of the log house. This cutting technology is called cutting without residue; it is more complex and labor-intensive compared to cutting “in the field” and requires a more qualified approach. All elements of the log house with this installation method are adjusted very carefully and any deviations can lead to the house being blown out, and no seals will help get rid of this shortcoming.
The cutting begins by carefully marking the ends of the logs, starting with the log whose top in the upper cut has the smallest diameter (Fig. 2). This log should subsequently become a standard and the end parts of the remaining logs should be marked based on the size of its “foot”. All deviations in the marking of the “feet” can lead to a violation of the verticality of the corners of the log house and their tightness, therefore, the marking, and even more so the processing of the “feet”, should be treated with maximum attention. One edge designed for inside the walls are hewn along the entire length of the logs. The edge opposite the inner one is trimmed to a length equal to one and a half to two log diameters. In this case, the end of the log, hewn from two parallel sides, is called a “block,” the resulting planes are called “cheeks,” and the untreated convex surface is called a “wane.” The two remaining edges are trimmed to a length slightly larger than the diameter of the log.
It is much easier and more convenient to mark the “paws” using a special template, which is made according to the method shown in Fig. 3. To do this, draw two identical circles on a sheet of cardboard for templates No. 1 and No. 2. In this circle, two mutually perpendicular diametrical lines are drawn through its center. By connecting the points of their intersection with the circle, a square is obtained. Then the opposite sides of one square are marked in different proportions: 8/8 or 6/8 and 4/8, etc. The resulting templates, if they are made of paper, are glued onto the base and cut out. In the places where the vertical line ended, notches are made necessary for further marking the ends of the logs. When marking the “paws”, the template is applied to the end of the log, aligning the notches with the line of vertical diameters previously drawn at the ends of the logs, and traced along its contour. After weaving the sides of the log, all the edges of the “foot” are outlined. When arranging “paws” in logs thinner than 22 cm, the sides of the template squares are divided not into 8, but into 12 parts, and then the division proportions look like 8/12 to 6/12 and 6/12 to 4/12.
“Paws” are prepared on all the logs of the future log house, they are carefully adjusted, a control assembly of the log house is made next to the foundation and left to dry for several months. After the logs have dried, they are laid on the foundation, final assembly is carried out with insulation laid between them and secured with insert tenons. Seam caulking is done when final assembly and a year after that.
2016-02-24, 22:12
Tool Removing bark Laying out logs Initial markings Cutting feet Adjusting feet planes Log grooves
Cutting down a log house yourself is quite possible. Now we’ll find out all the details and see, and then the ax will be in your hands.
You won’t find this kind of material anywhere else on the Internet, since everywhere the cutting of a log house from first-class logs is shown, but it’s not easy for an inexperienced person to get first-class round timber, so we’ll cut from what God sent, without sacrificing quality.
At that time, God sent the forest felled by a hurricane, and there is no talk of the first grade. Nevertheless, we will make an excellent log house from it for a bathhouse.
If you get the first grade - great, make your work easier.
Tool
To make a log house you will need the following tools:
2. Hacksaw or chainsaw
3. Scherhebel plane or electric plane
4. Level 40 - 60 cm.
5. Metal ruler 40 - 60 cm.
6. Construction cord.
7. Template.
Learn more about the template, as it will need to be made. Pattern for a Canadian paw ( dovetail). Here he is:


Template dimensions

A - width, taken relative to the crown (thin) part of the thinnest log. The width of the template is taken to be 4 centimeters narrower than this part. For example, if the thickness of the log is 20 cm, then the width of the template is 16 cm.
B - 3/4 of A
C and D - 2/4 from A
E - 1/4 of A
Removing the bark
First of all, remove the bark from the logs. From all. So that the log under the bark does not rot, and in warm weather, the bark beetle does not become active under it.
This operation is done with a shovel sharpened like this:


With the bark removed, logs can lie for a very long time, but if the expected storage period exceeds six months, it is necessary to ensure ventilation and cover the top of the pile with roofing material, or something similar.
Laying out logs
The work begins with laying out the logs. To do this, two stands with recesses are made, on which the log is given the position required for marking.
If the material is of the first grade, without noticeable bends, the log is laid out along the annual rings so that the part where the annual rings are thinner will later turn out with outside log house
If the material is not of the first grade, then the log is laid out in accordance with the existing bends, which should be facing either upwards or towards the outside. Or in both these directions. Just don't go down and in.
Be careful. At first glance, the log may seem very straight, but a look along it will immediately reveal the curvature.


When laying out, we also determine the direction of laying the logs in the log house relative to the previous one. The butt part is placed on the crown part, and vice versa.
Initial marking
The logs are selected as follows: the first crown is the thickest, then thinner and towards the middle the thinnest. from the 7th crown it is thicker again, and the last pressure crown is thick.
For marking, the log is trimmed. Special devices for this purpose, no - it is done by eye, but the smoother the trimming is done, the less adjustment there will be and the likelihood of gaps in the corners.
The trim is done exactly to size, the same for all logs of the wall.


After trimming according to the level, we carry out horizontal line along the widest part of the end of the log (for the first grade this is the middle), mark its center, and from the center we take the width of the template.


We draw two lines along the width of the template, along the vertical level, thereby beginning to outline the cheeks of the paw.


Then along these lines we stretch a thread between the ends of the log, and along it we draw the longitudinal part of the cheeks, 25 - 30 cm long. Only all are the same.


As a result, the ends of the log will have the following markings:


Paw cutting
According to the markings, we cut out the cheeks of the paw.


We adjust the width of the cheeks exactly to the width of the template so that it fits tightly, but without strain. Until your hand is full, it is better to make them with a small margin, and then trim them with an ax to the desired size.


A chainsaw is used to cut out the cheeks when there are knots on them. If there are no knots, then the entire segment is cut down with an ax.
Let's move on to production seat paws. The first two logs have one seat - the top one.
We put the template on the paw in the middle and draw along the upper border. The narrow part of the template is located with outside walls.


From the edge of the border outlined according to the template, draw a line upward along the vertical level on both sides. The distance from the border to the top of the log, on the wide (inner) side, must be at least 5 centimeters.
 .
.
Then we draw out the edge of the seat, cut through the end, and cut down a segment of the log. It is important when cutting the end not to make a cut below the border of the template.


The paw is made in the same way at the opposite end of the log. Then, according to the same instructions, a second log is made, which in the log house will be parallel to the first.

Let's move on to the transverse logs of the first crown. Trimming, marking and cheeks for a transverse log are done in exactly the same way as for the first one. But the paw is a little different, since it is already complete, with two landing pads, upper and lower.
First, the lower platform of the paw is made. We measure approximately 5 cm from the bottom of the log, install and outline the template.
Why about 5 cm? Since the logs are not perfectly even, and the trimming will most likely not be perfect at first, the template will most likely move away from the plane, so it will need to be adjusted to the lower leg, and this adjustment can eat up another 1 - 2 cm.
As a result, we get the normal depth of the paw. The depth of the paw should be approximately 0.5 of the width of the groove, so if the average width of the groove is 12 - 14 cm, then the depth of the paw is normally 6 - 7 cm.
Don't forget that the narrow end of the template is on the outside. You don't have to draw the top edge yet. I have outlined it here to make it clearer for you.


Now we draw the inner edge of the paw using a level.


We turn the log over, and just like on the first log, we draw the edge and make a cut, and we cut out the paw in the same way, only if on the first log we made the top of the paw, now, on the transverse one, we make the bottom.
We are not touching the upper fit yet, since the lower one will still have to be adjusted.
After this, we take an electric planer and process the knot protrusions. If there are sharp bends or protrusions on the log, then we trim them too.

We just have to adjust the planes of the legs of the longitudinal and transverse logs, but how to do this, so as not to repeat ourselves, I will show you on the second log, which will already have a groove on it.
In the meantime, let’s install the transverse ones and draw out the entire structure along the diagonals and level. The level is taken from the bottom of the first logs.

Adjustment of paw planes
We have the top of the paw of the first log and the bottom of the paw of the first transverse log ready. Now we need to adjust these planes.
First of all, we draw the vertical. This is done using a level and a wedge.


Having positioned the log in this way, we look at the gap, determine and mark out the places on the paw that need to be cut so that there is no gap and the log lies strictly vertically.
After fitting, we measure the resulting depth of the lower plane of the paw, and using this size we draw according to the template and cut out the upper plane. This way the paw will be located exactly in the middle of the log.
Now we prepare the log three times. It will be longitudinal, with a groove, and all subsequent logs will be made according to the same instructions.
We position the log as mentioned above, cut out the cheeks and cut out the bottom of the paw to a depth of about 5 cm, process the knots and protrusions with a plane and install them on the previous one.
We set the vertical using a wedge, and look at the gap between the logs.
If you look at the frame of the log house in paw, we will see that the perimeter of this log house is a normal rectangle without logs protruding beyond the outer planes of the walls of the log house. A log house in a paw can be called the antipode of a log house in a bowl (with a remainder). But this type of log house is antipodeous not only in the design, but in the characteristics of the log house.
The log house in the paw is whiter and colder, compared to the log house with the remainder. The edges of the logs are cut, the corner of the house is straight and accessible to winds and precipitation.
To improve thermal performance“a log house in a paw”, the corners of the log house from the outside are necessarily sheathed with clapboard. In addition, the cold corners of the log house place increased demands on the fit of the logs of the adjacent crowns of the log house, especially in places of castle connections.
Log cutting - log locks
The locks of the log houses have a characteristic trapezoidal cut. The planes of the trapezoids are directed inside the log house, due to which the locks are held together by the weight of the logs. To additionally fasten the logs, they make a lock with a so-called undercut, which is essentially a fastening spike offset to the edge of the lock.

In addition to the fastening lock on the log, a standard thermal lock is made, a hollow along the entire length of the log.

class="eliadunit">

Assembling a log frame into a paw
The assembly of the log house is standard. To the bottom crown molding The thickest logs are used for the log house. It is laid on the foundation of the log house, making a layer of roofing felt and a 50 mm thick unloading board.
A thermal lock is made in the logs of the second crown, which is also a sealing longitudinal groove. After adjusting the groove, insulation is laid on the lower crown and the upper log is laid (rolled) onto it.
Finishing the log house in paw
Many people believe log house in paw more neat and are advised to cover it with clapboard or siding. “There are no comrades according to taste,” but I don’t see the point in building a log house to cover it with side legs. Although you can buy cheaper logs for sheathing, cutting without residue will allow you to use the entire length of the logs for usable area Houses. More often, the log house is not sheathed entirely, but the corners of the house are sealed.

After the log house shrinks (after a year), the log house is caulked and outer skin log house