The basement is the lower part of the facade of the house. The main purpose of the plinth is to provide reliable protection of the facade from all kinds of dirt and various types of damage. It is for this reason that the considered structural element must be made of reliable and durable materials. At the same time, the lower part of the house should be beautiful. To solve this problem, you can use many different different materials. At the same time, finishing the base can be done with your own hands without any problems.
Regardless of what kind of material you decide to use to finish the plinth with your own hands, before starting work, the base must be cleaned of any kind of dirt and carefully leveled. To eliminate depressions, use a special leveling solution. Knock down protruding parts in a convenient way.
The surface of the base must be impregnated with a priming emulsion. Without such treatment, the base will absorb moisture from the adhesive solution, which will not in the best possible way will affect the reliability and quality of the cladding.

Some finishing materials, for example, artificial stone, must be treated with special water-repellent compounds before installation. They will help reduce the water absorption rate of the finishing material and increase the resistance of the cladding to various contaminants.

A large selection of water repellents are available for sale. These are colorless solutions that can be applied using rollers, brushes, etc. convenient tools. On a cladding treated with a high-quality water repellent, moisture will simply flow down without being absorbed into the finish and leaving no traces on it.

The base with such cladding looks very much like a wall made of simple clinker bricks. But the tile has significantly less weight and is much thinner compared to the mentioned brick. The thickness of the tiles usually varies from 8 to 20 mm. The width and length are most often the same as that of clinker bricks.
First step. Determine your starting level. To do this, add the width of the future seam to the width of the element, and then divide the height of the base being finished by the resulting value.
To make the calculation principle more clear, consider the following example. The height of the base of the house is 400 mm. The width of the tiles used is 65 mm. Seam width – 6 mm. In total you will need to glue 6 rows of clinker tiles. The starting level must be set 26 mm down from the planned ground level.
This will leave approximately a 6mm gap above the last top row of cladding. You will fill it with polyurethane or acrylic composition.

Second step. Lay the cladding over the entire surface. Lay out in even horizontal rows. Use elastic to secure glue solution necessarily with frost-resistant properties. Apply the solution with a notched trowel to both the base and the tiles.
Do not cover a large area with glue at once. It dries on average in 15-30 minutes. Usually in this time it is possible to cover about 1 m2 of the base. Leave the finished cladding to dry for about 2-3 days.


Third step. Fill the joints with an elastic mortar designed specifically for clinker jointing. The composition must have frost-resistant properties.
Such tiles do not require treatment with water repellents etc.
The finished cladding will be slightly recessed into the surface (after appropriate finishing external walls), so there is no need to install a drip cornice.

The stone cladding has a chic appearance, but requires significant financial costs. Most often, limestone or sandstone is used for plinths. The most expensive and luxurious option is marble or granite cladding.
Finishing elements can have very different sizes and textures. At this point, be guided by your taste. Sandstones and limestones require pre-treatment with water-repellent compounds.

The procedure for tiling with stone is very similar to tiling and is carried out in a few simple steps.
First step. Determine the lower level of stone fastening. The calculation is the same as in the case of covering with the previously discussed tiles.
Second step. Apply a stone bonding solution to the previously cleaned base. The same solution must be applied to the reverse side of the cladding elements. Use strict glue to fix the stone. The use of other compounds will cause cracks in the finish and very quickly lead to peeling of the tiles.

Select the width of the joints in accordance with the size of the tiles. Leave seams of half a centimeter between small cladding elements. A 2mm joint is sufficient between large tiles.

Third step. Fill the seams with a special jointing compound. Make sure that the composition is frost-resistant and sufficiently elastic.

If the plane of the base protrudes against the background common plane at home, be sure to install a protective eaves. Without it, your cladding will begin to crumble after the first frost.
Externally, this material is as similar as possible to its natural counterpart. Special additives and various types of fillers make it possible to obtain finishing material with excellent performance and properties, and dyes - choose a cladding that fits perfectly into the landscape.
A large selection of materials is available for sale in various forms that imitate a wide variety of materials.

The cladding is carried out in almost the same way as in the case of tiles.
First step. Apply to the previously cleaned surface of the plinth and directly to the cladding. adhesive composition. You can use elastic or regular glue. Select the specific composition in accordance with the manufacturer’s recommendations artificial stone.

Cover the entire surface. You can make the seams as narrow or wide as you like.
Second step. Fill the seams with a solution specially designed for this purpose.

Third step. Coat the finished cladding with a water-repellent compound. Also, cladding elements can be subjected to this treatment before they are mounted on the wall - there is no difference. Thanks to this treatment, even after a few years the finish will look almost like new.
At the end, all that remains is to install the ebb to protect the base from precipitation.

This is a relatively new finishing material. Externally it can imitate “torn” stone and decorative brickwork. Such tiles are characterized by low weight, which allows them to be successfully used even for cladding structures with low load-bearing capacity.
The cladding in question is characterized by fairly good plastic properties, which eliminates the risk of cracks and various chips. The tiles are resistant to moisture and negative temperatures. Pre-treatment with moisture-repellent compounds is not necessary.

First step. Attach the sheathing elements to the previously cleaned base. Assemble the sheathing from wooden slats. Select the pitch between the slats in accordance with the sizes of the cladding elements used.
Second step. Fill the cells of the sheathing with thermal insulation material. If insulating the base is not part of your plans, you don’t have to do the sheathing either. In this case, the tiles will be attached directly to the wall.
Third step. Start attaching the polymer sand tiles from bottom corner base Use screws to secure. Attach the tiles to the sheathing or wall material of the house, depending on the chosen installation method. Cover the entire base.
An additional advantage of using polymer sand tiles is the possibility of laying insulation simultaneously with the cladding.

Externally, this material can successfully imitate sandstone or clinker brick. The big advantage of such tiles is their surprisingly small thickness - 3 mm. The material is characterized by good flexibility; it can even be used for cladding arched bases. Also, such tiles can be safely bent at the corner joints of walls, which greatly facilitates the work.
If necessary, the tiles can be easily cut using scissors. It can be glued to plaster, concrete base and even for insulation. The tiles may have grooved and smooth surface. Available a good choice colors.

First step . Define top level, from which you will begin installing the cladding elements. The best option– laying a whole number of tiles. Therefore, determine how many horizontal rows of tiles you can glue to your base, determine their total height, and then subtract the smaller value from the larger value. This way you will determine the required gap.
Set aside the required gap from the top edge of the base. Finally, you will fill the remaining gap with acrylic or other suitable composition.
Second step. Start gluing the tiles. Start installation of elements from the corner of the base. Apply the glue with a notched trowel you already know. Glue 4 rows of cladding at once in one go.
You don't have to fill the seams. The protruding glue will perfectly cope with the functions of the filler. You just need to carefully distribute it along the seams using a brush.
Third step. Protect the tiles from rain. To do this, the cladding can, for example, be covered plastic film. The protection can be removed after the glue has completely dried, i.e. in 2-3 days.

Externally, this cladding is practically no different from the finishing natural materials, and it costs much less. To protect the base, be sure to install a rain cornice (flash).

Such plaster compositions have a granular structure. The grain size can reach 3 mm and even a little more. After applying the solution, a pattern is formed on the wall, similar to a multi-colored mosaic. The function of the binding component is performed by the resin. Thanks to it, the finish simultaneously receives vapor-permeable and moisture-proof properties.

Mosaic plaster is not afraid of frost and various mechanical damage. It is prohibited to apply such a composition to heat-saving and lime plasters. A base made of various artificial materials will also not work. The best base option is concrete and other substances based on mineral components, gypsum, cement and, of course, lime-sand plasters.
First step. Prepare the solution according to the manufacturer's instructions. Also prepare a tool for applying the composition - a stainless steel grater.
Second step. Start applying plaster from any convenient angle, preferably from above. The layer must have the same thickness. The immediate thickness of the finishing layer should be equal to the size of the grains contained in the plaster.
The applied composition must be smoothed with a grater before it dries. The plaster is applied and rubbed down strictly in the same direction.

Third step. Treat the coating with a high-quality water repellent.
Finishing 1 m2 of plinth can take up to 8 kg of plaster mass. The specific consumption depends on the size of the crumbs.
Thus, the finishing of the base can be done using a wide variety of materials. At the same time, there is absolutely nothing complicated in arranging any available cladding. All you need to do is follow the instructions and be attentive to the procedures performed.

PVC panels are great for cladding small cottages and country houses. Plastic goes especially well with siding. PVC panels are light in weight, easy to process and do not cause any hassle during the installation process.
First step. Fix the lath to the wall. It can be metal or wood. Choose the material that is more convenient and easier for you to work with. The wood must first be impregnated with an antiseptic. Select the sheathing pitch in accordance with the size of the panels.

Second step. Proceed to attaching the panels. Start covering from the bottom of the base. To attach the cladding panels to the sheathing, you can use self-tapping screws or even liquid nails. Adjacent planks are fastened together with factory tongues and grooves. Cover the entire surface.

Siding ( Wall panels PVC)
Third step. Cover the upper border of the plinth with a special overlay profile.
Fourth step. Cover the corners of the plinth with corner pieces.
Additional treatment of the cladding with a moisture-repellent composition is not carried out. Panels can be used for cladding different sizes, choose to your taste.
Good luck!
Video - Do-it-yourself plinth finishing
The base of the house requires reliable protection from moisture penetration, getting wet, sun rays and mechanical damage. To obtain a solid foundation and uniform weight load, various facing materials are used. In this article, we will look in detail at what to cover the basement of a house with, and provide characteristics of the materials, their advantages and disadvantages.
Types of basement structures
The most reliable type is a recessed base. Its device perfectly protects the structure from mechanical and atmospheric damage, and for its installation there is no need to construct a drain. The sunken view looks great and complements the building.
The protruding base is arranged in frame houses With thin walls. This type requires a drainage device in order to remove precipitation as much as possible from the foundation.
An important point in the design of the base is its waterproofing. Before choosing a facing material, you should consider the following points:
- brickwork extends the basement structure;
- Insulation is placed inside the frame, which reduces heat loss;
- the frame system allows you to carry out any renovation work Anytime;
The main purpose of plinth cladding is:

- minimize Negative influence on the foundation of the house from atmospheric precipitation, humidity, temperature changes and direct sunlight;
- preventing dirt from entering the walls of the house, chemical substances, which can cause destructive processes in the foundation;
- protecting the foundation from the formation of mold, stains, mildew and insects;
Full characteristics of the facing material
Cladding the basement of a house and which material is better to choose, this question arises for every owner country house. We suggest considering popular materials for finishing the foundation.
Finishing with decorative plaster

Plaster is used for any type of structure. This mixture mixes well with others building materials. The advantage of plastering is:
- high vapor permeability;
- responds well to temperature changes;
- easy to repair;
- easy to apply to the surface;
- the ability to combine with other materials;
- affordable price.
- short operational period;
- requires constant updating of the coating (painting);
- If dirt gets on the surface, it may be difficult to wash it out.
The finishing process consists of simple steps:
- before plastering, insulate and level the surface;
- fix the plaster tiles;
- use paint that is resistant to frost and moisture;
The photo shows a plastered facade
Siding finishing

To cover the base, siding panels designed for this work are used. The advantage of such a facade is:
- high strength and reliability, the panel is able to protect the entire surface;
- easy to care for, can be easily washed;
- resistant to impacts and damage;
- panels do not fade in the sun;
- installation of panels is possible on any type of foundation;
- Replacing parts will not cause unnecessary trouble.
Disadvantages include:
- installation will take a lot of time and effort;
- the cost of finishing material is higher due to installation additional elements(frame, slats);
- the material is highly flammable.
The façade should be covered with siding after:
- installation of sheathing;
- perform high-quality sealing of all connections;
- perform and take into account the dimensions of the gaps.
For your information. IN Lately Manufacturers began to produce brick-like panels. This finish looks very beautiful and original. The product resembles a stone, sometimes it is even difficult to distinguish it. This similarity is achieved by the fact that during the production of siding panels, a cast is made that clearly conveys the entire structure and roughness of the stone. The photo shows a panel element made from rubble stone.
Facade finishing using stone

Facing the foundation of a house with artificial stone is optimal and inexpensive option. The tiled facade of the house has the following advantages:
- a large selection of shapes, textures and color palettes of the product;
- high strength of the product;
- long service life;
- easy to repair;
- easy installation.
Disadvantages of artificial stone:
- laying the material is possible only at positive temperatures;
- The work is quite labor-intensive and time-consuming.
Natural stone for cladding the façade will increase the cost of purchasing materials. It is worth noting that manufacturers have learned to produce artificial stone, the appearance of which is no different and completely resembles the structure of natural stone. The facade using it looks natural and natural. The photo shows a stone facade
Not everyone can do stone laying on their own. As a rule, specialists are hired for such work.
Using clinker tiles

Cladding the base with clinker tiles will cost almost the same as brickwork. This material has a number of advantages:
- the manufacturer produces ready-made corners, external and internal elements;
- products are easily fixed to the foundation;
- due to its light weight, the façade experiences little load;
- variety of decorative coatings;
- tiles do not require additional finishing;
- long service life;
- provides reliable protection foundation;
- The tiles are easy to clean when dirty;
- has high strength to mechanical damage and blows;
- large selection of color palette.
For information! Clinker tiles can give an interesting appearance to the facade of a private house. If the products are installed correctly, it is difficult to distinguish it from natural stone.
It is worth noting that clinker tiles allow for additional decoration of walls and even corners of the building. The material matches perfectly with the tiles and gives the house an attractive appearance.
When installing it, use a special glue that is resistant to freezing. The tiles are glued like regular tiles, the only thing is that there is a small nuance: the ground level is variable along the entire perimeter of the building. Before installation, it is necessary to seal the seams with jointing mortar.
The photo shows the façade, finished with clinker tiles
For information! Clinker tiles combine well and get along with other building materials.
Corrugated sheet

The most economical option For cladding the façade of a building, corrugated sheeting is used. To perform the work, galvanized or polymer-coated products are used. Such cladding reliably protects the foundation from destruction and has a long service life.
The surface of the material is resistant to corrosion processes. To attach the corrugated sheeting you will need waterproofing, thermal insulation and fasteners. The end result is quite attractive. The photo shows a house covered with corrugated sheets
Low tide device

The device of ebb tides can reliably protect the protruding part of the foundation from moisture and water. Castings are made from different materials:
- metal castings are made of galvanized steel, onto the surface of which they apply polymer coating, which prevents products from corrosion;
- aluminum products are made from sheet copper, this is a fairly expensive product that will be an excellent addition to the copper roof of the building;
- plastic castings are the cheapest material, which have a short service life; most often, plastic ebbs are used in combination with PVC siding;
- The ebb made of profile ceramic blocks will be a good addition and protection for brick or clinker tiles on the facade of the building.
As we see, there is a large number of options for covering the basement of a house. The choice of material directly depends on the financial capabilities and features of the private house project.
Many people paid attention to the buildings with beautiful cladding and how the basement of the house was decorated. Most people think that covering the base is just a decorative trick, but in fact it protects the building from moisture and harmful effects environment. The upper part of the foundation is subject to temperature changes and is negatively affected by groundwater and flood waters. That is why houses that have a basement need its protection and finishing. Finishing the basement, as well as a possible blind area, are one of the main tasks that are performed after the construction of the house.
Finishing the basement is one of the main tasks after building a house
Functions
If we talk about technology, the finishing of the base must be done after pouring the foundation and its erection. However, most people clad the basement of the house after all construction work has been completed. To properly protect the facade from moisture and dirt, its height should be no less than 20 centimeters. There are buildings that do not have a basement; in them, the entire load goes directly from the building to the foundation.
Several functions of the plinth:
- Prevents façade contamination and also protects it from mechanical damage
- Compensates for soil shrinkage under the heavy weight of the building
- Due to its elevation above the ground, it makes the floor in the home much warmer
- Thanks to him you can do ground floor or basement
- Protects walls from getting wet, thanks to the insulation that is located between the base and the walls
To cover the base, it is necessary to use durable and moisture-resistant materials that are not afraid of sudden temperature changes.

One of the most important stages construction is finishing the basement
Device
The design of the plinth can be different and depends on the type of foundation, the type of construction and the composition of the soil. Some homes don't require it at all. These include summer and light buildings. For strip foundations, the base is a continuation, and for pile foundations, a wall is made between the supports. In order to answer the question of how to make a basement for a house, you need to know that the materials for its construction must be of high quality and weather-resistant.
These include:
- Reinforced concrete blocks
- Stone
- Brick
- Concrete

Plinth cladding wooden house
Basement walls can be monolithic or prefabricated. The monolithic version is durable and strong, and the reinforcement frame will protect the concrete from cracks. The concrete base is made by pouring into the formwork and most often this happens along with pouring the foundation.
For a small private house, a base with a height of 50 cm is sufficient, but for a building with several floors its height should be no less than 1.5 meters.
It all depends on the load of the building.
For log house the base also carries only positive aspects. It isolates wooden frame from dampness and moisture, increases thermal insulation and improves ventilation.
Kinds

Exist different types plinth
There are also several types of base:
- Sunken - considered the most reliable design. Thanks to its shape, it protects the waterproofing layer from all kinds of negative impacts and moisture. In addition, it is more economical due to the protruding plinth design
- Protruding - justifies its use in buildings with thin walls and where the installation of a warm floor is wider than the thickness of the outer wall
- A wall in one plane is a completely impractical structure, since the waterproofing layer is open.
For each home you can choose your own, more suitable option, but we should not forget about the presence of a blind area and the quality of the materials from which the finishing is made.
Advantages of the basement
The basement floor in a private home can be very useful.
There are at least two options due to which the construction basement room justifies itself:
- The ground floor may be technical room. A boiler room, garage, workshop and even a sauna will fit perfectly into it. It can only be used for utility rooms, which will free up the entire first floor for living rooms
- If you properly insulate the basement floor, the temperature on the ground floor in the cold season will be comfortable even without special heating. And the base itself will not need strong heating, for it optimal temperature heating will be up to 16-18 degrees Celsius. In addition, the floor on the first floor is winter period it will be warm.

Garage in the basement
The most important thing is that a do-it-yourself basement floor is not a myth, but a completely doable job that does not require special skills or global knowledge. With the help of one or two people, all preparatory and construction works on one's own.
Important! During the construction of the basement foundation, large foundation blocks are used. Their installation is impossible without the help of special equipment, so for self-construction A prefabricated or strip foundation is suitable.
However, the use of foundation blocks is much more affordable than the use of other options. Such blocks are placed around the entire perimeter of the building and laid as evenly as possible, which simplifies the work with plastering. Foundation blocks They are held together with cement, and holes are made between the blocks for wiring and water. Plinth blocks must protrude above the ground by at least 1 meter.

Foundation blocks are more affordable than other options
Upgrading the basement
Now let's move on to the most interesting options cladding for the basement of the house. Each of them is unique and in demand.
For many facades, a base plank is used, also called “starter”. Externally, it looks like a profile, has a special shape and serves to protect the lower edge of the insulation system. In addition, the base strip is a support for the insulation board.
The cladding with plastic panels looks attractive and is quite easy to install. No special skills are required to install it. Plastic panels are strong and durable, and color palette very wide. Before installation, you need to calculate how many panels will be needed for cladding; for this, it is enough to know the height of the base and the length of the foundation.
Advantages of plastic panels:
- Plastic panels are unpretentious and durable - for cleaning, they can simply be washed with a hose
- Not afraid of mold and mildew
- Plastic panels are not subject to temperature changes and are able to maintain their properties from -45 to +55 degrees.

Color options plinth panels
A good option for covering the base is a corrugated sheet. Sheathing the basement of a house with this material is inexpensive and quick. In addition, professional sheets exist different forms, but they use it not only for the base, but also for other purposes. Stone-look corrugated sheets are the most popular type when finishing the basement of a house. This type is very stable and does not need special care. Before sheathing with corrugated sheets, you need to prepare the base. The first task is to treat with water-repellent material.
Profiled sheet does not provide good waterproofing and protection from moisture, so base treatment is required condition when sheathing with metal sheets.
Simplicity installation work with corrugated sheets, and most importantly, its price makes this type of finishing very popular.

Base covered with corrugated sheets
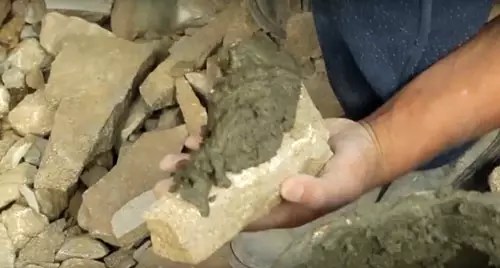
The house will look most impressive if you cover its base with plastic. This is what people call pieces of natural stone various shapes. The price of a plaster can vary, depending on the thickness and color of the stone. Most cheap option this is a natural stone gray. Covering the base with plastic is a labor-intensive task, but it can be done with your own hands. Natural stone is attached to cement mortar or with an adhesive that is suitable for exterior use and heavy tiles.
Sequence of work:
- Before laying the plasters, you need to level the surface of the plinth from protruding pieces of concrete or cement
- Next, prime the surface with concrete contact
- Afterwards, cement mortar or glue is applied to the pieces of plastic
- Having placed a piece of stone against the wall, you need to remove all the air by tapping and pressing the stone
- Large gaps between the sheets are filled with small pieces of stones
- Next, all seams are filled and rubbed as quickly as possible, until they harden.
Since plaster or sandstone are not protected from moisture, upon completion of work they must be coated with water-repellent impregnation. A log house will have an impeccable appearance with such finishing.

Finishing the base and façade with sandstone
Blind area
It is used to drain water from the foundation; it is a platform that is built around the entire perimeter of the house. Typically, the slope of such a blind area is on average 3-10%.
Made from different materials, such as:
- Cobblestone
- Concrete
- Asphalt
- Concrete plates

Scheme of the plinth blind area
If the house has a warm basement floor, then it is better to make a blind area with insulation. Such a device will protect the room from sudden temperature changes. It is necessary to make a drain along the entire blind area; it serves to drain water. A plastic pipe is suitable for it - if you cut it lengthwise, a nylon pipe and ceramic segments.
In order to make a blind area, you need to remove the vegetation cover to a depth of at least 15 cm. If the blind area is made of asphalt pavement, then the thickness should be at least 3 cm, and for concrete – at least 15 cm.
The blind area of cobblestones is made from alternately laid materials - a 15 cm layer of clay, and on it a 10 cm layer of sand, along with cobblestones. The blind area protects the foundation from large accumulations of moisture, and work on its implementation is carried out after the base of the house is completely covered.
, as a rule, protrudes above the ground. This part must be decorated not only for aesthetic, but also for practical purposes. We will look at the six most popular options with detailed instructions on installation.
Strip foundation- This concrete mixture with metal or filled with crushed stone and gravel. Firstly, such a surface looks unattractive, even if its edges are perfectly smooth. And they are rarely even, depending on what formwork was used when pouring. Usually there are traces from shields and.

Based on this, we designate the tasks of finishing the plinth:
- it must protect the pouring surface from the scorching rays of the sun and winds;
- the cladding hides not only all the imperfections of the foundation, but also the layer;
- and finally, decorative cladding should correspond to the general design and decorate the building.
Basics of self-finishing the basement of a private house
Before we talk about how to cover the base of a house from the outside, let's focus on the basics. First, installation of the cladding can be dry or wet. In the first case, the material is attached to or directly to the concrete surface using fasteners. The second option requires the installation of lathing and the use of building mixtures.
The second important point is that you need to take into account the climate of your region.

It is important that the casing of the base does not absorb water and does not allow it to pass to the surface. Another nuance is that the cladding should not lose its qualities under the influence of reagents used in winter.
Advice! Taking into account the operating conditions of the facing material, its choice must be approached with full responsibility, trusting trusted manufacturers who guarantee the quality and durability of the product.
Features of the selection and use of natural stone for cladding the base
Natural stone is considered the most respectable and expensive finishing material. Construction professionals recommend not using loose rocks, such as shell rock and limestone, to decorate the base. They will soon lose their presentable appearance.
Dense frost-resistant material is suitable for this purpose, preferably dark color.

Igneous gabbro and granite are best suited in this regard.
Important! Finished with natural stone important condition– reliable sealing of joints and seams. If defects are allowed, moisture will seep through the cladding and destroy the base.
Features of choosing natural stone for exterior finishing
Natural stone must match in color and texture. But besides this, there are other requirements. If the stones themselves are very heavy, they need additional fasteners for strong fixation. It is also important to know that silicate rocks (quartzite and sandstone) are incompatible with carbonate rocks (marble, limestone). Their chemical components react with each other. The result is gradual mutual destruction.

Master class on plinth cladding with natural stone
Now let's see how the whole process looks in practice.
| Illustration | Description of action |
 | On the surface of the base you need to fix metal mesh. It will firmly fix the solution. |
 | Pre-lay out the torn stones for the plinth on the ground in the order in which you will place them on the vertical surface. Natural stone does not have two identical parts, so you need to assemble the cladding like putting together a puzzle. |
 | The parts that will be below and above need to be cut so that there is straight line. Use a special stone cutting wheel for this. |
 | To cover the base with natural stone, prepare a solution of sand and. The consistency should be quite dense. It is better to wet the stones a little before installation. |
 | To form gaps between stones, insert wooden or stone choppers. Start laying from bottom to top. |
 | After the stones are firmly fixed to the base, remove the chokes and fill the gaps with mortar. |
The nuances of facing the base with artificial stone
Artificial stone will cost you much less than natural stone. This feature attracts many developers. In addition, the artificial material has the correct geometric shapes, and this greatly simplifies the laying. All you need to do is trim the tiles a little in the corners using a grinder.
Attractive with a variety of shades, shapes and textures:


This stone has less weight compared to natural stone, so less mortar is required. Modern artificial materials are not inferior to natural ones in moisture resistance and durability. Their only drawback is their slightly unnatural appearance. But now you can find collections that can only be distinguished upon closer inspection.
How to choose an artificial stone for a plinth
Don't try to buy the best cheap material. As a rule, its quality leaves much to be desired. It is best to use stones cast in silicone molds; they most accurately imitate the natural texture. Before paying for the shipment, study the color of the stones: the paint should not bleed into other shades. The stones should not have holes or cracks or inclusions of foreign particles.
On inside The stones must have grooves for adhesion to the mortar, and the edges must have clear contours for high-quality joints on the wall.

Advice! Take cladding collections that contain corner stones. This will greatly simplify installation.
Video instructions for finishing the plinth with artificial stone
The technology for decorating a facade with artificial stone is not much different from working with natural stone. But there are some nuances, and you can learn about them in this video - how to finish the basement of a house with your own hands:
What is the finishing of the base with plastic panels to look like stone?
Plastic can now easily compete with natural materials. Modern components make it strong and durable. This material quite successfully imitates natural stone, and the ease of installation allows even a beginner to decorate the facade.

Advice! Picking up plastic panels for outdoor use, give preference famous brands. Cheap product quickly fades and crumbles due to temperature changes.
How to make the cladding of the base around the house with your own hands from plastic base panels - details in this video:
Finishing the base with siding and its nuances
Siding can be made of vinyl, polyvinyl chloride or propylene. All three of these varieties are suitable for decorating a plinth, as they are resistant to external influence and temperature changes. There are also on sale metal siding, but it is least suitable because it is not resistant to prolonged exposure to moisture.

Learn more about how to decorate the base of a house with siding in this video tutorial:
Using facing tiles for the basement of a house
If you have not yet decided how to decorate the basement of your house inexpensively and beautifully, pay attention to facing tiles. Not all tiles are suitable for outdoor use. It should have a non-porous structure that does not absorb moisture. You can choose the color and shape of the material that best matches the design of the facade.
An interesting point: it is not at all necessary to decorate the base with thick tiles. Enough standard thickness, and you won’t have to further strengthen the base.

The only drawback of this design is that there is no possibility to additionally insulate the foundation. mineral wool. But there are other options, which we will discuss below.
For your information! For external tile laying, the temperature during work is important; it should not be lower than minus five degrees. Do not be fooled by advice to use winter mortars for masonry - the tiles will quickly fall off.
The photo shows options for finishing the basement of a private house with tiles:


Do-it-yourself finishing of the basement of a private house with tiles
If there is a need to additionally insulate the foundation, use this master class:
| Illustration | Description of action |
 | Attach solid insulation, such as penoplex, to the outside of the foundation. |
 | Install a metal mesh on the surface of the insulation. Secure it firmly with special fasteners. |
 | Start laying with corner elements. Place them with the required gap of at least 1 cm. |
 | After the corners, start fixing the remaining elements. Make light vibrating movements when pressing the tile so that the solution penetrates the mesh cells. |
 | After the masonry has become, fill the seams with mortar and finish with a jointing tool. |
Cheap and cheerful: finishing the basement of a private house with corrugated sheets
Is there an answer to the question of how to inexpensively decorate the basement of a house from the outside? For budget construction Profiled sheet is an irreplaceable material. It will reliably protect the foundation from moisture and temperature, and also hide
The plinth represents the upper part of the foundation and is made to protect the walls from soil moisture and precipitation and insulate the entire house. You can protect the space under the floor different ways, depending on the selected material. I offer several examples of how to decorate the basement of a house with your own hands and give it a unique look.
My friend is a scientist and loves free time learn new professions. He's building Vacation home and helps me as a helper. The turn came to finishing the basement of his house. Among the rich selection of materials, Vadik could not give preference to one and asked to be an assistant. My team is small. During the season, I leave the office and put on work gloves. Now I have a helper who wants to do everything himself.
Purpose of finishing the base and basic technologies

The floor of the first floor is located at the border between the upper part of the foundation and the walls. The plinth partially protects the walls from moisture and the underground space from cold and dampness. This is not enough. For comfortable atmosphere At home, it is necessary to provide additional protection to external surfaces. This type of finishing is especially important in the presence of a basement and basement rooms.
The basic operations to protect the foundation are the same for all types of finishing materials:
- Preparation of the base surface.
- Installation of finishing and additions.
- External processing: decoration and protection.
Preparation consists of cleaning the surface from dirt and leveling it. Places where the solution crumbles are removed. The finishing is installed directly on the surface or on the sheathing. External treatment with special compounds additionally protects the finish from moisture and frost.
Finishing with natural and artificial stone

Base lined with natural stone
Finishing the foundation with natural stone looks great on any building, with the exception of a wooden house. The luxury of the bottom and simple walls made of logs are inconsistent in style and cost. Stone is a durable material with a unique pattern. It is difficult to do the work yourself without experience. So my friend helped me and watched.
Stone is the most expensive finishing material. It's difficult to attach. You cannot go on the surface of the base of a wooden house. The foundation is designed for low weight of the structure, and such weighting can destroy it. On other buildings, stone has advantages:
- beautiful view;
- strength;
- resistance to mechanical damage;
- moisture and frost resistance.
First, we cleaned the surface of the base from dirt. Then we went over it with a wire brush, removing everything that was loosely falling off. After that, Vadik walked around the perimeter of the house with a vacuum cleaner. You can simply sweep away small particles with a brush. Notches must be made on concrete surfaces to ensure good retention of the mortar.

A high-quality artificial stone, made from natural ingredients, with proper care, can last 45-50 years.
Using a level and a cord, we cut out a horizontal line indicating the top of the trim. The lower edge can be left uneven; it will be covered with a blind area.
Natural and artificial stone are attached in the same way, using cement glue. You can use a regular solution and make a complex one protective covering. It does not have additional components that make it resistant to moisture and frost. For better adhesion, the base of the house can be sprayed with water shortly before applying the solution.
Vadik diluted the finished product with water glue mixture. He helped me apply it to the surface of the foundation. I laid the stone starting from the top line. When finishing smooth slabs artificial and natural stone can be laid out from below, marking each row. The base looks good with a flat top. It is also easier to protect it from rain by low tides.
After 3 days we came to this house again. The finish was dry and we needed to finish the job. Now Vadik applied colored sealant to the seams with his own hands. Covered the entire surface of the stone with a water-repellent compound. Now moisture and frost are not dangerous for the foundation of the house. The ebb tides were fixed on top along the perimeter.
Laying clinker tiles

Clinker tiles create the appearance brickwork. Foundation finishing looks good when the rows are straight. After preparing the surface, we marked horizontal lines for each row. They did not wet it. The glue is applied to the back of the tile. And sticks to the base. To create the appearance of overlap, we started the rows with corner elements alternately with the short and long sides.
When doing the finishing yourself, remember that you need to dilute the glue a little. It hardens quickly, 20 - 30 minutes. For myself, I do it immediately based on 2 square meters. Vadik made the first portion 4 times smaller. Then, as he acquired skills, he increased it. I immediately remove any excess mortar protruding between the tiles. The next day we arrived and cleaned up the seams on the foundation and covered them with contrasting paint. The clinker tiles themselves do not absorb moisture and are resistant to frost. Only the glue needs additional protection.
Polymer sand panels are easy to attach

After finishing the base with stone and clinker tiles, my friend and I installed the polymer sand panels on the foundation in a day.
- Covered the base protective composition.
- Done wooden sheathing, placing the slats vertically.
- We filled the space between the slats with mineral wool.
- The panels were mounted on the frame.
- The joints were sealed.
- Covered with a water-repellent composition.
We were finishing the foundation of a wooden house. The surface must be protected from destruction by bark beetles and other insects. For this purpose there are special compounds. Polymer sand panels are durable and flexible at the same time. Their cost is significantly lower than that of artificial stone and clinker. For the owners, solving the problem how to decorate the base inexpensively, this convenient option. Especially if you do it yourself.
If insulation is not done, then polymer sand panels can be glued directly to the surface of the foundation. They are fixed to each other using protrusions and lowerings under them, and snap into place like buttons. The material is easily cut with an abrasive disc. They are attached to the surface of the base and walls of the house with glue and self-tapping screws.
Siding with insulation

To protect and insulate the house, siding with insulation is used. For a wooden house, it is good to finish the foundation and walls at the same time. The right combination of panels will change the appearance of the building and turn it into a luxurious home. Siding will protect it from destruction.
We started by treating the surface of the facade. Everything was cleaned and coated with a protective compound. Then they made the sheathing. Using a level, we drew a horizon line from the top point of the soil near the foundation. Then, parallel to it, the dividing line between the base and the walls. Checked the level. We marked vertical lines for racks less than a meter wide. The work is simple and requires attention. Anyone can do everything with their own hands.

Attached to the walls according to the markings wooden slats. The space between them was filled with insulation. A film was stretched over the top to allow moisture to drain when dew formed. The starting profile for finishing the foundation was screwed to the bottom rail with self-tapping screws. A J-profile was installed at the corners.
We started installing the panels from the lower left corner. The bottom part was inserted into the groove and the top was screwed to the sheathing posts. Last, on the plinth, were installed the corner elements. The edges were hidden under the extensions.