!
Today we will do real game with a ball and a labyrinth. The author of this homemade product is AlexGyver.

Many of you probably know games in this style. We have a ball in the maze, we need to bring the ball to the exit from the maze. This is hampered by holes into which the ball may fall and you will have to start all over again. Such games appeared on the first smartphones with a normal color screen and a built-in accelerometer and were very popular in their time.

So, why not do something like this in real life, that is, material and maybe even control it, for example, remotely. Let's try.
The platform with the labyrinth will be mounted on two hinges so that it can tilt strictly along two axes. At first the author wanted to make a spherical hinge, but this entails a bunch of other problems. First, let's make a mini-version for debugging the program. To do this, take a square piece of plywood - this will be the table.

The walls of the labyrinth can be made of cardboard, glue it with hot glue. To create a hinge you will need a couple of screws and something to secure them to. The author used a piece of thicker plywood for this.

The ball is like this, 15mm steel.

Next you need to draw the labyrinth itself.

Then we build a labyrinth. I had to change it a little.


Well, let's start drilling. Then we continue drilling with a Chinese step drill.


Next, we complete the labyrinth.


This is how the labyrinth with the ball turned out in material form.
Well, let's try to go through our resulting labyrinth, so to speak, in manual mode. It's not that simple.

The author specially made holes that act as traps. They stand directly in the path of the ball. He also specially made a complex map in advance to make it interesting to play. long years. Well, it seems to be working out fine.
And now it's time to collect electronics. We will move the table using 2 servos; they will be controlled by the Arduino platform and from a smartphone via bluetooth. The scheme is very simple:

The power supply for the servo must be separate and powerful enough; a 2A USB charger or power bank is quite enough. You will find links to all electronic components on the PROJECT page.

There you can also download an archive with the project, which contains all the diagrams and firmware. All instructions are also on the project page. Don't worry, there's nothing complicated there.
First, let's cut and drill cubes for attaching the hinges.


Then we collect. The cube with two holes is central, both axes are attached to it. Now let's secure the field to the hinge using hot glue.


And from below the hinge is attached to a small piece of plywood - this will be more convenient. After successful loading of the firmware and power supply, the servos will rotate to the middle angle, in this position you will need to secure the rocker, that is, exactly in the middle.


Our layout will stand on a cardboard box. We secure the servos along two edges using corners. We will transmit the movement using a paper clip, from which we will make connecting rods.

Pay attention to the location of the wire and the direction of the rocker and connecting rod - this is very important! It is in this position that we will attach the drives to the box.


From the archive with the project, download it to your smartphone and install the GyverBall application.

We first set up pairing with the Bluetooth module, the password is 1234 and go to the application settings. Let's connect. Ready. You can now control the labyrinth table. Here you can adjust the sensitivity and calibrate the table horizontally so that the ball does not roll anywhere in the zero position.
But the coolest feature is, of course, the accelerometer. We tick this box and get the same maze game with the same controls, but with absolutely real physics.


It is very difficult to play, because the design is very shaky and behaves a little unpredictably. The table also shakes constantly. At first it seemed that this noise was from the accelerometer, but it turned out that it was not. The problem turned out to be quite unexpected. The author connected the Bluetooth module using the SoftSerial library to be able to debug the program through a port monitor on the computer. But it turned out that using this library interferes with the operation of the servo drive. Keep this in mind if you are doing a project with bluetooth and servos. But this did not stop the author from going through the labyrinth. In general, bluetooth had to be connected directly like this:

And everything began to work perfectly, everything is absolutely stable and nothing shakes at rest. Before flashing the arduino, you need to disable the logical Pin with bluetooth, because the module will interfere with the firmware.
Well, now let's make a larger version. For this we need large leaf plywood and large powerful servos.


These are Chinese mg995, inexpensive, but very strong guys. The balls will be bigger this time.
The right ball is hollow, but the mass is the same as the left one. Due to the size, the author chose large.

The walls of the labyrinth are built from a 10 by 15 mm cable channel. It took 2.5 m.

This time the maze will have no holes, because we will go through it not for difficulty, but for time. The maze has a bunch of pockets into which the ball will fly by inertia when trying to quickly fly through the section - it will be interesting. Let's do the markings.

The author made a slight mistake and marked the field into 6 parts, but drew the labyrinth in a 5 by 5 grid. So I had to build a new and more interesting labyrinth, still 6 by 6.

We built and built and finally built it! Let's try to go through it manually.

Yes, it is very easy, but it will be difficult if you try to complete it as quickly as possible when controlled from a smartphone. We will make the fastening of the axles, which are M4 screws, from a piece of timber.
The axles themselves will be attached to these corners.


We put everything exactly in the center of the field and collect it. On the lower small square of plywood we will fasten it with screws and nuts. We attach the servos with hot glue.
You need to make slits under the rocking chairs; the mechanism will move there. Let's check.

We will make the connecting rod from an XXL paper clip. Carefully bend the paperclip around the rocker at as right angles as possible so that nothing interferes with its rotation. We measure the height to the bottom piece of plywood and bend it to the same height.


Then we make sharp U-shaped pieces to attach the connecting rod to the field and nail it down.


We collect and check.
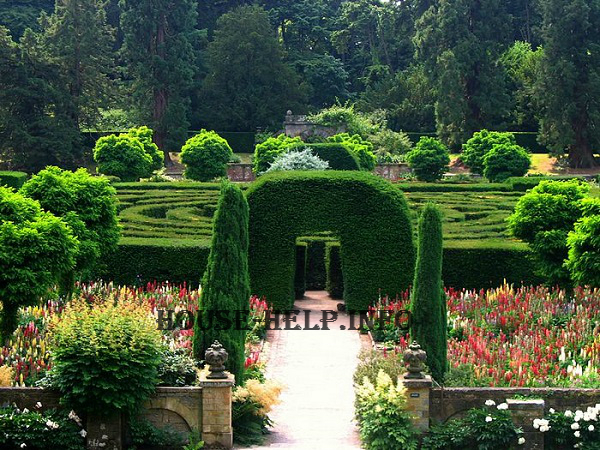
Perhaps all owners summer cottages they are trying to do something unusual and original in the yard, something that would make it stand out from the rest. It may be small, hidden between spreading trees, other options. These are all classics, but there are other, more mysterious garden elements - remember, for example, labyrinths during the Middle Ages, which were framed by luxurious palaces! And something similar (on a more modest scale, of course) can be done by any owner suburban area, if he has the capabilities and desire. And about how to make a garden labyrinth with your own hands, we will tell you in today's article.
Interesting! Did you know that there are several ways to remove tree stumps? If you want to know more about this, then this is for you!
But what's so good about a garden labyrinth? You will be surprised, but this idea has numerous advantages:
- the garden will be arranged in an unconventional, original way;
- it will be useful for children in terms of development;
- family and guests will be able to have great fun.

Determining what a garden labyrinth is
Let's say right away that any labyrinth is extremely complex system, which consists of intricate passages and paths leading to a single goal, namely the center of the entire composition. It is not at all necessary that the labyrinth in the garden be large - there are also relatively small ones among them, distinguished by their emphasized ease of implementation. In addition, to create a composition you can use the most different materials– from traditional hedges to original tracks made of stone.
And if you have children, then remember that such a labyrinth will very quickly become their favorite place to play, because it’s so interesting to play hide and seek there! For adults this is - a great opportunity take a leisurely walk, carried away by your dreams and thoughts.
Note! If we talk about a regular garden, then almost any type of labyrinth is suitable for it, while for a landscape garden it is better to use a fantasy or stone one.
Now - directly to the process of creating a labyrinth!
Stage one. Location, composition
Before you start doing anything, decide where the composition will be located. Obviously, almost all labyrinths can only be fully seen from above, for this reason it is very good if you have some kind of hill on your site or a house with two floors (from the second floor you can admire the delights of the composition). As for the location, it is better to arrange a labyrinth next to a children's playground or recreation area.
The most primitive version of the labyrinth is a twisted spiral, the paths of which connect in the center. But with compositions that have several exits or a dead end, everything is much more complicated. And a great example of this would be anyone park labyrinth Europe, and if you simplify it, you can get your own original scheme.
When creating a labyrinth, attention should be paid to both the interweaving of the paths and the “heart” of the composition, that is, the central part. It is recommended to set up a recreation area there, for which you can, for example, put a table with chairs, build a pergola, and so on. Even a beautiful sculpture, flower bed, pond or even a sundial can become a “heart”.

Stage two. Choosing plants
If the labyrinth is small, that is, for children, then when creating it you can use annual plants(such as curly parsley) flower pots, small cobblestones. But if the structure is large enough, then it will require planting shrubs. It is important that they are such that neither cutting nor care will cause any particular difficulties (and all this is extremely necessary to give the composition the required shape and adjust the dimensions of the walls).
When creating a medium labyrinth, plants no more than 0.5 meters high are used (this can be low-growing spirea, alpine currant, boxwood). All of these crops grow in middle lane. And if you are planning something really large-scale - a composition in which adults will fornicate for some time, then the best option there will be trees up to 3 meters high. According to experienced experts, yew, rose hips, Tatarian maple, hornbeam, and others are most suitable for this.
Note! The combination of crop types must be selected so that they have different periods flowering, that is, they did not bloom at the same time. Only then will your garden labyrinth look great most of the year!
As already noted, traditionally garden labyrinths are made in the form of a circle, although if desired, you can use any other shape - a triangle, a square, it can even be made in the form of initials. In short, there are a lot of options, so you can safely involve children in the process - they will take part in it with great pleasure. The most primitive version of the composition consists of:
- entrance;
- several turns;
- exit.
As for the forms, the simplest of them are spiral compositions, where all the paths are connected in the center. There is also a cross-cutting design that lacks a distinct “heart.” Now let’s figure out what types of labyrinths are the most popular in landscape design.
Stage three. Let's get down to business - several possible courses of action
There are four main types of composition, and your further actions will depend on which one you have chosen. So, let's take a quick look at everyone.
Option #1. Hedge composition
The most attractive, and therefore tempting, option is a garden labyrinth made from hedges. It is quite obvious that this option is also the most time-consuming and difficult to implement. The crops (this can be either trees or bushes) forming passages in this type of composition require constant care and frequent pruning. Moreover, the area of such delights will be considerable - no 6 acres in in this case they won't save you anymore.

Although, if the area of the plot is large enough, and you yourself are filled with the desire to keep the hedge “in shape,” then such a structure will turn into your favorite place for walks! Most likely, not only children, but also grandchildren will be able to play in the intricate moves, since with proper care the composition will still be attractive for decades.
If you plan to use a hedge as a “building material,” we advise you to resort to:
- brilliant cotoneaster;
- laurel;
- privet;
- evergreen boxwood.
And if you don’t have the desire to wait for perennial bushes to grow, you can do everything quickly using fast-growing annual crops (this could be, for example, broom kochia, which grows no higher than 1 meter). It forms a dense green mass in record time, and is also quite easy to cut. Although there is a significant drawback - such a labyrinth of annual crops will have to be restored every year, for this reason it is more of a temporary option.

Option #2. Labyrinth made of stone
You can also use stone to create a labyrinth - in this case, the finished composition will look like the ruins of an ancient fairy-tale structure. Of course, it will be intended exclusively for viewing and, perhaps, for walking, since it will hardly be possible to use it for “wandering.” To lay out a decorative spiral, take small pebbles that have same sizes, or masonry side. And if you use large stones, this will help create a kind of walking version of the composition.

If you wish, or, for example, if you think that the stone labyrinth looks too gloomy, you can “revive” it with the help of plants planted between the boulders. In this case, if small pebbles were used, then “alpine” crops (juvenile, sedum) are perfect. But for transformation stone wall experts advise taking ivy, kobeya, honeysuckle or dichondra.

Option #3. Flower arrangement
The labyrinth in the form of spiral flower plantings is very popular. It is important to select compact flowers with erect stems. Crops must clearly repeat all the outlines of a given composition, which is why spreading flowers are unlikely to be suitable (they, as you know, “love” to grow). It is also undesirable to use reseeding crops to create a garden labyrinth (this could be eschscholzia or poppy), since, as the name implies, they are prone to self-sowing.
Note! If these self-seeding crops are nevertheless used, the composition will lose clarity and become a blurry spot. Therefore, it is better to take compact plants for this - a border rose, for example, or a bush petunia.
As for color, the labyrinth in this regard should be as clear and uniform as possible, otherwise the outlines will be blurred and will not be perceived holistically. And if the composition consists of two spirals connected in the center, then you can use two colors that contrast with each other. By the way, flower composition can only act as an ordinary flowerbed, that is, it can only be inspected or used for walks. If walks were chosen, then between plantings lay gravel paths that clearly follow all the passages.


Option number 4. Fantasy composition
This option is the most unpredictable, since it is located away from clear lines and geometric laws. No circuit layout is required here, nor is the presence of a “heart”; the main emphasis here is on the extreme complexity of the moves, maximum quantity turns, dead ends in unexpected places. And, walking through such a labyrinth, a person will be able to take part in an exciting journey, during which he will not know what awaits him at the next intersection.
Fantasy-type labyrinths are interesting in that they can be not only a strictly defined area of a suburban area, like the options described above, but can be located throughout the entire garden, including play area, recreation area, etc. It is only necessary that the transitions be insignificant and “mixed” with various intersections and turns. Only in this case, the person inside the composition will not know what awaits him just a few meters ahead. And for this, pergolas, trellises or arches decorated with climbing plants can be used.

All plant crops, including hedge, will grow freely here, grow as they “want”, in order to hide from people everything that is a few steps away. And after every turn, something unusual and at the same time pleasant will await the visitor: a beautiful flowerbed, a comfortable bench for relaxation, a plaster sculpture, etc.
Summing up
If you make a garden labyrinth with your own hands, then you definitely won’t regret your idea, since this element of garden design will always attract attention, and you, in turn, will be proud of your creation! And you shouldn’t be afraid that the path to your dream may turn out to be too confusing. There is always a way out in labyrinths, you just need to make an effort and find it!

You will need
- Plywood, woodworking tools, sheathing material, sound component, wires, lighting lamps, toys and accessories.
Instructions
First you need to decide what exactly yours will be. It’s quite difficult to do it in a city, unless you have a two-story apartment. Best for creating a labyrinth Vacation home or dacha. Think about where you want to place the future labyrinth. It could be basement your house. This will give your labyrinth more mystery and mystery. You can also make a small maze for your children to play in. By placing it under the second floor, you can watch from above as your child tries to find the only correct path.
Let's say that you have chosen the basement as the location for the future labyrinth. now is the time to think about the drawing. This is one of the most important parts of building a labyrinth. There are labyrinths different types and of varying complexity. The best thing in the house is a rectangular labyrinth or square shape. This labyrinth is easy to build. Design a detailed maze on paper. You can take a ready-made diagram from some source, or you can use your own imagination. Remember that there should only be one correct exit to a maze. Also try not to make the paths too complicated. Still, this is a little entertainment for your guests, not torture. After making the sketch, make exact drawing with dimensions. The width should be sufficient for an adult to move comfortably in it, but not too wide so as to create the impression of an enclosed space.
Now that I'm ready detailed drawing, you can proceed directly to preparing the premises. It must be completely cleaned extra items. Also examine the floor, walls and ceiling for unevenness. They need to be removed. Now you need to purchase the material from which you will make the corridors of the future labyrinth. It is best to use thin sheets and plywood. They are easy to process and do not take up much space. You need to take the material with a reserve in case you spoil some of the workpieces.
Make labyrinth blanks from the purchased material. There will be a lot of them, so you should collect them as you make them, starting from the far wall. It is recommended to fasten the parts together with screws. Make sure that the bottom of the parts fits tightly to the floor and that there are no small gaps through which light can penetrate. When all the pieces are installed, you need to think about lighting. Here everything depends only on your imagination. It is best to install small lamps in different parts labyrinth, but this must be done evenly so as not to highlight the correct exit path.
After installing the lighting, you need to take care of the exterior decoration. You can paint the walls of the labyrinth in some color or imitate the surface oak boards. But it is best to cover the walls of the labyrinth with fabric, for example, a material similar to velvet. Also think about accessories. Install stylized toys with mysterious dim lighting. They will look beautiful the bats with glowing eyes. You can also hang portraits of magicians or sorcerers, lightly lighting them. It will be very realistic if you add to everyone else sound accompaniment. To do this, install several speakers on the ceiling. To do this, use round speakers.
You can also equip your labyrinth with a video tracking system, then you will be able to monitor all the movements of the guest. Don't forget about the correct exit route as well. It needs to be highlighted somehow. It is best to use light signals. For example, in the middle of all corridors lay LED strip. Lay a green tape on the right path, and red tape on the wrong path. Connect the tapes to one button or remote control, now when you press a button, a lost person can easily find a way out.
Marina Suzdaleva
Sensory development of a child is one of the main areas under the age of 3 years. To enrich the baby's tactile sensations, enthusiastic mothers create various toys with their own hands: sensory cards and bags, and sensory boxes. Another such wonderful toy is the sensory labyrinths that the participants of ““ made for their kids. 6 ideas for sensory toys with step by step wizard classes and play ideas from passionate moms.
My labyrinth is two squares of fabric sewn together. Inside there is a ball that needs to be moved along the paths of the maze. It is easy to take with you, it is pleasant to tinker with it, since the game provides a lot of sensory sensations, in a word, as an independent toy it is much more useful.
To make the game more interesting, there are two balls inside different color. Thus, until the end of the maze, the intrigue remains as to which ball will appear. You can guess, or you can purposefully select balls by color.
For this toy I will need:
- soft felt;
- transparent thick film;
- two beads with a diameter of 1.5 cm and inspiration.
I cut out two squares, and in the corners, diagonally, I cut out irregular circles from other colors of felt. I cut out similar circles from packaging from toy sea creatures. I outline where my windows will be and cut them out. 
Now I start stitching. To ensure that the film does not interfere with the movement of the bead inside the labyrinth, I sew it between two layers of felt. When the windows are ready, sew the top square to the bottom one on three sides.

I didn't have colored beads, so I took wood beads and covered them in advance acrylic paint. Unfortunately, Blue colour in the jar it was very bright and beautiful, but when it dried it became almost black. I put the dried beads into the resulting envelope and sewed up the fourth side. Now I'm with reverse side I marked the envelopes for the future labyrinth and stitched them on a typewriter. The toy is ready.

Kosteva Oksana and son Sashenka 1 year. 11 months, Dolgoprudny
We made our tactile labyrinth from whatever came to hand. The result was a whole playing field.
The pig's task is to walk along the path to the house. Each section of the road is some kind of path: now it is a dense forest, now a flower meadow, now a rocky road, now a stream... They didn’t glue the characters to the labyrinth, but simply put them side by side - this is how the labyrinth becomes universal.

To make the tactile labyrinth we used: cardboard, PVA glue, buckwheat, rice, corn, peas, Gossamer noodles, sugar, sand, pebbles, cotton wool, wool threads, satin ribbon.
Manufacturing process: PVA glue was poured onto the cardboard (in the form of a labyrinth), after which cereals, peas, sand, pebbles, cotton wool, threads, etc. were poured onto the glue. After the glue had dried, the labyrinth was decorated with a pig and a house.
Salimova Olga and daughter Alena 2 years old. 4 months, Ekaterinburg.
When I saw the task, I immediately realized that the time had come to sell the felt toy I had seen for a long time and had sunk into my soul. The essence of the toy is to guide a bead sewn inside the toy through the maze. For clarity, I used plastic windows (cut from a plastic folder), and to create greater tactile sensations - additional elements from ribbons and beads.
To create the toy I used:
- felt in four colors (2 large squares and two shapes for free-form corners (in my case, a house and part of a circle));
- small plastic squares;
- beads.
Additionally, I included ribbons with beads, or you can use figured buttons or thermal appliqué.

Manufacturing process:
Tired of the mess in your nursery? Tired of endlessly collecting toys for your child?
First, cut it out corner parts with windows made of felt, and the windows themselves are made of a plastic folder. We sew (I think you can use it here too) glue gun). Next, we attach the corners to the top part of the toy (a square piece of felt), after which it is convenient to trim the excess part of the base.
We take the second square piece and attach it to the finished front piece, not forgetting to sew up the beads. I used two large beads different shapes and a small bell.

At the final stage, we stitch the “walls” of the labyrinth. Here it is important to ensure that the beads can easily go everywhere and focus on the age and skill of the child - you should not immediately make a complex option so that the game is fun!
Kudryashova Nadezhda and children Misha 1.5 years old and Anya 4.6 years old, St. Petersburg.
Labyrinth flower and snail
In our homemade toys There are two sensory labyrinths at once:
- Developmental soft cube, on one side of which labyrinth flower.
The technique is very simple. I found a fabric with a labyrinth circle, or you could just cut a circle out of the fabric and stitch it onto the fabric. I embroidered a leaf from green bugles. I placed mesh fabric on the main fabric and stitched labyrinth circles. It is important to remember to insert the beads before finishing the very last large circle.

- On a development mat, crawling underneath labyrinth snail.
The technique is similar, but you still need to cut out a body from some textured fabric and embroider a face on it. Sew the body of the snail onto the main fabric, then the circle of the labyrinth and the mesh fabric on top of it. Sew the circles of the maze, just remember to insert the beads before finishing the very last large circle.

Gavrilova Faina and daughter Taisiya, 1 year 3 months, Arkhangelsk.
To create a sensory maze, I took a piece cardboard box, covered it with white self-adhesive paper. Old red leather belt cut into strips different lengths, made stair steps out of them using universal glue.

I made it out of lace (rails and sleepers), since Olesya really loves a similar massage and a similar railway is very familiar to her.
I laid out a thick gold thread and glued it with a wave.
I also laid out a winding path using colored buttons using glue. Initially I wanted to glue shells, but decided that they were too convex and would distract from the game. For the same reason, I didn’t decorate the screen with any stickers.

Fun track play ideas:
- you can walk along the paths with your fingers, lead animals;
- compare buttons by size, color, look for the same ones;
- stairs steps - compare by length, size;
- study prepositions (on the stairs, under the stairs, near, etc.;
- count steps, sleepers, buttons.
On the first day of our game, the bunny jumped along the path towards the carrot, and small animals walked along all the paths. Subsequently I plan to launch trains different colors By railway. You can put a picture or a toy of an animal on one side, what it eats, where it lives, on the other, you can play the game “mother and baby,” or use any logical chain depending on the topic being addressed at the moment.
Summer is ahead, various trips are ahead, and this is the kind of fun that is very easy to take with you.
Olga Antonenko and Olesya 1 year 7 months. Yaroslavl.
Do you like DIY sensory toys? Save to your favorite wall social network, to make the same one for your child and enrich his developmental environment with a new “tool”!
Assembling a children's play labyrinth
In order to avoid any difficulties when assembling the labyrinth, we decided to tell and show the entire assembly process step by step. For example, we took the labyrinth model. Although the model here does not have special significance, because all other labyrinths are assembled according to this principle.

The labyrinth is a rigid frame made of pipes; this is exactly the frame we will assemble. Makes our work easier Assembly drawing, which is included with any labyrinth. Our model came with the following diagram.


Of course, at first glance everything looks complicated and confusing, but let’s try to understand the drawing, and then we’ll move on to assembly.
In the drawing we see the designations A1, A2, A3 and so on. This is how the nodes for attaching pipes to each other are indicated. The pipes for assembly are already sawn and have final dimensions; corner connecting elements are screwed to them. The vertical pipes and connecting units are marked with the designations A1...3. B1...3, C1...3, D1....3, these are the ones that need to be correctly connected to other pipes.
Now let's start assembling the children's labyrinth. It’s hard to know where to start, because the purchased product looks like this after unloading:

And there are still a lot of unpacked parts. The question arises: how to deal with all this?


But patience and work will grind everything down, as the Russian proverb says. We begin to prepare the site on which our labyrinth will stand.
First you need to sweep, clean, and disinfect the floor.
Collectors must also ensure that shoes and work clothes, their gloves were clean.
After unpacking the maze, you shouldn’t lump everything into one pile. For comfortable work You can place all the parts along the wall or around the perimeter.

After the site is prepared, assemblers begin assembling the floor. It is laid according to the principle of puzzles exactly in the place where the labyrinth will be installed. To prevent the coating from deteriorating in places of contact with the floor, plastic tips must be placed under metal pipes.

Cover the finished floor with film or paper to keep it clean.
The secret of assembling the labyrinth is that the assembly begins not from the bottom up, but from one side.
Let's start the assembly from the side of the racks A1, A2, A3 (see the assembly drawing) and assemble the first wall.
When assembling the first and second levels, you do not need to tighten the mounting bolts too much.
This is what the wall we assembled looks like.

We continue the assembly


If it suddenly happens that some pipes are not quite level at this stage, do not worry.
And now you need to install the slide, if this is not done now at this stage, then later it will be impossible to install it, since the frame of the labyrinth will be assembled.


We continue to collect

We assemble the stairs at our labyrinth.
Let's look at the photo to see how this is done.


Now we need to assemble the third level. To do this, you will have to move around the frame itself, so we tighten all the fasteners.
We put the pipes on top, level the frame and tighten all the fasteners.
Result of frame assembly


And now the real thing begins interesting stage, when the frame gradually takes on its final form.
First, we lay out the floors of the second level and steps, and tie the pears.
Then we take the soft shell for the pipes and cut each pipe lengthwise on one side. Then we begin to stretch the pipes. We cut the pipes with a knife. If the joint is triple, then the pipe mode is at an angle so that the three pipes connect at the corners. We tighten the soft pipes in two or three places with special plastic clamps (included in the kit). There should be no stains left on the maze frame metal pipes, you need to make sure of this.
Now let's stretch the mesh. We tie the net with plastic clamps to the corner of the labyrinth at point A1, after that we tie the entire edge of the mesh to pipe A1, we tie the network with clamps every 15 cm, then we need to stretch the net along the wall and tighten it with clamps. The mesh is fastened in this way along the entire perimeter of the labyrinth.
Then we cut passages in the net and attach decorative arches along the top of the net.
Also, decorative ribbons for a dry pool are attached to the top of the mesh, and a rope is attached to the bottom of the labyrinth (included in the kit).
Banners (bright pictures) are secured to the sides of the maze with clamps or rope.
All that remains is to place a step and the children's labyrinth is ready.
Before starting operation, it is imperative to treat all components of the labyrinth and its fillers with disinfectants.
Separately, it is necessary to say about the processing of balls for a dry pool. It is very convenient to process them in a bag sewn from the remaining mesh. All you have to do is pour them into such a bag, place them in a large container and let them sit certain time, and then rinse and dry without removing from the bag. Once dry, pour them into the dry pool compartment.
Now the labyrinth can be safely used.


About the assembly.
When making a labyrinth at a factory in China, manufacturers make sure that the parts are precisely adjusted to each other, so that nothing needs to be filed, tapped, or trimmed. Thanks to this, the maze is very easy to assemble by hand.
The only tools you need are a hex wrench to assemble the frame and a knife to open the packaging and trim the pipes.
As you can see, to assemble a soft children's labyrinth you do not need to have special knowledge and skills.
This maze was assembled by two untrained people. On complete assembly This labyrinth with mesh tension takes two working days.
Sincerely, Technical Department "Amurvneshtorg"