Modern technologies allow you to arrange a warm floor in several ways, depending on which connection you plan to use. Water systems have proven themselves to be excellent underfloor heating, with high reliability and efficiency. Electric heated floors are easy to install, their wide popularity is due to the ability to be placed under any covering. Of course, all the positive aspects take place only when using high-quality equipment and its correct installation. Since part of the work on energy saving and ensuring convenience is assigned to the thermostat, special attention must be paid to its installation and connection.

A modern thermostat can be programmed to change the temperature not only by hour, but also by day of the week
The use of a thermostat allows you to use any heating device without the danger of overheating and failure. This is why thermostats are built into electric irons, kettles and water heaters. Cable, rod, and film heated floors were no exception. Thanks to the installation of a control device, you can not only change the temperature under your feet, but also program the operation of additional heating to save energy.
In systems with liquid coolant, the principle of adjusting the heated floor is different, since the thermostat controls the operation three way valve and/or circulation pump. This allows you to obtain the required degree of heating regardless of the temperature of the coolant.
All existing thermostats can be divided into two types:

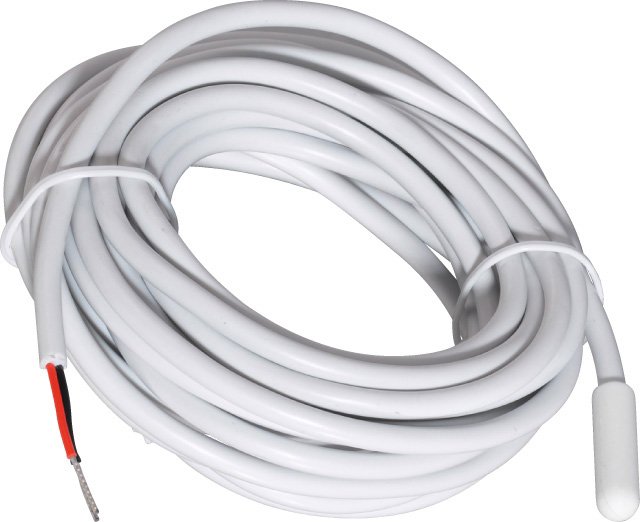
The electronic thermostat sensor is installed in the controlled area, and the control unit is mounted separately
Types of thermostats
Depending on the design and purpose, thermostats are divided into several types:
- devices with an economy mode that reduce the degree of heating when there are no people in the room;
- devices combined with a timer, which help save energy due to the ability to program periods for turning the system on and off;
- intelligent programmable devices that control heating operation both according to a given algorithm and depending on other factors: temperature and humidity outside the window, the presence of people, etc.;
- limiting thermostats that are activated when the set heating limits are reached.
IN small rooms it is more rational to use simple electronic thermostat or a device with a timer. The use of smart devices is justified in complex heating systems and large areas.
Some models of thermostats are equipped with a pair of temperature sensors and two separate load control channels.
Choosing a location to install the thermostat

Built-in programmable electronic thermostat is the most popular model
When choosing a location for placing a thermostat, several factors are used.
- Device type. In the retail chain you can most often find built-in thermostats, but if it is impossible to install it, you can find a design designed for wall-mounted installation.
- Ergonomic considerations. The regulator is placed in convenient location, at a height of 10 – 80 cm from the floor.
- Availability. It is best to install the thermostat near the doors. In this case, you don’t have to worry that after a while, access to the device will be impossible due to standing furniture or equipment.
- Rational use of materials. When choosing a location, you should take into account the distance from the electrical panel and the location of the cables, since these factors affect the consumption of electrical wiring.
When using heated floors as the main heating, a thermostat with a built-in sensor is often used. Since the device operates depending on the air temperature in the room, it is installed at a height of about 150 cm from the floor.
Features of connecting the thermostat to the mains supply

The power of installed heaters can be calculated based on the passport data or found out practically by multiplying the current consumption in amperes by 220, which corresponds to the voltage in a two-phase network.
It is designed to make the task of connecting the thermostat to electricity easier. color coding conclusions.
In accordance with generally accepted standards, the phase wire corresponds to black or Brown color, and zero – blue. Grounding is connected to the yellow-green conductor.
The supply voltage supplied to the device is life-threatening, so the circuit must have a grounding loop and a residual current device. When installing a thermostat, you should not ignore safety requirements, and if you lack experience, it is better to contact a professional electrician.
Technology for connecting a thermostat to a heated floor
Depending on the type of heated floor and the method of laying the heaters, its connection diagrams may differ.
Single core heating cable
The installation of a single-core underfloor heating cable is carried out in such a way that both ends are as close as possible to the installation site of the thermostat. In this case, the connection is made in the following order:
- The temperature sensor wires are connected to the corresponding terminals (without observing polarity);
- a power cable from a socket or panel is connected to contacts L and N, while L corresponds to the phase wire, which can be detected using an indicator screwdriver;
- The power relay output terminals are connected to the heating element of the heated floor.

Connection diagram of the thermostat to a single-core electric heated floor cable
After installation, check the correct connections using a multimeter, apply voltage and test the system in all modes.
How to connect a single-core cable floor (video)
Two-core cable
Thanks to two current-carrying cores, this type of cable is connected only on one side. A typical connection diagram is no different from a single-core design, except that the output of such a cable has three wires.
If there is no ground terminal of the thermostat, the yellow-green terminal of the heating cable is connected to the neutral power wire.

Connection diagram of a two-core cable to a thermostat
Installation and connection of a heated floor consisting of two-core mats (video)
Rod and film heating systems

Rod and film heaters are connected to the thermostat in parallel
When installing heated floors equipped with infrared or rod heaters, a scheme is used in which several panels are connected to the thermostat in a parallel connection.
The same principle is observed in the case of using a heating cable in mats, when it is necessary to lay several parallel strips.
In this case, connecting heaters to the temperature controller is possible in two ways.

Installation and connection of film heaters (video)
Temperature control of water heated floors
Heating of water floor systems is carried out by transporting hot coolant along a circuit laid in the floor screed, so temperature adjustment can be done in two ways:
- change in coolant flow;
- change in its temperature. This method is used most often. It involves installing a three-way valve that controls the mixing unit. In this case, the relay output of the thermostat is connected to the solenoid of the electric locking device. As soon as the temperature exceeds the set value, the valve opens. After this, the cooled water from the return line begins to mix with the incoming liquid, reducing its heat capacity.

Today, “warm” floors are becoming increasingly widespread as an alternative to traditional convection additional heating of rooms. And if in country houses While cable systems are the most popular, city apartment owners prefer to use film and infrared coatings.
However, to automate and increase energy efficiency, the operation of any electrical underfloor heating systems is impractical. Available today various systems control the temperature regime of the heated floor, which you can simply connect yourself.
To connect, you will need a minimum of tools that are usually used when performing electrical work:
- Screwdriver Set;
- side cutters with insulated handles;
- indicator screwdriver;
- pliers;
- Maybe .
The sequence of installation and connection of the thermostatic device is as follows:
- Before starting floor installation, it is necessary to determine the place where the thermostat will be located, to which it is necessary to connect mains power voltage 220.0 volts. Typically, a regular power outlet is used for connection.
- When laying the cable, determine the installation location of the temperature sensor. The temperature sensor should be located on a functionally important area of the floor of the living room, free from furniture. To reduce length connecting wires the sensor must be placed in close proximity to the control unit.
- When installing floors with a cable heater, which is poured into a concrete screed, the wire connecting the control and measuring unit to the temperature sensor must be laid in a corrugated pipe. Thanks to this, the temperature sensor can be easily removed and replaced if it fails.
- When laying a film heater, the temperature sensor is simply glued to the bottom side films.
- After completion of installation work heating element install the regulator in place and connect the sensors to it. In order to avoid punching grooves in the wall when laying a film heater, the wire along the wall can be laid in a special decorative trim.
- In the case of independent installation of a heated floor, when the heating cable was purchased separately from the thermoregulatory device, when connecting it, it is necessary to determine maximum power consumed by the heater. If it is less than that allowed for switching by thermostat contacts, then the cable is connected directly to the device. If the heater power exceeds the maximum permissible switching power, then it is necessary to install an intermediate magnetic starter, the contacts of which will turn the cable on and off.
- Connecting the cable to and the temperature sensor to the thermostat, and the temperature control unit itself to the network, is carried out in accordance with the installation instructions for the specific model.
- After connecting the heating cable and the wires of the remote sensor, perform a test switch on of the device.
Test sequence
The advantage and comfort of using heated floors is unlikely to be fully experienced if the installation and connection of the temperature control device is carried out incorrectly or with defects. In this case, trial activation and verification are a very important step.
They are carried out under the control of the home owner, who must be sure that the electric floor heating system can subsequently be left unattended.
The check and test run sequence is as follows:
- check the reliability of contact connections;
- the unit is supplied with supply voltage from a household network with a voltage of 220.0 volts;
- set the minimum temperature value on the control panel of the device;
- turn on the toggle switch to supply voltage to the heating element;
- set the maximum temperature regime, and a characteristic click should be heard in the device, indicating the closure of the switching contacts;
- During the day, the reliability of operation in various modes is checked.
 Device and connection diagram
 Connecting an electronic thermostat to a hydronic floor heating system
When using a thermostat to control a underfloor heating system, it controls the temperature and is the switch for the servo drive that controls the flow hot water. General scheme Installation of the thermostat is similar to the sequence of installing a thermostat for an electric heated floor. However, there are certain nuances here.
The sequence of installation operations for a water heating system is as follows:
- The remote temperature sensor is installed in close proximity to the control unit, at a height of 1.0...1.2 meters above the floor level.
- Lay circuits to power the thermostat and connect the temperature sensor to the device;
- If electrical control of the servo drive is provided with a wired connection directly from the device controller, lay a cable from the servo drive to the thermostat;
- If the servo drive is controlled wirelessly, adjust the radio control unit;
- Checking the temperature in different zones living space is carried out using a conventional thermometer. To do this, set the thermostat to the desired temperature mode and after 2…3 hours measure the temperature near the device and in the place furthest from it. The thermometer readings should have minimal differences.
In conclusion, it should be noted that the majority modern models thermostats are universal devices. They can be successfully used not only for heated floors, but also for automating the operation of electric boilers.

In underfloor heating control systems, the role of the control unit is played by a thermostat - a device that processes information received from a temperature sensor and, in accordance with a given mode, turns the floor heating on or off.
At electrical system underfloor heating, thermostats are installed in mandatory. Installing a thermostat in a water heated floor system is not necessary. But, if the floor is an additional heating measure, and the temperature of the coolant at the entrance to the circuit is above 50 degrees, installing a thermostat will solve the problem of room overheating.
Types of thermostats
Thermostats for any underfloor heating system can be:
- programmable, working according to a pre-established, including complex program;
- without software control.
Changing modes on non-programmable thermostats is done manually, using a rotary control (mechanical adjustment) or buttons (electronic digital).

Programmable thermostats are more expensive and more difficult to control, but they can save significant energy resources by turning off floor heating or lowering its temperature at night or during the day when heating is not needed.
Mechanical non-programmable thermostats are controlled by simply turning the knob to the specified level. Electronic digital - using buttons, touch panel or remote control. The price of non-programmable thermostats is lower due to the extremely simple logical part.
According to the installation method, thermostats are:
- built-in - they are installed in a special recess in the wall;
- overhead - they are attached to the wall using screws or self-tapping screws.
The choice of installation type is a matter of taste, but it does not affect functionality.
Temperature sensors
The sensors are a thermocouple made of two wires that changes the resistance of the circuit when heated. The wires are connected to the corresponding terminals of the thermostat. Sensors are:
- remote;
- built-in
Remote sensors are divided into floor or air temperature sensors. The first ones are installed simultaneously with the installation of heating elements directly under finishing coat, the second - in a place convenient for measuring air temperature. Built-in sensors are located right inside the thermostat. Some thermostat models have both types of sensors.
In the bathroom and kitchen, it is better to install thermostats with a floor temperature sensor - the air in these rooms can be heated by a stove or hot water, but the floor will remain cold.
Connecting a thermostat to electric heated floors
Electric heated floors are made using a high-resistance heating cable or infrared film. They are laid on a specially prepared base, after which the floor is screeded and the finishing coating is laid.
Thermostat connection technology:
- Before installing the floor, it is necessary to determine the location where the thermostat will be located and plan its connection to electrical network. To connect the thermostat, a voltage of 220 V is required alternating current, that is, you can connect it to a regular outlet or to a separate cable through a circuit breaker.
- When laying the floor, choose a location for the temperature sensor. It should be located near the thermostat, on an area of the floor free from furniture.

- For infrared floors, the sensor is placed on the reverse side of the film and connected to the wires going to the thermostat.
- For cable heated floors, poured concrete screed, the sensor must be placed in a metal corrugated pipe, isolating it from concrete. This measure is necessary for easy removal and replacement of the sensor in the event of its failure. A sensor embedded in concrete cannot be easily removed. The pipe is led to the wall on which the thermostat is installed.
- After laying the floor, begin installing the regulator. In the selected location, prepare a recess in the wall according to the dimensions of the built-in thermostat housing or make markings for attaching the overhead thermostat. Remove the front panel and secure the regulator in place.
- Compare the permissible switching power of the thermostat contacts with the power of the heating cable or infrared floor. If it is less, an additional magnetic starter with a coil rating of ~220V is installed. In this case, the heating cable circuit is connected to a 220 V power supply through the contacts of the magnetic starter, and the starter coil circuit is connected to the output from the thermostat.
- If the switching power of the thermostat contacts is sufficient, then the heating cable is connected directly to the output from the thermostat.
- Connect the sensor circuit to the terminals specified in the passport or instructions.
- Connect the 220 V power supply to the appropriate terminals: they are usually designated as L or F - phase and N - zero. Phasing must be observed. You can determine it by the color of the wire: if the cable is new and laid according to the rules, then the phase wire has black, brown or white insulation, and the neutral wire has blue insulation. If you connect the thermostat to a common outlet, the phase is found using a voltage indicator or an indicator screwdriver.

- Check the functionality of the thermostat:
- 220 V power supply;
- Set the minimum temperature value on the thermostat;
- Turn on the floor heating with a toggle switch;
- Change the temperature mode to maximum by turning the knob or using buttons - a click should be heard, notifying that the heating circuit is closed.
Thermostats for water floor heating systems are a device for controlling a servo drive that regulates the flow of coolant into the heating circuit. They can be either electronically or manually controlled, while such control systems usually use sensors for measuring air temperature rather than floor temperature, due to the high inertia of heating.

- The sensor is installed at a height of approximately 100-120 cm above the floor level on the wall, possibly next to the thermostat. The wall should not be subjected to additional heating from heating radiators.
- Install the power supply circuits of the thermostat and the sensor circuits.
- If a thermostat with electrical connection with a servo drive is used, lay a cable to its control circuits.
- When using a radio-controlled controller, adjust it.
- The operation of the control system is checked using an external thermometer: the desired mode is set on the regulator and the temperature is measured at the location where the sensor is installed for several hours. The temperature should not fluctuate significantly.
All work on connecting electrical circuits must be carried out when the circuit breaker– this is the key to your safety!
With the onset of cold weather, many begin to think about additional heating of your home. Since with the beginning heating season, as a rule, begin renovation work in places where heating mains break. Or do you have thoughts of switching to electric heating, as an additional alternative for country house. In this article we will talk about a temperature-controlling device - a thermostat, namely, we will talk about how to install and connect the thermostat to infrared heater.
Installation nuances
We will not go into the types and types of regulators, or arrange comparisons and tournaments. All of them are good in their own way and will fulfill their purpose, serving faithfully. The first thing you want to pay attention to is the installation location. Doesn’t depend on what type of heaters you have: infrared, panel, convection.
Installation of a thermostat with an air temperature sensor is prohibited in the following places:
- in close proximity to heaters;
- in places where there is a draft;
- in the heating zone of infrared emitters.
All these places are unsuitable for placing a thermostat, since when located near the heater, the air next to it will heat up to the desired temperature earlier, which will lead to false operation, as a result of which the room will not heat up to a comfortable temperature.
If you install the thermostat in the heating zone of the IR heater, its body will heat up earlier and distort the sensor readings. In places where there is a draft, the sensor will not show desired temperature and heaters will overheat the room, consuming excess electricity. The height of the temperature sensor should be placed in the comfort zone, at a level of 1.5 meters from the floor.
Connection diagrams
Always, before installing and connecting the thermostat, read the instructions and passport data for the device. Since the manufacturer indicates the required cable cross-section and provides a connection diagram for its products. If you deviate from the requirements and save on wires and thermostats, there is a high probability of equipment failure or fire hazard.
Connection diagram of the thermostat to an infrared heater with a power of up to 3.5 kW:

If the room is heated by a group of heaters up to 3.5 kW, then the connection diagram will look like this:

If you are the owner of a three-phase network and heating is carried out by a group of heaters with a total power of more than 3.5 kW, then a magnetic starter is added to the control circuit, which is controlled by a thermostat:

This is the principle used to install a temperature controller. As you can see, there are some features in installing and connecting the thermostat, so it is important to first read the instructions from the manufacturer and then proceed with the main process.
Room thermostat
A thermostat is an automatic device necessary to regulate the operation of boiler equipment. It reads the air temperature in the room and gives a “command” to the boiler, reducing or increasing its power. Modern boiler equipment, as a rule, has built-in programmers. But there are situations when you have to connect additional equipment yourself. Let's look at how to connect a thermostat to a gas boiler.
Adjusting the operation of boiler equipment
Regulate work gas boiler can be done in two ways - manually or automatically using a room thermostat. Let's look at how this happens in practice. The degree of air heating is affected by the temperature of the coolant in the system. Increasing or decreasing it provides a comfortable microclimate with the best temperature indicators.
After the coolant reaches the set temperature, the boiler turns off. When the indicator decreases, it turns on. If the temperature delta changes outside and inside the building, the boiler operation will have to be reprogrammed. These manipulations are carried out throughout the heating season, so manual adjustment is not the most convenient option.
Note! Connecting a room programmer allows you to completely solve the problem. All temperature data will be read by sensors, and the boiler will operate according to the specified program.
Installing a programmer allows you to solve another problem important problem. With manual adjustment, the boiler operates in the mode of constant short-term on-off switching. The start-up is carried out for a short period of time - about 10 minutes. Coolant circulation in the system is usually ensured pumping equipment. Moreover, it will work regardless of whether the heater is turned on or not.
All this significantly increases energy consumption. In addition, this mode of operation is not in the best possible way affects the durability of the unit.
What does a thermostat do?
A thermostat is an automatic programmable device. The user sets it to a comfortable room temperature. When the temperature drops, the programmer automatically turns on the boiler. The response threshold may be different and depends on the model of the device. On average, the sensors are triggered when the temperature drops by 0.25 degrees.
After the boiler automatically turns on, the coolant begins to heat up and the air temperature rises. When the specified parameters are reached, the programmer turns off the boiler. At first glance, it may seem that there is no difference with manual control. In fact, there is one important difference that has a significant impact on the efficiency of heating. When turning off the boiler, the thermostat will automatically turn off the circulation pump.

Schematic diagram
The equipment will be restarted after the air temperature reaches the sensor response threshold. Since the room thermostat reacts to the temperature of the air, and not the coolant, the frequency of boiler switching on is significantly reduced compared to manual adjustment. This is explained by the fact that heated air cools much more slowly than the water in the system. Speaking in simple language, it is not so important how much the batteries cool down - as long as there is the right warmth, the boiler and pump will not turn on.
The boiler will not turn on in other cases:
- Heating the room by the sun's rays.
- Reducing the temperature delta.
- An increase in the number of people and, as a result, an increase in air temperature.
- Gaining heat through enclosing structures, etc.
As the practice of using thermostats has shown, they can save up to 30% of energy. With such indicators, we can talk about an energy-efficient heating system, reducing the cost of ensuring home comfort and saving fuel.
Installation and connection

Connection diagram
Experts recommend installing room thermostats in residential areas. Their installation, for example, in the kitchen, in the hall, in the boiler room will lead to disturbances in the operation of the system. It is advisable to choose either the coldest room, for example, a corner room, or the room where people most often gather. a large number of of people.
There should be no heat sources near the thermostat - radiators or additional heaters. It should not be hit by straight lines. Sun rays. Not the best place and for installation in a draft. You need to be careful when installing regulators near electrical appliances that emit a considerable amount of heat. All this is so-called thermal interference that interferes with the normal operation of the programmer.
The boiler is turned on and off using a relay. Modern gas boilers Regardless of their manufacturer and features, the models have connection points for a thermostat through which heating and cooling are controlled. You can connect the device using the terminal on the boiler in the right point or using the included thermostat cable. The method of connecting additional equipment can be found in the technical data sheet of the boiler, which contains not only a description, but also all the necessary diagrams.
The thermostat is connected in accordance with the recommendations of the heating unit manufacturer. As a rule, in technical documentation There is a corresponding section for the boiler. In general, installing an additional device does not cause difficulties, so you can do it yourself.
Settings
After connection, the device must be configured. This is where the instructions for the thermostat will come to the rescue. As a rule, on the front panel of the programmer there are buttons with which it is configured, as well as microswitches. Programmable hardware requires energy to operate. Thermostats operate on regular batteries.

Room mechanical
Using switches you can control:
- Heating and air conditioning.
- Sensor response delay time. For example, in the event of a short-term draft, the sensor will detect a decrease in temperature, as a result of which the boiler should turn on. The response delay will allow you to avoid false activations.
- Temperature fluctuations. For example, temperature fluctuations are set to 0.5 degrees. This means that the device will turn on the boiler when the parameter drops by 0.25 degrees, and turn it off when the value is exceeded by the same 0.25 degrees.
Using the buttons, the optimal and economical temperature is set. The optimal (comfortable) temperature will be maintained during the daytime. At night, the indicator will decrease, providing savings and preventing excessive fuel consumption. Thermostats have preset programs. If necessary, the user can select one of them for normal operation heating system. The number of such programs varies depending on the programmer model.
Advantages of automation
Automation for boiler equipment is the choice of people who need energy efficient system heating. Installing the cheapest programmer will provide savings of at least 15%.
In addition to this, automation has many other advantages:

Control Panel
- Solving the clock problem heating device- unreasonably frequent switching on and off.
- Setting the exact temperature regime in terms of time - optimal/economical.
- Easy to install and configure.
- Facilitation of boiler operation.
- Increased system reliability.
- Ability to set fine settings.
Only the most are listed here obvious advantages automation. Their practical advantages can only be learned during operation. The only thing that cannot be ignored is that it is not advisable to save on installing a thermostat. This simple and inexpensive equipment will allow you to significantly save on heating costs. For cold regions of Russia, such savings are very significant.
Conclusion
Thermostat - important element autonomous systems heating. It allows you to provide automatic operation the entire network and avoid excessive fuel consumption. This simple device is the key to long-lasting operation of both the boiler and the entire utility network. Installing a thermostat is not difficult. Based on the descriptions and diagrams given in the instructions for the boiler and automatic device, you can connect and configure it yourself, without turning to specialists.