Any complex technical equipment working resource is limited. And with an increase in the intensity of its operation, the risk of its failure increases. However, every owner has the power to reduce the number of such emergency situations if he strictly adheres to the rules of operation and maintenance recommended by the manufacturer. In any case, you should be prepared for the fact that, at a certain period, problems with the device will still arise. Malfunctions that may occur in the operation of the trimmer may be different character. However, in some cases it is quite possible to repair the trimmer yourself.
Electrical problems

- the mechanical part that transmits torque to the trimmer head;
- electric motor;
- power cable.
In this case, all problems that may arise with this equipment can be presented in the following groups.
Mechanical problems
Main function when using the device placed on the trimmer head, in which the cutting surface is made of fishing line. In most cases, the device fails due to problems with its supply.

If failure petrol trimmer is associated with problems in the mechanical part, then the repair technology will mostly repeat the work carried out in relation to electric models.
Electrical damage
 To repair electric trimmers, you need to prepare the appropriate tools:
- indicator screwdriver;
- multimeter;
- blowtorch.
Find out when visual inspection, what caused the problem is quite difficult; in most cases, only the most obvious faults can be determined “by eye”.
Regardless of the nature of the malfunction, this in any case leads to the engine stopping.
- If there are signs of damage power cable, then you will need to think about installing a new one.
- If the problem is in the socket, then in this case you need to make sure with an indicator screwdriver that this is really the case. If your fears are confirmed, you should choose a different outlet to connect to.
- Engine failure may be due to damage to the fork. In this case, it must be disassembled and replaced with a functional product.
- Sometimes problems can be related to the control knob. First you need to make sure of this, for which use an indicator screwdriver: if one of the wires breaks, the contact will not close. In this case, the damaged wiring is replaced.
- The motor stator winding can also cause the motor to fail. First, check with a multimeter. For this purpose the measuring the device must be switched to operating mode with minimal resistance, and then its probes are connected to graphite brushes. If there are no resistance readings, then based on this we can conclude that the winding has burned out. The repair will consist of installing a new engine. Usually with the search for the necessary spare parts for electric trimmer no problems arise.
- Also, the engine may fail as a result of a break in one of the contact connections. If there are no signs of damage to the winding, it is necessary to check all connections using a multimeter. When a damaged contact is detected, you need to solder it yourself.
 Equipment of this type is characterized by a more complex structure, since it provides not only a drive, but also a number of other elements: gas distribution system, fuel tank and control.
When considering mechanical damage, it should be taken into account that this includes filter clogging. The operating requirements stipulate that they must be changed during regular maintenance of the device.
Extremely It is undesirable to opt for models from little-known manufacturers, since the level of their implementation is often quite low. Considering that components for gasoline trimmers are not offered in every store, it may be difficult to purchase them.
Fuel supply and ignition system
In most cases, malfunctions arise precisely in this area, and each owner can fix such problems with his own hands.

Engine malfunctions
 If the failure of the trimmer is associated with a non-working engine, then in this case it will not be so easy for the owner to understand what caused the problem and how it can be fixed. It’s good if the device is still under warranty, in which case you can take the trimmer to a repair shop, whose specialists will handle this task fairly quickly and efficiently. Among the causes of engine failure that are often identified and least associated with difficulties in eliminating the causes of engine failure is the destruction of the piston rings. You can verify this by removing the cylinder head and piston.
Conclusion
The owner of a gasoline or electric trimmer should always be prepared for the fact that at some point this equipment will require repairs. However, it is not always the right decision there will be an appeal to service center. Often the causes of the malfunction can be quite simple, which can be eliminated at home. The main thing is to know where to look for it.
However, it is best not to solve such problems, but to prevent their occurrence. For this Manufacturer's recommendations for use and care must be strictly followed. behind the trimmer. Then situations when you have to think about repairing a gasoline or electric trimmer will arise much less frequently. And this will help the owner save a lot of time, effort and money.
Trimmer, both electric and motorized internal combustion(ICE), is an indispensable tool in summer and autumn period for owners of dachas and private houses. With its help, weeds, small bushes are easily removed and the lawn is trimmed. But, like any equipment, trimmers fail at the most inopportune moment. To troubleshoot problems with your own hands, the user of this equipment first needs to determine the cause of their occurrence.
With a lawn mower and an electric trimmer, if we do not consider breakdowns associated with the bar and the mowing head, malfunctions mostly occur in the engine area.
Gasoline trimmer breakdowns
Typical breakdowns of a gasoline trimmer that owners of this unit most often encounter are the following:
- engine breakdown;
- problems with the carburetor;
- problems with fuel supply;
- muffler malfunction;
- gearbox failure;
- the starter is broken;
- problems with the air filter;
- The breather on the gas tank is clogged.
Malfunctions of electric trimmers
Since the design of an electric mower is much simpler than a motor trimmer, there are few reasons for its failure.
It should be noted that it is better to entrust the elimination of some of them to a specialist.
Basically, the trimmer stops working normally in the following cases:
- malfunction electric cable;
- control button is faulty;
- burnt out motor stator winding;
- broken contact connections on the engine.

Why does the gasoline trimmer not start?
The reasons why a gasoline trimmer stopped starting may be different, so it is necessary to carry out a step-by-step diagnosis of the device.
Fuel tank (fuel quality)
Remember that before starting the unit you must always checking the availability and quality of fuel. IN in this case You shouldn’t be greedy and save money, and don’t be “clever” about the amount of oil you add. Everything must be done in accordance with the manual supplied with the device, since if the piston group fails, replacing it will cost about 70% of the total cost of the trimmer. Fill with fuel in the expectation that you will completely use it up when performing the work. . Gasoline remaining in the tank loses its properties after some time and can harm the engine.. Therefore, do not prepare the mixture for future use or in large quantities. If the lawn mower has trouble starting, try draining the “old” fuel from the tank and refilling it with a freshly prepared mixture.
Important! Filling the device with fuel, the origin of which is unknown, is fraught with danger negative consequences. Gasoline must be of high quality, purchased at a gas station, and its grade must be at least AI-95.
Candle and candle channel
So, you changed the fuel, but nothing changed, and the trimmer still won't start. In this case, it is worth checking the spark plug channel to see if it is filled with a combustible mixture. Users often translate air damper to the “OFF” position when starting, and when the engine starts, do not turn it to the “ON” position, after which it stalls. Further, an attempt to start the internal combustion engine again leads to the spark plug being flooded with gasoline, and starting becomes impossible. To diagnose and fix possible problem in this node, do the following.
- It is necessary to unscrew the spark plug, wipe it well and dry it. When installing a spark plug into an internal combustion engine cylinder, it must be dry.
- Drain any accumulated fuel from the combustion chamber. This is done through the hole from which you unscrewed the candle.
- If there is carbon deposits on the spark plug electrodes, it must be removed either with a thin file or a nail file.
- Do not forget to set the gap between its electrodes before installing the part in place. The gap on the spark plug should be 1 mm. You can use a coin as a feeler gauge to check the gap.
- Next, reassemble the unit, read the starting instructions and try to start the engine again.
If the internal combustion engine does not start, you will need to check the spark. For this:
- unscrew the spark plug;
- put the cap of the high-voltage wire on it;
- touch the metal part of it to the cylinder body (to ensure contact, you can insert a tubular wrench) as shown in the figure below;
- Pull the starter cord until the engine turns several times.

Normally, each time the piston pumps, a spark should jump between the electrodes of the spark plug. If there is a spark, then the reason that the internal combustion engine does not start must be looked for in other components of the device.
To better understand the process of how to test a spark plug for the presence of a spark, you can use this video, where the test is shown using the Soyuz lawn mower as an example.
If there is no spark, then at the beginning check the cable connecting the spark plug to the coil - perhaps this is the reason. You can ring it using a tester. If a circuit break is detected, the high-voltage wire will need to be replaced.
Also, the reason that the spark has disappeared may be ignition coil malfunction(magneto). The figure below shows what a coil (magneto) from a Patriot gasoline trimmer looks like.

To exclude a malfunction, you will need to use a tester to check the trimmer magneto, namely, its primary and secondary windings. On the primary winding, the resistance should be in the range from 0.4 to 2.0 Ohms. If the device shows 0, this means that a short circuit has occurred in the winding, and if infinity is a clear sign of an open circuit. The resistance on the secondary winding should be in the range from 6 to 8 kOhm.
On some coils it can reach a value of 15 kOhm.
If your lawn mower does not start well or immediately stalls after starting, you should pay attention to air filter, since it may be clogged, as a result of which air does not enter the combustion chamber and ignition of the fuel does not occur. To check if the problem is in the filter, remove it and try to start the engine. If it works, then the reason has been found. The filter must be replaced or thoroughly washed and dried before installation. In case you find oil in air filter, it must be washed with gasoline, wrung out well and dried for at least 2 hours before reinstalling.

If the unit still does not start with the air filter removed, it is recommended to check the fuel filter.
Fuel filter
This filter cleans the fuel from possible contaminants. If it is clogged, then gasoline does not enter the cylinder, and, accordingly, the unit does not work or stalls after starting. The fuel filter is located at the end of the intake hose that is located inside the fuel tank. To get to the filter, you need to remove the plug with the tubes coming out of it.

When removing the plug, the intake hose may become detached and remain in the tank. It is removed using tweezers.
Next, remove the old fuel filter from the hose and put a new one, purchased in advance, on it. You can also clean the fuel filter, if you don't have a new one. The filter must be secured to the hose using a spring clamp.

Install the intake tube onto the plug and insert the latter into the tank.

It should be noted that in some trimmer models the intake hose is not located on the plug, but inside the tank. You can remove it using tweezers or a hook bent from wire.

Breather is check valve, which is designed to equalize the pressure in the gas tank. If it is clogged and does not allow air to pass towards the tank, then a vacuum forms inside the fuel container and fuel stops flowing into the carburetor. To check the serviceability of the valve, remove the hose that goes from the reservoir to the carburetor. If gasoline does not flow out of the tank, it means the breather is clogged.
Trimmer users often wonder: where is the breather? This valve is usually located in the gas tank cap and looks like the following picture.

Cleaning the breather is very simple: disassemble the valve and wash all its components. In some lawn mowers, this valve may be located directly on the fuel tank. It will not be possible to find it right away, since it is hidden from view under the starter housing. This breather can be cleaned using a regular needle.
The reason that the trimmer has significantly lost power, and when trying to increase engine speed, it gains them slowly, is often a clogged exhaust channel through which exhaust gases exit the combustion chamber.

It is necessary to remove the muffler so that no fumes get inside the cylinder. Next, clean the exhaust channel of carbon deposits.
This must be done very carefully, preventing carbon deposits from entering the combustion chamber.
After this procedure, the weak power of the unit and the slow increase in the speed of rotation of the mowing head will no longer frustrate you.
Insufficient compression
If the compression is insufficient, then in most cases it will not be possible to start the engine. To check the compression, you can use a car compression tester.

What compression should it be? Normally, compression should be not lower than 8 kg/cm 2. Although, even at 8 kg/cm2, some engines do not idle and stall because fuel is not pumped sufficiently. If your lawn mower does not pump above 8 kg/cm2, you will have to check the cylinder, piston and rings.
Also, poor compression may be due to loose carburetor. Check if it is wobbly. If so, tighten the fasteners holding it in place well. Also, if the carburetor is not screwed on properly, you may notice that gasoline drips during operation.

Electric trimmer vibrates
Many users of mowers have noticed that after some time after the device starts operating, it begins to vibrate strongly. Some trimmers, mainly more expensive models, have an anti-vibration system in the form of shock absorbers located between the engine and the rod. But in some cases, even this cannot save you from strong vibration. The reason that strong vibration appears in the trimmer may be a small amount or complete absence of lubricant on the hard or flexible shaft, located inside the apparatus boom.
Replacement hard shaft lubrication happens as follows:
- unscrew the gearbox located at the bottom of the rod;

- after removing the gearbox, you will see the end of the shaft, which you need to pull to remove the part;

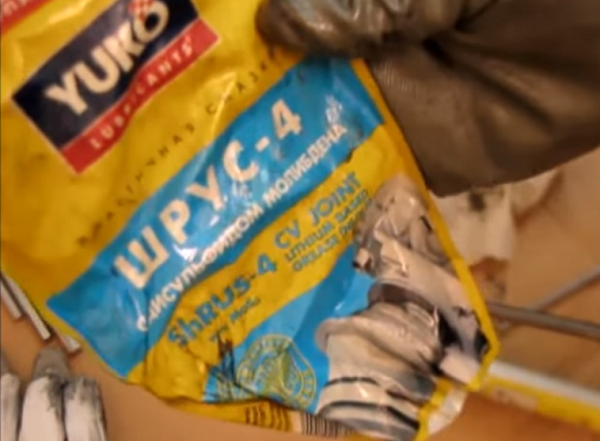
- after removing the shaft, it must be generously lubricated with special grease “Shrus-4” or regular grease “Litol-24”;

- do not apply a large number of lubricate the shaft and spread it evenly along the entire length of the part, including the splines at the ends of the rod (if they have worked together, the shaft will have to be replaced);
- After lubrication, insert the shaft back into the rod and place the gearbox in its original place.
Flexible shaft lubrication is done as follows:
- unscrew and remove the mowing head;
- remove the rod from the electric motor by unscrewing a couple of bolts;
- pull out the flexible cable from the rod;
- Lubricate the cable along its entire length.
This is done like this: first you need to lubricate the end of the cable, and then insert it into the rod, after which, as it moves inside the pipe, you should apply lubricant to the part and distribute it evenly over the surface. Then insert the rod with the flexible shaft into Electrical engine and secure it.
If lubrication does not help and vibration continues to appear, you will need to change the flexible shaft.
The trimmer gets very hot
Overheating of the trimmer can occur for many reasons:
- gasoline does not have the same octane number as indicated in the instructions for the unit;
- the proportions of gasoline and oil were not observed during preparation of the fuel mixture;
- the mixture of fuel and oil was prepared a long time ago (the mixture cannot be stored for more than 2 weeks);
- the trimmer operates beyond the time specified according to the instructions;
- a low-power trimmer is used on thick and hard grass, the device works with overload and heats up quickly;
- has moved towards the rod or the cassette cover has become stuck.
The latter happens if you set unsuitable mowing head for the machine, or when the axis moves inside the rod. These changes make it harder to rotate, the load on the engine increases, and it overheats.
Buyers' Choice 2018
Trimmer ECHO SRM-2305SI
Trimmer ECHO SRM-350ES
Trimmer Hitachi CG22EAS
Trimmer BLACK+DECKER GL8033
Trimmer Hammer MTK25B
At first glance, a simple device for mowing grass using a two-stroke engine has fine tuning. Repairing a lawn mower should be entrusted to a specialist or you should study the equipment yourself using the instruction manual. Maintenance Braids need to be maintained. Lubricating the gearbox, replacing the fishing line, and sharpening the teeth can be done on your own.
Petrol mower malfunctions and how to fix them
 Any type has a hollow rod in which a connecting cable is placed between the motor shaft and the lower gearbox, which transmits rotation to the working element with cutting tool. At the top there is a carburetor and a motor, at the bottom there is a gearbox and a working tool covered with a casing. In the middle part there is a transverse handle in which control buttons are located. To unload the hands, there is an unloading belt that holds the bar with the operator’s torso.
When choosing a lawn mower, it is preferable to have a device with a two-stroke engine rather than a four-stroke one. A two-stroke engine is more maneuverable and easier to repair. With a four-stroke unit, the vibration level is lower.
They follow this, repairing a lawn mower consists of troubleshooting;
- the engine does not start;
- the cutting mechanism does not gain momentum;
- the engine stalls;
- the gearbox gets hot;
- an extraneous knock is heard, strong vibration of the rod.
Before troubleshooting, you need to diagnose and identify the non-working unit.
It is important to know the lubrication points of the tool. Regular care and cleaning of the device after use will extend its service life. Before work, you need to tighten the mounting bolts, prepare fuel and fill the tank.
Chainsaw engine does not start
 If the mechanism does not start, it stalls immediately, check sequentially:
- is there fuel in the tank;
- serviceability of the spark plug;
- cleanliness of the air and fuel filter;
- cleanliness of the breather and exhaust channel.
It is necessary to refill with a freshly prepared mixture based on AI-92; the oil is injected for precise dosage with a medical syringe. This will help avoid expensive repairs chainsaws.
You need to make sure that the spark plug is working and produces a spark when it comes into contact with the body. In this case, it is necessary to dry the spark plug channel, clean and dry the part itself. You can change the candle, but the channel still needs to be dried for 40 minutes. Check the serviceability of the high-voltage wire; there may not always be contact. A malfunction in the ignition unit when repairing a lawn mower cannot be repaired with your own hands.
If the engine does not stall when the air filter is removed, this is the reason - replacement or cleaning is required. The fuel filter is replaced with great care. After checking the cleanliness of the breather, remove the muffler mesh and clean the exhaust channel.
 The next step will be where you have to find the fault and fix it, taking into account the tiny size of the parts. If the simplest operations do not bring results, in order not to disrupt the fine tuning of the system, it is better to entrust the repair to a specialist. Where to start diagnosing and how to properly repair a lawn mower with your own hands, watch the video:
Repair and lubrication of the lawn mower gearbox
 The role of the gearbox is to transmit torque from the motor shaft to the cutting tool through 2 toothed gears with different quantities teeth Torque is transmitted at an angle of 30 0. Lower speed cutting disc 1.4 times less engine speed. Gears must be clean and lubricated. There is a hole under the screw on top to supply oil to the teeth.
The lawnmower gearbox is lubricated at least once a season. If the work is intensive or there is extraneous noise in the lower unit, it is necessary to lubricate more often.
First, you should clear the area where the plug covers the hole from soil and grass. Unscrew the plug with the appropriate tool, it is included with the saw. We use grease from a tube. Select either a native lubricant from the manufacturer, or well-known high-quality compositions, such as Oleo-Mas, Litol -24, Azmol 158. We open protective layer tube and place the instrument on its side. Slowly rotating the knife, squeeze the lubricant into the gear housing. The gears, turning, spread the composition with teeth over the entire surface. You can also add lubricant using a special syringe.
Too little or too much lubrication can cause the gearbox to heat up. An audible knock and play indicate the destruction of the bearing or the ingress of dirt due to damage to the anthers. Bearings must be replaced using a puller, without using the heating method.
 If the gearbox wobbles and moves along the rod, it is necessary to replace the housing, or temporarily tighten the assembly with a clamp to secure it to the pipe. If the knife stops rotating, it means that the gears are not engaging - the teeth have become worn out or chipped. The pair will need to be replaced with complete disassembly of the unit.
Disassembly of the gearbox with removal of the shaft and bearing units cannot be carried out using heat. When heated, the metal loses its strength qualities and subsequently the unit becomes unreliable. To remove bearings, use a puller.
When replacing a gearbox, it is necessary to select a new unit, guided by:
- pipe diameter;
- drive shaft diameter;
- drive shaft cross section;
- method of securing protection
Caring for cutting units of lawn mowers
 The saw set becomes dull or wears out over time. Working with the tool becomes stressful, the load increases, and the quality of the swath deteriorates. Metal saw blades sharpen, plastic ones are replaced.
If the cutting tool is a fishing line, it gradually wears out, and a new material. The principle of operation of a cutter with a fishing line is the gradual unwinding of the reel under the influence of centrifugal force. When in contact with grass, the fishing line wears out and is fed out of the reel gradually. Special winding is needed in order for two cutting element came out at the same time and did not get confused with each other.
 The picture shows how to properly wind the fishing line onto a reel. Before winding a new fishing line you need to:
- Having unscrewed the nozzle, carefully remove the cover, holding the spring with your hand;
- remove pieces of old fishing line from the reel;
- measure 5 meters of new string and fold it in half;
- there are guides in the reel for 2 ends, hook the middle part to the notch and wind in the direction of the arrows for each half of the string;
- pass the remaining 20 cm through special recesses at opposite ends of the coil;
- install the spring and washers, bring the ends of the fishing line out, close the drum with a lid.
To better understand how to change the fishing line on a lawn mower, watch the video.
Replacing fishing line in the trimmer head of a lawn mower - video
The use of various electrical devices greatly simplifies the performance of many types of work, but unfortunately, all complex products break sooner or later. Electric trimmer failure
will lead not only to the inability to carry out work in the garden, but also to significant financial expenses for repairs. It is possible to significantly save money and increase your own knowledge of how this equipment works if you repair the trimmer yourself. Before you begin this type of work, you should carefully study the operating principle of this type of household appliance.
Electric trimmer: device and principle of operation
The electric trimmer consists of:
- Enclosures with electric motor.
- Detachable rod.
- Trimmer reel with protective cover.
- Shoulder strap rivets.
Electric trimmer device
A power cable with a plug is connected to the trimmer body, through which electric current is transmitted. In the cavity of the detachable rod there is a flexible shaft, thanks to which torque is transmitted to the trimmer coil. The device is turned on by pressing a button located on the handle of the device.
This trimmer design is the most common, but
If desired, you can find products powered by a battery, as well as with a bottom-mounted electric motor.
Do-it-yourself grass trimmer repair: common causes of breakdowns
The trimmer may fail when operating under heavy loads. This situation may arise when the treated area is overgrown with tall grass.

Mowing tall grass
When working in such areas, the engine may fail, the bearings may break, and the coil of the electric scythe may be destroyed. When operating in rainy weather or in heavily foggy conditions, the trimmer may “burn out” as a result of a short circuit.
Damage to this electrical device can also occur as a result of frequent use. If household appliance will be used in this mode, then after operating a certain number engine hours, it will be necessary to carry out mandatory repairs and preventative adjustments of many parts of the electrical device.
Start button repair
If the electric scythe does not show signs of life, then the electrical cable inside the handle of the body may have broken, or the power button for the electric motor may be faulty.

Start button
In order to diagnose the electrical system, you will need to disassemble the handle of the electrical appliance. The work is performed in the following sequence:
- The control handle is removed from the frame of the electric mower.
- The handle comes apart.
When access to the inside of the electric trimmer is provided, use a multimeter to measure the resistance of the electric trimmer power button. If there is no resistance after pressing, then this
The part must be replaced. It is also necessary to check the connection points of the power cable with the internal electrics located in the handle
device. The contacts should be checked for open circuits using a multimeter. Often such a malfunction can be determined “by eye”. After detecting a broken contact, it is enough to solder the damaged area to restore the operation of the electric trimmer.
In the absence of a multimeter, diagnostic work can be performed indicator screwdriver. For this purpose, you should turn on the plug electrical network and using this diagnostic tool
find the “phase wire” and thus check for the presence of electric current before and after the power button. If phase current is detected in another electrical circuit, then it is enough to install electrical plug on the contrary in the socket so that correct diagnosis can be carried out
trimmer malfunction. The second diagnostic option should be carried out with great care, since there is a danger of electric shock when checking the integrity of the wiring.
Checking the electric motor
If the device power button and areas internal wiring appear to be undamaged, then you should begin checking the electric motor. For this purpose, it is necessary to remove the housing cover, after unscrewing several screws with a screwdriver.

Checking the electric motor
The first thing you need to do after accessing the electric motor is to check the functionality of the brush assembly. If the brushes are worn beyond the limit permissible value, the electric motor may stop completely or operate unstably. In the case when the brushes and commutator are in in perfect order, you should start “ringing” the motor winding. In order to eliminate the possibility of breakdown in both circuits, you should alternately carry out
checking the stator and rotor of the engine. To perform this operation you must:
- Remove the motor from the electric mower.
- Turn the multimeter into resistance measurement mode and check all collector plates for breaks. When checking, there should also be no significant deviations in the readings of the diagnostic device.
- Check for breakdown of the rotor winding to ground. For this purpose, one probe of the multimeter should be connected to the “ground” of the rotor, and the other to any collector plate. The multimeter must be set to measure resistance greater than 1 MOhm. In a working motor, the resistance between the winding and ground should be very high.
- Measure the resistance of the stator winding. If there is no resistance, then in this case it can be stated that it is faulty.
- If the stator wiring is in perfect order, then a possible breakdown of it to the housing is checked, in the same way as when diagnosing the stator.

Trimmer motor
When checking in this way, in 90% of cases it is possible to determine the cause of the electric motor malfunction. It will not be possible to check for an interturn short circuit, which can only manifest itself during engine operation, but it is possible to diagnose such a malfunction
by indirect signs, which manifest themselves in a decrease in the power of the electric motor and its overheating. If the electric motor is equipped with a thermal relay, then such an electric scythe, with an interturn closure, will work for a short time, after which the trimmer will automatically turn off. In some cases, the thermal relay can cause a malfunction of the trimmer motor, therefore, in a set of test
activities, the thermal relay must be “ringed” using a multimeter or tester.

Digital multimeter
This is very simple to do: in good condition on a cold engine, the thermal relay passes electricity, V
In a faulty state, the electrical circuit will be open.
Problems with the performance of the electric scythe associated with broken wires are easily eliminated by soldering the contacts, but if the motor is “burnt out,” then you will need to perform a complex rewinding process, which can
Only be carried out by a qualified specialist. In many cases, it is much easier and cheaper to purchase new engine and install it in place of the burnt one. this work can be done independently
V reverse withdrawal the unit is in order.
If the trimmer's electrics are in good condition, then you should pay attention to other types of faults that may appear during operation of the electric scythe.
Mechanical problems with trimmer
If the electric motor of the device turns on, but the reel with fishing line does not rotate, the cause of such a malfunction may be a break in the flexible shaft transmitting torque. This problem especially often occurs when the electrical appliance is not properly maintained. For example, if there is no lubrication inside the rod of an electric braid, the cable will be subject to excessive friction and within a short time this part will fail. To replace it, it is enough to disconnect the upper part of the electric scythe, in which the electric motor is located, after which it will be possible to remove the flexible shaft from the rod.

Flexible shaft

Flexible Shaft Lubricant
If there are difficulties in removing the second part of the cable remaining in the cavity, the lower part of the braid with the reel and shaft is disconnected. The mechanism is assembled in the reverse order.

Undermount trimmer
Before installation, the flexible shaft must be thoroughly lubricated with grease to reduce the likelihood of repeated failure of this part.

Electric mower shaft bearing
Flexible shaft rupture can only occur in electric trimmer models with an overhead motor.
Electric scythes with a bottom engine do not have a flexible shaft, but malfunctions of such devices can manifest themselves in the form of destruction of the bearing of the main shaft of the electric scythe on which the reel with fishing line is installed.
Fixing such a malfunction is very simple; just replace the failed bearing with a new part.
Conclusion
At frequent use and improper care of the electric scythe, the listed malfunctions can appear with enviable regularity. To minimize the likelihood of breakdown, it is enough not to overload the device, lubricate the rubbing parts in a timely manner and do not work under high humidity. Despite some limitations when working with this device, unlike gas trimmers, malfunctions cannot occur in the ignition unit. And such a malfunction as “the trimmer motor immediately stalls” cannot exist in principle. Engine electrical device cannot stall, because it does not need to be started. To start, just press the power button, which is why many summer residents choose electric trimmers to care for the surrounding area.
A petrol mower is one of the main tools of a summer resident, used to quickly bring land plot in order. Acquire this weapon for mowing grass in the garden area and owners of private houses. The period of active use of lawn mowers and electric trimmers falls on summer period. Before using the tool, bring it into working condition: rubbing parts are lubricated, the cutting set is changed, poured into the tank fuel mixture. If the engine does not start at all or stalls quickly without gaining enough revolutions, then you have to look for the causes of the problems and eliminate the identified problems. To repair a lawn mower with your own hands, you need to understand its structure and the operating principle of its main components. This information can be found in the operating instructions supplied with the garden equipment by the manufacturer. mandatory. Check for such a manual when purchasing a chainsaw. An imported tool must be accompanied by instructions written in Russian.
A long tubular rod is attached to the gearbox of a two-stroke internal combustion engine. Inside the rod there is a shaft that transmits torque from the gasoline engine to the cutting mechanism. The line or knives rotate at a speed of 10,000 to 13,000 rpm. The protective housing of the gearbox has holes into which lubricant is injected using a syringe. For ease of use of the tool, the manufacturer equips it with a special adjustable strap that is thrown over the shoulder.
The cutting accessories are included with the lawn mowers:
- The fishing line, the thickness of which varies from 1.6 to 3 mm, is located in the trimmer head. When mowing grass, the line wears out. Changing fishing line is done quickly and easily in two ways: by winding fishing line of the same diameter onto a spool, or by installing a new spool with already wound fishing line.
- Steel knives with double-sided sharpening for trimmers for clearing the area of weeds, small bushes, and coarse grass. Knives differ in shape and number of cutting surfaces.
A U-shaped, D-shaped or T-shaped handle attached to the bar contains the trimmer control levers. The cutting mechanism is protected by a special casing. Household brush cutters are fueled with a mixture prepared from gasoline and oil, which is poured into the fuel tank. Device for semi-professional and household lawn mowers equipped with four-fold gasoline engine, slightly different. The refueling scheme is also different: oil is poured into the crankcase, and gasoline into the tank.
The measured piece of fishing line is folded so that one end is 15 cm longer than the other. We insert the loop into the slot on the reel and begin to wind in the direction indicated by the arrow
What to do if the engine does not start?
If you cannot start the lawn mower, then the first thing you need to do is check the presence of fuel in the tank and its quality. To refuel the tool, it is recommended to use high-quality gasoline purchased from gas stations, the grade of which must be no lower than AI-92. Saving on cheap fuel can lead to breakdown of the cylinder-piston group, the repair of which can cost a third of the cost of the brush cutter itself. It is equally important to properly prepare the fuel mixture of gasoline and oil. The proportional ratio of these mixture components is indicated by the manufacturer in the manual. You should not prepare the fuel mixture in large volumes, as its properties are lost during long-term storage. It is better to use a freshly prepared mixture.

When preparing the fuel mixture, pour oil into gasoline using a medical syringe, which allows you to accurately maintain the required proportion of components.
A dirty fuel filter in the tank can also interfere with the operation of the trimmer's engine. Therefore, if you have problems starting the engine, check the condition of the filter. If necessary, replace the filter. Do not leave the inlet pipe without a fuel filter.
The air filter also needs checking. If the part becomes dirty, remove it field conditions washed in gasoline and put in place. At the dacha or at home, the filter can be washed in water using detergents. After this, the filter is rinsed, wrung out and dried. The dried filter is moistened with a small amount of oil used to prepare the fuel mixture. Excess oil is removed by squeezing the filter with your hands. The part is then installed in place. Cover removed put back and secured with screws.

The air filter, washed in the fuel mixture, wrung out and dried, is installed in place in a plastic case and closed with a lid.
You can see how this procedure is done in more detail in the video:
If all of the above procedures have been carried out and the engine does not start, then adjust its speed to Idling, tightening the carburetor screw. The video posted at the beginning of the article focuses on this issue.
So, in order:
- Place the tool on its side so that the air filter is at the top. With this arrangement of the chainsaw, the fuel mixture reaches exactly the bottom of the carburetor. The engine will start on the first try if you remove the air filter before starting and pour a few drops of the mixture into the carburetor, then install the dismantled parts in place. The method has been tested in practice.
- If the first tip does not work, then most likely the problem is in the spark plug. In this case, unscrew the spark plug and check its functionality, and also dry the combustion chamber. Replace a spark plug that shows no signs of life with a new one.
- If the spark plug is in good condition, the filters are clean and the fuel mixture is fresh, then you can use the universal method of starting the engine. Close the carburetor choke and pull the starter handle once. Then open the throttle and pull the starter 2-3 more times. Repeat the procedure three to five times. The engine will definitely start.
Some people pull the handle so hard that they have to repair the lawnmower starter with their own hands. This is only possible if the cable breaks or the cable handle breaks. In other cases, it is recommended to replace the starter. This unit is sold assembled.
How to properly replace a spark plug?
The work order is as follows:
- Stop the engine and wait until it cools down.
- Disconnect the high voltage wire from the spark plug.
- Unscrew the part using a special key.
- Inspect the spark plug for replacement. The part is replaced if it is faulty, heavily soiled, or has a crack in the body.
- Check the gap between the electrodes. Its value should be 0.6 mm.
- Tighten the new spark plug inserted into the engine with a wrench.
- Install the high-voltage wire on the central electrode of the spark plug.
As you can see, there is nothing super complicated in this procedure.

A new spark plug for a two-stroke internal combustion engine of a gasoline spit is installed to replace old part, out of order
Why does the lawn mower stall after starting?
After starting, the engine may stall if the carburetor is incorrectly configured or misadjusted. By what signs can we understand that the reason really lies in this? It’s very simple, based on the vibrations that will be clearly felt when the mower is operating. You can adjust the fuel supply yourself by following everything that is written in the operating instructions for the tool.
The engine may stall due to a clogged fuel valve. The cause can be eliminated by cleaning it. If the lawn mower starts up and then suddenly stalls, it means that the supply of fuel to the carburetor is obstructed. Loosen the carburetor valves to ensure free flow of fuel in the required quantity.
Excessive air leaks may also cause the engine to stall. Increase engine speed so that air bubbles leave the unit's fuel system faster. Also be sure to check the integrity of the fuel intake hose. If found mechanical damage(cracks, punctures, etc.), replace the part.
How to clean and store the instrument?
During operation of the lawn mower, monitor the condition of the engine cooling system. The channels in the starter housing, as well as the cylinder fins, must always be clean. If you ignore this requirement and continue to use the brush cutter, you can damage the engine due to overheating.

Proper care of a gasoline scythe during operation allows you to use it for several seasons in a row without major repairs.
Allow the engine to cool before cleaning. Take a soft-bristled brush and scrub away any dirt from the outer surface. Plastic parts are cleaned with solvents, including kerosene, or special detergents.
At the expiration of summer season the lawn mower must be prepared for long-term storage. To do this, the fuel mixture is drained from the tank. Then the engine is started to exhaust any remaining fuel in the carburetor. The entire instrument is thoroughly cleaned of dirt and sent to “hibernate.”
As you can see, you can repair malfunctions of a household lawn mower entirely on your own. You should contact service departments in case of serious breakdowns. In this case, you should compare the cost of repairs with the price of a new lawn mower. It may be better to buy a new tool.