The decision to make the cesspool yourself remains perfect choice for a situation where it is impossible to connect to the central sewer system. Such a structure solves the problem of ensuring the removal of waste and sewage for a private home. The choice of this option is due to simple installation, easy maintenance and small financial investments required for construction and further operation.
The very structure of this simplest and most ancient sewer system is a depression dug and equipped with walls in the ground, intended for collecting and partially processing wastewater. Partially filtered liquid enters the soil below, and the accumulated residue must be removed periodically so as not to overload the container.
Installed above the recess light wooden construction After filling the hole, the upper part is removed and the remaining space is filled with earth. The accumulated elements undergo a process of decay and turn into compost. Planted here fruit trees will feel great in a fertilized area. And you can use the new building. 
But this method is clearly insufficient for the needs of a large building in which many people constantly live. In this case, for large volumes of waste it is necessary modern designs with walls made of various materials. Most often used for these purposes:
- brick is an excellent masonry option even for beginners;
- concrete rings, the delivery and installation of which requires special equipment;
- cost-effective method of arrangement from tires;
- metal barrels that prevent the side surfaces from falling off;
- The use of ready-made plastic barrels has a long service life - more than 40 years.
It is worth mentioning the convenient and modern version– use of septic tanks. These products are made in multi- and single-chamber modifications. The most complete and deep waste cleaning occurs in models equipped with several chambers. Purified water is suitable for watering gardens.
The construction of a cesspool involves the installation of two types - sealed and filtering. In the first case, wastewater accumulates until it is pumped out. The second provides for the presence of holes in the walls for partial penetration of waste into the ground. To carry out filtration around the tank, you will need to lay a gravel-sand layer with a thickness of at least 15 cm.
According to sanitary safety requirements, there must be at least 1 m of soil from the bottom of an infiltration-type structure to the groundwater table.
The purpose of such a recess is drainage from storm sewer and drainage.
At large quantities household waste There is always a danger of soil contamination, which can only be prevented by installing a sealed system.
Principles of design and preparation of waste pits
 A carefully designed project and competent planning will help to avoid problems during the construction process in terms of existing standards and rules. First of all, attention should be paid to the most important points:
- Safe in terms of sanitary requirements location.
- The choice of system type depends on the specifics of the site and housing construction.
- Determine the dimensions of the recess.
- Plan the technology of work in advance.
- Prepare appropriate materials.
Each of the items in the list has its own nuances, the implementation of which is very important for safe and reliable operation.
- The place where the structure will be located must be remote from fences, residential buildings, and wells. From the tank with drinking water, For example, the distance is maintained at least 25 meters, and from the house - starting from 5 meters.
- For existing relief irregularities Placement at the bottom of the site should be avoided. Flooding during heavy rains and melting snow threatens to contaminate the soil and groundwater. Construction technology is selected based on the characteristics of the soil in the surrounding area.
- Dimensions are primarily calculated taking into account the number of residents. The planned daily volume per person is 0.5-2.0 cubic meters. m of waste. The need to pay for each call of equipment used to pump out a cesspool after it is filled requires adhering to one more rule - making the volume of the structure a multiple of the capacity of the sewer truck.
- The problem of drainage drainage is solved using perpetual cesspool technology. Design feature This method consists of constructing two containers connected to each other by a special pipe at a certain slope. After filling the first tank, the liquid flows into the second. This technique allows you to significantly increase the area of soil for water drainage, and only fractions will accumulate in the main pit big size and feces.
- A do-it-yourself cesspool of a sealed design is a recess with a concreted bottom. The main advantage of such a device is complete isolation of sewage and the absence of any odors on the site and in the house itself. But relative the disadvantage is fast filling and frequent pumping, especially in the presence of washing machines and dishwashers, intensive use of the bath and shower.
A casual approach to planning and execution installation work threatens with the following consequences:
- unpleasant “aroma” inside the building and on the site;
- freezing of residual water inside the drain pipes;
- penetration of harmful substances into the soil.
Careful execution will create a favorable and comfortable environment for living and relaxing. You only need to clean the cesspools on time and periodically monitor the condition of the system.
Let's take a closer look at the construction features different types such a sewer system.
Construction of a brick cesspool
- as far as possible from any buildings;
- take into account the direction of groundwater flow;
- provide access for the sewer truck.
 Sizes are always an individual choice. There is no doubt that a deeper device will require less frequent cleaning, but one should never forget about the level of soil water. The bottom cannot be placed closer than 30 cm to them.
How to make a cesspool if water is close to its location?
Alternatives to the sealed type of device in in this case simply doesn't exist. In case of shallow depth, you can increase the length dimensions or use a design of several tanks. But digging more than 3 meters is not recommended, even in dry soil.
The standard option for a residential building with 4-5 people living in it is a depth and diameter of 3 meters.
Buy only red ceramic brick. Silicate and cinder blocks will get wet pretty quickly and will be unusable. Most best material- This is a burnt brick, rejected for construction due to its irregular shape.
The construction process consists of several main stages:
- Digging a pit is the most labor-intensive procedure. With manual work, two people can dig a 1.5 x 3 m hole in sandy soil within a couple of days. But clay soil will cause a lot of difficulties and will require the use of the services of hired workers or an excavator. The shape for the pit is usually chosen in the form of a glass with a slight expansion towards the top, which gives additional reliability.
- The foundation should begin with the process of backfilling the soil with gravel and sand. This layer is poured with concrete with preliminary installation of reinforcement. Usually the thickness of this layer is 15-20 cm and depends on the diameter of the pit.
- Wall masonry is done in half a brick at a size, and in brick - at large diameter . The proportion of cement and sand in the solution is usually 1:3 and 1:4. After completing this stage, bitumen mastic is applied to the walls.
- A ready-made pancake with a hatch hole of the appropriate size and a self-molded lid are used.
- Finally, the ceiling is covered with a layer of earth. with the hatch cover located slightly above ground level.
Video of arranging a brick cesspool:
Over time, any structure becomes clogged. Used for cleaning various ways. Biological products for cesspools remain one of the best methods provision accelerated decomposition waste and increasing the service life of such sewer systems.
How to make a concrete cesspool
The use of such elements will ideal option for the safety of soil and plants located near the wastewater storage area.
In the usual version, 2-3 concrete rings with a diameter of 1.5 m and a meter in height will be required. If a family of 3-4 people lives in a house, then to pump out the total volume of the structure of 4.5 cubic meters. We will have to call a special vehicle on average once a quarter. 
How to make a cesspool in a private house from concrete rings - sequence of installation work:
- at the required slope below the freezing point of the soil, the drain pipes leaving the building are laid and insulated;
- a pit is dug with a width exceeding the diameter of the rings by 80-90 cm. A 30 cm cushion of sand, fragments of brick or gravel is poured into the bottom of the depression;
- a crane or winch will be needed to lower the concrete elements;
- first, place the ring with the bottom, using a building level to avoid vertical and horizontal distortions;
- waterproofing layer from bitumen mastic applied to the internal surface and joints;
- the free space is filled up and thoroughly compacted;
- a slab of reinforced concrete and a metal or polymer cover is attached.
There is a high probability of accumulation of methane and sulfur gas in the container, released during decay. To display them, set ventilation tube with a diameter of 100 mm.
How to make a concrete cesspool video:
Instructions for making sealed and filtration cesspools
After selecting the location area for the drain tank and having all the calculations, you can begin excavation work. Using earthmoving equipment or manually a pit of the required dimensions is prepared. Usually, an excavator is used for such events, but the specifics of the site do not always allow special equipment to arrive at the required location.
In such a situation, you can use the old, proven method - install one ring in place and begin to remove soil from under the walls with a shovel. It is important to control the level of the product. After leveling the upper cut of the element with the soil level, another ring is set and soil sampling continues in a similar way.
To make a cesspool yourself, you will need to prepare materials for the walls, formwork boards and prepare the following components:
- sand and cement the right brand for mixing the solution;
- crushed stone and rubble for the manufacture of a filtration layer;
- reinforcement or rod useful for arranging the lid;
- corner or suitable metal for making a hatch with frame;
- waterproofing materials;
- suitable container and buckets for solution;
- mason's tools;
- plumb line, construction cord and level;
- set of bayonet and shovel.
For large-scale work, you can rent or ask your neighbors for a concrete mixer.
Decoration of cesspool installation sites
Mask the sewer from prying eyes will not be difficult due to the layer of earth with which it is covered. After this, there are many ways to decorate - sowing a lawn, laying out a flower bed, planting shrubs. Sewage hatches ennobled with stone and wooden elements. The owner of the site can show all his imagination and creative ingenuity in this process.
The photos below show examples of beautiful decor.
An excellent example of making a luxurious cover that is equipped with a septic tank for cesspools can be viewed in the video:
How much does it cost to make a cesspool on the site?
When determining the costs of constructing a sewer collector, one should proceed from the fact that equipping a small tank is not economically feasible. It is best to start calculating the total cost for devices from 3000 liters. Several major factors influence your financial investments. To make a cesspool the price of which matches your capabilities, you should analyze the following parameters:
- costs of materials for the selected type of device;
- prices for the services of specialists involved in construction.
 For example, let’s take a cesspool structure made of two rings of one and a half meters in diameter. These elements are supplied with a neck, the presence of which will allow you to completely hide the main part below ground level.
If you order turnkey installation, the cost estimate includes:
- A complete set of materials, including concrete preparation components, waterproofing and hatch.
- Delivery depending on the distance to the installation site.
- Digging and subsequent backfilling of the pit.
- Installation measures for installing rings.
- Concreting the bottom of the well.
On this moment all these stages will cost the customer 30,900 rubles.
By doing similar works on one's own professional builders We recommend paying attention to the following points:
- To fill a three-cube tank, you will need about one and a half cubic meters of soil. It can be left, and the remainder can be removed immediately after the foundation pit has been constructed;
- Having concreted the bottom, let the mixture sit for 10-12 days to achieve optimal strength;
- brickwork cannot be done very smoothly. It is hidden from view and performs the main function of keeping the soil from crumbling;
- for formwork it is best to take a profiled sheet or board;
- bayoneting the mixture used to fill the floor helps ensure good filling of the reinforcement cage;
- carefully compact and level the soil around the entire perimeter and on top of the well.
An extensive selection of designs allows you to build a device according to your financial capabilities and needs. One of the main conditions remains compliance with sanitary standards in terms of protection against environmental pollution.
The cesspool is still used, despite the emergence and active use of septic tanks, local treatment facilities. This is due to the low cost of arrangement and the possibility of using used materials. Digging a pit is carried out independently or using special equipment. First you need to select the appropriate type of device and ensure the pit is sealed.
A properly equipped cesspool functions for many years without requiring attention.
Types of cesspool installation for a private home
Available options:
- sealed pit (with a bottom);
- cesspool without a bottom.
In the first case, the wastewater ends up in a storage tank, which needs to be cleaned periodically. The pit with the bottom is well protected from leaks. Waste products and contaminated water accumulate inside. When the level of wastewater rises to a critical level, the pit is cleaned using a sewer truck. The frequency of such manipulations depends on the intensity of use of plumbing fixtures (toilet, bathtub, sink).
If the object is small (1-2 people live in the house), purchase a special small-sized container. It is sealed and made of polymer material.
This design is called a drive (available in the form of a plastic container). At facilities with permanent residence It is recommended to drain into a large pit. In this case, the depth of the structure should not exceed 3 m, otherwise it will be difficult to pump out wastewater.
Positive qualities of this type of structure:

Sump pit diagram.
- due to tightness, sanitary safety is ensured: the soil is not contaminated, the likelihood of leaks is reduced, provided that the finishing work is carried out correctly;
- a closed cesspool is installed in different types of soil.
A pit without a bottom has the disadvantage of a high risk of penetration of pathogenic bacteria into the soil and surface groundwater. This may be a consequence of a violation of construction work or operation of the structure.
Features of this version of the sewer system:
- the side walls prevent the penetration of contaminated liquid into the upper layers of the soil;
- instead of the bottom, drainage is installed, which is used as crushed stone or gravel.
The wastewater first goes through a kind of filter of small and medium fractions. Then they fall into the soil, which also traps pollution. Such sewer systems also require periodic cleaning, but they are carried out much less frequently.
It is necessary to install separate pits for wastewater from the sink/bathtub and waste products (from the toilet). This is due to the fact that water containing a minimum amount of insoluble inclusions drains faster through the drainage at the bottom of the pit.
To maintain the conditional cleanliness of such structures, bioactivators are used. They contain bacteria that accelerate the process of decomposition of contaminant fractions. As a result, almost all wastewater leaves through the drainage. Only sediment remains in the pit in the form of sludge containing insoluble particles.
Open drainage structures are not equipped in the following cases:
- clay soil on the site: water will have difficulty draining through such a sewer system, which is due to high density and soil fatness;
- close occurrence of groundwater: sewage does not pass through the soil, but immediately enters the water, polluting the environment.
Calculation of cesspool volume
The dimensions of the pit are determined taking into account the number of people living in the house. Their age plays a role. For example, it is generally accepted that for 1 adult there is 0.5 m³ of wastewater, for 1 child – 0.25 m³. To find out the daily volume, the indicated values are multiplied by the number of people. For example, if 2 adults and 1 child live in a house, the following is considered sufficient: 2*0.5 + 1*0.25 = 1.25 m³. The resulting value can be rounded up to 1.5 m³.
A more accurate volume can be found by multiplying the resulting value by the number of days before pumping.
For example, if a sewer truck is called once a month, then 37.5 m³ will be sufficient. If you round up, you get a total volume of the pit of 38 m³. It is necessary to take into account another margin - up to 10% of the obtained value. If it's too much big hole, you can make it smaller, but pumping will be performed more often.
The depth of the structure should be 2-3 m. It is not recommended to dig a hole less than 2 m, since it is necessary to allocate a meter space for the release of gaseous substances. In addition, it is important to take into account the likelihood of soil heaving, which can contribute to raising the drainage level and displacing runoff. The width is determined based on the initial volume of the cesspool and its depth.

Standards for placing a cesspool on a personal plot.
Choosing the location of the drain pit
The treatment plant and storage tank are installed on the site taking into account the norms and regulations described in GOST, SNiP.
- a sealed storage tank can be located at a distance of 5 m from a residential property (but this is permissible as a last resort, when there is not enough space on the site), drainage well settles further - from 25 m;
- 10 m are retreated from the neighboring plot to the cesspool;
- the storage tank or drainage well should be located at a distance of 30-50 m from the natural reservoir;
- there should be 15 m to outbuildings;
- the pit is dug at a distance of 2-4 m from the road.
To prevent wastewater from entering garden plot or a vegetable garden, you should retreat at least 5 m and only after that proceed to installation.
Construction of an independent sewer system

Scheme homemade septic tank made of brick.
To speed up the work, the option of installing a ready-made storage tank, for example a septic tank made from Eurocubes, is often chosen. However, a structure built with your own hands from brick will be cheaper.
A diagram of such a design:
- digging a hole in the ground;
- the walls and bottom are reinforced with bricks;
- a sewer pipe is installed on the side under the soil layer, it is located at a slight angle to speed up the movement of wastewater;
- the structure is closed with a lid and a hatch is provided for maintenance;
- in the upper part of the pit (in the side wall) there is a hole for connecting the ventilation duct.
A structure with a filter base is built according to the same scheme. However, in this case, a crushed stone cushion is formed at the bottom. There should not be a hard bottom that ensures tightness, as in the first case.
When choosing finishing material To protect the walls from wastewater, it is necessary to take into account the properties and degree of strength of the products.
For example, it is not recommended to use silicate or porous bricks. Such material will absorb moisture, which will not only lead to its destruction, but will also cause the contaminated liquid to spread outside the storage tank.
The best option for sewerage facility- burnt brick. It is durable and therefore can withstand the forces of soil heaving. In addition, baked clay brick is not a material with a porous structure. For this reason, it is better resistant to moisture.
If you plan to install drainage at the bottom of the pit, use a multi-layer structure: a layer of soil, sand, gravel or crushed stone. The recommended distance of the filter base from groundwater during the rainy season, when its level rises to its maximum, is 1 m. Sometimes holes are left in the walls of the well during laying, which will improve the filtration properties of the structure.
Digging a pit
Excavation of soil on the site is carried out in accordance with previously made calculations. Moreover, between the outer surface of the brick structure, which will be erected in the future, and the walls of the pit, a gap of up to 50 cm is left on each side.
If this is not done, the storage volume will decrease, since brick walls will have to be moved.
This measure allows for waterproofing on the outer sides of the structure. Even if baked brick is used, the structure is protected from prolonged contact with moisture. This helps to increase its service life.
Preparing the base of the container
The foundation of a sealed structure must be strong. For this reason, reinforcement is performed, and drainage is additionally arranged. If you skip one of the stages, the strength of the cesspool will decrease.
Instructions for making the base:

Installation diagram of a septic tank with a sand and gravel filter.
- A sand and gravel cushion is formed at the bottom of the pit. The total layer thickness is 200 mm. The sand is carefully compacted, which reduces the risk of subsidence of the base during the process of pouring and drying concrete. Gravel should also be compacted whenever possible (it consists of large fractions, so such material is more difficult to compact).
- The base is waterproofed. To do this, roll durable material, such as roofing felt, is placed at the bottom of the pit. It is laid with an overlap. Thanks to this, cement laitance will not get into the ground when filling the hole with mortar.
- A pre-prepared frame of steel rods with a diameter of 8-10 mm is laid on top of the roofing felt. It is recommended to use flexible strong wire for fastening. Welding will cause a deterioration in the properties of the material, resulting in a decrease in the strength of the structure. The cell dimensions of the reinforcing mesh are 100x150 mm.
Concrete bottom casting
To prepare the solution, use cement grade M300 and higher. Due to this, the strength of the structure increases. The prepared multilayer base is poured with a layer of concrete up to 150 mm thick. This is enough for the cesspool to withstand the impact of a large volume of wastewater.
Installation work can continue when the concrete has dried. If there is no time to wait 28 days, proceed to execution brickwork in 7-10 days.
During this time, the solution will set and harden enough to withstand a significant load without the risk of loss of properties.
Walling
In most cases bearing structures built using half-brick technology. For large pits, more reliable walls are erected: 1 or 1.5 bricks. To strengthen the structure, after completing the construction of the vertical partitions, the space between the storage tank and the walls of the pit is backfilled. A mixture of sand and cement is used.
There is no need to prepare the solution. It is enough to wait until sedimentary moisture begins to release, helping to strengthen the cesspool. The desired result is achieved when the cement-sand mixture is completely moistened. The result is a monolithic structure that will withstand the load exerted by wastewater even when the storage tank is full.
Application of waterproofing
Protection work brick partitions from moisture are produced as the masonry is completed. It will not be possible to protect the surfaces after construction is completed due to the small distance between the storage tank and the walls of the pit.
For waterproofing, coating and roll materials. Bitumen-based insulation is the most common. They use mastics and roofing felt.
It is recommended to cover the cesspool with coating-type materials. Roofing felt will not last long in direct contact with monolithic walls made of a moistened mixture of cement and sand. It is permissible to combine waterproofing materials, but this will lead to an increase in the cost of the structure. The sand and cement mixture used for backfill does not need protection. On the contrary, it is necessary to ensure access of moisture to this layer of material. Only under such conditions is it possible for the composition to harden.
Finishing the walls of the cesspool from the inside

Waterproofing a brick septic tank must be done using water-repellent materials.
But this waterproofing method is not reliable enough, given that the plaster layer will be affected by water in the existing storage tank around the clock.
For this reason, add to the mixture at the preparation stage liquid glass. A potassium or sodium composition is suitable. This component improves the properties of the plaster.
However, all possible methods should be used to protect the internal walls due to the high humidity inside the drive. For this reason, the surfaces of the structure are additionally ironed with cement.
Covering the drain pit
From above, the pit and brick structure are closed in different ways:
- concrete slab with a hole for a sewer hatch;
- a wooden shield, to protect it from water, it is covered with roofing felt, the surfaces are pre-tarred.
Reduce heat loss from the building to winter time layer helps thermal insulation material. It is recommended to use polystyrene foam for this purpose.
However, such measures do not always help prevent freezing. It is necessary to additionally use a layer of soil as a thermal insulation material. Soil is laid on top of a concrete slab or wooden panel. The layer thickness should be 150-500 mm.
Construction of a cesspool without a bottom

Scheme of a cesspool without a bottom.
The installation principle remains the same as in the case of a sealed drive. However, instead solid foundation a layer of bulk materials is formed: soil, crushed stone. The technology for constructing walls and their waterproofing is the same.
The brickwork is strengthened with a sand-cement mixture, the structure is covered with a slab on top, and isolated from contact with water.
Local sewerage system with wastewater treatment
In this case, ready-made septic tanks are used. They are installed in prepared pits. The main function of such structures is to collect and purify contaminated water.
Septic tanks can be one-, two- and three-chamber. Each of the compartments solves different problems.
The wastewater passing through it is first purified naturally (sediment sinks to the bottom), then goes through the biological treatment, then fall into a drainage well or onto filtration fields (equipped according to the principle of drainage). Here the water is purified to 90-97% and can be reused.
Drainage sewer complex
Distribution wells are being installed. Their height does not exceed 400 mm, the diameter varies from 400 to 700 mm depending on the type of material used to construct the walls. To protect the structure from water, the same techniques are used: coating insulation of external surfaces, plaster inside, as well as the ironing method.
Wells are being closed concrete slabs or wooden shields, perform thermal insulation. It is recommended to equip them with bends. At the bottom of wells is created concrete tray, in height it corresponds to the diameter of the pipes. Such wells are located away from the septic tank. Communications are diverted from them.
The nuances of operating cesspools
In addition to the above measures, it is recommended to make a compost pit. Its walls are protected with a layer of clay (thickness up to 300 mm), then they are concreted. Brick laying is done on top. Walls compost pit must rise above ground level. They are subject to ironing. Sludge is dumped here when cleaning a septic tank.
This measure is used to disinfect sewage and convert it into compost. To do this, the sewage is laid out in layers: first peat or soil, then sediment from the septic tank, earth again on top, etc.
Currently available in stores huge selection drainage systems made of plastic and metal, you can buy any set both from very well-known manufacturers and from very young companies. They work well and are quite adequate in terms of operational and design indicators. modern requirements consumers. But all factory systems have one significant drawback - high price. For ten meters of the cheapest gutters you will have to pay 10,000 rubles. Installing drainage systems on a medium-sized cottage will cost no less than 50,000 rubles. Such sums are beyond the means of rural residents, and it is even more a pity to pay them for ordinary drainage systems. There is a way out - to make a roof drain with your own hands from cheaper materials.
The cost of home-made structures is approximately five to ten times lower than factory ones; the specific price depends on the chosen material and the professional skill of the performer. An inexperienced craftsman can only ruin the purchased pipes and additional elements.
To make a device with your own hands, you can use several types of materials.

There are objective reasons for this state of affairs.
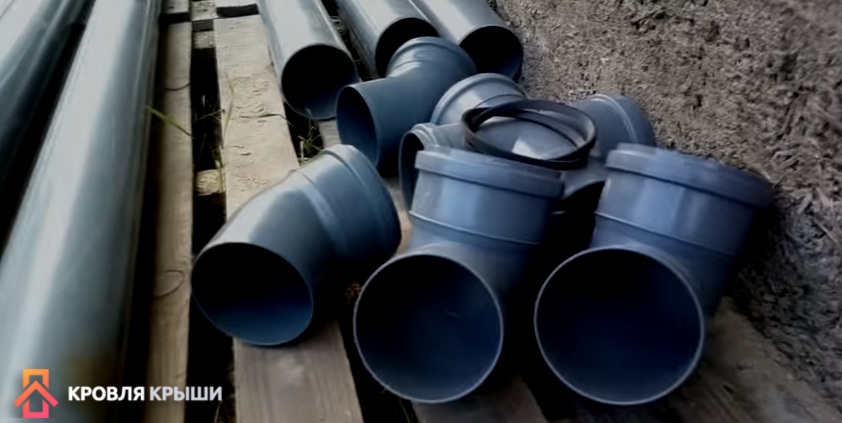
- The first is that sewer pipes are made from the cheapest plastic, most often not primary, but secondary, they are not affected by hard ultraviolet rays, they do not freeze/thaw, and mineral dyes are not added to them to improve the design look.
- Second - famous manufacturers drainage systems set additional markups for brand promotion. This does not apply to sewer pipes.
- Third, excellent shapes and appearance significantly complicate the production of drains. Must have special machines and precise multi-component molds, the set of devices includes many dozens of units. Fourth - high quality is also supported by process control at each stage of production. This causes an increase in defects and, accordingly, increases the selling price of products.
In this article, we will look at making a roof drain with your own hands from sewer pipes, as the only acceptable option, in detail and give step-by-step instructions.
What function should the drain perform?
Regardless of what material the drain is made of, it must protect the foundation and base of the house from rain and melt water.

Waterlogged soil can cause premature deterioration of building masonry materials or subsidence of the foundation. Reducing the load-bearing indicators of the foundation is very a big problem. It can only be noticed when cracks appear on the facade walls of the house. Restoring the strength of the foundation is very difficult and expensive; such work can only be performed by professionals. But they are not able to give a 100% guarantee that the measures taken will achieve the goal. All other functions of drainage (collection of rainwater into a container, decorative decoration of the facade of a building) are considered secondary and do not have any impact on the duration and safety of operation of the building.

Prices for gutters
Gutters
Step-by-step instructions for making a drain from sewer pipes
Before starting work, you should clarify some technical issues; this will help avoid annoying mistakes and improve the performance characteristics of the structure.
Components of a homemade drain
| Item name | Design features and purpose |
|---|---|
| One of the most noticeable and most important elements of the system. It not only removes water from slopes, but also withstands quite significant snow loads. It must be made of durable materials, have a neat appearance and have high values of physical strength. |
| Directs water from gutters to special receivers or into the house sewer system. Sewerage can be not only hidden underground, but also open above ground. The main thing is that water is effectively drained away from the house. |
| The homemade one is significantly different from the factory one, but it takes water perfectly. During manufacturing, attention should be paid to the tightness of all joints. The fact is that the funnel may wobble a little, this is due to the peculiarities of the places where it is installed. Due to additional sealing it is possible to level out minor fluctuations. |
| Installed at the ends of the gutters. They don't play the system very well important role, restrain water overflows only during very heavy rainfalls. |
| Problems with turning pipes are easily resolved - sewer systems have these additional connecting elements. For gutters you have to make the turns yourself. In terms of complexity, these are some of the most difficult elements. |
| Fix gutters and pipes in the desired position and location. For homemade systems, metal strips bent at certain angles are used. The thickness of the strips and the distance between the fixation points should guarantee the stability of the structure under maximum loads. |


We specifically dwell on the purpose and operating conditions of each drainage element; such knowledge will help to avoid mistakes during self-made designs.
Step 1. Preparation of materials and tools. Pipes with a diameter of 110 mm are quite suitable for drainage; most factory systems are manufactured with a diameter of 100 mm. These are universal sizes and are suitable for most homes. If your slopes are too large in area, then you can use one straight line gutters, install not one funnel to drain water, but several at a distance of approximately 6–8 meters from each other. The standard length of sewer pipes is 2.5 meters, made of polypropylene.

Prices for polypropylene pipes for sewerage
Polypropylene pipes for sewerage
Important. You need to understand the difference between pipes for internal and external sewerage.
Some inexperienced craftsmen think that pipes for external sewerage are not afraid of ultraviolet rays and freezing temperatures, because they are installed outside the house and connected to external mains. Everything is correct, these are pipes for external sewerage, only they are installed in trenches, and not on outdoors. And in the trenches there are no UV rays and negative temperatures, but there are additional mechanical loads. In order for the pipes to withstand them, they have thicker walls and, accordingly, a much higher price. Pipes for external sewerage do not have any additives against the negative effects of ultraviolet rays. For gutters, it is better to buy pipes for internal sewerage, they are noticeably cheaper.
Calculate the footage of the pipes, and you need to know the height and length of the building. Two gutters are made from one pipe. Immediately find out the number of turns and at what angles they should be, the number of bends with different angles of rotation, tees and plugs. A meter of sewerage pipe costs approximately 150–200 rubles, ten meters of drainage will cost approximately 1,500 rubles with all additional elements. This is an order of magnitude cheaper than a factory drainage system.
To work, you need to have an electric cylindrical grinder and several thin metal discs of the appropriate diameter. Choose the smallest grinder. For cutting plastic high power no need to work alone light hand An angle grinder is much more convenient.
Prepare a ruler and tape measure, hardware, metal strip, plumbing and measuring tools. It is advisable to first draw a sketch, think through everything again and calculate.

Practical advice. First try to make a homemade drainage system for non-essential buildings: garage, bathhouse, workshop, etc. During this time, you will gain experience and learn how the system looks on site.
Step 2. Prepare workplace. The fact is that the pipes are long, you need to think about how to cut them from one place. If you work inconveniently, then the cut will never turn out smooth. This is an obvious defect, it will either have to be corrected, which takes a lot of time. Or install such a gutter in an inconspicuous place in the building. It is very convenient to work on ordinary pallets. The pipe is rolled into the gap between the boards and held there quite firmly, which greatly facilitates the process of longitudinal sawing.
Provide a separate area for storing purchased materials and finished elements, a table for tools and hardware, and resolve the issue with the light supply.
Step 3. Install a plastic plug into the end of the pipe. The pipe is subsequently cut into two halves for the gutter, so the plug will not hold. To prevent it from falling out, secure the element with self-tapping screws; the length of the hardware is approximately one centimeter. You need at least four pieces, the distance between them is symmetrical. After cutting the pipe, there should be two self-tapping screws on each gutter. Make sure that the screws are not located very close to the cutting line.
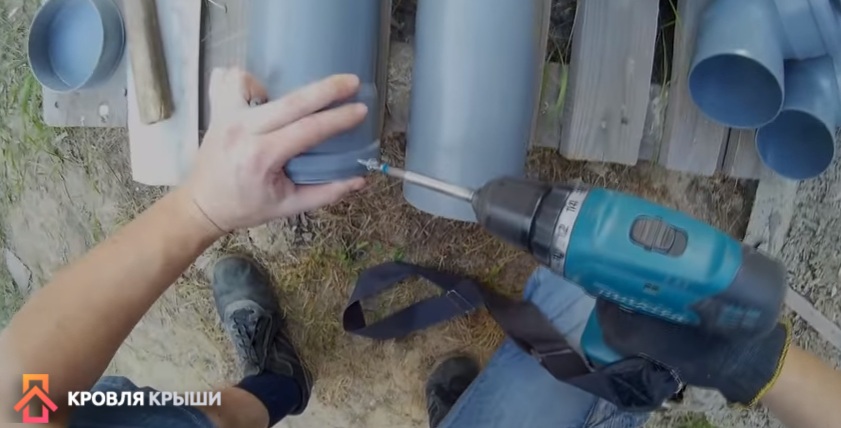
And one more nuance. A rubber ring is installed at the end of the pipe; it seals the plug. The screws should be screwed in in such a way that they do not damage the rubber ring, but press the pipe socket against it. Step back from the end about 3-4 cm, measure the specific distance yourself, it may vary slightly due to differences in pipes from different manufacturers.
Step 4. Mark to cut the pipe into two halves. Marking should be done with a felt-tip pen; a pencil does not draw on plastic.


Step 5. Carefully cut the pipe along the drawn line. It was already mentioned above that you need to hold the grinder with one hand and fix the pipe with the other. As sawing progresses, the pipe moves towards the tool. If it’s difficult to work like this, you’ll have to call an assistant. Let him hold the pipe, and the master works with the grinder with both hands. By the way, this is how the safety instructions recommend working with the tool.

Step 6. Remove hangnails. The disc does not cut the plastic, but melts it, leaving large burrs that can be easily removed. Some use special grinding discs, put them in a grinder and try to use them to remove melted plastic from the edges. We do not recommend doing this; the disc will remove old burrs and leave new ones; high speeds will melt the plastic. Work without tools, burrs can be cut off without any problems with a mounting knife or broken off by hand, but you will have to make significant efforts. Third option - take an abrasive disc and work with it manually. If your cut is wavy, then it is advisable to trim it. Don’t be too upset, the next pipe will be cut much better and easier, and a slightly damaged gutter can be replaced with reverse side buildings, no one will see him there.

Using the same algorithm, continue cutting all the remaining pipes for the gutters. The two gutters are also connected using self-tapping screws; in places where they overlap, half of the factory rubber gasket must be installed; for this they have technological grooves.


The gutter connection areas are the most dangerous; this is where leaks most often occur. The fact is that the gutter is long, minor forces at one end through the mounting brackets increase tenfold, they work like a lever. The second end may move slightly. In order to completely eliminate the possibility of leaks, we strongly recommend using a sealant. You can buy a cheap one, there is no need to use one that is resistant to ultraviolet rays, the material is not exposed to the open air, half a plastic pipe lies on top and protects it. But you should pay attention to the indicators of adhesion and ductility.

Now you have some experience and you can begin to manufacture more complex elements of the drainage system.
Making a funnel
This is one of the most complex elements of the system. To make it you need to prepare:
- a piece of pipe of the required length;
- end cap;
- turn;
- connecting cross.
Step 1. Assemble all the elements into one structure, check the length of the pipe section again.

Step 2. Fasten the individual parts with self-tapping screws, as we described above.
Important. Remember to always lubricate the surfaces to be joined with sealant; do not rely only on rubber seals.
Step 3. Carefully find the middle of the structure and draw lines on both sides.
Step 4. Use a grinder to cut the assembled structure along the lines.

Remove hangnails. Work carefully, don't rush. Make sure that the individual parts do not move during cutting.
Practical advice. It is better not to cut the plugs at the ends of the gutters into halves, but to leave them whole; in this position they are held more firmly. To do this, the pipe socket is not cut along the axis, but its half is cut along the circumference. Appearance such a gutter differs from the standard one, decide for yourself which connection to make.


The water will be drained into a storm drain buried in the ground. Rainwater considered very useful for watering all plants, summer cottage will always come in handy. Moreover, if there is no centralized water supply.
Almost all elements of the drainage system are prepared, you can begin to manufacture metal brackets.
Prices for popular models of screwdrivers
Screwdrivers
Manufacturingbrackets
You need to prepare a metal strip approximately 2.0 mm thick and up to two centimeters wide.

Step 1. Measure the length of the brackets. It is equal to the length of the section that is fixed to rafter system and half the circumference of the gutter. To avoid mistakes, it is recommended to use soft wire. Make a template out of it, adjust it several times to the optimal position. Everything is fine - align the wire and measure its length. Practitioners advise in any case to give an additional margin of about 2–3 cm.
Step 2. Make marks on a long strip and cut blanks for brackets, drill holes in them.
Drain installation
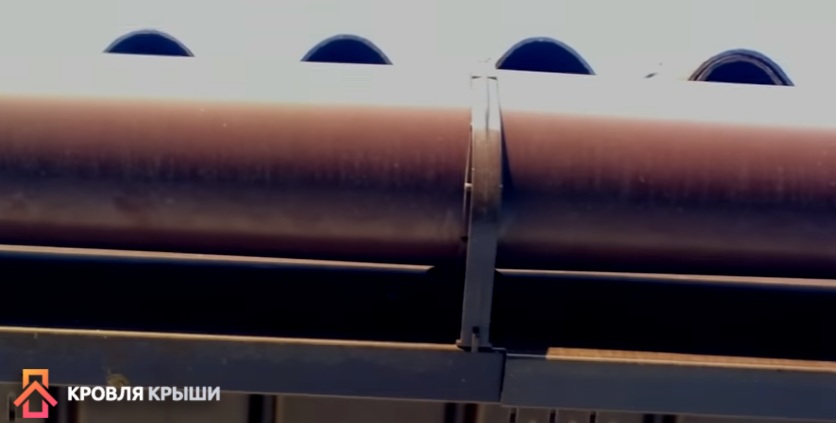
If the length of the slope is short and there is an assistant, then you can attach the brackets to the gutter while still on the ground, and install the assembled structure on the roof. You will have to work very carefully; during installation, you can damage the assembled gutter. Do not forget that for the water to drain, you should make a slope of ten linear meters approximately 2-3 cm. No more is needed, otherwise at the opposite end the gutter will be too far away from the roof and water will not get into it.
Assemble the drain pipes, attach them to the drain, and place the other end into a container to collect rainwater. Vertical pipes are attached to the walls with any clamps; there is no need to tighten them too much. It is advisable to place the clamps in such a place that they rest against the projections of the sockets.

If there are any near the house vertical racks, then you can tape plastic pipes to them too.
Practical advice. In order to completely eliminate the possibility of depressurization of vertical pipe joints, screw in self-tapping screws at the junction. They will not allow the pipes to fall out under their own weight.
Manufacturinghook bender
The method of fixing the gutter described above is considered very risky; it is advisable to use the traditional one - first the hooks are fixed, and then the gutters are installed on them. But it can be quite difficult to bend homemade metal strips correctly. To facilitate the process, you can make a simple “hook bender” device.
This will require two segments square pipes 30–40 cm long. The cross-section of the pipes must be selected so that they fit into each other with a gap of approximately 6–8 millimeters. For example, the width of one pipe is 30 mm, and the second is 20–25 mm. Carefully clean the ends of the pipes, remove all burrs, and level the surfaces.
Step 1. Insert the pipes into each other, align the ends, they should be located in the same plane.

Step 2. Insert a bracket into the gap between the pipes; it will control the size of the gap.

Practical advice. The width of the gap should be slightly greater than the thickness of the metal strip, this will make it easier to use the device. Not all metal strips are perfectly straight; some have slight bends. The increased gap will allow them to be bent in the fixture without any problems. In order to achieve such dimensions between the device and the metal strip, it is recommended to insert a piece of sheet iron approximately 1 mm thick over the strip. After tack welding, it is removed.

At the bottom of the mute, grab the pipes with electric welding, and do the same operation at the other end.

Step 3. Remove the bracket and weld the pipes firmly. Clean off any dross.
The device is ready for use. It is very easy to work with him. The workpiece is inserted into the hook bender according to the mark, the device is held with one hand, and the part is bent with the other at the desired angle and at a given distance.


The hook bender allows you to make not only even bends, but also at various slopes. To do this, the workpiece should not be pressed against the side wall, but slightly rotated in one direction or another. Depending on the angle of rotation, the bend angle changes. Over time, experience develops; all hooks are bent exactly to the specified dimensions, taking into account the characteristics of the roof and drainage system.

Conclusion
It will take no more than one day to make such a roof drain, and the financial savings are very significant. The only drawback is that sewer pipes are afraid of ultraviolet radiation. If possible, it is recommended to take any measures to protect the plastic from sun rays. Otherwise, the system will last no more than 4–5 years.
And a dug pit where all the sewage goes. Despite everything positive sides such structures, they can be dangerous to humans due to microorganisms that begin to multiply abundantly at above-zero temperatures.
Basic information
If a cesspool was built without taking into account all sanitary and technical standards (according to SNiP), sewage can seep into the soil and then into groundwater, which can lead to severe poisoning of the body. If you do drain hole do it yourself, do not forget to take into account all the requirements for the work.
How to build a sealed model?
In general, it is no different from the previous method, but there are still minor differences:
- The bottom needs to be concreted.
- No infiltration holes required.
The diagram looks like this:
- To begin with, the lower part of the concrete base is reinforced.
- To prevent the reinforcement from sinking, it can be raised and secured on pegs.
- The walls require careful sealing. The most inexpensive option is bitumen; plaster or clay is suitable for the external part.
Brickwork in this case takes much longer.
Installation of ready-made models
 You can follow the standard solution, dig a pit according to classic scheme and purchase the finished product. The owner will need to prepare a place for the pillow, which is made of gravel and concrete. This structure should be strengthened within a week, after which the finished kit is laid.
Conclusion
Without a properly functioning one, it is impossible to create comfortable living conditions. The process is not complicated, you can do it yourself. Don't skimp on materials; you'll be using the drain pit for a long time. The main thing is to ensure sufficient volume and regular maintenance. If the work is done correctly, you can enjoy the coziness and comfort of your country house for many years.
Useful video
The video review will clearly show all the details of the installation work:
Brick construction:
Formwork for pouring concrete:
Unfortunately, not everywhere there is a centralized sewerage system and people are forced to install outdoor toilets on their property.
In the warm season, going outside is not difficult, but in the cold season, you don’t want to go out into the cold again.
And that’s why many people think about equipment in the drainage pit area. Let's consider the topic of a drainage pit in a private house in this article.
To ensure the installation of a drainage pit, it is better to hire professional workers, but you can equip it yourself.
Volume calculation
The equipment for the drainage pit is considered cheap and in a simple way in order to provide private homes.
To calculate the required volume of the drainage pit, you need to multiply the number of people who will live in the house by 1.2 m3. Let's give an example: if there are five people in your family, then the volume of the drainage pit will be at least two and a half meters cubed.
Types and purpose
Drain pits come in different types:
- Fecal. A pit, the name of which speaks for itself, that is, this pit is designed to drain water from a toilet or toilet, which is located on the site.
- Sewage. It is intended for, that is, drainage from baths, showers, and washbasins.
- Combined. The pit is designed to drain both fecal matter and household water.
IN rural areas It is better to equip two pits: fecal and waste.
How to equip a drainage pit in a private house
Determining the dimensions
Depth
First, find out the groundwater level in your area. You can check the level yourself, or you can check it using a well if you have one nearby.
If groundwater is at a depth of 6-8 meters, then a pit for draining waste must be made at a level of 2-2.5 meters.
Length Width
In the event that groundwater is close to the surface, plastic container cannot be placed underground. In this case, make a sealed concrete well and a plastic container is placed in it, but this method will cost more.
In order for a plastic pit to work well for a long time, the hole under it must be dug so that there is a distance of 30 cm from the walls to the container.
The container is installed strictly horizontally. It is important that the tank has a ventilation pipe, otherwise there will be a danger of the tank exploding, since during decomposition organic waste release methane gas.
A drainage pit has its positive and negative qualities, but its presence takes country life and life in a private house to another level. For this reason, people are increasingly doing cesspools, of different designs.
We wish you good luck in your endeavors!