A summer cottage should be a pleasant and comfortable place to relax and work. A garden arch will be an excellent addition to the decorative area, and will also allow you to form excellent place to relax all family members. Such designs may have in different forms, for example, a trellis or have the shape of a vault, each of them can be realized without outside help, which is very affordable.
You can find arches on sale today various designs, however, inexpensive ones look very simple, and are also made of plastic, which is susceptible to aggressive environments, which indicates a short life span of the structure. While expensive models may not be suitable for design features or shade, and they are most often made of metal, which is very problematic to deliver to the location yourself.
For these reasons, a garden arch is often made by home craftsmen on their own. Carrying out such work is not challenging task, and even a person who does not have enough experience can cope with this. It is best to use wood for manipulation, as it is easy to process and looks natural.
Preparation for work
If you are making an arch for the garden, you will need to prepare wooden beams or pillars in the amount of 4 or 6 pieces. Their height should be equal to two meters, while the width is 100 or 75 millimeters. These pillars must be installed strictly vertically so that they act as supports to which 2 side transverse beams will be fixed. The crossbars, in turn, will be attached to them. For the manufacture of the latter, a cross section of 20 x 200 millimeters is suitable. It is important to choose the right wood; its humidity should not be too high, otherwise, when it dries, the material will lose its original shape, and the entire structure will no longer be smooth.
Material selection

It is best not to skimp on wood; this is the only way to make an arch that will last for many years. If you purchase material from summer time, it is worth asking about the period when the forest was cut down. IN winter time It is most preferable to carry out such manipulations, since the trunks contain the least amount of juice, which negatively affects the quality characteristics during operation.
Arch manufacturing technology

Initially, you will need to prepare recesses, the parameter of which can vary from 0.5 to 1 meters. The pillars will be installed there. It is worth noting that when you make an arch for the garden, the depth of the holes depends on the type of soil. If you have to work with loose soil, then you should go deeper. In order for the design to be practical, some of the supports that are to be buried must be treated with bitumen or well wrapped in roofing material. Roofing felt, as well as other materials, are suitable for carrying out this work. waterproofing materials. When arches are made, the correct installation of the supports must be checked using building level, which will ensure the vertical position of the elements. The resulting empty space in the pits should be filled with crushed stone, but the most reliable method is to fill it with concrete.

When making garden arches with your own hands, you should think about the location of the structure. You can start lining it up along the path or in a recreation area. If the pillars are increased to 6 pieces, this will allow you to form a real gazebo. If you want the plants to entwine the pergola, it is recommended to string twine between the posts. If you stuff slats between them, arranging them in the form of a lattice, the pergola will have a very attractive appearance. In order to exclude negative impact insects on wood, it is better to treat the surface of the elements special composition. It will protect the structure from the harmful effects of atmospheric influences. The gratings can also be located on the roof, so it will be more convenient for plants to climb up.
Nuances of the work

When making arches for the garden, photos of which are presented in the article, you can also use elements made of metal. This could be a corner or fittings. Such blanks are first degreased well, and then painted in required color. It is best to choose a composition that has weather resistance qualities. Wooden elements It is recommended to fix it using galvanized parts. A wooden arch goes better with plants, but severe frosts and subsequent thawing, the wood may change its original size and also darken, which does not always look very attractive. It is important to take into account that plants may die if they freeze to metal.
Conclusion
Pergolas-arches for the garden can be made from combined materials, for example, wood and OSB, with which you can make the walls blank. Using as many materials as possible, you have the opportunity to realize all your design ideas. Wooden arches for the garden can become full-fledged gazebos if you use polycarbonate for this, which will become a covering material. It is mounted on a frame pre-made of wood or metal.
Growing climbing flowers is impossible without providing them with reliable support. Any supports are used in this capacity: pillars, fences, stretched threads etc. However, the most spectacular spectacle can be obtained by forming a tandem of climbing plants with special architectural elements. One of the most popular similar designs is an arch - an arched structure on two supports. Despite the highest decorative qualities, its design is very simple, so an arch for flowers in the country can be made with your own hands. Let's consider 3 options for its manufacture from different materials.
Simple model arches with a height of 2130 mm and a width of 1830 mm are created from two reinforcing sections bent into arcs, connected to each other by metal rings. The arch for flowers is made by hand without the use of welding; thin wire is used to connect the parts.
The metal arch looks like a light, weightless structure entwined with greenery and flowers
The distance between the arched arcuate sections is 31-32 cm. To hold them in place, they are dug into the ground at least 40-45 cm. A distance of 15 cm is maintained between the connecting cross-ring rings (d = 30 cm).

Schematic illustration metal arch
List of materials for making a metal arch:
- fittings (rod) d=10 mm, length 6 m - 2 pcs.;
- fittings (rod) d=6 mm, length 0.94 m - 9 pcs.;
- soft wire;
- primer, enamel for painting;
- pins for the template - reinforcement d=10 mm, length 0.25 m - 10 pcs.;
- rope L=0.9 m.
Step-by-step manufacturing scheme:
1. First of all, you will need to bend pieces of reinforcement d = 10 mm to obtain an arched opening. To do this, you can use a simple template of 0.25 m long pins driven into the ground along the calculated contour of the arch.

Cut the reinforcement into pins using a hacksaw
The outline is drawn directly on the ground as follows: a rod is driven into the ground, a rope L = 0.9 m is tied to it and, taking the free end in the hand, a semicircle is drawn with paint or chalk. Then, starting from the top point of the semicircle, the pins are driven into the ground.

Drawing a semicircle using a rod, string and paint
The resulting template is very easy to use. In order to give the arch an arched shape, the reinforcement d = 10 mm is bent around the driven pins. The bend will be smoother if a strong, but flexible material. A strip of siding, a chipboard strip, etc. will do.

Reinforcement bending - labor-intensive process, which is easier to cope with together with an assistant
2. In this arch model, metal rings are used to connect the reinforcement sections. They are made from reinforcement d=6 mm thinner than the main sections.
From a bundle of reinforcement, 9 pieces of 94 cm are cut and rings are formed from them using a pipe bender. If you do not have this tool, the design of the arch can be simplified and instead of rings, connect the arched sections with straight rods. This arch will look simpler original version, but it will also be quite functional.

Forming rings from reinforcement using a pipe bender
3. The bent main sections of the arch are installed in the ground, deepening the reinforcement by 40-45 cm.

4. At a distance of 61 cm from the bottom of the arch soft wire tie metal rings, keeping a distance of 15-20 cm between them. They will allow you to connect the arched sections together and fix the shape of the arch.

Attaching rings to metal sections of the arch
5. To protect the arch from corrosion, all metal parts of the product are coated with a primer and then a layer oil paint.
Option #2. Wooden arch made of timber
A traditional wooden arch made of timber is the simplest and inexpensive construction, fitting into the design of any garden. This garden arch for flowers, 2.2 m high, consists of two vertical frames, two inclined and one horizontal parts.

An easy-to-make wooden arch will help divide the garden space into functional areas
Materials required for construction:
- timber 40x50 mm, length 2 m – 4 pcs.;
- timber 40x50 mm, length 0.35 m – 4 pcs.;
- timber 40x50 mm, length 0.65 m – 2 pcs.;
- wooden planks 35x20 mm, length 0.65 m – 24 pcs.;
- wooden planks 35x20 mm, length 2 m – 2 pcs.;
- metal corner, length 0.25 m – 4 pcs.;
- screws or nails;
- primer, paint.
Wooden arch construction plan:
1. Make two vertical frames. Each frame consists of two vertical supports of 2 m each, two crossbars of 0.65 m each and one strip in the middle, 2 m long.

2. Assemble the side of the arch. Planks 35x20 mm long, 0.65 m, are stuffed onto the frame in increments of 0.2 m. The edges of the planks are cut at 45°, and any irregularities are sanded. sandpaper or a sander.
3. K vertical posts fasten metal corners. Subsequently, when installed in the ground, they will play the role of a foundation and will be able to hold the structure in a given position.
4. Cut out the bars for the top of the arch. Inclined bars 0.35 cm long - 4 pcs., upper horizontal bars 0.65 m long - 2 pcs. They are fastened together with self-tapping screws.
5. The upper part of the arch is connected to the sidewalls.

The arch is completely assembled on the ground, and then lifted and installed vertically on permanent place
6. Dig holes at the site where the arch supports are installed. Metal corners are fixed in the ground, setting the arch level. In order to wooden structure lasted longer, stones can be placed under the supports.

7. On wooden surfaces a primer is applied, then a layer of varnish or paint.

A layer of varnish protects the wood from corrosion and increases decorative properties arches
Option #3. Arch with gabion base
A wooden arch, the sides and rounded top of which are formed from galvanized mesh, will be a convenient support for climbing flowers. Another unexpected detail of this design is the foundation of two massive gabions. They firmly hold the arch supports, eliminating the need to fill concrete foundation or dig posts into the ground.

Unusual arched design - a combination of beams, mesh and gabions
Materials used:
- beam 65x45 mm, length 1800 mm (4 pcs.) – vertical supports;
- beam 65x45 mm, length 800 mm (2 pcs.) – transverse beams;
- timber 21x10 mm, length 1380 mm (8 pcs.) – slats for creating grooves;
- galvanized mesh sheets, width 500 mm, length 1800 mm (2 pcs.) - for the sides and top of the arch;
- metal grid double torsion – for the manufacture of gabions;
- galvanized wire;
- screws.
Stages of gabion arch production:
1. Two gabions measuring 100x50x50 cm are made from meshes. Each gabion consists of three boxes: two for the base (they will be used to install wooden supports arches), one – unifying, smaller in size. The gabion parts are connected with durable galvanized wire.

The gabion box is made of durable mesh, ideally from a special, so-called “gabion” mesh.
2. On each cross beam A router is used to make through slots 4 mm wide and 500 mm long. The trellis mesh will be inserted into this groove in the future.

Cutting a through groove along the crossbar beam
3. The vertical posts are secured to the sides of the cross beams with screws.

Screw connection of crossbars and vertical pillars of the arch
4. Triangular brackets are attached to the posts and crossbars to add rigidity to the structure.

Attaching the bracket to the crossbar and support increases the strength of the structure
5. On the vertical supports, the groove for fastening the mesh is formed by two wooden slats. They are fixed screw connection above and below the support beams.

Two slats are fixed along each support at a short distance from each other (3-4 mm). This allows you to create a groove for attaching the mesh to the side parts of the supports
6. The mesh is inserted into the grooves formed by the rails in the support posts and pulled out through a slot in the horizontal cross member.

The mesh is installed in grooves on the crossbar and side supports
7. Install the arch support posts into the gabion boxes.
8. Gabions are filled with stones: basalt, granite, limestone, glass blocks and so on. At the same time, they strive to fix the support posts as tightly as possible so that they cannot move during operation.

9. To obtain a rounded top of the arch, the mesh sheets are bent towards each other and tied in the middle with steel wire.

When the arch is ready, it doesn’t matter whether it is metal or wooden, climbing flowers are planted near it. Therefore, do not worry about minor defects in the construction! Massive lashes of climbing roses, clematis, annual morning glory or sweet pea will hide all design errors that are often made in the process of independent production.
Growing climbing flowers is impossible without providing them with reliable support. Any supports are used in this capacity: pillars, fences, stretched threads, etc. However, the most spectacular spectacle can be obtained by forming a tandem of climbing plants with special architectural elements. One of the most popular such structures is the arch - an arched structure on two supports. Despite the highest decorative qualities, its design is very simple, so an arch for flowers in the country can be made with your own hands. Let's consider 3 options for its manufacture from different materials.
A simple model of an arch with a height of 2130 mm and a width of 1830 mm is created from two reinforcing sections bent into arcs, connected to each other by metal rings. The arch for flowers is made by hand without the use of welding; thin wire is used to connect the parts.
Metal arch for flowers in the country
The metal arch looks like a light, weightless structure entwined with greenery and flowers
The distance between the arched arcuate sections is 31-32 cm. To hold them in place, they are dug into the ground at least 40-45 cm. A distance of 15 cm is maintained between the connecting cross-ring rings (d = 30 cm).
Schematic representation of a metal arch
List of materials for making a metal arch:
fittings (rod) d=10 mm, length 6 m - 2 pcs.;
fittings (rod) d=6 mm, length 0.94 m - 9 pcs.;
soft wire;
primer, enamel for painting;
pins for the template - reinforcement d=10 mm, length 0.25 m - 10 pcs.;
Rope L=0.9 m.
Step-by-step manufacturing scheme:
1. First of all, you will need to bend pieces of reinforcement d = 10 mm to obtain an arched opening. To do this, you can use a simple template of 0.25 m long pins driven into the ground along the calculated contour of the arch.

Cut the reinforcement into pins using a hacksaw
The outline is drawn directly on the ground as follows: a rod is driven into the ground, a rope L = 0.9 m is tied to it and, taking the free end in the hand, a semicircle is drawn with paint or chalk. Then, starting from the top point of the semicircle, the pins are driven into the ground.

Drawing a semicircle for the template
Drawing a semicircle using a rod, string and paint
The resulting template is very easy to use. In order to give the arch an arched shape, the reinforcement d = 10 mm is bent around the driven pins. The bend will be smoother if a strong but flexible material is placed between the pegs and the reinforcement. A strip of siding, a chipboard strip, etc. will do.

Bending reinforcement around pins
Bending reinforcement is a labor-intensive process, which is easier to handle with two people and an assistant.
2. In this arch model, metal rings are used to connect the reinforcement sections. They are made from reinforcement d=6 mm thinner than the main sections.
From a bundle of reinforcement, 9 pieces of 94 cm are cut and rings are formed from them using a pipe bender. If you do not have this tool, the design of the arch can be simplified and instead of rings, connect the arched sections with straight rods. Such an arch will look simpler than the original version, but it will also be quite functional.

Formation of rings from reinforcement
Forming rings from reinforcement using a pipe bender
3. The bent main sections of the arch are installed in the ground, deepening the reinforcement by 40-45 cm.

Installation of metal arcs in the ground
4. At a distance of 61 cm from the bottom of the arch, metal rings are tied with soft wire, keeping a distance of 15-20 cm between them. They will allow you to connect the arched sections together and fix the shape of the arch.

Attaching rings to metal sections of the arch
5. To protect the arch from corrosion, all metal parts of the product are coated with a primer and then a layer of oil paint.

Option #2. Wooden arch made of timber
A traditional wooden arch made of timber is the simplest and inexpensive structure that fits into the design of any garden. This garden arch for flowers, 2.2 m high, consists of two vertical frames, two inclined and one horizontal parts.
Wooden arch for flowers
An easy-to-make wooden arch will help divide the garden space into functional zones
Materials required for construction:
timber 40x50 mm, length 2 m - 4 pcs.;
beam 40x50 mm, length 0.35 m - 4 pcs.;
beam 40x50 mm, length 0.65 m - 2 pcs.;
wooden planks 35x20 mm, length 0.65 m - 24 pcs.;
wooden planks 35x20 mm, length 2 m - 2 pcs.;
metal corner, length 0.25 m - 4 pcs.;
screws or nails;
primer, paint.
Wooden arch construction plan:
1. Make two vertical frames. Each frame consists of two vertical supports of 2 m each, two crossbars of 0.65 m each and one strip in the middle, 2 m long.

The frame serves as the basis for forming the sides of the arch
2. Assemble the side of the arch. 35x20 mm strips 0.65 m long are stuffed onto the frame in increments of 0.2 m. The edges of the planks are cut at 45°, and the irregularities are smoothed with sandpaper or a grinder.
3. Metal corners are attached to the vertical posts. Subsequently, when installed in the ground, they will play the role of a foundation and will be able to hold the structure in a given position.
4. Cut out the bars for the top of the arch. Inclined bars 0.35 cm long - 4 pcs., upper horizontal bars 0.65 m long - 2 pcs. They are fastened together with self-tapping screws.
5. The upper part of the arch is connected to the sidewalls.

The arch is completely assembled on the ground
The arch is completely assembled on the ground, and then lifted and installed vertically in a permanent place
6. Dig holes at the site where the arch supports are installed. Metal corners are fixed in the ground, setting the arch level. To make the wooden structure last longer, you can place stones under the supports.

Stones under the supports increase the reliability of the structure
7. A primer is applied to wooden surfaces, then a layer of varnish or paint.

Wooden garden arch for flowers
A layer of varnish protects the wood from corrosion and increases the decorative properties of the arch
Option #3. Arch with gabion base
A wooden arch, the sides and rounded top of which are formed from galvanized mesh, will be a convenient support for climbing flowers. Another unexpected detail of this design is the foundation of two massive gabions. They firmly hold the arch supports, eliminating the need to pour a concrete foundation or dig posts into the ground.

Unusual arched design - a combination of beams, mesh and gabions
Materials used:
beam 65x45 mm, length 1800 mm (4 pcs.) - vertical supports;
beam 65x45 mm, length 800 mm (2 pcs.) - transverse beams;
timber 21x10 mm, length 1380 mm (8 pcs.) - slats for creating grooves;
galvanized mesh sheets, width 500 mm, length 1800 mm (2 pcs.) - for the sides and top of the arch;
double torsion metal mesh - for the manufacture of gabions;
galvanized wire;
Screws.
Stages of gabion arch production:
1. Two gabions measuring 100x50x50 cm are made from meshes. Each gabion consists of three boxes: two for the base (the wooden supports of the arch will be installed in them), one for unifying, smaller in size. The gabion parts are connected with durable galvanized wire.

The gabion box is made of durable mesh
The gabion box is made of durable mesh, ideally from a special, so-called “gabion” mesh.
2. On each cross beam, a router is used to make through slots 4 mm wide and 500 mm long. The trellis mesh will be inserted into this groove in the future.
There are many ways to decorate your suburban areas. Some people prefer to plant areas with flower beds with perennial plants, others like garden figurines and figurines, while others spare no time and money to create landscape design. But there is a decoration that everyone will like. This decoration is a garden arch, which gives any area a corner of romance and a certain sophistication.
As a rule, climbing plants with dense greenery are used for arches.
For some, flower arches are associated with a solemn ceremony, but this does not mean that this design cannot be present in country or garden areas. A garden arch, curled with lush greenery or flowers, can be used not only as a decoration for the area, but as a way of somehow zoning the area. For example, a garden arch can be a kind of entrance if you use it to highlight some area of the garden. If you install a garden arch in front of the entrance to garden plot, it will turn into a decorative gate.

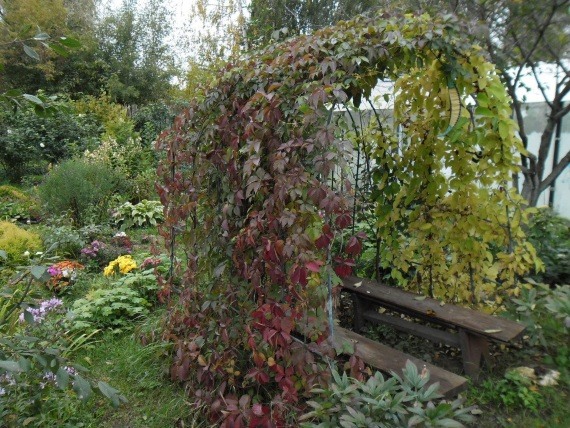
Also some landscape designers An arch for climbing perennial plants is often used to create a separate recreation area. You can install a bench inside the structure or small table. Sometimes garden arches, entwined with charming flowers, are installed along the path or garden path, thanks to which the path turns into a beautiful flower tunnel.

Modern arches are made from a variety of materials, the most common being wood, plastic and metal. Metal structures look very beautiful if they are created using forged elements. Also, garden arches made of wood fit well into various landscape styles, becoming a coordinated complement to natural beauties.
Plastic arches are very popular due to their lightweight design. Arches can be made of brick, stone or even concrete.

Metal garden arches
When choosing a garden arch, remember that the material from which it will be made will determine its appearance and reliability. For example, metal garden arches are the most reliable because they are not afraid of precipitation and temperature changes. But in winter metal structure may damage some types of perennial flowering plants.

Wooden garden arches
The tree does not tolerate sudden changes in temperature, and is also vulnerable to pests. It is necessary to install a wooden arch only in a temperate climate zone. It is best to choose structures made from hard wood - larch, cedar, oak. Before how to plant wooden arch climbing plants, it must be treated with antiseptic agents.

Plastic garden arches
Garden arches made of plastic also do not tolerate climatic conditions with high precipitation and sudden temperature changes. But plastic structures are made in a prefabricated version, so in winter the garden arch can be removed indoors and the plants can be covered with a canopy.

Garden arches for plants do not have to be a stereotypical shape. Currently on sale you can find garden arches with rectangular ceilings or gable roof. If you dream of decorating your garden original decor, you will probably like pergola arches or round arches, created from standard arches.

Choosing plants for a garden arch
To decorate a garden arch, you can use absolutely any climbing plants. It all depends on the desired result. If you want your arch to “bloom” quickly, plant annual climbing plants. Bindweed, beans, nasturtium, kobeya cope well with this task, “ squirting cucumber" If you dream of a garden arch that will delight you for several seasons, choose these perennials like honeysuckle, wild grapes, clematis and charming roses.

Garden arch design
There is nothing complicated in the design of a garden arch. After installing a garden arch, two plants that belong to the same species are attached to the arch frame on the sides. As they grow, you will need to bend their tops so that they form a vault that will repeat the shape of a garden arch. In this case, the main thing is not to miss the moment. If you bend the top too early, its side branches will grow upward, becoming the central shoot. If you bend it too late, the hardened branches will not be able to wrap around the arch.

But some plants have almost no need for such “direction”. To decorate a garden arch with grapes or ivy, just plant the plants at the edge of the garden arch, and the plant will wrap around this structure on its own.

If you want to decorate a flowering arch using clematis or roses, then as the plants grow they will need to be tied up. Also remember that beautifully flowering plants need proper care. For example, it is recommended to insulate roses in winter, and clematis require regular fertilization.

TO unpretentious plants To decorate a garden arch, you can include morning glory, kobeya and honeysuckle. They will decorate the garden arch bright colors and fill your garden with a pleasant aroma.

Garden arches can be decorated in different ways. Of course, the arch looks attractive if it is entwined with dense vegetation and flowers; you can also decorate only the arch’s arch and side parts.
An arch of climbing flowers is bright decoration for any garden. To decorate the arch, you can choose your favorite plants, turning your site into a prototype of the Gardens of Eden.

Plants on arches look very beautiful, and therefore are often used to decorate garden and summer cottages. What climbing flowers can be used for arches - vertical gardening? This is what we will talk about.
Letniki
Sweet pea (sweet pea) – quite often used in vertical gardening liana The plant gained popularity due to its ease of care and abundant flowering. In total, gardeners are offered 16 groups of sweet peas, differing in flowering period, height and color. If you wish, you can choose a variety that will bloom even in a darkened area of the garden.
Nasturtium - beautiful flowering liana. Atypical for her fast growth, and this must be taken into account when planting. The foreign nasturtium variety (known as Canary) looks very decorative. This is an annual vine that grows up to three meters in height.

It blooms with bright yellow inflorescences with corrugated edges. It is sown for seedlings in February, and planted in a permanent place in May, when the threat of frost has passed.
climbing roses
When choosing a variety, you need to pay attention not to the flowers, but to the shape of the bush. Most of the plants have thick, stiff shoots, so they are not suitable for arched growing.
Among the numerous varieties of climbing roses with large inflorescences and relatively flexible shoots, the following have proven themselves well:
· Zephirine Drouhin;
· Constance Spry;
· New Dawn.
They are used to decorate low arches.

For high forged supports, varieties with plastic wood are recommended. It is then convenient to remove them and roll them into rings for subsequent wintering. Good feedback small-flowering climbing rambler roses are obtained:
· Jasmina;
Florentina;
Excelsa;
· Dorothy Perkins;
Bobby James
Roses should be planted on one side of the arch, since thickening can lead to fungal infection. Growing shoots must be tied to the arch.
Before the onset of cold weather, the lashes are removed from the support, rolled up and insulated in two layers.
Clematis
Bright large inflorescences of clematis are in no way inferior in decorativeness climbing roses. These perennial vines bloom from mid-summer until frost.

The following varieties received good recommendations:
· Patens. Can grow up to five meters. The buds are large – up to 17 cm in diameter;
· Jacqueman. It has large inflorescences - up to 20 cm in diameter - purple, blue or lilac color. Flowering duration is two months (from the beginning of July to the end of August). The peculiarity of the variety is its thin shoots that need a strong base.
Before the onset of cold weather, the shoots are removed from the arch and cut to a height of 20 cm. Peat or foliage is used as insulation.
Bougainwellia
If you need to get a beautifully designed arch, you can plant bougainwellia. The plant can be grown in a pot, wrapping long shoots around a support.
Bougainwellia is ideal for shady corners of the garden. In addition, it is unpretentious in care and resistant to various diseases and pest attacks.

Bougainvillea can be grown either through seedlings or by planting directly in a permanent place.
Wisteria Blue Moon
This variety of wisteria attracts with its variety of colors. You can choose a plant with red, blue, white or purple flowers. It blooms in the third year after planting.
The plant loves light, so you need to plant wisteria in open area. To stimulate flowering, it is fed with superphosphates in early spring.

It is worth noting that the vine is very difficult to care for, but it looks incredibly attractive.
morning glory
Morning glory is an annual vine with big flowers blue, purple, red or yellow color in the form of a saucer. They bloom early in the morning.
The maximum length of the vine is 1.5 meters. The heart-shaped leaves are also large - up to 12 cm in length.

Morning glory is easy to care for and can grow in any type of soil. Easily tolerates drought.
Kobeya climbing (Monastery bells)
Kobeya climbing in middle lane Russia reaches two or more meters in height. Blooms large flowers in the form of white or lilac bells.
The plant is unpretentious. It can be grown in both shade and sun. It is also undemanding to soils.

Kobeya is planted as seedlings in February. They are transferred to a permanent place in mid-May.
Campsis rooting
Campsis rooting – climbing plant, growing up to 12 meters in height. The vine has unusual-looking flowers: they are elongated in the form of a tube and have several shades at once, ranging from orange to red and yellow notes.

The plant grows well in the shade, but for lush flowering It is better to choose well-lit areas.
Hop
Hops is a perennial, low-maintenance vine. During the season it can grow 11 m, so it can braid a high arch in a couple of years.
For decoration summer cottage The most commonly used varieties are:
· Japanese hops. The liana grows slowly, but is different beautiful foliage– colorful and carved. Planted with seeds. The plant is able to fully master the proposed support in a couple of years;
· common hop. Distributed everywhere. The liana is undemanding in care and can grow on any soil.
When growing hops, you need to remember that they are actively growing, capturing new lands.
Arch design - features
The material that is planned to be used for support must be durable. It must withstand the weight of the plant in summer, and the weight of the snow crust.
Light plastic arch It is not advisable to use for climbing perennials. It will need to be disassembled in the fall and reassembled in the spring. It is suitable for annuals that grow and bloom for only one season.
When choosing an arch frame, you need to ensure that it fits into the overall design concept of the garden.
The height of the arch must be at least 2.5 meters. You need to take into account human height and the ability of the vine to grow. For the same reason - growth activity - the width of the arch cannot be less than 1.2 meters.