Wood chips for wood concrete are the main component of the material (from 75% to 90% of the total volume). The selection and preparation of wood filler is an important step that directly affects the structural and thermal insulation characteristics of wood concrete.
Almost any wood is suitable for wood concrete. The best option would be to use coniferous species(for example, pine, spruce) or hardwood (for example, birch, oak, poplar, aspen). It is strictly forbidden to use larch, beech (due to the increased content of substances harmful to cement - sugars), and you also cannot use freshly cut wood; it must lie down for 3-4 months.
To produce wood chips, any logging waste (boughs, branches, tree tops), woodworking waste (slabs, rounding residues), and secondary waste (wooden furniture, pallets, etc.) are used. The volume of wood filler should contain no more than 10% bark admixture, no more than 5% pine needles and leaves by weight of the dry filler.
Why is pine needles better? Wood contains substances that adversely affect the characteristics of wood concrete, especially strength: various groups sugars, starch, extractives. Their content in coniferous trees is less than in hardwood and other species. In any case, aggregate produced from the above rocks needs further preparation and processing. It’s just that removing sugars from the filler of hardwood trees, unlike coniferous trees, requires a little more effort and components.
Chemical composition of wood species
Wood chips: shape and size
The geometry and size of wood chips for preparing the wood concrete mixture is determined by GOST 19222 for wood concrete.

Wood chips
Firstly, according to GOST 19222, the wood fraction must have a needle-like shape to create a reinforcing effect and increase the strength of the material. Secondly, the best wood chips for wood concrete must meet the following requirements:
- length should not exceed 30 mm (optimal length 20 mm)
- The width should be no more than 10 mm ( the best option 5 mm)
- thickness 5 mm
Machine for making wood concrete chips
The correct geometry and size of aggregate fractions can be obtained by manufacturing it on chipping and chipping machines. An excellent option for obtaining the correct needle shape and size of the chips is to use wood shredders. However, a wood shredder is a very expensive machine. Chip cutters for wood concrete (hammer crushers) will give no worse results. It is also possible to produce large size fractions on rotary chippers and then re-grind in a chip crusher.

Wood shredder
If you buy one of the machines described above, you can easily make wood chips with your own hands. But most often, wood filler is easier to purchase from forestry enterprises.
Preparing wood chips for wood concrete
Harmful substances contained in wood filler negatively affect the strength of wood concrete. Therefore, an important step before producing a wood concrete mixture is the preparation and processing of wood filler.
There are the following methods for preparing the aggregate:
Physical way
It involves treating wood with water, which washes out a significant portion of water-soluble substances. This is why freshly cut wood contains more water-soluble sugars than driftwood. Wood that is stored under cover will contain more water-soluble substances than wood that has been left out in the rain. A great effect can be achieved by soaking wood chips for a long time in a pool, but this requires space. It is enough to soak for 24 hours in plain water or 2-3 hours in heated water.
Chemical method
The easiest way: oxidation of tannins with atmospheric oxygen. To do this, the wood is kept in the air, and preferably under the sun.
Chemical reactions that occur during woodchip processing chemicals, convert sugars into insoluble and harmless compounds, and also create an impermeable film. For enveloping wood waste Urea-formaldehyde resin (KS-11 or KF-MT-P) is used as an impermeable film. To reduce the influence of sugars harmful to cement before creating cement mixture wood chips are impregnated with a mineralizer (4 - 10% bleach solution). The impregnation process is called mineralization.
In practice, it is popular to treat wood filler with solutions of calcium chloride, liquid glass and alumina sulfate to eliminate the effect of harmful sugars on cement. Calcium chloride should only be used on seasoned softwood wood chips. When using liquid glass and alumina sulfate, the type of wood and its curing time are not important, however, when using them, the strength of wood concrete decreases by almost half.

Calcium chloride or calcium chloride CaCl2
Biological method
Elimination of wood poisons is carried out using catalysts, which can be bacteria. This method includes simply heating the wood. It activates biological processes, which will lead to partial fermentation and oxidation of water-soluble sugars. During the drying process, sugars become insoluble: they vitrify and crystallize.
Combined method
This method combines the above-described chemical and physical methods. However, it must be admitted that the combined method is labor-intensive.
There is an example of a combined method used in England. Boil the wood filler for 10 minutes and then rinse it in water. This partially removes water-soluble sugars. Then it is boiled in a 20% solution of iron sulfate to precipitate tannins.
Another recipe for the combined method: the wood chips are soaked in liquid glass from 5 hours to 24 hours, then it is washed and dried.
The section of GOST 19222 “Determining the suitability of wood filler” describes a method by which you can check the effectiveness of a particular method.
Natural unpainted wood chips are suitable for mulching the soil and solving such problems landscape design, as filling paths and platforms.
This is a convenient, completely natural material without any chemical additives. You will definitely find a use for it at your dacha!
Please note that this is wood chips from deciduous trees (birch, linden, poplar, maple and aspen). You don't have to worry about mulch or filling from these wood chips acidifying the soil or harming your plants.
Wood chips are very convenient to use. All work can be carried out independently, because it does not require any special physical strength or any special knowledge. Ease of use is also enhanced by packaging. We sell wood chips in sealed bags of 40 liters. The package is voluminous, but not heavy. You will be comfortable working with him. Delivery and storage of wood chips in bags also does not present any difficulties.
Chips from deciduous trees will make your site beautiful and your plants healthy.
For comprehensive protection against weeds, we suggest using DuPont™ Plantex® garden geotextiles. The material creates favorable conditions for healthy plant growth, its unique design allows air, water and nutrients to pass through, allows the soil and plant roots to breathe, while trapping weeds underground.
You can read the technology for using geotextiles in the description of any product from DuPont™ Plantex®.
Mulching the soil
Mulch is a natural product that covers the top layer of soil, lawns, and garden plots.
Beneficial features
When people use and exploit the land in urban conditions, bare, unprotected areas are formed on it, which has a very bad effect on the appearance, composition and microflora of the soil. Natural decorative mulch will help cope with this task. It brings not only benefits, but also aesthetic beauty to landscape design.
Materials for mulching can be very different, depending on the desired effect: stones, pebbles, decorative sand, pine needles, straw, wood chips (natural and decorative), wood shavings, bark, cedar shells and husks, and much more.
The advantage of bark, chips and shells over stone, granite, crushed stone and other similar materials is that bark and chips reduce the risk of soil compaction, improve the physicochemical characteristics of the top layer of soil, and activate the development of microorganisms beneficial to plants. Due to its porous structure, natural mulch maintains soil moisture during dry periods. These natural mulching materials also support temperature regime: protect the soil from hypothermia in winter, overheating and active solar exposure in summer, even out daily temperature fluctuations in autumn and spring, and retard the growth of weeds. The ground underneath natural materials breathes, allows air and water to pass through. Natural mulch enriches the soil with oxygen, allowing free air access to the soil and regulating its acidity.
Mulch made from coniferous trees has many beneficial properties:
- exceptional beautiful appearance
- antibacterial effect: wood-boring beetles do not live in them. Thanks to this property, there is no need for chemical treatment in the production of wood and bark, while other species are subject to rotting
- contain antioxidants - substances that help the body in the fight against aging and the occurrence of various diseases, especially under conditions of stress, polluted environment, radiation.
- throughout the entire period of operation, Siberian larch and Angara pine evaporate natural flavonoids, which, when entering the human respiratory tract, prevent viral and colds
- Siberian larch and Angara pine grow in ecologically clean areas, so they do not contain allergens
- the bark and chips of these tree species are resistant to rot and mold
Mulch has not only useful, but also decorative qualities.
Thanks to the bright colors, you can diversify your garden, lawn, children's or sports ground, park, flower bed, lawn, etc.
In the production of colored decorative chips, only natural, stable, harmless dyes are used. Modern colors - environmentally friendly clean materials with a rich range of bright colors and natural warm tones that will create a healthy, natural, cozy atmosphere.
Another advantage of shells, bark and chips of Siberian coniferous species is that such mulch does not rot for a long time, which cannot be said about straw and similar materials. In the spring you can add a certain layer. In total, for mulching and for decorative purposes, a layer of bark or wood chips 6–8 cm thick is sufficient. After a few years, the bottom layer will naturally turn into natural organic fertilizer.
Application
Mulching is necessary for the unprotected soil surface to restore it or to hide its deficiencies.
Mulch can be used in garden plots, cottages, children's and construction sites, in parks, squares, flower beds, rock gardens, rock gardens, winter gardens, along the banks of reservoirs, swimming pools, for indoor plants and many other places to improve the appearance of the soil and its composition.
Unlike stone and gravel, bark, shells and wood chips can be used as turf. This lawn is soft and pleasant to walk on. Maintenance is kept to a minimum: no mowing or watering required.
Mulching calculation
1 bag of mulch (50-60 l) is enough for 1 m2 with a mulching height of 5-6 cm.
Everyone knows that starting from the stage of timber harvesting and at all stages of wood processing, a colossal amount of waste remains. Among them are tree branches, tops, twigs, stumps, slabs, substandard fraction, sawdust and trimmings. There are various methods for reducing the volume of wood waste. The simplest is combustion, but this method is ineffective and does not bring profit. Another method is the processing of wood waste to create wood chips.
Wood chips
Wood chips are created in a variety of wood chipping machines, which make it possible to crush large volumes of wood waste in a short time, resulting in high-quality process chips. Chip production facilities are a fairly profitable business that can regularly generate profits.
What is made from wood chips? Today, wood chips have a wide range of uses. It is used as fuel to operate gas generating equipment. Wood chip boilers provide buildings and businesses with steam and heat. Gas generators can operate on wood waste and are economical. If for the production of wood chips you use not just one wood chipper, but a full-fledged production line, including a chip cutter, a drum dryer, a gas generator, a sorting and packaging plant, conveyors and bunkers for the supply of raw materials, then the final product will be chips for smoking with low humidity. As a result, the shelf life and quality of the product increase.
Process chips are excellent for use as fuel in universal solid fuel boilers due to their efficiency and high level efficiency. Boiler rooms of both private houses and individual areas are increasingly being equipped with such boilers. major cities. Fuel chips are in great demand today.
Chip brands
| Chip brand |
Purpose |
|
Sulfite cellulose and wood pulp, intended for the production of paper with regulated contamination |
|
|
Sulfite cellulose and wood pulp intended for the production of paper and cardboard with non-regulated contamination, sulfate and bisulfite cellulose intended for the production of paper and cardboard with regulated contamination |
|
|
Sulphate cellulose and various types of semi-cellulose intended for the production of paper and cardboard with unregulated contamination |
|
|
Alcohol, yeast, glucose and furfural |
|
|
Food Grade Crystal Xylitol T |
|
|
Furfural and yeast in two-phase hydrolysis |
|
|
Fiberboards |
|
|
Particle boards |
Requirements for woodchips
|
Indicator name |
Standard for brands |
|||||||
|
Mass fraction of bark, no more |
||||||||
|
Mass fraction of rot, no more |
||||||||
|
Mass fraction of mineral impurities, no more |
Not allowed |
Not allowed |
||||||
|
Mass fraction of residues on sieves with holes diameter: |
||||||||
|
30 mm, no more |
||||||||
|
20 and 10 mm, no less |
||||||||
|
5 mm, no more |
||||||||
|
on a pallet, no more |
||||||||
|
Carbonized particles and metal inclusions |
Not allowed |
|||||||
Wood species for making chips
|
Purpose of wood chips |
Mass fraction of wood species in chips, % |
|||
|
conifers 100 |
deciduous 100 |
in the mixture |
||
|
coniferous |
deciduous |
|||
|
Production of cellulose: sulfite and bisulfite |
Spruce, fir |
Not less than 90 |
No more than 10 |
|
|
Birch, aspen poplar, alder, beech, hornbeam |
No more than 10 |
Not less than 90 |
||
|
sulfate |
All species, larch separately |
Not less than 90 |
No more than 10 |
|
|
All breeds |
No more than 10 |
Not less than 90 |
||
|
neutral sulfite |
Not allowed |
All breeds |
Not allowed |
|
|
Semi-cellulose production |
All breeds |
Not less than 90 |
No more than 10 |
|
|
All breeds |
No more than 10 |
Not less than 90 |
||
|
Wood pulp production |
Spruce, fir |
Not allowed |
Not allowed |
|
|
Hydrolysis production: yeast |
All breeds |
All breeds |
Allowed in any ratio |
|
|
alcohol |
All breeds |
All breeds |
Not less than 70 |
No more than 30 |
|
glucose |
All breeds |
Not allowed |
Not allowed |
|
|
furfural |
Not allowed |
All breeds |
No more than 5 |
Not less than 95 |
|
Xylitol production |
Not allowed |
Birch, aspen admixture no more than 10 |
Not allowed |
|
|
Production of furfural and yeast by two-phase hydrolysis |
Not allowed |
Birch, beech, maple, oak, hornbeam, aspen admixture no more than 10 |
Not allowed |
|
|
Production of fiberboard and chipboard |
All breeds |
All breeds |
Allowed by agreement with the consumer |
|
Woodchip production
When producing wood chips of a specific size, in order to calibrate the raw materials, drum chippers are used, which are equipped with removable meshes with a given mesh size. In such installations, wood chips of any given parameters are created. For example, if your specialty is the production of wood chips for smoking, then it is important to use wood chips of the same size in the smokers. If you use chips of the same size, you will never encounter the problem of small particles causing flames. Technological chips of the same caliber are an excellent material for creating building materials, for example, wood concrete. Due to the homogeneous mass, a high quality of the final product is achieved. Wood chip plants equipped with sizing grids significantly increase production capabilities.
Cellulose is produced from industrial wood chips, wood boards and products of wood chemical and hydrolysis industries. It is created from thin round wood raw materials with a cross-section of 2-6 cm and a length of 1.0-3.0 m with a gradation of 0.5 m and maximum deviations in length of ±5 cm.
Creation of wood concrete
From wood chips they create modern high-tech wall blocks. Arbolite blocks are produced on the basis of wood chips and cement component. This produces a building material that is not hazardous to human health. It is lightweight, retains heat well, does not freeze, does not rot, and does not burn. Wood concrete panels are used for the construction of country cottages, as well as courtyard buildings, bathhouses, garages, storage facilities, cowsheds and poultry houses. Projects of arbolite buildings are almost similar to buildings made of brick or other materials. Wood concrete houses are an excellent replacement for log houses. Today, high-quality wood concrete blocks are quite popular on the market, this makes it possible to erect a building in a short time.
Creation of building materials
Wood chips are actively used to create chipboard, fiberboard, cardboard and paper, plywood, briquettes for heating, wood pellets and pellets, drywall. For these purposes, it is necessary to additionally grind the wood chips in wood chippers to obtain a finer fraction. The use of wood chips for the manufacture of building materials used in Everyday life, makes it possible to significantly reduce tree cutting and reduce the amount of wood waste.
Substandard timber and industrial chips can accumulate as dead weight on the territory of forestry enterprises, but they can be given a second life, thereby saving the environment.
Any owner country house wants to make it unique and beautiful. Decorative wood chips can help with this, as they are an attractive product that is at the same time beneficial for the soil.
Decorative wood chips are used for mulching, that is, covering the soil in the process of growing both agricultural and ornamental plants. The main task of mulching is to prevent soil erosion, suppress the development of weeds, optimize the soil water regime and improve soil nutrition of plants.
At the same time, today wood chip mulch is often used as a decorative element in landscape architecture and gardening. She complements perfectly decorative properties any plants, adds variety to the design of flower beds, gardens, squares and parks.
 Despite the fact that marble chips, calibrated pine bark, gravel, and crushed stone can serve as decorative mulch, decorative chips are very popular today. The main advantages of wood chips:
- environmental Safety
- ease of disposal
- softness (it’s even pleasant to walk on it)
- excellent aesthetic characteristics.
Decorative wood chips can be colored in a variety of shades. It is used as a background for landscaping elements, as well as as an independent decorative element. Mulch from this wood chips stylistically combines parts of the composition into one complete one, visually divides the area into zones and replaces the lawn, thereby creating enormous opportunities for creating unusual projects landscape design.
Mulching with decorative wood chips is an excellent way to enrich poor soil. Wood stimulates the reproduction of earthworms and beneficial microflora in the soil, protects it from drying out and has high heat-protective parameters.
Mulch is placed on warm and moist soil. In the conditions of central Russia, this is done in May - June, after the threat of frost. The area needs to be cleared of perennial weeds, because they can grow through the wood chips. If you need to plant plants in mulched soil, the mulch layer will have to be removed. Decorative chips, or bark, must be added every year in the spring to maintain an attractive appearance, in a layer of 1 - 2 cm.
Alder and oak chips
Oak chips perfectly “ennoble” the taste alcoholic drink. This is the most common use of oak chips. It is added to various stages wine production, both at the very beginning of fermentation and during the filling of industrial containers with wine.
Oak chips brought to wine production are first “fried” over a fire and then saturated with water. Under the influence of flame and smoke, the wood chips become saturated with a persistent smoky smell, the aroma of smoked meats and caramel.
The use of wood chips in wine production can significantly increase the area of contact between wine and wood, which significantly speeds up the aging process, and saturation with water reduces the concentration of tannins.
Alder chips are an excellent material for smoking a wide variety of products. It is alder chips - perfect option for preparing smoked dishes at home. During combustion, alder does not emit acrid toxic smoke, nor does it form a layer of soot on the surface. Alder chips can be used in any smokehouse: both factory-produced and self-designed.

The production of wood chips, despite the simplicity of the product, is a fairly profitable business. Especially considering that in our country there are very few enterprises that produce wood chips. Mainly, it is created in workshops based on other wood processing industries. In this article we will tell you how to make wood chips with your own hands and why it is profitable to engage in such a business.
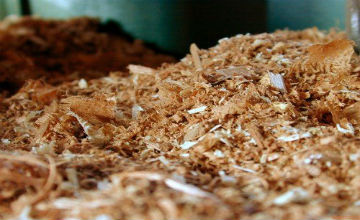
08 FebruaryIn this article we will talk about various ways getting rid of sawdust , their uses and compare them with each other.
In some cases you have to pay for someone to take it out and one way or another disposed of the sawdust, in others they are taken away by interested persons or organizations, and it happens that they are created by processing this material.
Sawdust is a unique material with many properties of wood. Therefore, such material is in great demand in:
- fuel production;
- production of building materials;
- home and agriculture;
- repair and construction work.
Fuel production
Various types of fuel are obtained from sawdust, among which the most famous are pellets and briquettes.
These types of fuel can be used for conventional boilers, stoves or fireplaces, but maximum effect is achieved only in automatic heating devices.
After all, all elements of one batch are identical in size and shape, due to which the systems automatic feeding fuels can dose them more accurately. Read more about these types of fuel.

Another popular type of fuel is mixture of different alcohols, which is obtained from fermented sawdust.
This material is mixed with a sulfuric acid solution and heated under pressure, causing the cellulose to break down into simple sugars that can be fermented.
After fermentation is complete, the mass is passed through a distiller, resulting in alcohols various quality.
Read more about this use of sawdust in a separate section.
Also obtained from sawdust pyrolysis gas, suitable for use in heating and cooking stoves, as well as in hot water boilers and other natural gas-powered equipment.
In terms of calorific value, pyrolysis gas is much inferior to natural gas, but, due to the minimal cost of its production, heating with pyrolysis gas is often cheaper than with natural gas.
Read more about this gas, the method of its production and use.
Manufacturing of building materials
 Sawdust is used to produce building materials such as sawdust concrete.
Compared to conventional concrete, this material is noticeably lighter, and also has lower thermal conductivity, therefore, a house built from it loses less heat, which means you will have to spend less on additional insulation.
In addition, wood in concrete improves the vapor permeability of walls, thanks to which such houses always have optimal humidity, because its excess goes out through the walls to the street.
Another popular material made from sawdust is wood concrete. In many ways it is similar to sawdust concrete, but it also has differences. After all, the mixture for pouring wood concrete is prepared without adding sand, that is, by mixing cement, sawdust and water.
Besides, this material lighter and stronger sawdust concrete, although it is much more expensive. You can read in more detail about the production and use of wood concrete in.
Sawdust makes good ones insulation and finishing materials:
- Fiberboard (fibreboard);
- Chipboard (chipboard);
- organic insulation.
Fiberboard is used for finishing walls, ceilings and floors, a t also forinterior lining cabinet space.
On the basis of fiberboard, a popular finishing material is made - hardboard, which differs from fiberboard by the presence of a decoratively treated side. Chipboard is used for creating furniture and many other works.
Organic insulation is only slightly inferior to mineral wool, but environmentally friendly, because its basis is paper obtained from sawdust.
Household and Agriculture
Sawdust is an excellent material for feeding various animals. This applies to both pets, such as hamsters, parrots or cats, and various livestock.
The material for backfill is chosen based on many factors, one of which is smell, because fresh sawdust has a strong smell, and not everyone likes it.
For more information on how to choose bedding, read the article (Sawdust for pets).
Another use for this material is in the soil around plants.
Bare soil quickly loses moisture, overheats and cools, causing plant roots to suffer. By filling the soil around the plant with waste from sawing wood, you will protect the roots, which will make the plant better able to withstand winter cold and summer heat, and it will also be possible to water it less often.
Wood sawing waste is an excellent material for growing mushrooms and creating quality fertilizer . Mushrooms receive enough nutrition from them to multiply quickly, and the cost of such food is low, and you can often get it for free.
Sawdust also makes good humus , soil saturating nutrients and increasing plant productivity.
To learn more about this method of using wood sawing waste, read the article (Sawdust fertilizer).
It is also very convenient to cover paths between beds in fields, vegetable gardens or greenhouses with sawmill waste.
Even after heavy rains along such paths it will be possible walk without getting muddy, so you can check your plants after a rainstorm.
Once every few years it will be necessary plow a garden or field so that the sawdust is evenly distributed over the ground and fertilizes it.
Repair and construction work

The main use of sawdust during repair and construction work is various insulations.
They are poured between thin wooden walls, due to which, at minimal cost, the thermal conductivity of such a wall is comparable to the same parameter of a wall made of timber of the same width.
That is, with a wall width of 20–30 cm, insulation will be required only in the northern regions.
In addition, wood sawing waste mixed with clay and the resulting solution is used to insulate ceilings, floors and brick walls.
The effectiveness of such insulation is much lower than that achieved by using mineral wool or polystyrene foam, but you can increase the thickness of the layer, due to which significant savings are achieved.
The same compositions are made on the basis of lime or cement, which act as a binder. Read more about all the methods of insulation using wood sawing waste here ().
Processing business
If there is a constant supply of sawdust or the ability to get it for free or very cheap, then you can start a business processing it. The final product can be anything, so it is necessary to focus on the demand for a particular product.
For example, if gas is bad in a region, but people there is an opportunity to buy automatic boilers, then high-quality pellets and briquettes will be in good demand. Read about choosing such a boiler or burner.
After all, access to free or very cheap sawdust allows you to produce products whose price will be lower than the market average for similar products.
If you are interested in such a business, then read more about it.

Another promising direction is the production of sawdust for cats or hamsters.
For this purpose, wood sawing waste dried, treated with deodorants, giving a pleasant smell to the material, and are packaged in paper or plastic bags.
No less interesting can be the sale of sawdust in bags for smoking.
After all, each product uses its own combination of wood species, providing the best taste and smell, so packaged sawdust of various types of wood will be in demand.
Responsibility for disposal of waste from the wood processing industry
Despite the fact that sawdust is classified as Hazard class 5 According to the federal catalog of waste classification, that is, practically safe, they still need to be disposed of in any available way.
In addition, dried sawdust is very flammable material, which is difficult to extinguish if the fire has gained strength. Therefore, wood sawing waste can be disposed of in any available way:
- dispose of in a landfill;
- bury in the ground;
- distribute to people and businesses;
- sell to any buyers;
- use for heating in winter;
- use in a subsidiary farm for any needs;
- used to produce pyrolysis gas and use it in any way;
- hand over to the nearest pulp and paper or chemical plant that processes wood;
- process in any way (a license may be required for the production of some products).
If the sawdust for a long time they don't clean and there is a fire threat or someone else's territory is littered, then questions may arise from various regulatory organizations.
In Russia, the disposal of any waste, including sawdust, is regulated the federal law N 89-FZ dated June 24, 1998 “On production and consumption waste”, which you can read by following this link.
 Another document regulating the disposal of any waste, including sawdust, is the federal law of March 30, 1999 N 52-FZ “On the sanitary and epidemiological welfare of the population.”
Everything is in it waste storage and disposal issues considered in terms of the impact on the sanitary and epidemiological well-being of people.
Therefore, any disposal method must comply with the laws adopted in Russia.
No permits are required for one-time burning of small amounts of sawdust, but for regular burning of large volumes, not only permits for the burning itself are required, but also final product disposal solution– ash or soot.
The same applies to burying sawdust in the ground. In some regions, claims may be made by officials in connection with formal violations of some points of the law, but in reality, such quibbles may be lobbying the interests of landfill owners.
Advantages and disadvantages of various processing methods
Any owner of a woodworking enterprise or sawmill wants to get rid of sawdust with maximum profit, but there are situations when it is no longer a matter of profit, but of minimizing the costs of disposing of this waste.
Recycling is the most profitable, but it all comes down to difficulties in selling finished goods and high cost equipment.
To transport sawdust to a landfill, you need to obtain permission from Rosprirodnadzor (RPN) and buy quotas, and these are all considerable expenses.
After all, the amount of payment depends on the volume of material transported to the landfill. It is possible to bury sawdust in the ground if we are talking about a small batch, but when tens or hundreds of cubic meters of waste are received monthly, then it is no longer possible to bury them.
In addition, there is a high probability that burying large volumes of sawdust in the ground will arouse the interest of RPN officials, who will immediately begin issuing fines, because such work must be coordinated with them.
Wood sawing waste can be give to people for free, however, it is necessary to conclude an agreement with them on the free transfer of tangible assets.
Otherwise, questions may arise from the tax office.
Such an agreement can be concluded in simple written form.
Wood sawing waste can be sold in any volume if there are buyers, but it also needs to be dealt with enter into a formal agreement and issue a receipt, otherwise the tax office will have questions. The same situation applies to the delivery of waste to recycling plants.
Selling sawdust may be in great demand in bags with delivery, even if you don’t make money from it, you can get rid of some of the accumulated waste. Stores take this product for sale at a low price and sell it as cat litter.
For such a sale you will also need enter into an agreement with the store, and also attach receipts confirming payment for the goods by the store. The disadvantage of this method is high transportation costs and the inability to accommodate large volumes of material. After all, even hypermarket chains will be able to take only a few tens of cubic meters of such material per month.
The easiest way is to use sawdust for heating your own premises in winter– this method of disposal does not require any documents.
However, even in this case one cannot do without bureaucracy, After all, during the combustion of wood, soot and ash are formed, which also need to be disposed of somehow. Otherwise, questions arise for the RPN and the fire department. After all, according to their logic, soot and ash are simply thrown into a landfill without paying a disposal fee for it.
Additionally, in the event of a fire at a landfill or any nearby waste storage area enterprises producing ash or soot will be under suspicion, but refused to enter into an agreement for their disposal.
The situation is the same with the production of pyrolysis gas: permits for the process itself and the use of gas on the territory of the enterprise are not required, but it is still necessary to conclude agreement for the disposal of soot and coal.

There are situations when sawdust lies for a long time and begins to rot, as a result of which the cellulose breaks down into carbon dioxide and various sugars.
It’s difficult to get rid of such sawdust, because no one wants to take it even for free, so the easiest way is to bury it in the ground, having received this on-load tap-changer approval. This will cost less than purchasing quotas required for disposal of solid household waste to a landfill.
If the nearest on-load tap-changer is several hundred kilometers away, then sawdust can be bury without their consent.
In contact with
Wood has a remarkable property - it splits along the grain under the influence of a wedge. It is this property that we use when we chop wood and split a splinter. From ancient times until the invention of the saw, boards for construction and other household needs were obtained exclusively by splitting logs along the grain. But even later, when saws appeared, village architects preferred to make roofing boards the old fashioned way. And that's why.
On a note
The saw, cutting the wood fibers, allowed moisture to enter the board, and this caused it to rot faster. In split boards, the integrity of the fibers was not compromised, which means that roofing made from such boards lasts longer.
Roofing boards and wood chips have long been replaced by tin and slate, and electric lamps have replaced birch light, but people still continue to use the wonderful ability of wood to split along the grain. They are attracted by the high decorative value of split wood: its shine, beautiful textured pattern and rich amber shades.
Wall panels, lamps, pencil holders, newspaper holders and screens - this is not a complete list of what can be made from a splinter.
But before you try to make even the simplest thing, learn how to split wood correctly. To work, it is enough to have only two tools: an ordinary table knife with a wide blade and an ax that fits your hand.
Any log can be split in two ways - in the tangential direction and in the radial direction. If you split a log so that the split plane passes through the core, you get logs whose split surfaces are radial.
And if you split in any other direction, but not through the core, then from under the ax there will be horns with tangential chipping surfaces. On any piece of wood, radial and tangential chips can be determined by the pattern of the growth layers. On the first, the annual layers are visible in the form of parallel stripes, and on the second - in the form of characteristic arcuate lines.
Attention
To obtain splinters with the desired chip, the annual layers in the blank bar must also have a certain direction. Thus, splinters with tangential splitting planes can be obtained from a bar whose annual layers are parallel to its narrow edge. If the annual layers in the bar at the end are parallel to its largest face, then the splinters will be obtained with radial chips.
Rice. 71. Chip Bird:
1-5 – manufacturing sequence
Keep in mind that not all trees split equally in all directions. For example, oak wood splits well only in the radial direction. The core rays, diverging in all directions from the core, coincide with the plane of the radial split and thereby facilitate splitting. With a tangential split, on the contrary, they pull the wood fibers together as if with harsh threads. These features of oak are taken into account by the producers of cooper's staves.
Due to poorly developed core rays, aspen and poplar wood splits well in all directions, so it is the main material for the production of matches.
Pine and spruce also split well in all directions, although in the radial direction it is better than in the tangential direction.
The width of the growth rings also matters. Cleaner and more even chips occur in fine-grained wood.
This is interesting
If you place a splinter opposite a burning lamp, the splinter will seem to glow with a soft, warm light. Take several splinters from different types of wood at once and compare their color and pattern. Each of them will glow differently.
Aspen wood fibers turn from white against the light to golden straw. Splinters of poplar and linden acquire approximately the same color. And the splinters of birch, which is denser wood, are less visible and are painted in a thick yellow-ochre color. Wood is especially beautiful when exposed to light coniferous trees: pine, spruce, larch and cedar.

Rice. 72. Sharkunok. Drawings of sharkunk parts:
1 – top (1 piece); 2 – small strip (18 pcs.); 3 – large bar (4 pcs.); 4 – handle (1 pc.)
The splinters of these trees against the light seem to be filled with amber in a wide variety of shades - from light orange to crimson-red; pine splinters have many shades. Almost Crimson They acquire those areas that are located close to the knots and contain a lot of resin.
When exposed to light, the texture is clearly visible, which makes the wood even more expressive.
All these features must be taken into account first of all when working on various lamps. With decorative fields, the lampshade can be assembled from splinters of different colors, alternating pine with aspen, linden with spruce. By alternating two darkly colored splinters with one lightly colored one and vice versa, you can build a composition on a clear rhythm of color spots. Splinters made from colored wood of alder, oak, apple, pear and cherry are almost not translucent at all, so they are of little use for lamps. In addition, apple and pear trees are quite difficult to split in a given direction.
In all chipped products, individual splinters must be tied together with twine made from hemp, flax, bast or pine, spruce and cedar roots. It is undesirable to use twines made of synthetic materials: they do not combine well with wood. For flexible connections, for example, a newspaper rack, you need flax, washcloth and hemp twines, and for rigid ones, spruce and pine roots.

Rice. 73. Sequence of assembling a sharkunk
Since the lampshade must have a rigid structure, it is advisable to connect the beams with each other using roots. If it was not possible to prepare the roots, then use bast or hemp twine instead. Only in this case with inside For rigidity, strengthen the lampshade with hoops made from steamed splinters.
Having prepared necessary materials, get to work. Before splitting the workpiece into thin splinters, moisten it by placing it in some container and pouring hot water over it. After half an hour, make a test. If the workpiece does not split well, then keep it in the water a little longer. If, on the contrary, it is too swollen, then dry it a little. The knife you use to split the workpieces should not be very sharp. Otherwise, it will cut rather than split the wood, violating the integrity of the fibers.
By splitting a simple block, you will get splinters in the form of rectangular strips, which are mainly used for weaving. From the strips you can weave a basket, a mat for a vase or a stand for hot food.
To simplify the work, you can make a simple device from two bars in a matter of minutes. At the ends of the bars, at about a millimeter height, make two cuts and insert a knife into them. Nail the bars to the edge of the table or workbench. Between the bars on the back of the knife, make a shallow groove on the workbench to ensure the free passage of the splinter. By feeding the workpiece onto the edge of a knife, you will quickly split the workpiece into splinters of equal thickness.
On a note
For decorative panels and lamps, the splinters are additionally decorated with figured slots. Exactly identical outlines of the slots on individual splinters are achieved by cutting grooves on the workpiece before it splits. Depending on the purpose of the product, weave the finished carved splinters with twine or a root folded in half. Welt patterns that can be made from splinters have many options.
The high plasticity possessed by thin splints makes it possible to give them a certain bend, which is necessary when creating products more complex shape. To make a lampshade that has a curved lateral surface, formed from many bent splinters, you need to cut two identical templates from a thick board. One side of each template should exactly follow the curved line of the lampshade surface. Connect the templates with mortise slats. The length of the slats should be slightly greater than the perimeter of the widest part of the lampshade. Under this condition, you can bend all the rays included in the lampshade at once. Before inserting the splinters into the finished device, steam them in boiling water for 5-10 minutes. Place the device, along with wet splinters tucked into it, somewhere near a warm radiator or stove. They should dry for at least a day. After complete drying, the splinters will retain their given bend. All that remains is to intertwine them with split roots.
There was once a custom in the Russian North to decorate huts with wooden chipped birds. Suspended from the ceiling on a thin string, the funny birds peacefully “snoozed” all day. And in the evenings, when the whole family gathered at the table near the boiling samovar, and the hut was filled with leisurely conversation, the miracle bird suddenly came to life. She slowly rotated over the table, as if she was looking into all corners of the hut, checking that everything was assembled and that the family harmony had not been disturbed.
They hung the bird over the table, or rather, over the place where the samovar usually stood. It's not hard to see why. Warm air from the hot samovar, rising to the ceiling, barely touched the light feathers of the bird, but this was quite enough for it to rotate slowly and smoothly.
The owner of the house most often made the wooden firebird himself, since the tools required were very simple - a knife and an axe. The father passed on his skills to his sons, and they, growing up, taught their children to make strange birds - this is how the northerners preserved this amazing craft for many decades.
The secrets of making chip birds are not lost in our time. Today, not only villagers, but also city dwellers willingly decorate their apartments with funny wood chip sculptures.
The best chip birds are made from fine-grained pine. It easily splits into thin plates and bends well. Old masters noticed that thin-grained wood is most often found in pine that grew in a swampy place. This pine tree has golden wood with a beautiful shimmering shine. But instead of traditional pine, you can successfully use straight-grained and easily split wood from spruce, aspen, linden and other trees; and one more condition: the wood prepared for the chip toy must be sufficiently plastic.
The degree of plasticity of wood is determined as follows. Separate a small sliver from the workpiece with a knife and cut a corner from the sides. Rotate one part of the wood chip relative to the other by approximately 90°. If the sliver does not break, the tree is ready for use. Well, if it breaks, you will have to increase the moisture content of the wood. Immerse the workpiece in water for several hours, and then test it again for flexibility. If the wood is still brittle, soak it again.
It is necessary that the moisture is evenly distributed in the wood. This time, keep the workpiece in water for a short time: the wood oversaturated with moisture will become too viscous and will not split easily. Therefore, experimentally, try to determine its optimal humidity in time.
To make a firebird, you will need two even bars with a length of 200 mm and a cross-section of 28 x 14 mm each. When processing the workpiece, try to trim the wood so that the annual layers are parallel to one of the sides of the block. Pine splits equally well in both tangential and radial directions.
First, the body and head of the bird are cut out of one block. Do not try to convey them with naturalistic accuracy - such a condition will contradict the conventional, decorative design of the plumage. The feathers of the right and left wings, as well as the tail, should be the same in pattern, so they need to be made according to a template cut out of thin cardboard or thick paper. Alternately placing a template on each of the two blanks, trace the outlines of the feather with a pencil. Then cut the workpieces with a knife along the outlined contours and saw grooves to connect the bars to each other. Now start splitting the bars into thin plates. This operation is the most important. It requires patience and accuracy.

Rice. 74. Various types of wooden bows and simple patterns made from them:
1-9 – options for filling cells with wooden arches

Rice. 75. Sketches of various images that can be made using bent parts
Remember
The thickness of each plate should be no more than 1–1.5 mm. The thinner the plates, the more openwork and airy the bird will be.
Northerners figuratively call the next stage in making a bird “unfurling the feathers.” Lift the top wing feather slightly and carefully bend it to the left. Carefully place the right edge of the bent feather behind the feather lying below. Then bend the second feather to the left along with the first and bring its right edge under the third feather.
The remaining wing feathers unfold in the same way as the first two.
Attention
With each subsequent feather, the angle at which you bend it increases, so try to spread the last feathers of the wing especially carefully. When spreading the feathers of the other wing, do not forget that the feathers of the left wing should be spread from right to left, and the feathers of the right wing should be spread from left to right.
The tail feathers need to be spread in a different order. All feathers bend alternately to the right - left, right - left, only the top feather remains motionless. When the tail is completely spread out, the top feather will be in the middle, and to the right and left of it there will be an equal number of feathers.
All that remains is to attach the wings to the body by driving in a thin hook for string, and the strange firebird is ready.
Having mastered the manufacturing technology protozoan bird, you can begin to complete a more complex task using a pre-designed sketch. Modern folk craftsmen create not only individual chipped birds with original plastic solutions, but sometimes very complex multi-figure compositions.
The ability of wood to easily split along the grain was also used by craftsmen in the manufacture of sharkunk. This amazing toy was born on the shore of a cold White Sea, in a fishing hut of Russian Pomors. In good weather, fishermen went to sea to fish or hunt sea animals. But there were days when the sea was stormy and there were heavy rains. At such a time, a smokehouse with animal fat burned dimly in the fishing hut, and the Pomors sat closely around it, whiling away the time at some craft. There were no special tools at hand - a fishing knife or an ax.
And the material is the simplest - pine and birch logs harvested for firewood. But in the hands of original craftsmen, an ordinary chock often turned into a real work of applied art. Various household utensils and children's toys were carved from wood. Pomors especially loved to make ingenious rattles - sharkunkas, as they were called in these places. To make a good sharkun, you needed not only artistic taste and skill, but also ingenuity. It happened that the master would disassemble a ready-made sharkun and invite someone to assemble it again. And the uninitiated turns the wooden piece this way and that, trying to find its place for each one, sits there, racks his brains, and sometimes gives up. This is how a simple wooden rattle suddenly turns into an intricate puzzle.
The design of the sharkunk resembled multi-storey building without windows and doors, but with many cell rooms. Such a house was built from thin pine planks-partitions, which were fastened with a locking joint on a carved birch handle. At the top of the handle the master carved a small figurine of a bird or horse. The bird in the North was revered as a symbol of the sun and light; the horse was the personification of the powerful forces of nature - wind, storm, lightning.
This is interesting
In order for the shuffler to find its voice, and for the tree to sound, a pea, a pellet, or a small sea pebble was supposed to be placed in each cell. With peas the sound was soft, a little dull, but with pellets or pebbles it was ringing and perky. The master shakes his shuffle lightly, and the sound of the sea surf, the gusty rustle of leaves, and the lively chirping of grasshoppers burst into the hut. And it seems that all the sounds of the modest northern nature, which the pine tree has absorbed for decades, have burst out.
Perhaps, in ancient times, the sharkunok was not only a children's toy, but also a musical instrument, something like the ancient Russian maracas. In modern orchestras of folk instruments, the sharkunok could take its rightful place.
To begin with, in order to understand the design, we suggest you make a simple sharkun. It is assembled from twenty-four parts. According to the dimensions given in the drawing, plan eighteen small and four large planks from dry pine. Cut the handle and top from birch.
Assembly is one of the most critical stages in the manufacture of a sharkunk. Usually the sharkun is assembled by holding the handle and gradually inserting one bar after another into it. But for the first time, it is better to strengthen the handle in a vertical position, for example, in a carpenter's vice. During the assembly process, cells will form between the slats. Don't forget to put pellets, pebbles or peas in them. The lower, main part of the sharkunka consists of twelve parts, and the upper part – of four. The assembly is completed by connecting the upper and lower parts. If all the parts were made accurately enough, the connection will be tight and durable. But before connecting the top and bottom parts, do not forget to put a pellet between them.
After you have successfully assembled this toy and become familiar with the principle of constructing locking joints, you can safely begin making a sharkunk more complex design. You can double or triple the number of cells, increase the size of the slats, decorate the handle and top in your own way by cutting out an animal figurine.
To obtain a sound of a certain color, the sharkun is adjusted directly during the manufacturing process: by changing the thickness and width of the slats, and by empirically selecting the size of pellets or pebbles.
Woodchip applique
Applique is the oldest method of creating ornamental and plot compositions. Products with skillful appliqués made of felt and leather, created by ancient craftsmen more than two and a half millennia ago, have survived to this day.
Traditional materials for applique were also fur, birch bark, straw, metal, wood, and multi-colored paper. Now lovers of this type of craft also use dried leaves of trees and shrubs, herbs, flower petals and even poplar fluff for their compositions.
The application made from wood chips is original and simple to make. The kinks make it especially decorative, but in order to break the chips correctly or, as they say, decoratively, you need to know well some of the properties of wood. Let us remember that wood has a fibrous structure. Dry wood is usually brittle and brittle, while wet wood, on the contrary, is elastic and easily delaminates. These properties of wood are taken into account when preparing appliqué elements - ray-shaped “beards” formed by thin laminated fibers. How do you get them?
First, make a simple device in which you can break pieces of wood chips exactly at a given distance from the edge. In a block of brass or aluminum, cut a groove into which the workpiece should fit freely. The depth of the groove is equal to the distance from the edge of the workpiece to the intended fracture line. Round the top edge of the metal bar. It is advisable to have several of these bars of different sizes with different groove depths. During operation, the block is clamped in a vice or attached to the edge of the work table with screws. The workpiece is inserted into the groove and broken using pliers. Thin chips are broken by hand.
For application, wood from pine, spruce, aspen, linden, alder, willow, oak and other trees is used. It’s easy to prepare wood chips yourself from slightly moistened wood chips, or you can use ready-made ones. Roofing chips in sizes 350x50 and 500x200 mm usually have a thickness of 2 to 5 mm; plaster shingles (its dimensions are 500x15 mm and 1500x25 mm) are produced in thicknesses from 2 to 4 mm, plywood veneer - from 0.55 to 1.5 mm. They are made from beech, oak, birch, alder, ash, linden, larch, pine, cedar and other types of wood.
So, split the veneer or chips into narrow strips, fold them in a pack and saw them into equal rectangles. Then, stepping back from the edge of each workpiece at a distance equal to the depth of the groove in the block, use a knife-cutter to cut shallow slits across the grain (approximately to a depth of one-third of the thickness of the workpiece). It is better to move the cutter not towards you, but to the side (to the right). Hold the workpiece with your left hand, making sure that your fingers are not in the path of the cutter. After making slits on all the pieces, turn them over reverse side and make exactly the same cuts, only stepping back a certain distance from the other end of the workpieces.
When all the workpieces have been cut on both sides, insert one of them, cut side down, into the slot of the block clamped in a vice. Take the free end of the workpiece with pliers and begin to bend. The chips should break along the cut line. Take a look at the resulting break line - it is unlikely to attract the artist's attention.
Torn and wrinkled short wood fibers look quite unsightly. It is clear that dry wood blanks are not suitable for appliqué. This means that it needs to be moistened with water, but so that the moisture penetrates only into the upper layers.
Dip the workpiece in cold water and hold for about a minute, then insert it into the slot of the device and carefully begin to bend. As soon as the end of the workpiece, clamped with pliers, is at right angles to the other end inserted into the slot, the chips will break, but not completely, but by about two-thirds of its thickness.
You will see how a thin layer of damp wood connects the two halves of the workpiece: in this place it did not break, but only bent. Holding the part of the workpiece that remains in the slot with your finger, continue to bend the free part until it reaches a horizontal position.
There will come a moment when one part of the workpiece separates from the other. Remove the resulting applique element from the slot and straighten the resulting fibrous “beard”.
The length of the resulting “beards” will depend on how deeply the moisture penetrates into the wood. The more the workpiece gets wet, the longer the “beard” will be. But here, too, there is a certain limit: if moisture penetrates the wood through and through, then the chips will no longer be able to break, it will simply bend in an arc. Therefore, depending on the type of wood, you will have to empirically determine optimal time keeping the workpiece in water. Well, what if you overexposed the workpiece in water? The error can be corrected - dry the workpiece thoroughly and lower it into the water again.
In one application, blanks of different sizes and from different types of wood can be used. It is quite clear that small thin pieces will have to be soaked less than larger ones. In this case, the type of wood must also be taken into account. For example, blanks made of oak or beech take longer to soak than those made of linden, spruce, aspen, and alder.
This is interesting
Each type of wood has its own fracture, its own unique “beard” shape. In oak, at the break, it has wavy rays of approximately the same length and width; in deciduous species with soft wood (linden, aspen, alder, willow) - with numerous thread-like fibers. These appliqué elements can be used in cases where you need to imitate animal fur or get a soft transition from one tone to another. In pine, spruce and other coniferous trees, the fibers at the fracture are leche-shaped. Moreover, the rare large fiber rays are most often found to be longest in the middle.
You can prepare elements that have “bits” on both sides. In this case, make two slits on one side of the workpiece at an equal distance from the edges. Insert the wood chips into the device (its slot should be deep enough), break it first along one line, then along the other. “Beards” are formed at both ends.
Usually the “beards” are so thin that they can be cut quite easily, while they are wet, with ordinary tailor’s scissors. Dry wood is cut only with a cutter. Using scissors, the beard can be shaped into a petal, rectangle or triangle. A wide variety of patterns can be obtained from ready-made elements.
The easiest way to get a pattern is by gluing the elements in one row. The fibers of the barbs can be directed in opposite directions or towards each other. It is possible to arrange the elements in a checkerboard pattern.
From elements cut at an angle, you can create a pattern in the form of a spikelet. A spikelet of a slightly different shape can be obtained as follows. The applique elements are glued onto a sheet of dark-colored paper. Allow the glue to dry and form fibers on both sides parallel to the axis of the spikelet. Get a pattern that can be used for decorative finishing caskets rectangular shape. The patterns are either glued directly onto the surface of the box, or placed in pre-cut nests.
The patterns in the circle are endlessly varied, where the appliqué elements can be arranged as desired. In one case, the rays are directed from the center of the circle, in the other, on the contrary, towards the center. In this case, the elements are cut so that they fit tightly to each other. In addition to the given patterns of ornament, you can come up with others with more complex and original designs.
On a note
From wood chips you can create not only ornamental, but also plot compositions. In these compositions, along with elements made from broken wood chips, ordinary wood chips can be used in the form of straight or curved thin splinters, wide strips, tightly fitted to each other and cut along the contour.
The base, which serves as the background for the chip application, must be wooden: a sheet of plywood or a wide board, turned carpentry. The expressiveness of the application depends not only on the design, but also on the color and tone of the background. Wood for the background can be stained with a strong solution of potassium permanganate, walnut stain, black or brown aniline paint. Oak wood is painted black with a solution of iron sulfate. You can do the opposite - paint the applique elements in a more dark color, and leave the background light. On a black and dark brown background, appliqué elements painted in bright colors with aniline dyes look very impressive.
To glue applique elements, use quick-drying glue, such as latex or PVA. Place the part coated with glue on the background and press tightly with your fingers. After a few seconds, as soon as the glue sets, stick on the next part. If you have to work with carpentry or office glue, which dry rather slowly, then the parts on top must be pressed with a weight until the glue dries completely.
Of course, gluing the appliqué elements should be done based on a pre-developed sketch. The sketch is usually drawn up taking into account the technology and decorative features broken wood chips.
On a sheet of thin paper with a simple pencil the sketch is transferred to the base using carbon paper.
Decorative grilles
Since man first thought of intertwining several rows of poles, he has been constantly inventing more and more new types of weaving and improving various wood lattices. In everyday life, these lightweight fences have been and are being widely used. The constant desire of man to aesthetically design the objects around him led to the fact that later lattices began not only to have practical significance, but also to serve as decoration. The high decorative properties of gratings, with clear lines and an expressive silhouette, have made it possible to expand the scope of their application.
Attention
Lattices began to be used to decorate tables, screens, mirror frames, boxes and many other wood products. Increasingly, architects and decorative artists are incorporating wooden grilles into the interior design of public buildings and outdoor summer cafes.
There are a variety of technical techniques for making wooden gratings. For some, parts are made using carpentry tools, for others - on lathes, and for others they are bent from steamed wood.
A few words about lattices, the elements of which consist of bent wood. Unlike other types of gratings, these have one remarkable feature - the image on them, at the request of the author, can be changed at any time without destroying a single detail. Such grids can serve as a kind of construction kit for a young artist.
Start small. Try making a small decorative wall grille for the first time. But before you start making it, develop a sketch on graph paper or checkered paper. Keep in mind that when working on a sketch, you can only draw arcs in each cell, and they must be specifically located and of a certain size. Large arcs should rest on opposite corners of the square, and small arcs should rest on corners adjacent to one of its sides. When small and large arcs are combined in one cell-cell, a more diverse pattern is obtained. But only the simultaneous use of all options for the arrangement of arcs in squares will allow you to depict almost any object, animal or plant, and not just an ornament.
A few simple sketches for lattice sets. Each image is made in a conventional decorative manner, which was suggested by the material and technique of making the lattice. From the sketch it is easy to determine how many cells need to be wide and how many high in order to make a base for the grid. Select the size of each cell depending on the size of the grid and the nature of the image. The depth of the grating, and therefore the width of its constituent slats, depends on this. All slats must be same sizes, well planed and cleaned.
To make a base for the grate, clamp several slats at once in a vice or clamps and make parallel cuts at equal distances along the thickness of the prepared slats. Then assemble the base grid from the obtained parts. If you don't have ready-made slats, cut them on a circular saw. The parts produced on a circular saw are highly accurate. Cross cuts must be made on the board before it is cut into thin slats.
Any strong wood can be used for the base of the lattice, and wood with high ductility can be used for insert elements. For the manufacture of insert elements, the wood of willow, linden, bird cherry, birch, oak, beech, hornbeam, acacia, maple, and elm is used. If the cells of the base grid are small, then wood from soft-leaved trees should be used for inserts: willow, linden, aspen and bird cherry. For lattice with large cells, plastic hardwood is more suitable.
The length of the insert elements is easy to determine experimentally, but if desired, you can also calculate it using the formula 2L" I/4, where R is the side of the square, and P = 3.14. If, for example, the side of the square is 50 mm, then the arc length of the insert element will be 78.5 mm.
Attention
No matter how high ductility wood may have, it acquires the necessary flexibility only after soaking, steaming and boiling. Therefore, the finished preparations are placed in a metal bowl and boiled in water over low heat for about 30–40 minutes. Large preparations are brewed in one container, small ones in another.
After boiling, you need to let the workpieces cool directly in the water. After removing the workpiece from the cooled water, carefully bend it into an arc and insert it into the grid cell that corresponds to a specific cell in the sketch. Each insert element must be bent very carefully, without sudden movements, keeping in mind the popular proverb: “Little by little you bend an alder tree, but with a twist (suddenly) you break an elm tree.” Of course, you can only bend a relatively thin workpiece with your hands.
Thicker workpieces must be bent with an arc in advance using a wooden punch and matrix cut from thick bars. The blanks laid in a row are compressed between the punch and the matrix using a press or clamps, where they take the shape of an arc. In this form they are dried for 24 hours at room temperature and several hours in drying cabinet or on a heated stove. After removal from the press, the finished arch elements are inserted into the cells of the base with some force. This guarantees the adhesion strength of all grille parts.
First, insert all the large elements into the base cells, and then the smaller ones. When all the required cells are filled in, give the opportunity bent parts dry overnight. Once dry, they will retain their arc shape. And then you can freely remove each of them from one cell and insert it into another, clarifying or complementing the drawing. Indeed, in a sketch on a flat image it is difficult to imagine some features of spatial forms that are well conveyed only in the material.
The inserted parts-arches adhere quite firmly to the base, but if the composition suits you well and you are not going to change it in the future, then for strength, place the parts on glue.
If the typesetting pattern does not stand out very clearly against the background of the cellular base, strengthen it with additional half-arcs, that is, make the bent elements double.
If you plan to place the grille against the background of a wall, then draw the outline of the typed pattern with oil or tempera paint. Select the base grid so that it is close in color and tone to the wall. To do this, before assembly, stain it, etch it or paint it with aniline dyes. In some cases, to enhance artistic expression You can try to select the base of the lattice and insert elements from different types of trees, contrasting in tone and color.
It is known that wood goes well with other materials. And if it is immediately difficult for you to bend wood, then try making insert elements from other materials that have good ductility and low elasticity: baseless polyvinyl chloride linoleum, relin (linoleum made from rubber waste), various types of transparent or translucent plastic (from old toys, etc. ), colored plexiglass, thick cardboard, etc.
Wood filigree
In one of the halls of the Sergiev Posad Museum of Local Lore, an inquisitive visitor will definitely pay attention to the small relief in wooden frame with an intricate pattern. At first glance, it may seem that the frame is covered with the finest carvings made by a skilled craftsman. Only after looking closely do you begin to understand that this is not carving at all, but rather filigree, but... made of wood shavings. Probably, many of you have seen filigree items made of gold, silver or copper in museums or in reproductions in books. They are very similar to lace. This lace is not woven, but soldered from flat wire spirals, rings and curls.
This is interesting
Metal lace... How did the filigree technique become the property of woodworkers?
Perhaps, while working with a plane, the master woodworker admired the intricate curls of golden, resin-smelling shavings. And they reminded him of filigree patterns made of thin twisted wires. And then, perhaps, the master came up with the idea of trying to make something similar from ordinary wood shavings. True, these are just our guesses, everything could have been different.
The technique of making stranded filigree is relatively simple, but requires a lot of patience and care. Try to make some simple pattern. Once you have mastered the techniques, you will be able to come up with new, more complex patterns yourself.
For such filigree, any hardwood, well-dried and without knots, is suitable. But still, before work, it doesn’t hurt to check once again whether the chips of the wood you have selected curl well. Therefore, after sharpening the knife first on a small block, and then sharpening it on a leather belt with GOI paste (the paste can be replaced with paint - chromium oxide), try to remove thin shavings, no thicker than a notebook sheet, from a piece of wood. If the shavings easily curl into small rings, then the wood has been selected correctly. When choosing a material, keep in mind that dense and hard wood from fruit trees (apple, cherry and pear) is more suitable for small jobs, while soft wood (linden, aspen and alder) is more suitable for larger ones.
Plane several planks from one to three millimeters thick from the wood prepared for work. Remember: the larger the pattern, the thicker the board should be. For very fine patterns, straight-grain plywood veneer can be used instead of planks.
The thinner the chips removed, the smaller the curl, and vice versa, the thicker the chips, the worse they curl into the ring. Therefore, by reducing or increasing the thickness of the chips, you can obtain curls of any configuration as you wish.
A simple pattern consisting of a number of identical curls is not difficult to obtain. It is much more difficult to make a pattern in the form of a curly branch. The thinnest shavings are obtained when making the first curl. For the second curl, remove the shavings in a thicker layer. Then it will turn out to be slightly larger than the first one. And so, each time increasing the thickness of the chips, cut all the remaining curls. When the last largest curl comes out from under the knife blade, continue removing the wood so that all the other curls are separated from the base along with it. Having separated from the base board and remaining connected to it in only one place, this element of the pattern resembles a large branch with small leaves. All other branches of the pattern are performed in the same way. When cutting branches, make sure that their curls have a certain steepness.
On a note
Chip filigree is very fragile and is afraid of moisture, which causes the chips to unwind and the pattern to be irreparably destroyed. But if the boards along with the patterns are glued to the base, the shavings will not lose their acquired shape.
When making a frame, planks with curled shavings are glued onto slats planed from the same wood as the pattern itself. If you want the pattern to stand out in contrast against the background of the slats, then before gluing the slats, tint the slats or select wood with a subtle texture, but with a contrasting color. For example, you can stick a pattern of pear shavings on aspen slats, and linden shavings on cherry or oak slats. Remember that chip patterns can only be glued with waterless BF-2 glue or epoxy resin. Water-soluble glue causes the chips to unwind.
Blurred background thin layer glue, carefully place a board with a shaving pattern on it, and then elements from individual shavings (if there should be such according to the plan). The chip filigree must be in a recess that protects it from mechanical damage. In this case, this recess is formed using two planks. One of them is the one on which the pattern is made, and the other is glued on the opposite side. The planks must be the same thickness. The parts to be glued must be dried under pressure or under pressure until the glue has completely hardened. In the same way, you need to make three more slats decorated with wood filigree, necessary for making the frame.
You can lay out a filigree pattern from individual shavings. Shavings of various steepness are prepared using a plane. A thin board is fixed in a workbench and, stepping back a few millimeters from the edge, one shaving after another is sequentially removed. Usually the same chips come out from under the plane, but their thickness and character can be changed depending on the degree of release of the plane iron. The finished product must be cut in advance the desired shape recess: rectangular, round, oval or shaped.
The depth of the recess must correspond to the width of the chips mounted in them, and the bottom must be carefully leveled and well sanded. The chips must be glued carefully, inserting them into the recess using tweezers.
You can do it differently - do not select a recess with a chisel, but cut out holes from thin plywood or veneer with a cutter or cut out holes with a jigsaw a certain shape. Then plywood or veneer is glued onto a wooden base, and chip curls are glued into the resulting nests in the usual way.
Although the chip patterns are found in the recesses, products decorated with them must be handled quite carefully. But if you have epoxy resin, then it’s easy to fix the chip patterns so firmly that you can use them to decorate objects that you have to constantly pick up: keychains, pencil cases, paper knives, etc. This can be achieved simply by filling the recesses with chip patterns to the top with epoxy (transparent) resin. When the resin has dried, sand the product and polish it with polishing paste or horsetail.
Attention
As you can see, the wood filigree technique is very simple, but it contains so many possibilities that have yet to be discovered. Try decorating some inconspicuous-looking box with filigree, and a miracle will happen before your eyes: an ordinary box will turn into a product that can decorate the interior of any room.
To decorate objects with wood filigree, you can use patterns at first. But don’t forget about creativity - coming up with patterns yourself is much more interesting. In this case, you must always take into account the capabilities of the material and the shape of the object being decorated.
Women's jewelry made of wood
When making women's jewelry from wood, it is advisable to make them complete sets, including a complete set of products, so that they are made in uniform style and went well with the suit.
Women's jewelry is very diverse in design, shape, material, manufacturing technique and finishing. The general requirement for these products comes down to the development of traditional forms, originality, and elegance in decoration. The main material for jewelry can be wood and fruit seeds of many species. An amateur carver is obliged to look for the original composition and form of jewelry, and choose the material accordingly.
Women's jewelry belongs to miniature products. On their small surface it is difficult to show the texture of a tangential cut of wood. But the texture of the end sections of some species (acacia, oak, etc.), which have an openwork pattern of growth rings with medullary rays, can be widely used. The main decorative elements in these products are shape, color, decoration, and sometimes inlay and slotted or shallow ornamentation.
With any finishing method, wood should not resemble plastic, metal or other materials. The fruit seeds themselves resemble plastic. The decorative elements of products made from them can be natural color and shape, which to some extent should resemble the silhouette of the source material. The seeds should be chosen fresh, well-dried, of a certain size and shape.
The set of women's jewelry includes earrings, brooch, necklace, belt, bracelet and other items. To avoid overloading the toilet, use these items alternately. A single decorative motif should be repeated in all headset products.
For example, if the earrings look like a stylized bunch of grapes, a brooch from this set can resemble a leaf with a bunch of grapes, a necklace and belt - a grapevine with leaves and bunches, etc. Women's jewelry is made from wood of a natural color or tinted. Sections with natural mushroom colored wood are widely used.
Due to the relatively small size of objects or their parts, special methods and devices are used for processing them. Repeatingly shaped parts are made from blanks in the form of blocks. For example, for a set in the shape of a stylized maple leaf, parts of the same size are repeated in earrings, a necklace, a belt, etc. The length of the block blank is calculated by the number of parts, taking into account the margin for their processing. The entire block is given a leaf-shaped cross-section. It is more convenient to immediately finish the ends of the workpiece and then cut it. The operations are repeated until the required number of parts with good quality is obtained.
To cut blocks of parts, a trench is made, in the walls of which a slot is made along a square. Pressing the block against the wall and bottom of the gutter and inserting the saw blade into the slot, they saw, obtaining the correct cut of the part. If you install the front wall in the gutter and screw a screw into it with the head facing the block, you can adjust the thickness of the cut and cut the block into parts without marking.
To process parts from the cut side, a holder is made in the form of a wooden block, which can be easily clamped in a vice or on a workbench. A nest is cut out in the block according to the shape of the part, which is buried in it to the required depth. At the opposite ends of the bar, two pressure plates are attached to screws - swivels made of metal or hard plastic. By pressing the part with one plate and turning the other one to the side, half the surface of the part is processed. Then they press it with the second plate, and the first one is moved to the side and the processing of the part is completed. Parts are processed in such a holder different ways– cutting, drilling, performing all inlay operations, grinding and polishing by hand or with a drill.
Other parts of complex shapes, as well as fruit seeds, are processed in a similar way.
Earrings consist of two completely identical or mirrored items. They are made from blocks in the manner described above. A hole is made in the upper part of the earring into which the pendant fittings are inserted using glue. The decorative element is usually the texture of the end cut. Sometimes the plate can be inlaid or decorated with an incised design. The drawing should be concise and expressive.
There are two main types of earrings made from fruit seeds: from whole seeds or from sections. In the first case, whole pits of plums or apricots are polished and a pattern is cut on both sides, which should be simple and not weaken the strength of the pit. The seed is crushed through a hole in the seed and removed piece by piece. The finished part is dipped in glue, the streaks are removed and dried. Then holes are drilled into the part and the suspension fittings are attached to them. The finished earrings are coated with a thin layer of varnish and polished. For earrings of the second type, sections 2.5–3 mm thick are cut from large, unopened peach seeds with a fine-toothed saw.
You can also make a necklace and a belt from the seeds, but the parts for them should be somewhat thicker. By positioning the cuts on the necklace and belt you can vary their shape. In accordance with this, holes are drilled for the lace of the necklace or connecting fittings for the belt are inserted. It is necessary to ensure that the halves of the bones do not split along the line of natural connection of the parts. Decorative elements must be consistent with the overall style of the set. If the earrings are inlaid or decorated with pendants, the brooch should have the same decoration elements. For ease of handling, the brooch pin should be pinned to clothing from right to left and unfastened from top to bottom.
Making a bracelet
A set of women's jewelry made of wood or wood seeds should be complemented with a bracelet made of the same materials. It is usually made from set-style pieces joined together to form a bracelet using two braided rubber bands threaded through them. To do this, two holes are drilled in the body of each plate at the same level in height and direction, spaced 8-10 mm apart from each other. To jam the place where the elastic bands are sewn together (or the place where the knot is tied), holes are made in one of the plates with a slightly larger diameter. General requirements for a bracelet are the same as for any piece of jewelry. You can add the following to them: the bracelet should be put on freely and fit your hand so that the elastic bands are not visible. The internal planes of the bracelet parts should be smooth and at the same level to make it comfortable to wear. The lateral connecting planes of the plates must be adjusted to each other so that the bracelet takes the elliptical shape of the hand.
A bracelet with plates of the same size and shape looks monotonous. Therefore, the details of the bracelet for the back of the hand are made somewhat wider, reducing each subsequent plate.
Sometimes the plates are given an arbitrary shape along convex lines and lateral planes, but so that adjacent plates seem to fit into each other. The outer planes of the plates become oval and uneven, with soft transitions of convexities and depressions that are slightly tinted. This brings the bracelet to life. The decorative effect of such a bracelet can be increased during the finishing process. The plates are first coated with matte varnish, and then the convex parts are polished.
The composition of a flat bracelet can include wrist watch appropriate size. The clock can be embedded into one of the plates.
The described requirements and manufacturing methods are also preserved for a bracelet made of fruit seeds, which are selected according to size: larger in the middle with a gradual decrease towards the edges. The lower plane of the seeds is cut off, the seed is removed and the resulting cavity is filled with mastic made from wood flour with glue. The outside and sides of the bones are polished so that there are no sharp protrusions. By changing the depth of the layer being removed, you can vary the shape and texture of the bracelet. Covered with a thin layer of matte varnish and polished along the ridges, this bracelet looks very decorative.