It is difficult to overestimate the importance of the table, both in terms of everyday comfort - and any interior design of an apartment or cottage. Moreover, a kitchen without a table loses its functionality, so a table is deservedly considered a necessary piece of furniture for this room. Huge selection various models of tables that can be purchased at furniture showrooms, does not detract from the desire of some of us to make a table from boards with our own hands - according to our own design, with the individuality and charm of a valuable thing self made.
The prospect of making a table from boards with your own hands gives a special charm to the fact that you can choose any model, tabletop shape and size - as long as they are comfortable and suitable for the room in which the table will be installed.
A few examples below will help you make your choice and help you make the model that suits you. In addition, drawings on how to make a simple table from boards will help you visualize more clearly future design and assembly processes.
Table 1. Sturdy and stable dining table for home
To make this table we will need tools such as a jigsaw, electric drill, screwdriver, and sander. You can, of course, do without some of the above “helpers” by using a screwdriver and a block with sandpaper attached to it - such a replacement will simply increase the time and effort spent on making the table.
The material for the manufacture of the tabletop is a tongue-and-groove board with a thickness of at least 30 mm. The tongue ensures a tight connection of the boards, increasing the service life of the table, since with this joining method the possibility of food debris getting into the gaps between the boards is practically eliminated.
To make the remaining elements of the table, take a regular 50 mm board.
- Boards, if they are not treated, must be thoroughly sanded - in addition to aesthetic considerations, this is required by basic safety and practicality: a sanded board is easier to paint, and much less paint is required for such a surface;
- Cut out the table parts:
- Grooved boards for tabletops, length 230 cm – 6 pcs.;
- Spacer board about 170 cm long;
- Bars for fastening the tabletop (their length should match the width of the tabletop, or be slightly shorter) - 4 pcs.;
- Bars for legs - 4 pcs., 2 pieces of board for their base.


To improve the appearance of the product, file the ends of the fastening bars at an angle of 45 degrees, carefully cut off the tongues of the outer boards, and slightly round the corners of the tabletop using a jigsaw.


Table 2. The simplest table for a summer house or gazebo
Perhaps there is nothing easier than making this version of a table from boards with your own hands, shown in photo 5. Table dimensions: 1200x740 mm, height - 750 mm.

To make it you will need:
- Edged board, smoothly planed 40x140 mm;
- 2 bars 40x60x740 mm;
- 8 confirmations 70-75 mm long; self-tapping screws of various lengths;
- Chisel and plane;
- A jigsaw, a drill with a special drill for sealing mats, a furniture key, a sander.
The first step is to assemble the tabletop, fastening the boards with two transverse bars, placing them at a distance of 120 mm from both ends of the future tabletop and using self-tapping screws up to 80-85 mm long (so as not to reach the outer surface of the tabletop). If ordinary boards are used, when making a countertop, it is better to leave small, only 10 mm, gaps of the same width between them: through gaps will prevent contamination of the countertop with food debris, without interfering with cleaning and without reducing its aesthetic appeal.
To achieve equal width gaps in the tabletop, during its assembly you need to place a centimeter standard made of slats or other solid material between the boards.
Second step: assembling the table legs. On chipboard sheet or plywood, draw a template - a rectangle with sides 600 mm (width) and 690 mm (length). First we make one pair of legs, then do the second in the same way: we lay 2 boards on the template in an X-shape, mark the lines of the upper and lower cuts of the legs, as well as the lines of their intersection - this is where the boards will be fastened together. We saw off the ends of the boards along the marked lines, and at the intersection points, use a chisel to select recesses 20 mm deep for a “half-tree” connection. We fasten the legs using 35 mm self-tapping screws;
Third step – final assembly table. The drawing shows in detail how to make this simple table from boards: thanks to it, the assembly process will not cause difficulties (Figure 6).
The kitchen table is the same age as the kitchen itself. Probably even older than her: in parking lots and settlements primitive people large flat stones were found near the hearths, which served as cutting, distributing and dining tables; they contained remains of food and food. In this article we will look at how to make a kitchen table with your own hands completely at home. This will not only allow you to save a certain amount (in general, not ruinous), but will also provide an opportunity to acquire initial skills carpentry work, which may turn out to be much more significant in the future. The most common types of furniture joints are used in kitchen tables, but its design forgives rather serious flaws in work. There are also great-looking types of kitchen tables, for the manufacture of which it is enough to be able to saw off a piece of board and tighten a screw.

A table in the kitchen also provides considerable opportunities for creative self-expression: much less skill is needed here than imagination, and failure will not ruin the entire interior. The samples of original kitchen tables in the photo below are quite accessible for making with your own hands, but first you need to get a feel for the design and material at a basic level, which is what we will try to help the reader with.

You can make a table for the kitchen at least 15th different ways , including artistic forging and casting from homemade artificial marble. However, firstly, we will limit ourselves to kitchen tables made of wood, as a material that allows us to obtain the desired result with the least amount of labor, Money and time.
Secondly, we will deal with tables with rectangular or rounded corners. A round table requires 1.6-2.2 times more usable area than rectangular for the same number of eaters. Moreover, the first meaning refers to the case when the hostess is deprived of a free approach to him and must be served over the shoulder of the person sitting. This already falls into the category of parodies of the rules of good manners. Like, how should you tilt the plate when finishing the soup: towards you or away from you? Answer: depending on what you want to pour on yourself or the tablecloth. Besides, round table V small kitchen stronger than a rectangular one of the same capacity is wedged into the so-called. functionality triangle, see below.
Dimensions and ergonomics
The height of the kitchen table is normal, 700-780 mm, counting from the floor to the top surface of the tabletop. For people of average height, the optimal table height is 750-760 mm. But with the dimensions of the kitchen table in plan, the situation is more complicated.
The essence is in the same triangle of functionality: refrigerator-sink-stove. Ideally, it should be rectangular isosceles with legs of 1.2-1.6 m. However, the ergonomics of the kitchen is spoiled much more than a slight deviation from these proportions by wedging the dining area into the hypotenuse. Simply: the hostess bent over the sink or stove and pressed her seductive forms against her husband’s cheek just when he brought the spoon to his mouth. Therefore, it is advisable to make the table in the kitchen, especially of economical layouts, smaller, as long as it is comfortable for the eaters.
The minimum acceptable dimensions of a family kitchen table in plan are considered to be 600x900 mm. For single people, let's say a table is 450x750 mm, like in railway cars. In this case, in a “micro-kitchen” or kitchen area of a small-sized one-room apartment, it is also permissible to make it a wall-mounted folding one, see below. But optimal sizes kitchen table tops are considered (650-800) x (1100-1400) mm, depending on the available usable area and the build of the users.
Which one to do
Traditional kitchen table - on the base, pos. 1 in Fig. The underframe is the supporting frame of their boards placed on edge - the tsar. The drawers can be tightly fastened to the table legs, and the tabletop can be placed loosely on them; those. its fastenings only prevent horizontal displacement. This kitchen-sized table is simpler in design and stronger, but it is more difficult to bring in/take out, especially if the passage to the kitchen is narrow. The second option is that the drawers are tightly fastened to the tabletop, and the legs are detachable. Tabletop in in this case you need something durable and not made of anything suitable for use. case, the material, and the design is more complicated. But there are no problems with bringing in/out. Both of these options for a classic kitchen table will be discussed in more detail below.

The table on the base can also be artistically designed, pos. 2. Making an artistic kitchen table is not as difficult as it might seem. The basis of its design - turned shaped legs - can be easily obtained from commercially available railing balusters (see below). For a novice craftsman who knows how to use a jigsaw, a figured sawed-off drawer does not pose a problem. What remains is a molding - a shaped chamfer on the lower edges of the drawers. You can rent a manual one for it. milling machine with a cutter of the profile you like, with it the work itself on setting the molding takes less than an hour plus 10-15 minutes of training on some kind of cutting.
Tables are no less common in kitchens beam structure, pos. 3. Even in their simplest design (see 2 options below) they are more attractive than tables with a base. However, to complete them in a high-end design (item 4) requires well-equipped carpentry and solid manufacturing skills. Beam tables require more material, but they undeniable advantage– they can be made completely collapsible without tools (also see below).
Tables with a load-bearing tabletop without an underframe (item 5) are also very often found in kitchens. In a factory-made version, this is perhaps the cheapest type of kitchen tables good quality. A set of legs for such a table + a postforming tabletop (see below) will cost about 2,500 rubles, and assembly will take at most half an evening. But when completely self-production With such a table, a beginner will encounter some significant nuances, see below.
Tables-books, they are also tables-pedestals, pos. 6, initially created a sensation due to its compactness when folded and the ability to be used in a half-fold version, but then there was a period of some disappointment. Firstly, no matter how you sit at such a table, your legs feel uncomfortable. Secondly, in the first samples, the rotary support lock was the simplest, consisting of a pair of 50x20 bars, attached with a gap equal to the thickness of the support to the underside of the tabletop. The outer faces of the bars were often removed with a wedge so that the support would not cling to them when unfolding the table. However, if you accidentally pry the tabletop with your knee, the lock is immediately released. Therefore, such tables could not do without a hodgepodge of cutlets and mashed potatoes on the trousers and the floor, and a reliable and easy-to-use mechanical lock turned out to be very complex and expensive. Nevertheless, both amateur craftsmen and serious manufacturers are improving this, in principle, very promising design, which will be the subject of a special section in this publication.
Wall-mounted folding tables (item 7) are rarely found in very tiny kitchenettes. Most often - among busy bachelors who are accustomed to doing everything while standing, even sleeping on the carpet in front of their bosses, because... have all the disadvantages of book-tables with virtually no room for improvement. Serving tables (item 8) are used much more often on the farm, but this is a separate class of furniture with its own specific qualities and manufacturing technology, so here we will limit ourselves to just mentioning them.
Technological subtleties and innovations
The kitchen table, firstly, is made from wood species or materials that are little or not subject to shrinkage when dried: oak, hornbeam, wenge, laminated chipboard, MDF. Ordinary industrial wood in a kitchen atmosphere with its fluctuations in temperature, humidity and organic vapors in the air begins to warp and crack after 5-7 years, even if impregnated and varnished. On the other hand, the dimensions of the kitchen table are small. This leads to some features of its manufacture, which ultimately make it possible to simplify the work.
Tabletop
This is the main detail of any table. For homemade table to the kitchen best option– buy a ready-made postforming countertop; they are available in a wide range of colors, textures and sizes. Postforming is a profiled laminated chipboard with rounded edges, finished to look like wood or other material. The advantages of postforming in relation to a kitchen table are as follows:

Postforming is good technologically for simplicity and speed of work. But countertops made from boards, the so-called, look much more solid. solid wood or furniture panels. Joining boards into an array is quite delicate and painstaking work; for this purpose, special devices are used - clamps. If you want to try your hand at making furniture from solid wood, we offer a selection of videos:
How to assemble a furniture panel with your own hands:
How to make a panel top for a kitchen table:
How to make a tabletop from wood end cuts:
In the last video, the material is junk, but you can achieve the look - cool oligarchs will salivate.
Dowels, confirmations and dowels
Traditionally wooden furniture going on the dowels. The dowel connection is invisible and cheap; Just in case, let us remind you what it is and how it is done, see fig. For connection wooden parts wooden dowels are used, which dry out along with the connected parts; The laminated chipboard, which practically does not dry out, is connected with plastic dowels. Corner plastic dowels are rarely used, because... often break. Connections with wooden dowels are usually glued.

It is often difficult for novice craftsmen to achieve accurate markings for the dowel connection. Tricks, such as marking with bitten nails (item 4 in the figure), do not always help, and it is impossible to remake an incorrectly marked dowel connection; both parts go to waste. Therefore, it is better for beginners to assemble their first products using Euro-furniture screws - confirmed ones. This is more expensive, but does not require special skills, because... the confirmation hole in both parts, compressed with a clamp, is drilled in one go, see fig.

Parts made of laminated chipboard or dense thin-layer wood, connected with confirmats, last for many years. All the designs described below can be assembled both on dowels and on confirmations. However, in the latter case, the following rules must be observed:
- Use furniture grades for wood, not plumbing grades for plastic. They differ at first glance: furniture slots have a hexagon slot, and plumbing slots have a Phillips screwdriver.
- The diameter of the body of the confirmat without thread when attached to the end should be no more than 1/5-1/3 (as an extreme case) of the thickness of the attached part.
- The height of the confirmation neck should correspond to the thickness of the main part.
- The penetration of the threaded part of the confirmat into the attached part must be at least 5-6 full diameters of the confirmat.
- The hole (blind hole) for the confirmat is drilled to its full length with the head.
- Use only a twist drill for wood.
- The main drill must be inserted into a mandrel that exactly matches its diameter and screw size.
- Drill holes for confirmations with a main drill of a diameter equal to the diameter of the confirmation by thread.
In practice, it is not difficult for even a perfect “teapot” to fulfill these conditions:
- Based on the thickness of the part, we determine the diameter of the body of the confirmat without thread;
- There is a lot of information on confirmatories on the Internet, from which you can, knowing the diameter of the screw body, the thickness of the main part and the drilling depth, determine the required standard size. It is better to immediately open pictures for the request “furniture screw (or confirmation) drawings dimensions”;
- We are looking for a retail outlet where the seller, when asked to show furniture confirmations, shows them exactly;
- We say: “I need so many of such and such a standard size and a drill with a mandrel for them.” They may offer a solid drill just for this confirmation, it will be cheaper.

And a little more about dowels. It is best to place a detachable (freely applied) tabletop of a classic kitchen table on them. Incl. and for such purposes, plastic dowels with a round head or dowels with a head and different types of corrugation on the long recessed and short protruding parts are produced, see fig. on right. Thick tabletops are attached first, approx. from 20 mm; the second ones are thinner.
Various tables
Classic
Classic tables on the underframe along with the legs (item 1 in the figure) are traditionally connected (assembled) using tongue-and-groove joints, which is quite complex and labor-intensive. Modern instrument– a drill with a twist drill for wood and a screwdriver – in combination with legs, the section of the heads of which is not less than 60x60 mm (for balusters the heads are usually from 100x100 mm), allows for a kitchen table with plan dimensions of up to approx. 750x1500 mm can be made by connecting with wood screws at an angle, pos. 3. In any case, the outer sides of the drawers should be 1.5 cm away from the outer surfaces of the heads of the legs, this is necessary for overall strength. The minimum permissible height of the kitchen table drawers is 120 mm; thickness – 30 mm.

It is highly advisable to reinforce the connection with oblique screws with diagonal ties in the corners (item 4, above) from the same board as the drawers. If the tabletop is not intended to be removed unless absolutely necessary, then the labor-intensive installation of it on dowels can be abandoned. Then, at the corners of the finished supporting frame, scraps of the same board - crackers - are cut into the drawers and the tabletop is attached to them from the bottom with self-tapping screws, pos. 4 below.
Tabletop classic table with detachable legs should be at least 24 mm thick (chipboard, plywood) or 30 mm thick (solid wood). Countertops made from other materials, e.g. artificial stone, suitable for tables on the base along with the legs, are not applicable here. Due to the large difference in thermal expansion modules between them and wood, the table will soon become loose.
Next, the drawers are attached to the tabletop with long confirmations right through the end, on the left in the figure, with sizing with wood glue or PVA. It is difficult to achieve accurate assembly using ordinary wood screws, because... they are without a neck to keep the joint from moving.

The next point is that jibs in the corners (also in the figure) are required, wooden mortise ones or ready-made steel overhead ones. The legs are attached at the corners in the usual ways, on the right in Fig.
Desk drawer
A drawer is a classic structural module of a classic kitchen table. The guides for the table drawer are the same as for the drawers of the bedside table, chest of drawers, and closet. Since a large weight load is not expected in this case, but the smooth movement of the drawer and the possibility of its full extension of great importance If they don’t, you can use inexpensive roller guides on which keyboard boards on computer desks run.

Device furniture box shown on the left in Fig. It is not necessary to assemble its tray the old fashioned way on a box tenon (on the right in the figure); you can use self-tapping screws into the ends of the boards. The thickness of the boards for the drawer sides is 12-20 mm. The plywood bottom is often fastened with a furniture stapler, but this is not entirely reliable. It is better to attach it with self-tapping screws through the cranial bars along the contour of the bottom. The front of the drawer can overlap the front side of the table or fit flush into it, it doesn’t matter.
To install the drawer in the table, an opening is cut to size in the longitudinal front drawer cross section drawer tray, plus allowances on the sides for the guides (indicated in the specifications for them), plus another 3 mm along the contour. Then the side support boards are installed to secure the guides. They are attached to the longitudinal frames from the inside using backing bars. There is no need to fasten it to the tabletop; it will become loose. Next, the box is assembled, attached to it and to the supporting boards, respectively. the guide parts push the drawer into place, that's all.

Quite simple
Quite simple but good looking kitchen table a classic look can be made on a supporting frame made of boards, see fig. on right. Its length, if the drawer section is at least 120x20 mm, can be increased to 1100 mm. Tabletop – any weight up to 15 kg. The angle of inclination of the legs from the vertical is 15-20 degrees, this is one fundamental point in this design. The second is transverse ties made of 50x15 timber, they give the entire structure the necessary rigidity. So, although this table looks classic, in fact it is already a beam table.
Beam
Drawings of a pair of kitchen tables with a beam structure are given in Fig. Above - completely collapsible without tools. The tabletop is structurally any, placed on dowels, although the style of this table (rustic) is fully consistent only with a tabletop made of solid wood. A variant of its fastening from the underside without dowels on cranial bars is shown in the inset in the center on the right.

In this product, a beginner may find the bottom bandage (longitudinal tie) with a beveled through groove for the wedge to be a stumbling block. In fact, everything is very simple: the bottom bandage is assembled with glue from 3 layers of 10 mm plywood or boards. How to make beamed kitchen tables of this type, you can watch the following video:
Video: DIY table by components
The table, drawings of which are shown below, has 2 features. First, all material is boards with a width of 120 mm, timber is not used. The second is that only a tray is provided for the tabletop, and it can be made of glass, plywood with a mosaic of tiles or its fragments, etc. The gap between the board of the tabletop and the frame of the tray is prone to clogging, but removing the tabletop for cleaning is also easy. So whether it’s rustic or modern, whether it’s a kitchen table, boudoir or coffee table, you decide for yourself.
Without table support
Factory-made kitchen tables without bases are usually produced with postforming countertops, pos. 1 in Fig. Those who want to make something similar on their own for a wooden tabletop will encounter the following tricks.

First, a table stand is still needed, because wooden beam from 50x50, pos. 2. The fact is that mechanical stress in boards always flows to the corners, where they are distributed very unevenly. But the wood under all 3 fastening points of the leg frame must be tensioned approximately equally, otherwise the fastening will loosen on its own. Timber piping expands the fan of stress in a given place to an acceptable value, but it is impossible to replace continuous piping with corner pads; they will be of no use.
The second is the material of the countertop. Standard threaded sockets for mounting leg frames (item 3) are designed for laminated chipboard or dense, fine-grained wood. If the tabletop is made of pine, etc. layered enough soft wood, then the nests can, having torn the layers, crawl back out already during the installation of the clips. And the probability that this will happen when someone accidentally pushes the table is close to 100%
And the third is the leg clips themselves. In cheap sets of parts for tables without tabletops from “alternative” manufacturers, they are most often made of silumin, pos. 4. And silumin, as you know, is very, very fragile. In general, if you like such tables, it will be easier to buy a ready-made one with a guarantee. Most likely, and cheaper than assembling a kit for self-assembly at retail.
Books and Cheburashkas

The disadvantages of the table-book of the original design (see figure on the right) have already been mentioned above. In Fig. Below is a drawing of the design of a table-book (conventionally, only one rotary support is shown without the wings of the tabletop), which eliminates them in an amateurish, but effective manner. Simply, the width of the rotary support is reduced by more than half compared to the wing span of the tabletop (350 and 720 mm, respectively). Now the support rotates 90 degrees, so you can sit comfortably as you wish. The support, located in the working position along the longitudinal axis of the tabletop, holds it even better than an oblique one, and in order to lift the tabletop until the upper support bar comes out of the simplest clamp (see above), you need to raise your knees so that it will be very uncomfortable for yourself. Overall stability is ensured by the legs of the cabinet section, which must be made as long as possible, but not less than 600 mm. Otherwise, the swivel supports must be brought down in height to the floor level.

A fundamentally similar solution was used in the wall-mounted folding table (items 1 and 2 in the next figure), but here the bevel of the hanging corner of the support contributes to operational reliability. Which is quite applicable in the previous one. case: there are no contraindications for performing that support in the form of a trapezoid converging downwards.

A proprietary solution to the problems of a book-table is removable legs stored in the cabinet. Placing them is not much more troublesome than catching the latch on the tabletop with a rotating support. Such a table-book is, of course, more expensive, but its operational reliability is complete: there is no latch, because it's simply not needed.
The next step in the evolution of the book-table is a design with a larger cabinet and one leg on each wing of the tabletop. There are half as many legs, which means the whole table is cheaper. Its stability has only increased due to the expansion of the cabinet, it is generally comfortable to sit, and there is more space in the cabinet (which is always in short supply in the kitchen).
Consumers liked such kitchen tables so much that they were already given the nickname - Cheburashka table. Probably, remembering from the cartoon: “Here, we built, built, and finally built it.” A folding kitchen table as it should be.
Alternative
If your kitchen is combined with a living room or you plan to combine them, then you don’t need to think about a kitchen table; it’s better to replace it with a column. You can not only drink at the bar counter, you can also eat there. The point of such a replacement is that at least half of the dining area goes beyond the kitchen, and the rest is used sporadically and does not wedge itself into the functional triangle. Result? See fig. It is more convenient to work and dine in a 5-meter kitchenette with a bar counter, which separates the apartment zones, than in an 8-9-meter Brezhnevka kitchen. Don't believe it? Let's do the math.

The kitchen table does not stand on its own. To plant the eaters, you need to add 400 mm along the contour, and another 300-350 for the approach. As a result, a 900x600 mm table requires approx. 2.5 sq. m of “living space”, and the table is 1200x700 mm and all 3.5 sq. m. Shove such a thick piece into the kitchen regular sizes without crushing the soft-boiled functional triangle is very, very difficult. Here, even if two people sit at the counter from the kitchen side, the functional triangle is not disturbed, and the hostess is within easy reach of everything.
One of the famous culinary experts once said: “The kitchen is conservative, like the digestive tract.” Here, of course, he bent and overdid it. Something like a stove, refrigerator, food processor and microwave is not found in our stomachs, although the kitchen is really conservative. But even in the most conservative sphere, at some point there comes a time that requires fundamental changes.
Table for summer cottage- not just a piece of furniture, it is a ritual place where all household members invariably gather. In the summer, no one wants to go indoors to drink tea or have lunch. In the fresh air, your appetite is better and food tastes better. In order not to carry furniture from home for gatherings, you can make an outdoor table for your dacha with your own hands, at the same time taking care of the benches.
garden table with built-in bench
A country table does not imply a complex design, so assembling it will not be a problem even for individuals far from carpentry and creative work. We will present you with several very simple and at the same time original ideas for creating it; perhaps some of what we have proposed will become a decoration for your site.
Material for country table
DIY garden table: interesting ideas
Conclusion
Photo gallery - DIY garden table:

the garden table must be durable
Outdoor furniture is subjected to serious testing, so it must be made from durable materials. Specifically for the table you can take:
- Stone.
- Tree.
- Metal.
- Available materials.
The tables from the latter look especially interesting. But first things first.
Wooden table

outdoor dining furniture set
Selecting material Special attention pay attention to the type of wood. There are different boards and boards and, in our case, not all are suitable for use. Pliable and easy to work with conifers, alas, will not fit. In addition to the fact that they need special impregnation, because they are too fire hazardous, the resin they release will spoil the tablecloth and dishes.
The necessary elements must be looked for among hardwood blanks. On the tabletop you need to assemble boards with a thickness of 30-50 mm. For added strength, they are stuffed onto a frame. The legs of the structure can be saddled straight or X-shaped. It is important to process all the details well so that there is no danger of driving a splinter while wiping the table. It is mandatory to treat the finished product with protective impregnations.

folding wooden table IR at the dacha with your own hands
In order to make a table “for centuries”, cover it with varnish, and do this, as they say, without sparing the brush. The composition must be literally rubbed into the wood, and this will only be possible if you slightly heat it in a water bath. Varnish coating make three layers.
Stone table

a round table and benches made of stone will last for decades
You want to do monolithic structure that amazes the imagination and creates a special mood for meals - try working with stone. You can create this type of table for your garden with your own hands or buy it ready product. Stores offer a wide range of granite and marble options. There you can also select benches made of similar material to go with them.

to inspire life in old table, it is enough to tile the countertop
It will not be cheap, but if you really want to have such a luxury in the garden as a stone table, try to make it cheaper. Lay out the bases of the benches and table yourself. This will work quite well for this:
- Flagstone.
- Brick.
- Modern blocks.
- An ordinary cobblestone.

table made of stump, lined with stone
It will be much easier to fit these materials into the overall concept of the garden and combine them with existing buildings. It is quite possible to take it on the tabletop, seats and backrests fake diamond. The composition will not lose its view from this.
Metal tables
Those who are “friendly” with iron and have a welding machine at hand may be interested in the option metal furniture. The products are elegant and aesthetic, with openwork decorative inserts. The metal table will also need to be protected from premature destruction. This is done by priming the metal before final painting.

round garden table with stone top and shaped metal legs
Forged tables will satisfy the needs of respectable owners, but it is unrealistic to make them with your own hands. Such designs are ordered by professionals. Forging requires the conditions of a forge. However, considering that products of this type can be wonderfully combined with wood, stone, glass, you can only purchase a forged base for the table and complete it with a tabletop yourself.
DIY garden table: interesting ideas

Styling the table and chairs to look like a mushroom meadow will create some zest in the landscape design of a summer cottage
If you are determined to work on creating a country table yourself and are ready to make it non-standard, look at the “unnecessary” things available in every shed. Perhaps among them there are items that can become consumables for creativity.
Assorted assortment
No less practical option For a country table, along with wooden, metal, rattan, and stone products, there is a “hodgepodge” of all sorts of things. This creation will become a multi-colored “character” of your garden and will never go unnoticed. What is it made from? You will not believe! Source materials will serve you:
- Broken flower stand.
- Metal barrel lid.
- Scraps of colored plastic or round glass.

timber set
Take a piece of paper and try to draw a circular pattern on it in the spirit of Moroccan style. Enlarge your creation to the required size. A photocopier will help you do this quickly.
We place the resulting blank under glass and draw lines with a copper outline. Let it dry for a day or a little less. The manufacturer indicates the recommended drying time.

It is enough to decorate the sides of benches and chairs with wheels to get original garden furniture for your cottage
Now it’s time to paint the marked glass with stained glass paints. The main thing here is that the colors are located evenly within the area allocated to them. If you have never worked with specific paints, it makes sense to practice on a separate piece of glass in order to understand how much you need to use for high-quality painting of fragments. The completed painting must also be thoroughly dried.
The finished glass can be additionally decorated with elements drawn with a copper outline.
Cover the lid of the barrel with white paint, which will hide traces of rust, and proceed to preparing the main part of the tabletop.

garden table made from a basket of firewood
The metal part of the flower stand, which will serve as a supportDIY garden tableneeds to be primed and painted acrylic paint copper color and partially patinated.
Once the footboard is ready, seal the areas where it touches the glass with window sealant. This is necessary for its better fastening.
Now the final stage. Assemble all the parts together: place the glass tabletop in the lid and place the composition on the stand.
It may not be very comfortable to dine at such a table, but drinking coffee in the cool of the evening will be very pleasant.

By decorating an ordinary tree stump with mosaics, you can get an original table
Pallet models
After construction country house you probably have at least a few pallets left on which packaged bricks or building mixtures. You don’t even suspect what a lifesaver this is for decorating your dacha. With their help, the table will be ready in a few hours, and it will look such that it will not be a shame to place it not only in the garden, but also in home interior. In this case, note that you will not even incur any special financial costs.

garden table made from pallets
A table for a garden, made with your own hands from pallets, can be constructed in several ways. For example, for the simplest option you will need:
- Screwdriver.
- Brushes.
- Sandpaper.
- Swivel wheels.
- Colored antiseptic stain.
- Screws.

mobile table for a garden made from pallets
First of all, start sanding the pallet. At the first stage of removing the rough layer, use coarse-grained sandpaper; fine-grained sandpaper will be needed for final processing. If you have a grinder in use, the configuration of which includes grinding wheel, use it instead of rolls of sandpaper. This will speed up the preparation process.

master class on making a table for a garden with your own hands
Turn the tray over and attach small casters to the bottom. This is done using ordinary screws. For greater reliability of fastening, place under the last washers, which can be removed from similar screws used for working with metal tiles. Don't ignore this advice. The wheel bases have enough large holes, and a screw without a backing will not be able to properly fix the part to the wooden surface.

step-by-step process of making a table
Now all that remains is to open the finished product with a wax-containing antiseptic. If you want to highlight the structure of the wood, use a transparent composition. To add color you will need a stain. You can style the table:
- under oak;
- larch;
- rosewood;
- nut;
- pine
A low wide table would be appropriate on the veranda, in attic room, bathhouse interior.

without additional treatment, the table will last at least two seasons
If you want to make your summer recreation area more comfortable, make not just a table from pallets, but a whole set country furniture, supplementing it with permanently fixed benches. Such a kit can be made portable and, if necessary, moved from the barbecue, say, to the pool or to the pergola.

bright table made of pallets for the whole family
A creative option for a country setting would be a pallet transformed into a tabletop and equipped with vintage legs left over from an old chest of drawers, table, or cabinet. This detail needs to be highlighted in a contrasting color.
You can use such furniture in the bedroom, gazebo, or on the terrace.
Reel table

Vertical planks allow you to place various items
“The coil itself is heavy, but it’s easy to construct a lightweight version from it table for the dacha and again, do it yourself »
Cable spool is also an excellent material for creating country house design. Look at her - it's practically ready table hic! A little decor and it's ready to use. The easiest way to decorate a reel is with twisted twine. To do this, simply wrap it tightly around its trunk. The upper disk of the structure is sanded and varnished. If you want to add functionality to the product, install vertical slats around the circumference. They can also be decorated with rope. With the advent of crossbars, you can store the necessary items under the table.

reel table with umbrella mount
The coil itself is heavy, but it’s easy to use it to construct a lightweight version of a table for a summer house and, again, do it yourself. You will only need the top disk from the product, which will act as a tabletop. The frame frame for its installation can be made of metal.
If in a shady garden there is a stump of suitable height and strength, then it can also be converted into an impromptu table using a reel disk. This idea will be good not only for a playground, it can also be rationally used when organizing a relaxation corner for adults. By sawing a wooden disk in half, you can assemble original chairs, which can also be placed on stump legs. This will make a nice garden set.

a table made from a reel can be decorated with any pattern
Wood table?
Why not? This brutal option can decorate a barbecue area or even a living room. Work is nothing at all. Finding the old thick log, saturate it with stain and level the lower part, giving the product stability.

table on wheels made of stump
Equally simple to manufacture and attractive in design mobile table from hemp. By the way, its functionality can be expanded if you are not too lazy to sew a foam seat on it, which will allow you to easily transform the structure into a comfortable pouf.
Not in short supply at the dacha and chopped firewood. Using them, it’s also not a problem to quickly build a comfortable table design for your garden with your own hands. Assemble a flat base and secure the split timber into the tabletop with a strap tie. Put it all down and enjoy communing with primeval nature to the fullest.

table for a living room from an old log
Garden composition made of tires
Take your time to get rid of old tires. You can make them great landscape decor expanded functionality: use the table not just as a table, and the pouf next to it not only as a pouf, but also create a place inside them for gardening tools, for example.

the table and chairs are made in the same design style from old tires
Paint the tires in a color acceptable to you, dry them, fold them into a column, holding the elements together silicone sealant or other suitable composition.
Now work on the table top and seat. It’s a good idea to make the first one from durable plastic or cut it out of wood. For the pouf, also cut out a plywood disk of slightly smaller diameter than the tires, glue foam rubber to it and cover it with fabric. The removable parts are ready.
Cooking table

mobile table made from old quartz with a wooden tabletop
Did you find grandma's brew in the bins? Fabulous! Let's transform it into a mobile storage table. We equip the bottom with wheels, and for the upper part we assemble a tabletop from boards. Having cut the boards to size, we assemble them together into transverse strips, the length of which should correspond to the diameter of the weld. This will help the tabletop stay firmly in place and not move to the side or tip over at the slightest load. There will be enough space inside the makeshift table to organize a mini-bar.
Using the same principle, you can transform it into useful items empty boxes, barrels, etc.

original table with large metal wheels instead of legs and built-in benches
Conclusion
As you can see, assembling a garden table with your own hands is a very exciting and absolutely not labor-intensive activity. Here, even beginners will not have to be afraid of ruining something, because the work will be done with items and elements that are initially unsuitable for direct use. Try your hand at something that is unfamiliar to you. Perhaps the final results will become an incentive not to stop there, but to go further. From the presented materials you can make many more unusual and useful things in your country life!
Photo gallery - DIY garden table:


How Nice on a fine summer day to sit with family and friends in the garden, drink tea and just talk about this and that, enjoying the voices of birds, the smells of herbs and clean air.
And to make the gatherings as possible as possible comfortable both for the owners and for guests, in the garden you need a reliable and convenient table.
What types of country tables are there and what is possible? use as material for them manufacturing, manufacturing Let's look at it in this article.
In contact with
Classmates
Types of garden tables
Options gardening there are a lot of tables. This could be a small table for picnic and a large outdoor dining table, table- grill(aka fire table) and gazebo table.

An excellent solution for a summer cottage - table-bench. It can be either a stationary table combined with benches into a single structure, or transformer. In the latter case, seemingly ordinary bench with back if necessary, it can be converted into a table and one or two benches.
![]()
Another transformer option is a bench with a folding table for two

What can you make a garden table from?
- Tree
Country tables are mainly made from solid array,, MDF or plywood. Very impressive look like countertops made from cuts tree.
Tree - aesthetic, a strong, pliable material, but less durable than metal, glass and plastic. - Metal
Less popular, but no less beautiful are products from metal The disadvantage of the material is that options The decor of the tabletop is much less than that of wood or plastic. - Glass
Tempered glass looks beautiful, enough durable. Still, glass products are not popular as outdoor furniture. In addition, if you make it yourself, problems may arise with cutting material and subsequent fastening glass parts of the table. Also much fewer options glass table decor. - Plastic
In order for the plastic table to hold shape, metal must be used frame. - Scrap materials and unnecessary items
It's easy to build a table from a stump, old boards, pallets, logs and remaining unnecessary things. If you have the desire and perseverance, then the table can be woven even from newspaper tubes.

Table-bench

Materials and tools
To create a country table with benches you will need the following materials:
Also needed tools:
- pencil, ruler, marker;
- hacksaw or electric saw;
- chisel;
- sanding machine or medium grit;
- brushes for impregnation and varnish;
- manual milling cutter(can be used for additional edge processing).
Manufacturing stages

Step 2. Sand them by hand or grinding machine.
Step 3. All the top boards that hold together benches(4 pcs. each) and table (4 pcs.), we file at an angle of 45 degrees in the shape of a trapezoid. To do this you need to draw rectangle, fold two boards crosswise (from corner to corner), and saw them along bottom the long side of the rectangle. There is no need to file the top parts!
Next you need turn over boards with unsawed sides and do the same so that they take shape trapezoids. There should be a total of 4 trapezoidal boards for table(2 pcs. on one side and 2 pcs. on the other) and 4 pcs. for each benches(2 pieces on each side of the bench).
Step 4. We stack 7 long boards in a row with gap 3-4 mm and fasten them with beams (2 pieces on both sides) using self-tapping screws(80 mm).
Step 5. Place in rows of three boards the same length as the table and fasten them with smaller ones beams. The gap between the boards is 5-10 mm. Self-tapping screws 80 mm.
Step 6. We drive two bench legs on each side between the fastening trapezoidal boards. We fasten self-tapping screws 100 mm.

Step 7 Between the legs we fix board perpendicular to the bench seat. And long boards we fasten both benches between each other (2 boards on each side of the bench). It turns out rectangular dinner Zone with benches on the sides.

Step 8 The legs of our table will be crossed. To do this, mark the sampling location, saw off with a hacksaw and knock out half of the board with a chisel so that the second leg fits perfectly into the first. We make both in this way supports and fasten them with table top(between trapezoidal boards).

Step 9 Finished table supports insert between long boards (inside the dining area).
Step 10 All joints we strengthen furniture bolts and tighten.
Step 12 8-12 hours after application last impregnation layer can be applied transparent varnish We took the colorless protective covering in order to emphasize natural the beauty of the tree and focus on naturalness products.

Possible after impregnation paint table with regular waterproof paint or decorate other methods (carving, mosaic, painting contrasting paint through a stencil, etc.). After decoration, it is necessary to apply 1-2 layers of transparent varnish
Note! Instead of regular boards on the bench and table top, a more aesthetic option would be an edging made of boards, the edges of which are cut strictly at 45 degrees.
You can build the same table, but a little lengthen it, placing another one in the middle support and fastenings on legs supports and benches. They make a table-bench with another option supports (A-shaped).
You can put it or do it right away with canopy:

Stump table

There must be a stump dried, no cracks, severe chips, rot or dampness wood(especially the middle). Term drying freshly sawn or a freshly uprooted stump - no less 70 days.
When bark the stump will become with ease move away from the inner surface, proceed to processing.
Note! Wood materials, used for the manufacture of tabletops, must be at least 20 mm thick.
Another option for a stump table is a stable, medium-sized stump with roots, on which the table top is attached various materials. In this case bark It is not necessary to remove it from the stump.

Materials and tools

- table top;
- level, pencil, ruler or tape measure;
- impregnation and transparent varnish;
- sandpaper medium grain;
- sander or hand sander plane;
- hacksaw(saw);
- chisel(chisel);
- screwdriver;
- hammer;
- screws, nails, screws.
Manufacturing stages
Step 1. We release the dried stump from bark using a chisel (chisel). If soft, damaged, rotten or damp places are found in the stump, they must also be carefully delete.
Step 2. With the help of construction level we trim the bottom and top of our hemp so that the tabletop is positioned clearly horizontally. Irregularities are removed using plane, hacksaws or saws. All new cuts polishing sandpaper and sanding machine. Necessary thoroughly work out all parts of the stump, all folds and bulges.
Note! By hard to reach places It is recommended to go first with medium-grain sandpaper and then with fine-grained paper.
Step 3. We make a tabletop. The most simple option will cut it is made of laminated chipboard or MDF. Simple rectangular or square shape and a matching shade of varnish for processing hemp will make the table more attractive. You can also make a tabletop from edged boards fastened together. The most common form of such countertops is round.

Very cute option may be small slice thick tree trunk, glass tabletop or tabletop of some kind quirky forms.

Step 4. The table top can be attach thick long nails or using additional fasteners on it inside. To do this, boards are nailed (sideways) or bars on both sides, on the other two sides boards are attached a little longer.
Step 5. Two small boards are placed opposite each other on the inside of the tabletop so that they fit between fastenings on a stump.
Step 6. The table is treated with a special impregnation for 3-5 layers (each layer is well dried). After complete drying it processed transparent or translucent varnish.

Self-production gardening tables significantly saves money and time searching for the table you need.
Would you like to suggest photos on the topic for publication?
Please help us make the site better! Leave a message and your contacts in the comments - we will contact you and together we will make the publication better!
Is such a building on personal plot or in the garden, where you can relax with the whole family and invite friends.
But arrangement is not only about giving aesthetic appearance the building itself.
It is important to organize and inner space.
The role of the gazebo in the design of the cottage
The gazebo has a special role in the design of the dacha. In addition to his functional purpose, it must be in harmony not only with the surrounding buildings, but also with the landscape of the site.
It would be good if all the facades of buildings on a personal plot, including the gazebo, were finished with the same material. Gazebos whose roof is an exact copy of the roof of the house look interesting.
But even such a room is unthinkable without internal filling, the main element of which is the table.
You can make a good table yourself
You don’t have to buy a ready-made table for the gazebo, because you can make it yourself.
This option is preferable. As a result, you will receive a piece of furniture that you not only need, but also fits perfectly in size and shape.
No need for this great experience in construction work and special tools. Simple skills and a small set of tools are enough.
Wood is the best choice for making a table. Its main advantage is long term service, visual appeal and naturalness.
Such a table will become a worthy element of the overall design of the cottage.
Creating a Project and Drawing
At this stage you need to create detail drawing future table.
Self-tapping screws and fasteners made from of stainless steel. Be sure to use wood impregnation, which will protect the table from rot and fungus.
Development of a 3D drawing of a garden table in AutoCad.
Step by step instructions
Do garden table you can do it yourself by following this master class.
It is necessary to prepare all tools and materials for work in advance. On preparatory stage process the wooden surface and select boards according to thickness.
Then four boards measuring 15x70 cm are laid in a row and connected with thin wooden planks. And the end parts are covered on both sides with boards measuring 15x60 cm, which are fixed using special metal plates.
This results in a smooth wooden surface.

Rectangular top frame box
For the preparation of top harness make a box. For this you can use boards measuring 10x91 and 10x46 cm. First you need to make a base rectangular shape from long boards.
After this, stiffening ribs are installed on its surface, fixing them with self-tapping screws. It is important to install them at equal distances.

Support box
Preparing the lower frame
It consists of 2 parts, made in the form of the letter “P”. They are attached to each other using a long wooden plank. U-shaped elements are represented by two legs connected to each other by a bar.
Every support leg made from four bars measuring 4x4 cm. After making both parts, they are fastened to each other with a strip, the length of which is 10x99 cm.

To make it more convenient, turn the tabletop over and place it on the ground. Do the same with the frame.
Metal corners and self-tapping screws are suitable as fastening elements, which ensure reliable connection of structural elements.

Connecting the tabletop to the frame
We treat surfaces
All wooden surfaces must be carefully treated using a special protective compound.
He will give reliable protection from exposure to moisture and insects.

Varnish impregnation
Wooden table
Wood is the most environmentally friendly and pliable material.
A wooden garden table can be round, square or rectangular. Irregular shaped models are also popular.
If you plan to make it yourself, the tabletop may consist of narrow boards or slats.
The table also looks good from wooden cuts, which can be done in several ways:
- connect the cuts to each other with a tongue-and-groove joint or staples, forming a flat surface;
- secure the cuts to some kind of base.
The finished surface is sanded and varnished. The gaps between the boards can be coated with epoxy resin.
Sand the finished product and coat it with a protective compound.
To give the surface desired shade, you can use stain or special impregnation with pigment. Such a piece of furniture can be placed not only in a gazebo, but also in an open space in the garden.
For more information on how to make a table for a gazebo made of wood, watch the video:
Pallets are used as a basis
Designers actively use to create furniture wooden pallets. This technique allows you to create an original stylistic solution.
Existing ideas can be used to implement the following solutions:
- models on a stand;
- on wheels;
- with lid;
- with glass top.
It is not necessary to buy a ready-made table. You can make it yourself using pallets.

Such tables themselves are not difficult to manufacture. To do this, you first need to find or buy a pallet. You can find it in one of the large hardware stores. Then you need to saw off a part of suitable size and screw the wheels to it.
You can put an MDF panel or glass on top. You can also buy them at one of the hardware stores. The finished table must be treated with impregnation.
If you want to change its color, use a stain of a suitable shade. This completes the production of a table from a pallet.
Such a piece of furniture will look natural not only in a gazebo, but also in the open air on a personal plot. And the design, complemented by wheels, is mobile and inexpensive.
From scrap materials
Many designers use any available materials to make a table. Such a piece of furniture allows you not only to decorate the interior space of a house or apartment, but will also look organically on a personal plot, in a gazebo or garden.

Ordinary stumps decorated with mosaics look original. Larger stumps can be used in a high-quality original table. And smaller stumps are suitable for use as unusual stools.
Any tile left after renovation is suitable for decoration. It is split into small pieces, which are attached to the surface using cement mortar or tile adhesive.
Originality lies in you creative approach. Such designs often turn into real works of art.

Tabletop in mosaic
An old table that has fallen into disrepair can also be decorated with mosaics. This will update the countertop. To do this, first remove old paint from the legs, sand them and cover them with one or two layers of new paint.
Then they sand the tabletop and glue the mosaic to it. You can apply grout on top, which will protect the surface from the adverse effects of the external environment.
You can also use a wooden spool for winding cable as a table. To do this, it is enough to process it and paint it in suitable shade. But it can be further decorated.
The resulting piece of furniture will become more convenient if wheels are attached to its lower part. In this case, you can easily move it around the site.
Also, many people have inherited tables. Usually they are not used, as they require serious modification. With the right approach, they can be used as garden furniture or put it in a gazebo.
If you inherited a wrought-iron table, you can simply restore or replace the old tabletop.
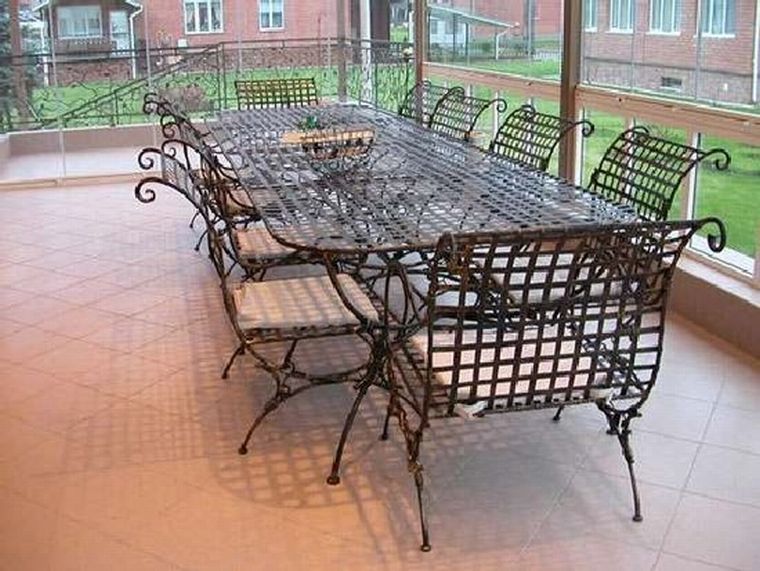
Wrought iron furniture for the gazebo
For those who have weaving skills and sufficient perseverance, wicker garden furniture made from wicker is suitable. You can make such furniture yourself.
But if you like wickerwork and don't want to make it, go to a big box store. Here you can buy tables made of wicker or rattan, as well as artificial fibers.
If there is a lot of metal left on your site, and you know how to work with a welding machine, you can make beautiful table for a garden or gazebo.
If you have the necessary skills, you will get an openwork and original product that will be one of a kind.
But before you start using it, do not forget to process everything metal surfaces anti-corrosion agent.
If you plan to paint the table, you can coat its surfaces with a special primer and apply a finishing coat of paint. The most suitable materials for countertops are wood or glass.
You can use a more interesting approach. Finish a simple tabletop with mosaics or pebbles of the same height. Then cover the surface with glass according to the size of the resulting tabletop.

Whatever table you choose for the gazebo or your garden, the main thing is that it is in harmony with the surrounding landscape and the interior of the gazebo. And a thing made with your own hands will delight you with its uniqueness and originality for a long time.