Regularly losing keys is a reason to look for a key holder, with the help of which these important pieces of hardware in life will always be in one place and in plain sight. The easiest way is to buy a miniature “hanger” in a store, but in this case you can forget about the originality and originality of the accessory. Option with homemade key holder lacks standardization and allows you to make any model quickly and cheaply.
If you don’t plan to buy a new piece of furniture, then ideal solution will become independent creativity, which will help detailed instructions how to make a beautiful key holder.

Why is it better to do it yourself?
Just look at the photos of the original key holders to understand all the advantages of making them yourself:
- Identity. No standard forms or stamp designs.
- Harmony. You don’t have to choose among the available options when you have the opportunity to make a key holder that fits perfectly into your home interior.
- Cheapness. For small hooks, stores charge three times the real price, but you can easily make “your own” from scrap materials.
- Quality. You are using quality materials, and in stores - fragile plastic and wood.

The variety of options is also attractive: you can make a “key keeper” from any available material. Below is everything in order.


From a cut tree
The most popular material from which a key holder can be made is wood. The easiest way to use a cut is:
- Saw off the cut suitable thickness(it is better to use a pine trunk).
- Sand the surface on both sides, moving along the grain.
- Sequentially cover the workpiece with stain in three layers, waiting for each of them to dry completely.
- If desired, apply a design, pattern or ornament to the surface.
- Cover with varnish.
- Drill holes for fastenings on the back side with a drill.
- Screw the hooks on the front side.

From the whole thread
Among the ideas on how to make a key holder, there is another part of the tree - a branch, which ideally complements the ecological style in the interior.

The main thing is to find beautiful branch, clean, dry, file and perform several steps:
- Cover the workpiece with stain and leave to dry for an hour.
- Screw on the fasteners.
- Supplement the knot hooks with several metal hooks.

From a photo frame
A stylized “screen” with keys will look no less impressive and original, for which you need:
- Prepare a piece of plywood suitable in size for the existing frame.
- Apply a suitable design to the board or simply cover it with plain paint.
- Paint the frame to match.
- Connect the parts.
- Screw on the hooks and fasteners.

From a piece of chipboard
Any piece of wood, chipboard or plywood is an excellent basis for an original key holder. The main thing is to follow these steps:
- Find a suitable stencil.
- Cut out the figure.
- Sand the contours.
- Drill holes for hooks and hangers.
- Supplement the product with a drawing or drawing of details.
- Apply a final coat of varnish.

From the LEGO constructor
An interesting solution would be to decorate the hallway with children's construction sets. Step-by-step production such key holders with your own hands looks like this:
- Find a base: take a single plank or assemble interesting composition from Lego.
- Make an inscription on the base using the designer “keys”, “home”.
- Burn holes on individual “bricks” with a hot nail.
- Insert separate keys into the burnt hole.
- Attach the keys in any convenient place.


Leather
If you have a square piece of leather lying around at home, then a good option would be to make a table key holder from it. This is done simply:
- Treat the skin.
- Secure each corner of the square with a metal rivet.
- Add fittings that suit the style (chain, braid, studs).

There are other ideas for table key holders: a varnished seashell, an old jewelry box or a gift box.

Any given master class on do-it-yourself key holders is your chance to make your own “place” for constantly lost keys, ideally in harmony with the existing interior. To do this, just find a gnarled branch in the yard or slightly update the photo frame. The main thing is to turn on your imagination, find a suitable basis and be inspired by the ideas above.

DIY key holder photo


Note! 


Note! 


Note! 


Tired of constantly looking around the house for your keys? I bring to your attention six ideas for making a key holder with your own hands from scrap materials. Thanks to this accessory, they will always be in one place known to all household members.
Ideas that you can bring to life in your own workshop
Of course, you can simply buy a key holder for the hallway. But when you start choosing for yourself suitable model, it turns out that:
- Price so simple product very considerable;
- They do not have any complex structural components, which could not be made independently.
So, the question arises, why overpay for a factory model, which, moreover, can be found in the apartment of friends, if you can make an original key holder literally from cheap cheap materials at hand?
Idea No. 1: a board with a slot
It is enough to take a sanded board that you might have left over after some home renovation, and make a slot in it with a router. That's it, the basic key holder is ready. In this case, depending on the position of the slot, the following options are possible:
| Photo | Description |
 |
Horizontal slot. The keys fit comfortably, but may touch each other when you take them out. |
 |
Vertical slots. In this case, the keys do not interfere with each other, but they require large key fobs, which are not very convenient to carry in your pockets. |

You can even secure such a wooden product with simple double-sided tape, because the load on it will be small.
Idea No. 2: board with hooks
If you have several hooks for clothes, you can make a key holder using them:
| Photo | Description |
 |
|
 |
|
 |
Screw it in in front there are hooks for keys, having previously drilled holes for them. |
 |
Testing. |
Idea #3: frame
Beautiful key holders for the home are made from frames. Here we can also highlight several different approaches to the manufacturing process:
| Photo | Description |
 |
Frame decoration. In this case, the structure for storing keys is made in the same way as in the previous paragraph, but in the end it is also decorated with baguettes. |
 |
Hooks in a frame. Here the wall key holder is made from a frame by screwing hooks into it. |
To make a key holder from one frame, only wood or MDF is suitable. Cast or overlay moldings will crack when drilled.
Idea #4: locker
A wall-mounted key holder in the form of a locker has two main distinctive features:
- Positive: lower or upper wall design - a ready-made shelf for various small accessories;
- Negative: combines only with classical and old Russian styles.
It is noteworthy that the cabinet itself does not have to be assembled from scratch; it is quite possible to use ready-made frames:
| Photo | Description |
 |
Case from an old watch. In the presence of finished frame Making a housekeeper with your own hands is very simple:
|
 |
Old box. Here, in addition to hooks, you will also need to consider a system for attaching the product to the wall. |
 |
A box from old furniture. Here also:
|
If you plan to assemble the cabinet yourself, then the following diagram will be useful to you:

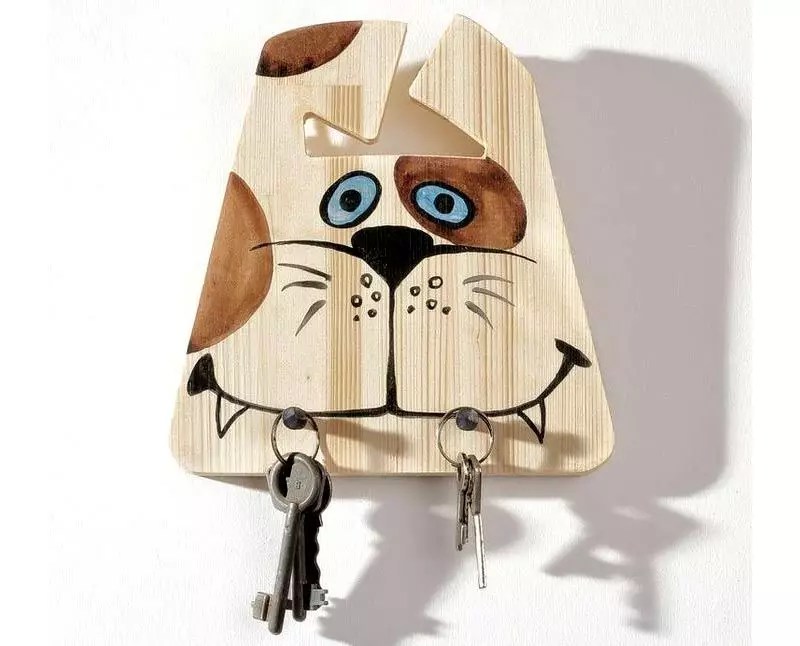
Idea No. 5: plywood figure

The most original designs for storing keys can be made of pliable plywood. The principle of installing hooks here is the same as in the case of a regular board. Only now the background will not be in the form of a simple rectangle, but will take the form of any figure you desire.
How to make a key holder from wood-laminated board? Let's highlight five main steps:
- We create the desired drawing in pencil on a sheet of paper or in any graphics editor, then print it out;
- We transfer image on a sheet of plywood using carbon paper;
- Let's direct electric burner circuits;
- Cut it out hand jigsaw;
- Sanding m and decorate.

Idea No. 6: tree branches

Another way to achieve originality is to use branches and twigs from trees. Trim them to required sizes, connect with self-tapping screws and paint.
Decoration
The decor also allows you to add a key holder to your look original solutions, make it as suitable as possible for the surrounding interior, or even turn it into a real attraction in your hallway.
Let's consider the most popular decoration options:
Polymer clay

This material allows you to create a three-dimensional design for your design. This is done like this:
- Knead thoroughly a block of polymer clay until soft and pliable;
- We fashion from it a plate with the desired ornament or even figurines with hooks. It all depends on your creative idea;
If the bar is very difficult to handle with your fingers, drop a few drops on it vegetable oil. This will make the process easier and faster.
- Bake the finished product in the oven at a temperature of +120-139 degrees Celsius until a brownish crust appears;
- Turn off oven and let the craft cool without removing it;
- We apply acrylic varnish or paint;
- After drying, install on the key holder.

Decoupage
In the decoupage technique, there are two options for applying an image to the surface to be decorated:
- Straight. The base is primed with a special compound, after which PVA glue and the paper picture itself are applied to it;

- Back. This is, in fact, just a decal that can be purchased at a specialty store.
Conclusion
You have become familiar with several ideas for making key holders and methods for their subsequent decoration. The video in this article contains Additional materials. In the comments you can ask any questions on the topic.

In many families, the situation with the constant loss of keys has become simply anecdotal. And after a long search they are found in absolutely unexpected places. If you purchase a key fob with a signal, then in addition to the keys you will also have to look for a remote control for the key fob. No matter how much we negotiate with all family members, the result is the same. So a reasonable solution comes to mind - .

So that at the most inopportune moments you don’t have to look for keys that are constantly in the wrong place, a key keeper will help out. There are many options for such key lockers. So, to make a metal key holder you will need the following tools and materials: a thin metal cabinet, two-component glue, parts for fastening, and also for art decor: a large bearing, wrench, various parts from a faulty watch. To make a key holder with your own hands, you first need to select the small metal parts that make up the composition: they are laid out on the cabinet door like a “safe.” Then the parts need to be placed on the tabletop according to the same pattern that was on the door. To better remember the drawn drawing, you can photograph the “picture”. Then, using two-component glue, all parts are glued one by one to the door, located horizontally, so that metal objects did not move when the glue hardened.

Although when designing such a key holder, a lot of small parts, located in a chaotic manner, such a locker is designed to maintain harmony in storing keys. For greater convenience, you can even glue the corresponding inscription on top of each key hook: “Basement”, “Balcony”, “House” and the like.

This easy way confirms how easy it is to make a key holder with your own hands. A master class of this process can be seen on many sites. It can be presented with both videos and photo galleries. Convenient to use and step by step instructions. Here is an example of such simple work, which results in a very functional item. Moreover, not only will the keys always be in place, but the key holder itself will turn into a nice decorative interior detail. In order to make such a simple key holder, you need the following tools and materials:
- sheet of plywood or fiberboard,
- acrylic paint in aerosol,
- black craquelure varnish in aerosol,
- napkins,
- acrylic paint,
- tassel,
- PVA glue,
- contours,
- acrylic gloss varnish,
- hooks, loops,
- a sheet of sandpaper.
Step-by-step master class: DIY key holder
A pocket key holder can be made with your own hands in a similar way, but, of course, in smaller sizes. It can be placed in a leather case like a notebook. Well, for a wall-mounted key holder, a square is cut out of a sheet of plywood or fiberboard, which is first sanded to eliminate irregularities. After cleaning, the workpiece is coated with yellow acrylic spray paint. Some time after the paint has dried, black aerosol craquelure varnish is evenly applied, after application of which cracks will immediately begin to appear. The drying time for the varnish is about half an hour. Then you need to walk along the edges of the workpiece with a foam sponge with acrylic paint black color. The result is a simple blank in which the cracks are filled with black. Next, the key holder is easily covered with blue paint using a sponge, which will add a blue craquelure effect. You can also make your own leather key holder using the decoupage technique. At the same time, on the skin, and in in this case– a napkin print is attached to a finished fiberboard sheet. It is cut to the required size. The napkin is applied to the workpiece, outlined and the area under the napkin is painted over with white acrylic paint, since without priming the area under the napkin, the design is lost. After the paint has dried, take a napkin and lay it on the file ( front side down) and using a fan brush of medium hardness, starting from the center, apply PVA glue, half diluted with water, onto it. At the same time, the napkin gently stretches. The file is turned over and the napkin is transferred to the workpiece. Using the file, it is smoothed with gentle, slow movements, air bubbles and excess glue are expelled. Due to the fact that the napkin stretches when wet, the primer is applied only along the contours of the dry sheet of the napkin. With a smooth movement, the file is removed from the workpiece with the napkin glued. The product is dried, acrylic varnish is applied on top in one layer, and after it has dried, the irregularities are sanded with zero-grit sandpaper (with the finest grains). Next, the wall-mounted key holder, made with your own hands using the decoupage technique, is decorated and varnished. But first, the napkin is drawn with acrylic paints and an outline. Following the drawing, after all the paints have dried, the work is secured with several layers of varnish (glossy acrylic is best). Between applying layers, there is an intermediate drying period of several hours (the time depends on the thickness of the applied layer). After the varnish has dried, the pearlescent contour peach color in the form of a bitmap, the created composition is completely completed. Finally, two golden-colored loops and hooks are taken and screwed to the workpiece, and the loops are attached invisibly. As for the napkins used for decoupage, they can be selected so that the pattern depicted on them fits into the general interior hallway

DIY wall key holder
Another “safe” for keys is made of wood. Making such an original key holder with your own hands is very simple, following the instructions given. To make it you will need the following tools and materials:
- small cabinet with hooks for wall mounting;
- red and white acrylic paint;
- paper glue (preferably PVA) and two-component glue;
- acrylic based varnish;
- three-layer napkins with flowers depicted on them;
- mirror;
- furniture handles - six pieces;
- cardboard;
- gun with liquid nails;
- drill, drill bit for woodworking.
First, measure the width and depth of the cabinet. Then a small box is glued together from durable cardboard. Its size should be smaller sizes wooden box to easily enter the key holder. A ready-made box can also be used, but its front wall needs to be made slightly lower than the rest. Next the box is painted in White color, and after the white layer has completely dried, red paint is applied. This wooden key holder is made with your own hands using the decoupage technique, but if you have the desire and opportunity, you can decorate it differently: apply a picturesque design, an ornament, or decorate the product with a collage or mosaic. In general, there are no restrictions! In our version, the design you like is cut out of a napkin, pasted onto a white piece of paper, and a layer is applied on top of the design acrylic varnish(strictly from the center of the element to its edges). After the varnish has dried, flowers are cut out and glued to the box. After the glue has dried, a layer of varnish is applied on top of the pattern and on the entire door. To achieve a glossy effect, you can apply 2 more layers of varnish. Already attached to a dry surface Furniture handle with shortened screws. WITH inside The mirror is attached to the doors with two-component glue so that the wooden key holder, decorated with your own hands, has the most presentable appearance. A box is glued into the key holder, hooks for keys are attached, which can be supplemented with inscriptions indicating their destination. Again, the product is decorated to the taste of the craftsman or customer.
As one of the simplest options for a key holder, you can make this the right thing in 15-20 minutes, using a regular A-4 photo frame. First, the glass is removed from the frame. Before making a key holder with your own hands, sketch a drawing on its backing with a pencil. For example - a tree, flowers, a house, floral ornament and so on. The drawing can also be made using a stencil. Then the details are drawn with acrylic paint or a marker. While the drawing is drying, the key hooks are being prepared. Their role will be played by small nails, each of which has a bead strung on it.

As you can see, the implementation is absolutely simple and straightforward, and the result is both useful and pleasing to the eye!

DIY wall key holder - video
This article contains 7 step-by-step master classes- how to make a key holder with your own hands on the wall in the hallway on a very budget! This does not require a lot of materials and time, because they can be made from scrap materials such as wood, branches, old toys
And with the help of the original design of a key hanger, you can emphasize the style and interior of your home or apartment.
Sometimes, looking at familiar things from the other side, you can notice completely new possibilities for their use.
Here we offer a new look at using Lego. We perceive it as an educational children's game (of course, adults too, because it's no secret that parents sometimes buy toys more for themselves than for their children). But with the help of a few tools you can use it to make not only different figures for games, but also an original wall-mounted key holder.

Key tag - also made from a construction element

Wall-mounted key holder made of plastic Lego
You will need:
- Lego pieces: a flat rectangular platform and as many small pieces as you want to hang keys
- Drill with fine bit
- Screws, dowels (2 are enough)
- Keychain rings
- Ruler
- Marker
- Lace
- Scissors
Manufacturing:
- On small parts of the construction set (square or rectangular to your taste), on one side, mark the middle with a marker and carefully make a small hole with a drill.
- Tie a string to the ring and to the small part of the construction set (thread through drilled hole and tie a knot).
- On a large flat platform, make two symmetrical holes for screws.
- Attach the platform to the wall (depending on what kind of wall, use dowels)
- Put your keys on rings, hanging from small pieces and attach them to the platform.
Enjoy using it and don't lose your keys again!

Master class No. 2: Original key tags
Let's look at how to make a simple wooden key holder, mounted on the wall. This Master Class is very simple, for complete beginners in tinkering with their own hands.

Materials:
- Dremel 8050 Micro multi-tool or similar model (can be used separately grinder, saw, drill)
- wooden block approximately 2.5 cm x 5 cm x 14 (we made it for 4 keys, if you need a different number, take the appropriate size)
- two small pendants for shelves (consider the selected size of the bar)
- leather lace (we used 1.5mm thick, but a regular strong lace can also be used)
- screwdriver
- 4 small opening rings
- 4 pendants around the neck (you can take the keychains you like)
- wire cutters
- round pliers
- pencil
- ruler

Step 1: To make the holder you need:
- Sand the wood block.
- Fix it and go through it first more rough grinding disc to remove irregularities and protrusions, then medium and smooth.
- Mark with a pencil the place for the hangers on the back side of the block and use an engraving cutter to make recesses with a depth of approximately 3 mm(the bar is symmetrical, so choose one of the two back sides at your discretion).
- In the place where there is an opening in the suspension, make recess another 3 mm.
- Place the hangers on the block and secure them with screws.
- On the front of the block, make marks for 4 openings(parallel, as in the photo) and using a cutter attachment, make indentations about 1 cm deep.
- Attach the block to the wall.
Step 2: All that remains is to make the keychains:
- Regardless of whether you took a pendant or a keychain, remove the mount (the keychain is too thick for the opening, and the pendant is too long). Use wire cutters if necessary.
- Place the release ring on the key. Can be clamped with pliers.
- Cut off from leather lace 4 even parts, thread through the key ring and keychain, tie.
Instead of a wire polygon, you can use any object, for example, any toy or ball.

Key tags can be made of any shape and type
Master class No. 3: Key hanger made from tree branches
The easiest way to make a key holder is to use tree branches.
- How to do it right .
- Then we decorate them at our discretion, either varnish or paint with paint.
- We buy in the store hooks, they must be sharpened on one side and carefully hammer it into the wood.
There are many design options for such hangers - look at the photos and choose!

Boho style key hanger


Very simple and beautiful!


Different options for hangers for keys and not only using branches

Master class No. 4: Made from wood and old keys
It sounds strange, but it is true, in this master class we will actually make a key holder, the hooks of which will be made from old and unnecessary keys.

Retro housekeeper
You will need:
- Rectangular wooden board
- Old keys (3-5 pieces depending on how many hooks you need)
- Nails (short and thin, but the head should be wide enough)
- Pliers
- Sandpaper
Manufacturing:
Using a saw, give the board the desired size and shape, and round the corners. Then use sandpaper to remove all burrs. If you are lucky enough to immediately find suitable board, this step is skipped.

Attaching hooks to the base of the key holder
- Lock the key head, and bend the blade with pliers to form a hook shape. Repeat this step with the remaining keys.
- Place evenly hook keys on a board.
- In the place where there are holes in the key heads, drive in the nails(the hat must be bigger hole on the key to hold it).
- The key holder is ready, all that remains is to hang it on the wall. This can be done by attaching hangers to the back of the board or driving two nails into the wall and making holes in the board and hanging them by them.
It looks very original and immediately reminds of its purpose.
Master class No. 5: Key holder with a vase
In fact, such a board with hooks can be used not only as a key holder in the hallway, but also as a kitchen hanger for potholders and towels, or for the bathroom.

Key holder with vase
It looks interesting and unusual, because it’s not often that you see a vase of flowers on a hanger.
Materials:
- Rectangular wooden board
- White paint for wood
- Hooks (3-4 pieces)
- Jar (maximum 0.5 l)
- Metal pipe clamp (must fit the jar)
- Hangers for fastening
- Screws
- Drill
Manufacturing:

- Paint the board white. This will perform two functions at once: aesthetic and protective, the latter is especially important when used in the kitchen or bathroom to reduce the effect of heat and moisture on the wood. Let the paint dry.
- Attach the hooks and clamp to the board using screws and a drill.
- The hooks have special holes for screws, but most likely they will not be in the clamp, so you should use a drill.
- Attach the hangers to the reverse sides e boards and hang them in the chosen place.
- Insert a jar with a bouquet or sprig of flowers into the clamp.
The result is a beautiful key holder in soft colors. It will complement the interior well and will serve as an additional accessory for decorating the apartment.
We also described in more detail how to make such a mount - as in the photo below.

Master class No. 6: Housekeeper “like in a hotel”
Such a housekeeper has not only original design, but a definite advantage over others described here is clarity and orderliness. It’s not for nothing that they are used in hotels, because each key location can be signed.
Only we will indicate not the room number, but the purpose of the key: for a house, work, dacha, car, mailbox, parents’ apartment, staircase etc. Often the keys to different rooms look the same, such a key holder will once and for all save you from situations when, instead of keys to the office, you put the keys to the dacha in your bag, and then you cannot open the door.

Large wooden key holder

Necessary materials:
- Thin wooden strip (approximately 8 cm wide)
- Frame strips
- Set of metal tags
- Hooks (threaded)
- Dye
- Suspensions
- Small nails or screws (very thin)
Assembly steps:
Step #1: Prepare the base
Saw wooden plank into 5 identical parts. When choosing the length of the planks, keep in mind that you will then glue them together to make a rectangle or square; calculate the dimensions for the desired shape.

- Form a frame of the required size from frame strips.
- Staple 5 planks and a frame with special wood glue, as it shown on the picture.
- Now we need to paint this entire structure.
You can first apply a wood antiseptic, wait until it dries, and then apply several layers of paint one after another. Wait for it to dry.


If you wish, you can give the wood an antique effect by rubbing it a little with sandpaper.
Step 2: Attach tags


- It's time to attach the tags. Think about how the board will hang: so that the slats are vertical or horizontal (in our example they are vertical). Lightly with a pencil mark the mounting locations, they should be at the same distance. You can place them under a ruler or make a stencil out of paper. Attach tags to wooden base cloves or tinsel.
- Under the tags in the center of each of them Make thin holes for the hooks with a drill, use the thinnest nozzle.
- Screw the hooks into the holes.
- Attach With reverse side key holders pendants and hang it on the wall.
- Insert notes about the purpose of the hooks into the key tags and hang the keys.
Use it to your heart's content!
Ideas for key holders using improvised means
From a tennis ball
Easy way to make a key holder from a tennis ball:
- fasten with liquid nails a ball to the suction cup (bath hooks are sold like this),
- make a cut sharp knife in the center
- decorate: attach eyes (can be taken from an old doll) or draw with a marker.

Through the correct implementation of the appropriate project, it is possible to ensure convenient storage important things and... A high-quality wall-mounted key holder with your own hands will be made quickly and without extra costs after reading the materials of this article. There is general thematic data and special photos here. good decisions. Some production technologies described in detail. Therefore, anyone can reproduce them accurately even without previous experience in performing similar work operations.
To formulate a list of requirements for this design, it is necessary to make several clarifications regarding the intended purpose:
- A decorative wall key holder is installed in the entrance area, in a visible place. Its aesthetic characteristics should.
- The direct loads from the keys themselves are not great. However, with intensive use it is difficult to count on very careful handling. Possible mechanical influences should be taken into account.
- Resilience will come in handy decorative coatings to changes in humidity and temperature. The differences in these parameters are especially large in the hallways of private houses.
- It is necessary to ensure good visibility of all objects. If necessary, install.
- In some cases, it is necessary to equip the structure with closing doors.
Taking into account the features noted above, we can consider various traditional solutions.
One glance is enough to check that objects are in their place. An additional advantage of this design is its simplicity. Decorative design choose individually. But a base with several hooks can be created in just a few tens of minutes. Of course, it will be necessary to provide suitable system fixing on the wall. But this problem is not difficult to solve using ordinary screws with dowels, or other standard ones.

They provide some protection against theft during visits by courier service workers and other strangers. For good review installed in the door glass insert. If necessary - inside


This modification rationally uses the free space inside the door. A mechanism was installed there that performs decorative and practical functions at the same time.
For your information! Similar project not too difficult to implement on our own. You just need to purchase a watch that matches the size of the product. It is better to choose an electromechanical or electronic model to reduce the operating load on users.

It must be remembered that such accessories should not interfere with free movement. To store a large number of keys, you can use the internal volume, or open shelves.


It’s not difficult to make a wall-mounted wooden key holder at home
One of the main advantages of this material is its ease of processing. You can make a beautiful and functional key holder from wood with your own hands using simple carpentry. Chisels are also used to give the desired size and shape. An ideal flat surface is created using a plane and sandpaper. Interesting natural cut lines are preserved using clear varnish. If necessary, decoupage or other decorative coating techniques will be used.

In the example in the photo, you will need to find a birch log of suitable size. After cutting and cleaning the ends, hooks are screwed in from below. This completes the manufacturing process of the device.
This product is a suitable illustration of the shortcomings simple solutions and the material itself:
- Primitive appearance imposes significant restrictions on compliance with interiors.
- Without treatment, the log will become a source of pollution.
- If you do not treat the product with a deep primer, the structure will be quickly damaged by changes in humidity and temperature.

It’s not difficult to buy a wall-mounted wooden key holder in a store. But it’s much more pleasant to create the desired product yourself. If the plans are implemented correctly, it will become a source of pride that will be shown to guests.

This example shows that the key holder, with appropriate equipment, can be used to store jars and smartphones, gloves and other small items.
Reliability and durability of metal wall key holders


Metal products are highly durable. They retain their functional characteristics over many years of use in excellent condition. Using special technologies parts are made from these materials complex shape. The only drawback is destruction by corrosive chemical reactions. To eliminate such negative manifestations, use different kinds decorative and protective coatings.

Metal is more difficult to process than wood. To manufacture some products, you will have to master welding, casting, and other complex technologies. You will have to equip your home workshop accordingly. Even without a thorough analysis, it is clear that the total investment will be significant.
What's good about making a plywood key holder with your own hands?
This material is better for the following reasons compared to the options discussed above:
- Plywood is created in factory conditions, so the thickness and other characteristics are precisely known.
- If you purchase a moisture-resistant variety, you can prevent damage from appropriate external influences.
- The outer surfaces, even without treatment, are quite smooth. They are well suited for applying images using various techniques.
- Unlike metal, plywood is not difficult to process.
- Even large products made from it weigh little.


Important! When using plywood, take into account the relatively low hardness of the material. Places for attaching hooks, etc. additional details may become loose over time. We must also not forget about the limited resistance of wood to moisture and microorganisms. To protect against them, special impregnations are used.
Quick creation of key holders from cardboard with your own hands


These pictures explain the algorithm for creating a functional . You will need to first compile a list of necessary components. To avoid mistakes, you should prepare the project in advance. It is enough to make a sketch by hand with dimensions and other design parameters. You should also choose and master the application of beautiful, long-lasting images in advance.
This material itself is inexpensive, but you will have to take into account the additional costs of production technologies. We must not forget about the limited resistance of cardboard to mechanical loads, high humidity

In this photo of a do-it-yourself wall-mounted key holder, only a container for small items was made from a box. Solid foundation And decorative overlays- made of plywood. Metal hooks with the necessary aesthetic characteristics purchased in the store.
Examples from other materials
These examples clearly demonstrate ample opportunities using different materials. Quite often, craftsmen use combined designs. When preparing the appropriate project, you should pay attention to the following general recommendations:
- The power frame is calculated taking into account real future loads.
- The dimensions are selected so as to eliminate obstacles to the free movement of people.
- All parts of the product must be designed for the appropriate operating conditions. If necessary, they are protected from adverse external influences.
- In any case, it is necessary to consider the entire complex of works. Some complex components (hooks, locks) can be purchased in a retail chain, or ordered from a specialized workshop.


DIY key holder: master class and useful recommendations
Before making a pocket key holder with your own hands, you need to decide on the method of securing objects inside it.


In this example, you can look at some of the components:
- button for fixing in the closed state;
- You can use a carabiner to attach this useful accessory to your belt;
- rivet;
- device with rotating elements for keys;
- linings to prevent edge wear.
For manufacturing you will need not only leather and the special metal fittings listed above. Drawing the workpiece and cutting will not cause significant difficulties. However high quality seam.


To make a wall-mounted key holder from wood yourself, you don’t need to purchase expensive specialized equipment. A suitable blank could be a completely free piece of driftwood of a special shape, found while walking through the forest. When purchasing a small board or plywood from a hardware store, you will not need significant expenses. You can also purchase standard fasteners, hooks, varnishes and paints there.

The following description will help you create such a key holder for the hallway with your own hands without errors:
- After specifying the dimensions, you need to buy plywood (up to 10 mm), rings with key chains.
- Making drawings individual parts V life size. With its help, templates for the lower and upper parts and key rings are cut out of thick paper.
- They are applied to a sheet of plywood and outlined with a pencil.
- Cutouts are made along the marked lines using a jigsaw.
- Surfaces are sanded with sandpaper. Drill holes in the key rings for subsequent installation of the rings.
- The “house” and the base are fastened using PVA wood glue.
- “Hearts” and other decorations can be applied using burning tools.
- The products are varnished. After drying, fix it on the wall.

When creating a wall key holder with your own hands, it will help improve the decorative parameters of the product without extra costs and personal artistic talents. Therefore, this technology is worth studying in detail:
- By preparing the surface, chips and irregularities are removed.
- Apply 2-3 layers of white paint, which forms a neutral color background and eliminates minor defects.
- Cut out the design you like from a napkin, making the edges uneven.
- Having attached such a blank to in the right place, apply (transparent PVA). Move from the center to the sides to remove air bubbles.
- After drying, coat with varnish.
Article