Mass Effect Andromeda.
Prologue. Hyperion
The first mission in, the events of which take place on the Hyperion, is rather educational. Just follow the suggested steps. All dialogues with characters in the game, if they are not marked with markers, are optional for completing the main storyline.
And first, we suggest you familiarize yourself with the video walkthrough of Mass Effect Andromeda (beginning of the game):
Walkthrough of Mass Effect Andromeda. First mission "On the surface"
After landing on the planet, another short training will begin, during which you will learn about the mechanics of jumping and basic principles battle. Just follow the directions and do what you are told and shown until you meet Fischer.
Your first encounter with the kett is fairly straightforward; you will have to kill two opponents. As soon as you kill them, use the scanner on everything you see around. Get used to using it constantly, as scanning will allow you to earn research points necessary to develop blueprints for new weapons and armor. Follow the other marker.
Eventually, you'll reach a strange structure where you'll need to kill another group of enemies. Use cover, and after destroying enemies, examine motionless body Kirkland. There is no way to save him!
Shortly after receiving a distress signal, you will be ambushed. After talking with Liam, get ready to kill your opponents. Continue following the marker until you reach a point where the path diverges.
Your main objective is ahead, but you might want to go left to find the alien building. The entrance is at the bottom, on the right side under the large pipes. Scan everything you see inside, then activate the generator in the far left corner to open another door. It will lead you to your first encounter with the relics. Destroy the robot.
Once you've done this and explored the rest of the building, return to the fork and head towards the marker to the southeast. You will encounter another part of the rescue shuttle, located near the cave with the kett. Get rid of them and then move on to the main goal.
When you arrive, you will be faced with a larger group of kett who will attack in waves. This time you will have to use cover even more often, since the enemy has an advantage in numbers. You can use your jump to suddenly attack mobs from the flank. While jumping, you can land near enemies to push them away and deal some damage.
As soon as the location is cleared, a new marker will appear. Proceed to the new location to meet with Ryder Sr. and prepare for a rather lengthy battle against the kett. By the way, before this you can save Grig, another member of the squad. If this is not done before meeting Ryder Sr., you will find his body in a huge kett complex.
Once you reach your destination, you need to protect Ryder Sr. while he opens the door. Most enemies will come from the upper areas, left and right. Therefore, send one partner to right side, and the other - to the left. Fight until the target refreshes. Watch a long cutscene after entering the structure.
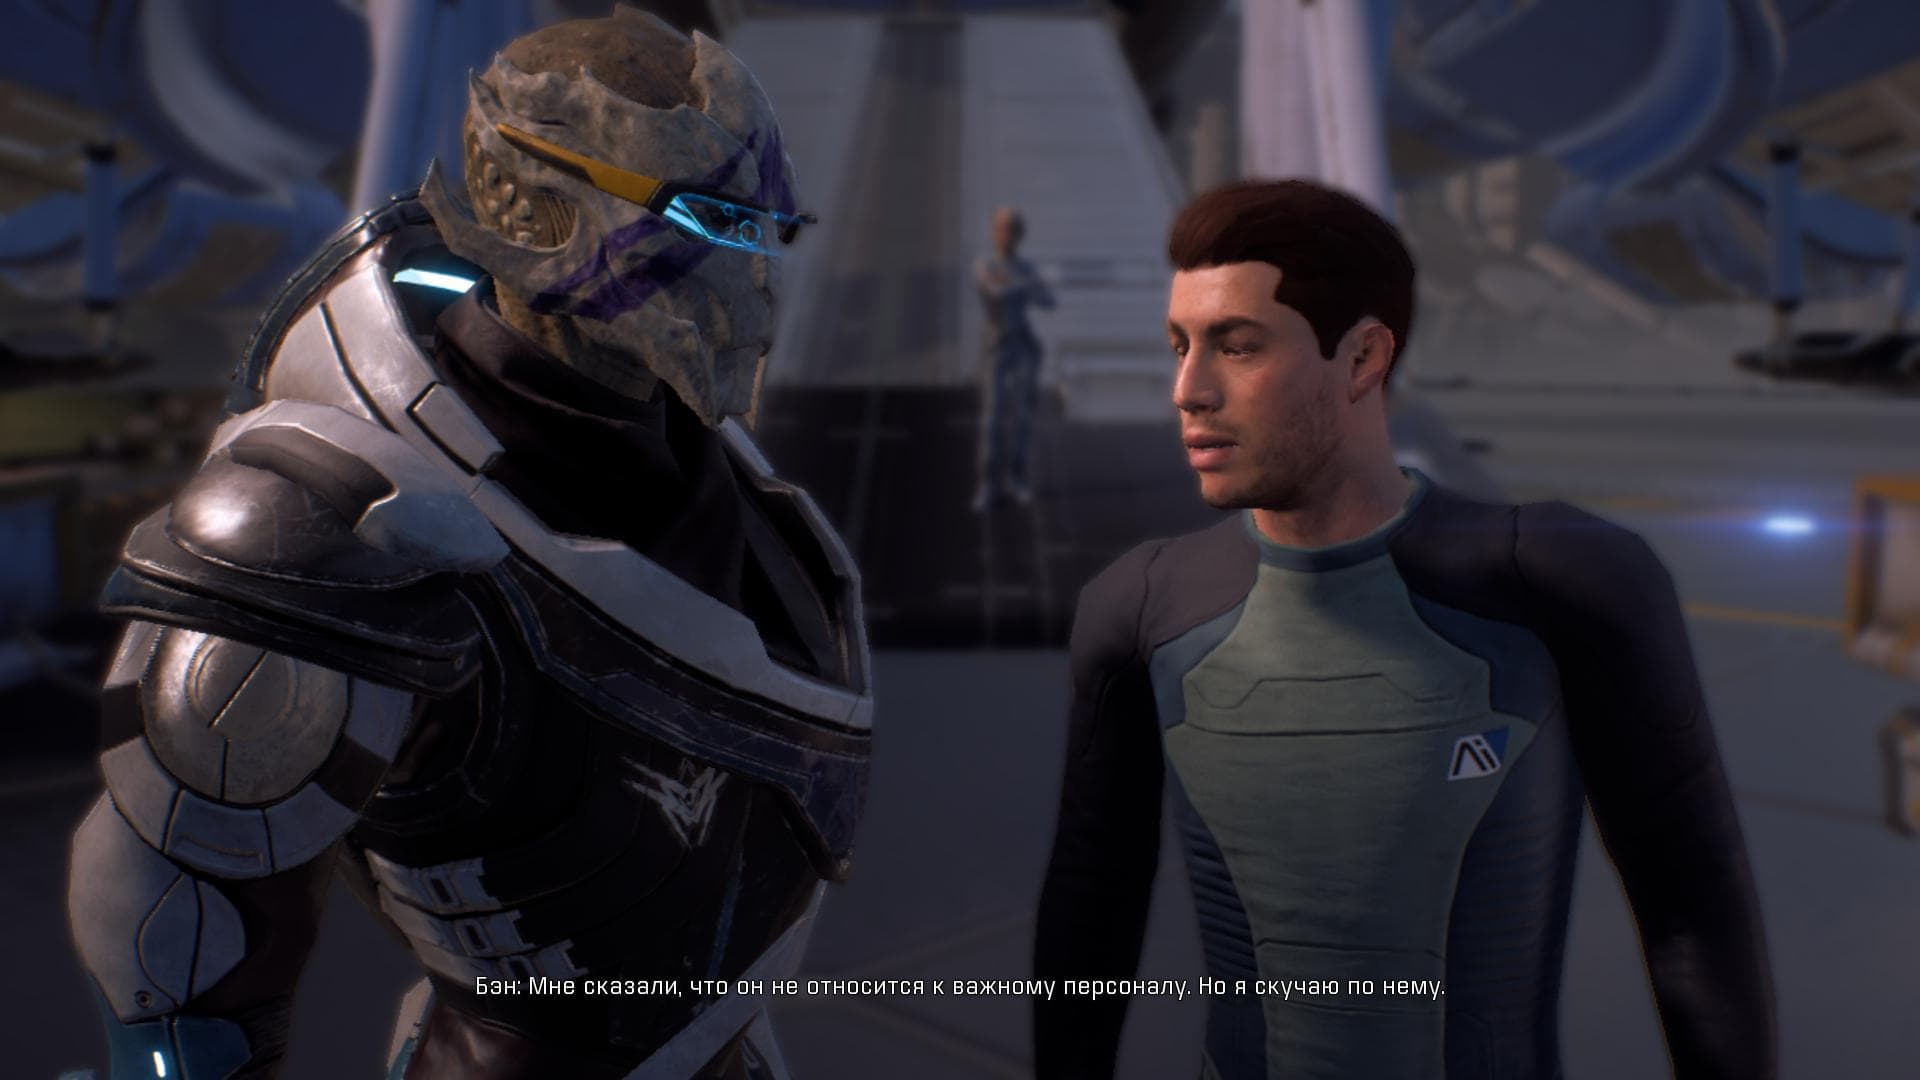
When you arrive at the Nexus, talk to Avina near the entrance, then go forward, climb over the crates and talk to the technician.
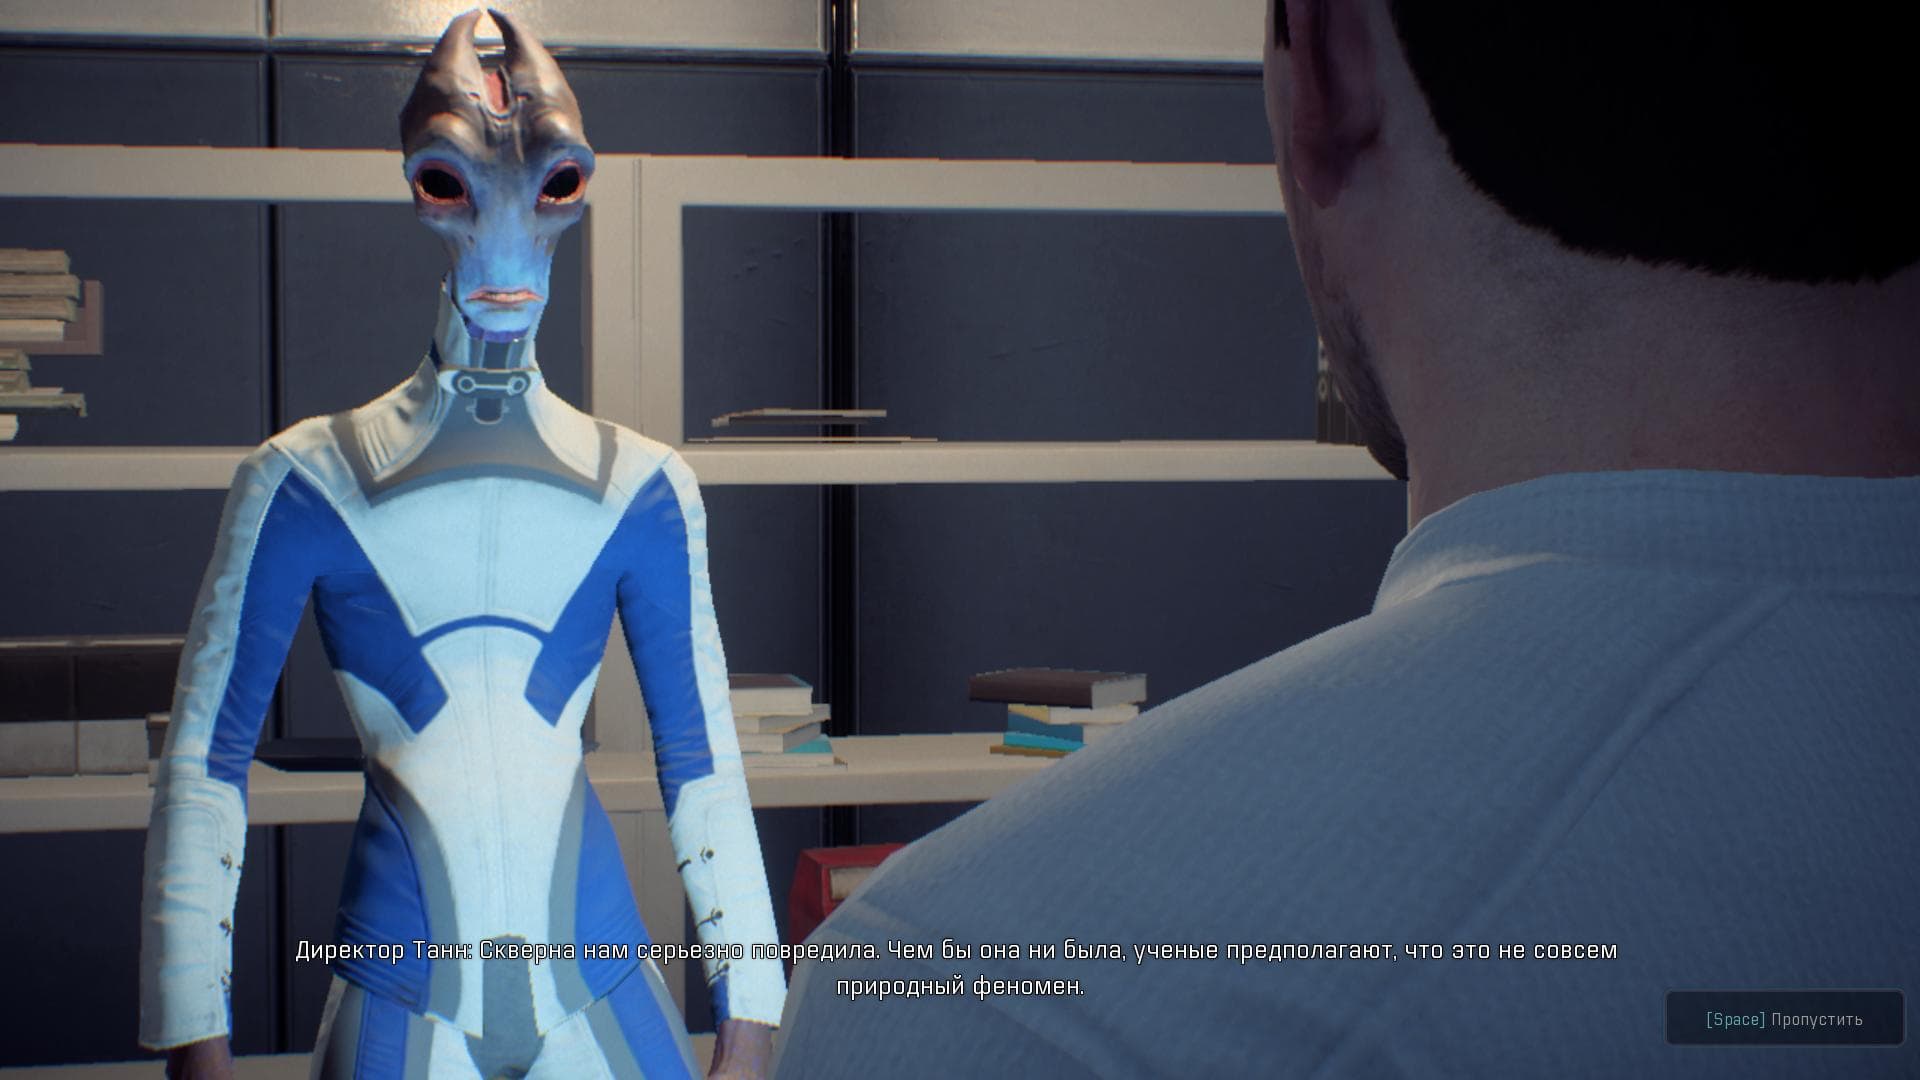
Soon you will receive a new task, which is optional. But to do this you just need to talk to several NPCs and finish everything with a conversation with Director Tann.
You need to talk to him twice to complete the mission and unlock the story mission, which involves going to Eos in the Pythia system.
Walkthrough of Mass Effect Andromeda "From scratch"
Talk to SAM to begin the Ryder Family Secrets mission, then head to the Tempest to new house. After a short tour and meeting the crew, you will be able to travel to Eos, in the Pythia system.
As soon as you land, move towards the marker. The door will be locked, so follow to the new location. Examine the datapod on the table to get the password, then return to the first building.
Use the console inside it, then go back outside and go to the building with the generator. Someone has barricaded himself inside and will not allow you to pass, but he will allow you to activate the generators.
Turn on the nearby generator and then scan the small pylon nearby. As soon as SAM tells you, jump up and activate the pylon. Go to the second generator and do the same. A kett dropship will appear, so you'll have to destroy them. Then you will be able to access the building. Activate the power management system and go to the next point on the map.
Scan the huge box with right angles that looks like a garage, then use the keyboard on the side. Go to the new marker to summon your first mobile station within the .
Go back, enter the research building near the large container and interact with the terminal. Go back and use the keyboard on the container again to access the Nomad.
Jump into it and go to the marker. Leave the Nomad and examine the terminal in the center of the area before interacting with it. SAM will tell you what to find Additional information, so use the scanner again and follow the visible yellow cables. Scan the objects on top of the huge pillars before returning to the terminal.
When you interact with him, Peebee will appear. She's harmless, so don't pay attention to her. Talk to her and then destroy the relics. Focus on the larger robots first, which can spawn endless Observers.
 Peebee
 Return to Nomad and follow the markers until you reach a large relic monolith.
Before you can access the terminal, you need to destroy a group of relics. And you will again need to use the scanner to follow the yellow cables and scan the two glyphs.
On horizontal column can be reached by walking along its far end and top, and on vertical column- using a small terminal near it, which will allow you to create several pillars that you can jump onto.
Once you've scanned both glyphs, return to the central terminal to solve the first relic puzzle. Arrange the symbols so that they are not repeated horizontally and vertically. Everything is very simple!
By completing such puzzles, you will activate various terminals. Interact with them, and then get ready to fight another group of kett.
After this, you need to go to the kett research center. Return to the Nomad and move through the desert to the indicated point. Kill the enemies on the territory of the complex and inside the building talk with another ally - Drak.
Next, it will be time for another monolith of relics. After a short conversation with Drak, approach the nearest monolith. Scan the glyphs and interact with the terminal, then return to the Nomad. To get to the glyphs, again use the scanner and other terminals that create pillars that you can jump on.
Head to the next marker, leave the Nomad and interact with the console to create a bridge over the ravine. Approach Peebee on the opposite side. Go down the ramp, open the big door and go inside. Jump through the large hole in the center of the room to reach the area below.
Interact with the terminal in the back of the room and then use your scanner to follow the yellow air duct in the frame Mass Effect Andromeda walkthroughs.
Avoid contact with large barriers in next room, go through the door, jump into another gravity well and kill the enemies.
Activate the terminal, then continue following the cable along the ledge to the right. Deal with the relics and proceed further until you see Pibi again.
Continue along the wider corridor and you will find yourself in another area with relics. Eliminate the resistance, then activate the terminals on either side of the room to gain access to another gravity well. Go downstairs.
When you find yourself at the bottom, you will find yourself at a dead end. Luckily, Peebee will tell you what to do. Use your Omnitool to fix the leak, then continue along the yellow cable. Activate the console in the next room, jump across the pillars and activate another terminal to create a path to the other side, where you will encounter some more relics.
Once they are neutralized, activate the nearby terminal, then go to the center and follow the new path to find a new console.
After activating it, kill the relics, and then use the next terminal to create a bridge across the chasm.
Before going through the door, activate the terminal located on the upper platform to the right. He will create a new bridge at the far side of the hall - return to the central area with the tree and jump over the pillars to the new location. Kill the relics and enter the "library".
Scan the glyphs on the walls on both sides and then solve the relic puzzle to get the loot.
Go through the large door, activate the terminal terminal, and then run. You will have enough time even for breaks, but you still shouldn’t stop. Just follow the markers.
When you're done, you'll find yourself at the mobile station. Deploy Nomad and head towards the marker. Along the way, help Drak, who will join your team.
Use the nearby outpost beacon. You will be given the choice to deploy a research or military outpost. Each of them will have their own advantages, but your choice will not have a significant impact on the plot of the game. You will be able to establish other outposts on other planets, so choose the one you like best.
Return to the Tempest, talk to Drac, then head to the Nexus and re-talk to Tann to complete the mission.
Now you will have a choice. It is possible to complete the side mission "Destroying the Kett" or the mission related to the First Architect, but we would recommend completing them later due to the high difficulty. Next, you need to start the mission "Ray of Hope", which will allow you to explore Aya, the planet of the hangar.
Mass Effect Andromeda Walkthrough "Ray of Hope"
Travel to the Onaon system and once you are there, you will eventually land on the planet Aya.
Follow Paaran Shi around the city; You can't influence anything here. Just watch what happens, and then return to the Tempest and talk to Jaal, the newest member of your crew.
Jaal
Now you have two missions - to help the scientists on Havarl and to meet the resistance. In the second case, there will be less action, but in order to advance in the story, you only need to complete one of the two tasks. You can do both if you want, in any order. When you're ready, return to the Tempest and contact Efra to continue the Ray of Hope quest. Read the walkthrough of both missions below.
Use the video com in the conference room on the Tempest to chat with Efra, then head to the resistance base on Voeld.
When you arrive, use the scanner to find the access point to the right side force field. Use this access point to create an opening and kill the kett that are waiting for you on the other side. When the path is clear, go up to the ventilation hole on the right, scan the grate and break it by simply shooting.
When you reach the T-junction, kill the enemy hiding in the far left corner of the corridor. The rooms on either side have datapods and credits, and the marked room contains a group of kett hiding in cover on the other side. Deal with them and watch a cut-scene of the events taking place in the huge hall.
Fight your way through the kett complex until you reach the shielded door. Use SAM to deactivate the barrier, then scan all internal modules before using the console.
Once you know where Moshae is, go through the complex, destroy another grate and deal with a few more kett, heading towards the shuttle launch area in passage of Mass Effect Andromeda.
When you arrive, you will encounter the Cardinal. She can fly and teleport, and has her own shield that will need to be destroyed before you can damage her. Shoot the sphere rotating around the Cardinal until the shield is destroyed. After this, deal as much damage to the enemy as possible, since the shield will soon be restored again. You'll have to repeat it all over again. On location a large number of consumables, so don't stand still.
Afterwards, talk to Moshae and you will have two options. As far as we can tell, your choices solely affect the upcoming dialogue, but it's possible that there could be consequences in future installments of the series.
Now you need to leave the base. Moshae will give you a protective energy shield while you destroy your opponents. But it only has a short-term effect, so it is better to use regular shelters instead.
When you find yourself on the far side of the bridge, you will meet a huge creature for the first time. Do not get close to him, otherwise he will trample the hero in no time.
If you have a sniper rifle, then try to kill him before the monster has time to reach you. But new monsters will soon appear, so you need to evacuate on the arriving shuttle.
Return to Aya and talk to Efra and Moshae. You will be taken to the Vault. When the cutscene ends, return to Efra to complete the mission and begin the new story quest, “The Hunt for the Archon.”
Helping scientists on Havarla
Travel to planet Havarl and go to the research station. Immediately behind it is a deployed mobile station. Activate it before entering the building.
Talk to the scientists inside and go to the monolith in the jungle. Along the way you will need to destroy hostile creatures. When you get to the monolith, you will have to kill the relics before using the console. Use the scanner to find the glyphs in the room and then access the terminal. Solve the relic puzzle.
Once the scientists are freed, quickly return back to the mobile station and report before returning to the Tempest.
If you decide to meet with resistance (the second of two missions), then know that this task is much simpler and shorter. Take the Tempest to the planet Voeld, follow the marker and talk to the resistance forces. Don't stay outside too long.
Once you meet your contact, activate the mobile station on the other side of the cave and return to the Tempest.
From there, call Efra through the videocom in the Tempest conference room to continue the Ray of Hope quest and infiltrate the kett facility.
Mass Effect Andromeda Walkthrough "Hunt for the Archon"
First of all, go to the Kadara port location in the Govorkam system and after landing, go to the bar. Wait for your informant to arrive and follow his lead to meet Sloane Kelly. She will allow you to see Ven Terev and tell you the approximate location of the Archon's transponder, but on her own terms. If you do not agree, then get information from the informant.
Go to the transit console and select Slums as your destination. Take the exit to reach the Badlands. Ahead on the right there is a place to call a mobile station. Do this to get "Nomad".
Drive over rough terrain to the marker. You must first move towards the west, go around the ridge and break through several enemy outposts.
When you reach your destination on the Nomad, you will find a transponder buried in the ground under the southwestern part of a large building. Return to the Tempest and talk to Gil in the engineering department. Return to the bridge and set course for the Tafeno system.
Dock to the Ark and use the console at the back of the room to open another door. Walk along the corridor to the medical bay. Scan the salarian lying on the bed on the left side of the room, use the nearby console, and then go through the room to the terminal in the frame Mass Effect Andromeda walkthroughs.
 Archon
 Once the Salarian has been identified, head into the previous hallway and scan the capsules along each wall to find the Salarian Pathfinder.
When Salaf recovers, you will find yourself on the kett ship. There will be many enemies here on the way to the next room. When you go through the door, go left and look back to see several opponents above your back who can take you by surprise.
After clearing the room, go to top level and use the console by the window to disable the kett's security system. Now wait for the salarians to retreat before you can access the door controls.
Behind the door there will be two more safe rooms, but when you get to the hangar, you will be attacked again.
Ships will land on the platform to the left at various points throughout the battle, so it's safest to stay as close to the entrance as possible.
Clear the area, and then go to the far door until you reach the next firefight in the course Mass Effect Andromeda walkthroughs.
This time you will face an Ascendant who will have the same shield as the Cardinal. Destroy his shield, and then attack the mini-boss himself, as you did with the Cardinal.
Make your way through the ship and eventually meet up with Raeka. Talk to her through the glass, and then continue moving deeper into the ship.
Eventually you will reach a door that opens with a voice. Select the answer to go inside, and you'll soon encounter another group of kett before you reach the Archon.
After your capture and escape, you will find yourself in a room with a hatch control. Use it (in one of the two side rooms), and then return to the hall to see a passage (ventilation) at the top of the wall.
Follow through the narrow tunnel and you will soon find yourself in the Archon's personal room. Use your scanner to examine relic artifacts floating in the sky and gain research points. In the far part of the room, examine the smallest artifact that you needed.
After the cutscene you will find yourself in an ambush - pay attention Special attention on the Behemoth, as it can deal decent damage if you allow yourself to get close to it.
Clear the room and go into the corridor, where you will be faced with another choice. It does not affect the plot of the game in any way, but it can have its consequences. Whichever option you choose, you will have to storm a corridor with a huge number of kett. When you get to the end, wait for the Storm to arrive and leave this place.
Mass Effect Andromeda Walkthrough "Path to Meridian"
The mission begins with a lengthy dialogue that will be interrupted by good news. Once you have control, go to the dock area and talk to the other Pathfinders. Return to the Tempest.
Head to the research station and use it to install the necessary Phantom Storm technology. Head upstairs to the meeting room and brief your team before setting course for the planet Hi Tasira in the Tsivki system.
Move to the ledge ahead and use the scanner to follow the cable to find a hidden terminal. Interact with it to open a bridge across the chasm and activate the terminal on the other side. Jump into the gravity well to find yourself at the bottom and follow forward.
The next room will give you some kett and then a handful of relics. When you get to the command node, go up the slope to the right and follow the cable using your scanner.
This is a rather long and curved path, but there are no forks, so you won’t get lost. Just keep following it, killing the kett, and then activate the tower at the very end.
Just below the eastern part of the bridge there are several platforms you can jump onto.
At the bottom is a locked door that requires solving a particularly difficult relic puzzle to proceed. Mass Effect Andromeda walkthrough.
Several relics will appear after activating the tower, so kill them and then follow the marker. You'll encounter more kett and a couple of relics blocking the path. As soon as you cross the bridge, another relic will appear ahead.
When you finally reach the control room, interact with the terminal on the far side.
Now you will need to restore power using four smaller terminals, but this must be done in a certain order - the wrong sequence will lead to the appearance of relics that will need to be destroyed.
If you look from the large terminal, then you need to activate the smaller ones as follows:
- near right;
- near left;
- far right;
- far left.
Activate the main console, kill the huge relic and follow the markers until you reach the bridge.
Pull it out, jump onto the platform at the end and follow the path to the control room. As expected, the kett will appear. The Relics will release their new deadly weapon - the Destroyer. Eventually you will be able to reach the central command hub.
Archon Sword
Activate the console and watch the light show. Prepare for a tough battle. A wide variety of kett will appear, accompanied by the next boss - the Sword of the Archon.
 Archon Sword
 The boss has an excellent shield, as well as a cloak that makes him invisible. Once you destroy the shield, you have a short period of time to deal real damage to the enemy before he disappears again and hides from you, recharging his shields. Try not to let him out of your sight.
You can still damage him even if he is in stealth mode. The final mission of the game awaits you ahead.
Mass Effect Andromeda Walkthrough "Meridian: The Way Home"
The first step is simple. Travel on the Tempest to any of the three marked systems and carry out a sounding to find the location of the Meridian.
Once you find it, return to Hi Tashiru. Starting this mission will activate the game's endgame - once completed, you will be able to continue completing side quests in passage of Mass Effect Andromeda.
From the drop zone, follow the markers - they will lead you through several doors with relics along the way until you finally reach the console.
When you activate it, everything will not go according to plan. Get to the next marker, after which you will be given control of another relative of Ryder (if you play Scott, it will be his sister, or vice versa).
Go to the weapon locker and grab it, then make your way through the Nexus to kill the enemies. Don't forget that you don't have good weapons and armor. Once SAM is rebooted, you will regain control of your character - interact with the terminal several times until it works. Walk along the corridor until you reach the gravity area. Back on the Tempest, go to the bridge to launch final stage missions.
Use the terminal and then activate the gravity well and continue into the building. You'll go through three open areas infested with enemies to kill. Next, another well awaits you.
When you find yourself downstairs, you can open doors for yourself. You will find yourself in the central hall. Kill the enemies to begin the final showdown with the Archon.
The boss fight essentially consists of three identical stages. First you need to clear the location of enemies, and as soon as this is done, you need to run to the marker and hold the position until the console is activated (look at the scale). Soon after the defeat of the Archon The origins of Mass Effect Andromeda will end.
All you have to do is go through an excerpt from the epilogue!
First, talk to Suvi on the Tempest, then continue through Mass Effect: Andromeda in that we need to start researching the three systems that we have already noted earlier in this guide. When you enter the desired cluster, you will receive a notification regarding the anomaly. Using a scanner, find the source of this signal on the surface of the planet; when it is detected, send a probe to get more information.
This way you can study three anomalies, after which you head to the Tsivki system on the planet Hi Tasira. Remember that, in general, this is reaching the finish line and there will be no turning back, however, almost all additional tasks can be completed after the end of the main story campaign. But still, the key word is “almost”, some missions will no longer be available after the end of the story, so make sure that you have completed everything that interested you.
Returning to the actual task, at the first stage we will need a control panel. Access to it is limited to attacking robots, but when you destroy aggressive machines, you can activate the console, after which a cut-scene will start. The result will be an unexpected gain of control over the brother or sister of the main character (depending on your choice).
In his role, we take the weapon from the cabinet and run forward, following the sign. On the way, of course, there will be enemies - they all need to be neutralized. When you go out into the corridor, you will encounter more powerful opponents, so it is better to jump straight into the door on the left. There you will enter another corridor, at the end of which you will go to the console, activate it. Now follow the gravity well and open the door. Walking a little further along the marker, you will come face to face with the Archon.
Finale of Mass Effect: Andromeda
The ending of Mass Effect: Andromeda will quite predictably have increased intensity and complexity: we have met a key antagonist who is more than capable of giving us a worthy rebuff, but he is still not invulnerable. More precisely, it is, but only by default and this can be corrected. This situation is corrected as follows: The Archon receives energy from the panels, which we can easily turn off.
Once you reach these points, you need to hold your position while the gauge fills. While filling it, simply repel enemy attacks in your direction. The boss, seeing that things smell frying, will begin to use more effective attacks: this time he will throw energy explosive fields at you and, worst of all, nothing will really help with this rubbish, including shelters - the fields will safely pass them and hit the target, that is, you.
The only salvation in such an uncomfortable situation is constant movement, don’t stand still, run and shoot at the same time. When you manage to turn off all the panels, the Archon will become much weaker and will no longer be able to really resist. Now all that remains is to watch the very lengthy final cut-scene.
Epilogue
Despite the end of the main story campaign, the passage of Mass Effect: Andromeda as a whole does not end there. You can chat with your allies and return to the spaceship, where the endless Andromeda galaxy is still available for study and exploration. If you wish, you can also visit the “Nexus”, where there are more side missions and colorful characters available for communication. In general, after the elimination of the Archon, the game is essentially over.
Players will now find themselves far beyond the Milky Way, into the very depths of the Andromeda galaxy. The main character (or heroine) will have to take on the role of the Pathfinder and thereby lead the search for a new home not only for humanity, but also for many other races in a new, hostile corner of space. Discover new and hitherto completely unknown secrets of the endless galaxy, eliminate alien threats, create your own powerful and combat-ready team, plunging headlong into a deep system of development and customization of skills (abilities).
The Andromeda Galaxy is a completely new chapter in the history of mankind, so whether the new founders will be able to survive in it and find a new home will depend only on your choice. As you delve into the mysteries and secrets of Andromeda, with the future of many species resting on your shoulders, ask yourself... What are you willing to do to survive?
Character Creation
As usual, the passage begins with character creation. You have to choose: gender (male or female), appearance (default or customizable), training (character class, which are described below), name and history.
. Soldier class- while serving in armed forces Alliance, you tried to learn everything about weapons and tactics. The class has three unique starting skills. The first skill is “Stunning Shot” (Starting skill) - the hero releases heat-guided ammunition that knocks the enemy down. The second skill “Turbocharge” (Open skill) - does not last long, but greatly increases the rate of fire of the weapon and the effectiveness of thermal charges. The third skill (Open skill) - “Endurance in battle” - improves stamina and will allow you to take more weapons into battle.
. Biotic class- While serving in the Alliance armed forces, you were a biotic and helped your comrades with the ability to control mass effect fields. The class has three unique starting skills. The first skill is “Throw” (Starting skill) - biotic skills allow you to throw opponents into the air. The second skill is “Singularity” (Open skill) - a whirlwind holds enemies caught in the way. Third skill “Barrier” (Open skill) - your defense will be strengthened by a powerful biotic barrier.
. Engineer class- While serving as a technician in the Alliance armed forces, you learned to control drones and hack enemy systems. The class has three unique starting skills. The first skill “Reboot” (Initial skill) - causes an electrostatic discharge, which causes great damage to shields and synthetic enemies (can hit several targets in a row). The second skill is “Invasion” (Open Skill) - you hack into the enemy’s armor and weapons, infecting him with a computer virus, weakening his defense (the virus spreads to nearby enemies). Third skill “Group Support” (Open Skill) - special technology increases the squad's chance of survival.
. Leader class- While serving in the Alliance military, you were a team player and worked with your comrades for your own safety. The class has three unique starting skills. The first skill is “Energy Absorption” (Starting skill) - absorbing the energy of the target’s shields allows you to restore yours (this skill is especially effective against synthetic enemies). The second skill is “Extermination” (Open Skill) - an aura of mass effect fields that envelops you, slowly deals damage to nearby enemies. The third skill is “Group Support” (Open Skill) - a special technology increases the Otrad’s chances of survival.
. Class "Badass"- when the battle starts, you always find yourself in the midst of it - often in accordance with the recommendations of the Alliance, but sometimes not. The class has two unique starting skills. The first skill is “Dash” (Starting skill) - you fly at enemies like a comet, restoring part of your shields upon impact. The second skill “Endurance in battle” (Open skill) - improves stamina and allows you to take more weapons into battle. The third skill is “Dash” (Open skill) - see above.
. Operative class- While serving in the Alliance armed forces, you studied covert operations and technology used by special forces. Before participation in the Andromeda Initiative, such knowledge was rarely applied. The class has two unique starting skills. The first skill is “Tactical Camouflage” (Initial skill) - the technology of bending light rays allows you to become invisible for a short time (attacks from invisibility cause more damage, but destroy the camouflage). The second skill “Endurance in battle” (Open skill) - improves stamina and allows you to take more weapons into battle. The third skill is “Tactical Camouflage” (Open Skill) - see above.
Prologue: "Hyperion"
After creating a character, an introductory video will begin. Control will not pass into your hands right away - before that you will have to talk with some members of the crew of the Hyperion ship. At the beginning of the game you will be introduced to response styles. The style of answer will determine the character of the main character, so always think before you answer. There will be four response styles in total: 1 - Emotional, 2 - Reasonable, 3 - Relaxed, 4 - Professional.
So, after a short dialogue, a strange incident occurs with the ship, so the Pathfinder asks the main character (or heroine) to appear on the captain’s bridge. This creates two tasks: the main one - «» , additional - «» (or brother if you play as a girl). Since the sister’s capsule was damaged during the gravity shutdown, it is necessary to carefully examine it. The capsule will stand 9 meters from the character. Everything will be alright with my sister in perfect order, since the SEM will not detect anything alarming, so you can safely go to the captain’s bridge of the ship (the icon with an asterisk is the main goal).
Upon arrival, there will be a small explosion due to the system rebooting, so a new main task will appear - «» . When Cora tells you what the problem is, you will need to scan the power circuit and thereby find out what the cause of the problem is. Now you can get confused because at first it is not entirely clear what needs to be done. Cora ordered a scan of the power circuit, which is located directly above the key mark (in the middle of the huge generator). After that, scan the part on the right and get the following task - «» . To do this, go to the next mark and interact with the control panel. Done? Then it's time to head to the monorails. Open the doors ahead and go further to the mark. Upon arrival, launch the monorail, after which the cutscene will begin.
Well, after a rather interesting scene, the Pathfinder decided that it was necessary to study the planet, because it was unknown what awaited the Hyperion in this place. He orders a squad to be assembled for reconnaissance, so when control of the character returns to your hands, collect your things: helmet and weapons. Then go to the hangar.
Mission: "On the Surface"
“The expedition to Housing-7 ended in disaster. The planet is not even close to the treasure that the scanners showed: its atmosphere is toxic, and deadly electrical storms brought down both shuttles.”
The landing on the first planet in the Andromeda galaxy did not go very well: another incomprehensible anomaly occurred that disabled the ship. Eventually main character and Liam fell to the planet and lost contact not only with the rest of the team, but also with the Hyperion. So the first task looks like this - «» .
: By scanning samples of unknown technologies and life forms, the character will receive scientific data points - “ND”. In turn, ND can be spent in scientific center, thereby obtaining new types of armor and weapons.
The path will be completely linear for now, so along the way I will mark the most remarkable and important details along the way. So, the first thing the young heroes will do is stumble upon a path along which lightning will strike - here they need to make a dash and quickly run to the cave on the opposite side. The main thing is not to slow down, otherwise the hero will be hurt. And after leaving the small cave on the other side, you can optionally test the weapon by shooting the fuel cell a couple of times. Further the path will remain the same linear, but now you will have to learn how to use a jetpack, which is not difficult at all. Therefore, upon arrival at the key point, a cutscene will begin.
During the cutscene, the heroes stumble upon unknown creatures who are armed and, judging by appearance dangerous. But the most important thing is that among the wreckage of the ship lies the wounded Fisher, who urgently needs help. The only problem is that very soon unknown creatures will find him. Your new task is «» . I recommend not waiting for the moment when they finish off Fischer and attacking them first. After the battle, the next cutscene will begin.
So, it’s impossible to take Fisher with him, because he broke his leg, so he asks to go further and find the rest of the members of the Pathfinder reconnaissance group. This creates an additional task: «» . The task is easy to complete, because the container with supplies is nearby, so take everything that is inside and the task will be completed. In any case, move on, the path is again linear.
When you get to a huge alien building, you will find not only representatives of an alien life form, but also your comrade, who will soon be killed. Therefore, feel free to start a shootout and kill all enemies. After the battle, find Kirkland. Unfortunately, the guy died, so there is a new additional task: «» . By the way, don’t forget to search the alien corpses and other debris.
Having walked a little further, the heroes will notice signal lights in the sky, so the task will appear: «» . I recommend going there right away. However, do not rush too much, because an unknown and invisible creature will suddenly run out into the gorge along the way to meet the heroes. Immediately at this moment, step back and shoot the monster from afar. You will come across such monsters more than once in the future, so be prepared. In addition, when you get to the second half of your ship (the fallen part after the crash), the heroes will again be attacked by alien creatures that will need to be defeated. At the same time, constantly move forward and inspect all the debris, boxes, enemies, etc. Don't miss items.
In addition, when you reach the strange ruins, a corresponding additional task will appear: «» . Do not be afraid. Feel free to go inside the building with the orange mark on it. Move deeper into the building, where the heroes will soon stumble upon a strange sealed door.
: At this point, pay attention to the radar icon. The point is that this icon will indicate the most interesting places. And the more it flickers, the closer the character will be to the goal. So take note.
So, in order to open the sealed room, the power supply must be restored. There is a machine responsible for this matter in another part of the complex. You could even say on the opposite side. Since nothing will work without power, I recommend not even wasting time on any devices, so go to the corresponding icon and click on the control panel. As a result, the energy supply will be restored, so return back to the sealed doors and be sure to collect all the items along the way. In general, go inside the room where you will meet a strange robot. You shouldn’t admire it for a long time, so quickly deal with it, scan and collect all the items, and then leave this alien complex.
But before you go outside, get ready for battle, because the enemy has ambushed you with the participation of invisible monsters. Pick up some fast-firing weapon to react faster and kill enemies. After you kill everyone, go in search of Greer.
To find your partner, you need to go forward from the alien building directly under the large bridge at the top. Then go through the rocks and look to the left - there is a passage into the cave. Right near the entrance you can hear Greer's voice, who does not understand what is happening and what these creatures need. When you get a little closer, open fire as soon as possible, otherwise Greer will be killed. After the battle, it turns out that Greer was unable to contact the others due to a broken receiver. But this is not so important anymore, because it is time to move on.
Since the flares were fired from the same location as the main target, head straight there. As you get closer, you can hear “SOS” signals from Cora, so this is how the task appears: «» . Don't waste time and move on. And remember that almost everything hard to reach places can be overcome using a jetpack.
When you reach the second shuttle, a task will appear: «» . Therefore, quickly take a comfortable position closer to your comrades and start shooting enemies carefully and confidently. In addition, I would like to add that this time the enemies will try to throw grenades at the heroes, so either quickly dodge using rolls or using a jetpack. When there is a moment of calm, regroup, raise the level of the heroes and get ready for the next enemy attack, because now the enemy analogue of the landing force will begin to land spaceships. Don’t forget also that you also have grenades in your arsenal (it’s best to throw them into the thick of enemies), and against melee creatures (invisible monsters), a shotgun is perfect (unless, of course, you missed it). And also, if the shield has disappeared, then it is better to sit behind some kind of cover, for example, behind a stone, until it is restored.
At the very end of the battle, your squad is attacked by “Something Heavy”. So, it’s better to behave carefully with this alien creature, because in his hands is a powerful weapon that will quickly remove the shield, and then all your health. Try to attack from the pull-up and “shine” your body less so that he doesn’t critically hit you. After the battle, a cutscene will begin.
Thanks to the successfully repulsed attack and established communication, it was possible to contact SAM, who in turn connected the main character with the Pathfinder, but it turned out that he was trapped, so it was necessary to find and save him as soon as possible. Your new main task: «» . Travel from your current location to east direction to a key point on the map. Along the way you will have to kill a couple more stone-headed enemies, and upon arrival another cutscene will begin.
The pioneer said that he would have to destroy a huge alien tower. Otherwise, not only will the heroes not be able to get out of this planet, but also the Hyperion will not be able to get out of its trap, so it commits sabotage by blowing up several important structures, after which lightning begins to strike across the entire area. This gives rise to the next important task: «» . In general, now everything will be simple, because you just need to make your way forward, expose yourself less and kill enemies more - in general, an assault.
If you have chosen a character who has some effective skills against enemies, then now is the time to use them. In addition, do not forget about the jetpack, because if it becomes too difficult to break forward further, then you can use it to quickly change position or counterattack. And don’t forget to collect all sorts of useful items from containers and other things along the way. Move to the next key point, which is indicated on the radar.
When you reach the tower gate, an additional objective will appear: "Order Cora or Liam to protect both flanks." To do this, press the key assigned for orders and move the squad to any convenient area. Orders related to an attack work absolutely the same way - you just need to show the target. There will be two points in total and only you can choose which point and whom to send, and especially important role it doesn't play.
When you order the squad to defend the points, the “Defend the Pathfinder” task will again appear and another line with the decryption progress. All you need to do now is wait for this download to finish. The task is only complicated by the fact that now enemies will begin to attack, from which you need to fight off, so find comfortable spot and fight back. When the download is finished, go to the door and click on it. The next cutscene will begin.
Mission: "Reunion with the Nexus"
“Hyperion has docked with the Nexus, which is supposed to coordinate the work of the Andromeda Initiative participants.
Due to unforeseen circumstances, the Ryders' father died, so the command of the Hyperion is taken over by the main character (or heroine), to whom the Pathfinder has transferred, in addition to everything, artificial intelligence - SAM. Now you need to go to the Nexus on the monorail, so go to the indicated mark, inspecting the ship along the way. Upon arrival, you will need to find Nexus employees, so open the doors and first of all talk to the artificial intelligence that helps with immigration issues, called “Avina”. Although it will not provide anything useful, it will become clear that its data is outdated.
Go down the steps a little lower and go forward, where you will come across a worker among all the boxes and lamps with whom you can talk. Soon Kandros will join the conversation, who will tell you that they arrived here fourteen months ago. Travel with him to the Nexus command center on the monorail. Upon arrival, another cutscene will begin.
After a small shocking scene you will receive an additional task «» , the passage of which is - . However, this is not important now, since the first thing we need to do is talk and discuss everything in detail with Director Tann at the Pioneer headquarters. Go down and turn to the right towards the doors, where the next cutscene with a bunch of dialogues will begin. However, this is where the current mission will end and the next one will begin.
Mission: “From a clean slate”
The Nexus needs an outpost to supply resources, but the only planet within reach is Eos. You, the Pathfinder, are asked to do the impossible: find a way to make Eos habitable and help the Initiative gain a foothold in the system. Director Tann provided funds for this desperate operation. You will receive both a ship and a support group."
After a conversation with Director Tann, the new “Trailblazer” learns about many events that have occurred during all this time. Thus, a new task appears: «» . It's time to return back to your ship, so get on the monorail and use it to move to another location.
Run to the Atrium, and from there to SAM’s think tank for a very serious and important conversation. After the dialogue, the character will have the opportunity to choose a unique “Profile”, which will improve general human skills. Moreover, there will be a total of seven profiles to choose from, each of which is unique in its own way. All profiles are described below.
All profiles and bonuses
. Profile ""- soldiers specialize exclusively in combat. No one knows how to deal with enemies like they do. The profile allows SAM to reconfigure the Pathfinder implant for best performance on the battlefield. All profiles and first rank bonuses:
♦ Sniper Focus: Increases damage dealt for each target destroyed in a short period of time.
>+10% Weapon Damage
>+10% Weapon: Accuracy
>+2 Damage Resistance
>+10% Weapon: Magazine Capacity
. Profile ""- engineers understand both offensive and defensive technologies. This profile customizes the implant worn by Ryder, allowing him to control a small combat drone. First rank bonuses:
♦ Combat Drone: A small drone that speeds up the recharge of techs and self-destructs by releasing an EM pulse if enemies approach it. After the drone is destroyed, the reload speed becomes normal.
> +20% Damage of all combo moves
> +20% Vehicle: Construction Health
> +20% Technique: Restore health of structure
> +20% Technique: Structure Damage
> +20% Technique: Recovery and Defense
. Profile ""- Adepts specialize in biotics and can destroy and stun enemies through the use of mass effect fields. In this profile, the biotic implant worn by Rider has been modified to allow him to take out opponents without firing a shot. First rank bonuses:
♦ Biotic Echo: Biotic combos can additionally explode all enemies they affect.
> +15% Biotics: Strength
> +15% Biotics: Area of Damage
> +15% Biotics: Area of Effect Radius
> +20% Biotics: Effect Duration
> +20% Biotic Combo Move: Radius
. Profile ""- Guardians are unique warriors who simultaneously use technology and biotic abilities on the battlefield. This profile creates a direct connection between the Pathfinder implant and the built-in computer systems his armor, which gives the Pathfinder additional protection blitz shields. First rank bonuses:.
♦ Tech Armor: Absorbs a significant portion of damage that passes through shields.
> +15% Damage of all combo moves
> +10% Vehicle: Reload speed
>
> +20% Skill: Recovery and Defense
. Profile ""- attack aircraft act aggressively in battle, preferring to engage the enemy at a short distance and inflict great damage. This profile subtly reconfigures the Pathfinder's physiology, allowing it to absorb enemy blows and use external energy to enhance shields. First rank bonuses:
♦ Siphoning Strike: Melee attacks restore shields.
♦ Biotic Jumps and Dodges: Use biotics instead of a jump pack.
> +20% Melee: Damage
> +50% Melee: Strength
> +10% Biotics: Cooldown Speed
> +20% Skill: Reduce shield cost
> +10% Maximum shield charge
. Profile ""- infiltrators are versed in both weapons and technology. They prefer to eliminate enemies from a safe distance. With this profile, Ryder will become more agile and will be able to track his enemies even in the most frantic battle. First rank bonuses:
♦ Observation in battle: Enemies are visible through the sight through walls.
♦ Tactical Retreat: When evading, the cloaking device is temporarily activated.
> +20% Weapons: Accuracy
> +20% Weapons: Stability
> +20% Vehicle: Reload speed
> +10% Weapons: Increases damage when hit in the head/weak spot
. Profile ""- This is a jack of all trades, possessing both combat and technical and biotic skills. This profile modifies the Pathfinder's mind and body for versatility, allowing him to quickly switch between shooting, technology, and biotics. First rank bonuses:
♦ Biotic Leap: Evades allow you to quickly cover short distances, even if there is solid matter in the way.
> +5% Weapon Damage
> +5 Damage Resistance
>+ 15% Vehicle: Reload Speed
> +15% Biotics: Skill Damage
> +15% Skill: Recovery and Defense
So, after you have decided on the profile of your hero, the next important task will appear: «» . In addition, you will receive an additional task «» - completing all additional tasks. In any case, go to the ship. Upon arrival, a cutscene will begin. When control returns to your hands, then you can look around, but do not forget that you need to report to the bridge. A cutscene with a couple of dialogues will begin on the bridge, and then the heroes will set off.
: Be sure to visit the scientific terminal just below, because in the “Research” section you can open new drawings and enhancements using previously obtained scientific data - “ND”. And in the section called “Development” you can create new items and various improvements.
: In the Research section, each category has different types of scientific data. This includes " Milky Way", "Eleus" and "Relics".
Soon a map of the galaxy will appear before your eyes, and the task will say: «» . There is nothing particularly complicated: you choose a system, and then choose a planet. On the planet, in turn, you choose a landing site and equipment. A splash screen will follow.
: In addition, for the first landing on Eos, I recommend taking Vetra with you, because she will greatly help in establishing relations with the new companion - Drak.
Well, after landing on the planet Eos, two main tasks appear. So, the first main task: «» . Second task: «» . So, move towards the buildings and collect items along the way + try to sometimes view various objects using a scanner, because this way you can collect a lot of useful data.
When you reach a place called “Outpost Central Control Point”, then you will need to find the access code to the locked buildings. The code (in the form of a data block) is located in the building next door - in the northeast side of the entrance to the locked buildings. In addition to the code, there will also be an interesting audio recording and “Diary: Botany Analysis” inside. Anyway, now go back to the locked doors and open them.
Inside, scan the doors ahead and turn left. In the hallway there will be a terminal with a "Message for Nick Taniopoulis" and a note called "Huh?" A little further on at the end there will be another terminal, but with an audio recording. In addition, here you can collect a lot useful items and scan many objects. In any case, you will need to listen to the plot recording, from which it will become clear that there is a remote blocking in place in this place, and therefore there is no power supply. This is how the task appears: «» .
So, now you need to go to the building on a small slope, which is located behind the “Storm”. Go up the stairs, interact with the door and a dialogue will begin with the living character inside. The survivor will be someone named Clancy, so anyone needs him in a convenient way convince that it is necessary to turn on the power. You can promise that you will deal with the kett. In any case, the next task will be: «» . It soon turns out that the generators are not working, so you need to scan the power towers to find a place to connect. By the way, the easiest way would be to use the generator, which will stand right next to Clancy’s house, because there will also be a power tower right next to it. After scanning, you will need to turn on two energy towers. Finding them isn't a problem, so it's only a matter of time before you activate them, but when you do, the outpost will be attacked by kett, so you'll need to defeat them. There will not be many waves, so after destroying a couple of landing groups, it will be possible to finally launch the power control station. Return back to Clancy Arkvist and a cutscene will begin.
So, now it's time to find the transport Clancy was talking about. To do this, you will need to carefully inspect the containers using a scanner.
Mission: "Ray of Hope"
All endings and key decisions
In Mass Effect: Andromeda, as in all other games from the BioWare studio, there are different endings, each of which depends on what decisions the players made during the game (and not just the story part). And, as a rule, there are an incredible number of such solutions. However, in addition to this, there are many other decisions and choices in the game for the development of the storyline/world, which will be reflected in one way or another at the end of the game. Some options greatly influence the end, for example, who exactly will come to the rescue in the final part. There are even plot development options that affect the future (future games in the series). Below we detail all the endings and resolutions in Mass Effect: Andromeda that exist in the game and what they affect.
Some choices and decisions of the main character (heroine) can be found in the Code. For example, it will be possible to find the consequences of completing story missions, attitudes towards allies and companions (in the corresponding section). But in fact, there are many endings in Mass Effect: Andromeda, since they all depend solely on the decisions you made along the way. Everything is taken into account: from the plot to additional missions. Therefore, all solutions and choices are presented below.
Important storyline decisions
♦ - Prologue. Has the hero/heroine explored Habitat 7 in detail? Very important point. If this is the case, then Alec Ryder will speak highly of the future Trailblazer as a hardworking and moral leader.
♦ - Mission - 1: “From a clean slate.” On the planet Eos, in the end you will have to make a choice about which outpost to build: scientific or military. If you choose scientific, then all subsequent dialogues and cutscenes will be sent to this moment. There will be no significant impact on the plot from this decision, but the resolution of internal issues will depend on you. If you choose military, then this will be mentioned in subsequent dialogues. In the future, during the development of the plot, if military support from Prodromos is needed, it will be available.
♦ - Mission - 3. Being on Voeld (Nol), the hero/heroine will have to fight the Kett Cardinal at the very end of the mission. After the battle and a short cutscene, a difficult choice will appear: 1 - "Destroy the entire facility along with the Kett Cardinal", 2 - "Save the objective, but take a shot at the Kett Cardinal.", 3 - "Save the facility and the life of the Kett Cardinal". If you save the object, but kill the Kett Cardinal, then in the very last mission on Meridian, representatives of the hangars will come to the main character/heroine to help.
♦ - Mission - 4. Was the deal with Sloane Kelly accepted? Whether you allowed her to kill Veren or not. If you save Veren's life, he will later appear in the Angarsk Resistance. If you agree with Sloane and kill Veren, you will still have the opportunity to talk to him, after which he will be executed. This way, regardless of the choice, the hero/heroine will still be able to see them.
♦ - Mission - 5. Who did the character save from the Archon's flagship at the end of the mission after the battle with the Boss, a modified krogan? It all depends on who was found: the Krogan Pathfinder or the Salarian Pathfinder. The point is that the choice affects which people will join the Pathfinder in the final story mission. As for the escape phrase, it does not affect anything. As a result, either a krogan or a salarian will simply join the hero/heroine. So you will still have to fight off the waves of advancing kett, no matter how you look at it. In addition, if Drac is on your team, then he will definitely speak out about any decision made.
♦ - Mission - 6: “Point of no return.” now this the fate of Captain Dunn(she is also the captain of the ark "Hyperion"). She can either die or survive. How to save Captain Danna? In order for Captain Danna to survive, it is necessary to complete a loyalty mission for Cora before the start of the mission and convince Avitus in the building of the Turian Ark to become the Turian “Pathfinder”. Thus, in the last mission, the Pathfinder should have three other Pathfinders: the first is one of the two salarians, the second is a turian, the third is an asari. Only in this case will Captain Danna be able to survive the emergency landing. If the conditions are not met, then she will die after the heroic rescue of the crew.
♦ . So now the story ends with Ryder having to decide who to make ambassador to the Nexus. Everything is simple here, because you can even choose the one you like the most. This decision does not affect anything.
Important side mission decisions
Important Ally and Relationship Decisions
Dear visitors! Complete walkthrough Mass Effect: Andromeda is currently under development, so bookmark this page to make it easier to keep up with updates!
Restoring the world- a side mission on the planet Voeld. Like on Eos, we have to activate three monoliths to improve the atmosphere and build a colony. The headache in such missions is those same Sudoku puzzles. In this guide, we will tell you how to complete the mission Restoring the World in Mass Effect: Andromeda. decipher monolith codes.
Walkthrough of the Return of Peace on Voeld.
This quest can be obtained automatically by arriving in Voeld and driving around the surrounding area. Below you will find a screenshot of the location of the three monoliths.

We follow the marks in the specified order.
The first monolith on Voeld
We go to the places indicated by markers in the specified order. We find ourselves on the spot and look for the missing glyphs to decipher the monolith code. Below in the screenshots you will find the correct solutions to local Sudoku.

We drive through the Voeld area and find a symbolizing marker on the map.

Solving the puzzle of the first monolith on Voeld.
Second monolith on Voeld
The second monolith is located inside the cave and there you will find the necessary glyphs. We turn on scanning and carefully examine the area. After successful searches, we hack the Relics console.

We find the second monolith deep in the cave.

Solving the second monolith puzzle.
The third monolith on Voeld
With the search for the third, everything is more complicated; here you will be met by enemies and after destroying them you will need to find the glyphs. Two of which are located on the surface of the grotto, outside the cave area. Don't forget to use scanning. We find all three, decipher the Relic code.

We find glyphs, 2 of which are on the surface behind the monolith.

The third glyph is located inside the cave; when you turn on the scanner, you will immediately find it.

Solving the riddle of the third monolith.
You will see the location of the storage facility from which you will have to remove the lock.

We go to the place following the landmarks.
Storage on Voeld
Once in the vault, you will need to do two things:
- Activate emergency generator
- Remove the lock from the storage.
This is done using the relic console. Having activated the emergency generator, we will find ourselves in the next location with platform elements of the previous planet. If we don’t want to bother with access to additional rooms with good loot, then we activate the console to the right and go unblock the storage.

In the Vault on Voeld you will find extra room. To the left of the Vault unlock console.
Halfway up the path, go upstairs and here you will find an additional room that will be useful for you, we get inside and take out powerful enemies. We approach the console, hack it by solving Sudoku puzzles. Keep in mind that upon completion of decryption you will receive 2 additional skill points.

Solving the puzzle in the Voeld Vault.
We continue to move forward towards unlocking the vault. After activating the console, run away from the black smoke to stay alive and seal the vault.
In this guide we will look at deciphering the Relic code inMass Effect: Andromeda . These are Sudoku-style puzzles, only from the future, and therefore you match symbols rather than numbers.
Now we will tell you how to do this in the easiest way, and at the end you will find already solved relics.
The rules of the game are as follows: in front of us is a field, with a certain amount cells. These cells are divided into sections, which are clearly framed by blue lines. Some cells contain symbols, and in the rest we need to substitute other necessary symbols. How it's done? The main rule is that new symbols must not simultaneously coincide with symbols from the same section in the same horizontal line and the same vertical line. Everything is very simple, but sometimes you have to work hard.
Also in some cells you can see question symbols. This means that by scanning the area near the relic console, you can find cables at the ends of which there are symbols that replace question marks.

Next we proceed to manual deciphering the relic codeMass Effect: Andromeda and selection of symbols. First, fill in those elements in which there is only one symbol left to find, for example, in a section of 4 cells, 3 are already filled, you just need to insert the remaining symbol into the fourth and you’re done. The same goes for vertical and horizontal lines.

Then we look at where else we can substitute only one character. Try not to overcomplicate the problem or guess, otherwise the whole puzzle may be wrong.

Another trick is to give each symbol some meaning, for example, I redraw them on a piece of paper and in front of each I write a number and present them in such a way so as not to get confused.
If for some reason you are stuck and cannot go further, you can always use relic decryption keyMass Effect: Andromeda , but they are difficult to find, especially at the very beginning, so try to find the solution yourself.
Mass Effect: Andromeda Relic Codes Deciphered
Relic Codes Eos Mass Effect Andromeda
Some of the consoles will open during the second mission, and the other part during the passage of the third.


Relic Codes Gavarl Mass Effect Andromeda
A puzzle you must complete as part of the Dying Planet quest.

The second one will come to you during the additional mission “Help Scientists”

And the third, hidden one, is located in a cache, which is marked on the map after completing “The Dying Planet” and reading the mail.

Relic Codes Voeld Mass Effect Andromeda
Will be available after the second story mission.


Northern and Eastern


Western and key to the shelter

As well as a secret panel, available as an add-on. mission "Secret Project"
Relic Codes R-047C Mass Effect Andromeda
In order to find the panel, you need to complete the quest “Out of Dust”, after which you will head to the nearest dome and find the datapad, which will begin a new task, at the end of which you will find this terminal.

Relic Codes Elaaden Mass Effect Andromeda
After completing several tasks on the planet, you will come across a mission to explore an abandoned Remnant ship.

A few more will be available when completing the quest “Tacing the Desert.”


And you will find a secret monolith in the underground, in the northeast.

Kadara Relic Codes Mass Effect Andromeda
Will open after interrogating Ven Terev, in the task “Catch the Archon”. Next, simply solve two puzzles.


Khi Taseer Relic Codes Mass Effect Andromeda
Located thanks to the fifth story mission, in the southern tower. Once on the bridge, jump down and find the desired console. I advise you to save, otherwise, if you make an error, the panel will be locked.

Now you know, how to decipher the code of relics inMass Effect: Andromeda And breaking It won’t take you much time, and if you find more puzzles, leave screenshots of their solutions in the comments.
Have a good game!