Almost always after repair work building materials remain. It’s a shame to throw it away, but there’s nowhere to store it. What to do? If it is laminate or parquet, then you can find a very worthy use for it. Flooring materials are predominantly created from natural wood, which determines their safety, environmental friendliness, strength and durability. So what can you do with parquet if there are only a few good pieces left after renovation? You will learn options for using products in this article.
A little about the material
Parquet usually consists of three layers of wood, firmly bonded together. The upper part is either varnished and is the most dimensional in terms of thickness. Thanks to this, the product can be restored with help if, after years, the floor has lost its attractiveness appearance. Among the main properties of parquet it is worth noting:
- wear resistance;
- low thermal conductivity;
- withstand temperature changes;
- antistatic characteristics;
- moisture rejection.
Usually only high-quality material is endowed with all of the above characteristics. Therefore, before deciding what to make from old parquet, carefully read its properties.
Product options
DIY parquet crafts – best idea use of leftover building materials. Why throw away products if you can build them into practical and useful thing. But how exactly to apply them? What can be made from old parquet?
Kitchen accessories
When deciding what’s missing at home, head straight to the kitchen. Since parquet has good performance properties, it can be used to construct:
- cutting boards;
- stand for hot utensils;
- containers for dishes;
- container for sweets.
Parquet products such as coasters are especially practical. With their help, you can protect the surface of the tabletop from damage and at the same time decorate the interior with a unique and original element. It is unlikely that any of your friends will make exactly such crafts from parquet.
Making boxes
Another original solution use of leftovers flooring– make a storage box and various items. Even if there is a chest of drawers in the house, the need for additional capacity still arises. Therefore, you shouldn’t even think about what you can make from parquet with your own hands. Just make small boxes that are ideal for storage:
- toys;
- offices;
- documents;
- clothes and other things.
Do you love gardening? Make boxes for growing seedlings various plants. Using a similar principle, it is possible to construct a container for storing cereals, berries and vegetables. So you can do a lot of things with old parquet.
What else?
As you can see, it is not difficult to find a use for leftover or dismantled flooring. In addition to the above options, there are other ideas on what to do with parquet flooring. So, to make your home practical, functional and decorative, build several protective structures For:
- doors;
- furniture facades;
- heating batteries, etc.
If you have imagination and desire, you can actually make even:
- stool;
- table top;
- window sill and much more.
There are hundreds of options for how to use old parquet. Therefore, feel free to embody your design ideas and find a worthy use for such useful building material.
Parquet is a durable and durable flooring option, which is why it is often preferred. The easiest way is to buy the material in a store, but some craftsmen decide that making parquet with their own hands is not a waste of time, but an opportunity to get an environmentally friendly and high-quality coating.

Indeed, you can make parquet yourself, but how expedient will these actions be? In order to understand this, you will have to understand with examples how this is done.
One Russian family in the early 2000s was able to obtain about 4 pallets of small mahogany and oak bars. And at the same time, they became the owners of an apartment that needed major repairs, since it had only bare walls and ceilings. The family decided to do all the finishing work themselves and came to the conclusion that they could make wood material parquet. The idea was crazy, but what do difficulties mean to the hardworking and determined?

Is it possible to make parquet with your own hands?

As a base for the parquet, they made M-300 sand concrete - thus, they were able to eliminate the unevenness of the floor, the differences of which ranged from 3 to 12 cm throughout the apartment. Next on bitumen mastic they laid OSB sheets, additionally secured with dowels. The choice fell on OSB, because this material is very durable and not afraid of moisture. Next, the slabs were covered with a special primer.
On a note! To make parquet with their own hands, the family used available tools and the material itself, which miraculously fell into their hands. However, parquet made independently at home can only be made without locking joints, which increase the solidity of the coating. This can be a massive or stacked version of the material. Such parquet can only be fixed to the floor using glue.

Parquet cutting was carried out using stationary circular and cross-cut machines. The resulting slats had to have the same size - in that case it was 10x70x500 mm. The moisture content of the wood should be low - about 9%.
Fixation ready-made boards on the basis was made using the usual. At the same time, sometimes it was necessary to individually adjust the planks to each other. After installing the floor, the parquet was sanded and the gaps were puttied acrylic composition woodworking, sanding and varnishing.


Master Class. Self-production parquet floors with heating system. Downloadable file (click the link to open the PDF in a new window).
Laying the manufactured parquet
Laying self-made parquet is done in almost the same way as installing regular store-bought material. Let's look at how this process happens in practice.
Step 1. First, the base is prepared - it must be perfectly flat, since the parquet will be fixed using an adhesive composition. To do this, first, if necessary, it is made cement strainer from concrete grade minimum M250. If the old screed is well preserved, then it should be cleared of debris and primed with epoxy. Used as a base directly under parquet in in this case plywood. Its sheets are cut into same sizes squares. The thickness of the plywood should be about 12-18 mm. The squares will have dimensions of 50x50 or 75x75 cm. For convenience, appropriate markings are applied to the plywood sheets.

Advice! If the screed is made from scratch with your own hands, then it is important not to forget to lay the waterproofing material.

Step 3. The next stage is laying the plywood on the base and fixing it. Installation of individual elements is carried out staggered, that is, the seams should not be joined at one point. There is a gap of about 2-3 mm between the individual sheets. The base is coated with adhesive mastic, after which the sheets are laid and screwed for additional fixation to the floor using dowels or screws (depending on the type of base - wood or concrete).


Step 4. The plywood is sanded using a special machine.

Step 5. For convenience, markings are applied to the plywood along which the parquet will be laid. It is applied in accordance with the selected pattern.

Step 6. Next, the base is gradually coated with a special glue, which is applied using a notched trowel. It is on this glue that the parquet boards are laid one at a time. They are pressed tightly to the base, and the gaps between separate elements should be minimal. While the glue dries, the parquet can be pressed down with a weight.


Step 7 The entire subfloor is covered in the same way. Next, the parquet is sanded.


Step 8 The last stage is varnishing the parquet flooring.

Advice! You can close the joint between the parquet floor and other coverings at the exit from the room using a sufficiently wide aluminum threshold.
Video - How to lay parquet?


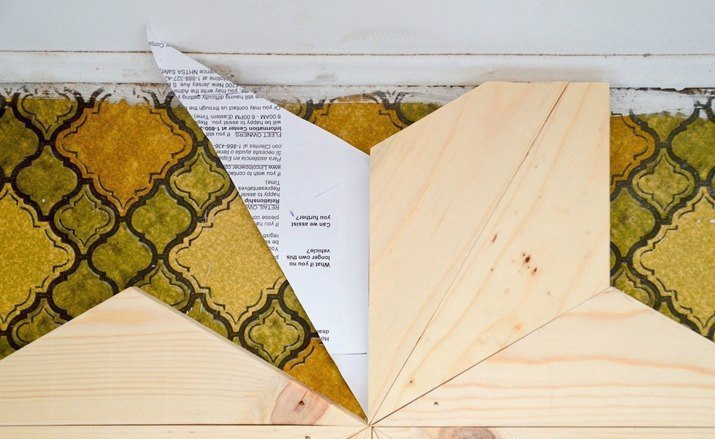
Making such a floor yourself is extremely simple. To do this, we cut these wooden triangles. The degrees of angles are indicated in the figure. This element is good because it can easily form a beautiful and at the same time beautiful pattern.


![]()


Working with artistic parquet
Sometimes craftsmen decide to take a completely desperate step and make artistic parquet with their own hands. This is also a type of parquet flooring, but the materials are laid in a special way. In this case, the design is made from several types of wood, and may also have patterns made separately.

On a note! Artistic parquet was first used for flooring back in the 16th century. Its production was considered a very complex process, and therefore the labor costs were equal to those required when weaving expensive carpets. Such parquet was used only for decorating halls in castles, palaces, and houses of the nobility.
But even today, artistic parquet has not outlived its usefulness, although it continues to be a very painstaking type. self made, that's why it's very expensive. The work is complex because it requires attentiveness, a sense of taste, responsibility, the right choice materials - everything, even the most seemingly insignificant properties of the wood used, must be taken into account.

Techniques for making artistic parquet
For the manufacture of artistic parquet Usually they use types of wood such as oak, ash, maple, walnut, etc. The denser the material is used, the longer the floor will last, it will be easier to repair if necessary, and it will be faster to work with such material. The beauty of the finished drawing will also depend on how the wood was processed. For example, cutting a log can be done in different ways and this will also affect the appearance of the floor.
Prices for Papa Carlo parquet
Papa parquet Carlo

On a note! For artistic parquet, cross-cut wood is usually used.
Table. Options for artistic parquet designs.
| Name | Description |
|---|---|
| In this case, several types of planks are used to create a pattern, which, after processing, are attached to the base board. The most popular option for making a drawing. |
| The finished drawing is placed deep into the base. Materials such as metal, amber, and mother-of-pearl can be used for decoration. Less durable option artistic parquet, but more expensive. |
| In this case, the pattern is created by cutting grooves for the design, which itself is made of dark wood. The method is very ancient and is now practically not used. |


Also, the parquet flooring can be laid in a “rosette” (the parts are oval or round shape, are located in the middle of the picture), a “border” (a part of the floor with a certain motif that divides the space of the room), modules (in this case, the parquet is assembled from individual panels - original geometric compositions are obtained).

Advantages and disadvantages of artistic parquet
It’s not for nothing that artistic parquet is still valued today. It has a number of advantages:
- durability due to the use of hard wood;
- environmental friendliness;
- excellent thermal insulation performance;
- beauty and originality;
- the ability to create your own pattern.

Disadvantages include high cost, difficulty in manufacturing, low resistance to frequent and strong mechanical stress.
Making artistic parquet at home
The high cost of this parquet and at the same time the desire to still make such floors force home owners to try making this parquet with their own hands.
Step 1. The first step is to draw up a design project, which will mark the dimensions, the place where the pattern was created, as well as the main pattern of the parquet.


On a note! Work should be carried out at a temperature of +17-23 degrees, humidity - about 40-60%.
Step 3. Using the templates laid on the floor, the future pattern is milled into the parquet base.

Step 4. Unnecessary elements are removed - gaps appear for the installation of artistic details.

Step 5. The finished gaps are cleaned of any resulting dust, sawdust, or wood chips.

Step 6. According to the sketch from pieces of wood different types details of the pattern are made, which are then glued into the main parquet in previously prepared places. Gluing is done on adhesive composition, intended for parquet. A hammer can be used to force the parts into place.


Step 7 The entire picture is inserted in the same way.

Step 8 Parquet floors with a finished pattern are sanded with a special machine.

Step 9 A primer coat of varnish is applied. It is spread over the surface with a spatula evenly and without leaving empty spaces.

Step 10 After drying, the varnish coating is sanded using a special machine.

Step 11 The floor is cleaned of dust with a vacuum cleaner - preparation is made for applying the final varnish layer.

Step 12 Finishing layer The varnish is applied with a roller, and hard to reach places and along the walls - with a brush.

Video - Making palace parquet
Brushed parquet boards - what is it?
At home you can make the so-called brushed parquet. This is one of the new technologies for creating artificially aged floors. The material undergoes special processing, during which it acquires an original appearance. By the way, this processing method can significantly increase the service life of the parquet base.

Aging of wood occurs through treatment with a hard metal brush, which removes the soft fibers of the boards, while the hard ones remain in place. This way, the textures on the wood will be clearly visible, and if you cover them with oil, the natural beauty will become clearly visible.
After the soft wood fibers are removed, the boards are covered with a patina (special paint), which helps make the wood structure more obvious, emphasizes its porosity, or other materials. Also, the boards can be tinted - that is, the wood will change its color by a couple of tones. Usually it becomes somewhat darker than it was. Wood can be coated with varnish, wax or oil.

How to make brushed parquet with your own hands
To make brushed parquet you will need a grinder, a saw, a drill, a hard metal brush attachment for a drill, and a stripping router (it is not cheap, so it is best to rent it). Next comes the brushing process: the wood is cleared of soft fibers using a metal brush. This process gives it texture.

Advice! To reduce dust in the air, you can wet the wood with water before processing. However, before next step the material must dry well.

To get rid of wood fluff formed during the aging process, the board is treated with a polymer brush with a grain size of P80-P120. On last stage finishing material for the floor is polished.

Polymer brushes - end and radial

You can make parquet with your own hands, but all of the above procedures are quite time-consuming and will take a lot of effort. How advisable is it to tinker with such parquet? It is impossible to give a definite answer. However, in modern world With its constant rush and lack of time, this type of work is performed either by specialists or enthusiasts.
The coatings have earned special respect from consumers. They are valued for their natural and attractive appearance, reliability and durability.
However, even with the most careful attitude And proper care there comes a time when the old parquet needs to be completely replaced or repaired. To carry out this work, you can hire specialists, or you can save money and do all the work yourself.
We will look at how to dismantle the old coating yourself and whether it can be restored to its original appearance in this article.
Determining the scope of work
Depending on the nature and extent of damage to the old coating, the scale of repair is determined. If the old parquet is very worn out, the boards have a large number of cracks, darkening and chips, it is subject to complete dismantling.
If defects appear only on some elements of the coating, the strips can be carefully removed and replaced with new ones.

If the boards are fairly well preserved, but have unsightly scratches, chips, and the floors themselves have begun to creak unpleasantly, you can do without dismantling. In this case, it is enough to restore the parquet and make minor repairs.
Situations also often arise when the coating has not yet lost its presentability, but the owners of the room decided to change the decor and change the floor covering. In this case, you can very carefully remove expensive material and put the old parquet in another room.
We will tell you below how to do the job correctly in each of the above cases.
Preparing to remove parquet
Before proceeding with dismantling, the room should be cleared of furniture. Don't forget about your own safety. It is necessary to prepare thick clothing, protective gloves and a hat in advance. If there is wiring in the area of the baseboards, the room must be de-energized.
During the work you will need the following tools:
Hammer;
Hatchet;
Chisel;
Circular Saw;
The degree of complexity of this process will depend on the type of parquet (slatted, piece, panel) and the method of its fastening at the base (using nails or glue).
Complete dismantling of block parquet
If the old parquet is presented in the form of piece strips that are attached to the base with glue, it will not be possible to remove it carefully. In such cases, the boards split and become completely unusable. Modular and plank decks are much easier to remove.
Dismantling process piece parquet includes the following actions:
1. Using a crowbar, all skirting boards are dismantled.
2. The covering is tapped with a hammer, and from those places where the sound from the impact is more dull, they begin to dismantle the parquet.
3. If the dies are fastened with nails, the work is done with a nail puller, and if the planks are fixed with glue, an ax and a crowbar are used for the work.
4. Tightly glued elements can be removed using a hammer drill with a flat nozzle. In this case, it is necessary to protect your eyes from splinters by wearing safety glasses.
Removing parquet boards and modular coverings
Very similar to the process. The elements are attached using special locks, so all you need to do to dismantle them is to carefully snap out the fastening grooves.

In this case, no damage is caused to the coating, so it is quite possible that it reuse. For example, in rooms where old parquet can be laid.
Dismantling the modular flooring also does not require much effort. Here it is only important to determine on which side the elements with an open ridge are located. Since the installation of such a covering always starts from the window, it is more logical to start dismantling from the opposite wall.
The corner module is pryed off with a crowbar and torn off from the base. If nails were used, they are first removed.
Many people are interested in the question: how to remove old parquet if it is fixed with resin? In this case reverse side The module must be carefully cleaned of glue using a hatchet.
How to carry out partial parquet repairs
During the operation of such a coating, the planks may dry out and lag behind the base.

In such situations, you can do without completely replacing the flooring by repairing the old parquet.
To do this you need to do the following:
1. Old varnish it must be completely removed to reveal all the loose elements.
2. Severely dried dies, with a distance of more than 5 mm between them, are removed and replaced with new ones. To dismantle unnecessary elements, they are split into chips with a chisel.
3. To install a new die in an empty space, cut off the protruding tenon from it. The base is covered with glue, after which it is laid (at an angle). new element so that its groove fits onto the tenon of the adjacent plank.
4. If the gaps are small, glue is poured under the board. This area is pressed down with a heavy weight and left overnight.
5. The restored flooring is sanded and varnished.
Color restoration
Under the influence of external factors, the coating made of natural wood gradually loses its attractiveness, begins to fade and darken. However, this phenomenon can be easily eliminated; it is enough to just restore the old parquet a little. A coating that does not have major mechanical damage is easy to repair and does not require large expenses.

To do this you need to do the following:
1. Using grinding or scraping equipment, the varnish is removed.
2. The surface is cleaned of dust, small cracks and cracks are puttied.
3. If the owners want to change the shade of the coating, at this stage the floor is covered with stain of the desired color.
4. Using fine-grit sandpaper, the decking is sanded again. This is necessary to eliminate chips and darkening.
5. The smooth surface is cleaned and treated with 1 layer of primer varnish. After this, the floor is sanded again with zero-grade sandpaper and varnished again. This treatment can be performed up to 9 times until the surface becomes perfectly smooth.
6. After applying the final layer of varnish, the floor is left to dry (for 3 days). There should be no drafts in the room, high humidity and sudden temperature changes.
Removing scratches
Scratches are the most common defect in hardwood floors. If they are not very deep, they can be easily eliminated using a parquet repair kit or special wax pencils. But what to do if the old parquet is covered with deep and numerous scratches? In this case, you won’t have to lay a new coating, but you will need to spend time and effort to repair the damaged one.

In order to remove deep defects, the parquet must be completely cleaned of varnish and using scraping machine remove the damaged layer. This cannot be done in one go, so you need to be prepared for several treatments.
What to do if the floor begins to creak a lot
Old parquet flooring can start to creak for several reasons:
If voids have formed under the planks;
If the spacer wedges are sagging;
If the planks become loose.
To find out the cause, first of all, the baseboards are removed and the wedges are inspected. They may dry out, as a result of which they will no longer perform their functions. New wedges are installed in their place and the sounds of the floor are observed for a week. If the squeaks do not disappear, the problem is something else.
If certain elements creak, this indicates that a void has formed underneath them. Then a hole is drilled in the center of the plank through which glue is poured under the plank (until it stops being absorbed). This area is pressed down with something heavy and dries for 3 days. When the mixture has completely hardened, the hole is completely filled with putty.

If creaking is observed throughout the flooring, the above methods will not help. This defect can be eliminated by completely re-laying the parquet.
As can be seen from all that has been said, during operation parquet flooring gradually lose their original qualities. However, they are very easy to repair, so any acquired defect can be removed and you can continue to enjoy the beauty of the natural coating.
What's good about parquet is its ability to acquire the new kind after repair. Restoring parquet is possible even after decades of use and even if it is not the first time it has been repaired. To do this, you don’t even have to contact a professional – you can do all the steps yourself!
How to restore old parquet with your own hands - stages of work
You should think about parquet restoration as soon as the first creaks, cracks, or drying or swelling of individual planks appear. In a word, there is no need to bring the flooring to a state where there is no turning back. However, the most important sign of upcoming renovation is usually the shabby appearance of the floor: scuffs, peeling, dirty spots.
In any case, no matter what condition the floor is in, restoring it is often much preferable to completely replacing the floor. It's cheaper and faster! Restoration work traditionally includes the following stages:
- identification of problem, creaky areas;
- dismantling of individual parquet planks or the entire floor;
- replacing damaged strips or modules with new ones;
- repairing cracks, filling cracks;
- scraping and (or) grinding;
- coating with varnish, oil or wax.
What list of restoration work you will make depends only on the condition of your parquet. It may be enough to sand the floor and cover it with a new layer of varnish, or you will have to use the entire arsenal of techniques to return the coating to its former novelty.
Do-it-yourself parquet restoration - cosmetic repairs
So, the floor covering has worn out, squeaks have appeared in places, and a few cracks are spoiling general form. In this case, it will be enough to redecorating! You should start with the cracks - first, clean them of debris. This should be done using a vacuum cleaner with a special narrow nozzle, but you shouldn’t pick it out using improvised means - you can damage the parquet floorboards even more. Using a special wood putty and a spatula, the cracks should be covered, moving the spatula both along and across. In this way, only small cracks, up to 2 mm wide, can be repaired. If the die has a larger defect, it should be completely replaced.
When all the cracks are covered, we'll deal with the creaky floorboards. If it is one or two “parquet floors”, then the problem can be solved with the help of self-tapping screws and dowels. If the parquet is laid on concrete or cement-sand screed, then the creaking means that the floorboard has come unstuck from the base and is rubbing against adjacent planks. Since it is almost impossible to remove it without damaging it, we will solve the problem without “surgical” intervention.
To begin with, you should drill a hole in the creaky plank, capturing a few centimeters of the base, just along the length of the dowel. Insert the dowel into the hole and screw in the self-tapping screw. By expanding the insert, the self-tapping screw will create a strong adhesion of the plank to the floor and eliminate friction. Having sunk the cap into the wood, cover the place where the fasteners are screwed in with the same wood putty.
Having solved the problems with squeaks and cracks, it’s time to take on the main stage of cosmetic repairs - scraping or grinding. - this is the removal of several millimeters of wood along with varnish coating. That is, problematic potholes and scratches will be removed along with the layer of wood. The parquet will indeed be like new after such treatment, but its thickness will be significantly reduced. Taking into account the fact that the coating has an average thickness of about 10 mm, it is possible to repair parquet in this way in best case scenario 3 times.
The last time will be final and irrevocable - when the parquet again loses its decorative appearance, it can no longer be repaired.
Sanding removes minimum layer wood, maximum millimeter. Deep scratches, potholes and chips may remain, but they can be repaired with putty or special wax pencil. In any case, you will remove the layer of old varnish, especially if you soften it first special solvent and remove the base layer with a spatula. This process will take you more time, but it’s worth it - you’ll save the required few millimeters of parquet thickness.
If you are concerned about the future fate of the coating, and you would not like to change it to another long years, then the varnish should be replaced oil impregnation. It was with the help of oils that parquet floors were treated in ancient times, thanks to which many have survived to this day. If the varnish creates a rather fragile membrane on the surface of the parquet, then the oil impregnates the wood itself, making it stronger and harder. In addition, colored oils also tint the surface.
Advantage oil coating is that at times you will be able to carry out repairs on small areas
, returning worn slats decorative look. This will not work with varnish - if you apply it, it will be applied to the entire surface. Main disadvantage oils - no way back. That is, it will no longer be possible to coat the surface with varnish in the foreseeable future, and even sanding will not help - the oil saturates the wood to a depth of several millimeters.
Major parquet repairs - step-by-step instructions
When it’s not just a few floorboards that are creaking, but almost the entire floor, and a lot of “parquet flooring” is cracked and deformed, then cosmetic repairs won’t help. The parquet needs to be completely renovated! By the way, if it suddenly turns out that your parquet is assembled not from individual planks, but from panels with glued floorboards, then, most likely, it can no longer be repaired. This method was used back in the Soviet Union to speed up installation, but repairing such parquet is very difficult, almost impossible.
How to overhaul parquet flooring - step-by-step diagram
Step 1: Dismantle the coating
A major restoration of old parquet begins with dismantling in order to sort through the entire parquet and reassemble it, properly gluing it to the base. Therefore, dismantling should be carried out carefully, trying not to damage the planks.
Step 2: Leveling the Base
If the parquet is more than 10 years old, then, for sure, the base underneath is quite uneven - at that time there were no self-leveling floors. But today their range is extremely large, and you can correct mistakes long ago days gone by. For the base under the parquet you will need a finishing cement-polymer self-leveling floor, which is applied only a few millimeters thick. Spreading over the surface, it fills all the unevenness and evens out the slope of the floor. By the way, if the slope turns out to be large, and the difference in floor height between different angles the room turned out to be a few centimeters, it is better to first level the floor using a base self-leveling floor, and only then apply the finishing mixture.
Parquet is probably the most “elite” flooring option. It brings beauty and sophistication to any room, and at the same time it is quite strong and durable. Although, over time, parquet still loses some of its attractiveness. This happens in most cases due to improper or untimely care, but it is also possible mechanical damage parquet or defects resulting from exposure to unfavorable external factors (for example, water). Of course, parquet that has lost its attractiveness can be replaced, but since “pleasure is not cheap,” many prefer to restore the old floor covering. The most “radical” way to restore parquet is to sand it, followed by treatment with mastics and varnishes. But often the damage to the parquet is not so significant as to require resorting to such “ radical measures" In these cases, you can restore the beauty of parquet using several quite accessible methods.
But before we get to know them, let's look at " complex cases", in which independent restoration of parquet is not possible.
“Complicated cases” of parquet repair
There are several situations in which it makes no sense to undertake parquet restoration yourself - you will only waste time and effort. Here are the most common ones:
- The parquet is very worn and has numerous defects and cracks. In this case complete replacement It may not be necessary, but you certainly can’t do without scraping;
- The parquet “swollen” after being heavily flooded with water. Since in this case some planks have probably come off the base, it will be necessary to re-lay the parquet (and possibly replace some elements), after which, again, resort to the scraping procedure;
- Over time, the parquet board has become dark and loose (it can be easily pierced with an awl). This is perhaps the most “sad” option, since in this case even sanding will not help the matter - a complete replacement of the parquet is necessary.
Sometimes a complete replacement of parquet is necessary
In other cases, it is quite possible to restore the parquet yourself; you just need to be patient and familiarize yourself with the basic restoration technologies.
Restoring the appearance of parquet
This type of restoration work can be divided into several stages:
- Grinding. Depending on the overall condition of the parquet, it will need to be partially or completely sanded. This can be done either using a grinding machine or in “manual” mode.
If you decide to use grinding machine, it is better to use small sandpaper, since coarse abrasives can leave deep grooves on the surface of the parquet.
Using grinder try not to “tilt” it on its side. The edge of sandpaper (even the smallest section) can leave a very noticeable scratch, which will be quite difficult to get rid of.
If you don’t have a sanding machine at hand, it’s quite possible to sand the parquet with your bare hands, or, to be more precise, with your feet. To do this you will need a pair of "junk shoes" and 40 and 80 grit sandpaper.
Using glue, we glue “coarser” paper onto one sole, and “fine” paper onto the second, after which, putting on the shoes, we simply shuffle our feet in those places that need to be sanded. Of course, this task is a little tedious and very comical, but believe me, it is much easier than manual sanding.
In cases where “deep” sanding is necessary, we recommend that you first use only 40-grit sandpaper, and after removing all the dirt and old varnish, “walk” over the cleaned surface with a fine “eight-grit.”
- Putty for scratches and chips. Defects and scratches formed in the parquet boards are removed using cosmetic parquet putty. This is done using a regular spatula. Today you can buy quite a lot of shades of this material, however, if you could not find cosmetic putty (also called restoration paste) of the shade you need, you can make it yourself. To do this, you need to mix sawdust with epoxy varnish in a ratio of 1 to 4 and add to the resulting mixture required amount dye. After the putty has dried, it is treated with fine sandpaper.
Defects and scratches can be removed using cosmetic parquet putty
In some cases, get rid of minor scratches You can use a wax “repair kit” for parquet.
Video about puttying parquet
You can learn more about the parquet putty technology in the following video:
- Imitation of joints. After puttingtying the parquet, it may be necessary to create imitation joints in some places. This can be done using an ordinary awl and a metal ruler. To do this, after the putty has partially dried (it should not stretch or “take”), just apply light pressure with the end of a metal ruler at the joint. The end “false joints” are made using an awl, which is used to draw a small line along the same ruler.
- Varnishing of parquet. The final stage of parquet restoration work is coating it with varnish. For this you can use almost any varnish - alkyd, epoxy, acrylic, as well as varnishes based on water based. Detailed instructions How to work with each type of varnish can be found in the instructions supplied with it.
The final stage of parquet restoration work is coating it with varnish.
Please note that to create a smooth “mirror” surface of the parquet, it must be varnished with at least 2-3 layers.
After the varnish has completely dried, all that remains is to rub the parquet with mastic and restoration work can be considered completed.
In addition to the loss of visual appeal, other “troubles” can happen to parquet, the most common of which is creaking and loosening of individual boards. Let's figure out how to get out of these unpleasant situations.
Repairing loose boards
You can secure individual parquet boards using small nails driven into the end of each board at an angle of 45 degrees. This process is shown in more detail in the figure.
Securing diagram for individual parquet boards using small nails
In order to completely drive a nail into the end of a parquet board, you need to use a rod - a “doboychik”. The most ordinary nail can play this role. big size. The “doboychik” head is placed on the head of the nail being driven in and hit with a hammer on its opposite side.
If it is not individual boards that are loose, but entire “pockets” of parquet, then you can use bamboo inserts to secure them. The fact is that bamboo has a structure different from wood, due to which it swells significantly more than any type of wood when exposed to moisture. To fix a group of parquet boards, it is enough to drill a number of holes around the perimeter of the “hearth” and drive bamboo “blocks” into them. Excess bamboo is cut off with an ordinary knife. After about a week, after the bamboo has swollen, the repaired piece of parquet can be puttied and varnished.
Parquet floor creaking
Creaking is one of the most common problems with old parquet floors. Unfortunately, in many cases, it is possible to completely get rid of it only by completely replacing the coating in compliance with all necessary technologies. However, in some situations you can eliminate the squeak yourself, and without special financial costs. To do this, you need to try to “wedge” the parquet along its perimeter.
Before carrying out wedging work, it is recommended to check the humidity in the room. If it is above 40%, then the probability of a successful result after the work is extremely low.
To prevent the parquet from creaking, it is necessary to “wedge” it around the perimeter
The first step is to remove the baseboards and remove the old wedges, which most likely no longer fulfill their function. In their place we drive new wedges, at a distance of about half a meter from each other. For a week, we “knock out” the wedges every day and check the floor for squeaks. If the creaking does not disappear within a week, then, alas, this method cannot be eliminated.
As you can see, it is quite possible to carry out minor parquet repairs yourself, without turning to specialists for help. But if your parquet flooring does not require repair yet, remember that the best way To maintain its attractive appearance for many years is timely and proper care.
Good luck with your renovation!