Wallpapering a kitchen is not a very complicated process that you can handle yourself. You just need to choose the right material, prepare necessary tools and surfaces, follow the technology of cutting and gluing the canvases. Updating walls is a great way to quickly and relatively inexpensively change the interior of your kitchen.
Briefly about the types - which is better?
First you need to decide on the material suitable for the kitchen conditions and the desired design.
What to choose from a practicality point of view? Exists the following types coatings:
- Paper;
- Non-woven;
- Vinyl;
- Textile;
- Fiberglass wallpaper.
Each of these materials may look beautiful, but, of course, they have different strength and moisture resistance characteristics.
On each roll you will find markings by which you can determine how suitable the wallpaper is for the kitchen. As you can see, some icons are underlined - it is desirable that your wallpaper have exactly these characteristics.
On, durable, light and moisture resistant. In short, our view:
- The best choice: . The canvas fits neatly on the walls, looks beautiful and is easy to glue on your own, and in addition, this material is distinguished by high moisture resistance, plus, if your walls are not perfectly smooth, this option is the most desirable.
- Worst choice: it is better not to use wallpaper made of paper and textiles, since they are difficult to clean and quickly deteriorate in the kitchen.
Choosing a design - 7 main secrets
A lot can be said about the topic of choosing wallpaper from the point of view of color and pattern, because this issue really needs to be carefully thought through. After all, we are our own designers, which means we will have to figure out the colors, prints, and the right combinations with furniture and walls in other rooms ourselves. The color and design of the canvases are selected depending on the shape, size of the room, its level of natural light, and your preferences.
Here are 7 main rules in choosing wallpaper design that you need to know:
- For well-lit rooms, choose cool shades;
- Kitchens with windows facing north are decorated with wallpaper in warm colors;
- decorate with light wallpaper without complex drawings. One accent wall is acceptable.
- will become wider when decorating the walls in light colors and a pattern with longitudinal stripes;
- walls with stripes or a vertical pattern are shown;
- Win-win and most universal colors that always look beautiful: white, beige, gray, muted blue;
- Plain wallpaper is not only a tribute to fashion and always appropriate restraint, but also the best option gluing with your own hands is easy and quick, because they do not require joining patterns.


Advice! You can wallpaper the walls different wallpapers, creating interesting interior accents. To avoid problems of choice and doubt, if you want to create such a design yourself, without the help of a designer, you need to choose from one collection, where all the companion options have already been carefully selected.
Preparing the wall correctly
Work always begins with preparing the walls.
Step 1. A high-quality result cannot be achieved unless you first remove the old wallpaper and putty the wall. All this is not difficult to do with your own hands.
To remove old wallpaper from the wall, use a metal spatula and a spray bottle ( wet wallpaper easier to remove from the wall). Old coatings - peeling paint and whitewash - also need to be removed.

Step 2. After this, the walls must be leveled with putty. Vinyl and non-woven wallpaper can be used to cover surfaces with minor defects, but large irregularities, cracks, etc. must be eliminated.

Advice! Keep in mind that one layer of putty will be enough, and for vinyl, and especially paper, a more even surface will be required.
Step 3. Last layer Putties must be sanded.
Step 4. Now you need a primer. After such operations, your old walls will be unrecognizable, and all coatings will be glued to them without difficulty.
To learn more about how to properly putty and level the walls yourself for wallpaper, watch the following video:
Preparing the tools
When deciding how to hang wallpaper in the kitchen, you cannot ignore the issue of preparing tools.
To quickly cut blades, you need:
- Square;
- Metal rulers are long;
- Wallpaper knife with sharp, replaceable blades;
- Good scissors;
- Yardstick.
And for gluing wallpaper you will need:
- A spray bottle with water, a metal spatula - to remove old layers of wallpaper;
- Plumb line, level (regular or laser);
- Rule, profile for vertical marking;
- Rollers or brushes for applying glue to panels and walls;
- Wide, narrow rubber rollers for smoothing fabrics;
- Bucket and tray for glue mixture;
- Water, clean soft rags or brush.
Let's start work - cut the canvas and prepare the glue
To understand how to properly hang wallpaper, you first need to understand how to cut the roll. The following cutting options are available:
- Cut along the wall, first placing the roll in in the right place and marking.
- Cut on the table, measuring the height of the ceiling once and adding 10 centimeters to it in reserve.
- Wallpaper with a pattern is cut taking into account the pitch of the repeating pattern - as a rule, this value is indicated on the packaging, but you can check by finding repeating elements.
Advice! If you are cutting several canvases at once, do not forget to label them in the order in which they will be glued to the wall.

There is one more important point– dilution of glue. The adhesive composition is selected in accordance with the type of wallpaper material and diluted with careful adherence to the instructions in cool water. The composition is mixed until it acquires a jelly-like consistency. More information about the types of glue and its preparation:
How to paste walls - step-by-step instructions
So, how to hang wallpaper correctly? The walls are already completely prepared - the old coatings were removed, and the surface was puttied and primed. After the primer has dried, we select options for applying glue (depending on the type of material used):
- In the case of vinyl wallpaper on paper based canvases are coated;
- To glue non-woven wallpaper, glue is applied to the walls.
If you need to apply glue to the canvas and not to the wall, then prepare in advance clean place for them.
The glue is applied in an even layer to the wallpaper without gaps, after which the canvases are folded in half and left for several minutes. Special attention need to be given to the wall - in the place where the wallpaper will be joined (after all modern materials glued end-to-end, not overlapping). Work should begin from the center of the room if it has 2 windows or from the corner of the wall where the window opening is located.

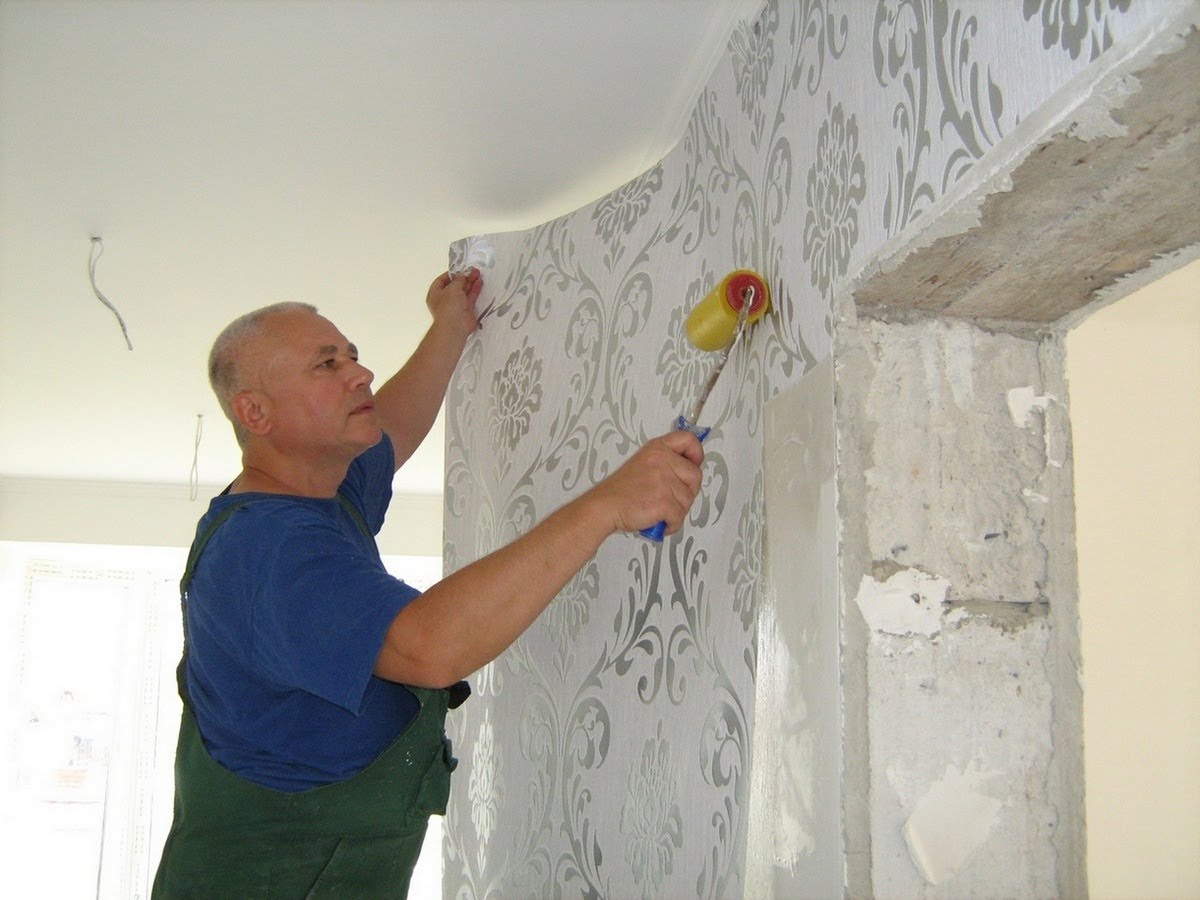
The first canvas is glued just in the corner - so that it overlaps the adjacent wall by 5-6 cm. Before gluing the first canvas, be sure to mark a vertical line along a building plumb line or level - this line is drawn with a pencil along the wall, as shown in the photo above. Start gluing the wallpaper on top, aligning the canvas exactly along the vertical line. First, the top and edge of the material are exposed, and only a rag or brush is used for pressing, but not a roller. After the upper part of the canvas is glued, open the lower part and also carefully level it to the plinth.

After the canvas is aligned and fixed, it is pressed in a herringbone pattern, first in the center, and then to the side, moving from top to bottom.
If a micro-gap forms between the panels at the joints, they can be easily moved. It will be easier to do this if the canvas is coated with the wall. At the final stage, you need to additionally coat the joints and go over them with a short rubber roller to fix them.

Then follows the quality control of gluing - the wallpaper should fit tightly to the wall without air bubbles. After the entire room has been pasted over and the canvas has dried a little, you can trim off the excess that has formed at the top and bottom. Here it is important to use a sharp knife so that there are no burrs at the cut site, or cut evenly with scissors at the fold, as shown in the next photo.


How to glue the last piece? Measure the width of the area of the wall that has not yet been pasted over and add 1.5 - 2 cm to it (photo 1). Cut the canvas to the desired width. Now join this fabric with the adjacent fabric, glue and iron the seam, and then in the corner vertically smooth the resulting overlap with a rag or brush (photo 2).

Carefully trim off the excess at the corner, top and bottom. Wipe off any remaining glue with a sponge. Keep in mind that the resulting pattern may not line up perfectly, but it won't be too noticeable in the corner.

How to hang wallpaper near the door, window and in the corners?
To hang wallpaper beautifully and professionally with your own hands, you need to pay special attention to working near windows and doors in the kitchen. It's not difficult, the main thing is to know how to do it according to the rules and common sense.
How to hang wallpaper near a window?

When you reach the window, glue the next section as usual, that is, the canvas will extend onto the window opening. Make horizontal cuts on the canvas, bend and iron the paper as shown in photo 1. If a piece of wallpaper does not reach the window, then it is necessary to glue an additional piece. Use a cutter to cut the canvas so that it perfectly frames the window sill (photo 2). Cut off any excess and iron (photo 3). Now we will paste over the upper part of the window opening as shown in the photo.


The side walls and top do not need to be covered. Simply glue the pieces of canvas, joining the pattern, and, if desired, install corners along the edges of the window opening.
How to wallpaper a wall near a door?
When you reach the door, apply the sheet as usual to the door. Cut off the excess (the section that covered the door) with scissors, leaving a few centimeters of excess paper on the top and sides (photo 1). Then make a small cut diagonally as shown in photo 2.

Trim the excess paper from the top of the door frame and the bottom. Use the edge of the door frame as a guide. Iron the wallpaper along the door.

Now let's decorate the wall above the door. Hang a short piece of fabric above the door. Join the pattern and trim off the excess at the ceiling and top of the door (photo 1). Cover the other side of the door using the same principle as described above. But do not cut off the excess vertically (along the edge of the door body) until you have glued the next panel, so that later you can correct the unevenness.

How to wallpaper in corners?
There are internal corners in any room. You need to glue them as shown in the photo instructions below.

But not all kitchens have protruding corners, but many do.

We glue the border and wallpaper near sockets, switches, batteries
So, in general, we figured out how to hang wallpaper in the kitchen with our own hands. How to properly decorate walls near batteries, sockets and switches with wallpaper? Let's figure it out.
How to properly hang wallpaper near the battery?
Start wallpapering the wall above the radiator as usual, and after gluing the canvas to the edge of the radiator, let it hang over the surface of the radiator (photo 1). Then cut the wallpaper so that it extends slightly behind the radiator (photo 2). Now use a roller to glue them behind the battery (photo 3).

How to decorate wallpaper where sockets and switches are located?
- Turn off the lights. Hang the paper on the breaker panel. Mark the position of the corners of the switch as shown in the figure.

- Using a utility knife, make a diagonal slit from one corner to the opposite corner, you should get four triangular flaps. Fold these flaps along the edge of the wall and cut off the resulting unnecessary triangles along the fold.
- Loosen the switch or socket panel and pull it out a little through the hole.
- Iron the paper under the switch panel. Then install it back and remove any excess glue. Do not turn on the electricity until completely dry.
- Draw control lines on the wall with a pencil at the height where you want to glue the border and stick it slightly overlapping the adjacent wall. (photo 1);
- On the second wall, glue the border in the same way to create an overlap in the corner, and then carefully cut it upper layer border exactly in the corner (image 2).

Many people primarily associate renovations with wallpapering. Many people mistakenly believe that there are no tricks in this matter and that it is enough to simply stick it more or less evenly and that will be enough. The basis Have a good mood in the future - non-peeling wallpaper. To prevent this from happening, it is necessary to prepare the walls for gluing.
Preparing the wall for pasting
How to remove old wallpaper from walls?
Pasting wallpaper onto old wallpaper is the biggest mistake you can make during the renovation process. If for some reason you glued new wallpaper onto old ones, then be prepared that soon this entire structure will soon collapse. Therefore, first of all, you need to remove the old wallpaper. Wallpaper labels usually indicate a method for easy removal, but if the label is not preserved, then it’s okay, you can use the following methods to various types wallpaper:
— Vinyl wallpapers. To remove vinyl wallpaper, you need to make cuts on the surface and then moisten the wallpaper with water. After the water is absorbed, a horizontal cut is made at the top of the wallpaper and the wallpaper is removed in whole pieces;
— Non-woven wallpaper. In such wallpaper it is necessary to make cuts and holes, and then apply water to the surface using a sprayer. After 20 minutes, the wallpaper itself will begin to peel off from the wall;
— Washable wallpaper. This is a two-layer wallpaper, the first layer is wetted quite easily: notches are made on the wallpaper, the surface is wetted. After which the top layer comes off quite easily. It is best to remove the second layer with a steam generator; you can use a regular steam iron.
— Ordinary paper wallpaper. There are fewer problems with this wallpaper; just wet the wallpaper and after a few minutes start removing it with a spatula. In this way you can even shoot multilayer structures from wallpaper.
Wall putty
After removing the old layer of wallpaper, you need to prepare the wall. The first stage is leveling the wall using putty. High-quality wall putty takes place in three stages:
1) Covering the wall with a primer composition. This is done to improve the adhesion of the putty to the wall. It is best to apply the primer composition with a roller - this ensures uniform distribution of the primer composition over the entire surface of the wall;
2) Starting putty. After the primer has completely dried, you can begin to putty the wall; this is done to level the walls. Layer starting putty should not exceed one and a half centimeters. If the differences in wall level are greater, then it is necessary to apply the putty in several layers; for this, a paint mesh is used; in this case, it is necessary to let the first layer of putty dry, let it dry and apply a primer solution to it.
It is worth paying attention that the packaging of the putty should indicate that this is a starting putty.
Layers of putty are applied with a spatula in small, even portions. To avoid the appearance of bumps and irregularities, it is necessary to apply the putty diagonally overlapping. To putty corners, you must use a special corner spatula. If your walls are even on their own or high-quality putty was done during a previous renovation, then you can safely skip this stage. Starting putty is only needed to level the walls;

3) Finishing putty. After the starting putty has dried, apply finishing layer putties. It removes all small cracks and irregularities, making the wall perfectly smooth. The composition used to perform this operation has a similar name finishing putty. The layer of finishing putty should not exceed two millimeters. If you did not level the walls with the starting putty, then the finishing putty is applied immediately to the primer after drying;
Primer of walls
The final stage of wall preparation is priming the walls. Priming the walls is a mandatory step, but many people skip it, which is not recommended. The main purpose of wall priming is to improve the adhesion of wallpaper to the wall, but in addition to this, wall priming is necessary for the following:
- Removing dust and small debris from walls;
- Increasing the moisture resistance of the wall;
- Reduced glue consumption.
The priming process is quite simple and does not contain any tricks. It is best to apply the primer using a roller - this ensures an even distribution of the layer over the surface. The primer must be applied in two layers, the second layer is applied after the first has dried.

Where to start gluing wallpaper?
The first strip of wallpaper is the most important; everything will depend on how well it is pasted. It is necessary to glue the first strip strictly perpendicularly; you should not focus on the corners of the room - often they are far from the value of 90 degrees, and in this case, the drawing will be crooked and the result will disappoint you. You need to focus on either the window or doorway. They are always strictly perpendicular to the floor, and in this case there will be no problems with gluing. It is worth remembering that when gluing strips, you must move strictly in one direction.
Features of gluing different types of wallpaper
Paper
Pasting technology paper wallpaper is quite simple and is divided into the following steps:
1) The roll is cut into sheets equal to the height of the wall. But it is necessary to leave a small margin of 10-15 centimeters, depending on the pattern. If the pattern is solid, then it is necessary to adjust the stripes to each other in advance. Some wallpaper has an edge on one or both sides that needs to be cut off;
2) Applying glue. Glue is applied with a brush thin layer. If the wallpaper is made using duplex technology, then the glue is applied in two layers. After applying the first one, the surface will become wavy. The second layer of glue smoothes the surface;
3) The process of pasting itself has no tricks. Better wallpaper Glue together, holding the strip on both sides. This way you can safely stick the strips strictly vertically. There is no need to rush, and you should pay a lot of attention to the first page, because the final result depends on it. When gluing corners, it is necessary to make a slight overlap;
4) It is necessary to smooth out the wallpaper soft cloth from the middle to the edges. Thus, they will not form on the surface of the wallpaper. air bubbles. To smooth light-colored wallpaper, place a sheet of white paper under the fabric;
5) The glue must be removed carefully with a damp sponge. Do not forget that paper wallpaper can be easily damaged.
If there are sockets and switches on the wall, you must first turn them off, then remove the housings. The wallpaper is pasted over the sockets, after sharp knife a cross-shaped incision is made, then a hole is cut.
Vinyl
Vinyl is known for its durability and the gluing technology differs from paper:
1) The roll is cut into strips according to the height of the wall. The stripes are adjusted to each other according to the pattern. Vinyl wallpapers are thick and they are glued only end-to-end. It is necessary to leave a small margin, the room may have height differences;
2) Be sure to read the instructions. Usually the adhesive is applied only to the wall, but some vinyl wallpaper requires the adhesive to be applied to a strip;
3) The sticker process is quite simple. The strip is applied to the wall, after which it is smoothed from the center to the edges with a special rubber roller; the glue can be removed with a damp sponge or cloth. Particular attention must be paid to the joint, if necessary, glue it with a brush. When gluing the corners, you definitely need an allowance of 3-4 cm. The excess is cut off with a sharp stationery knife.
When gluing vinyl wallpaper, it is necessary that all rolls come from the same batch. Lots may vary in thickness and color tones. This will not be noticeable in rolls, but on the wall the difference will be striking.
Non-woven
Non-woven wallpaper is very specific in the gluing process; if you decide to cover your walls with this type of wallpaper, here’s what you need to know:
1) Before marking the roll and cutting it into strips, it is necessary to lay a film on the floor surface. You need to cut non-woven wallpaper with a very sharp knife. Having cut off the strip, it is rolled into a roll. front side inside, starting from bottom side. It is also necessary to mark the wall for each strip;
2) Glue must be applied to the wall in sufficient quantity. The strip should slide freely over the surface of the wall, but it is necessary to prevent the formation of smudges;
3) Each strip is rolled out from top to bottom, according to the applied markings. After which the strip is carefully smoothed from the center to the edges;
4) Excess glue is removed with a damp sponge, allowances are cut off with a sharp stationery knife.
- Cutting wallpaper is best kitchen knife, it is much easier to manage, and trimmed with clerical work;
- Trim wallpaper on windows and door slopes it’s much easier the next day when the wallpaper is dry;
- It happens that the eyes get tired and the gaze becomes blurred and air bubbles can be missed. To prevent this from happening. Just run your fingers along the strip; a characteristic rustling sound will immediately reveal the location of the bubbles;
- If a little wallpaper is missing. You can use scraps, but this is quite difficult to do with composite drawings;
- Draft is the enemy of fresh wallpaper, so you can’t create a draft in the room immediately after pasting the walls;
- To ensure that the glue is uniform and without lumps, it can be stirred with a drill with a mixer-type attachment.
- Vinyl wallpaper on a non-woven basis is glued in the same way as non-woven wallpaper.
One of the most popular types interior decoration - wallpapering. But in order for the result to please you, you need to know how to glue wallpaper correctly. There are enough exact amount nuances that affect the quality of finishing.
Preparatory stage
First, everything in the room that can be removed is removed, including door frames and baseboards, if possible. They also remove sockets and switches, closing the boxes with wires with plugs - plastic or wooden.
Turn off electrical outlets
When working with electricity, we de-energize the room and do not turn it on until we are finished. It is advisable to carry out all work, including wallpapering, with the power turned off. The work is “wet”, and water or glue can get on the wires and short out. If the wiring is done according to all the rules and there are protective circuit breakers, this is not a big deal. They'll just turn off the power and that's it.
If the wiring is still done in the old way, it can be dangerous. The worst part is that in this case there is often no way to turn off the power in a separate room. Only in the entire apartment or, in best case scenario, in her half. Then the solution is to remove the power wires from the sockets and switches (with the power off, of course) and carefully insulate the ends, then hiding them under plugs. Then you will have to unwind them and put them back in place, but it will be safe.
Lighting during work is temporary - extension cords are pulled from other rooms and portable lamps are turned on. Once you have dealt with electricity, you can move on.
Sealing irregularities
Here you will first have to assess the condition of the walls. First you need to remove all the nails and screws, remove chips and repair cracks. Then examine the results. If the walls are more or less even, there are only small defects, you can get by with occasional leveling. Only cracks, dents and chips are repaired. You can cover them up finishing putty. Just before leveling, completely clean the wall of dust and pieces of wallpaper, and then cover it with a primer (with a wall roller and a brush in the corners).
If the wall has been “treated” with a hammer drill, you cannot do without full putty of the entire wall. Mostly used today gypsum putty. First, apply a layer of primary or starting. It has a coarser grain and the layer can be up to 3-5 mm. This composition is used to level out the main unevenness, trying to achieve a smooth surface. After drying, they pass through a special mesh, removing any unevenness or sagging that may exist.
Afterwards finishing putty is used. It is very plastic and is applied in a thin layer - up to 1-2 mm. After this, the wall becomes smooth (after the irregularities have been smoothed out with a mesh, only with a smaller mesh).
Primer of walls
The second layer of primer is applied after puttying. It forms a film on the surface that reduces the absorption of the glue and also improves adhesion. For wallpapering, you can use a thinner wallpaper glue as a primer. Each pack has a table indicating the amount of water for gluing and priming. We dilute the glue in the required proportion, wait for it to be ready (also on the package) and cover the walls with the composition. The priming technique is the same: first go over the corners with a brush, then with a roller on smooth surfaces.
In the video, for some reason, the use of primary putty is called plaster, but otherwise the sequence of actions is presented correctly.
Rules for gluing
When wallpapering there are several rules that must be followed. The technique varies depending on the type of wallpaper, as does the glue, which is necessary for a quality result. the difference is mainly in when and where to apply the glue. You don't have to guess. Everything is on the insert, which is included on each roll of wallpaper. There it is graphically depicted, and in some it is written, which part should be coated with glue: only the wall or only the wallpaper, or maybe both at once.

But some things remain the same. For example, applying a starting strip.
Where to start
In reality, the starting location is not that important. It is important that the first strip is glued strictly vertically. Therefore, the choice is yours.
If the room has a perfectly designed corner: smooth and exactly vertical, you can start from there. You can start from a door with a perfectly aligned jamb. If there is nothing like that, draw a guideline for yourself. Take a building level, mark a point on the wall and draw an exact vertical line through it. Inexpensive building levels household class, which we usually use during repairs, sometimes give a significant error. And since it is important for us to stick the first strip strictly vertically, check the accuracy of the line using a plumb line. He never lies, pointing straight down. If everything is fine, you will align the edge of the strip along this line.
If you still haven’t decided where to start gluing wallpaper and this is your first experience in this area, start with the wall that is least visible. For example, the one along which there is a closet. The first couple of pages will be difficult for you, but then you will better understand what’s what and there will be fewer flaws.
How to glue wallpaper on a wall
If glue, at the request of the manufacturers, is applied to the cut fragment, the smeared strip is folded so that the coated side is inside. To do this, fold the edges towards the middle, then fold them several more times. The folds are not pressed. Let them remain round. This is necessary so that all layers are saturated and the canvas fits well on the wall and also sticks without bubbles.

If you need to apply glue to the wall, coat an area slightly larger than the width of the wallpaper. The area under the ceiling, in the corner and near the floor is coated with a brush. Then the rules are general.
Take the cut strip and climb up the stepladder. Place the top edge a few centimeters on the ceiling, then align one of the edges along the drawn “start” line. Since wallpaper today is glued end-to-end, it doesn’t matter which edge.
Strictly attaching the side edge to the line, moving from this line to the other edge, glue the wallpaper in the ceiling area. Then, gradually moving down, you go down a little lower.
Extra centimeters on the ceiling are cut off. It is more convenient to do this with a paper knife and a large spatula. Press the paper well against the corner by running your hand. Then apply a spatula. Run a knife blade along its edge.

Trimming under the ceiling and near the baseboard
When gluing the canvases, movements are made from the center of the strip to the side and slightly downward, expelling the trapped air to the edges. Previously, this was done with a rag, but it works better and faster with a roller with an elastic nozzle (it is usually yellow color). There are practically no bubbles when working with it. But if the wallpaper is structural, with an embossed pattern, you can crumple it with a roller. Then take a wallpaper brush. It is wide and flat, with hard pile.

Wallpaper brush for quick pasting
Having reached the place where the strip is not yet glued, unroll the rest tightly and proceed according to the same pattern. First, you expose the edge, then use a roller or rag to expel the air, achieving a flat surface.
The second strip is glued in exactly the same way, with the only difference being that the canvas already on the wall will serve as a guide for gluing the edge. That’s why it’s important to glue it evenly, otherwise everyone else will also be mowed.
Secrets of pasting corners
The most difficult part to glue wallpaper correctly is in the corners. But this is only until you know the secret. You can try to do it simple at first. Wrap one of the parts onto the adjacent wall by 1-2 cm, and cut the second at the corner.

It’s not difficult to do, this method looks good. But on some wallpapers this stripe is very visible. For such a case, there is another way. Glue the canvases on both sides of the corner so that they wrap at least a little on the other side (2-3 cm is enough). Press well so that they fit exactly. to the walls and corner.

Then take a special cutter or large spatula. Press it in the corner, cut the wallpaper along its edge with a sharp knife. It is necessary to cut both sheets at the same time, so considerable effort may be required. To ensure a continuous cut, do not tear off the knife. Having stopped, move the spatula, which you rest against the blade and then continue the cut.
Having cut everything off, remove both cut strips and join the remaining strips in the corner. If the wallpaper was pressed well before trimming, the match is perfect, without any discrepancies.

How to glue wallpaper on outside corners? Almost in the same ways. In the first case, one of the stripes is wrapped around the corner by one or two centimeters (for thicker wallpapers, 2 cm is better, for thin ones, 1 cm is enough). The second strip is glued strictly along the corner. If this overlap is visible (usually on non-woven wallpaper), you will need to cut along the entire strip. In this case, we wrap more and cut vertically using the same spatula and knife. We remove the cut and glue the joint.
Meter-long wallpaper in the corners is glued in the same way as narrower ones. It happens that a narrow strip is needed in a corner, and the rest is cut off. If the wallpaper is without a pattern, it can be used somewhere, at least in another corner. With patterned canvases, sometimes it is also possible to attach them somewhere, but this is more difficult to do. That’s why they take patterned ones with a decent supply: just for such cases.
How to glue vinyl wallpaper on paper, how to remove imperfect corners in this video.
How to glue wallpaper near doors and windows
If the door or window is flush with the plane of the wall, problems usually do not arise. Wallpaper is cut along the door frame or along the edge of the trim. The canvas is cut at an angle of about 45° to the corner of the casing or frame. The cut parts are wrapped along the opening, bent and then cut off with scissors or a knife. It’s smoother and faster using a knife and spatula.

How to glue near the door
The option that causes more difficulties is when it is necessary to cover the slope of a door or window. When using paper wallpaper, the principle is again simple: glue the strip onto the slope, extending it 1 cm onto the wall. We glue a piece on top exactly along the cut of the window opening.

But this method will not work with wallpaper on non-woven fabric: the “overlap” is too visible. In this case, the strip is cut along the window opening with a small margin. Another fragment is glued on top with an overlap, cutting them exactly along the cut of the window opening. The glued piece is wrapped inside, onto the slope. Then they join as before.
It's difficult to explain in words. It’s more accessible in video. By the way, it also contains a story about the design of wallpaper for arched openings.
How to make joints invisible
Care must be taken to ensure that the joints of the canvases are invisible during gluing. You need to connect the canvases so that there is no gap between them, but also so that they do not overlap one another even by a millimeter. A perfect match must be achieved.

Because it's perfect smooth walls Unfortunately, we don’t see them very often; it turns out that the seam either creeps in a little or diverges. Your task is to move the canvas so that it becomes perfect and invisible. You can move the canvases with your hands - they can slightly stretch and contract. Due to this, you achieve the required match. If the resulting defect is too large and nothing can be achieved by shifting, the strip is peeled off to this place and, having corrected it as necessary, is glued again. Sometimes, if the seam is sticking out a little, rolling it with a special tapered roller can help.
With this technique, it turns out that first the edge is glued, which is joined, and then, from it, they begin to smooth out the rest of the surface of the canvas. If you have examined the seam and are satisfied with the result, take a clean rag and wipe it off any excess glue that may have come out during all these actions.
To learn how to glue meter-long vinyl wallpaper on a non-woven backing and how to make the joint invisible, watch the video.
Eliminating shortcomings
If there is a lack of experience, it may happen that bubbles appear on the walls after or during drying. You can remove them with simple steps. Take a large syringe, fill it with glue, pierce the bubble and inject some glue into it. Vinyl wallpaper, acrylic, paper - the top part is unimportant. The actions vary depending on the basis. If the wallpaper is paper-based, wait five to seven minutes; if it is non-woven, act immediately.

How to remove bubbles from wallpaper
Seams come apart quite often. Wallpaper may peel along the thread or baseboard. There are two ways to glue them. Use a brush and the remaining glue or buy a special one for seams. It comes in a tube and is applied precisely. And again, the procedure depends on the base. After wetting the paper, wait a while, then glue it, making sure the edges match.

They say that whoever has not served in the army does not know life, but in our case, whoever has never done so and not in his own apartment is not ready for independent life. In general, there are a lot of jokes about repairs, but let's get back to serious things. From today's review by the editors of the online magazine site, you will learn how to hang wallpaper correctly, what is needed for this, and some of the subtleties of this seemingly simple process.
Read in the article
What you need for wallpapering
Before gluing new wallpaper, you will have to do some preparatory work. First of all, it is necessary to prepare the walls: remove old canvases, paint, level and prime the surface. But the most important thing is to buy enough and decide on their type. When buying wallpaper you need to consider 3 main factors, namely:
- dimensions and shape of the room;
- wallpaper parameters. Basically, the width of the wallpaper strip is 530 and 1060 mm, and the length is 10 m +/- 50 mm. Some manufacturers' webs may differ in size, and therefore, when going to the store, it is worth taking a calculator with you so that, if necessary, you can make a final calculation of the required number of rolls;
- size and complexity of the drawing. Since wallpaper with a large or complex pattern requires careful adjustment, the consumption of this type of finishing materials increases significantly. So, for example, if from one standard roll with a pattern that does not need precise joining, 3-4 stripes are obtained, then when selecting a pattern, 2-3 canvases will come out, and then depending on the height of the ceilings.
Before you count required quantity rolls, it is necessary to measure the room taking into account protrusions, niches, door and window openings, arches, etc.


Calculator for calculating the required amount of wallpaper
Every person gets tired of constantly being in the same atmosphere. It is necessary to carry out periodically redecorating. Replacing the wall covering instantly changes the mood and perception of the space. If there are no extra Money to pay for the services of builders, then you should think about how to glue wallpaper yourself. One person can easily cope with this task. However, if you have at least one assistant, the work will go much faster. Let's consider where to start gluing wallpaper in the room.
In contact with
Beginning of work
For getting high-quality surface It is not enough to choose the material and glue for it. Additionally, you will need to think about how to start gluing the wallpaper in such a way that joints and irregularities are not visible. It is important in the process take into account the main recommendations specialists in this field.
Starting point
At the first stage, you will need to decide where to start gluing the trellises in the room. The first stripe should be located as smooth as possible. The rest of the material will move away from it around the entire perimeter. If the coating is formed unevenly, the joints will become noticeable from the side.
The trellises were thin, so they could easily be glued overlapping. The result was a slight thickening that was easily camouflaged.
Only in this case will it be possible to convey the author’s idea when creating a drawing.
If professional builders decide, then they primarily focus on the features of the room. Sometimes you even have to start directly from the very center. Before starting work, it is best to consider the available options.
The parties still use the most popular choice today. Comfortable start from the window completion of all work. However, if the layer is large enough, it is quite possible to perform all manipulations from the door. The disadvantage is the need to cut the roll lengthwise.
Wallpaper in the hallway can be glued immediately in both directions from the window. But first you need to consider covering the joint with curtains. In the same way it must be done over front door. If you start the process from the window, it is much easier to match the drawing. Quite often this is difficult to do in the window sill area. You have to cut a lot from the overall piece. Such costs are not always considered justified. It is also difficult to glue the material under batteries and radiators.
As a main guideline it is allowed use the door. This eliminates the need to match the first and last fragments. The method should definitely be used if you are installing material with a bright print. The calculation must be done in mandatory, because in the end it may not come together.
Quite often people decide to wallpaper from the corner. At the same time, they should be as even as possible. The method is ideal if there are no windows in the room.
Additionally, you will have to decide at what angle to start gluing the material if several colors and textures are used at once. Thanks to this, it is possible to cover the opposing sides equally. There will be no seam at the corner, because all work is done from this area.
 As a guideline you need to choose only smooth an object. For this it is advisable to use special tools.
It is strictly forbidden to rely only on visual characteristics.
It is best to choose the largest level. Thanks to it, the measurement process will be much faster.
You can also use hand-made plumb lines to form straight lines.
Builders use laser level. However, it is unlikely that everyone has such a device at home. ordinary person.
Detecting vertical at uneven angles
If a person does not have adequate experience in carrying out repair work, then the problem may become unsolvable for him with uneven corners. They will only be emphasized by a bright print. However, to solve the problem you need to resort to the following tips:
- Work on each wall is carried out with a preliminary selection of a starting point.
- If there is a need to make a joint in a corner, then an additional overlap should be left 10 centimeters.
- You need to draw on the wall straight line. However, it should not be compared with the angle.
- Each new side begins to be glued with a special transverse strip. However, this option can be used for thin material, which will not be damaged by overlaps. Trellis made of non-woven or vinyl are attached in other ways. To match the pattern, each canvas is cut with a regular stationery knife.
- The material should only be cut after the measurement has been made several times. Even a minor mistake can significantly ruin appearance the entire room. For example, incorrect joints make it difficult to imagine the overall picture of the room. The location of furniture in the future must also be taken into account. Thanks to this, the renovation will look quite harmonious.
Pasting walls with non-woven wallpaper
This material has its own characteristics. That is why you should find out in advance where to start gluing non-woven wallpaper. Experienced builders advise to do this from the corner. To obtain a flat surface, you must perform the following manipulations:

Important! Particular attention should be paid to the corners: the formation of wrinkles in them is not allowed.
To eliminate it, just make one cut with a knife and release the air.
Description of stages
It is also important to determine in advance in what order to glue the wallpaper in a particular room. In some cases, it is advisable to start with the second stripe. Wherein the following recommendations:
- A new sheet is applied on top. Next, it is gradually glued along the entire length of the wall.
- It is necessary to compare the sections not only with the floor, but also with the ceiling.
- Air can be expelled in any direction.
- Where to start gluing wallpaper in the kitchen directly depends on the future arrangement of the furniture. the best thing from an accent wall.
- The area near doors and windows is decorated in last resort. If it is possible to disguise the covering with curtains, then it can be covered in pieces.
- You can cut a piece of wallpaper only after careful measurement. . It is best to do this several times in a row.
- The joint should not cover the baseboards. It's best to hide it directly underneath.
 Even a person without the necessary experience in carrying out construction work can hang wallpaper.
It is important to be patient and first pay attention to studying all the nuances of the process. Additionally recommended
Their . In this case, you are guaranteed to get an ideal surface.
It is necessary to determine where to start the process. The answer is not clear and directly depends on the specifications of the selected room.
It is necessary to analyze the presence of windows and doors. The location of the furniture in the future plays an important role. If you take into account all the nuances, you are guaranteed to get cozy room.
Useful video: where to start gluing wallpaper