Country holidays for many it involves family or friendly gatherings around the fire, which become more and more comfortable if there is a gazebo with barbecue,B-B-Q and a stove. In such a small but very convenient building on your own site, you can fry meat, cook kebabs, smoke food, or even organize entire culinary competitions with first, second and third courses. The construction of such a vacation spot does not present any particular difficulties, and therefore you can create it with your own hands, having prepared a project in advance taking into account its purpose, appearance And internal filling gazebos.
Variety of gazebos
Gazebos on the site can be of absolutely any shape and design. These are the lungs awnings with mobile barbecues, and solid buildings with a whole barbecue complex, and indoor spaces with a stove-fireplace, where you can comfortably stay even in winter. The decision on choosing a gazebo design is made by the owners, taking into account the available free space, other buildings on the territory and landscape design plot.
Building materials for the construction of gazebos can also be different, depending on the financial capabilities of the owners and the chosen design option:
- The most common material is wood, which allows the gazebo to fit into any landscape. Wood makes excellent open gazebos, similar to pergolas, where a stove is placed against one of the walls. Wood is considered the most affordable and easy-to-use material, but one of its properties is flammability, and therefore it cannot be used for all work on building a gazebo with a stove. To protect wooden structures, the material is pre-treated with special non-flammable mixtures.
Many owners country houses They are trying to make them more comfortable, trying to arrange a recreation area. That is why gazebos are increasingly being created with.
Features of wooden gazebos
Wood is relative inexpensive material, so many site owners choose it to create a gazebo. Moreover, such structures fit well into the landscape design of any site. Wood is easy to process, so if desired, you can create an original gazebo.

Structures are often created from rounded logs. To understand which design will be more suitable for a particular area, it is worth considering photos of designs for gazebos with barbecues.

When choosing the type of gazebo, it is worth remembering some features:
- Structures made of treated wood protective compounds, can last long enough long time. At the same time, damaged building elements can be easily replaced with new ones.
- If the soil on the site is dense, you can create a gazebo without a foundation. In this case, it is enough to lay a massive slab of concrete on the ground. Concrete can be covered with boards or paving slabs.
If you wish, you can find ready-made ones so as not to draw up a building diagram.
Brick gazebos
If there is a brick house on the site, brick gazebos are often created, as they are combined with the main structure.
It is worth remembering that a brick building will cost more than a wooden one. At the same time, construction will require more time. Also, for such a gazebo you need to build a massive foundation.

But the advantages of such buildings are undeniable:
- brick gazebos are not afraid of fire and moisture;
- the described structures can be used for several decades without requiring replacement of structural elements, as happens when using wooden gazebos.

It is worth noting that brick gazebos are often made in combination:
- Often created wooden structure, one wall of which is brick. This is necessary to create a furnace.
- Many people also build a gazebo, the seating area of which is made of wood, and part of the structure near the stove is made of brick.
- If brick construction has large openings, they are decorated forged elements or wooden gratings.

Having considered the designs of bathhouses and gazebos with barbecues, you can choose the most suitable design.
Metal structures
Wrought iron gazebos are delivered to the site already in assembled form or assembled from several parts. Such designs have high cost and can be an original decoration of the site. It is worth noting that the described gazebos do not require preparatory and finishing work.

But it is important to treat the metal so that rust does not appear on it. One of the advantages metal structures is the absence of the need to create a foundation.
Often wrought iron gazebos are complemented by wrought iron benches. If desired, the gazebo can be painted in the color you like.

Choosing a stove for a gazebo
It is worth noting that the foundation for the furnace is poured separately. It is important to make it above the level of water that can accumulate on the floor after rain. This is due to the fact that the masonry is done on a sand-clay mortar, which is resistant to moisture.

Many experienced builders It is recommended to place the grill in the middle of the building or on the northeast side. In front of the stove, it is necessary to secure a material that is not afraid of fire. This is necessary to protect against fire if sparks from the furnace fall on flooring. It is also worth considering that the stove should not be located close to a wooden wall.

Stoves installed in gazebos can be divided into several types:
- Barbecue oven, which can be stationary or portable.
- Russian stove, which has an oven, grill and barbecue grill. Sometimes such ovens are equipped with a smokehouse.
- Kitchenette. When choosing this option, additional furniture is installed.
The size of the stove installed in the gazebo depends on the expected number of people.

Creating a foundation
The most simple option is the installation concrete slab. Such products can withstand the weight of any gazebo. It is worth noting that the slab can be laid on dry soil. But before that you need to dig a hole required sizes and cover it with rubble. After such actions, it is necessary to lay a layer of waterproofing. Roofing felt is most often used.
But it is worth remembering that the described option is not suitable when groundwater located high or if the site is in a lowland. Due to exposure to moisture, the gazebo may warp over time. That is why it is important to take into account all the conditions that may affect the structure.

Pile and column foundation
If the gazebo is being created at the same time as the house, the piles should be driven in while creating the foundation for the main structure. In the absence of desire to hire professional builders worth installing brick pillars or block supports. They are laid to a height of approximately 900 mm. The height above the ground is about 30 cm.

Important! To create pillars you need to use only solid red brick.
The pillars are installed at the corners of the structure, as well as along the walls. It is worth remembering that the distance between the pillars should not be more than 2 meters, since the reliability of the structure depends on this. Lightweight gazebos are often installed on wooden poles.
Tape base
This type of foundation is chosen most often, since it can be created with your own hands. To create it, you need to dig a trench around the perimeter of the future structure and create formwork. A sand cushion is created at the bottom of the trench. The depth of pouring the tape for gazebos is usually about 40 cm, since such structures are light in weight.
After creating the sand cushion, it is placed in the formwork reinforcement cage, which is then filled with concrete. It is worth noting that such a foundation can be prefabricated and consist of reinforced concrete blocks. In this case, the process of creating a gazebo is significantly accelerated, since there is no need to wait for the concrete to harden. From the moment the concrete is poured into the trench until the walls are created, you must wait about 7 days.
Construction of the furnace
The area of the furnace foundation usually does not exceed 1.5x2 m. To connect the bricks, a solution of clay, sand and cement is used in a ratio of 2:3:1. It is important to make the mixture homogeneous, otherwise it will not hold the bricks together securely.

It is worth remembering that the thickness of the seams should not exceed 5 mm. Otherwise, the solution may begin to crack during oven operation. When laying bricks, excess mortar must be removed immediately before it dries. The first 6 rows of brickwork are the base of the oven. During work, it is important to ensure that each brick is positioned evenly relative to the rest of the structure.
On the 7th row, an overlap is created, for which metal corners are installed. After this, you need to start creating a brazier for the grill. It is worth noting that the second row in the grill moves inward. This is necessary to create a protrusion for the skewers.

After the 9th row, you can begin to build the furnace roof. After the 19th row, an overlap of the frying chamber is created, which ends at the 21st row. The hole above the frying chamber gradually narrows, forming a chimney. When creating a gazebo roof, you should properly remove the chimney and seal the hole between the bricks and the roofing material.
If desired, you can do winter gazebo, creating closed room. In this case, it is necessary to properly insulate the building so that it can be used comfortably at any air temperature.
What's a vacation without grilling meat over charcoal? But what to do if the weather has completely turned bad, and you are already fully armed with soaked kebab and bags of food? IN in this case A gazebo equipped with a brick barbecue will help. You can shelter from bad weather under the roof, and also safely cook food over coals even in the rain.
Below we will look at the options for brick barbecues, as well as their step by step construction. Let me draw your attention to what we have already considered.
Undoubtedly, the masonry process is quite labor-intensive, especially for an unprepared person. But if you do not pretend to be a jewelry form and are making it for yourself, then our analysis will be quite enough for you.
In tandem with the stove
At the end you will see several interesting gazebos, in which a roaster under a canopy has already been implemented. You can probably find out for yourself useful information from the presented buildings and take some idea into account.
Classic barbecue grill
The simplest and budget option It is considered to be a classic brick grill, which is designed for cooking shish kebab on skewers.

In shape, it is completely different from its metal counterpart, because it is closed on all sides, and the smoke escapes through a special chimney.
The problem with all these small structures is poor draft, which must be calculated directly on the spot. IN open gazebo This is not so critical, but still unpleasant. Soot appears, which does not add aesthetics at all.

At the same time, for little money you get a full-fledged installation for cooking in any conditions, even the most extreme.
Brick BBQ
The difference between a barbecue and a regular barbecue lies in the method of cooking the meat.
In this case, a grid is used on which the meat is placed and periodically turned 180 degrees. For some, this approach is considered more comfortable and interesting.

The meaning of the building does not change much from this. Also used brickwork, inside which wood is heated and meat is fried.
A more global approach to cooking can be realized using an oven complex. It may include a grill, oven, stove, etc.
This whole thing is equipped good hoods, as a result of which you can cook in several formats at the same time.

Such a design can cost at the same level as the gazebo itself, since in addition to large quantity building material calculations required.
It would be a shame to invest 100 thousand rubles in such a project and get a complete lack of traction or a brick that collapsed after the first fire.

Therefore, in this case, construction must be approached as responsibly as possible and with a decent wad of money in your pocket. Pleasure costs money, in this case there is no way to avoid it.
Step-by-step construction of a barbecue inside a gazebo
Video instructions
The process of creating a barbecue can be seen most clearly in the video. We have prepared several videos, each of which shows a different approach to this action.
Since everyone’s gazebo is different, the placement of the barbecue, its size and shape can differ radically. So we think it's better to take a look various options, and then choose the one you like.
Drawings with dimensions
Interesting project provided stove maker Roman, who prepared the full 3d model brick barbecue. She is presented in a video that he posted on YouTube (see below).
In the form of photographs, we have collected the most interesting drawings, from which you can calculate the size of the future building, as well as the consumption of materials for it.
Pouring a slab foundation
The weight of the barbecue can reach several tons (including brick chimney), so in mandatory needs to be filled in. The structure of such a base is shown in the photo below.

You will need to adjust the size of the site to suit your project. It is quite possible that you will need small area, but you need to do it with a rating of 5 plus.
Bricklaying
It is better to see the masonry visually on video, so in this block of information we will present schematic step by step masonry, which indicate all the bricks individually.
Each master has his own quirks in terms of applying the solution and leveling the entire structure, but everyone has the same order, and this is precisely the point we want to convey to you.


Installation of a chimney with good draft
One of the most important points in creating a brick from a barbecue is considered to be traction, in the absence of which all the work goes down the drain. To do this, you need to think about the hood and chimney, which should be not only efficient, but also aesthetic.

We discussed this point in detail in the publication about barbecue hood (). It will be a shame if the calculations turn out to be initially incorrect and the smoke goes in the opposite direction into the gazebo, so work on this point in advance.
Variety of gazebos with photos
Below we have prepared a small selection of photographs that you can use as a guide for your future construction.
If you want to find more more examples, then go to the publication about gazebos with barbecue, barbecue and stove (). There you will find them in abundance.


If you still have any questions about this topic, then do not hesitate to ask them in the comments. We will try to answer you within 24 hours.
It is not surprising that gazebos with barbecues can turn banal cooking into a truly enjoyable pastime and even a kind of culinary magic, because the event will be held over an open fire. Few dishes are as popular as the juicy kebabs cooked on the grill.
Today we will find out how to get even more pleasure from this process! Let's get acquainted with the best options gazebos with barbecue facilities, consider drawings and several detailed master classes.


What you should know about gazebos with barbecue facilities
Today, a gazebo with a barbecue is already something more than a place for preparing barbecue. Here, according to many, there should be all the amenities that are available in the house. In addition to the barbecue itself, there can be an oven, smokehouse, brazier, etc. Let’s be clear, there are many options, but you must choose only one of them – the one that best suits your needs. In any case, often small gazebo, in which there is only a minimum of the most necessary things, as more comfortable than a pretentious building, “stuffed” with all possible devices.

You can add a cooking area. In the case of a small gazebo, you can place a sink and a table near the barbecue in order to turn it all into a true summer kitchen. Take care in advance of the table top (it should be easy to clean), as well as a small shelf on which the most frequently used kitchen tools will be stored. If possible, install a refrigerator there for more convenient storage drinks and, of course, meat.

The space should be used practically. Traditional dinner Zone such a gazebo is a table for lunch and a bench. However, if your plans include saving space, you can have the benches slide under the table (this will give you more room to maneuver while cooking).

Take care of cleanliness! In terms of the use of materials, all elements of the structure must be durable, resistant to outdoor use, and they must also be easy to clean. Simply put, it is better to give preference to metal (pre-treated), stone or wood (also treated).

The cook should be comfortable. It will hardly be pleasant for him to cook while hearing bursts of cheerful laughter behind him. His place should be isolated from the epicenter of the party, but at the same time he should be able to quickly turn into the “highlight of the program.” Perfect option- This is a good bar counter, slightly raised from the side of the cooking area. Can a feast begin with something more pleasing to the eye than the sight of a chef preparing meat on a grill?

The gazebo should be warm. In case of cold weather, you can use special PVC curtains in the building. If you do not intend to purchase such curtains, you can easily make them yourself - to do this, purchase PVC film, cut it according to the dimensions of the openings, edge it with thick fabric, and subsequently equip it with eyelets on the edges. In order to secure these curtains inside the gazebo with barbecue, thread a cord through the eyelets.

Note! You can also take care of auxiliary heat sources - install, for example, IR lamps, preferably in areas of maximum functionality (near the cooking area, next to the table).
If the barbecue is not equipped with an exhaust fan, it is better not to place it inside the gazebo - instead, install it nearby. Take care of a high-quality canopy over the grill (you also need to think about the comfort of the cook), otherwise sudden rain can easily interfere with your plans.

You can equip an open hearth. And not only next to the gazebo, but also on the edge of the structure. Such a hearth will serve as an additional cooking surface on which, for example, you can cook kulesh.

Take care of an additional seating area. Equip next to the gazebo, say, a paved area or, as an option, an additional canopy - a kind of extension to the gazebo, a separate umbrella, etc.

And if the climate in your region is cool, then a separate gazebo can serve as a recreation area.

Take care of a convenient firewood rack. There should be a place near the structure where firewood would be stored. This way you won’t have to go to the other end of the site to get fuel.

From the gazebo with barbecue you can make an entrance to the basement. This means that there will be no need to install a refrigerator inside, and the entrance itself will look more harmonious (when compared to a lonely mound in the yard).

High-quality lighting is the key Have a good mood! If you take care of the bright lighting of the gazebo, then it will be in tandem with general lighting the plot will provide a harmonious and functional atmosphere. It is important that the cooking area is illuminated especially brightly, while the table and rest area can be equipped with adjustable lighting (to create the same special mood).

Don't forget about safety measures! Be sure to ground each electrical appliance! To install wiring outdoors, use a special cable; In addition, additionally treat all wood elements with a fire retardant.

Correct location of the gazebo. This must be the most cozy corner your garden. While it is more advantageous to locate a summer kitchen directly next to the house, placing a gazebo further away also has its advantages. This way, you will provide yourself with a kind of “escape” from the daily hustle and bustle, enjoying instead the silence and luxury of the garden.

Take care of good decoration. Garden gazebo- This great chance test yourself in choosing decorative elements. And the decor in this case will consist not only in decorations on the walls, but also in flowers on the table, attractive kitchen utensils, curtains and more. Transform your gazebo into your own personal sanctuary!

Combine the structure with landscape elements to highlight the entire area in the garden.

You can take care of the original addition near the gazebo in order to emphasize the importance of this entire area. For example, create a small flower bed or a small kitchen garden.

Gazebo with barbecue – best projects
Not everyone can afford to build a gazebo from expensive Siberian pine. For this reason, we bring to your attention several functional, but fairly simple gazebo designs. Quite ordinary materials are used for their manufacture; the projects themselves are not complicated and are accessible to almost every owner. suburban area.
Option one. Construction with bathroom and barbecue


Option two. Project of a gazebo equipped with a washbasin, pantry and barbecue


Option three. A gazebo with a barbecue, as well as an entrance to the bathhouse and basement


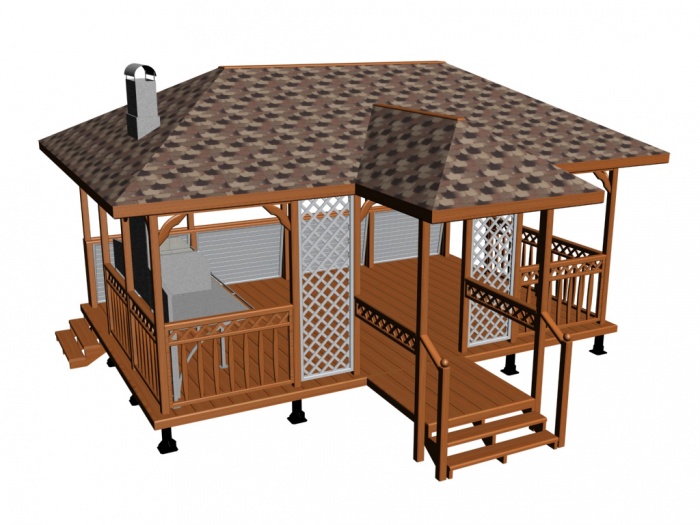
Option four. Original hexagonal design with barbecue


Option five. A project with a pantry, a sauna and, again, a barbecue


It should also be noted that the gazebo options described in the article acquire last years increasingly popular. If allowed weather, then in such a structure it can be assembled in festive table guests - it will be much more pleasant and less troublesome than if the feast was traditionally held in the house. This way you and your loved ones can really relax!

But maybe there are some more important elements, which can be used to complement your gazebo with barbecue? Yes, there are some - they are described in detail in the thematic video below.
Video - Examples of designing gazebos with barbecue facilities
Now, having familiarized yourself with the main important nuances and some simple projects, can proceed directly to production. Let's look at a few step-by-step instructions, illustrated with high-quality images.
Master Class. Making a wooden gazebo with barbecue
As you probably already guessed, the structure itself in this case will be made of wood, and the grill will be brick. When manufacturing, we recommend using boards and beams 6 meters long - this way you will significantly reduce the amount of waste.

First, you need to choose a suitable location, and also decide on the configuration of the future building. Be sure to keep the following important points in mind.
- Don't forget about fire safety! There will be an open fireplace inside the gazebo, so do not build it in close proximity to the house.
- It is also important that Entrance door“looked” at the entrance to the gazebo (this requirement is related to the convenience of setting the dining table).
When you decide on a location, use sand to outline the contours of the future object. The design described below will be octagonal and with a round base. To “draw” this circle, it is convenient to use a pipe fixed into the ground with a rope tied to it. Due to the fact that the weight of the structure is insignificant, small columns of concrete can act as the base. It is recommended to remove the soil under the posts by pouring a mixture of sand and gravel instead (thanks to this, you will be able to level the height).
Make the bottom trim from 10x10 centimeter timber. Use a cardboard template so as not to make mistakes when determining the cutting angles. Cross beams make 5x10 centimeters from a board. Additionally, you can fasten the strapping elements with iron corners (inside and outside) to make the gazebo more stable. Give preference to galvanized corners at 90/135 degrees. Be sure to lay roofing material between concrete columns and beams for waterproofing.

As for the floor of your gazebo with barbecue, then use the same edged board 5x10 centimeters. Required amount cut to size immediately. Plan the outside of the boards with a plane, and treat the inside surfaces antiseptic(at least two layers). Use screws to secure the floor boards, then check again that the trim is horizontal using a level.

As for the top trim, it is most convenient to make it at the bottom. This way you can adjust the lengths of the rafters and locks. Make the frames and rafters themselves from the same board.

The roof of this gazebo, as noted earlier, will have an octagonal shape. Therefore, the rafter lock should also be octagonal. To make it, use a 10x10 centimeter beam. Special attention Pay attention to the placement of supports for the bars! The octagon for their installation is extended using 1.5-centimeter boards.

Now start making the rafters. Make a triangle-shaped cut at the bottom of the fastening. You will use it as a bottom lock.

Samu truss structure, as before top harness, build on the ground to make it easier to correct minor defects.

The structure will be supported by ten support pillars made of 10x10 centimeter timber. Saw off their ends at an angle of 90 degrees - this will significantly simplify the installation process. To attach the supports to the base, use galvanized corners 10.5x10.5x9x0.2 centimeters. Check the design periodically using building level. Slopes (at least in our example) are not required.

After this, install the top trim and rafter system. When installing, use 90/135 degree angles, as well as metal connecting plates.

To construct the roof, use inch boards, the width of which is 10 and 15 centimeters. Lay them close to each other, start at the bottom and move in a circle until you reach the top point of the structure. To fasten each board, use four self-tapping screws (two per side) so that the roof does not deform over time.


You can start building a brick grill. First, dig a 40-centimeter foundation pit.

Build the formwork. You can use boards from old pallets for it, as in our example.

Cover the formwork with roofing felt, securing it with a mounting stapler.

Place reinforcement in the hole, fill the foundation with concrete (sand and cement in a ratio of 3 to 1). The cement itself should be M250, in total you will need about five bags.

Sew the perimeter of the structure with an imitation log of 4.5 x 14.6 centimeters. This way the frame will be more rigid, and the structure itself will be more attractive.

Make window sills from 5x10 cm boards. For fixation, use all the same corners.

Make benches from tongue-and-groove boards, strengthening the ends with metal plates.
Decorate the grill area of a gazebo with a grill wooden lattice to divide the space of the structure (use 1.5x2 centimeter bars).


Now that the gazebo is almost built, start building the grill itself. We recommend abandoning frills and using simple drawings.
For work you will need:
- 360 red bricks;
- 90 units of fire bricks;
- stove hood made of galvanized steel;
- 175 kilograms of oven mixture;
- 7 meters of hot-rolled corner (dimensions - 4x4x0.4 centimeters);
- 50 kilograms of fireproof mixture.


When laying bricks, stick to several simple recommendations. Do not use too thick a mortar so that you can adjust the bricks after installation. The thickness of the seam should be 3 millimeters. And finally, don’t rush – keep the masonry level. In principle, this is where our instructions end. All subsequent steps are clearly understood from the pictures below.

Finally cover the roof bitumen shingles, fixing it with a mounting stapler and nails, the structure itself should be treated with an antiseptic and varnish.


Master Class. Construction of a brick gazebo
If you prefer brick over wood, we recommend that you read the step-by-step construction instructions brick gazebo with barbecue. About the features of choice suitable place and we won’t talk about the marking procedure, since all this has already been described in the previous section of the article. In a word, let's get straight to the point!

The weight of the future brick structure will be impressive, and therefore the foundation in this case must necessarily be reinforced and monolithic. Having completed the construction of the foundation, feel free to begin laying the walls.


For the manufacture of rafter system you can use the same materials and technology as for the previous version of the gazebo.

It is better to lay the bricks of the first row “dry”, that is, without using mortar.

Build a firewood shed, which will additionally serve as the basis for a smokehouse and barbecue.

Carry on independent masonry barbecue The next step is the construction of a firebox and table top. If you want, you can additionally equip a niche for storing dishes.

In addition, you must install a stove under the cauldron. In the image below you can see an example with removable rings.

Now that the base of the barbecue is finished, you can start laying out the countertop using fireclay bricks.

Remember that when laying bricks at this stage, a fire-resistant mixture must be used!

After this, proceed to organizing the chimney pipe, as well as making a channel for the smokehouse.

Oven (at least in in this example) will be Russian. Start forming the hearth for it.

Do not forget that each of the rows must be reinforced with steel wire.

It is also important that the walls are laid out at the same time. To check the accuracy of the work performed, use a building level.

Finish with the stove vault.

The back wall in the example described here is slightly extended.

You will have to spend a lot of time on the work, but the results will definitely warm your soul.

Continue construction. Install smokehouse doors. Also finish with the arches over the grill, the oven itself and the hob.

As for unstitching, you don’t have to do it yourself; instead, your assistant can do the procedure.

You can additionally install a stainless steel mesh over the stove. Subsequently, this mesh will be very useful for drying mushrooms, berries or dishes.

How exactly to equip and cover the roof has already been written in detail in the previous section of the article.

The construction process of the brick gazebo is being completed, and the facility can already begin to be used.

Organize the water supply to the sink at the rear of the structure. IN winter time You can always turn off the water.

As for the pipe, it is better to make it three-channel, so that the draft is subsequently more stable.

Do not forget to cover the entire masonry with a special moisture-repellent impregnation.

In about a week, the structure will dry completely. That's it, now for sure further use gazebos with barbecue!

Master Class. Brick grill step by step

Traditionally, the construction of a brick barbecue begins with the construction of a reliable foundation. The dimensions of the latter should be selected in accordance with the dimensions of the future structure.


First, dig a pit and arrange wooden formwork along its walls (you can use the same old pallets). Fill the foundation with concrete, having previously completed the reinforcement. Wait until the concrete has completely hardened (this usually takes from 7 to 14 days).

When the concrete has dried, begin the actual construction of the barbecue.

Very useful to have on hand finished drawing– it will help to more accurately determine the quantity required Supplies. These include:
- fireclay brick;
- lime;
- steel wire for reinforcement;
- reinforcing bars or, as an option, mesh;
- cement;
- galvanized corners;
- sand.


This brick absorbs moisture well, and therefore it is recommended to lay waterproofing underneath it. The best option- roofing felt laid in several layers. Now you can begin the actual construction work.

Prepare the solution by mixing lime, sand and cement in a ratio of 3/4:3:1. Ready mixture you will use it for laying bricks.

Be extremely careful and careful during laying. Align the bricks, and be sure to watch the seams.

Remember that the rows should be laid in a checkerboard pattern. Start laying from the corner, then gradually fill the side space.

Obviously, the grill will be exposed to high temperatures. Therefore, for laying the second row, it is imperative to use a fireclay clay mixture.

To build a base for the brazier, install reinforcing bars between the walls. Install the firebox base on the latter (you can use, say, an iron pallet as such).


For efficient combustion of fuel, it is necessary that oxygen constantly flows inside. For this purpose, leave several gaps in the masonry that are not filled with mortar.

Install a grate over the rods and select a suitable countertop.


Master Class. Brick country barbecue
This barbecue is the most suitable option for a suburban area. The construction is simple, but reliable and durable. The step-by-step instructions below will help you do everything quickly and correctly.

First, make a detailed plan. Below is an approximate diagram, however, you must take into account the fact that your stove will have its own characteristics - both decorative and structural.

Think in advance about the niche for fuel, as well as the place for the grill (it should be located at a height of approximately 0.6-0.7 meters), while the stove should be approximately 10 centimeters lower.

Having finished drawing up the project, go directly to practice. Start work, as in the case of the previous options, by building a foundation.

The base in this case must also be reinforced and monolithic. Dig a pit about 50 centimeters deep, fill the bottom with a gravel-crushed stone mixture, add water and compact it well.

Proceed to install the reinforcement and form the frame. Make formwork and fill the foundation with concrete.

After about two weeks, when the concrete is completely dry, begin construction of the brick barbecue.

Lay out the stove using fireclay bricks. It is inexpensive, but is durable and resistant to critical temperatures. Prepare red clay, sand and cement in advance (all this will be needed to prepare the solution).

Note! The clay should be watered with water and wait at least a few days.
Prepare the solution and start laying. Do not rush while working, act according to plan, gradually lay out each new row. Regularly monitor the quality of work at the construction level.

Place a pedestal under the barbecue. No more than 70 centimeters in height.

Row No. 2 should be offset by 1/2 brick.

The depth of the furnace should be at least 3 bricks, while the length should be 6. Use the same fireclay bricks, and place reinforcing rods on the ceilings.


At the end add decorative elements to your taste. Clean the masonry from excess mortar; you can paint the structure with paint to visually highlight the seams. In principle, you can already begin to operate the structure.


Now you know everything about gazebos with barbecues, their features, types and construction options. Don't forget to watch another useful video at the end of the article! Good luck with your work!

Video - Making a barbecue with your own hands
For most people, a summer cottage has become a place of pleasant relaxation. This is where city residents want to relieve the burden of worries and stress that has accumulated during the working week. A pleasant feast is also common. But how can it do without the aroma of meat personally cooked over a fire? That's why the owners summer cottages They carefully plan barbecue gazebo projects.
Types of structures
People who spend most of their time outside the city in the company of family or friends simply need to think about building a gazebo with a barbecue, barbecue and stove. Such a building will provide excellent protection in case of bad weather. In addition, this is a great place to relax and original decoration your site.
Initially, you need to decide which ones you are interested in. Building options garden houses great variety:

Since gazebos with barbecue, barbecue and stove imply the presence open fire, building materials for construction should be selected taking into account the following factors:
- reliability;
- fire resistance;
- resistance to high temperatures.

So, what materials can gazebos be built from:
- Of course, the most suitable option is stone or brick. Gazebos built from such material are centuries-old and beautiful structures. They are not afraid of rain, wind, fire. However, despite such obvious advantages(durability and reliability), buildings made of stone or brick have obvious disadvantages at work. Such gazebos are very labor-intensive to construct. The materials used for construction will cost much more than their wooden counterparts.
- Popular today wooden houses made from boards, logs, timber. These buildings are very light, so they are built on a lightweight foundation. In addition, the project summer gazebo with a barbecue it is quite economical. After all, a tree does not belong to expensive materials. To protect such a structure from fire and moisture, special impregnations are used.
- Metal gazebos are durable and reliable. For the frame, either profile pipes. The gazebo is decorated glass inserts, polycarbonate.
But the most beautiful gazebos barbecues are obtained by combining a variety of materials: metal and brick, stone and wood.
Types of stoves
This important point, which must be resolved before starting construction work. Often fireplaces and cauldrons are installed inside buildings. And sometimes small Russian stoves.

Let's consider the features of such buildings:

Construction of a gazebo
Now let's move on to phased construction desired structure. Let's consider the algorithm of your actions. The first stage is drawing up a project.
You have already practically decided what kind of structure you would like to see on your summer cottage. In other words, you have learned various projects gazebos with barbecue and barbecue.

Now you should make a drawing. Determine the size of the house. When calculating dimensions, consider:
- what kind of furniture would you like to place in the gazebo;
- how many people should your building accommodate?
The optimal diameter of the gazebo is 2-3 meters.
Come up with a design and style for the house. You may want to provide several zones:
- for relax;
- cooking;
- eating food.
Choose a suitable location
The best option is to locate the gazebo close to the house. In this case, it will be easy to remove food and dishes from the kitchen.
However, you should not build a gazebo too close to the house, since the smoke from the barbecue will constantly penetrate into the living space.
And most importantly, place your construction at a safe distance from trees, gas pipelines and power lines!

Laying the foundation
This process is needed for any type of gazebo. After all, this is the basis of your design. It will give the structure the necessary stability. Columnar foundation quite enough for
Construction stages
Initially, dig holes in the center and corners of your future building. Fill them with crushed stone and install support pillars, carefully securing them with concrete mortar.
To protect the bottom of the posts from moisture, pre-treat them with bitumen.
This foundation dries out within 2-3 days. And only then can you proceed to the lower harness.

The floor in the gazebo can be filled with concrete or laid with paving slabs. It is recommended to lay a metal plate in the place where the barbecue, grill or oven will be located.
And don't forget that everything wooden parts It is imperative to impregnate the wood with a product that protects the wood from moisture.
Don't forget to decorate the gazebo!
And the last thing to think about is beautiful design your building. Any designs of gazebos with barbecues look very advantageous when decorated with beautiful climbing plants, beautiful carved grilles, original porches, paths. Such houses will allow you not only to relax, but also to enjoy the comfort of country life “to the fullest”!