Cork is an excellent floor covering if you need a “quiet”, pleasant to the touch, warm floor. The installation of cork flooring varies greatly depending on the type of material chosen. Interlocking cork flooring is easy to install; adhesive flooring requires some knowledge. But you can handle both of them on your own.
Laying cork flooring is not glue - not an easy task. It is complicated by the fact that the material is natural and there are shortcomings on the surface of some tiles during production. There are also differences in the size of the tiles (the discrepancy can be up to 1 mm) and thickness. Therefore, for self-installation, it is better to choose either the locking option - it is installed like a regular laminate. You can also put a cork bag, which is placed on the glue. But it’s better to take it with a chamfer - it will be easier. If there is a chamfer during installation, the different thicknesses of the tiles are not visible (the difference can be significant) and it is easier to work with the joints. But when purchasing, you need to take material with a large margin - about 10%: the displacement must be strictly the same, and this is additional expense material.
In any case, you should carefully read the installation instructions - there are a lot of nuances that have a significant impact on the result.
Base
Laying cork flooring requires careful preparation of the base. Suitable as a base for adhesive cork flooring concrete slab or screed leveled with a self-leveling mixture. They are also called . The compositions Vetonit 3000 or Osnovit T-45 have performed well, but similar ones can be used.
Under the adhesive cork covering for the floor, manufacturers recommend achieving a perfectly flat base without any drops at all; under the lock, there can be differences on the floor of up to 2 mm per 2 meters (checked with a ruler, level or rule). In practice, it turns out that adhesive cork (cork parquet) fits normally even on not entirely level substrates. It is only important that the recesses/humps are very smooth, without steps, cracks, cavities, etc.
Laying cork can only be done after the screed has completely dried. Permissible humidity- no more than 5%. If there is no device for measuring humidity, take a piece of polyethylene with an area of approximately 1 square meter, glue it to the base with tape. It must be glued tightly. Leave it for a day, then tear it off. If there is no condensation on the film, the floor has the required humidity, and a cork can be glued to it.

You can lay cork on such a base - it is smooth, dry, and clean.
Before laying, the base is thoroughly cleaned - first with a broom, then with a vacuum cleaner. There should be no debris or dust on the surface.
Wooden floors are leveled with a “dry screed” - moisture resistant plywood, fiberboard, gypsum fiberboard. The sheets are laid “spaced out” so that the seams do not coincide. When laying, leave gaps of 3-4 mm between the sheets; the sheets are attached to the subfloor using self-tapping screws. Their caps must be recessed into the material (if necessary, pre-drill holes).
Seams and holes are sealed with putty. It's better to take acrylic putty— it is more elastic than gypsum, and glue “lays” on it without any problems. After drying, sand the putty so that the entire surface is smooth. The base is cleaned of dust and can be primed to reduce glue consumption.
Tools
Installing cork with glue requires some tools. The set is not very large and does not require large material costs. Difficulties can only arise with a notched spatula - it must have a very fine tooth, and such are rare.

If you couldn’t find a spatula with a fine tooth, you can make one from a regular one using a file. The required depth of cut is obtained when you run the corner of the file along the edge two or three times. It won't take much time.
Laying method
Eat different schemes styling, including with patterns. But they need to be calculated, and this requires certain knowledge and time. First DIY installation cork covering is desirable using the simplest offset schemes. It looks good and is ideal for gaining experience.
If your floor adhesive plug does not have a chamfer, you can use a haphazard method. Usually at the end of the row the bar is not whole. The rest of it goes to the beginning of the next row. The same procedure continues, with the only limitation that the “spread” of the seams should be more than 15 cm. If it turns out less, lay this piece through the row or a little later. The result is that there is no pattern of displacement (well, almost), and the joints are almost invisible.

If you bought a cork floor with a chamfer, the offset should be clear - the boundaries of the tiles are clearly visible, therefore there should be order. In this case, an offset of 1/3 or 1/2 of the length of the bar is applied. The consumption with this method of laying cork flooring is higher and this should be taken into account when purchasing.
Preparing adhesive cork floor tiles
The tiles are unpacked (all packs) and left for a day at room temperature. During this time, the tile will take on “working” dimensions and subsequently no cracks will appear. By the way, there are requirements for “ weather conditions": humidity 40-70%, temperature from +18°C to +30°C.
While the tiles are acclimatizing, they need to be sorted. This material is made from natural raw materials and defects are common. When sorting you will need masking tape(paper) we use it to indicate the defects found so as not to have to look for them again. We sort the tiles into three categories:
- without defects;
- with minor defects (dents, slightly broken edges and corners);
- with significant deviations (potholes, foreign inclusions, peeling of the decorative layer).
Next to each “marriage” we glue pieces of paper tape - this will make it easier to find. There may be a lot of tiles with defects, but that’s okay - there will be a place for them. We glue those tiles that have slight deviations near the walls. There is usually no direct light and these flaws are not visible. Severely defective tiles are placed last in the row. We choose one so that the defect is under the baseboard, and the remaining piece without flaws goes to the beginning of the next row.

There is one more defect that is difficult to see in a separate tile, but it is very clearly visible in the installation. It happens that decorative layer along the edge it is sanded so that the backing shows through. We review all “good” planks for this deficiency. We put them in the first or the last row along the wall so that the hewn edge is also under the baseboard.
There are also tiles different thicknesses, so everything needs to be checked according to this criterion. We take a reference piece (you can cut it from a defective plank), place it on one side and the other, run your finger, checking whether the thickness matches. We set aside the thinner ones. We will place them closer to the wall, where the differences are not so visible. For thicker ones, sand the edges. To do this, glue a strip of medium-grain sandpaper to the standard, grain side down, and grind off the excess from the wrong side. The cork rests on the floor, the sandpaper removes the excess. As soon as the thickness is equal, we stop. After such preparation, laying the cork covering with glue will be easier.
Marking
It is better to start laying cork flooring from the middle of the room. We find the center, through this point we draw lines perpendicular to the walls (at an angle of 90°). In this case, we will lay the tiles along the walls. If you want to lay the cork covering diagonally, draw the lines at 45° in relation to the walls. It is easier to beat them off using a painting cord (an ordinary cord smeared in blue).

Typically, the long side of the cork strip is placed along long wall, but this is optional. Having decided how you will lay out the cork tiles, you need to check whether the last strip will be wider than 5 cm. To do this, “dry”, tightly lay out the tiles in a row on the floor - from wall to wall. The gaps at the walls should be more than 5 cm. If not, move the tiles so that the rule is followed. You need to check along the “narrow” - transverse side. Next, you can lay cork flooring, but the process itself is more complicated for cork parquet, which will be discussed further.
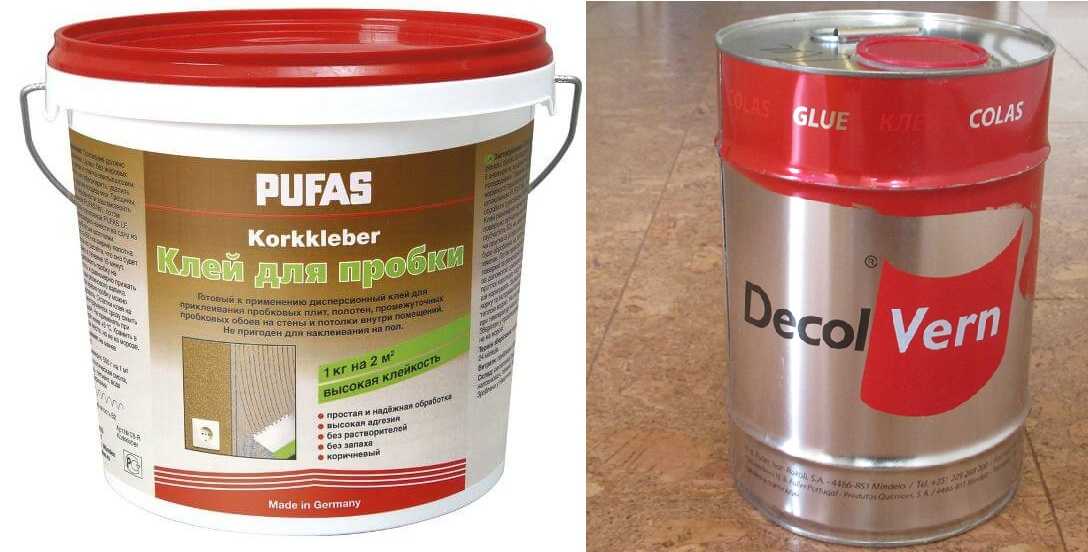
Glue for cork installation
This is very important point. When laying cork flooring with glue, manufacturers usually recommend a specific brand. It is advisable to listen to their opinion, but it is quite possible to use a replacement of similar quality.
Solvent-based neoprene contact adhesive is used to install the cork. It “smells” very much, so it is advisable to work in a well-ventilated area, but it is better to have a gas mask respirator. Without means of protection there can be a strong headache, vomiting, hallucinations may occur.
One more thing. Glue and its fumes are very flammable. Therefore, no smoking or even the close presence of fire. Just one spark ( short circuit, for example), leads to ignition. Even dried glue burns, but fresh glue generally glows over the entire surface. Therefore, handle it very carefully.
The glue is applied to the back side of the cork tiles with a velor roller and rolled out well in an even layer. It is poured onto the floor, then spread over the surface with a fine-tooth spatula. After application, the glue should dry for about 30-40 minutes (more precisely, see the instructions on the can), and the viability of the glue should be several hours, so there is time for gluing and eliminating defects. But it will no longer be possible to tear off the entire laid and “tapped” tile, so when laying the cork covering, we try it on well and only then begin to press it.

When coating the tiles, it is important to try not to stain front side- All stains show up under the varnish. If there are still stains, we remove them immediately after gluing with white spirit or another solvent for your brand of glue.
To make the work move faster, find a flat sheet (cardboard, fiberboard, hardboard, any other material) on which 5-10 tiles can be placed. Lay the tiles with the wrong side up, close to each other, joining the wide parts. You will get a path. We coat all the tiles at once and leave to dry.
Subsequently, to make the work go faster, it is better to have two boards on which the glue dries and coat two areas with glue on the floor. Wait 30-40 minutes each time - it will take a lot of time to install, and while the first one is installed, the second one is almost ready. We clean the freed board from glue, lay the next batch, coat it, etc.
How to cut cork
Cutting cork is simple - use a sharp blade along a metal ruler. If the tile is thick (there are 4 mm and 6 mm), approximately 1/3 of the thickness is cut in one pass. If the cut is hidden by the floor with a plinth, we lift the bar, bend it along the cut line, it breaks. If necessary, you can help yourself with a knife.

Sometimes the cutting line has to be joined. Then you will have to cut it off with a knife. You will have to do this 2-3 times, and in order for the cut to be even, the ruler must not move. To do this, several pieces of double-sided tape are glued to the wrong side of the ruler. To prevent the tape from being too sticky, it is “powdered” with dust, mortar, flour, etc.
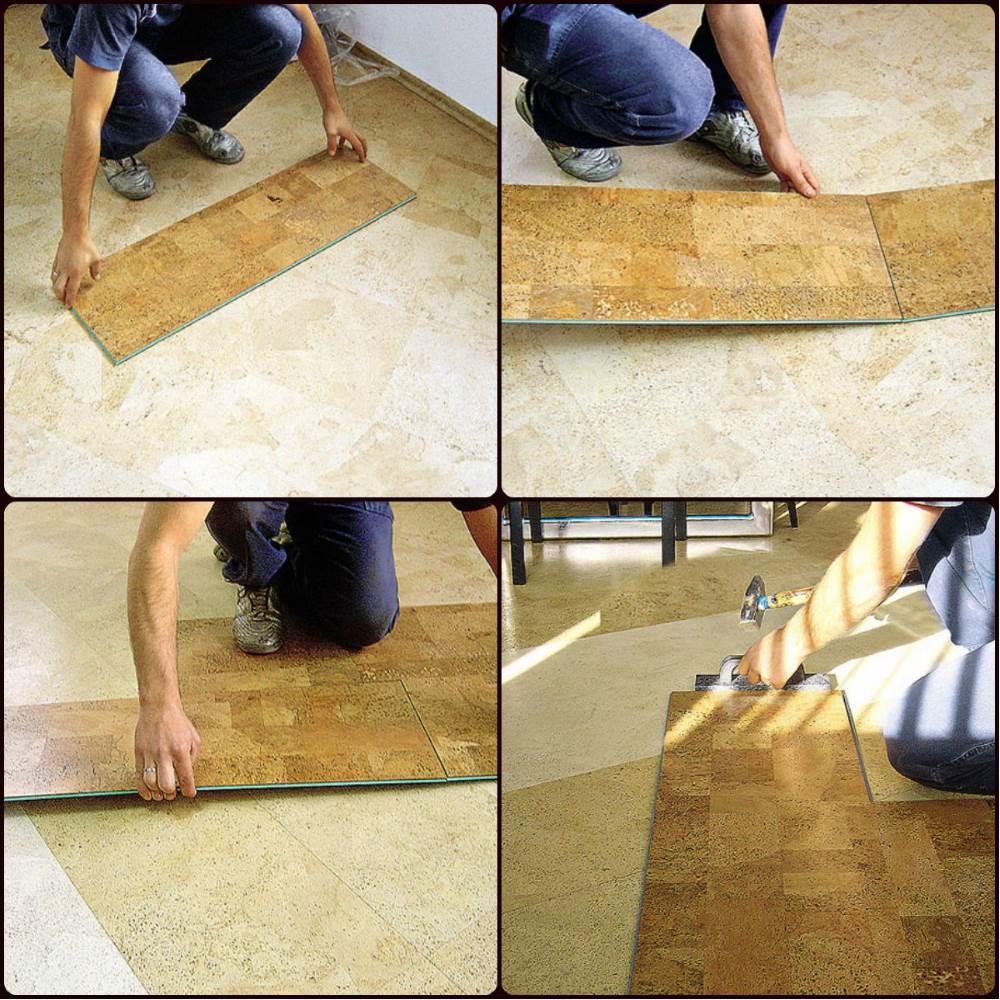
Installation process
Next, the actual laying of the cork flooring begins. We lay the first row along the drawn line. It is very important to lay it evenly, without distortions or deviations. All joints must be absolutely even, so in the first two rows from the “no defects” stack, select tiles with absolutely the same dimensions. They can be laid out on the unpainted part of the floor, checking that the size and thickness match.
Apply glue to the selected tiles and wait the allotted time. Let's start installation. Lay one edge strictly along the line. With the first one, everything is simple: they applied it, pressed it with their hands, and tapped it with a mallet.
The next one must be placed so that its edge overlaps the laid tile by 1-1.5 mm. This way the joint will be tight and cracks will not form even later. To do this, we try it on, holding it in weight, making sure that it does not stick. When you are sure that the edge extends to the required distance, you can lower the far end, align the long side of the plank exactly along the line, and install the second end end-to-end. A wave forms near the junction. It will straighten out due to the elasticity of the tiles, but the adhesive cork floor will more closely resemble a continuous coating and there will be no gaps between the tiles.

Glue the laid strip from the far end, first smoothing it with your hand, then tapping it with a mallet. The last thing we do is lay the “wave”. It is nailed with a mallet towards the joint. The result is a very tight seam. We lay all other tiles using the same principle. They should feel a little cramped. Due to the resulting wave, we compact the seam, and in subsequent rows, due to the elasticity, we also correct the discrepancies in the size of the planks.
When laying the second and subsequent rows, we also compact the longitudinal joint by creating “crowding,” but not to the same extent. We place the plank tightly, with a slight bend, against the edge of the laid one, then lower the opposite edge (the joint on the short side is still with a wave). We carefully tap each tile over the entire plane with a mallet, Special attention paying attention to the joints.
We cut the tiles near the walls so that there is a gap of 5 mm. This distance compensates thermal expansion floor covering and it does not swell when the temperature rises.
Difficult places
Installing cork flooring is rarely without complications. It's usually difficult to get around pipes. Try to ensure that the joint of the tiles falls on them. If not, cut the cork in this place. but not straight, but obliquely, so that the top front part lay on the bottom one.
In any case, first we make a template from thick paper or cardboard. We lay the cork floor so that there is less than one tile left before the pipes, wait some more time for the glue to dry even better, otherwise the paper or cardboard will simply stick and cannot be torn off without damage. In general, we wait about an hour or a little more. Now the template will not stick tightly. We cut out a piece of paper (cardboard) to the size of the tile, then cut out from it what we should get. We attach the corks to the sheet, trace and cut them out, then glue them in place. It will take a long time, but it will turn out beautifully and without flaws. If something goes wrong, the flaws can be sealed with parquet sealant before varnishing.
After installation, the entire cork floor must be rolled using a pressure roller. This is an ordinary roller, but its mass is 50 kg and it tightly presses the coating to the glue. Since not everyone has such a device, you can try to replace it by carefully stomping on the entire surface yourself. The weight is no less, so there should be an effect.
Cork plinth
The penultimate stage of laying cork flooring is installing a cork plinth. It is “tightly” glued to the floor covering, and then filled with varnish. Cork parquet laid in this way is absolutely airtight - a kind of trough is formed on the floor, the base of which is the baseboard. Therefore, we pay special attention to the fit - the joints must be tight.
The fitting process is not much different from installing a plinth made of conventional materials: the corners are filed using a carpenter’s miter box (how to do it correctly, read the article about ceiling plinth, but the floor one is also cut). A cork plinth adjusted to size is glued to the floor surface, but not to the wall. He just leans against the wall.

Cork flooring with a chamfer - so you don’t have to worry about visible joints
When choosing the length, the approach is this: cut it a little longer than necessary so that the joints are without gaps. After everything was cut, folded on a dry surface, the joints were checked (defects can be improved sandpaper) you can glue cork plinth. Apply glue to a strip along the width of the plinth on the floor, on the bottom side of the plinth itself, wait right time, glue it in place, pressing it well with your hands.
Now the floor is almost ready. The installation of the cork covering with glue is completed, the final stage remains - varnishing. We leave the finished floor to dry for several days (usually 72 hours, but check the instructions for the glue) and for now we try not to walk on it - so as not to move or stain it. After the glue has completely set, you can begin varnishing.
How to varnish
The varnish is applied in a few words with a velor roller. The number of rollers is based on the number of layers. Before varnishing, carefully inspect the cork floor for defects. There will definitely be some - you laid tiles with flaws, and in addition, new ones may appear during the work: an edge has become wrinkled somewhere, a dent has formed somewhere, etc. After the first varnishing, all these defects are covered with parquet sealant. The first layer is coming high consumption varnish, but a film never forms on the surface, but all the imperfections “come out” to the surface. We eliminate them. Please note that if the tile is already with a protective varnish coating(there are some), we use the sealant right away.
Take parquet sealant suitable color. Sometimes you have to mix several different colors To obtain desired shade. We use it to fill up recesses, chips, etc. We immediately wipe off the excess.

After applying the first layer of varnish, be prepared for all imperfections to become more visible and the surface to become rougher. We fill in all the flaws, after the sealant has dried, use medium-grit sandpaper to smooth out the roughness along the entire plane of the floor. Remove the resulting dust with a vacuum cleaner and wipe with a damp cloth. After drying, cover with a second layer of varnish. We pour it without sparing it, filling in all the irregularities (chamfers, if there are any too). Sometimes this is enough (the floor is smooth), sometimes a third layer is required. If the next layer is needed, use sandpaper with a slightly finer grain to remove roughness, remove dust, wipe, dry, and varnish. Do this until the result satisfies you.
There is a separate article about varnishing at home. You can read it.
Laying interlocking cork flooring
It’s not for nothing that this type of cork is called “ cork laminate" Laying - one to one. A substrate is required in exactly the same way, only it is better to use a cork one. The difference is that it is also recommended to lay a thick plastic film underneath. It is better if it is without seams, but it is possible to splice two panels together. For this you will need double-sided tape.

Two canvases are spread with an overlap of 10-15 cm. The knock is glued with two strips of double-sided tape. This ensures a sufficient degree of sealing. This layer cuts off the possibility of capillary suction of moisture in case the ceiling gets wet.
A substrate is laid over the spread film, and a cork floor with locks is already laid on it. The whole process is similar to laying laminate, and it is described.
Cork flooring It is distinguished by softness, environmental friendliness and comfort. This flooring is appropriate in a children's room and bedroom. He has high soundproofing characteristics. But in order for the coating to last as long as possible, the installation of cork flooring is carried out in compliance with technology. You can lay cork tiles yourself if you know some installation nuances and the specifics of choosing materials. We will also tell you how much cork flooring costs.
Types of adhesive cork for floors according to structure
Many useful and beautiful things are made from the bark of the cork tree, including finishing materials.
Floor adhesive plug has several varieties:
- adhesive agglomerated cork coverings;
- self-adhesive strips and tiles made from crushed cork;
- cork laminate.
Sinter plug
This type of cork is made from crushed material. It is then mixed with synthetic-based thermosetting resins and pressed. The result is blocks with a density of 450-800 kg/m³. The semi-finished product is cut into sheets up to 0.6 cm thick. Next, planks and tiles with a maximum width of 30 cm are cut out of these sheets on a machine. maximum length 1.2 m. Products are glued end-to-end because they have smooth edges.
Important! The cost of a cork floor made from agglomerated cork starts from $11.6 per square.
The agglomerated adhesive floor plug has the following features:
- It is allowed to be placed on heated floors. But in this case you need to use a special elastic glue, which is marked that it can be used for heated floors.
- Manufacturers do not recommend glue such a plug onto the screed with electrical system heating
- If as finishing coating varnishing or waxing is used, then material suitable for installation indoors with increased traffic and significant loads on the floor, for example, in the living room, hallway, kitchen.
- Adhesive cork floors successfully combined with other floor coverings (laminate, ceramic tiles, parquet).
Self-adhesive plug

This thin slabs veneered or traditional agglomerate. An adhesive layer is applied to the back side of the material. It is protected with paper on top to prevent the glue from drying out. Self-adhesive products are very convenient to lay on the floor, walls and ceiling.
Important! If you are interested in self-adhesive cork flooring, the price per meter starts at $13.3 per square.
This cork covering is produced mainly in the form of square tiles with a side of no more than 300 mm. Their thickness is in the range of 3.6-5 mm. Less common are adhesive-based planks with a width of no more than 180 mm and a length not exceeding 900 mm.
This adhesive cork flooring has the following features:
- The front surface does not have a finishing coating and needs to be protected from the ingress of dyes, water, abrasive compounds and household chemicals.
- Gluing is carried out without the use of additional adhesive mixtures, but for better adhesion to the base it must be carefully and correctly prepared.
- Gluing is allowed on floors with a water heating system.
- The self-adhesive plug can only be installed on the floor in a room with normal humidity, for example, in the bedroom, nursery, living room.
- The coating is suitable for interiors in eco- and retro style.
Attention! Craftsmen install adhesive plugs at a cost of $4.8 per square. This price does not include foundation preparation services.
Glue plug installation technology

Before laying cork flooring, you need to prepare necessary tools and materials:
- Before laying the coating, prepare the base. To do this, you will need repair and leveling compounds for a wooden or concrete base (epoxy or cement mixtures, self-leveling floors, plywood, OSB, chipboard, etc.).
- Tiles can only be glued to a primed base. Therefore for wooden base buy a fungicidal primer, and an adhesive primer is suitable for a mineral floor.
- The technology for laying agglomerated tiles requires the use of polymer adhesive.
- As a final protective coating use wax, oil, acrylic or polyurethane varnish.
- Brushes and rollers for applying protective compounds.
- To apply the glue you need a short-haired velor roller or a notched trowel.
- Level, tape measure, hygrometer, pencil, square, paint cord.
- Rollers or mallet for rolling the covering to the floor.
- Sponge to remove excess glue.
- Drill to perform technological holes and cutter.
Important! The material is laid after it has been left in the room where it will be installed for 1-2 days.
Work is carried out in compliance with following conditions in room:
- heating appliances should not be running;
- get rid of drafts;
- the optimal air temperature is between 18-25°C;
- relative humidity 55-65%.
Choosing adhesive for cork flooring

The adhesive installation method involves choosing a suitable glue. Thus, cork coverings without a finishing layer can be glued using water-dispersion compounds. Tiles with a varnish or vinyl protective layer are fixed using solvent-based adhesive.
It's important to remember that everything adhesive mixtures Solvent-based products are flammable and slightly toxic, so work is carried out using protective equipment and in a ventilated area.
Important! Glue on organic solvents It is environmentally friendly and less toxic.
Adhesive compositions for water based They don’t like contact with water, so if the room is flooded there is a risk that the tiles will come off. If work is carried out in the cold season, then it is better to buy glue that is resistant to cold and temperature changes.
Selecting a laying scheme
If you use square tiles, you can lay them out in only two ways:
- according to principle brickwork with a shift of the joint in each subsequent row by half an element;
- traditional checkerboard stitching, seam to seam.
Important! Rectangular and square shape laid diagonally in the room or traditionally parallel to the walls.
Regarding the elements rectangular shape, then they are laid in several ways:
- traditional staggered masonry;
- plain and triple brickwork;
- diagonal laying;
- herringbone flooring;
- deck masonry;
- network;
- flooring in squares.
Preparing the base
The step-by-step process of laying cork flooring begins with preparing the base. Since the elements are small in thickness, all defects in the base will be visible after they are laid. That is why the beauty of the floor depends on the quality of preparation of the base.

Requirements for the rough foundation:
- Compressive strength – not less than 150 MPa.
- The maximum permissible height difference is no more than 2 mm per two meters.
- The base should not have cracks, loose or rotten areas.
- There should be no traces of glue, soot, grease, soot, bitumen or remnants of the old coating.
- The residual moisture indicator for a wooden base is 8-12%, for a concrete base within 0.5-2 percent.
A mineral screed or sheet screed is suitable for leveling the base. wood materials with bridging edges. To fill the seams between the sheets, acrylic sealants or a mixture of PVA and sawdust are used.
To improve the characteristics of the base, deep penetrating and strengthening primers are used. If you need to increase adhesion to the base and make the absorbency of the floor more uniform, use an adhesive primer.
After this, begin marking the surface:
- Using a tape measure or laser level find the center of the room.
- Through the center, parallel to one of the walls, we draw a line from which we will lay the tiles. At diagonal laying the line is drawn at 45 degrees.
- We carry out a preliminary layout of the cork elements in a checkerboard pattern or with an offset.
- We cut the edge products to the required size, taking into account a centimeter gap around the perimeter of the room.
- If required, technological holes are cut in the elements.
- Sometimes the tiles are chamfered. To do this, the edges of the product are treated with fine-grained sandpaper, and the dust is removed with a damp sponge.
Cork covering is excellent option for residential premises in an apartment or private house. It has excellent decorative, heat and sound insulating properties, and is characterized by a long service life with strict adherence to installation technology. Cork can also be placed on other surfaces - floors or walls. So in an original way easy to create stylish room with minimal investment.
Cork floor installation cost
Approximate prices for cork installation services are indicated on the website. To find out a more accurate cost, you need to contact us. A technologist comes to the site completely free of charge, takes the necessary measurements and draws up an estimate. It includes the cost of work and materials. If necessary, also free of charge, you can get advice on any issue of interest that concerns the installation of the floor or the features of its further operation.| # | Name of works | Unit change | Uena |
|---|---|---|---|
| 1 | Laying cork on the wall | m 2 | from 350 rub. |
| 2 | Laying cork on the ceiling | m 2 | from 450 rub. |
| 3 | Laying decorative cork on the wall diagonally | m 2 | from 450 rub. |
| 4 | Laying adhesive cork floor covering (3 layers of varnish) on a prepared base is simple | m 2 | from 480 rub. |
| 5 | Laying adhesive cork floor covering (3 layers of varnish) on the prepared base diagonally | m 2 | from 580 rub. |
| 6 | Cutting the hole for the pipeline | PC. | from 350 rub. |
| 7 | Laying cork on the walls - designing the corner joint of the walls | m.p. | from 300 rub. |
| 8 | Varnishing cork floors/walls 1 coat of varnish | m.p./m2 | from 30 rub. |
| 9 | Installation of floor skirting boards | m.p. | from 120 rub. |
| 10 | Laying technical cork with glue on the floor, walls | m 2 | from 280 rub. |
| 11 | Laying technical cork on the ceiling | m 2 | from 380 rub. |
| 12 | One-sided cork cutting (approach close to fixed parts) | m.p. | from 300 rub. |
| 13 | Double-sided cork cut (joint of two cork materials) | m.p. | from 600 rub. |
| 15 | Primer of floors, walls | m 2 | from 30 rub. |
| 16 | Installation of interlocking floating cork floor. Easy installation | m 2 | from 250 rub. |
| 17 | Installation of interlocking floating cork floor. Diagonal laying | m 2 | from 380 rub. |
| 18 | Self-leveling floor to a height of up to 10mm | m 2 | from 250 rub. |
| 19 | Self-leveling floor to a height of up to 20 mm | m 2 | from 300 rub. |
| 20 | Self-leveling floor to a height of up to 30 mm | m 2 | from 350 rub. |
| 21 | Dry screed Knauf up to 6 cm | m 2 | from 450 rub. |
Types of coatings
Several types of material are used for flooring - solid veneer, agglomerate chips, mixed. The first type of cork is the highest quality, but it is also the most expensive. Also this material released in various forms, which determines the way it is laid. Highlight:
- technical jam. Available in the form of rolls or large plates;
- boards that are installed with glue. They can be rectangular or square;
- floating floor They are MDF panels covered with cork.
Installation using adhesives
Laying a cork floor using the adhesive method works like this:
- Preparation of the base - leveling, removing dirt, priming.
- The glue is applied both to the cork and to the surface of the base. It should dry for 10-15 minutes, after which you can begin installation.
- To better fix the panels, tap them with a rubber hammer.
- On finished surface varnish coating is applied.
Floating installation
The technology of work involves the following stages:
- The prepared base (flat, free of dirt) is covered with a thin cork backing in the form of rolls.
- The individual strips are connected to each other with adhesive tape.
- Cork panels are laid on the entire surface of the floor, which form one whole due to the presence of a locking connection.
- For getting high-quality coating After installing each board, it is tapped with a rubber hammer.
Where to order cork flooring in Moscow?
Our company installs cork flooring in Moscow. We take on orders of any complexity and install coatings in rooms of various sizes and functional purpose. Our company employs only professionals in their field, which guarantees high quality. During the order fulfillment process, step-by-step control is carried out, which eliminates any defects. Also, the commissioning of the facility will occur within the previously agreed upon time frame, which will satisfy even the most demanding client.
Search interesting solutions for apartment renovation? How would you like to install a cork floor? Don’t know what it is, what the benefits are for you and how to do it? Everything is very simple. Let's look at what cork flooring is and how to lay it correctly.
The material for making cork is the bark of the cork oak tree. The bark is removed from trees that are 25-30 years old, but it is not used in construction. Then, within 6-9 years, the bark is restored, it is removed again (if the technology is followed, no damage is caused to the tree). And this material is already used for the manufacture of various products.
According to technology, cork fabric can be divided into types:
- veneer is the most expensive type of cork;
- agglomerate - the most cheap option(made by pressing crumbs at high temperatures with the addition of various resins);
- combined - both pieces of veneer and crumbs are used for production.
Finished panels can be treated with various compounds that affect the properties of cork and give it greater strength and moisture resistance.
Pros and cons of the material
Benefits of cork floors:

- excellent heat and sound insulation;
- cork - the material is elastic and resilient, does not creak, does not slip, it is pleasant to walk on it;
- cork does not rot and is fireproof;
- the material is hypoallergenic, does not attract dust and does not accumulate static electricity;
- cork floors can withstand high pressure, including point ones.
Flaws:
- like any natural material, cost cork panels higher than the usual laminate or parquet boards;
- the base for the cork covering must be perfectly flat;
- if there are cats or dogs in the house, then claw marks may remain on the cork flooring;
- Over time, the protective layer wears off and tracks remain in areas of heavy traffic.
Return to contents
Types and options of cork flooring
- Floating type (you can find the name cork parquet). Available in the form of panels with locks and consists of a layer of cork glued to an MDF panel.
- The adhesive type is produced in the form of square or rectangular tiles. Sizes may vary. A protective layer can be applied on top.
- Technological cork is sold in the form of rolls or plates and is used as a substrate.
For final finishing The first 2 types are widely used, it all depends on your choice. It should be taken into account that if you plan to lay cork in a bathroom or toilet, then you need to give preference to the adhesive type. This is due to the way it is processed special composition which prevents the floor from swelling.

Floating cork flooring is best used in a room with a low level of humidity: in a bedroom, nursery or hallway.
To lay a cork floor with your own hands, you will need:
- Pencil.
- Roulette.
- Square for precise cutting of panels at right angles.
- Long ruler.
- Chop cord.
- Construction knife. It can be used to easily cut adhesive-type cork panels.
- Spatula or roller for applying adhesive to floors and cork boards.
- Electric drill. Useful if you need to drill holes, for example, for heating pipes.
- Fine-toothed hacksaw or jigsaw. These tools are useful for cutting floating panels.
- Rubber hammer for fitting cork slabs into place.
Return to contents
Cork flooring technology
Surface preparation
Before laying the cork covering, the surface must be leveled, if necessary. It must be dry, clean and primed.
You don’t have to remove the old flooring, but lay cork on top.
Laying cork flooring with glue:

- Before laying the 1st row of cork tiles, you need to use a construction cord to mark the main line along which its assembly will begin. This can be diagonal from opposite corners of the room or laid in a straight line along the walls.
- Draw a pencil line using a ruler along the chop cord.
- When working with glue, you must use a respirator, for example RPG-67. Cork tile adhesive is flammable and has a pungent odor. After work, the room must be thoroughly ventilated.
- Apply glue evenly to the base using a spatula or roller along the marked line.
- You also need to apply glue to the panel and let it dry for 10-15 minutes.
- Then attach the panel to the base and tap the entire surface with a rubber hammer.
- In some places it will be necessary to adjust the cork panels. To do this, marks are made with a pencil, using a square or ruler, markings are made and construction knife the excess part is cut off.
- After laying the tiles on the floor, it is necessary to cover it with 2-3 layers of varnish. A two-component polyurethane varnish is perfect for these purposes.
- The glue dries within 24 hours. It is advisable not to walk on the laid panels during this time to avoid their displacement.
The floor inevitably comes into our field of vision, forming the image of the room as a whole. It should be comfortable and beautiful, because every day you will have to come into contact with its surface. The main requirements include insulation performance, environmental friendliness, wear resistance, representative appearance. The choice of surface material should also include the specifics of the room, so the level of humidity and the number of visits to the bathroom, hallway and nursery are different. Among the many options, of course, preference should be given to wood. It is always in fashion and fits any style and color. This material is capricious and is unacceptable in rooms where the level of humidity is high, condensation and steam often appear. Thus, it is worth excluding the bathroom, toilet, and kitchen. Wooden floor– these are solid boards, MDF, laminate, and combined coatings. There is another way to arrange the floor in living rooms– do the installation of cork flooring yourself. This procedure will occupy the whole family, becoming a vivid joint memory. The material is pliable and pleasant to the touch, and its fixation and distribution do not require special skills.
Origin of the material, its types
Cork is comparative new material. Only in the 17th century did they begin to use it for clogging wines, guided by the properties of the material that did not affect the taste of the wine. Nowadays, cork wood is used in construction and decoration. This is a layer of cork oak bark that is removed from the tree starting on its 25th anniversary. It is during this period that the bark easily moves away from the branches and does not harm it. The material then goes through several processing stages, which currently work quite effectively with large volumes of cork.

Cork floors are divided into types, installation differs depending on this, therefore video instructions differ from each other depending on the type of material used. The most expensive material is solid cork veneer. This is a slice that can be of varying thickness. The form can be either solid - in the form of a board, or flexible - in the form of rolls. The surface color is yellow-brown, with a large natural pattern of dark, rich color. The material can be cut into tiles as whole piece It is difficult to spread out, and the surface under it is ideally prepared. Down side can be covered with a film for better adhesion of the glue to the surface.

Installing cork floor panels is like putting together a puzzle. In this case, a special technology is used for each board. The MDF base is covered with a layer of pressed cork chips, and then a section of cork veneer is glued to the front side. This type of flooring can use the scraps and scraps that are collected when making a solid cork sheet, so it costs less. In addition, those who are going to do the work of laying cork floors themselves will find it easier to work with this material. A separate category is cork laminate, which is already prepared for fastening and can be laid after preliminary calculation footage

There are also offers from construction stores, where knowledge of the technology for laying cork floors will help you create a masterpiece. We are talking about cork tiles, which are made from crumbs. Under influence high temperature it is pressed, resulting in a yellowish base tone speckled with small grains of a darker color. The properties of the material, such as elasticity, thermal insulation, environmental friendliness, are preserved in this case. The size of the tiles traditionally follows the parameters ceramic slabs- these are squares and rectangles with a side of 30, 60 cm. There are also smaller tiles, they are more reminiscent of parts of a stained glass window, thanks to their bizarre shape and small size. Only an experienced craftsman will be able to assemble it with high quality.
Laying work
Any construction and repair work requires concentration, remarkable desire and strength. In order for everything to be successful and the result not to disappoint, you need to choose the right materials in the store, calculate their required volume, find out where it’s best to start the work and what to do with the room after it’s finished. The work of laying a cork floor is not easy, as it requires accuracy, a good eye and patience, but from a technological point of view, even a child can handle it.

The basis is the subfloor. It must be smooth, clean and dry. If your base is made of concrete, clean it from dirt and dust, examine the surface for cracks and chips. If there are any, they need to be sealed with putty, and if the floor is completely covered with uneven surfaces, it is better to apply a layer of screed. Do not forget that the liquid layer must dry completely, which may take a week. A wooden floor can be additionally covered with a layer of plywood.

Next, you need to buy glue, depending on the type of coating you choose. The packaging usually indicates the parameters of this product, so you should rely on the instructions and advice of sellers. Do not use regular water-based glue, it will not dry completely and will transfer moisture to the cork, which will quickly swell and begin to peel off and rise in lumps.

In the case of cork flooring, we are talking more about panels different sizes, and it is very important to position them correctly. We start not from the walls, but from the center of the room. It can be determined by pulling the ropes from the corner to the prick and fixing their middle. It is from this point that the layout will go. It is important to maintain symmetry so that the strips of laid panels or tiles are parallel to the line of the walls.
Cork laminate and solid panels
There are two ways to lay cork flooring - glued and dry. Solid cork, laminate, and veneered MDF panels can be laid by attaching them to each other with special grooves. This type of floor is called “floating” or interlocking. On one side of the tile there is a narrow hole along the entire length, and on the other there is a ridge. One panel is placed under the other and snaps into place. This method is pleasant, since there is no need to fuss with glue, scrub it off and breathe in its vapors. This method requires a specially prepared layer on rough floor For better insulation. It could be polyethylene film, fastened at the joints with tape or a furniture stapler, and maybe a layer of wood. Laminate or solid cork flooring can also be laid over carpet if it is clean and level.

Laying cork flooring starts from the wall. The second panel is applied to the first panel, slightly at an angle, then it is lowered, and the lock latches itself. After laying the first row, you can move on to the second, and so on. It is better if the tiles are placed in a checkerboard pattern; to do this, you need to start with half a board every other row. Laying such a cork floor does not even require a training video; everything is intuitive. It got its name due to the gaps between the boards, which must be left (about 7 mm), and due to the lack of fastening to the wall - the plinth only hangs over the floor, without being attached to it in any way.
Tiles - the master's weapon
Cork tiles are a cheap coating, but they do not regulate the laying pattern, giving room for imagination. It is very important to work with glue correctly here. It is better to buy an expensive sample so that the work does not go down the drain. The first step is to distribute the tiles. To do this, we determine the center of the room, from which we begin to lay out the tiles dry. First, we determine the main points by laying out the largest tiles. Having covered the space of the room, we place small tiles in the crevices. Once you like the result, start gluing. It is made according to the same principle - starting from the center, with the largest tile. Remember that they must be adjacent to each other.

The glue is applied to both the tile and the base; the impregnation time for the cork is indicated on the packaging. The technology for laying cork flooring involves applying pressure to the tiles so that the adhesive adheres better. Excess should be wiped off immediately so that no stains remain; you can use a sponge for this. After the large tiles are glued, you can fill the space between them with smaller pieces. If you don't have the right size, you can cut the tiles into several smaller ones with a knife.
Laying a cork floor can take from one day to several, it all depends on the rough surface. If you filled the floor with screed, it is better to wait an extra day for everything to dry completely; if you laid a cork base, then the period may be shorter. When choosing a cork floor, take care of the baseboard to match. Knowing how to lay tiles, you can put together a whole composition using different shades of cork or even tinting it, but such panels are more suitable for walls.

A number of warnings
Cork also has a number of disadvantages. It swells and expands from moisture and shrinks from dryness and heat. These are normal properties of wood, so there is no way to get rid of them. Plus, it absorbs odors. Such a floor is unacceptable in a country house, which you leave closed and unheated for a long time, in the bathroom, where you constantly high humidity, in the kitchen, where food odors permeate the material.

Despite all the advantages natural material– softness, shock absorption when walking, a feeling of natural texture, there is also back side question - cork is not an antiseptic. In this case, you can see under a broken tile or in another area that there are probably microbes under the coating. This is a coating, a dubious liquid similar to glue.
Of course, if the surface is glued to the right glue, the humidity will always be normal, and you will clean regularly, the likelihood of getting to know germs face to face is minimal.
Care
The cork will serve you for a long time if handled with care. Sufficient for regular cleaning clean water or soap solution, but use chemical substances not worth it, there is a risk of damaging the natural surface. If you have a lot of furniture that also moves, it is better to fasten pieces of cork to the legs; this trick will avoid scratches. You should not use mats made of rubber or latex, such as those sold for yoga, as they leave stains on the cork that cannot be removed.
Cork flooring means warmth for your feet and the ability for your children to lie and sit on the floor. He will not allow such injuries from falling as concrete base, it will cushion as you walk, creating the effect of being in contact with nature. Choose high-quality flooring, follow the instructions and your apartment will gain an unsurpassed look and comfort.