Most domestic holiday villages do not yet have the opportunity to connect to centralized communications. In terms of infrastructure, it’s good if there are asphalt roads and power lines. In such conditions, building a brick stove for a wood-burning cottage will help solve an important problem: it will provide thermal energy for heating rooms and for cooking.
We have selected for you diagrams and orders of the simplest stove structures, the laying of which can be handled by a novice master. With our help, home craftsmen will easily master the basics of the difficult, but extremely interesting activity of a stove maker. An impeccably constructed structure will delight both the owner and household members.
Except detailed description masonry technologies brick stoves We provide valuable recommendations on the selection of materials for the construction of units. The article meticulously describes significant subtleties and the smallest nuances. To help independent stove makers, diagrams of stove structures, procedural instructions, photos and video tutorials are included.
Proper selection of material for a structure exposed to high temperatures is an important part of the job of a trained stove maker. After all, the unit will be operated in far from difficult conditions, and it should not malfunction, crack or collapse.
Option #1 – stove with a single burner panel
This is an extremely simple and compact design, seemingly elongated in the vertical direction. In the example, it is equipped with a door with heat-resistant glass, which allows you to monitor the process. If it is not possible to purchase just such a door, the cast iron variety is quite suitable.
Stove heating is not going to become obsolete at all. Wood-burning stoves made of brick continue to be built not only by the owners of village houses, but also by the owners of large country cottages. Another question is how much does it cost to hire a master stove-maker to build and buy necessary materials. The only way to save money is to build a brick oven with your own hands, having studied the construction technology according to the schemes - procedures presented later in the article. Of course, a beginner cannot build a Russian or two-bell stove with a stove bench, but you can overcome a heat source of a simple design.
Projects of simple brick stoves
The first thing you should worry about is choosing a home heater design that can meet your heating needs. We offer 3 options for simple designs, proven by many years of practice:
- duct-type heating stove, the so-called Dutch stove;
- hob with an oven and a tank connected to water heating or hot water supply;
- Swedish - a combined heater with a niche for drying things.
Duct stove - Dutch
Folding the Dutchman shown in the picture yourself is quite simple. She's different small in size in plan, but it can be placed indefinitely in height, while the internal vertical channels are lengthened. This allows you to heat a two- or three-story small house or cottage if you build a Dutch oven with a passage through the ceilings. A duct stove successfully burns wood of various qualities and satisfactorily heats rooms, although it cannot be called economical.
Reference. The Dutch oven warms up quickly, and after extinguishing it does not give off heat for long; the duration of combustion from one bookmark also leaves much to be desired. Its strengths are its ease of construction and low fuel requirements.

The plate shown in the photo is - convenient option For country house or a small dwelling in the village, including for use in summer period. A tank installed in the path of hot flue gases is capable of supplying hot water for heating systems or household needs.
Swedish brick stoves combine the advantages of the two previous heaters. In addition, they are economical, release accumulated heat for a long time and work equally well with wood and coal. But the masonry of a Swedish stove is much more complicated than a hob, plus it requires more bricks and purchased iron fittings.

Swedish oven built between the walls
Drawings and orders of stoves
 Stove order - Dutch
  Cross-sectional diagram of a Dutch woman
  The procedure for laying the hob
  Schematic structure of the plate
  Ordering a Swedish oven
Any brick stove transfers heat into the room in two ways: using infrared radiation from hot walls and through heating the air circulating in the room (convection). Hence the conclusion: for effective heating it is necessary that the heater, or at least part of it, be located in the heated room. Taking this requirement into account, we will give some advice on choosing a place for a building in rural house and at the dacha:
- If you need to heat one large room, then it is better to place the stove in the middle, with a slight offset to the side outer wall where the cold comes from.
- To heat 2-4 adjacent rooms, the structure must be placed in the center of the building, dismantling some of the interior partitions.
- Suppose there are 1-2 small rooms adjacent to the hall. You can go there water heating with radiators and circulation pump, connected to the furnace heat exchanger or tank.
- Do not plan to install the heater close to external walls. There is no point in warming them up; some of the heat will simply go outside.
- The hob and oven should go into the kitchen, and the hob should go into the living room or bedroom.

Advice. When placing the heater in the center of a private house, make sure that the future chimney does not fall into the ridge of the roof. It is better to move the building by 20-40 cm and bring the pipe through one of the roof slopes.
Partitions and floors made of wood or other combustible building materials located closer than 500 mm from the body of the stove must subsequently be protected with sheets of metal. It is advisable to lay a layer of basalt cardboard under them. In a stone house, these precautions apply only wooden elements roofs located next to the chimney.
Procurement of materials and components
The main building material from which a do-it-yourself stove is built is red ceramic brick. It must be of high quality and must be solid; stones with voids inside are not used in the stove business, except perhaps for the construction of outdoor grills and barbecues.
Advice. The Dutch one is so undemanding in terms of the quality of materials that it can be made from used red brick. Only upon completion of the masonry will it be necessary to refine it, for example, cover it with tiles or come up with a beautiful tiled decor.

To assemble a small-sized Dutch oven, you need to prepare the following materials and fittings:
- red burnt brick – minimum 390 pcs.;
- grate size 25 x 25 cm;
- loading door 25 x 21 cm;
- small cleaning and blower doors 14 x 14 cm;
- metal flap 13 x 13 cm.
Note. As mentioned in the first section, the Dutch oven can be laid out to any desired height. The specified number of bricks is enough for construction in a one-story private house.
List of components and building materials for the hob:
- solid ceramic brick – 190 pcs.;
- grate 25 x 5 cm;
- two-burner cast iron stove measuring 53 x 18 cm with disks;
- fuel chamber door 25 x 21 cm;
- metal tank - boiler with dimensions 35 x 45 x 15 cm;
- oven 32 x 27 x 40 cm;
- cleaning doors 13 x 14 cm – 2 pcs.;
- chimney valve;
- steel corner 30 x 30 x 4 mm – 4 m.
To save money, you can take on the manufacture of a tank for heating water yourself - simply weld it from metal 3, or better yet, 4 mm thick. There is another option: instead of a tank, place a coil inside the furnace, welded with your own hands from a steel pipe with a diameter of 25-32 mm. But we must remember that in such a water circuit it is necessary to organize constant circulation using a pump, otherwise the metal will quickly burn out.

To build a Swedish heating and cooking stove, you will need the same set of materials as for a stove. Just take a larger corner - 50 x 50 mm, buy a steel strip 40 x 4 mm and prepare fireproof (fireclay) bricks for laying the firebox. To install accessories, find soft wire made of steel with a diameter of up to 2 mm.
Advice on masonry mortar. Preparing natural clay, which experienced stove makers use to lay bricks, is a long and difficult process. Therefore, beginners are recommended to use ready-made clay-sand mixtures for constructing stoves, which are commercially available.
Laying the foundation
Before folding the stove, you need to prepare solid foundation. The structure is quite heavy, so placing it directly on floors, even flooded ones cement screed, unacceptable. The foundation of the stove is a separate structure, not in contact with the base of the building. If you are building a brick heater near walls or constructing corner fireplace, you need to make an indent of at least 150 mm so that there is a minimum clearance of 10 cm between the foundations.

If the floors in the house are covered with screed, then it is recommended to follow the following step-by-step instructions for installing a stove foundation:
- Dismantle the screed section and dig a pit protruding beyond the dimensions of the stove by 50 mm in each direction. The depth depends on the thickness of the upper layer of subsidence soil.
- Pour a sand cushion 100 mm high and compact it. Fill the hole to the top with rubble stone or broken brick, then fill with liquid cement mortar.
- After hardening, lay a waterproofing layer of roofing felt and install formwork protruding above the screed, as shown in the drawing.
- Prepare the concrete and pour the foundation slab. For strength, you can lay reinforcement mesh there.
After 3 weeks (the time for the concrete mixture to completely harden), place a sheet of roofing steel on the finished base, and on top - impregnated felt clay mortar or basalt cardboard. After this, you can begin to lay the body of the furnace.

Scheme of the base structure for wooden floors
To correctly lay the foundation of a stove under wooden floors, use the same algorithm, only instead of a concrete slab, lay out the walls of red brick (used) to the level flooring. Fill the void inside with rubble or crushed stone and concrete on top. Next is a sheet of metal, felt soaked in clay and a solid first row of stove masonry. You can get more information on the topic by watching the video
Today there are many options for heating a dacha: centralized gas, boilers, electric heaters.
But if all this is not possible to implement due to the area’s remoteness from civilization, a DIY brick stove for a summer house will become great solution.
Reliable and durable - it will gather around itself more than one generation of household members, providing the house with warmth and filling it with comfort.
The services of a good stove maker are not a cheap pleasure. Therefore, if you decide to implement a project at your dacha brick oven, it will be useful for you to read this article, in which we will tell you about the operating principle, features and layout of the furnace structure.
A brick stove can become not only a functional device, but also the main highlight of the interior if it is used correctly. Today there are many ways to beautifully veneer and decorate a stone stove.
No matter how much time has passed since the appearance of the first stove designs and no matter how far home heating technologies have come, the stone stove still does not lose its relevance. Compared to other types of heating (electricity, gas), it is more economical. At the same time, thick stone walls allow you to retain heat for another day after the firewood burns out.
According to their purpose, furnaces are divided into the following types:
- heating;
- cooking;
- multifunctional;
- combined.

- combustion chamber, which is purchased already in finished form, or laid out with fireclay bricks;
- an ash pit where ashes are collected;
- chimney.
This type of design also includes a fireplace with an open or closed firebox. It is used not only in decorative purposes, but also allows you to effectively heat a room with an area of 15-20 square meters. meters.
Depending on the selected material, wall thickness, masonry scheme, heating stoves may have different heat return.
Most popular view The stove is a one-brick construction. This allows the walls to be heated to 60 0 C. The famous Dutch ovens are laid out according to this scheme.
In terms of dimensions, the heating stove can be wide and broad, or it can have an elongated rectangular shape. It all depends on the area of the room, the style of the interior and the personal preferences of the owners.
Tiled tiles are usually used for lining such a stove. decorative plaster, decorative rock.
Brick heating stoves in the form of a three-sided prism look very stylish and original, but a beginner will not be able to implement this option, since it requires great experience. Of great difficulty is the cutting of bricks and the requirements for maintaining an angle strictly at 60 0.
Round stoves, which are laid out according to the design of the famous Russian furnace engineer V.E. Grum-Grizhimailo, also look beautiful and unusual. The furnace operates on the principle of free movement of gases. To ensure tightness, the outside of the structure is lined sheet metal. Such a stove can heat a large country mansion and will become a real decoration for any home.

The design of the stove consists of a brick body, inside of which there is a combustion chamber, an ash pan, and a chimney. There is a metal plate on top (an oven can be built in).
- A heating and cooking stove is already a multifunctional design.
This is a more difficult project to implement, as it consists of:
- combustion chamber;
- chimney;
- ash pan;
- hob;
- oven.
The stove looks massive and is usually chosen for dachas where there is no other heating option.
In our country, heating and cooking stoves are the most popular, allowing you to heat the house and prepare a delicious dinner for the whole family.
It can be additionally equipped with a drying chamber, where you can make preparations for the summer: mushrooms, berries, fruits. In cold and damp weather, you can quickly and safely dry clothes and shoes in this chamber.

By the way, ovens with drying chambers were first invented in the countries of Northern Scandinavia, where hunters and fishermen needed to dry clothes and boots in one night.
Many schemes of heating and cooking stoves have additional devices in the form of a comfortable bench, drying for firewood, an oven, and a water-heating tank.
Construction of a stove for a summer residence and its features
The main elements of any brick stove for a summer residence are:

10 basic rules for laying a country stove

Which brick stove to choose for your dacha?
The choice of stove design determines the size and type of room. For large cottages you will need a massive furnace structure with thick walls, which will take a long time to heat up, but at the same time can long time maintain temperature. Building such a stove is not an easy task. This will require some experience and knowledge.
But even a beginner can handle a small stove for heating a small dacha if you strictly follow the diagram and do not change the laying rules.

The first place in the popularity of heating and cooking stoves is worthily taken by the Swede, which enjoys well-deserved love and respect among Russian stove makers.
This design is a compact, ergonomic shape with a small cooking surface and a three-channel chamber. It is ideal for a small cottage, the length ranges from 880 to 1250 mm.
For the location of such a stove, the place most often chosen is between the kitchen and the living room. Thus, the stove performs a double function: it serves for cooking and decorates the living room with a fireplace.
Today you can find hundreds of different layouts for laying a Swedish stove with a hob on the Internet, so it won’t be difficult to implement it for your dacha. Many stove makers contributed to standard scheme masonry is an additional option, so each design is named after its creator: Buslaev’s, Kuznetsov’s stove, etc. But the principle of operation in them is the same.
Traditionally, a Russian stove can be called a bulky, massive structure, which is decorated not only with a hob with an oven, but also with a spacious bench.

This stove is not only a functional device for cooking, but also a place for relaxation. It allows you to warm up the room well, retaining heat for a long time, and has a beneficial effect on the human body, thanks to which the owners of such stoves are less susceptible to colds.
The building usually has two fireboxes (main and additional). Thanks to the special design of the oven, heating is carried out evenly, from bottom to top. Any solid fuel is suitable for kindling, and there are no particularly strict requirements for the materials for laying a Russian stove.
A special place among small heating and cooking stoves is occupied by the little V.A. Potapova, created by a famous engineer at the beginning of the 20th century. To lay it, you need only 211 bricks, and the dimensions of the stove are only 630 * 510 mm.
Moreover, this little thing contains a single-burner stove, a small oven for baking and a hood. This type of stove would be an excellent solution for a small garden house or one-room cottages.
In this article, we invite you to study the rules and main points of laying a small heating and cooking stove.

Do-it-yourself stove laying
Step 1. Select a brick and prepare tools
Which brick to choose for laying a small country stove? We will need 2 types of bricks: fireclay (heat-resistant) for the construction of the firebox and red ceramic (at least M-150). You should not skimp on materials; the further performance properties, safety and efficiency of the furnace depend on this.
Fireclay brick can be easily recognized by its yellowish color and porous surface. The composition of this material includes refractory clay and crumbs. This material, in addition to its heat-resistant properties, is also valued for its ability to accumulate heat for a long time. Even after the firewood has completely died out, such a stove is capable of giving off heat for a long time.

Heat-resistant fireclay bricks can withstand temperatures up to 1500 0 C, so the combustion chamber must be made exclusively of this material.
The smaller the mass of fireclay bricks, the greater the number of pores it contains, which are created by aluminum oxide. Such a brick will conduct heat very well. The cost of this material is almost 5 times higher than the price of red brick, but there is no need to save.
But it’s also not worth laying out the entire stove from fireclay bricks; the outer part of the structure does not heat up much, and red ceramic bricks look more attractive.
When choosing bricks for the stove, pay attention to color and shape.

You can test the material. If you throw a brick from a height of 1.5 meters and it doesn’t break, take this batch. But a bad, overexposed brick can split into several parts. Such a brick makes a dull sound when falling.
The brand of brick for lining the furnace should be M150 or M200. The number in this case means how much weight the brick can withstand per 1cm 3 .
Do not take silicate and hollow brick. It's not even a matter of the ability to withstand high temperatures - they can handle that. Sand-lime brick It conducts heat poorly and a room with such a stove will not be very comfortable.

For masonry mortar you will need sand, red oven clay and water. It directly depends on its quality and consistency. appearance and durability of the oven. To prepare it, you should use red oven clay of medium liquid. When frozen, it should not fall off or crumble.
The masonry will be made with a thickness of 0.5 mm, in which case the precious heat will not escape quickly.
You can also use ready-made masonry mortar, which is sold in stores. Usually it contains various impurities that add strength and heat resistance to the structure. In this case, it will be enough to dilute the dry mixture with water and bring it to a homogeneous state using a construction mixer.
The consistency of this solution should resemble thick sour cream. If the mortar rolls off the trowel, you need to add more dry mixture. If it turns out to be too thick, then it will be difficult to work with it and make thin seams. Add some cold water and stir again.
So, to build a furnace, we will need the following materials:

- Masonry mortar (sand, red oven clay).
- Red ceramic brick M150 – 120 pieces.
- Fireclay bricks – 40 pieces.
- Foundation material (cement, graphite, sand).
- Ruberoid.
- Asbestos cord, galvanized wire.
- Plywood or boards for creating formwork.
- Reinforcing mesh for foundation construction.
- Grate.
- Metal stove for one burner (cast iron).
- Ash pan and ash pan (blower) door.
- Cast iron firebox door.
- Chimney duct damper.
- Chimney view.
- Metal chimney cap.
Tools needed to build a furnace.
- Building level.
- Shovel
- Construction marker.
- Goniometer.
- Spatula, rule.
- Master OK.
- Measuring tape (roulette).
- Construction plumb.
Important! When laying a furnace, much depends on the quality of the clay. Ideally, use red river clay of medium fat content, which has been on outdoors at least 2 years. Make exactly as much solution as you can handle in “1 go”. The solution quickly becomes thick and difficult to work with.
Step 2. Preparing bricks for laying the stove
Before starting to lay the stove, it is necessary to lay out all the bricks in advance and prepare them according to the ordering scheme.
This stage includes dividing the brick into ½ or ¼ parts and cutting off the corners.

Study the diagram carefully and see which pieces of bricks you will need for each row.
If necessary, you can number the brick so that later it is easy to navigate which row to insert it into.
How to properly split a brick? Before “beating off” the required part of the brick, according to the diagram, you first need to make a groove. This can be done using a hacksaw or file.
To make ½ brick, make 1 groove.
For 1/6 or 1/8 brick, make a groove on all sides of the brick.
Step 3. Choosing a location for the oven
This is a very important stage in laying the stove, which is advisable to carry out at the stage of building a house.
But there are times when the decision to lay a stove arises among home owners already in the process of using the dacha. In this case, determine the place where it will be easiest to remove the chimney.

It is also important to evaluate the distance between the stove and windows and doors. After all, cold air blowing from the doors can interfere with the natural circulation of heat in the house, reducing the efficiency of the stove.
In addition, the stove should not interfere with free movement around the room. It should become one with the space without creating inconvenience. In many ways, the placement of the stove depends on the purpose.
The heating and cooking model is best placed in the kitchen, and the fireplace stove will look beautiful in the living room.
- The distance to the nearest wall should be at least 25 cm.
- The chimney must not pass through beams.
- The floor and wall will have to be lined with fire-resistant material.
- It is better to place the fireplace near interior wall Houses. To increase efficiency, it makes sense to install a stove in the space between the kitchen and living room. Thus, one stove will heat two rooms at once.
An excellent place to place the stove is the corner of the room, only if there is no Entrance door, from which cold air will blow out the flame.
Step 4. Construction of the foundation
To build a brick kiln, it is necessary to make a separate foundation. If it is laid during the same cycle as the construction of a house, completing it is not a difficult task.

If you decide to lay the stove after completion general construction, then it will be necessary to remove part of the finished floor and go deeper into the ground.
Why is it so important to perform a separate foundation? A brick oven, no matter what size it is, has a lot of weight, which will create a lot of pressure on the foundation. When shrinking, the house will sag. This should in no way affect the shape or design of the stove.
That is, the general foundation of the house should not pull the stove along with it, as this can lead to a violation of its sealing and deterioration of its technical properties.


Attention! Before laying bricks on the mortar, lay out all the bricks “dry”. First, it will allow you to see if you have enough material. And secondly, you will be able to see difficult moments at the draft stage that you will have to pay special attention to.
Step 5. Laying the stove
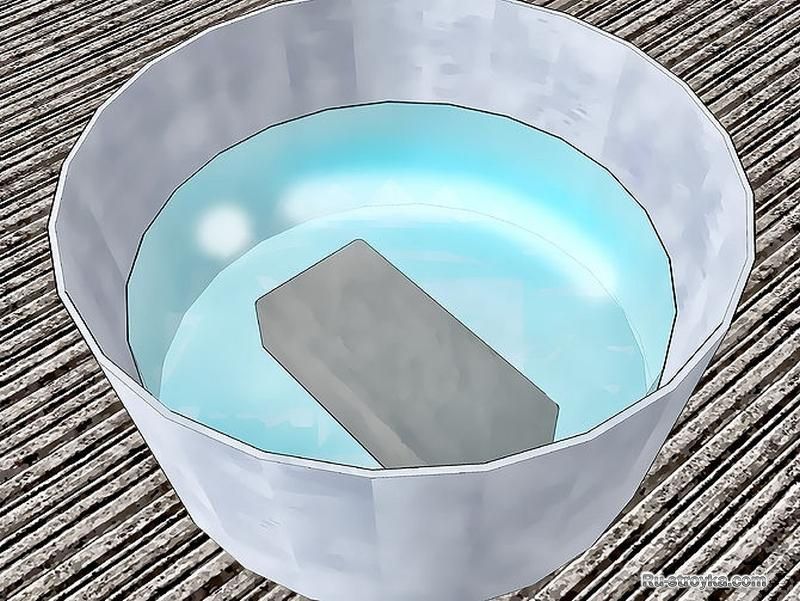
Attention! Before laying the stove, place the bricks in a bowl of cold water so that they absorb moisture. This way they will not draw water from the masonry mortar.

Fill this gap with sand. The entire area under the stove will be practically occupied by grates, which will ensure good and easy care of the stove, as well as complete burning of the wood.
We block the ash door with a brick.

Installation of the combustion door
We install the combustion door, having previously wrapped it with asbestos cord. To make it easier to install, place the door on a thick wire and support it with bricks on both sides. Then these bricks will need to be removed.

- 6th row. Closes the furnace door.
Here we begin to form a smoke channel pipe, creating overlaps for two vertical channels.
We lay the base of the firebox, which is made of fireclay bricks.
- From rows 7-9 we lay out the firebox with fireclay bricks according to the diagram.
In this row, two bricks covering the grate should be cut at an angle of 45 degrees.
- Row 10 - cover the oven. We create a partition from brick, raising it by 2 cm. Apply a clay-sand mortar to the oven, to the level of the partition. We are preparing a place for installing a hob.
It is necessary to make recesses in the bricks for reliable fixation with the slab and create thermal niches for the expansion of the metal. Immediately place the slab on a dry surface and number the bricks - this will make it easy for you to later lay the brick on the mortar and avoid making mistakes with the correct recesses for the slab.
We lay an asbestos strip on the brick (to expand the metal).


Step 6. Exit the chimney through the roof
This is a responsible step that should ensure complete safety of the furnace operation.
Follow the SNIP standards when withdrawing brick pipe through the roof. According to these standards, the gap between the roof and the chimney must be at least 13-25 cm.
Insulation is required around the pipe passage through the roof. thermal insulation materials. This will provide reliable protection from cold air blasts and ensure reliable fire safety.
If the stove is being installed in an already residential building with a finished roof, it will be necessary to remove part of the roof. After installing the pipe, you will need to completely ensure the integrity of the roof in this place so that during rain or snow, moisture does not get inside.
To waterproof a stone pipe, a special plate is used, which resembles a kind of pedestal around the chimney. The joining of slate and metal plate is done using sealant.

If you want to simplify the task, then the chimney will not be difficult to complete using steel pipes kind of sandwich. They have a stylish look and are easy to assemble. In addition, they have much less weight than brick and will not create as much pressure on the foundation.
Defining required height chimney, be guided not only by the height of the roof, but also by the height of the ridge.
The efficiency of heating the room and the presence of draft directly depend on correctly calculated parameters.

The edge of the pipe must protrude above the “ridge” of the roof by at least 0.5 meters, otherwise the turbulence that forms around the roof can prevent good draft and will constantly blow cold air into the chimney.
We complete the construction of the chimney with a metal grate. It will prevent debris from entering the chimney.
We put a metal cap on top, which reliably protects the pipe from precipitation.
Step 7. Furnace lining
There are many ways to beautifully veneer a stove for a summer cottage.

The decorative material can be clinker tiles, tiled tiles, decorative plaster, artificial stone, etc.
Or you can simply leave the stove in its original form, especially if you bought high-quality, beautiful brick.
Please note that any facing material reduces heat transfer. Therefore, if you do not want to lose thermal properties, you can cover the oven thin layer decorative plaster.
Step 8. Lighting the stove
After completely lining the furnace, you need to take a technological break for 10-14 days until the structure is completely dried. Leave the door wide open.

When you are sure that the masonry mortar is completely dry, you can carry out the first test firing of the stove. There is no need to rush and immediately, after laying, light the firewood.
Premature lighting of a damp stove can cause it to crack. For the first time, use ¼ of the firewood, add small logs. This will allow the structure to dry well from the inside. Do not exceed the maximum temperature of 60-65 degrees in the first week of operation.
- Do not use trash for kindling.
- The firebox door must be closed when lighting.
- Warm up the oven gradually, do not immediately turn on high heat.
- Use high-quality, well-dried firewood.
For ease of use country stove, you can make a stylish one with your own hands, which will become a decorative and functional element in everyday life.
As you can see, if you follow a clear ordering scheme, it is not so difficult to build a beautiful and high-quality country stove.
Video: Laying a brick kiln “dry”
Below we provide a detailed master class on laying a brick stove for a summer cottage.
Video. Master class on laying a stove for a summer residence
Despite the rapid development of new technologies and improvements in home heating methods, the old proven brick stoves for wood-burning cottages still do not lose their relevance.
Indeed, often in houses remote from civilization or located in areas where there are power outages and gas supply is not expected at all, wood-burning brick stoves are the only possible means of heating the room.

But sometimes people deliberately choose brick stoves for their country house, despite all the benefits of civilization. After all, they help create that unique comfort, give the warmth and atmosphere of solitude that we all look for when going out of town.
We’ll talk about the advantages, design principles and features of laying a brick stove with your own hands today in this article.
The experience of folk craftsmen and engineer-inventors has given the world a considerable number of types of stoves, from which it is not difficult to choose the only one for the dacha that will quickly warm up the room in the winter cold and help prepare food.
But, despite all the variety of stone stoves, they can all be divided into 3 categories:
- cooking;
- heating and cooking;
- heating structures.
In addition, you can also find multifunctional designs that combine a fireplace, water circuit, etc. Therefore, before you start building a brick stove in your dacha, you should immediately decide on the type of construction.
- Cooking type of construction. This type of stove is chosen by cottage owners only if the house is used only in the summer. This option works well in combination with a water heating tank. Often, owners install such a stove in a house where there is gas and electricity supply, but in order to save money, it is more rational to use a wood-burning stove in the summer.

The design is a stove with a hob, a water-heating tank and an oven.

Furnaces for summer cottages are also divided according to the type of construction:
- Russian;
- Dutch (Dutch);
- Swedish (Swedish).
Of course, today you can find many other variations of wood-burning stoves, but these are the most common, which have proven themselves due to their high efficiency, reliability and efficiency.
Russian stove
This design has been used by our ancestors for centuries, and its main feature is the arrangement of a bed and shelf for drying shoes and clothes. If the house is in use all year round, then this option is very effective. But for summer cottage It is better to refuse the Russian stove.

The fact is that the high efficiency of the Russian stove is achieved only with constant combustion. If you leave such a stove for the winter, then it will take more than one day to then dry it and “put” the stove into operation. Due to its technical features, it quickly gains moisture without a firebox.
In addition, when a wet brick is fired for the first time, it may crack.
The Russian stove is a fairly massive structure, so it will not always look appropriate in a small dacha.

The only advantage is the unpretentiousness of the material itself for the construction of the furnace and a fairly simple masonry scheme.
Dutch
One of the most popular types of stone stoves, the design of which involves the presence of a smoke channel. Thanks to this, the Dutch oven effectively heats several rooms at once.

The advantages include:
- small dimensions;
- high efficiency;
- fuel efficiency.
But the disadvantages of such a stove are high requirements to the quality of building materials and the quality of firewood. In addition, at sub-zero temperatures outside, such a stove takes a long time to warm up, so it is better to constantly heat it.
Swede
This stove is deservedly popular in our country, as it was designed taking into account the harsh climate northern countries. The advantage of the Swede is its compactness, high performance, fast heating and the ability to heat several rooms at once.

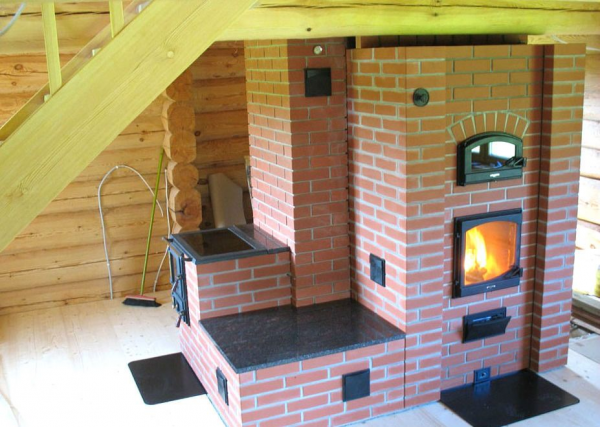
This is achieved thanks to the special design of the furnace. The back side with the fireplace usually opens into the living room, and the front side has an oven and hob. For a summer residence, this type of stove is the most optimal choice.
The only drawback of the Swede is the high requirements for the quality of the material. If a Russian stove can be made from leftover material, then for a Swedish stove you will have to purchase high-quality red ceramic bricks.
Also, high demands are placed on Swedish firewood. They must be well dried, otherwise the stove will not give off heat.
Features of the design of a brick stove for a summer residence
Depending on the type and design, the oven can perform the following functions:
- Cooking (frying, boiling, stewing, baking, etc.).
- Drying shoes and clothes, as well as preparing food for the winter (mushrooms, berries).
- Heating of beds.
- Opportunity to admire an open flame on winter evenings.
In addition to the functional classification, before building a brick stove for a summer residence, you need to decide on the configuration.

- rectangular heating stove;
- T-shaped;
- round oven;
- Russian stove with a stove bench;
- little one.
The size of the oven is also important. The large oven design with thick walls can distribute heat over 50 square meters. But in order to warm them up well, it will take at least two hours, which is not always convenient.
This especially causes discomfort at the dacha, where the owners only visit on weekends. A cold house will warm up for at least 3-4 hours before the room temperature returns to normal.
A small oven big house do not warm up. Its heat is enough for a room of 15-20 square meters. meters. At the same time, it will warm up in 30-40 minutes, giving off heat around. In addition, we should not forget about the efficiency of the stove. For a large stove, you need to take care of the supply of firewood in advance and prepare a large one in the summer.
A stone stove also has a significant drawback - the inability to heat distant rooms of the house. That is why in big houses where there are several rooms, 2-3 stoves are placed, each of which has its own chimney and performs its own function.
According to the principle of construction, brick ovens can be:
- Duct with forced movement of gases.
- Bell furnaces with free gas movement.
Channel stoves include the usual “Dutch” or “Swedish” stoves. The combustion of wood occurs in the firebox, from which a smoke channel extends. Under the influence of draft, combustion products are discharged through this smoke channel.
The main objective of this design is to maximize the heating of the furnace wall, and after that the heat will spread throughout the entire room for a long time.

Despite the simplicity of the design, such a stove has a number of disadvantages.
- It all depends on the traction force. The narrow channel obstructs the air flow and requires a high enough chimney to overcome this resistance to the flow. In houses with low ceilings, this is not always convenient. And as a result, after installing the furnace, the owners are faced with the problem of poor draft in the furnace.
- In addition, the principle of the channel structure of the furnace involves the concentration of hot air at the top of the furnace. That is, most of the heat is transferred to the upper part. Because of this, downstairs, near the floor, it can be quite cold.
- The efficiency of such units does not exceed 60-65%. And the average, with standard traction, is even less - 40-45%.
- Due to the large design, such a stove takes a long time to heat up. To heat a structure “from scratch” will take 2.5-3 hours.
Furnaces with free movement of gases show themselves in a completely different way in everyday life. Their principle was first described by Lomonosov, and later refined by Kuznetsov, which is why in everyday life such furnaces were called “blacksmiths”.
The operating principle is based on the movement of free gases. As we know from physics, hot air rises, displacing cold air. In such a furnace, the firebox and combustion chamber are combined, and hot air circulates freely from one chamber to another.
Such ovens also have a second and sometimes a third chamber, which are connected to each other by a dry seam located at the bottom of the chamber.

Features of laying a brick oven with your own hands
What nuances do you need to know before starting to lay the stove?

Materials needed for laying the stove.

Tools needed for laying the stove:
- Building level.
- Shovel
- Construction marker.
- Measuring tape (roulette).
- Construction plumb.
- Goniometer.
Important! A lot when laying a stove depends on the quality of the clay. It should be moderately thick and have medium fat content. Red river clay, which has lain in the open air for at least two years, is considered ideal for constructing a stove. Clay, under the influence of precipitation and natural factors, becomes plastic, homogeneous and will firmly hold the masonry.
Laying a brick oven with your own hands: step-by-step instructions
If all conditions of the instructions are met, laying the furnace will take 30-35 days. Great importance there is order here. You should not violate it or try to introduce your own adjustments into the design. The laying of rows, their number and installation of elements are clearly verified and require strict adherence to the instructions.
Below is a diagram of the arrangement of a brick oven with a hob and oven.

Step 1. Determine the location of the furnace.
Once you have decided where you will place the stove: in the corner, in the center or against the wall, you should clearly mark on the floor the location of the stone structure.

In order to clearly guess with the construction of the chimney and not run into problems when laying the pipe wooden beam roofs, we use a plumb line.
- We draw a diagram of the placement of the stove and the location of the firebox, chimney, hob and oven.
- Consider the location of windows and doors that will impede the free circulation of warm air.
In order for the stove to serve for a long time and delight you with its maximum performance, we will give several recommendations regarding its placement. And the point is not only in compliance with fire safety rules, but also in the efficiency of its work.

Today we propose to consider the features of a brick stove with a hob, since it is this type that is very popular among summer residents. Our detailed ordering diagram will help you build brick stoves for a wood-burning cottage.
Step 2. We build a foundation for the stove.
The construction of any furnace begins with the construction of a foundation. This is very important step, on which the strength will depend, reliable design and its effectiveness.

Ideally, of course, design a stove before building a house. Then the ideal place for the stove will be allocated, and the foundation will be laid at the stage of erecting the floors. But often people think about laying a stove after furnishing their home. Therefore, we chose this option so that you can build a foundation from scratch in an already finished house.
The foundation should in no case be connected to the main foundation of the house. When the house shrinks or other phenomena occur, the base of the stove should not be deformed.

- Using a construction marker, mark a rectangle on the floor along which you want to cut the boards.

Keep in mind that the size of the foundation should exceed the size of the stove by 10-15 cm on each side.
- Using a grinder, we cut out the boards according to the markings and move them to the sides.
- Now you need to go 70 cm deep into the ground to build a solid foundation for the stove. For this we use bayonet shovel. Focus on the layer of soil that will freeze in winter. In central Russia, it can reach 80-100 cm. In this case, you will have to increase the depth of the pit. It is very important to properly insulate the perimeter of the foundation. If you are building a stove in an already finished house, where the common foundation is well insulated around the perimeter, then you can dig a hole of 30 cm. This will be enough.

- After a pit has been dug in the ground along the perimeter of the marking, we proceed to the construction of wooden formwork. The formwork functions as a skeleton that forms the foundation. For formwork you can use plywood boards, old floors, etc.

This will not affect the quality and strength of the foundation in any way. Measure the length and width of the hole you dug and cut the boards to this size. Using nails, put together the formwork. It should end 14 cm before the start of the finished floor.
- After the formwork is built, it is necessary to protect the wood from moisture that will be contained in the cement mortar. To do this, we lay thick polyethylene around the perimeter and connect it to the walls with a construction stapler. Waterproofing is the most important component of the work when constructing a foundation. If frozen, moisture-saturated soil comes into direct contact with the concrete base of the furnace, then a force equal to 25 tons per 1 square meter will press on the foundation, which leads to destruction
- Now you can start filling cement mortar, but before that you need to create a durable cushion that retains moisture. At the bottom of the hole, pour medium-hard gravel and add 10-15 cm of sand.
- We fill the foundation with cement mortar to the height of the formwork, not reaching the finished floor by 14 cm.
- We lay a reinforcing metal mesh on top.

Level the top well with a shovel and check with a building level how even the surface is. Now you need to wait 24-28 days, depending on the quality of the cement mortar, until the foundation is completely dry. Do not rush under any circumstances and do not lay the stove before this time, otherwise it will become deformed within a few weeks.
- On a flat and well-dried concrete surface, we lay two continuous rows of bricks along the perimeter of the foundation. Thus, our foundation reaches the finished floor.

- Now it is necessary to lay a layer of roofing material on top of the masonry in 2 layers, which will serve as waterproofing.

- The solid foundation for the brick oven is ready - you can proceed directly to the laying. But, before laying bricks on the mortar, it is better to lay out the entire structure, according to the diagram, “dry”. First, it will allow you to see if you have enough material. And secondly, you will be able to see difficult moments at the draft stage that you will have to pay special attention to.
Attention! It is also recommended that each new layer be done dry first. This is especially true for beginners who are faced with laying a stove for the first time. After laying bricks on the mortar, it will be difficult for you to correct your mistakes and errors.
Step 3. Preparing bricks for masonry.
Immediately measure the amount of brick that you will need for the first stage of work. Please note that laying a stove is a complex and labor-intensive process and cannot be completed in a day. Be aware that beginners will be able to complete 4-5 rows per day, no more.
Take a portion of red ceramic bricks, clean it well and soak it in water for 12 hours.

When you lay out a firebox made of fireclay bricks, you just need to rinse it with water.
The process of preparing material for masonry also includes dividing the brick into ½ or ¼ parts and cutting off the corners. Look at the diagram to see what shape of brick you will need for each row. It’s better to do this right away, so that later, when laying the row, you won’t be distracted by these moments.

Splitting the brick also needs to be done at this stage. Keep in mind that before “beating off” the required part of the brick, according to the diagram, you first need to make a groove.

In this case, one longitudinal groove is enough for ½ brick. But if you need to chip off 1/6 or 1/8 of a brick, then the groove is made on all sides of the brick.
Step 4. Prepare the mortar for masonry.
The correct mortar for laying a stove is the key to its efficient work. If you decide to lay a brick stove for a wood-burning cottage with your own hands, then it is better to prepare the solution yourself.
Video. Furnace laying. We make a solution from clay with our own hands.
Although on sale now you can find ready-made factory mortars for laying a furnace, which are of good quality.
For this you will need sand and red river clay. Clay is the irreplaceable material without which no masonry mortar is unthinkable. Thanks to your unique properties, soft and plastic, it, under the influence of fire, turns into a durable stone.
After firing, it acquires the strength of a brick and can withstand high temperatures. However, in order for it to be truly strong and reliably fasten the masonry, it is necessary to observe correct proportion all ingredients.

One of the main indicators of clay quality is its fat content. If you take “skinny” clay, then when heated, it may crack.
We will not indicate the exact amount of ingredients, since there is no ideal proportion. Depending on the quality of the clay and its fat content, the solution is made “by eye”.

It should have the consistency of thick homemade sour cream and should not drip from the trowel. At the same time, in no case should there be grains in it, so the solution should be thoroughly kneaded.
We measure out the required amount of clay that will be needed for masonry and fill it with water. There is no need to immediately prepare the solution for the entire oven if you do not plan to finish the masonry in 1 day. Measure out exactly as much as you can complete.

Attention. Clay mortar is not suitable for arranging the foundation and chimney. Typically, cement mortar is used for this.
Step 5. Build the oven.
The first row is very important in the oven and the entire shape of the structure depends on it. Therefore, first lay out the first continuous row “dry”, and place a building level on top. Observe straight corners. They can be checked during the process with a plumb line.
Before you start laying bricks, we recommend that you familiarize yourself with detailed instructions and tips for building a stove.
Video. We are learning to lay a small stove.
Advice! You may not get straight seams the first time. For this you can use wooden slats, thickness equal to the thickness of the seam. They are laid on a row, after which the solution is applied and the second row is laid. Prepare enough slats to cover three rows. By the time you finish the third row, you can remove the sizing tool from the first row and use it further.
Before laying the first row of bricks on the roofing felt, make markings with chalk.

Advice! To prevent the stove from being pulled to the side when laying, and to avoid the need to check the verticality of the stove after each row, you can stretch 4 vertical threads in the corners, which are secured to the ceiling. They will serve as a kind of beacon guides for the furnace.

- The 2nd row repeats the first. Watch the thickness of the seams. The blower door is also installed here.

To do this, we pass burnt metal wire through the holes and twist it into a bundle. We lay the second end of the wire between the bricks.
- The 3rd row forms the ash chamber, in which all the ash and ash accumulate.

All gaps between the brick and metal elements must be filled with asbestos cord, which levels out the temperature difference when firing the stove.

- 4, 5th row begins to form a firebox with fireclay bricks.
- We install a grate on top. Maintain a seam gap of 3-5 mm. This gap must be left taking into account the expansion of the metal at high temperatures. Fill this gap with sand. We block the ash door with a brick. Installing the oven.

- 6th row. We begin to form the chimney pipe and lay the base of the firebox, which we make from fireclay bricks.
- 7, 8, 9th rows - laying the firebox with fireclay bricks.

- On the 10th row we close the oven. We create a partition from brick, raising it by 2 cm. Apply a clay-sand mortar to the oven, to the level of the partition. Here we place a metal corner (on the front side under the slab).
- We lay an asbestos strip on the 10th row before installing the hob on the next row. The fact is that metal elements tend to expand when heated, so it is important to lay a layer of asbestos.

- 11th row – install the hob. Please note that the slab is placed directly into the recesses on the brick. To clearly understand the marking of these recesses, number each brick when you lay the row and, with a marker, mark the place where you need to cut it with a grinder.

After this, assemble the row for the solution. Keep in mind that the entire row is placed on a clay-sand mortar, but the hob itself is placed on a clay-asbestos liquid mortar. To prepare it, take a small portion of the prepared clay-sand mortar and add crushed asbestos, knead well.
Attention! If the hob burners have different diameters, then it is necessary to place the larger ones above the combustion chamber, and the smaller holes above the oven.

Attention! When laying out smoke channels, make sure that the solution does not remain inside. Use a washcloth or trowel to remove any remaining solution, otherwise it will then interfere with the unhindered circulation of hot air.
- 17,18th row. We cover the cooking surface, carefully filling the seams with 3-5 mm of solution.

- Rows 19 and 20 – on the right side we install doors through which the oven will be cleaned.
- We make the 21-23rd row according to the chimney ordering scheme.
- 24th row - we lay the last steel plate on top of the bricks, which ensures the zigzag movement of gas in the smoke channel.
- 25th row - place a metal sheet.

- On the 26th row we install a valve, taking into account a gap of 5 mm, between which we lay an asbestos cord.
- On the 29th row, the masonry is expanded by ¼ brick to create a cornice. Here we block all the channels, leaving only the pipe.

- On the 30th row we make an additional extension of 5 cm.
- On the 31st row, we reduce the size of the oven to its original form.


Row 27-28 – lay out a hole for the chimney.
Step 6. Laying the chimney.
The location of the chimney is indicated at the stove design stage. But in any case, for normal draft, the height of the chimney should not be less than 5 meters.

Also make sure that there is no residual solution left inside, otherwise it will interfere with normal traction.
When leading the pipe out of the house through the roof, consider the height of the canopy. It should be 50 cm below the top of the chimney, otherwise turbulence may form around the chimney.
We complete the chimney laying with a metal grate that prevents debris from getting inside the chimney. You can also install a cap (umbrella) on the top of the chimney, which will reliably protect the pipe from precipitation.
Step 7. Finishing the furnace.
After the oven is completely laid out, you can begin finishing cladding. Decorative facing stone can be used as an outer layer, ceramic tiles, Red brick.

Remember that anyone additional material applied to the outside of the stove will reduce heat output.

Therefore, if you are more interested in the efficiency of the stove than its appearance, you can simply cover the brick with a layer of decorative plaster.
Step 8. Drying the oven.
Having completely finished laying the stove, it is necessary to dry it thoroughly, since it now contains a large number of moisture from the solution.
To do this, open the combustion chamber door and leave the stove for 7-10 days. Brick and clay-sand must dry well, otherwise the “raw masonry” may become deformed from the high temperature.
If you build a stove in warm weather, it will dry out naturally. In cold weather, use a fan.
Another option for forced drying is a 200-300W electric light bulb, which is installed inside the firebox and left to burn there for 7-10 days. But this necessary measure, which should only be undertaken if the outside temperature is less than zero degrees Celsius.
Step 9. Lighting the stove.
When all the finishing work is completed and the stove is well dried, it is necessary to carry out the first test kindling. This is not a tricky matter, but it is better to follow our advice to avoid troubles and achieve maximum efficiency ovens:

- Do not use trash or glossy magazines for kindling.
- Keep flammable items away from the stove.
- Close the firebox door tightly before the flame burns.
- Don't put the oven on high heat right away. It needs to be warmed up gradually.
- Use only high-quality, well-dried firewood.

The video describes in detail the process of laying a simple brick kiln on a dry
Video. Detailed laying of a brick stove for a summer residence.
What is a brick oven in a country house? This is an opportunity to heat your home all winter without using gas or electricity. Moreover, the feeling of comfort that comes from the stove is difficult to confuse with anything. There is nothing better than leaning against her hot wall at the end of the day, enjoying the warmth.
Modern construction technologies allow you to fold the stove in such a way that one good kindling will last you until the morning. In addition, a properly created design retains internal heat for 10-12 hours.
If you keep the fire in the stove a little at a time, you can heat it 24 hours a day with minimal wood consumption. In addition, it is not necessary to put firewood in the firebox. You can use special coal. But for this, the stove must be folded in a special way. Using fireproof stone that can withstand high temperatures.
It is also worth noting that stoves can have many modifications. For example, the structure can be folded in such a way that a fireplace will also be attached to the stove. It will not take up much space, but will give even more warmth and comfort to the home. In addition, one pipe is enough to extract smoke from two fireboxes.
Types of furnaces
The history of the evolution of stove designs goes back many centuries. It’s no wonder that building a heat-efficient and reliable stove is a real art. But with proper preparation and diligence, you can do it yourself, here is a good video instruction:
You can fold a stove using many methods. At the same time, there are a number of parameters that determine the specifics of the future stove:
- Purpose.
- The temperature to which the walls should be heated.
- The time required to heat the walls and the amount of fuel required for this.
- Chimney design.
- Heat transfer level.
- Scheme of gas movement in the channels.
- Form.
- External wall finishing material.
- Main material.
Based on all these parameters, you will build the stove of your dreams. The main thing is still initial stage draw up a drawing with detailed diagrams. The project must describe in detail all the features of the future design. But before that, you need to decide what type of stove you need.
Folding a heating stove is the easiest way. It performs the main function - it gives warmth to people and homes. Such designs do not provide any additional functionality, but are reliable and easy to use, for which they have won a lot of sympathy among summer residents.
Naturally, all heating stoves are classified according to heat output, the time required for kindling and the degree of heating of the walls. It is these parameters that you need to rely on first of all before you build the stove with your own hands.
If you expect to get a stove with moderate heating, you can fold it into one brick. Such ovens heat up slowly and also cool down slowly. average temperature walls about 60 degrees.
Heating stoves cannot be called a refinement of architectural thought. But the massive design and simple forms create a feeling of monumentality. In addition, if you skillfully lay the bricks in this stove, it can become an excellent decorative element.

Moreover, do not forget about exterior decoration. After you have assembled the stove, you can plaster it and lay tiles on top. Firstly, this will protect the structure from destruction, and secondly, it will give it a beautiful and aesthetic appearance.
Important ! Before you build a brick heating stove with your own hands, keep in mind that it requires a lot of material.
Typical representatives of the family of heating stoves include such designs as:
- "Dutch"
- OPT-3,
- Triangular oven,
- Grum-Grizhimailo stove,
- OTP-11
- Rectangular heating,
- T-shaped.
These stoves are rarely very popular. The fact is that in order to put them together it takes a lot of time and materials, and as a result the functionality turns out to be poor.

Very often, in country houses, owners decide to install a heating and cooking stove. This structure has many advantages compared to a conventional stove. You can cook food on it without any problems and even comfortably, using pine, birch or yew firewood.
Important ! About 90% of orders from stove makers are for heating and cooking structures.
The main element of such a stove is the hob, which is made of cast iron. The oven is not built in everywhere, since folding it requires considerable skill. The most advanced designs have the following additional capabilities:
- bread baking chamber,
- couch,
- niche for drying firewood,
- water heating boiler.
Actually, the quantity additional functions depends solely on your capabilities and desires. In fact, from a simple stove you can create a real multifunctional food processor, which will become the main decoration of the kitchen. It's not even worth talking about savings. In addition, food made on such burners always tastes better.
Attention ! The efficiency level in heating and cooking structures reaches 65%. Heat capacity is about 4 kW.
Such stoves can hold heat for a long time. Moreover, they provide powerful traction. The main thing is to fold everything correctly so that the smoke goes directly into the chimney and not into the room. The most common designs:
- "Swede",
- Volkov oven,
- "Housekeeper",
- "Teplushka"
- "Little one."
As you can see, there is a huge variety of heating and cooking stoves on which you can cook something delicious without any problems and at a profit for the family budget.
Structures with heating panels are cheap solution, which includes all the functionality necessary for a summer residence. To put together such a structure, you need a minimum of materials and physical labor. 175 bricks are enough for a complete masonry.
Despite minimum costs during construction, the efficiency of the furnace is more than high. This type stoves are increasingly popular among older summer residents due to their convenience and low cost.
There are stoves for the bathhouse to the side. Usually these are simple heaters, not distinguished by any architectural delights. Their main role is to heat the water in the bath and effectively increase the temperature. Such heating stoves can store heat for two days.

Advice ! The main advantage of heaters is the ability to adapt them to any room.
Of course, the classification of furnaces is not limited to these types. In fact, there are a huge number of types, which are classified according to many parameters. The most popular systems have just been described.
Which brick is better to build a stove from?
It is necessary to distinguish between ordinary heat-resistant bricks and stove bricks. Firstly, the latter can withstand temperatures above 1000 degrees. Secondly, if it is cooled sharply, cracks do not form in the structure.
Four types of stove bricks are used to build stoves:
- Quartz. This brick is the result of firing sand and clay.
- Carbon - consists of graphite.
- Fireclay. Best suited for a fireplace. But its unique thermal insulation qualities cannot be discounted. It can withstand temperatures up to 1600 degrees. At the same time, it does not crack and does not lose its qualities. The only negative is the yellowish tint.
- Basic - used when you need to fold a metallurgical furnace.
In fact strict rules regarding the choice of materials for masonry during construction, no. Nevertheless, there are some recommendations that are best followed, the main one concerns fireclay bricks. It must be placed in the hottest places, namely in the area of the firebox and chimney. For all other zones, the grade must be no lower than M-200.
Attention ! The best brick for the stove is considered to be M-500.
Making a stove with your own hands
Selecting a location

To build a good heating structure, you need to choose the right place. The following standards must be taken into account:
- From the smoke channel to wooden structures must be more than 37 cm.
- The minimum distance of the pipe from the ridge is one and a half meters. The height above the ridge is half a meter.
- If there is 1.5-3 meters from the pipe to the ridge, it can be placed flush with it.
It is best to put the stove in the middle of the house. This will ensure uniform heat distribution and ease of use.
Materials and tools

In addition to bricks, you will also need a number of other materials to build the stove. These include:
- clay,
- sand,
- fittings
These are the basic materials without taking into account the components, but you also need to take care of the vent doors, the vent, the firebox, and so on.
To fold good stove needs to be kneaded correct solution. It is best to use special refractory clay; in extreme cases, red clay can also be used. Sand grains should be no more than 1 mm. The optimal ratio is achieved experimentally. Usually it is 1 to 1 or 1 to 2. Plus 25 percent of water from the total volume of clay.
Metal objects play a fundamental role in the construction of the furnace. To put together a decent structure, you need doors and half-doors, grates, cast iron dampers, latches and views. If necessary, all these elements can be made with your own hands, but you will need to purchase iron sheets.
Of course, you won’t be able to build a stove without good tools; you will need:
- hammer-pick specially for the furnace,
- Master OK,
- ruler-rule,
- wash brush,
- roulette,
- plumb line,
- level.
With this simple toolkit you can build any stove.
The process of building a stove
For the foundation, a pit is dug, backfill and a reinforced frame are made. The resulting structure is filled with concrete. Before you put the stove together, make sure you have diagrams of the bricks in front of your eyes.

It is very important to maintain order when working. Otherwise, you won’t be able to build a high-quality stove. The slightest deviation in the design will lead to one of the channels being blocked. The result is more than disastrous. Instead of coming out through the chimney, the smoke will go indoors.

The first row is laid along the cord. Each subsequent masonry is checked using a level. Angles are controlled by body kits. After the masonry is completed, it is installed furnace equipment, for example, burners. The pipe comes out at the very end. To find out in more detail, how to fold a stove, watch the video below: