Often, land plots only require the construction of vital buildings. Small area plot, the use of every piece of land for planting or thoughtful simply does not leave room for additional buildings. In this case, there is only one solution left for lovers of bath procedures: building a mini-bath. What is a mini-sauna for a summer residence, how to build it and what is needed to build it - let's figure it out.
Read in the article
Mini-sauna for a summer residence. Advantages and disadvantages
The main advantage of a mini-bath is the area occupied during its construction. The second, no less important parameter is the cost of building a mini-bath in the country.

Ready-made projects for frame mini-baths are available online, and it is also possible to create such a project to order in construction organizations. But sometimes, in a do-it-yourself mini-bath project, the projects of frame and combined baths are simply combined.
We offer you to watch a video of building a frame mini-bath quickly and inexpensively:
Important! When purchasing lumber, pay attention to its quality. Lumber for construction must be well dried and free from geometric defects.
A summer sauna made of boards is an option frame bath, for the covering of which it is used. Like a frame bath, a bathhouse made from boards can be built quickly and easily with your own hands. The construction technology is similar to a conventional frame bathhouse, with one exception: instead of OSB panels, boards are used for the outer cladding. The budget savings are quite significant, especially if you use unedged boards for cladding. At the same time, such a structure is less durable than one using composites and has greater heat loss than one assembled using panels.

When building a bathhouse, you should pay attention to heat and vapor barrier. The higher quality materials are used in construction, the longer the steam room will last.
Laying boards on the wall should be overlapped. This order of installation will make the wall more dense and will reduce heat loss during use.
Before you build a bathhouse from boards with your own hands, you should take care of the selection of lumber. It is better to use wood for lining the inside of a bathhouse. coniferous species wood (pine or larch), while it is better to use aspen for exterior cladding. It is quite low, which will allow the bath to retain heat longer. Particular attention should be paid to vapor barrier. Dampness is the worst enemy of wood.

Typically, mini-ovens for small volumes are metal structures designed to generate steam. As an example, consider the Varvara “Mini” sauna stove.

Sauna stove Varvara Kamenka mini
This is a wood stove with overall dimensions 48x66 cm and height 88 cm. Steel structure The top of the firebox itself is covered with a casing, inside of which there are convection channels. The air, heating up in the firebox area, escapes into the heater through the holes in the casing, thereby quickly heating the stones. As a result, the oven heats up very quickly, warming up small room in a very short time.
In addition, there are also simpler stove designs in which the heater is heated directly by exposure to heat from fuel combustion. When using in a steam room, you need to provide a place for storing fuel, or a canopy not far from the bathhouse.
For small steam rooms, in some cases it is advisable to use electric sauna stoves and electric heaters.

On a note! Installing a heat exchanger on the chimney will allow you to quickly warm up the air in the steam room. But this option is possible with the appropriate dimensions of the bath.
Mini-pools for baths
Additional installation in the bathhouse will expand the functionality of the bathhouse and add comfort. It is worth noting that it is better to initially provide for the installation of a pool in the bathhouse design, since mini-pools for a bathhouse require water supply systems, water drainage, and heating.

For this reason, embedding a pool into a finished bathhouse is quite troublesome and costly. There are several types of pools designed for installation in a bathhouse:
- Stationary. In this case, the pool is initially included in the bathhouse design, a pit is dug under it, the walls of the pool are concreted and covered decorative coating. This type of pool is used mainly for full-size bath buildings.
- Font. Metal or plastic construction, intended for installation in a pre-prepared bed. To put it into operation, you only need to connect the font to the water supply system.
- Portable pools. Metal structures with plastic trim. Just like a font, they are installed in a prepared bed, after which they are connected to the water supply system.
Swimming pools can be equipped with water heating systems and hydromassage equipment, but in this case, connecting them requires the help of qualified specialists.
Mini sauna for a summer residence
It is distinguished from a bath by the type of steam and the temperature. In order to make a sauna out of a steam room, it is enough to install an electric steam generator, an electric heater or a wood-burning sauna inside the steam room. When using a steam room as a sauna, it is recommended interior decoration from one type of wood: pine, linden or alder. A mini-sauna in a country house should be as closed as possible, almost airtight. Particular attention should be paid to its thermal insulation. This is necessary to maintain high temperature inside the sauna for a long time, when minimum costs energy carrier.

portable sauna
How to build a small sauna for your dacha with your own hands
Before construction, you should familiarize yourself with the projects of already built baths and choose the most best option. Do-it-yourself mini-bath projects for a summer residence (both frame and timber) are quite widespread, and finding them is not difficult. Before you build a small bathhouse with your own hands, you need to decide on the type of bathhouse, the material for its construction and its location.
 Foundation on screw piles with your own hands. This technology is used to speed up the construction of not too heavy buildings and other architectural structures. In the article you will find step-by-step instructions for constructing the structure and useful tips specialists.
 The main requirement during construction is accuracy. Everything needs to be done calmly and without haste. This will allow you to build a bathhouse in a short time without any incidents in the work.
Helpful advice! When purchasing materials for construction, focus on the medium and high price range. Purchase soft materials for roofing, insulation and vapor barrier according to a pre-calculated estimate, +10% on the supply of material.

An important point when building a bathhouse is not to forget about. For a small steam room, a channel in the wall is sufficient; for larger rooms, a fan will be required. This is necessary so that our small bathhouse at the dacha is a place comfortable rest, and not a carrier of miasma.
Article
Not everyone can afford to build a large bathhouse from a log house, and it is not always possible to find enough space for this. If in your case the territory is limited, but you want to please yourself, then we suggest you find out how to build a mini sauna with your own hands.
Mini means small
In the case of building a mini-bath, it is important to approach the project correctly in order to best arrange all the necessary components and premises. It should be small, to achieve this, you need to evaluate:
- The size of the area that you are willing to allocate for the building.
- Soil quality and the possibility of organizing a drainage system.
- The need for communications.
- Number of premises.
- Frequency of use.
- Material of manufacture.
- Materials to be used for the roof.
- How will the insulation be carried out?

If space is completely limited, then the future bathhouse may consist of only one room. For year-round use, you need to take care of a dressing room where you can put on dry clothes. The steam room can be combined with a washing room. Based on these considerations, you can focus on dimensions of 2x2 m or 2x3 m. 3-4 adults can easily fit in such a room.
Note! For such purposes, you can use a small trailer or a truck booth, which are insulated and improved. It can be made transportable by placing it on a trailer or directly on a truck.
Foundation

Selecting dimensions and layout is one of the most difficult tasks. Now you can freely sketch out a plan for your future bathhouse. A very small frame bath does not need a powerful foundation, since its weight is very light. Depending on the type of soil and the location of the bathhouse, it can be very different.

When choosing a bathhouse option with dimensions of 2x3 m, 1.2 m can be left for the dressing room, and the rest for the steam room. If the main building is planned to be 2x2 m, then the dressing room can be completed with a separate canopy, which will stand on columnar supports.
Note! No matter how small the structure is, it is important to lay a quality foundation for it.

Even a small bathhouse, for the construction of which brick, timber or logs were used, will turn out to be quite heavy, so a more powerful foundation will be required, which will be discussed later.
- We clean the area that you have designated for the future building. It is advisable to get rid of the weed to make it easier to carry out excavation work.
- We make markings in accordance with our project. We determine where the corners of the building will be and where the exit will be directed. We hammer pegs in the corners. We calculate in advance what the diagonal should be. If this is a 2x2 m project, then the diagonal will be approximately 2.83 m. To find it out, we add the values of the two sides in the square and take the sum out from under the root. For 2x3 m - 3.61 m and so on.
- We measure so that the diagonals are the same, so we will achieve right angles.
- We stretch a string between the pegs. Next, we retreat a distance equal to the width of the future foundation and attach 4 more pegs in the corners. If your soil is dry clay, then the width can be 25 cm, if sandy - 40 cm. When the area is rocky or the rock is hard enough, then you can simply lay cobblestones around the perimeter and compact them well.
![]()
- We dig a trench 50 cm deep. If there is a partition, there must also be a foundation under it.
- Place sand at the bottom of the trench. The layer thickness should be 10 cm. Gravel can be used for the same purposes. We level it and compact it well.
- We make a lattice from a metal rod with a diameter of 8 or 12 mm, which will be the basis of our reinforced concrete structure.
- We make formwork from boards or plywood. In our case, it will be about 20 cm high, more is possible.
- We lay our metal lattice. We raise it by 5 cm using brick linings. Its width should be 10 cm less than the width of the trench so that the solution freely fills the entire space.
- Prepare the solution for pouring. The ratio can be seen in the presented table.

- Pour the mixture into our trench. Using a special vibrator, we process the solution so that it fills all the voids (in extreme cases, you can use reinforcement). Level the top using a trowel. Leave it until it hardens completely. It is advisable to cover it hydro insulating material so that evaporation does not occur too quickly. Also wet the foundation periodically.
- Compact the space around the foundation well.
- Can be made columnar foundation, if soil quality allows. In this case, it is not filled completely, but in sections. Supports should be located every meter along the entire perimeter, as well as under the partition. For the projects mentioned at the beginning, you will need to make a total of 9 supports.
Note! It is also necessary to make a separate foundation for the furnace if it is heavy enough. The height of the base must be calculated so that it is several centimeters higher than the future floor. Even before the foundation is poured, pipes are laid that will be used to drain water from the bathhouse. Sewer pipes Ø 50 mm are suitable for this.
Walls

While the foundation is gaining strength, you can begin preparing the framing and building the walls. For lower crown we need timber with dimensions of 150×150 mm (150×100 mm or 100×100 mm are also suitable).
- We lay the selected timber, which in length corresponds to the sides in our project.
- We carry out markings in order to connect individual logs into a crown. To do this, we make samples at the ends of each board. Its depth will be half the thickness of the beam, and its width will be equal to the width of the beam. For example, with dimensions 150x150 mm, it will be 150x75 mm.
- We cover the top of the foundation with insulating material. You can use roofing material that is attached to mastic. There is another way - slats measuring 20x50 mm are placed on the bottom of the boards for laying every 15 cm, and the space between them is then filled polyurethane foam.
- After our insulation has dried, the prepared beams can be laid on it. We place them so that the grooves coincide.
- We screw one screw into each external corner. This is necessary so that the structure is to some extent movable in order to set the diagonals. We check the diagonals and make adjustments if necessary. After this, we wrap the second self-tapping screw, which will ensure complete fixation. Next, using anchors, we secure the beams to our foundation.
- If we have a partition planned, then a beam is also laid under it and tied with the other two in the way described above, with the length of the binding equal to half the width of the beam, i.e. it should be 150x75x75 mm.
- For further actions we will need a beam 100 mm thick and 150 mm wide. Its length will depend on the height you choose for your bath.
- We make a tenon in it with dimensions of 50x50x50 mm, cut a hole of the same size in the lower beam and insert the tenon into the groove. We fix it with metal corners. We level it and throw temporary struts between the vertical and horizontal beams. This way we install verticals at all four corners.
- We make the top trim. The upper belt can be mounted from the same beams, we connect them to the racks using a tenon, and tighten several self-tapping screws.
- We make vertical supports around the entire perimeter. They are installed every 60 cm. For them, you can use a 50x150 mm board.
- After installing the top trim and additional vertical supports, stationary jibs are installed under the corner beams, and temporary ones are dismantled. The jib is made at approximately ⅓ of the total height. The ends are cut at an angle. It is screwed between the crown beam and the vertical support.
- Where windows are installed, it is necessary to cut one of the vertical beams and reinforce the opening around the perimeter with additional horizontal lintels. In the case of a doorway, it is necessary to place two vertical supports the width of the future door, taking into account the size of the frame.
Note! There is another method, but it is only applicable for frame construction. In this case, the corner beams are not installed separately. The planes of the two walls are assembled on the ground, and then raised and attached to the base.

The foundation in our project rises 20 cm above the surface, so you can proceed as follows:
- We compact the soil well and lay a hydraulic barrier.
- We fill the space with expanded clay on top.
- We lay joists for the future floor.
- We place mineral wool in the space between the joists. To prevent its parts from knocking out, you can also lay a film on top.
- The floor is sewn up using boards that are laid closely.
- There is another method. It is possible to the beams that were used for bottom trim, using metal corners, screw the sheathing, lay film or other waterproofing on it, and lay mineral wool or foam plastic on top. Next, everything is sewn up with a board and you get a warm floor.
- Do not forget that in the steam room it will be necessary to make a certain slope, thanks to which the water will flow into the installed drain.
Note! In regions where the temperature in winter does not drop too low, the floor is practically not insulated. And the space under the steam room is filled with concrete and a slope is made so that the water drains through the floor onto the slope and then falls into cesspool.
Wall insulation

If the bathhouse is made using frame technology, then for its insulation they use thermal insulation materials, after which they sew up the outer part of the wall using clapboard, siding or wooden boards.
Let's start with a description of the internal work.
- We lay a vapor barrier; you can use ordinary film.
- Expanded polystyrene or mineral wool is suitable as insulation. In the first option, it must be laid very tightly; small gaps can be filled with glue, which is designed for high temperatures and does not emit harmful substances.
- We place a hydrobarrier on top of the insulation. It is better if it is thick foil.
- After this, the walls are covered with clapboard panels.
- Shelves are installed in the steam room so that you can sit or lie down. It is better to make it from sanded linden or aspen boards. They are fastened together with copper-plated or galvanized screws or nails. Width and height are selected for a specific room.

In our case, when building a bathhouse from logs or timber, additional insulation External walls are most often not required. If desired, the bathhouse can be covered with siding, corrugated sheets or clapboard. And in the steam room you need to insulate the walls from the inside or make a heat-reflecting coating from foil.
Roof

In the case of a small bathhouse, a pitched roof is perfect. To make it, you can use beams that were used for vertical supports (50x150 mm). To attach the supports to the upper dressing, you can use metal corners. To make a slope, you can increase the reach of the supports on one side and attach the beams to them. After this, the lathing is made and the flooring is laid.

The width of the mini-bath allows the ceiling to be covered with ordinary flooring. For this purpose it is taken edged board and is placed on the top trim, it is tightly combined with each other. A foil hydrobarrier is placed on top. It is covered with mineral wool or polystyrene foam. If desired, you can cover everything with film.
Note! There is another way to install ceiling beams, and lining is stuffed onto them from the inside. Insulation is carried out as in the first case.
Communications and lighting

The laying of all communications must be thought out at the design stage.
- All electrical wiring It would be good to hide it under the skin, having first placed it in a metal sleeve. Use a double-braided cable, it can be VVP, PVS or ShVVP. Be sure to install an RCD so that you are protected from the slightest current leakage. Also organize a grounding loop.
- For lighting, you can use sealed tablet lamps that are mounted on the ceiling or wall.
- Assess whether it is really necessary to draw water supply; it may be easier to fill the tank before taking a bath, which will heat up from the heat of the stove.
- Be sure to take care of ventilation. To do this, you can install two lockable grilles in the ceiling, connecting them using a pipe with exits that will be located under the roof slope.
- Organize a waste pit nearby; it does not have to be large. It can be made from car tires, iron barrel or concrete rings. You can lay porous stone inside, which will prevent silting of the walls and will serve as a kind of filter.
Bake

You can make the oven yourself if you are familiar with the basics, or purchase it. It will be better for your safety. There are a large number of electric stoves on sale today that do not take up much space, but are capable of providing comfortable temperature. General rule for its choice is that to heat 1 m 3 of air, 1 kW of heating element power is required.
It is installed on a pre-prepared foundation (or reinforced foundation). Before installation, it is necessary to provide waterproofing by covering concrete base the corresponding substance. The place where the pipe exits through the roof is also carefully sealed to avoid leaks.
The design of such a bathhouse is relatively inexpensive, but it will serve for decades.
Video
This mini sauna was built in life size. Find out more about her in the video:
A mini-sauna is the dream of many summer residents! Look how a 2×3 log house and a clapboard dressing room were made:
A standard bath building has dimensions of 6 by 6 meters. Naturally, not everyone personal plot has sufficient dimensions to accommodate such a bath.
Therefore, the only way out of the situation is to reduce the size. And if you take into account all the features of bath construction, the result can meet all your expectations.
In this article we will look at the main aspects of planning and construction of mini-baths.
A mini-bath in the shape of a barrel is the most popular project for such buildings.
About mini-baths
A mini sauna for a summer residence can be built for several reasons:
- If there is not enough free space.
- In order to save money, because the price of such buildings will be significantly lower than standard ones.
- Based on practicality. Miniature buildings place less load on the foundation and are easier to maintain. And for a small family or single people there is no need to erect a large building.
A mini bathhouse in a country house should have the functionality of a full-fledged bathhouse building.
Therefore, when starting planning, you should consider several nuances:
- If you plan to use the sauna in winter period time, then a locker room should be provided here.

The photo shows a miniature building, including a steam room and a washing room.
- If you plan to use the building seasonally, and there is very little space on the site, then you can build a one-room steam room, which will only include a steam room. This great option if there is a natural body of water nearby where you can rinse in cool water after steam procedures.
- If there is no body of water nearby, then it is advisable to provide at least two rooms in the bathhouse: a steam room and a washing room, where the font is installed.
Building layout
Any project must begin with a construction plan.
Let's consider what nuances planning a mini-bath should take into account:
- First of all, you need to know about the design features of traditional Russian baths.
They include the following premises:
- A dressing room that serves as a locker room and a place to store firewood.
- A relaxation room with a table and chairs for tea parties.
Advice! The furniture in the rest room should be wooden and devoid of any upholstery. Otherwise, under the influence high humidity cushioned furniture will quickly lose its attractive appearance.

Dimensions of the steam room in a miniature bath.
- Steam room, which is the main bathing room, including a stove and a bench for taking procedures.
- A washing room where a contrast shower is carried out.
- More often, bathhouse projects involve combining an entrance hall and a rest room.
For example, the layout of a building 2.5 by 6 meters provides for the following rooms:
- The rest room is 2.5 by 2.5 meters, which is enough to accommodate a small table for four.
- Their rest rooms run along the left wall of the building narrow corridor, 0.5 meters wide. From it you can enter the steam room and washing room.
- The steam room occupies 2 by 2 meters, which is quite enough for one person to take the procedures.
- The washing room, accordingly, has an area of 1.5 by 2 meters. A wooden barrel with water is installed here for cooling procedures.
- If you abandon the hallway in a bathhouse with this layout, you will get a building with an area of 3.5 by 2.5 meters, which is very compact and at the same time has the full functionality of a bathhouse building.

The building plan is 6 by 3 meters.
Advice! Baths without rest rooms are an excellent option for adding to a house. Then tea parties and gatherings can be held in the living room.
For any building, even a miniature one, a reliable foundation is needed.
It can be of two types:
Since our building is miniature, we can safely build it on a columnar foundation.
Advice! Columnar foundations cannot be erected on unstable soils. Therefore, before starting work, order a soil analysis from a specialized office.
Instructions for installing a columnar base with your own hands:
- We mark the area so that the supports are located under the outer walls and furnace of the building.
- We drill wells about one and a half meters deep.
- We fill each of the wells with a mixture of sand and gravel (1:1), in a layer of 15 cm.
- We install asbestos-cement pipes.

- We insert 2-4 reinforcing bars into each pipe to increase strength.
- We fill the pipes and the wells themselves with concrete (cement, gravel, sand - 1:3:5).
- A week after pouring, we install wooden formwork on the pipes to form a grillage.
- We knit a frame from reinforcing bars and lay it in the formwork.
- Fill the grillage with concrete mortar.

Columnar foundation with a monolithic concrete grillage.
Construction of a bathhouse
The most environmentally friendly, cheap and traditional material for the construction of baths is wood. Ready-made mini-bath projects are most often made of wood.
Such buildings are erected from logs or timber. The timber is easier to work with, which is why we will use it for our project.
So, we build timber walls:
- A month after pouring the grillage, we lay two layers of roofing material on top of it.
- We lay the first beam, checking its verticality and level.
- We roll out the inter-crown insulation for the bath (jute, flax, moss) over the surface of the timber.
- We lay the second beam.
- Further construction follows the same pattern.

Laying inter-crown insulation.
Conclusion
We examined the features of planning and construction of miniature bath buildings. As you can see, the process of creating such buildings is not complicated, the main thing is to correctly calculate the layout. More information regarding this topic can be found in the video in this article.
Mini-baths for a summer residence: ready-made, video instructions for DIY installation, photos
Mini-baths for a summer residence: ready-made, video instructions for DIY installation, photos and price
Technology for creating a mini bath for a summer residence
Mini sauna for a summer residence
A mini bathhouse for a summer residence is built when there is no space for a large bathhouse, or it is expensive to build. If the dacha is used by the owners only for summer season, then the point of arranging a mini bath is the most straightforward. A bathhouse requires three rooms: a dressing room, a steam room, and a washing room. If the bathhouse turns out to be very small, you have to wash in the steam room, then it is better to add a washing station, because soap in the steam room is not at all useful.

Construction of a mini sauna for a summer residence
Projects and sizes
You can find a project for a mini sauna at your dacha on the Internet or order it from professionals, or you can create it yourself. It is impractical to build without drawings or drawings, a project or a plan; it will turn out poorly if there is no construction experience. Mini baths that turned out to be successful are presented in the pictures; the construction of a mini bath with your own hands can be organized with minimal costs of materials and time.
There are no standards for the construction of mini baths; everyone is guided by their own taste, which is why there is such a variety of projects and implementations of mini baths for the dacha. Small compact baths for small families seem to be the best option for construction.

In the photo - mini sauna, view from the inside
Rational sizes of mini baths
Since there are no standards or guidelines for sizes, you need to use common sense. If you have built a bathhouse, and washing in it is extremely uncomfortable and cramped, then you made a mistake already at the project stage.
When you build a mini sauna with your own hands, it, like a large one, requires the following zones:
- dressing room, also known as a relaxation room, its comfortable size is 1.5 x 2 m;
- shower or washing room, so that two people can turn around, 1×1 or 1×1.5-2m;
- steam room – no more than 1.5 x 2 m, but no less.
The fourth zone in the mini-bath is combined with the first, the dressing room, otherwise it won’t be a mini-bath, but just a sauna. The height of the mini-bath must be such that a tall person can wash himself, that is, at least 2 m. Therefore, a project is needed to eliminate obvious errors and inconsistencies.
Materials and technologies for building a bathhouse
Having your own dacha plot allows a city dweller to break out of the concrete jungle of the city and be closer to nature. Unlike country house A country house is usually miniature, so it will bring the same pleasure as a large one, a mini bathhouse, compact, decorated with soul. Industry building materials is developing rapidly, and even in such an ancient field as wood construction, new technologies appear every year, take, for example, laminated timber or frame houses.
Selecting the best materials
The owner of the summer cottage chooses the projects from which material to build his mini bathhouse. More durable stone baths, but then this is already a fundamental structure where it is necessary to provide communications, water drainage, etc. A compact bathhouse is built from materials that are cheap and practical, relatively durable, and meet sanitary requirements:
- wood (logs, rounded logs, timber, laminated timber, carriages);
- wall materials;
- heat-steam-waterproofing roll or sheet products;
- roofing materials;
- finishing products.
A country house and a bathhouse for it should be in harmony with each other, and if the house is made of wood, then it is advisable to build a bathhouse from it. Most quick way construction, house and bathhouse, it is frame. It consists of constructing a light, durable wooden frame made of timber on a foundation, using cheap wall and finishing materials, wall decoration, thermal insulation.
Modern finishing, roofing, and thermal insulation materials are perfect for frame structures, be it a country house or a bathhouse. A frame mini bathhouse is good because it is quickly erected and quickly disassembled.
Technologies for the construction of compact structures
When it is decided that a mini sauna for a dacha, built with your own hands, will cost less, then after choosing materials you should understand the technology. When deciding to build a mini sauna from logs, the technological stages listed below are assumed.
- Site selection.
- Laying the foundation.
- Construction of a log house.
- Roof construction.
- Flooring.
- Insulation.
- Finishing work.
Even though the bathhouse is a small structure, the stages and quality of work are similar to those of a large construction site. A popular construction method is frame construction; here it is necessary to follow a certain sequence.
- Site selection.
- Laying the foundation.
- Construction of the frame.
- Raising walls.
- Roof construction.
- Flooring.
- Insulation.
- Finishing work.
If you decide to build a mini bathhouse from wood, and choose a frame technology, then you will build the structure quickly, only here precision is required when constructing the frame. If your material is logs or beams, then construction will take more time and it makes sense to increase the size of the bathhouse.

Option for a compact mini bath
Mini baths made of brick, expanded clay concrete or foam concrete are also built, they have their own, somewhat different from wooden materials, construction technologies. It is only recognized that the best material for a bathhouse is wood.
Compact baths are built when there is a great need for them, but only in the summer season. If the bathhouse is idle most of the year, then there is no need to make it capital and large. If you are satisfied with the mobile option, then a solid foundation is not required; it is enough to place the bathhouse on concrete pillars located along the perimeter of the structure.
Drainage for a bathhouse in a summer cottage
The bathhouse differs from other structures in that during its operation it is necessary to solve the problem of drainage of used water. Whether you wash in a large bath or a small one, the water consumption is approximately the same, it has to go somewhere. When building a mini bathhouse, you need to keep in mind that drainage is included in the construction of a bathhouse as an integral and integral part.
Drainage sewer
For a mini bathhouse, the construction of a drainage sewer system is the best option, since the volume of water flowing from the bathhouse is still small. This economical option and it is easy to maintain. The sequence of sewer construction is as follows:
- Selecting a location and device drainage well.
- Prepare a trench for water drainage.
- Lay the pipe in the trench for drainage.
- Construction of a pit for collecting water.
- Water seal device to protect against odors.
The main labor-intensive work when installing a drainage system involves constructing a drainage well, which will require crushed stone, expanded clay, gravel and sand. These materials are necessary to filter contaminated water before it flows into the soil.
If you do not have the opportunity to arrange drainage from the bathhouse through drainage system, and the water will simply flow into a ditch outside the dacha area, then this is a violation of the law.
Installation of a septic tank for a bath drain
The installation of a septic tank allows you not to worry about the flow of water from the bathhouse and allows you to operate the bathhouse, bathroom, and kitchen at the same time. In order to build this structure, significant funds are needed, more than the construction of a mini bathhouse, so a septic tank is built when people live in the country permanently.

Laying drainage pipes
The septic tank consists of three wells, each of which performs a specific function.
- In the first, water is purified through fermentation.
- In another, water is filtered from suspended matter and particles with an unpleasant odor.
- A drainage well in which the final purification of water takes place and directs it into the soil.
The wells are connected by pipes, which should be made of cast iron or plastic, with a diameter of up to 10 cm. When draining water from the bathhouse, it is necessary to install a water seal. A septic tank constructed using technology is a full-fledged sewer system, although pouring water without measure is still not recommended.
Bathroom floor installation
The floor covering can be anything, of course from waterproof materials. It is best when the floor is made with a slope, then the water flows into the catch basin and from there through a pipe into the septic tank or drainage system. The floor can be straight, if it is plank with gaps, then the water should collect under the floor and flow into the sewer.
Floors for mini baths are exposed to water and detergents, and since they are most often wooden, the floor will have to be changed from time to time. For easy care For wooden floors, it is enough to dry them after each wash and treat them with an antiseptic before laying.
The mini sauna that you decide to arrange at your dacha will certainly recoup your costs and time with undoubted health benefits, and if it is done with taste, it will also bring aesthetic joy.
Mini bathhouse for a summer residence: design, materials, technology of creation
You can find a project for a mini sauna at your dacha on the Internet or order it from professionals, or you can create it yourself. It is impractical to build without drawings or drawings of a project or plan - it will turn out badly if there is no construction experience. Mini baths that turned out to be successful are shown in the pictures. The construction of a mini bathhouse with your own hands can be organized with minimal costs of materials and time.
How to build mini saunas for your dacha yourself?
The realization of the dream of building a mini-bathhouse for a summer residence can become a real reality if you have one desire, and there is no need to talk about the means that are at the disposal of the craftsman today. There is no need to chase frills. Functionality, convenience and environmental friendliness will be sufficient conditions to satisfy basic requests when building a bathhouse.

A mini sauna is an excellent option for a summer cottage.
Procurement of materials
It is known that any construction begins with an idea and a project. Only preliminary calculations will help to correctly determine required amount materials for the construction of a country house. In addition, it is advisable to have a set of tools and equipment available, which will greatly facilitate the work.
The usual dimensions of a bathhouse are: length - 3.0 m, width - 2.5 m and height - 2.2 m. For its construction, the following lumber will be required:
- timber with a section of 10x10 cm, length 3 m - 25 pcs.;
- edged board 20 mm - 1.5 cubic meters;
- edged board 40 mm - 0.3 cubic meters;
- beam for rafters with a section of 10x5 cm, length 2 m - 8 pcs.;
- lining - 0.37 cubic meters.

Floor arrangement diagram in different rooms baths
- cement for the foundation - 200 kg;
- crushed stone - 500 kg;
- slate or metal tiles and roofing felt as a substrate - 15 sq. m;
- refractory brick - 250 pcs.;
- oven door - 1 pc.;
- two water tanks;
- siding - 23 sq. m;
- aluminum vapor barrier - 20 sq. m;
- polystyrene foam 100 mm thick - 30 sq. m;
- 2 bottles of polyurethane foam.
To build a bathhouse, you need to have various tools. To dig a foundation and mix concrete, you will need shovels: bayonet and shovel. It’s good to have a concrete mixer, otherwise the solution will have to be mixed by hand. In progress direct work You will also need: a hammer, a wood saw, an axe, a plumb line, a level, an electric drill, a screwdriver. And, of course, we should not forget about nails and screws.
Construction of the structure

Drawing of a mini bath.
After choosing a location and drawing a diagram with all dimensions on paper, you can begin to carry out the work. The mini-bath begins with laying the foundation in four corners for the timber and for the stove measuring 75x60 cm. Formwork 30x30 cm is placed in prepared pits up to 1.5 m deep. It should rise 20-25 cm above ground level. Then concrete mortar is poured.
After a couple of weeks, the formwork is removed and the voids are filled with earth. Roofing felt is laid on the foundation as the simplest type of waterproofing. Erection of walls with installation of windows and doorways, install the ceiling, rafters and roof. Bathhouse windows and doors are installed in accordance with the project. Laying the floor. The interior of the steam room is lined with clapboard over an aluminum vapor barrier.
In the area prepared for the furnace, a laying of refractory bricks is made. The outer surface of the walls and ceiling is covered with polystyrene foam, the voids are filled with polyurethane foam. At the end, a frame for external finishing is installed. Covering the walls with siding will be the final stage external design buildings on a summer cottage.
Insulation of the building

Scheme of an insulated bath.
In terms of practicality, a small bathhouse in a country house is in no way inferior to a design with exquisite shapes, different rooms for fun. The main thing is that it is warm and comfortable for one or two people. The bathhouse is different in that it must maintain high temperature regime. Cheapest and available material, suitable for insulation, used by our ancestors - clay and straw. First, you need to fill the walls with a sheathing of shingles so that the dried clay holds tightly and does not crumble. Naturally, this method is complex and labor-intensive compared to modern means.
The use of polystyrene foam is an economical and fairly simple to install insulation method. The material is light and durable. 120mm foam panel thermal insulation properties can be compared with a layer of mineral wool or a wooden beam 450 mm thick. At theoretical outside air temperatures ranging from -100 degrees to +80 degrees, the heat resistance properties of the insulator do not change. To protect polystyrene foam from pests, it is better to treat it with special chemicals.
A small bathhouse usually consists of two rooms: a dressing room and a steam room. Polystyrene foam turns the building into a thermos, and clay has good breathability, meaning there will always be clean and fresh air in the rooms. The room, as they say, “breathes.” Therefore, what method of insulation to choose is decided by the owner himself, based on his own capabilities.
Laying communications

Scheme of water supply in the bathhouse.
It is very good when a water supply is laid to the dacha. Its absence complicates the construction process, since it is necessary to additionally purchase hoses and water containers so that it flows by gravity into the bathhouse. Reservoirs with hot and cold liquid are placed with a height difference of half a meter and connected by a pipeline. One end of the hose is attached to the top of the tank with hot water, the other - to the bottom of the second tank with cold water.
To remove used water, prepare a drainage pit with sewer pipes connected to it at an angle. The lower the soil freezes, the deeper the pit should be, but not less than 1.5 m. The bottom of the pit is covered with gravel, crushed stone half a meter above the freezing depth, then with earth to the very top and thoroughly compacted. Compliance with technological details will protect against freezing waste water, otherwise the bathhouse simply cannot be used.
If the soil is quite clayey and does not absorb water well, then you should build a pit with a direct flow and a water seal, which will ensure tightness, protecting against unpleasant odors. The water seal is a structure of three loose plates installed in a pit near the end of the pipe and 5-6 cm above the bottom. The water itself will ensure the tightness. Plastic pipes with a diameter of 50-100 mm are currently used to remove sewerage. They are connected to each other using seals, which must be of the highest quality to eliminate or minimize repair work.
The floor in the bathhouse can be made with your own hands, either leaky or non-leaky. In the first case, a removable wooden grate, made of high-quality processed and painted boards with a gap of 5 mm between them. It lies on top of the pan, from where the flowing water goes into the sewer. After bathing, the grate must be dried. The leak-proof floor is filled with concrete mortar with expanded clay and a drainage device is installed into the sewer pipe. Expanded clay makes the floor warmer. Ceramic floor tiles are laid on top.
Heating, ventilation and lighting

Options for arranging ventilation in the bathhouse.
Small baths can be heated and the water in them can be heated using a stove. The radiator is installed in a place that has the highest temperature. In this case, the end of the tube with hot water should be connected higher than the other end with cold water. Water can also be heated using tubular electric heaters - heating elements, which are sold in the store. To eliminate unnecessary energy consumption, before purchasing thermal elements, you must first calculate the required power for heating water.
A bathhouse without ventilation will “sweat” all the time. It is necessary to install a ventilation pipe with a deflector. Its diameter is 100 mm, which is quite enough to remove warm steam. A ventilation device will save the bathhouse from dampness and mold formation.
There are special requirements for lighting a mini-bath for a summer residence. The presence of high humidity precludes the use of household mains voltage of 220 V. In this case, a step-down transformer and 12 V halogen lamps are useful. All switches and lamps must be sealed, moisture- and heat-resistant.
The bathhouse building is being constructed in accordance with fire and electrical safety rules.
Wooden structures protect against exposure to sources with elevated temperatures.
Do-it-yourself mini baths for a summer residence
The realization of the dream of building a mini-bathhouse for a summer residence can become a real reality if you have one desire, and there is no need to talk about the means that are at the disposal of the craftsman today.
Mini sauna for a summer residence
If the area is so small that it seems impossible to squeeze in a bathhouse, build a compact structure. A mini sauna for a dacha is in no way inferior to a large one in terms of comfort and convenience. To build a mini bathhouse you won’t need a lot of materials, so you can build such a structure for your dacha with your own hands at minimal cost. Often, novice builders are interested in what place to allocate a mini bathhouse on the site, what dimensions and materials are needed for construction.
Options for country baths
Which is better to build a mini bathhouse on a summer cottage?
A compact bathhouse based on a frame made of lightweight insulated panels in the form of a wooden frame is easy to assemble. There is no need to build a foundation for it. A layer of insulation and waterproofing materials are placed in the space between the frames, and then the frame is sheathed with boards or other materials. At the location of the steam room, insulation is laid in several layers. This allows you to make a high-quality steam room.
 How to make a frame bath
Log
Lovers of hot steam prefer a log mini-sauna in which you can wash all year round. But for it you will have to build a foundation. If you are ready to allocate a decent amount from your budget, pay attention to this option.
Mini sauna in a country house
If the area of the house allows, select a small corner for a mini-bath or equip it in the bathroom. To do this, the room is insulated and removable shelves are made. The walls and ceiling are covered with clapboard. Heating is carried out using an electric furnace or heater.
Note! It is better to buy a special stove designed for built-in baths, with a container for stones.
The room must be equipped with good ventilation. The door from such a bathhouse should go out onto the street.
Bathhouse barrel
The choice of many summer residents is a barrel bath. This is a barrel-shaped log house, assembled from tongue-and-groove boards and tightly tied with clamps. Since there are no corners, the air circulates according to the principle of convection, so the room quickly heats up. Thanks to its rounded shape, the mini bathhouse is ventilated from all sides, which helps to avoid rotting of the building. The structure is installed on the beams, which are necessarily impregnated with anti-rot compounds. Such designs can be purchased ready-made by selecting minimal project mini baths that can accommodate 2 people at the same time.
There are many options for mini baths. Some summer residents even equip mobile bathhouses on wheels.
 The mobile sauna trailer will become ideal option for a small area.
Before building a mini bathhouse for your dacha, make a sketch of the project or at least sketch out a schematic plan. You should display:
- where the main facilities will be located;
- Dimensions of the mini bath premises.
The compact dimensions of a bathhouse in a country house are calculated based on the number of people. You can choose a ready-made mini bath project for any quantity. Competent design for a mini bathhouse will reduce construction time.
Sizing
When they begin to build a mini bathhouse with their own hands, many novice builders think about the best dimensions to make. IN standard projects for mini baths the dimensions are:
- length 6 m;
- height – 2 m;
- width – 2.2 m.
 Standard mini-bath plan
Inside, the mini bathhouse at the dacha is divided into functional rooms:
- dressing room 2 x 2 m;
- shower or sink 1.5 x 2;
- steam room 1.5 x 2 meters.
Ready-made, purchased structures have these dimensions; you need to build your own project based on your desires and capabilities.
 Correct calculation of the dimensions of the bathhouse premises is very important.
Then you must think about what kind of foundation you will make. If your site has fairly hard and dry soil, you can make a lightweight base.
If the soil is weak, then there is no doubt about the choice of foundation option - only strip foundation. To do this, dig a trench, fill it with sand and gravel, compact them well. Then lay the reinforcing mesh and fill everything with concrete mortar.
A columnar foundation is also suitable for a mini bath. If the building is installed on stilts, careful thermal insulation of the floor will be required.
Walling
When building a mini bathhouse, you cannot do without erecting walls. Most economical way – frame walls. First you need to line the inside with clapboard. Then thermal insulation is formed. Mineral wool is suitable for it; sawdust with clay; expanded clay
Advice! Add broken glass to the insulation to protect it from rodents.
Cover the thermal insulation with polystyrene sheets. Covering the outside with clapboard or siding will complete the wall construction work. You can choose the finishing of the building in uniform style with a house.
 Walls finished with molding look very beautiful
If you decide to build a small log bathhouse, choose wood from pine or other coniferous species. Knowing what requirements different tree species must meet, you can easily choose a material that meets your requirements for a mini bath.
It is better to make the floor from waterproof materials. Most often, wooden floors are installed in the bathhouse. They are made with a slope so that the water flows into the catch basin and then along the plastic or metal pipe entered the septic tank or drainage system.
Before laying the floors, the boards must be treated with an antiseptic. Tiled tiles are also suitable for finishing the floor in a bathhouse. To prevent slipping, wooden gratings are installed on it.
 Schematic construction plan
Roofs for baths used only in summer time, can be done without an attic. They are easy to build and much cheaper. To make a roof, you first need to decide on the material. For a small structure the roof should be covered lightweight material, most suitable: ondulin, concrete tiles or metal tiles. The insulation material for the ceiling is taken twice as thick as for the walls, since heat rises upward.
 The roof of a mini barrel bath can be covered with tiles.
Communications
Communications in a mini bath are often arranged according to a simple principle: the soil under the floor is dug with a slight slope to the side to drain water from the bath to in the right direction and cover it with clay. When arranging the floor, a small space is created between the ground and the floor. When laying boards, gaps of 0.5 to 1 cm are left between them.
This is a very old method, it is not labor-intensive and simple, but a wooden floor, even treated with an antiseptic, quickly begins to rot from exposure to water and steam. Therefore it is better to do modern communications and build ventilation that will help avoid rotting.
Ventilation
The ventilation system in the bathhouse delivers fresh air and ensures quick and high-quality drying. To install ventilation for a small bath, you can do without additional accessories. How to do it? You can simply install a window in the main compartment or make ventilation holes for fresh air. They are usually installed opposite the opposite walls of the steam room.
 Adjustable flap for ventilation
If your budget allows, it is better to install mechanical ventilation. It filters the incoming air and helps maintain the microclimate in the bathhouse at the desired level. For this purpose, fans are installed in the room.
Proper finishing of a bathhouse will help not only to equip beautiful interior– this also insulates the bathhouse and increases the durability of the structure. The most common option is finishing interior walls clapboard. Experts recommend using boards hardwood. It has a low heat capacity, so such walls do not heat up, and all the heat goes into the room.
If you use ventilation in the walls in the bathhouse, you need to decorate it with beautiful plugs.
Arrangement
What is a bathhouse without hot water? It is heated in tanks that are built into the furnace, placed next to it or placed on a pipe. For a mini bath, a remote option is more suitable. Water from the tank can be scooped with a ladle, or a pipe with a mixer can be made.
 How to make a remote hot water tank
To arrange water drainage, you need to make a recess in the floor and install drainage holes at an angle.
You can’t do a sauna without a stove. It is not at all necessary to lay out a large brick oven, for which it is necessary to build a foundation. Metal stoves with hot water tanks are now available for sale. A small wood-burning stove with a dual convection system heats up quickly, but does not retain heat for long and is easy to burn on.
 Metal stove for mini-sauna with heater
Electric stoves are very convenient; they do not require a pipe through which smoke comes out. But they need complex installation. To set up a steam room, a steam room in a mini sauna in a country house is usually made without windows. The main elements in it are the stove and shelves.
 How to make a stove with your own hands
Also, to equip a bathhouse, it is necessary to provide lighting for the premises. The light should be such that all objects are clearly visible. LED lamps in the bathhouse are unacceptable; hot air and steam can lead to rapid breakdown. The best and safest solution for bathhouse lighting may be fiber optic cable. It is better to make sockets only in the waiting room.
Don't forget about legal documents. Before building a mini sauna, you must obtain a construction permit from the relevant authorities.
Do-it-yourself or custom-made mini sauna for your dacha
If the area is so small that it seems impossible to squeeze in a bathhouse, build a compact structure. A mini sauna for a dacha is in no way inferior to a large one in terms of comfort and convenience. To build a mini bathhouse you won’t need a lot of materials, so you can build such a structure for your dacha with your own hands at minimal cost. Often, novice builders are interested in what place to allocate a mini bathhouse on the site, what dimensions and materials are needed for construction.
Mini-sauna for a summer residence: luxury or routine?
Often, land plots only require the construction of vital buildings. Small area of the site, use of every piece of land for planting or thoughtful landscape design it simply doesn't leave room for additional buildings. In this case, there is only one solution left for lovers of bath procedures: building a mini-bath. What is a mini-sauna for a summer residence, how to build it and what is needed to build it - let's figure it out.
 Mini sauna
Mini-sauna for a summer residence. Advantages and disadvantages
The main advantage of a mini-bath is the area occupied during its construction. The second, no less important parameter is the cost of building a mini-bath in the country.
To create such a bathhouse you do not need a lot of building materials. You can either purchase a ready-made bathhouse, in turnkey condition, or build it yourself. This does not require many years of experience working with tools, nor any special builder skills.
 Mini sauna on site
The advantage of small baths is that the structure fits into almost any landscape, a miniature bath structure, and very often the sophistication of stylistic forms.
 Mini-sauna integrated into the landscape
Such baths have only one drawback - they have a small internal area. Most often, these baths are a steam room with a relaxation room. The washing compartment is often combined with a steam room or is absent altogether. These baths are not designed for a large number of visitors; 2-4 people is the maximum for a mini-bath.
A small bathhouse in the country is comfort, convenience and savings in one building. Although with limitations in size and space.
Important! When choosing a frame technology for building a summer house, special attention should be paid to vapor barrier materials and moisture-resistant insulation. Insufficient vapor barrier can lead to rapid destruction of the mini-bath structure.
Construction materials
The traditional material for a bathhouse is wood, but due to the emergence of new materials and technologies, other building materials are also becoming widespread. The mini-bath is built using the following technologies:
- Frame-panel and frame method of construction;
- Construction made of rounded logs or timber;
- Profiled timber;
- Barrel sauna. An original look for a mini-bath made from boards.
Due to the light weight of the structure, lightweight foundations are also allowed: columnar type, screw piles or shallow strip foundations. A barrel sauna does not require a large complex foundation at all.
 Construction of the frame
Soft roofing materials are suitable for covering the roof, but in some cases it is advisable to use metal tiles or other coverings. It all depends on the preferences of the owner of the dacha and his capabilities.
The insulation must be selected according to the moisture resistance parameter, since it can be affected by water and steam. Negative influence. Foil materials should be used as a vapor barrier.
Frame mini-sauna
Building a frame mini-bath with your own hands is quite simple. Let's look at the construction technology step by step:
- Drawing up a mini-bath project. Selection of layout, location. Calculation of materials and delivery costs.
- Construction of the foundation for the construction of a bathhouse. Frame buildings have a relatively light weight, so to build such a bathhouse, a columnar or shallow one is quite enough strip foundation. Consider the need for its vertical and horizontal waterproofing. Otherwise, deformation and destruction of the foundation material under the influence of moisture is possible.
- Construction of a timber frame. In this case, it is recommended to use only high-quality, well-dried graded lumber. When using raw timber and boards, frame deformations are possible in the future.
- External frame cladding. To do this, it is possible to use either a board (in this case, the operation of the bathhouse is possible only in the warm season, due to large heat losses), or OSB (using oriented strand boards, the bathhouse retains heat much more efficiently, but at the same time, the cost of construction will increase due to the use of more expensive material casing).
- Insulation of the building. Mineral wool or polystyrene foam are best. It is important that the insulation is moisture resistant and not hygroscopic.
- Vapor barrier. On modern market building materials wide choose materials for vapor barrier. The main task of this material is to prevent the formation of condensation inside the bathhouse wall. First of all, pay attention to rolled vapor barrier materials; they are easy to use and do not require special skills when installing. Foil vapor barriers have performed well.
- Wall cladding from the inside. For a steam room it is recommended to use natural wood. Pine or aspen are suitable for these purposes, but you can also decorate the steam room with larch, linden or alder. Decorating the inside of a bathhouse is a matter of finances and personal preference. The rest room is sheathed with any moisture-resistant material, including wood-based composites. The main requirement for them is moisture resistance. You can enhance this characteristic of the material using special chemical impregnations.
 Bathhouse lining from the inside
- Flooring. Floor boards in the steam room must be laid with a gap. This is necessary in order to ensure free release of moisture. In some cases, it is better to make the flooring removable.
- Installation of roofing material. To cover the roof, you can use metal tiles or soft roofing materials.
- Engineering installation: stoves in the steam room, fans, water taps and other equipment provided for by the project.
 Frame mini-sauna
Ready-made projects for frame mini-baths are available online, and it is also possible to create such a project to order from construction organizations. But sometimes, in a do-it-yourself mini-bath project, the projects of frame and combined baths are simply combined.
Important! When purchasing lumber, pay attention to its quality. Lumber for construction must be well dried and free from geometric defects.
Bathhouse made of boards
A summer bathhouse made of boards is a variant of a frame bathhouse, the cladding of which is made from boards. Like a frame bath, a bathhouse made from boards can be built quickly and easily with your own hands. The construction technology is similar to a conventional frame bathhouse, with one exception: instead of OSB panels, boards are used for the outer cladding. The budget savings are quite significant, especially if you use unedged boards for cladding. At the same time, such a structure is less durable than one using composites and has greater heat loss than one assembled using panels.
 Bathhouse made of boards
When building a bathhouse, you should pay attention to heat and vapor barrier. The higher quality materials are used in construction, the longer the steam room will last.
Laying boards on the wall should be overlapped. This order of installation will make the wall more dense and will reduce heat loss during use.
Before you build a bathhouse from boards with your own hands, you should take care of the selection of lumber. For cladding the inside of a bathhouse, it is better to use coniferous wood (pine or larch), while for the outer cladding it is better to use aspen. It has a fairly low thermal conductivity, which will allow the bath to retain heat longer. Particular attention should be paid to vapor barrier. Dampness is the worst enemy of wood.
 Bathhouse-dome
Important! When designing and building a bathhouse, do not forget about its ventilation!
An original structure that looks quite elegant and stylish in any environment. The barrel mini-sauna is a Finnish invention; in this case, the sauna structure is built in the form of a cylinder lying on its side. This structure does not require pouring a solid or strip foundation, since the cylinder rests on several supports.
 Bathhouse barrel
The dimensions of such baths are small (from 2 to 6 meters in length), the weight of the structure is also small.
The technology for building such a bathhouse is quite simple at first glance. Assemble the frame, cover it with tongue-and-groove boards, install it on supports and use it. But in fact, a barrel sauna is a complex structure, the assembly of which requires skills in working with tools, precise drawings and calculations. If you want to install such a bathhouse on your site, it is better to contact the company that builds them.
 Mobile sauna
  A look from the inside
What do you need for a bath?
The most necessary component of a sauna holiday is a stove. There are a huge number of mini sauna stoves on the market. But if you have welding skills and an inverter, you can weld a stove yourself.
 Stove in a barrel
Typically, mini-ovens for small volumes are metal structures designed to generate steam. As an example, consider the Varvara “Mini” sauna stove.
 Wood-burning stove Varvara Mini with a water circuit for a bath
This is a wood-burning stove with overall dimensions of 48x66 cm and a height of 88 cm. The steel structure of the firebox itself is covered on top with a casing, inside of which there are convection channels. The air, heating up in the firebox area, escapes into the heater through the holes in the casing, thereby quickly heating the stones. As a result, the oven heats up very quickly, warming up a small room in a very short time.
In addition, there are also simpler stove designs in which the heater is heated directly by exposure to heat from fuel combustion. When using a mini-stove for a wood-burning sauna in a steam room, you need to provide a place for storing fuel, a woodpile or a shed not far from the sauna.
For small steam rooms, in some cases it is advisable to use electric sauna stoves and electric heaters.
 Kamenka
On a note! Installing a heat exchanger on the chimney will allow you to quickly warm up the air in the steam room. But this option is possible with the appropriate dimensions of the bath.
Mini-pools for baths
Additional installation of a swimming pool in the sauna will expand the functionality of the sauna and add comfort. It is worth noting that it is better to initially provide for the installation of a pool in the bathhouse design, since mini-pools for a bathhouse require water supply systems, water drainage, and heating.
 Pool
Pool
For this reason, embedding a pool into a finished bathhouse is quite troublesome and costly. There are several types of pools designed for installation in a bathhouse:
- Stationary. In this case, the pool is initially included in the bathhouse design, a pit is dug under it, the walls of the pool are concreted and covered with a decorative coating. This type of pool is used mainly for full-size bath buildings.
- Font. A metal or plastic structure designed for installation in a pre-prepared bed. To put it into operation, you only need to connect the font to the water supply system.
- Portable pools. Metal structures with plastic trim. Just like a font, they are installed in a prepared bed, after which they are connected to the water supply system.
Swimming pools can be equipped with water heating systems and hydromassage equipment, but in this case, connecting them requires the help of qualified specialists.
Mini sauna for a summer residence
A sauna is distinguished from a bathhouse by the type of steam and temperature. In order to make a sauna out of a steam room, it is enough to install an electric steam generator, an electric heater or a wood-burning sauna boiler inside the steam room. When using a steam room for a sauna, it is recommended that the interior be made from one type of wood: pine, linden or alder. A mini-sauna in a country house should be as closed as possible, almost airtight. Particular attention should be paid to its thermal insulation. This is necessary to maintain a high temperature inside the sauna for a long time, with minimal energy consumption.
 Mini sauna and shower in the bathhouse
How to build a small sauna for your dacha with your own hands
Before construction, you should familiarize yourself with the designs of already built baths and choose the most optimal option. Do-it-yourself mini-bath projects for a summer residence (both frame and timber) are quite widespread, and finding them is not difficult. Before you build a small bathhouse with your own hands, you need to decide on the type of bathhouse, the material for its construction and its location.
 Mini sauna barrel
After all organizational issues have been resolved, you should proceed directly to the construction process. First of all, build the foundation and pour the base, and then proceed to the construction of walls, roof and interior decoration.
DIY foundation on screw piles. This technology is used to speed up the construction of not too heavy buildings and other architectural structures. In the article you will find step-by-step instructions for constructing the structure and useful advice from experts.
The main requirement during construction is accuracy. Everything needs to be done calmly and without haste. This will allow you to build a bathhouse in a short time without any incidents in the work.
Helpful advice! When purchasing materials for construction, focus on the medium and high price range. Purchase soft materials for roofing, insulation and vapor barrier according to a pre-calculated estimate, +10% on the supply of material.
 Mini mini sauna
An important point when building a bathhouse is not to forget about ventilation. For a small steam room, a channel in the wall is sufficient; for larger rooms, a fan will be required. This is necessary so that our small bathhouse at the dacha is a place of comfortable relaxation, and not a carrier of miasma.
Do-it-yourself bathhouse. Projects, photos, videos, designs, choosing a location, step-by-step instruction on construction, how to make interior lighting, useful tips and recommendations - all this is in this material.
Where to buy a mini-sauna inexpensively and turnkey price
The cost of building a bathhouse depends on many factors. First of all, the price of construction depends on the materials and equipment used, as well as the cost of delivery and the location of construction. It will be convenient to order by finished project mini-sauna for the dacha, buy in disassembled condition and assemble on the site. The cost of the building itself depends mainly on the size and configuration. The average prices for purchasing a bathhouse are equal, so you should choose a contractor based on reviews of the qualifications of the workers and the quality of the work performed by this company.
From the presented table it can be seen that you can purchase a turnkey bathhouse for your dacha inexpensively, but you should take into account the delivery of the material to the construction site. In addition, the price of the building does not include the foundation. Work on the construction of a strip foundation costs an average of 10,000-12,000 rubles. But there is a possibility of saving the construction budget by installing a columnar or pile foundation.
 Bathhouse interior
You can separately order a sauna for your dacha, buy an inexpensive stove and sauna equipment. This option is advantageous because it allows you to choose equipment to suit your tastes.
 Electric heater
Photos of small bathhouses in the country with your own hands
This section contains interesting solutions bathhouse masters - photos of do-it-yourself mini-baths for a summer residence, created according to individual projects.


In conclusion, we can say that building a mini-sauna for a summer residence is a completely feasible idea, as in financially, and in terms of working with your own hands. It is necessary and important to note that building a small bathhouse on a summer cottage will take a little time and effort, but at the same time it guarantees a feeling of comfort in free evenings. We hope that our short review will help you make your choice.
 Interior
Mini-sauna for a summer residence: advantages, ready-made models, construction
Mini-sauna for a summer residence: pros and cons, materials for construction. How to build a mini-sauna with your own hands, a review of ready-made models and recommendations for arrangement.
A small bathhouse for a summer residence is by no means a luxury. With minimal construction skills, you can build it yourself in a relatively short time. In addition, the market today offers a wide range of ready-made structures at very affordable prices.
In general, there is plenty to choose from, but so that you can more confidently navigate all the diversity, below we will describe the main types of baths.
Historical classification
Even a quite compact bathhouse for a summer residence can have the most different designs, which, accordingly, provides a difference in sensations when visiting the steam room. And here the main role is played by the type of steam supply, as well as its temperature and humidity.
From this point of view, it is most convenient to consider the historically established types of steam rooms:
- Russian bathhouse is the most popular look on the territory of our country. It is a room with a stove-heater, which, in fact, is responsible for pumping up the heat. A special feature of the Russian steam room is high humidity, which can be adjusted independently by periodically adding cold water to the hot stones.

- The Finnish bathhouse (aka sauna) is only slightly inferior in popularity to the Russian one. The designs of these varieties are identical, but unlike a wet Russian steam room, the air in the sauna is maintained in a fairly dry state. Thanks to this, the human body more effectively resists high temperatures, so experienced amateurs can easily tolerate heat well beyond 100 0 C.
Note!
We should use the usual broom in the sauna only at low temperatures, otherwise there is a risk of severe burns.
- The Turkish hammam is distinguished by the fact that it maintains relatively low temperature. They try to keep the steam in the room quite humid and not heat it above 50 -60 0 C. Thanks to this, you can spend not just a few minutes in the hammam, as in a regular steam room, but up to several hours without any damage to your health.

- A Japanese bath (furo) is essentially a large wooden tub into which hot water is poured. The tub is usually placed in a room with hot (+30 0 C or more) and humid air. There are also varieties of furo designed for several people - the so-called sento. They are large in size, and it is advisable to dive into them only after taking a shower.
Analyzing this list, you can see that small bathhouses for a dacha can only be built in Russian or Finnish technology. To build a hammam, a Japanese bath, as well as other exotic options, such as a Roman or Mexican steam room, it is advisable to build a separate, fairly large room. Naturally, the price of the project will also be appropriate.
Structures used in private households
By type of structure
So, if we have decided that a small bathhouse at the dacha will be built according to the Russian or Finnish type, it is worth understanding the design features.
In private households, the following options can be implemented:
- Mini sauna in the country, which is part of the house itself. If the size of a residential building allows, then a separate room can be allocated for a steam room with a shower. This way we will ensure significant savings on the construction of a separate building, in addition, there will be no need to worry about thermal insulation: additional insulation will only be required for the steam room itself.
Note!
On the other hand, it is important to place it in such a way that the heat from it does not become a source of discomfort.
- Extension to the house. A compromise option that allows you to comfortably use the steam room even if this structure was not originally included in the project. Typically, mini saunas for summer cottages are attached to the back wall of the house, which allows them to be hidden from prying eyes and protected from wind and drafts.

- Full-size permanent structure. This option is suitable for those who want maximum comfort. Of course, building a sauna with your own hands may require serious investment, and you will have to work hard, but as a result we will have a full-fledged sauna in which you can steam without regard to temperature and humidity. And if you also add a terrace to it, then the resting place will be simply ideal!

- Compact version in the form of a mobile trailer. It is quite convenient to transport, installed either on the ground or on a low-power foundation, but has a relatively small area. In principle, you can steam in such a trailer, and even comfortably, but they are only produced in this format inexpensive baths for the dacha.
Note!
The exception is the technology used to produce country houses from a block of containers.
Baths made using this method turn out to be quite large and relatively spacious, and they are cheaper than a permanent building.
- A separate group consists of temporary structures, which are canopies made of tent fabric. They are installed on any flat area and dismantled after use.

By material
A homemade bathhouse in a country house can easily be erected without the involvement of third-party craftsmen. If this is your option, then you should choose in advance what material you will use to build the steam room.

Experts give the most different recommendations, which we tried to summarize in a single table:
| Material | Advantages | Flaws |
| Log |
|
|
| Beam (flat and profiled) |
|
|
| Brick |
|
|
| Cellular concrete |
|
|
It should be noted that this instruction contains information only about the main points. Thus, despite the low fire resistance, prefabricated bathhouses for summer cottages are often made from logs or timber impregnated with special protective compounds.
The same applies to foam concrete: yes, it cracks when it settles, so they try to compensate for this minus by building the most stable base possible.

By heat source
Another important factor Something worth considering is how our sauna will be heated.
A sauna stove can be very different, but the main thing is that it can heat the steam room and maintain a high temperature (up to 100 0 C) for a long time.

The following varieties are available on the market:
- Wood burning is the traditional option. The stove can be made of brick, or it can be a cast iron or steel container with a chimney and a heater located inside the steam room itself. Usually the firebox is located in the dressing room, which allows you to save space in the steam room and add firewood in advance.
- Gas ones are more modern and most economical. The main difficulty is the installation of the equipment, since only a certified specialist can connect it.
- Electric ones are the most compact and easiest to use. They are located in the steam room itself and do not require the installation of a chimney. Most electric ovens are equipped with convenient control panels that allow you to adjust the temperature.

Note! The right decision When installing such a stove, you will need to purchase or rent a diesel generator for your summer cottage: the device consumes a large amount of electricity, so it is advisable to purchase a separate unit to power it.
What if you buy ready-made?
If you don’t want to bother with construction, then your choice is ready sauna for the dacha.
Let's try to figure out what it is and what its features are:
- As a rule, such products are mounted either on the basis of small trailers (sometimes even on a chassis, which makes transportation possible), or on wooden frames covered with boards.
Note!
IN Lately cylindrical models became popular.
They look original, but there are questions about ease of use.
It’s better to independently examine the specimen you like and draw a conclusion.
- Outdoor and interior lining made from clapboard. Since such structures are positioned as budget ones, the lining is mainly pine, albeit well-treated and impregnated with moisture-proof compounds.
- More expensive models are assembled entirely from timber, most often profiled.
- Inside, mobile bathhouses for dachas are equipped with a small compartment for clothes (aka a dressing room), a washing area and the steam room itself. An electric heater is responsible for heating, but you can also find models equipped with a wood-burning stove.
- A water tank is mounted on the roof, and a drainage tray is installed under the washing compartment. At the bottom of one of the side walls there is a pipe through which water is drained.
In principle, the purchase of such a product will be completely justified if you do not have construction skills: the construction of even the simplest bathhouse by a hired team will cost much more.
Conclusion
Expensive, budget and very cheap summerhouses can have very different designs. And although they provide us with different levels of comfort, the wide range allows us to make a choice in favor of the most suitable option. And in order not to make a mistake, we recommend that you remember the information presented above, and also watch the video in this article.
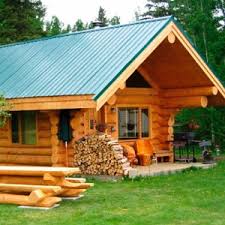
Washing in a country bathhouse is a pleasure available to everyone. Its construction does not require large financial investments. In a minimal plan, such a structure is erected in a few days.
In this article we will look at the topic of how to build the simplest bathhouse in your country house quickly and inexpensively.
Let's start by studying ready-made options, we will discuss the designs of walls, floors, stoves and sewers that are popular among craftsmen.
Design Features
The main conditions for the comfort of any bath are:
- Walls, floor and ceiling well protected from heat loss.
- Reliable insulation of structures from water and steam.
- Compact, quick heating oven.
- Effective sewerage and ventilation.
Examples of country baths
In photo No. 1 we see a simple bathhouse, reminiscent of Diogenes’ barrel. You can only take a steam bath in it. You won't be able to wash yourself here because there is no sewage system in the building. However, if desired, it is not difficult to do. To do this, you need to install a standard shower tray in the corner of the bath and remove drain pipe to the septic tank.

Photo No. 1 Build such a “barrel sauna” at your dacha and steam to your heart’s content
An important advantage of this design is its low weight, allowing it to be placed on a plank terrace.
The device itself the simplest bath from the container category is shown in photo No. 2.
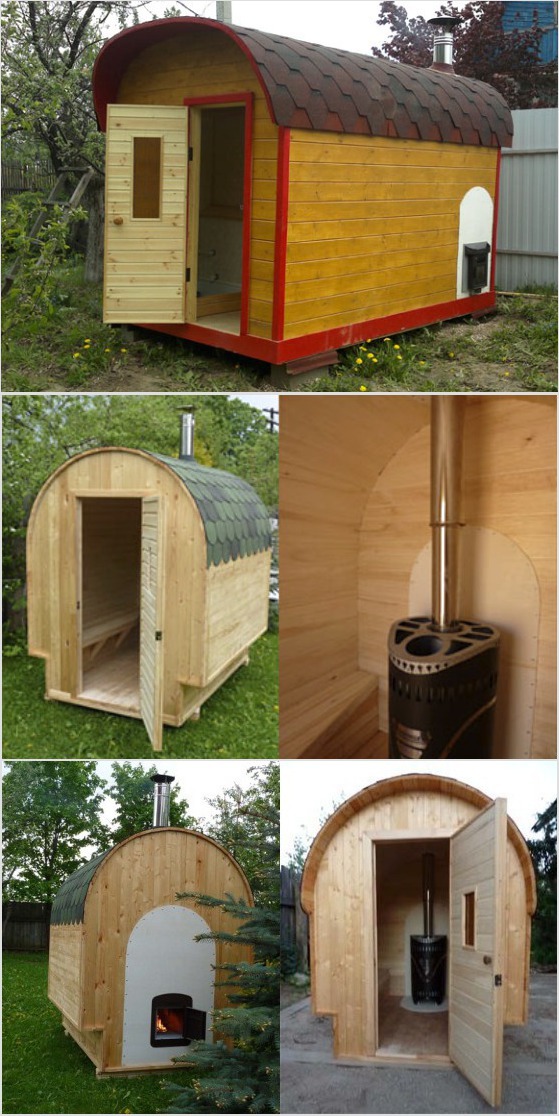
Photo No. 2 Container option country bathhouse
It consists of one steam room. For washing, the owner needs to attach a canopy with summer shower or supplement the room with sewerage, and the stove with a tank for heating water.

Improvising on the theme of a barrel-shaped bath, let's turn our attention to cellular polycarbonate. It can be quickly and easily assembled original design. In order for it to retain heat well, it will take two large sheets this material and a frame made of metal or wooden bars. A mineral wool insulation 10 cm thick is laid between them.

The ends of the building can be made from boards, stuffed onto an insulated wooden frame. Place such a bathhouse anywhere: at your dacha, on a polar ice floe or on the top of Everest and you will always be comfortable in its steam room (photo No. 5).
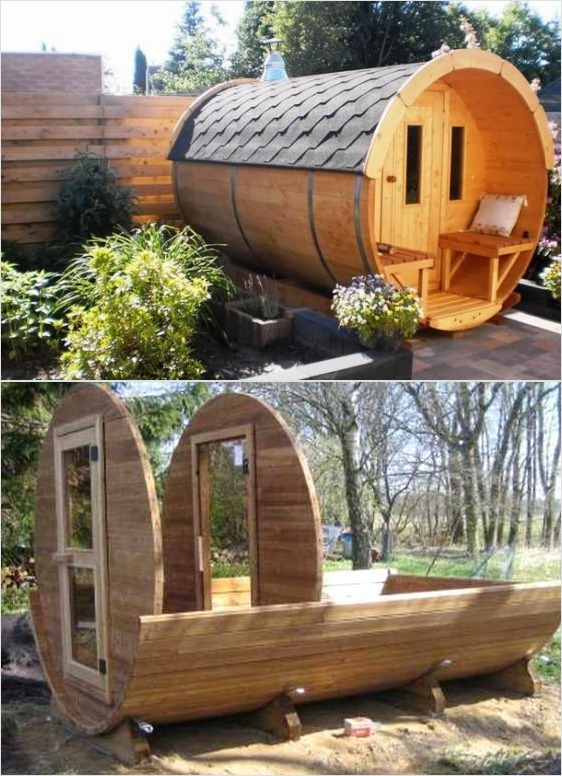
Photo No. 5 Simple barrel-shaped bathhouse
A small Russian bathhouse, made from scraps of timber, can be installed on oak posts. We see an example of such a structure in photograph No. 6.

Photo No. 6 Oak posts are an excellent support for a small wooden bathhouse
Larger structures require their own foundation. There are three possible options here:
- Rubble concrete tape.
- Brick columns.
- Piles made of asbestos cement pipes.
Do not forget that the type of foundation affects the choice of material and wall design. Pile and columnar foundations are used to install a wooden frame, as well as for bathhouses made of timber or logs (photos No. 7 and No. 8).

Photo No. 7 Bathhouse made of SIP panels on screw piles

Photo No. 8 Brick columns - the best option for timber, log and frame structure
The “tape” of rubble concrete is suitable for any walls (made of gas silicate blocks, logs and frames).

A cheap, reliable and simple version of a bathhouse is obtained using technology. For such a structure you will need little: a truck of firewood, a cart of straw and a dump truck of clay (photo No. 10).

The best shape for a wood burning structure is round. It eliminates the need to reinforce masonry corners and looks aesthetically pleasing and original.
By borrowing from birds the technology of building nests from branches and clay, you can build such a simple and warm bathhouse (photo No. 11).
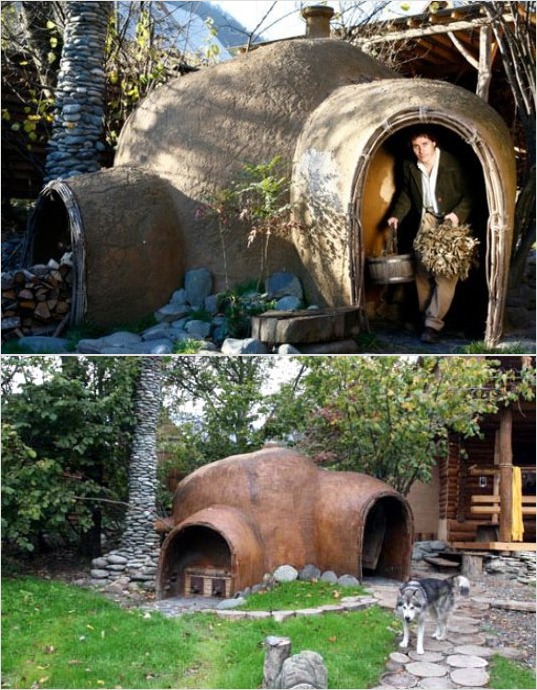
Photo No. 11 Wicker frame coated with clay - “know-how” of an inexpensive bathhouse design
Recommendations for choosing finishing, insulation, sewerage installation, flooring, roofing and stove
For the exterior finishing of a frame bath, we can recommend the following materials:
- Wooden blockhouse.
- Metal tiles or corrugated sheets.
- Plastic siding.
- Cement particle board (CSB).
- OSB board.
- Flat slate.

Photo No. 12 A simple, but at the same time very nice option for exterior finishing of a bathhouse using unedged boards
It is best to use ecowool as insulation. It does not accumulate moisture, does not rot and does not burn. If ecowool is not available in your region, then you can buy regular mineral insulation in the form of a semi-rigid slab. It is easily and simply placed in the spaces between the frame posts.
To protect mineral wool from water vapor and reduce heat loss, the walls are lined with sheets of foil polyethylene. After that, a frame of slats is attached to them and trimmed with wood: alder, linden or pine clapboard (photo No. 13).

Photo No. 13 Steam and heat insulation of the walls of a country bathhouse built from any material
We do not recommend installing OSB board indoors. This material releases toxic gases when exposed to high temperatures.
Options for steam and thermal insulation of walls of a frame structure, as well as a bathhouse built from blocks or logs, are presented in Figure No. 1.

Building a simple bathhouse with your own hands includes sewerage. It can be made from standard plastic pipes led into a cesspool or drainage well.
The water intake funnel is placed in the center or in the corner of the room, and the floor is made in the form of expanded clay concrete screed with a slope towards the drain. Before concreting, you need to compact the soil and cover it with several layers of waterproofing. Wooden floor- an excellent option, but in the bath it quickly rots and requires replacement. Instead, we recommend making gratings from wooden slats and laying them on a concrete screed. After washing, they can be removed, taken outside and dried.

The design of the bath ceiling is standard. First they “shoot” at the rafters vapor barrier film and fill the counter-battens (3x4 cm). A clapboard cladding is attached to them. The gaps between the rafters are filled with insulation and covered with under-roofing film. It protects it from weathering and atmospheric moisture (Fig. No. 2).

Fig No. 2 Ceiling structure of a country bathhouse
A counter-lattice is stuffed onto the film, creating a ventilated gap between the roof and the insulation. The work on installing the ceiling and roof is completed by installing the main sheathing and laying the roofing material (slate or metal tiles).
The main “detail” of any country bathhouse is the stove. It should provide rapid heating of the air and maintain a high temperature. A metal stove heats up the fastest.
To accumulate heat and create steam, it must be equipped with a compartment for stones. Options for stoves for simple baths A lot has been created, so we will not dwell on them in detail. Let's just say that the easiest way to make a heat generator is from a large-diameter steel pipe, an old gas cylinder or barrel (photo No. 15). Another easy-to-use material is a steel sheet 3-5 mm thick (photo No. 16).

Photo No. 15-16 A simple stove made of a pipe and a stove made of ferrous metal
Having mastered the simplest welding techniques, you can outside help you can assemble such a structure.