Modern technologies sewing and marketing can provide us with a truly limitless amount of clothing. And all of it needs to be laid out and hung somewhere. For a dry and clean environment, a closed cabinet with shelves and a hanger bar is ideal. However, removed after working day, wet or dusty clothes in the closet are closed. For such cases, there are floor hangers.
They are also good because bulky wardrobe items, when placed on such a hanger, do not come into contact with the wall, as a result of which both the wallpaper and the clothes themselves are not damaged. At the same time, the hanger can be folded, removed, rearranged at any time, which is very important in small apartments.
If you make it yourself from scrap materials, then it also has the following advantages:
- the price is significantly reduced;
- a thrifty owner feels pleasure from the fact that waste from repairs has gone into business;
- the hanger turns into an original, exclusive piece of furniture;
- any beautiful, good thing works for the positive reputation of its author.

Floor hangers: types of materials and designs
If desired, the hanger can be made from any durable material, but most often used:
- wood, especially fine-grained wood (walnut, birch, beech);
- metal, such as profile trim or reinforcement;
- polypropylene water pipes.
Structurally, floor hangers are divided into several different categories.
- Orderly, it is also a floor lamp hanger, or hanger. It is a vertical bar on a support in the form of a pancake or legs; in the upper part there are hooks for clothes and hats. Takes up minimal space, high-positioned hooks eliminate injury. But such a structure easily collapses due to the small support area. Used for placing jackets, raincoats, coats in hallways.
- Frame theater-wardrobe. A long hanger with an arbitrary number of hooks that can be arranged in several rows. Stability is ensured by wide legs, which, however, take up a lot of space. It is rational to place it in wide hallways based on big family and frequent guests.
- Folding frame. A small hanger, half the height of a person, designed to store a suit in an unfolded form. The upper element of the frame is made in the form of a trempel - hangers for a jacket, shirt or blouse, the second element assumes the placement of trousers. Special hooks for ties and belts are available. Looks solid in the bedroom, easily folds and stows on a closet or under the bed.
Attention! Any floor hanger can fall, so if you have small children in the family, it is better to choose a wall-mounted option.
We make a beautiful wooden hanger with our own hands
To make a good hanger for a casual suit, you will need the usual set of tools, which includes, among others, a drill, a screwdriver and a hammer. The work will consist of the following stages.

- We choose a drawing taking into account the size of the clothing and the dimensions of the room.
- We prepare materials. Ideal for self-processing The tree is considered to be pine. We purchase pine timber from a hardware store with a reserve, taking into account possible defects in the work.
- We cut out the parts according to the drawing. Where necessary, we achieve symmetry. We process flat parts with a grinder, curved parts - sandpaper.
- Selecting screws for wood suitable color, mark the places for fastening and drill holes, the diameter of which is approximately half the diameter of the screws.
- We assemble the product by tightening the screws by hand.
- We treat with stain and varnish.
- We glue soft strips of felt onto the parts in contact with the floor. If desired, the stands can be equipped with wheels.
Advice. Raise the trouser bar higher, then, if necessary, you can place several hangers with shirts across it.
Original hangers can also be made from:
- a worn-out floor lamp, replacing the lampshade with hooks; the metal rod can be braided with vine or rattan;
- the back of an old chair, separated from the seat along with the back legs;
- a small dry tree mounted on a solid base.
Advice. Hooks cut from the forks of the branches of an unnecessary Christmas tree look original.
Pipe hanger: creative and economical
After repairing a plumbing unit, there are always a lot of scraps of PVC pipes that are a pity to throw away, but there is nowhere to use them. They can make an original floor lamp hanger, especially if you place it in a bathhouse or in a country house.
The main problem with such a hanger is its stability, so the base must be made as heavy as possible. To do this, sand or gravel is poured into the sections of pipes from which the base is made, after which the ends are closed with plugs. The operating procedure is as follows.
- We draw a design for the hanger and mark all the straight pipes, fittings, splitters and plugs on it. We buy what we need.
- Remove burrs (with sandpaper) and dust (with a rag).
- We stretch the rope through all the parts and tighten it in the workroom or in the yard. We paint with spray paint desired color and leave to dry for two days.
- We assemble the structure using PVC glue.

Aerobatics: floor hanger made of metal
Create for real beautiful hanger You can make it from metal if you master the cutting and welding techniques of this material. However, there is a fairly simple way to make a designer hanger by assembling metal elements with wooden ones.
For work you will need wooden beam round section and several copper plumbing accessories:
- 6 knees;
- 4 tees;
- 4 plugs.
An important condition: the input diameter of the beam must match the diameter of the copper parts. We cut the timber into pieces according to the drawing and tightly place coppers on it.
We are convinced that if you need to add a floor hanger to your home decor, you don’t have to buy one. It is better to purchase materials and create a functional but unique thing with your own hands.
DIY floor hanger: video
The hallway, in a sense, is the face of the entire apartment. I want to feel coziness and comfort from the very entrance, so sometimes there is no point in cluttering it with massive cabinets. In this article we will tell you how to properly make a wall hanger with your own hands from wood and other materials, we will show drawings, photos and videos on how to create a clothes hanger in the hallway.
Some features
A wall hanger can be placed not only in the hallway, but also in the bathroom and kitchen, so you can make it design solution, which will add zest to the interior of the room. The main requirements that can be presented to this element are:
- simplicity;
- ease;
- simplicity;
- strength;
- availability of materials;
- compactness.
According to the installation method, it can be:
- wall;
- ceiling;
- mobile.

In the first option, it makes sense to make a corner structure. If you place the hanger on the floor, you can place more weight on it. Options can be combined, creating, for example, a wall-mounted hanger with floor support.
The floor structure is not usually used in bathrooms and kitchens. This is impractical: such a hanger takes up quite a lot of usable space.
Hangers are classified according to the method of hanging clothes:
- with hooks;
- with a barbell under the shoulders.

In the first case, the entire product will take up significantly less space, but you can hang any clothes on hangers without fear that they will wrinkle, stretch and thereby lose their presentable appearance.
Materials

Wood and metal are most often used to make hangers. Someone may decide to order a ready-made forged structure, if it fits into the overall picture. Hooks can be attached to:
- glue;
- self-tapping screws;
- magnets;
- suckers.
If you plan to hang outerwear that is winter time is especially difficult, then the most the best option self-tapping screws will be used. The rest are perfect for the bathroom or kitchen, where towels, bathrobes or oven mitts are usually placed.
The simplest

This option is used most often and it has a lot of variations that can be combined and combined. In order to make such a design, we will need:
- the material from which the hanger will be made;
- hacksaw or jigsaw;
- fastening material;
- roulette;
- corner;
- level;
- pencil or marker.

The most simple solution there will be a bar with hooks. To make it, we will need a wooden plank (it should be without cracks or chips, and also well dried); instead, you can use part chipboard sheet or MDF. Its length is selected to suit your needs, and the width should be sufficient to place hooks on it. Wooden base can be coated with varnish or stain; the slabs do not need this, because They already have a laminate applied to them. After this, several holes are drilled in the wall (their number will depend on the total length).
The distance between them should be such that there is a 5 cm indentation from the edges of the board. To ensure that the holes are in the same plane, use building level. Dowels are inserted into the holes, and the base is screwed to them using self-tapping screws. Hooks are already attached to the bar itself. If you choose good fastening material, then this design can withstand heavy outerwear.

You can get creative with hooks. Instead of buying them, you can use, for example, old spanners. First they are cleaned and polished. After this they bend. Two holes are drilled into them, and the keys are screwed to the bar. For these purposes, you can also use forks. You just need to take steel ones, because... aluminum is very fragile. The cloves themselves can be given an interesting shape.
Tree twigs are also suitable: such a twig needs to be located on a small branch. To fix it to the base, you can slightly grind down the plane of the branch using grinding machine, after that the hook is simply screwed on with self-tapping screws. It is not necessary to place them in one row. You can do them at different levels. If you draw a staff, the hooks will serve as notes. A rectangular plank is not a requirement. On the round one you can hang hooks like numbers on a clock, and draw arrows in the middle. In addition, the base can be made in the shape of a heart, cloud, sun, etc.

It is important that the wall under such a hanger has final finishing, but not whitewashed. This is necessary so that things do not get dirty.
Let's complicate it

To prevent things from getting dirty on the wall, you can slightly improve the entire structure. You need to take two planks same size. Their length must correspond to the width of the planned structure. They are fixed in a horizontal position parallel to one another (one higher, the other lower). Next, we fasten several more vertical slats between them (we do this using self-tapping screws; the length of the fastening material should be twice the thickness of the slats in order to tighten them well together.).
In width they can be the same as the previous two or a little thinner, in length - 1-1.3 m. If this is a hanger in the hallway, then it is good to attach a shelf on top for hats and caps. To do this, you will need a board 25 cm wide (you can take several elements that are smaller in width and secure them together using two jumpers). It can be fixed to the overall structure using metal corners or wooden jibs.
There is one more interesting option. To make it, you will need a block with dimensions of 5x5 cm. You need 7 of them. 30 cm each. To begin with, the boards are cleaned using a sanding machine. Sharp corners can be smoothed out. After this, cover them with several layers of varnish. Next, they will need to be secured to the wall using a hammer drill and self-tapping screws. They need to be arranged in the shape of two letters P, which are connected at the bottom by a jumper.
In each plank using feather drill 15‒20 mm we make two holes. Next, we cut out cylindrical dowels with a diameter for our hole. We clean it and paint it to match the color of the hanger. We coat them with PVA glue and embed them, let them dry well.

Most likely, you will like a hanger in the form of a tree. To make it, we need a sheet of MDF, chipboard or plywood. Using a marker, draw the outline of the plant. Next, use a jigsaw to cut out the resulting shape. The ends are processed and painted over or edged (in the case of chipboard). Using self-tapping screws, the product is attached to the wall, and hooks are hung on the branches. Here you can use real knots, as in one of the previous options.
Ceiling and tramples

Hooks are not always the way out of the situation. Often you need to make things fun on trempels. In order to ensure this, it is necessary to provide a horizontal rod. In this role you can use, for example, wooden plank 50x50 mm. It is better to round off sharp sides using grinder, then the hangers can move freely and can be easily removed. If the plank is long, then it is necessary to provide a horizontal jumper. Such a rod can be attached to the jibs of a hanger with a shelf, which was mentioned above. Instead of a wooden holder, you can use a special chrome-plated furniture tube. It is fixed using flanges.
You don’t have to use the wall for mounting at all. For this we need a chrome tube. We cut off two pipes 90 cm long. We attach two flanges to the ceiling (we select the distance between them as needed). We insert and fix these pipe sections into them. Next, we take another tube, its size will be such that it fits between the two hanging pipes. We mount the horizontal tube to the vertical ones using angles. The result is a minimalistic hanger for trempels.
This article is intended to give direction to your imagination, not to provide everything. possible options. We are sure that everyone has things at home that can be used in interesting ways.
Video
See what kind of hanger can be made from just a few planks:
Photo


As you know, theater begins with a hanger. The hallway also begins with hangers. The hanger is important element interior, capable of decorating and complementing, as well as streamlining the environment. It should look attractive and not take up much space. Today the furniture industry produces a wide range of various designs various designs, however, many are interested in how to make a clothes hanger with their own hands. It is these products that transform the atmosphere, make the premises unusual, original and with a “zest”.

Making a hanger yourself is quite simple. This will require imagination, as well as the desire to make something extraordinary, something that cannot be bought in a store. Homemade hanger, without a doubt, will decorate any room and attract the admiring glances of guests. To make it, you can use any available materials - empty bottles, beads, wire and all sorts of little things that you will probably find at home. Gifts of nature are perfect for this purpose, for example, bizarrely shaped branches, as well as leftovers. building materials after repair.
The design and shape of the future product depend on the wishes of the owner. You can look for inspiration on the Internet, look at photos of original hangers, or download a diagram of an idea you like. In any case, you first need to decide on the type of hanger and the material for its manufacture.
What types of hangers are there?

There are two types of hangers that you can make yourself - wall and floor.
A wall hanger is the simplest solution. It usually consists of a horizontal crossbar to which hooks are attached in one or several rows; it can be provided with an upper shelf for hats or a special cross beam for "hangers". The shape of the horizontal crossbar-base is usually rectangular or with rounded corners, but if desired, it can be made absolutely anything. For example, in the shape of a heart or a tree leaf.
Usually wall hanger in the hallway is made of wood. The fact is that wood is an excellent natural material, which can be easily processed at home: cut the required form made of canvas and coated with any paint.

floor hanger is a structure consisting of a vertical support on a base. Hooks for clothes are attached to the top of the support. It is important that the hanger is not only decorative, but also practical. Special attention need to be given to the base. It must be very stable so that the structure can withstand the weight of the clothing and not fall. There are many design options for such hangers, but they differ not only in shape and size, but also in the material they are made of.
Floor hangers

First, you need to decide on the material. Floor hangers are:
- Metal.
- Forged.
- Wooden.
- Plastic.
Metal products are very strong and durable, have a lot of weight, and therefore are considered the most stable. Metal hangers with elements artistic forging- real works of art that will add grace to any hallway. However, not everyone can make this kind of product at home, because the work will require complex tools and skills in working with metal.

The easiest option for making a floor hanger from metal at home is to re-equip an old floor lamp. It has a support and a lampshade to which you can attach hooks made of thick wire. By the way, you can weave from it original patterns and use them as coat hooks. The base can also be decorated with decorative elements.
Wooden hanger - wonderful a budget option for the hallway. Wooden crafts do not go out of fashion. They fascinate with their natural beauty; they can be used for any style and direction in the interior.
For the manufacture of wooden hanger you can use a sheet of plywood or boards, but if you want to make something truly unique, it is better to turn to the gifts of nature. So, a small dry tree can become the basis of a future hanger.

It should be cleared of bark and knots, thoroughly sanded and secured to the base. IN in this case It is better to provide a support on three legs, it is considered the most stable. Then you need to decorate the top of the hanger. It can be made like a tree crown. Can be used as hooks beautiful shape branches that should first be cleaned and sanded.
The final stage is coating the entire structure with varnish or paint. As decoration, you can use balls or large beads, which are fixed with glue to the base of the hanger or on hooks.
Photo


Video
This video shows the process of making a wall hanger.
Here are some more ideas for inspiration.
Such hangers can be used not only for outerwear in the hallway, but also as mini-wardrobes in the room. It all depends on what type and design you choose. Rack hangers for clothes are functional, easy to move from place to place, and free the backs of chairs from unnecessary clothes.
This article contains several interesting and simple ways make a floor clothes hanger with your own hands. They won't take much time or effort.
Choose the option you like and go ahead to interior changes!

Necessary materials:
- Two long copper pipes 3 m and 2 cm thick, each of them will need to be cut into the following parts (this can be done at the hardware store where you will buy everything):
- 1.5 m long– the height of the hanger (this height should be enough for both jackets and coats, but you can take more or less as desired);
- 1 m long– the size of the pipe on which you will directly hang things (it can also be longer or shorter, calculate how many things you want to place there);
- two tubes about 20-25 cm long– we will use them to make hanger legs.
That is, it turns out 2 copper tubes 1.5 m each, 2 1 m each, 4 20-25 cm each.

- 4 copper elbow bends (tubes bent at an angle of 90 degrees) for attaching pipes to each other, match the diameter to the pipes (approximately 2 cm);
- 2 T-connectors;
- 2 pipe caps;
- Glue (epoxy glue or consult with the store salesperson which of what is available will work);
 Step-by-step instruction:
Step 1: Measurements
Measure the space on the floor where the hanger will be placed to make sure it will fit. If you take the indicated dimensions, the result will be 150 cm x 100 cm x 45 cm.
TIP: Adjust dimensions if necessary.
Step 2: Assembling the hanger legs
We begin to fold the floor hanger itself from the legs, make a support and a stand. To do this, take the first pair of 20 cm tubes and attach them between a T-shaped connector, and then we do the same with the second pair.
Step 3: Attach the protective caps
To prevent dust and dirt from getting into the middle of the pipes that will serve as legs, you need to close the holes. Attach a pipe cap to each of the two legs folded in the previous step at one end.
Step 4: Base
- On tubes with caps on the other side, attach an angle in this way: when the angle is on the floor, the T-shaped connector located in the middle of the leg should be directed upward.
- Take one of the meter long pipes and insert it into the corners, now the base of the hanger is ready.
ATTENTION: To securely fix the structure, you can use glue (at least in all joints), but then the hanger cannot be disassembled and folded again (when moving, for example).
Step 5: Side Posts
Insert a one and a half meter pipe into each of the T-shaped connectors, thus forming the side posts.
Step 6: Finishing Touch
- Attach a corner to each of the newly installed racks (they should be directed towards each other), and insert a meter-long pipe into them.
- You can also attach felt pads to protect the floor. The floor hanger is ready!

Note: Because this design It can be easily disassembled (if you didn’t use glue), then you can change its length, for example, depending on the time of year: in winter there are more things - they installed longer pipes, in summer they are shorter.
Hanger made of PVC pipes (budget option)
The method of making this floor hanger is similar to the previous one: the pipes are folded like a construction set to form a hanger. But here we don’t use copper pipes, but PVC, so it will be much cheaper. And, of course, one more new idea design.

Necessary materials:
- PVC pipe 2 m long and 2.5 cm in diameter, it needs to be cut into the following parts: 12 cm (6 pieces), 80 cm (1 piece), 20 cm (2 pieces) and 10 cm (1 piece).
- PVC pipe 50 cm long and 2 cm in diameter, cut into 3 pieces of 15 cm each.
- 4 corner bends with a diameter of 2.5 cm.
- 3 corner bends with a diameter of 2 cm.
- 6 T-connectors with a diameter of 2.5 cm.
- PVC glue.
- Aerosol paint.
- 4 PVC adapters from 2.5 cm to 1.25 cm.
- 3 PVC adapters from 2.5 cm to 2 cm.
- Felt pads to protect the floor (optional).
Step-by-step instruction:
Step 1: Cut the tubes into pieces of the desired size
First of all, we have to cut the PVC pipes for rack mounting. You can do this yourself at home with a PVC cutter or ask at a hardware store.
After cutting the pipes into pieces, their edges can be sanded so as not to be scratched when assembling the hanger.
Step 2: Sorting materials
Now we have all the necessary parts and for convenience it is better to sort them, then the assembly process will be faster and more orderly. Arrange the materials in piles, depending on their purpose.
- For the hanger stand you will need: 4 corners, 4 adapters from 2.5 cm to 1.25 cm, 3 T-connectors and 6 tubes 12 cm long (diameter 2.5 cm).
- For each hand hangers: T-connector, PVC adapter from 2.5 cm to 2 cm, 15 cm PVC pipes with a diameter of 2 cm and a corner with a diameter of 2 cm (you can also put a pipe cap on it).
- For stand: one PVC tube 80 cm long, two 20 cm, one 10 cm and a cap.
Step 3: Assembling the hanger
- Stand

Secure each two tubes with a T-connector. Insert one of the three resulting structures between the other two, as shown in the photo. Place the corners on the edges of the other two, turning them down so that the hanger stands on them.
- Hands

Place the T-connector, adapter, tube and cap together as shown in the photo.
- Rack
Insert a tube 80 cm long into the stand into the T-shaped connector, attach one of the arms of the hanger to it, then attach a tube 20 cm long, another arm of the hanger, again the same tube and arm, a tube 10 cm long and the finishing touch put the cap on top.

To make the structure hold better, it can be secured with a special PVC glue. Be careful with the arms of the hanger to stick them turned in in the right direction- corners up.
Step 4: Painting
The design of the hanger is ready, but it still doesn’t look very aesthetically pleasing. Apply spray paint of your chosen color carefully and evenly, without staining the room.
TIP: to make the hanger more stable, you can pour sand into the pipes from which the stand is made. After such a little trick, the hanger will not fall and turn over.
Pipe hanger with several levels
Another hanger of this type, only with expanded functionality: here you can not only hang clothes, but also put shoes. Compact and convenient wardrobe.

Necessary materials:
- PVC pipes with a diameter of 20-25 mm:
- 4 length 100 cm
- 2 length 65 cm
- 4 length 48 cm
- 6 20 cm long
- 8 5 cm long
- 10 T-connectors
- 6 corner bends
- Plate for bottom shelf

We fold it completely similarly to the two hangers described above.

Wooden floor hanger in 10 minutes

Necessary materials:
- Wooden sticks (4 pieces) 180 cm long and 2 cm in diameter.
- Rope: This will be used to tie wooden sticks together (you can also use leather cords, wire, or some other decorative material, the main thing is that it firmly and reliably fixes the structure).
- Spray paint: We used gold to paint the bottom of the hanger legs (you could also use a different shade or color).
- Paint: we used four various colors paint, one on each hanger leg (but, of course, you can use the same color for all legs).
- Painting tape: When using spray paint, this will help you avoid over-painting.

Step-by-step instruction:
Step 1: Paint the supports
- Paint the legs in your chosen colors and let the paint dry.
- Paste masking tape at the place where it should end spray paint, and carefully apply paint to the legs. It is better to do this outside, or cover the floor with newspapers so as not to stain anything. Peel off the masking tape.

Step 2: Forming a hanger
Connect wooden supports together using a rope, and then gradually move them apart. The result should be something similar to the base of a wigwam, the legs should be spaced wide enough so that the hanger is stable and easy to use.

This hanger takes up a lot of space, so it is best to place it in a corner.
Interesting ideas and photos
Tree hangers
This can be a neatly sanded tree trunk or branch, or a folded wooden structure. The main thing is that there is one support and branches from it - the handles of the hanger. An original and useful addition to the hallway. 

Designer hangers
The number of elements and design may vary, but what all these floor hangers have in common is that they can be quickly folded and disassembled just as quickly (if you didn’t use glue). Sometimes more expensive and noble materials are used, such as copper, sometimes wood or PVC, in any case the result is beautiful and extraordinary.


An invariable element of the interior is the hanger. We encounter this object when we enter a room from the street. Today, many varieties of such products are produced. They are built into a closet, hung on the wall, or placed on the floor. Clothes hangers easy to rearrange in Right place, floor products can be an independent piece of furniture.
If there was no structure for storing outerwear, people would put coats and jackets on the shelf, having previously rolled up the items. The clothes would take on an unpresentable appearance, so this element is difficult to overestimate. Interesting design and convenience makes these items popular. Such products are purchased for the hallway, veranda, and placed in the bedroom and bathroom. Tree-shaped structures, letters of the alphabet, interesting figures etc. Hangers complement the interior, it takes on a finished look.
Advantages
When entering a room, a person immediately takes off his outer clothing. Removed items are hung in the closet, on wall hooks, for these purposes they use floor models. You have access to the desired wardrobe item placed on it. When clothes are placed in a closet, you have to spend time searching for the right thing. You don’t have to look for a coat on a floor hanger; it’s in plain sight. The cabinet takes up more space than a floor-standing structure. Not all hallways have space to install it, so a floor product becomes the preferred option. 
The advantages of such interior items:
- Mobility is an important advantage, since the hanger can be easily moved to another place at any time.
- Wall-mounted products are attached to the wall, which damages the coating. During dismantling, you will have to repair the surface. This will not happen with the floor option. If you have changed the decor in the room and the hanger is no longer needed, you can easily put it away in the utility room.
- Rich the lineup makes it possible to choose an item to suit any interior style.
- Capacity. On the hanger you can place many things in a circle, which is convenient if you have guests.
On such a device, clothes hang freely; some models are equipped with hangers on which wardrobe items are placed. If your clothes are wet and need to be dried, hang them up carefully and move them close to a heat source.
Materials
Depending on the material used, hangers are as follows:
- The metal structure has impressive weight and excellent stability. Such products are made from chrome-plated aluminum, painted in different colors. It is roomy, will allow you to place a lot of things, and is irreplaceable if you have guests. Simple devices are painted in a variety of colors.
- Forged products will become a unique decoration for the veranda or hallway. They are stable, comfortable and practical. Such a product will enliven the interior and bring chic to it.
- Wooden models look great in the hallway. They are made from different types of trees. Strong and durable products are obtained from this material. Wooden structure appropriate in classic interior and in fashionable loft. It will complement the country style interior. This option is suitable for a hallway decorated with natural materials.
- Plastic models are lightweight, inexpensive, but large quantities things on them, they may fall.
 Select suitable option for office, home, cafe. There are many original models for solving interior problems on sale. Unique products are created by designers to order, in which case they fit perfectly into the home decor.
Variety of models
A huge selection of such items allows you to choose the right option for a specific design. There are many types of floor hangers.
Tripod hanger is a tripod with hooks; they are often equipped with additional hooks for bags and a horizontal hoop for umbrellas. The bottom is made like a tripod or with flat base. This convenient design will solve the problem with many things in the hallway. It is convenient to hang jackets, coats and other things on it. 
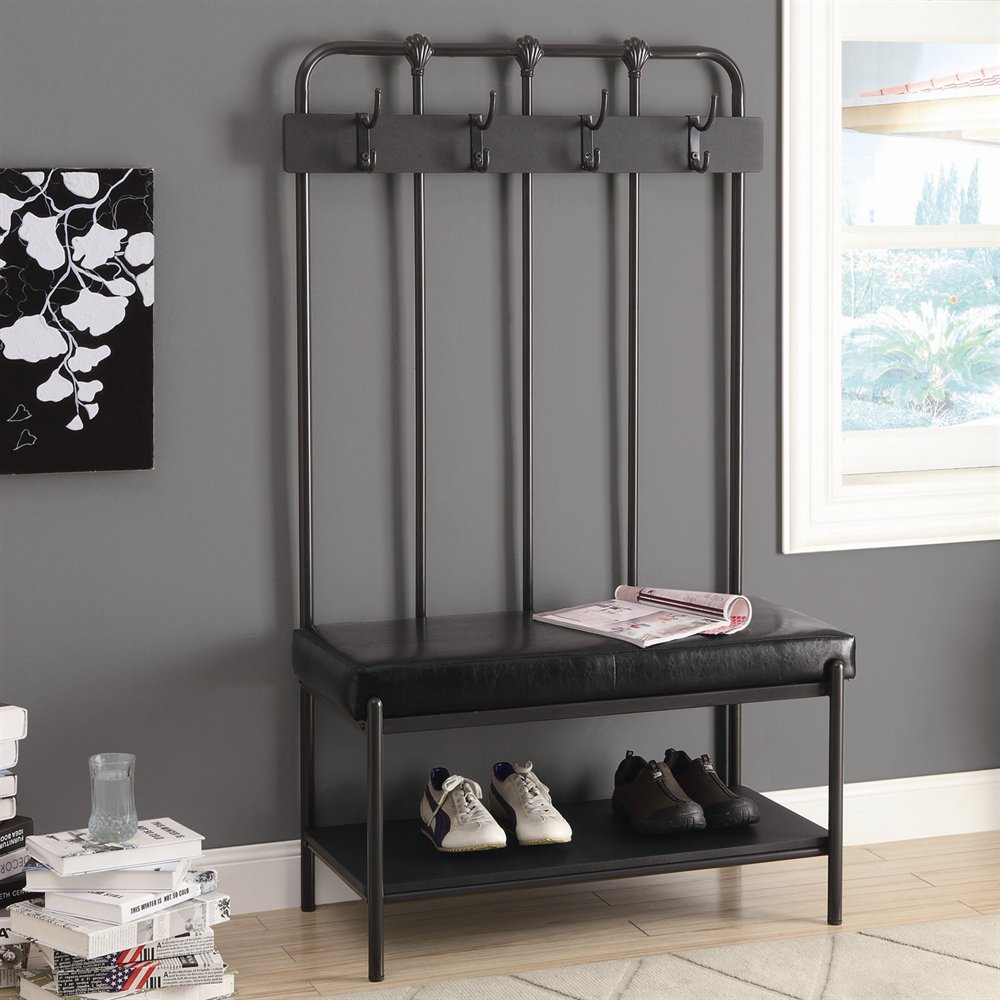
Model in the form of a chair with a high back will allow you to change your shoes by sitting on it. It has a shelf for shoes and a bar with hooks for clothes. This convenient option, especially if the apartment has old man or small children. There are folding models that can be hung in a closet. This original and functional item will become the highlight of the hallway interior. 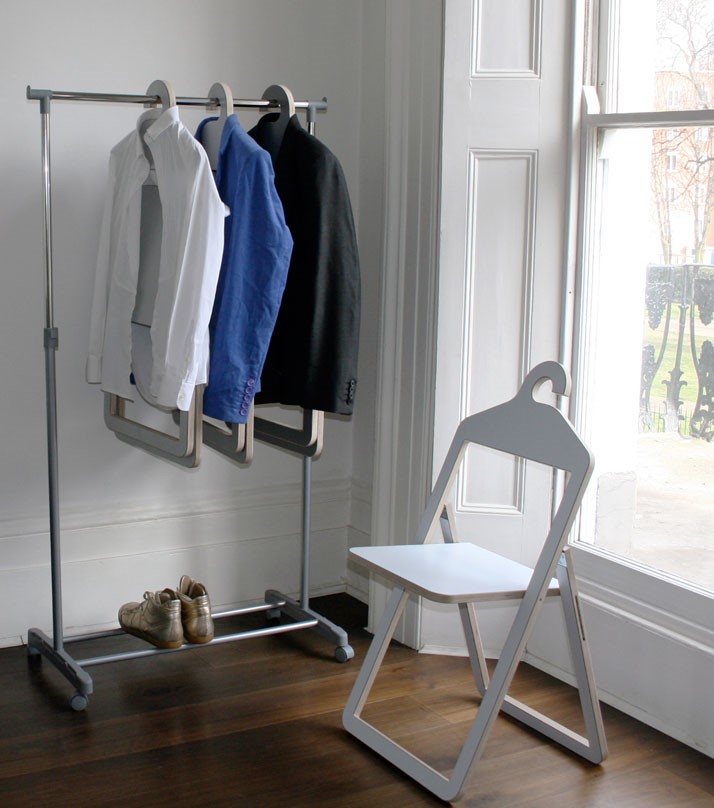
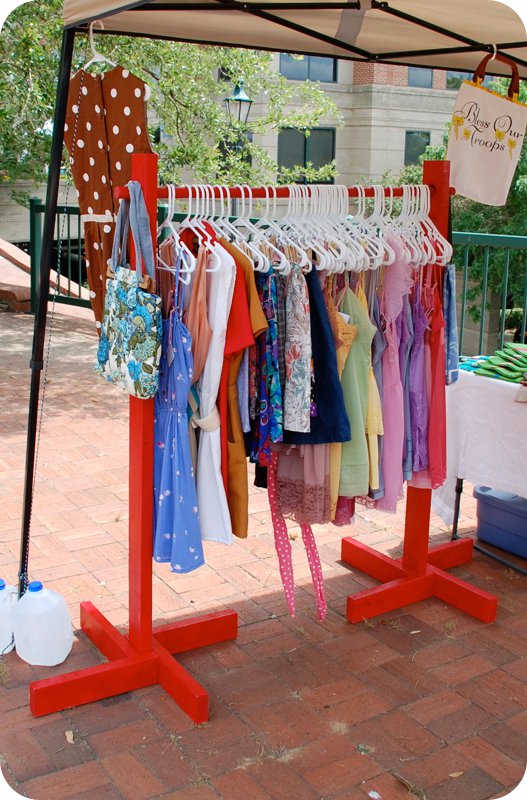
Hanger rack has a U-shape. The crossbar is equipped with hooks or is intended for placing clothes on hangers. This product is placed in the dressing room. Your things will not get wrinkled and will look impeccable. A good option is a model with a stand for umbrellas, shelves or special holders for hats. 
Hanger-basket has a base made in the form of a basket. Umbrellas, slippers and other things are stored in it. It is indispensable in your home, but takes up more space than the previous option. 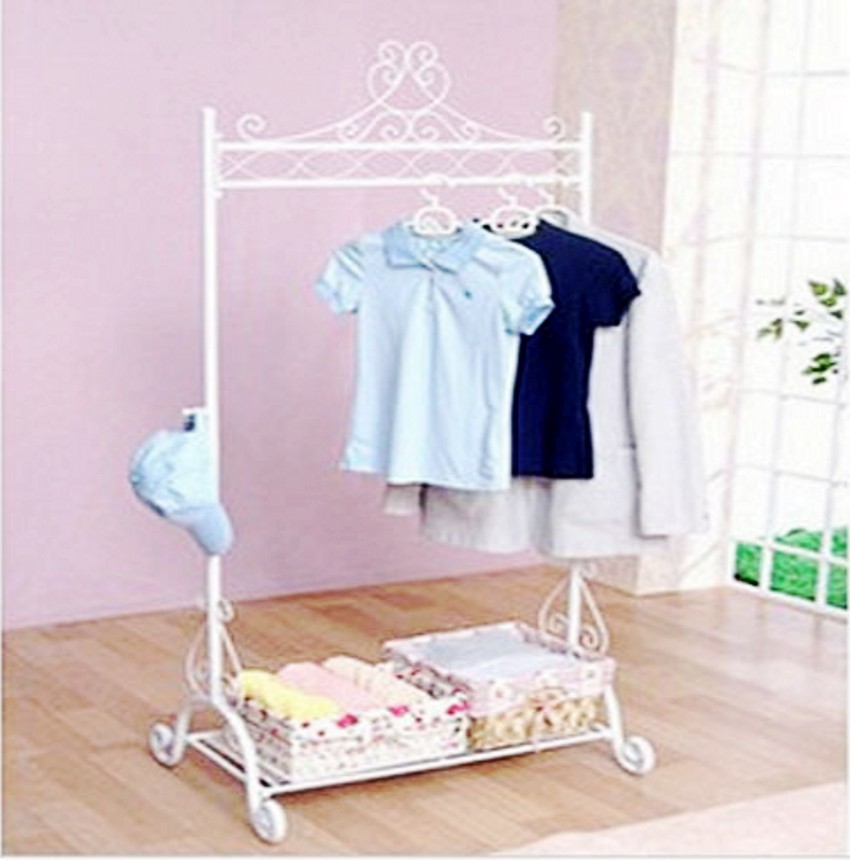
Suit model Convenient for storing trousers and jackets. It is also suitable for a dressing room. A floor hanger will help keep your suit tidy. It will be a wonderful addition to your office, and your jacket will always be in perfect condition. Such an item is necessary not only for men's suits and ties. Women's items can also be hung on the product: cardigan, shawl, coat. 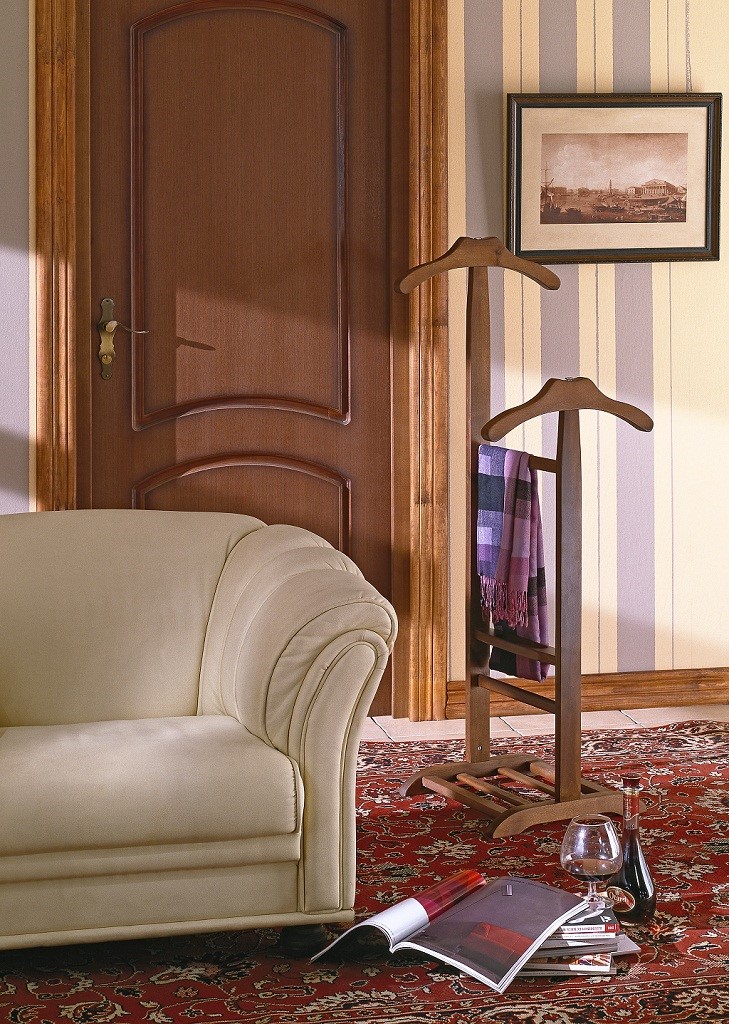
Non-standard hanger models
They combine functionality and beauty. Unusual products became fashionable back in the 70s of the last century in Italy. Scandinavian designers once came up with tree-shaped hangers that look great in the interior. If you have the desire and space, you can place several of these ornamental trees at the entrance. Today in interiors you can find hangers in the shape of flowers, abstract items, etc. Mobile objects are in fashion. Products on wheels are used in offices as they are easy to move. But they can be a great addition to your home decor. 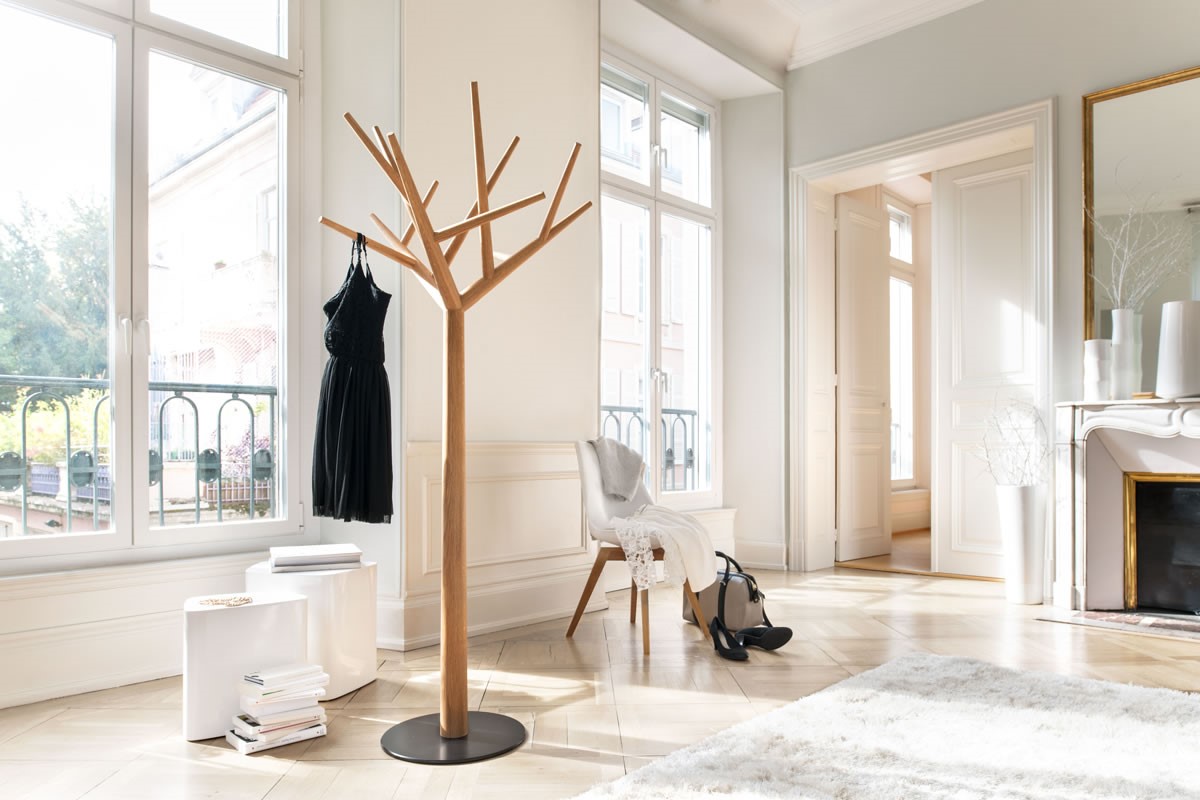
Products with special system adjustments allow you to change the height. The system of a standard hanger will create a convenient design for children. This is especially true when many children are invited to the house for a celebration. Geometric designs made of chromed metal, original models in the form of art objects are available to everyone. Having purchased a bright design, focus on it. Owners of spacious apartments and country houses can safely choose a fancy model that will become an original piece of furniture.
Choosing a clothes hanger
It’s difficult to do without a hanger in an apartment, country house, the office needs it. Depends on her appearance hallway The hanger should be in harmony with the interior and accommodate all the necessary clothes. For an apartment, it is better to opt for a compact floor-standing product. Floor hangers often have questionable stability, so when choosing, you need to consider what items they will be used for. There are many interesting items on sale, from which it is easy to choose a high-quality, stable and safe model. 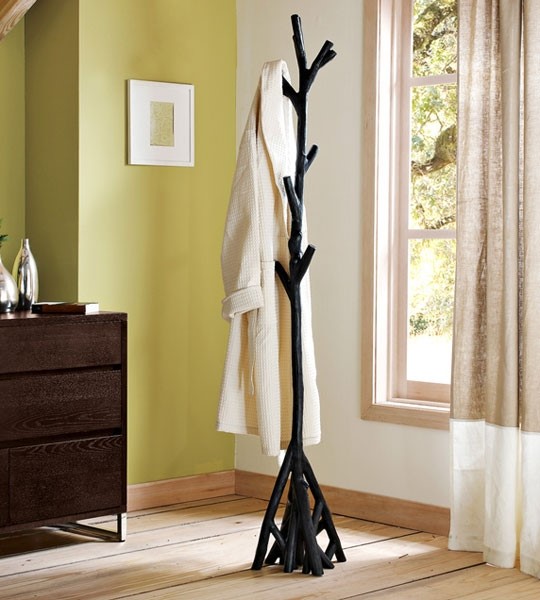
The choice of hanger depends on the design of the room; you can buy a product made from valuable wood of different shades or choose a more simple version. Hangers have hooks that are made of wood, metal, and plastic. Products with metal hooks stronger, they will serve properly for a long time. You should think about where exactly the item will be placed.
Advice! It is necessary to take into account the size of the room where you plan to place the item, as well as the number of residents in the apartment or house. If one or two people live in a home, then any compact version. For an apartment where a large friendly family lives, they buy floor option, on which the clothes of all household members can easily fit.
More massive models are selected for the hallway, and a lighter version is suitable for the bedroom and bathroom.
DIY floor hanger
Build such a piece of furniture from an old floor lamp. To do this, remove the lampshade and wire, and attach the hooks to the tripod. If on personal plot or there is a tree growing in your dacha that has not produced fruit for a long time, then use it for hanging. The plant is chopped down and the branches are removed. The bark is removed; if left, it will begin to fall off over time, and things will cling to its uneven surfaces. After cleaning the wood, you need to go over it with sandpaper. The structure is then attached to the base. 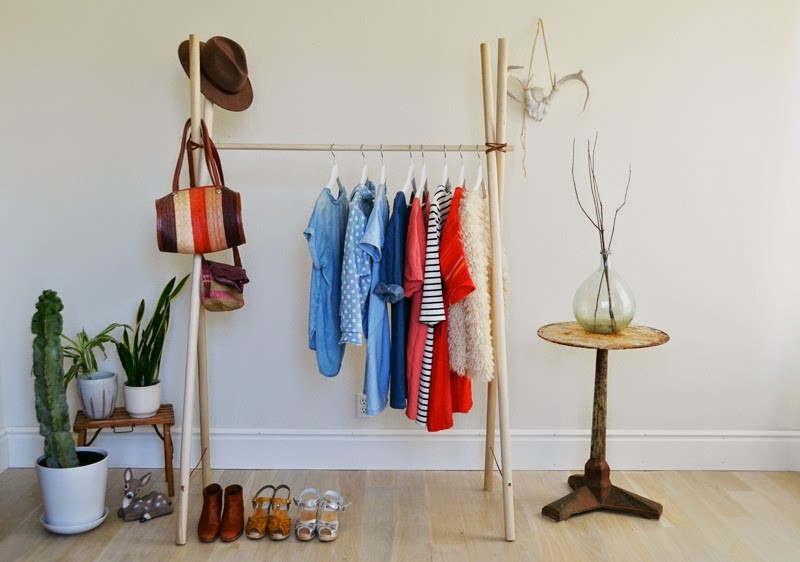
The item for storing clothes should not have sharp parts, so as not to damage the floor or things. It must be stable, aesthetically pleasing, and reliable. Stability is ensured by the base, which is made in the form of a circle and crosses. The center of gravity is placed as low as possible. For this, heavy bars and metal parts are used. Installation of the product on three points of support is necessary for the stability of the structure. The bottom of the hanger is upholstered with a material that is softer flooring. This will prevent leaving marks on the floor. To give the product functionality, hooks are attached to it.
Important! The center of gravity of the clothing placed on the product should not extend beyond its cross. Otherwise, the product will not be stable and will fall.
The final stage is giving the structure a finished look. Cover the lower part of the product with fabric, wood, or plastic. The structure is covered with a layer of paint or varnish.
Basic interior items form the style of the room and make it attractive. It's the little things that create an impression of the room and the owner. Interior items can emphasize the individuality of a home and tell about the character of the owner.
43 photos of floor clothes hangers: