On the construction market today you can find any finishing materials that are used in interior and exterior work. These also include artificial stone. It can be found in all shapes, sizes and compositions. Such stones imitate natural rocks. Their production occurs by casting various building mixtures with all kinds of additives into arbitrary shapes, which are adjusted to the required dimensions. This kind of stone is called “liquid”.
Countertops made of artificial solid stone add special elegance and luxury to a bath or kitchen. Many families dream of such a countertop, but not everyone can afford it. In such cases, home craftsmen look for a solution to this problem and most often find it.
In this article, we will look at what types of countertops there are, what stone is best to make them with your own hands, whether these structures can be made from ceramics and concrete, and much more.

pros
The main advantages of countertops made of artificial liquid stone the following can be distinguished:
- Acceptable price;
- Moisture resistance;
- Strength;
- Durability;
- Huge selection of colors;
- Maintainability;
- No background radiation.
Minuses
Of course, it was not without its drawbacks. Although they are insignificant, they are still there:
- Table top made of artificial stone afraid of elevated temperature;
- Countertops made from some materials are often subject to scuffs and scratches.
What to make a countertop from


Necessary tools for work
To make a tabletop with your own hands, you need to have for this a specific set of tools, which is presented below:
- Drill;
- Grinding machine;
- Jigsaw;
- Fraser;
- Excellent quality cutter;
- Glue gun;
- Vacuum cleaner;
- Guide bar;
- Circular saw;
- Measuring instruments.
Tabletop materials
The tabletop can be made from several types of materials. Therefore, it is first necessary to determine what it will be made from:
- Ceramic tile. It looks best in the bath. But, if you choose the right tiles, you can also make them for the kitchen.
- Concrete. Most often, concrete is used for major renovation. But if desired, you can also get a wonderful concrete countertop. Various fillers and additives will give it beauty and grace.
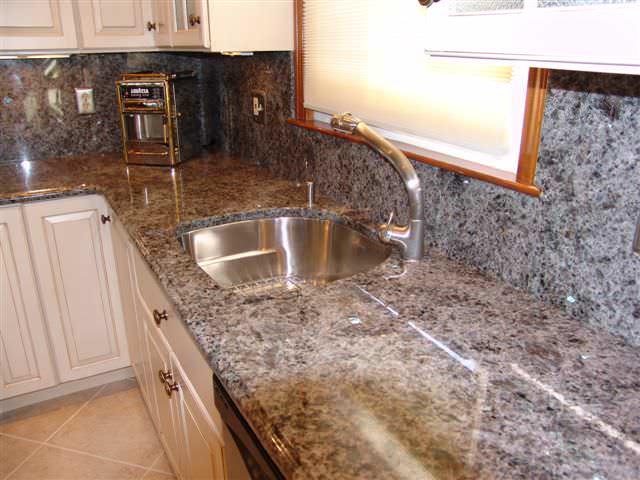
- Artificial finished stone. It is sold as an acrylic base with granite or marble filling.


Once the materials have been determined, construction of the countertop can begin. This process will be described step by step in order to better understand all the aspects of manufacturing the structure.
Tabletop design and measurements
Any serious business always begins with a written plan. This rule does not bypass the tabletop. Before you make it yourself, you need to decide on the configuration and all dimensions. After all, it’s one thing to design an ordinary rectangular tabletop, which is not difficult to make even for a novice craftsman. And it’s completely different when you need to make a single surface in the shape of the letter P, in which you also need to install a sink and hob.
Therefore, making a countertop with your own hands begins with measurements. . The depth of the working surface should be approximately 60 centimeters. The length is measured according to the existing base.

To understand how the countertop will look, you need to make a rough sketch on paper. It is not yet necessary to depict holes for a sink, pipe or sink. After this, the actual layout is drawn according to the actual dimensions. For such purposes, you can use sheets of whatman paper. Or cut out strips from plain paper and glue them together. This will be a kind of mock-up of the countertop, which should be tried on at the intended construction site.
The process of making artificial stone countertops
Table top made of acrylic artificial stone

After all the necessary drawings have been made, you can start building it yourself. . To start artificial The stone is cut into the required components:
- The tabletop itself.
- Strips for processing ends.
- Wall side. A similar version of the plinth is also possible.
Initial work
The edges and contours of the stone cutouts of the workpiece are trimmed with a milling cutter. After which you need to process the profile. To do this, the tabletop blank is turned upside down. Using a router, a shallow groove is made directly under the edge.
To form the frame, you need to cut several strips of plywood. Their length will be 7 centimeters. Using acetone, you need to carry out the degreasing process. This is necessary, since the edge can only be placed on a clean surface.
Making countertops from artificial stone:
- Now it becomes necessary to glue all the frames and edges. Therefore, the tube of glue is equipped with a mixer and is completely squeezed into a cellophane bag. You will need to mix the resulting mass and pour the glue onto the edge, after cutting the end of the bag.
- The glue dries instantly, so the subsequent process of squeezing the edge with the tabletop must be done as quickly as possible.
- The plywood strips cut in the previous stage of making the tabletop must be glued along the entire perimeter of the building. After that, the structure is clamped in a clamp and left in this position for half a day.
- Using a sanding machine, you need to process the plywood, and then round the edge using a router.
- The last thing you need to do is round off the wall skirting boards. After this, the stone countertop is ready for installation.
Making your own artificial stone

A stone countertop is made using “liquid” stone, which is molded and then allowed to dry.

Sometimes situations happen that artificial liquid stone does not appear on sale. In this case, you can do it yourself. The following components will be required:
- Acetone;
- Calcinitis;
- Chemical resin;
- Plasticine;
- Hardener;
- Hot melt adhesive;
- Filler;
- Epoxy gelcoat;
- Paste in a variety of colors;
- Fiberglass;
- Wood sheets.
To get a liquid stone, you just need to mix the ingredients written above.
Concrete countertop
Concrete is used to make jewelry, furniture, and much more. If desired, you can also get a concrete countertop made by yourself.
Initially, concrete preparation is required . For this you need the following components:
- Large and small fillers;
- Cement;
- Plasticizer;
- Burnt glass cullet;
- Colors;
- Dyes.

To get started, you will need a moisture-resistant glossy surface, such as plywood. The outline will be drawn based on it. You need to screw the bars along it with screws. You can use plasticine to chamfer the entire perimeter, thereby making it easier for you to finish the job at the very end.
It should be taken into account that the thickness of a concrete countertop is on average 4 centimeters. Of course, more can be done.
The concrete solution is poured into the frame, after which coarse filler is used. It is compacted to the very bottom of the base. It will take approximately two to three days for the concrete to dry.
After the concrete has hardened, the frame is removed. The tabletop is placed on bars. Upper layer literally one millimeter of concrete is removed with a grinding machine. The resulting surface is vacuumed. All small pores are filled with cement. The solution must dry again. The same few days are given for this.
The last stage occurs after the solution has dried. You need to go over the tabletop three times with a sanding machine. Now it can be attached to a base prepared in advance.
Ceramic tile countertop
You can also make a countertop from ceramic tiles with your own hands. But, unlike the previous options, it is more suitable for a bath. Her presence in the kitchen is very doubtful, although there is no dispute about tastes.

Laying tiles on a countertop is done quite quickly and does not require any special skills. You can find out how to do this yourself in our “Repair” section.

This tabletop looks like a horizontal surface with ceramic tiles or regular tiles laid on it. The basis is an OSB sheet 2 millimeters thick. An alternative would be ordinary plywood, which is not affected by moisture.
You can cut the base of the tabletop yourself . The end is formed from strips that are the same material as the base. After this work is done, the base is completely primed. Next, tiles are laid on it using any adhesive compound.
How to make a countertop with a stone sink with your own hands (video)
You can learn how to install it yourself from the video below:
Conclusion
So, we looked in detail various options manufacturing countertops, both from artificial stone and from concrete and ceramic tiles. Note that its production will require an average of no more than 3,000 rubles. While in a store you can buy a countertop for no less than 10,000 rubles. You just have to work hard and the end result will be high quality and beautiful tabletop, the service life of which will be very long.
Tabletop made of artificial stone (photo)

.jpg)


It is worth noting that artificial composite material costs much less natural stone. However, it is not inferior in quality, strength and durability. You can save a lot on artificial stone. It is inexpensive and easy to care for. It has moisture resistance and mechanical strength. The material is resistant to very high temperatures and can take any shape.
It is important to know! During prolonged or improper use of the tabletop,  some damage may occur of various nature. For example, pronounced cracks, chips of varying depths, severe swelling, stains and scratches. Therefore, it is recommended to follow the operating technology of the countertop.
To make a countertop with your own hands, you will need to choose a sheet of artificial stone. You need to decide on it color scheme and the thickness of the product. Can choose thin sheet up to 6 mm or a thick sheet of stone from 6 to 12 mm. It is also necessary to prepare a sheet of moisture-resistant plywood  30 mm thick. It will serve as a base for the table top. Experts recommend abandoning fiberboard and chipboard. These materials may swell when exposed to moisture. You will need two-component glue and a pencil with a ruler.
What tools are needed?
To make a tabletop you need a certain set construction tools. It includes an electric jigsaw, a grinder, a router, a tape measure, a pencil, a ruler, a saw, a drill, a vacuum cleaner, and a glue gun.
Preparatory work
First you need to design the countertop design. Determine its optimal size, color, shape and choose the type of stone. If you select square or rectangular shape, then it won’t take much to make such a countertop  time. If a sink or hob is additionally installed in the countertop, then a lot of time and attention will be spent on the work. If you plan to install a sink in the countertop, then a recess of at least 60 cm must be prepared for it. Next, you need to apply a mock-up of the future product on the cardboard according to the required size. The made model should be glued to a sheet of artificial stone. After this, the tabletop is cut out according to the layout.
Method number 1 – acrylic
When making an acrylic tabletop, it is better to buy a sheet measuring 360x70 cm. These are the optimal dimensions; you can choose the thickness at your discretion. Initially, you should assemble a frame from plywood and make a mock-up of the future tabletop. The model can be made from cardboard. Next, it is attached with glue to an acrylic blank and  plywood and held together with glue. The acrylic base should be in close contact with the plywood. If after drying there are notches and bases left, then they are leveled with a milling machine. The sides are degreased and glued with special strips. The strips need to be heated. It's a good idea to use a hair dryer for this. After this, the finished tabletop can be screwed to the base with screws. If niches are needed for a sink or hob, they need to be cut with a jigsaw.
Method number 2 – ceramic tiles
To make your own countertop from ceramic tiles, you will need a moisture-resistant sheet of plywood, OSB sheet and tiles. You can use tiles instead of tiles. The thickness of the sheet should not be less than 2 cm. Using the template, a drawing of the required dimensions for the future countertop is made. Next, the end is formed and screwed to the plywood. The end is decorated with tiles. The tabletop edging can be made from any materials: metal, wood, laminated strip. The tiles are laid on the finished base on an adhesive base.
Method number 3 – liquid stone
One of the most popular and modern methods Making a countertop with your own hands is a method using liquid stone. To make such a countertop, you will need certain components that are sold in any hardware store. For example, special paints, plasticine, fiberglass, filler, hardener, calcionite, acetone, epoxy, hot melt adhesive. You also need sheets of plywood and wood. All of these components are mixed together in a 1:1 ratio. Afterwards, a piece of chipboard is cut to the required size and the resulting mixture is sprayed onto it. Next, the product is dried and polished. The finished tabletop can be installed in a prepared place.
If cracks, scratches, chips or other defects have formed on the countertop, they can be removed, returning the coating to its original appearance. Initially, the crack will need to be cleaned and degreased. A special glue must be injected into the damaged area to glue the edges. After this, the area is sanded and polished. If the scratch is not deep, then it is enough to simply go through it with a grinding machine. You can sand the damaged area sandpaper. This is especially true if the countertop contains granite or marble chips. If noticeable stains or swellings appear on the surface, the damaged area must be cut out with a milling machine. You need to cut a patch from the remains of the artificial stone and insert it into the damaged area. Pre-lubricate the surface with glue. Next, the surface is rubbed and polished.
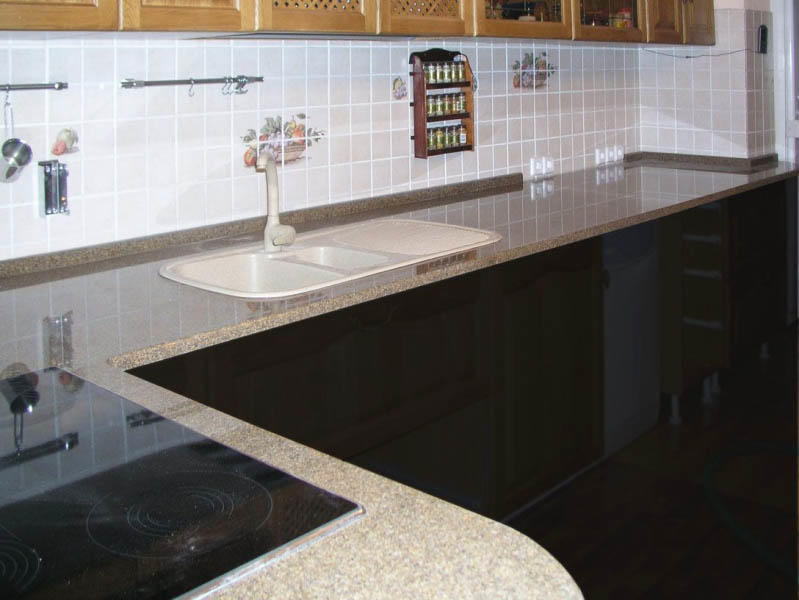
The correct selection of kitchen walls and countertops is one of the most critical moments when arranging modern kitchen. This is not surprising, since the requirements for working surfaces are quite stringent (strength, moisture resistance, ability to withstand significant loads). The same requirements (moisture resistance, resistance to mechanical damage, chemical neutrality) apply to countertops installed in the bathroom. The stone product meets all these requirements. There are a huge number of products made from artificial or natural stone on sale, but the prices, as they say, are steep. Therefore, it is worth thinking about making stone products yourself. If everything is done efficiently, then appearance and the performance qualities of a do-it-yourself artificial stone countertop are not inferior to a factory one.
Manufacturing materials: possible options
Here are the most common artificial stone options that you can make yourself:
- Concrete. The most durable and cheapest artificial stone for a do-it-yourself countertop. It can be used not only in capital construction. It will make a wonderful tabletop, strong and durable. An aesthetic appearance can be achieved using fillers and additives.
- Ready product. This is an artificial stone made from marble or granite chips on acrylic base. The base of the tabletop is made of plywood, and a sheet of acrylic stone is fixed on top.
- Ceramic tile. Simple a budget option, which looks great both in the bathroom and in the kitchen. The tiles are laid on a base made of OSB or plywood.
Once you have decided on the material of manufacture, proceed in accordance with the given algorithm.
How to make a countertop from artificial stone with your own hands: dimensions and design
The first thing you need to know before starting work is the configuration and dimensions of the product. If we are talking about a familiar rectangular surface, then there is nothing complicated about it. If you need to make a U-shaped structure for the hob, then everything becomes a little more complicated.
Be sure to take measurements.
Important! If you have dismantled an old tabletop that has become unusable, then you can take all measurements on it. There are also certain standard parameters. For example, the standard working surface depth is 600 mm. If you take into account the edge, then 605 mm. The length is measured in accordance with the existing base.
Draw a scale drawing of the tabletop on a small sheet of paper, and then make a life-size model from cardboard or a sheet of thick paper. Attach the layout to the installation site, make sure that it does not stick out or squint. Only with this approach will the production of the working surface be flawless.
If the tabletop has complex shape, then cut the layout into several parts. After this, you can proceed directly to the manufacture of the product itself.
Concrete
This material has long gone beyond the scope of ordinary building material. With help various additives it is possible to control its appearance and strength properties. For cooking concrete mixture you will need:
- Portland cement 500 (or grade 400 cement).
- Fillers: large and small.
- Plasticizer.
The coarse filler can be granite or marble chips or ordinary gravel, and the fine filler can be granite flour or river sand.
Important! Interesting idea– use of melted material as a filler broken glass no sharp edges. Multi-colored broken glass looks especially beautiful, creating a uniquely beautiful pattern on the surface.
Additional components are various paints and colors. If you add color to the mixture and distribute it occasionally, then after hardening you will get a beautiful, unique pattern. To work, you will need a sheet of plywood or chipboard with a waterproof glossy surface.

Operating procedure:
- Draw the outline using the ready-made template.
- Screw the block along the contour.
Important! If the technological holes are known in advance, mount mock holes on the surface of the base so that concrete does not fill these places. However, the hole can be made when the surface is completely ready.
- To save time on finishing, form a plasticine bevel around the perimeter of the base, leveling the plasticine with a spatula.
- Fill in concrete mortar the resulting frame. To ensure that the solution is distributed evenly, it is advisable to use a vibrating table. Reinforcement is optional. If you decide to reinforce concrete, you can use a lattice connected from reinforcement with a diameter of 10 mm.
- Fill in 2 stages. Fill in about half first. Wait a day for the solution to harden, then lay the reinforcement and pour the rest of the concrete.
- The time for complete hardening of concrete is 2-3 days. After this, carefully remove the wooden frame.
- With help grinding machine Level the surface of the product by approximately 1 mm. Then clean, vacuum and rinse the surface. All that's left is to erase it cement mortar to eliminate pores.
- Final point - polish it ready product in 2-3 stages, reducing the grain size of the grinding attachment.
Place the finished tabletop on the base. It will serve you for several decades, without the slightest hint of wear.
DIY acrylic tabletop
Ready-made slabs based on an acrylic mixture look beautiful and are easy to use. Size standard sheet is 366x76 cm. The thickness varies.
Important! The countertop can withstand temperatures of 180 degrees, so there is no place for hot pots and pans on it. Causes certain difficulties in caring for work surface. In particular, removing stains (such as coffee or tea) will be somewhat difficult. But repairing an artificial stone countertop with your own hands is a real pleasure. All minor defects can be easily eliminated by grinding.
Operating procedure:
- Plywood is chosen as the base for artificial stone. Then attach the artificial stone to the base using two-component adhesive.
- After the glue has completely cured, use a milling machine to level the ends of the tabletop.
Important! If you don't have a milling machine, you can use a block with coarse sandpaper.
- The remains of the artificial stone will be used to finish the end parts. Cut strips with the appropriate parameters, clean from dust and degrease the ends. Apply glue to the base and carefully glue the composite strips. To make them fit more tightly, use clamps.
- If the tabletop has a curved shape, then heat the strip in the bending areas using construction hair dryer up to 160-180 degrees. Only after the strip has completely cooled can you glue the remaining part.
Important! To prevent the joint between the main canvas and the end part from being too noticeable, add paint to the glue that is similar in shade to the materials used.
- After the glue has completely polymerized, sand the ends.
- Screw the finished product to the base of a bathroom cabinet or kitchen table. Select the length of the screws so that they fit only into the base, without touching the composite material. Make technological holes using an electric jigsaw.
Ceramic tile
Laying ceramic tiles on a base made of moisture-resistant OSB or plywood is an option suitable for the bathroom. It is important to choose the right base so that it can withstand the weight of the tile:
- Cut the base from plywood or OSB.
- Form the end from strips of OSB or plywood screwed around the perimeter.
Important! If you are going to decorate the ends with tiles, make the end width at least 50 mm, since cutting tiles is much easier. Alternatively, metal edging or laminated strip can be used.
- After the base has been prepared, prime it with a special composition for wood with a fire retardant and antiseptic. Only after this is the surface ready for laying tiles.
Video material
A tile countertop is as practical as a concrete or DIY acrylic table. At the same time, it is much easier to install. Which option to choose is up to you!
A tabletop is a convenient horizontal working surface that is usually installed in kitchens. It makes it easier to cook food and do other household chores. Instead of purchasing this thing in stores, you can try to build it yourself using artificial stone.
Drawings and dimensions
Before you design the tabletop yourself, you need to make a ready-made formwork. If the product is to repeat an existing one, then the template is made in accordance with it. If the shape of the new thing is more complicated, then before creating the formwork you will need to make a drawing of it. First, it is made to scale, and then transferred to a base that has the dimensions of the future product. An approximate design drawing is shown in the picture:
To create a drawing, you must first create a sketch on which the dimensions will be marked. They must be removed from the place where the manufactured product is planned to be installed. The countertop can be divided into several equal parts if it is installed on a corner kitchen unit. In this case, the formwork still remains alone, but it is separated by jumpers. This option is especially relevant when a concrete mixture is used in the work, since large products are formed on its basis.
If the tabletop has right angles, then you can make a template for it directly on site without removing the dimensions. In this case, slats of the same length are used, laid out along the old one, and linked together. After this, the manufactured template is moved to a smooth big table, where the required part will be assembled.
Can be used as the lower part of the formwork old surface. In this case, you need to make sure that the base is strong enough. The walls are fixed to end sides old table.
Required tools and materials
The simplest option is to use sheet acrylic stone. In this case, there is no need to create formwork, since the artificial stone is already ready for use. Depending on the size of the product, 1–2 sheets may be sufficient. Its standard dimensions are 3760x760 mm, while the thickness varies from 3 to 12 mm. The higher it is, the stronger and stronger the material. It is also easier to handle.
Also used moisture resistant plywood 3 cm thick. It is not recommended to use chipboard or MDF, since they tend to swell under the influence of moisture. This causes the stone to become damaged or deformed.

To join together these two materials, a two-component adhesive is required. Approximately 150–200 ml of substance is spent on each sheet of acrylic stone.

To others necessary tools relate:
- electric jigsaw;
- circular saw for cutting plywood sheets;
- clamps;
- guides;
- roulette;
- ruler;
- construction corner;
- pencil;
- Sander;
- milling manual machine, equipped with a cutter based on hard alloys;
- electric drill;
- glue gun;
- vacuum cleaner.
Step-by-step manufacturing instructions
The dimensions of an acrylic product should be calculated as accurately as possible. Each measurement should be immediately transferred to the drawing. Sink openings and cooking panels must be indicated there. If necessary, they are also made for a mixer or other kitchen equipment.
To avoid mistakes when transferring dimensions, you should make a template that has the natural dimensions of the tabletop. The best material to use is cardboard, the length of which can be increased by connecting the sheets with tape. The creation procedure consists of the following steps:

How to polish
To give acrylic stone more natural look, it is necessary to polish the entire product and mill the end border. The shape is selected based on the thickness of the acrylic. Usually, rounding is sufficient for tabletops, but there are also more complex reliefs, used primarily for dining rooms or living rooms. After milling, the edges are wiped with medium-grit sandpaper, then with the same material, but already moistened.

The top side of the tabletop is polished using the same method as the ends. To polish a large surface, use grinder eccentric type with replaceable nozzles. Polishing is carried out carefully, without emphasis, since acrylic material interspersed with stones may lose some of the plastic on its surface.
A DIY artificial stone countertop is easy to make. It looks great and saves you money.
2,324 ViewsStandard kitchen furniture sets are usually equipped by the manufacturer with a worktop made of thick chipboard with MDF finishing panels. Over time, the varnished surface becomes unusable, so many owners prefer to replace the wood with a more reliable countertop made of artificial stone at the first opportunity.

The work is difficult, but quite accessible even for the average DIY enthusiast. Making a thick and heavy stone shelf requires, first of all, accuracy and endurance, and the technology and recipe for artificial stone can be gleaned from the text.

How to make a stone countertop
IN general view the procedure for making a countertop from monolithic artificial stone is no different from casting facing tiles or massive decorative elements, the difference is only in the size of the product and the correctly selected materials.
There are two ways to make a stone countertop for a kitchen or bathroom:
- Cast an array of artificial stone directly on site, according to the dimensions and supports of the old tabletop;
- Pour the countertop with artificial stone into the formwork assembled in the garage or any other utility room.
Manufacturing technology monolithic slab made of artificial stone is practically the same in both cases, so the decision on how to cast the countertop is made based on local conditions. First of all, the stone casting material, the weight of the finished countertop and the possibility of safe transportation are taken into account. Even if you make a casting in the form of two parts, bring it in and install it in small room bathroom or kitchen multi-kilogram stove is not so easy.

The second factor influencing the choice is the complexity of the countertop configuration. A simple rectangular block of artificial stone can be delivered and installed on a supporting frame without any problems. It is easier to cast a stove with numerous bends, corners, openings for the sink, sink and hob in place of the old countertop. As a rule, furniture makers who developed the design of a wooden tabletop did not think much about a possible replacement wooden shelf artificial stone slab. Therefore, the supporting frame has to be strengthened, and the tabletop itself has to be slightly simplified and modified to finishing and polishing.

Advantages of artificial stone
The difficult procedure for forming a casting from artificial stone often confuses owners as to whether it is worth getting involved with the installation at all. stone countertop, if you can order and install a regular shelf made of pine boards, varnished polyurethane varnish or lined with MDF film.
The main advantages of a stone countertop over a wooden slab become obvious within a few days after completion of installation and finishing work:
- Heat resistance and high stability surfaces to mechanical damage;
- The strength of a stone countertop is much higher than that of a wooden one;
- Possibility of local repairs without the need to revarnish the entire surface of the slab;
- High resistance to moisture and condensation.
An artificial stone slab turns out to be much safer and more durable; in most cases, falling objects stored in kitchen wall cabinets do not even leave scratches, whereas serious damage to the varnish is possible.
A countertop made of artificial stone casting can withstand the difficult conditions of the bathroom no worse than sanitaryware. Installed instead of a traditional plastic or wooden shelf, a wide panel made of artificial stone will last 3-4 times longer than competitors and at the same time decorate the interior with a beautiful stone pattern.

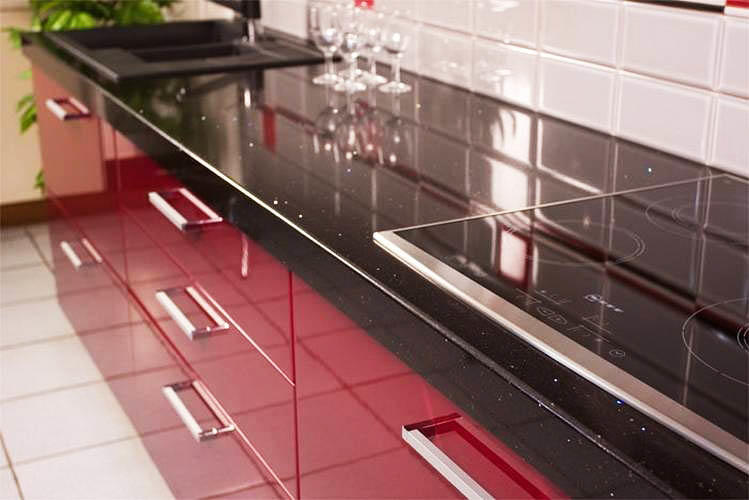
Customers really like the fact that they can safely place a hot kettle, dishes from the oven, and in some cases even chop meat on an artificial stone countertop. According to reviews from owners, a shelf made of stone casting is primarily valued for its excellent appearance, unpretentiousness and a huge margin of structural strength.
When choosing, you need to take into account the fact that not all materials can withstand high temperatures, especially since artificial stone is made on the basis of polymers. For example, a polyester matrix can easily withstand temperatures of 200-250°C, while chemically cured acrylic resin can withstand a maximum of 150-170°C. Therefore, before you try to make a slab from stone casting, you need to get an accurate idea of the dimensions and planned material for making the countertop.

Materials for making kitchen countertops
Artificial stone is made from 7-8 types of materials and their compositions, this includes mineral fillers and polymer materials matrices. For the manufacture of kitchen countertop The list of polymers is half as long:
- Acrylic resin;
- Epoxy matrix;
- Polyester compounds;
- Gelcoats or liquid stone varnish.

In addition to polymer matrices, fiber materials, quartz, ground silicon, titanium oxide, granite, basalt and marble screenings with a ground and polished surface are widely used. Approximately half of the countertops are made using high-strength concrete and polymer concrete composites. Therefore, isopropyl alcohol, ethylene glycol, calcium chloride, hydrogen peroxide and synthetic dyes, mixture stabilizers.

Concrete kitchen countertop
The idea of making a countertop using a concrete casting may seem slightly outdated and even inappropriate, due to the enormous weight of the material and unattractive appearance. In fact, any parts can be made from high-quality concrete, the strength and durability of which in some respects is not inferior to aluminum alloys and impact-resistant plastic.

Main advantage concrete countertop It is considered to be of high strength and versatility. If you use high-quality cement and plasticizing additives, you can cast a tabletop 3-4 cm thick, the strength of which can be the envy of any artificial stone.

In addition, it is quite possible to cast a tabletop from a concrete mixture directly at the installation site, and for the most vulnerable places of the casting, for example, in the openings under the sink, it is quite possible to make a monolithic niche from artificial stone. The metal sink will fit into the concrete pocket, after which problems with water leakage or deformation of the drain system pipe will disappear by themselves.
Quartz countertop
Quartz sand, ground calcite and crushed natural quartz are rightfully considered one of the most successful materials for making artificial stone countertops. Natural materials are thoroughly washed, dried and separated into fractions. The matrix for quartz artificial stone is purified or white ship grade epoxy resin or polyester compound with the addition of titanium oxide.

The result is a homogeneous monolithic countertop made of artificial stone, reminiscent in color and texture of the most beautiful natural stone - marble limestone. If pellets from quartzite, granite or any other ornamental or decorative stone, then you can get a fairly large range of colors and textures of artificial stone.
The most difficult thing to make at home is an artificial stone based on a polyester compound; this material provides high hardness and strength of the casting, but to cure the polymer it is necessary to use a thermostated box or chemical polymerization accelerators.
Therefore, home versions of polyester stone countertops after pouring are heated with hair dryers and blowers, but there is still a risk of the formation of a damp core of an artificial stone slab. If you install an artificial stone countertop without waiting for the polyester to completely cure, over time a sag may form on the surface.
Ceramic tile countertop
Regular cladding ceramic tiles can replace expensive epoxy or polyester materials. Especially successful are the combinations of porcelain tiles with the texture and pattern of natural stone, with a countertop cast from high-strength concrete.

The technology for forming countertops from tiles to look like artificial stone is no different from conventional installation on the walls of a kitchen or bathroom, but there are a few tricks that are important to consider:
- The concrete base of the countertop can be sealed only after 2-3 weeks of exposure to the shrinkage processes of the artificial stone;
- The front plane of the concrete stone is carefully ground and trimmed with sandpaper to remove any slopes and irregularities;
- The tiles are carefully calibrated, selected by size and, if necessary, cut to the same size with an accuracy of tenths of a millimeter.
If all the requirements for facing a countertop made of artificial stone are met in accordance with the preparation technology, then the tiles laid on concrete, metal or even thick bakelite plywood form a single canvas of artificial stone; thin joints, tenths of a millimeter in size, after grouting are simply not perceptible to the eye.

In a similar way, you can lay out a temporary countertop in the kitchen or bathroom, for example, when carrying out rough repairs in a new building. Ordinary tiles on a wooden base are inferior in appearance to artificial stone, but are just as durable and can withstand strong heat and even small impacts.
Table top made of acrylic artificial stone
Of all the listed materials available for work at home, acrylic is best suited for self-made countertops with imitation natural stone.

Casting from artificial stone based on chemically hardened acrylic is absolutely safe. sanitary standards, with a smooth monolithic surface. Artificial stone does not react with any liquids found in the kitchen, does not allow water to pass through, and there are no pores or microcracks in which dirt could accumulate. Acrylic artificial stone is best repaired and restored, therefore, even if a chip or deep scratch, the treatment process takes a maximum of 10-15 minutes.
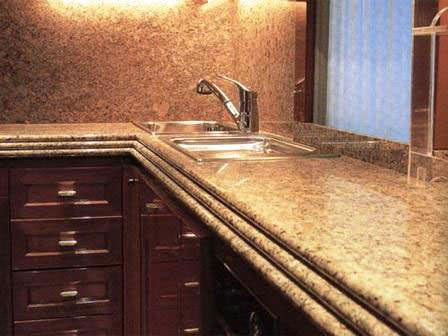
The correct selection of filler, for example, marble stones or polished granite screenings, basalt dust in combination with dye, allows you to create very beautiful, light and at the same time durable objects kitchen furniture and interior, not necessarily only tabletops.
Making countertops from artificial stone
The technology of stone casting and molding of artificial stone, at first glance, is very simple and even simple-minded, but can present serious surprises, first of all, when using low-quality materials, this is the first and the main problem possible failures in the manufacture of homemade countertops. Acrylic resin with a hardener must be purchased in one batch, preferably in a specialized store or salon. The material will need to be first tested with a test batch on a purchased filler, for example, ground quartzite or washed sand. If the 120x50x5 mm plate could not be broken by hand, it means that the proportions for the artificial stone are chosen correctly.
The first step is to measure the future space for the countertop and draw up a rough sketch with the exact dimensions of the slab. Using these data, you can easily calculate the volume of artificial stone and the required amount of materials. The proportions of the mixture for casting the tabletop are as follows:
- Acrylic polymer - 30%;
- Dry sifted filler -60%;
- Hardener - 4%;
- Pigments -6%.
For a countertop 60 cm wide, 250 cm long and 3 cm thick, a total of 40 liters of mixture will be required, excluding the window under the sink. The third part - 13 liters will be needed acrylic resin. In addition to the casting mixture, you will need an aluminum corner, 10-15 mm plywood, plasticine, window glass or several PVC panels, and liquid paraffin oil.
A set of necessary tools
The most labor-intensive part of the countertop manufacturing process is considered to be the construction of a finished mold for pouring the stone mixture. Only a person can make a mold for a tabletop exactly according to a sketch experienced carpenter, those who are not comfortable with carpentry will have to use a trick. A template or profile with all the openings for the sink and stove is cut out of a large piece of wallpaper or paper. Next, the tracing paper is transferred to the bottom of the mold and the outline of the future artificial stone slab is transferred.

To make a mold you will need a whole arsenal of tools:
- A container for mixing resin, a spatula and a wide paint brush;
- Jigsaw, drill with a set of drills;
- Set of corner clamps;
- Wide pliers;
- Metal tubular mandrel;
- Industrial dryer.
First of all, the bottom of the mold is laid out on a flat surface of a workbench or work table; it can be made of PVC panels or plywood with glass laid on top. To achieve the maximum flat surface castings are made of artificial stone, the glass has to be cut into separate sectors and placed on the bottom, the joints are rubbed with mastic or plasticine.

The side walls are cut with a jigsaw with a margin, the height is taken 4 cm above the expected thickness of the tabletop. The sides are tightened with clamps into a box and placed on the bottom of the mold.
For your information! The width of the form is planned to be 6-10 cm larger than actual size countertops.
Technological process
All cracks and joints are carefully rubbed with automotive plasticine to avoid leakage of the poured artificial stone mixture. On last stage the walls are lubricated with a thin layer of Vaseline or liquid paraffin.
Acrylic resin is poured into a clean container and mixed with a hardener, then pigment is added and everything is thoroughly mixed. After adding the filler to the mixer, the casting mixture for artificial stone is kneaded for another 15-20 minutes.

The casting mass is poured into the mold, and the first layer is actively punched with a spatula to avoid the formation of shells. After the level of the artificial stone has reached the mark on the wall of the mold, the pouring is stopped. Next, lay the reinforcing fabric and pour out the remaining mixture.

Final design of the tabletop
After two days, the clamps are removed and carefully separated from the artificial stone. Using a sharpened sliver, pry up and remove glass or PVC panels from the plane of the tabletop. Wipe off paraffin and dirt with a clean cloth and soapy water. All sharp edges are trimmed with a knife.
The end of the artificial stone slab is compressed with aluminum strips, heated with a hairdryer and bent at an angle of 90° using pliers with wide jaws. After the artificial stone has cooled, the bent edge is cut with a grinder to a width of 5-6 cm. It turns out that visually the countertop made of artificial stone looks thicker than its actual size, in addition, the rounded edge and stiffening rib provide additional rigidity to the canvas made of artificial stone mass .

Mirror end milling
In order for a slab of acrylic stone to look as natural as possible and not reveal its artificial origin, the entire surface will need to be polished, and the ends will also need to be mirror milled.
Polishing is performed with an automotive grinding wheel with a felt attachment. The ends milled or trimmed with a jigsaw are initially rubbed with sandpaper, then with wet emery cloth, and at the end of processing - with dry felt and polishing paste.
Polishing must be done with virtually no pressure, since artificial stone based on a hard filler and acrylic matrix can easily lose some of the plastic and turn into a “pimply” surface.
Do-it-yourself liquid stone tabletop
In practice, another method of making countertops is used, with a coating that imitates artificial stone. The technology is called “spraying with liquid artificial stone.” The process of manufacturing a slab coated with artificial stone takes half the time and money. The meaning of the technology is to apply a liquid epoxy or polyester mass with finely ground filler to the prepared surface.

The only drawback of the technology of pouring liquid stone is the poorly predictable behavior of the liquid mixture of artificial stone on the sprayed surface. It is necessary to experimentally test various mixture compositions to imitate an artificial stone surface in order to obtain a uniform, smooth coating with strong adhesion to the countertop.
We make liquid stone ourselves
For application artificial turf a compressor and a spray gun are used high pressure with a 3 mm nozzle. The finished mixture contains approximately 30% filler, so the torch does not produce a cloud of sprayed liquid stone, but rather a stream of tiny drops, which should be evenly distributed on the surface of the countertop.
To form a polymer-stone layer, soil and a finishing coating are used; the soil is prepared from:
- Finely ground calcite – 75%;
- Epoxy gelcoat -20%;
- Hardener - 1%;
- Softener - 5%.
After priming, 4-5 hours later, apply the finishing mixture, in which the specific proportion of gelcoat is doubled. Polyester gelcoats are not used to make artificial stone countertops due to the low hardness of the material.
Direct method
The simplest method of making an artificial stone countertop involves directly spraying the material onto the original surface, this can be a concrete blank made of artificial stone or an old primed countertop. In order for the coating to be as durable as possible, direct way apply 3-5 layers of material.
Reverse method
The reverse method technology will require making a mold for the countertop, as when casting from artificial stone. In this case, after applying the separating layer, the walls and bottom of the mold are filled with filler and blown with liquid stone.
The remaining cavity is filled with a metal profile and can be filled with polymer concrete or polyurethane foam.

Making a mold
With the direct method of forming the countertop, you can even use an old slab; you will need to carefully dismantle the panel, remove decorative layer, trim, clean and sand defects.
For the reverse method of producing artificial stone, a foam mold is cut out. The inner surface is varnished. The walls must be even. The foam box is installed on a flat and hard surface, for example, on a desktop.
Preparing the mixture
Liquid artificial stone is applied in three layers:
- The first layer with a minimum filler content, most often applied translucent hard layer, which will provide the artificial stone with shine and gloss;
- The second layer of artificial stone contains the calculated amount of filler and dye;
- The third layer is applied with the surface being covered with a reinforcing fabric.
All gelcoat recipes contain resins dissolved in styrene, so artificial stone should only be applied under heavy draft or outdoors.
Let's start making the table top
The first layer at the reverse way a separator is applied. The air temperature should be at least 18o C. Next, after 20-25 minutes it is sprayed thin layer epoxy varnish. Thus, a decorative glossy shell is obtained.
After about an hour, an intermediate layer of liquid mixture with filler is applied, reinforcing mesh and embedded elements - brackets and anchors - are laid. The next layer of epoxy with a high content of reinforcing glass fiber is glued on top of the gelcoat using a spatula and a brush.
The last thing to lay is a reinforcing frame made of steel profiles; voids and gaps are filled with polyurethane foam.
Tabletop installation
The weight of the new countertop, made of liquid stone, allows you to install the slab using the old frame. Brackets placed in the tabletop frame allow you to level the artificial stone slab and fix the stone surface in a perfectly horizontal position.

Repair of artificial stone countertops
The surface of the artificial stone panel is inferior in hardness and wear resistance natural material, so the countertop must be regularly inspected, checked and restored to stop deterioration at the initial stage.
Types of possible damage
The most common types of defects are peeling and mechanical damage. In the first case, the reason may be poor grip polymer layer with base. Mechanical scratches and chips are almost always the result of a blow or fall from a sharp object.

Cracks, scratches and their removal
Acrylic artificial stones have a high surface hardness, but scratches or cracks can be easily removed by polishing. The crack in the artificial stone is filled with polishing paste, and with a felt wheel, the edges of the damaged area are polished in the direction from the ends of the area to the central part. Deep damage on the surface of the artificial stone mass is sealed with pure acrylic and polished.
Elimination of blisters and spots
Most difficult case associated with the formation of fistulas and swellings under the varnish layer. Most often, the fistula point on the surface of the artificial material is pierced to the depth of the defect and filled repair crew. After the mixture has hardened, the surface of the stone is cleaned and polished. The stains are washed detergent and clean with isopropyl alcohol. The shine of the gloss is shaded on the surface of at least 20-30 cm2 to blur the boundary.
Conclusion
Making countertops from artificial stone requires some experience and skill in working with polymers. Unlike capricious natural stone, artificial material provides the opportunity to create real multi-color masterpieces, from imitation of satin jasper to complex patterns, serpentite or calcite, which are a huge success even for people to find in natural conditions. experienced craftsmen.
2018-09-21