The veranda is a very special room country house. First of all, this name hides a huge variety of designs, architectural and design solutions. So, the veranda can be completely enclosed, it can have large windows that fill the entire wall, which can be removed summer period, and maybe even in the warm season turn into an open terrace, protected from bad weather only by a canopy - a favorite relaxation area for the owners of the house. Such a variety of options, naturally, cannot but raise the question - how to cover the floor on the veranda?
How to cover the floor on the veranda
There are many options. They depend on the design of the extension itself, and on its foundation, degree of insulation, openness atmospheric air , features of the operation of the premises. Of course, in all cases, a good owner will also think about the aesthetic side of the issue - so that the veranda is beautiful.
Before making a decision on choosing a covering for the veranda, you need to know exactly what foundation it is located on. In principle, the problem can be stated even differently: even when planning the construction of a veranda, you need to immediately decide on the type of its foundation and, accordingly, the type of finishing coating for its floor.
We can consider two most common case - a veranda on a strip foundation or an extension on a columnar (pile) foundation.
- If the veranda itself is conceived as a permanent structure, as a full-fledged room of the house, and the main building itself is located on a strip foundation, then it would be better to install the extension on a similar foundation.
It is clear that in this case the floor will most likely require some kind of insulation; it must have a continuous surface, reliable waterproofing, preventing water from entering the voids located underneath it. If you plan to remove windows (walls) for the summer, then the problem of atmospheric moisture and precipitation entering the room must be thought out. You will probably need a slight slope to one side or a storm drain with a drain so that water from the veranda can easily find its way out without stagnating or penetrating through the covering.
If you plan to make the veranda completely indoors, then you can think about enhanced thermal insulation of floors or even,If there is an opportunity and desire to heat them in one way or another.
- A completely different picture if the veranda is a light extension to the main building, and remains open for a significant part of the year, and sometimes all year round, being something in between interior space and a terrace. With this layout, it is most often placed on pile foundation, so that there is free space between the floor and the ground level.
The foundation can be made of brick columns, which are laid out on cement-filled “pockets” buried 50 ÷ 70 cm in the ground.
Another option is screw piles or asbestos-cement pipes embedded in the necessary places.
Bearings are attached to the piles wooden beams, on which a subfloor (if necessary) and joists are then installed for laying the external, finished floor.
If the veranda is open, then very often the flooring is not made solid, but with cracks that will ensure the drainage of rainwater from the area. Another option is to think over a storm drainage system (surface slope, drainage drains, drainpipe system, etc.).
Basic requirements for the floor on the veranda
Whatever the veranda is designed to be, no matter how open it is to external influences, characteristics This room also affects the flooring requirements.
- People always go onto the veranda in street shoes, sometimes carrying with them large quantities of dirt, dust, and moisture - rainwater or snow. Thus, the floor should be easy to clean regularly, not absorb dirt and not swell under the influence of high humidity.
- Of all the rooms in the house, it is at the entrance, and on the veranda in particular, that there is the most intense flow of people. This means that the floor must withstand significant mechanical loads and be resistant to abrasion.
- The veranda is located in the intermediate zone, between street and home temperatures. Differences in values can be quite significant, especially in winter period. Conclusion - the coating should tolerate equally well and summer heat, and winter cold. At the same time, it should not be susceptible to temperature deformation.
- A state of high humidity, combined with temperature changes, can lead to the floor becoming very slippery and causing injury. This means that the surface must have certain properties that increase the adhesion of the sole of the shoe to the floor so as not to pose a danger to people.
- And finally, the decorative aspect of the covering is important for everyone - even on the veranda it should be beautiful and cozy.
What floors are suitable for a veranda
So, based on the architectural features of the veranda itself and the requirements for the floors in this room, you can choose one of several coatings:
Concrete floor
Yes, if the veranda “rests” on a strip foundation, then there may well be such a solution. Of course, this does not simply mean rough screed, even perfectly aligned. Modern technologies concrete processing allows you to create a high-strength coating, which in its decorative qualities is quite capable of competing with other types.
We are, of course, talking about polished and hardened concrete. Adding and grouting at the pouring stage of special dry mixtures - toppings, gives a perfectly smooth coating that is not afraid of literally anything - neither loads, nor moisture, nor temperature changes. Various color shades additives open up the possibility of decorating the floor in accordance with your own design. The surface can be given either a glossy or matte rough structure.
Another option with concrete floors is to sand them down. Of course, this is a rather labor-intensive process that will require special equipment. A mosaic grinding machine can be rented for a certain period of time, but there is another option - use hand power tool, right down to special attachments for a powerful grinder.
You can sand the floor yourself using hand tools.
The result is a perfectly smooth coating that can be brought to even a polished shine. And if, when pouring the screed, you include fragments of granite or marble in its component composition, then the decorative effect of the surface will be beyond praise.
The main thing for the veranda is not to overdo it with polishing so that the surface does not become too slippery.
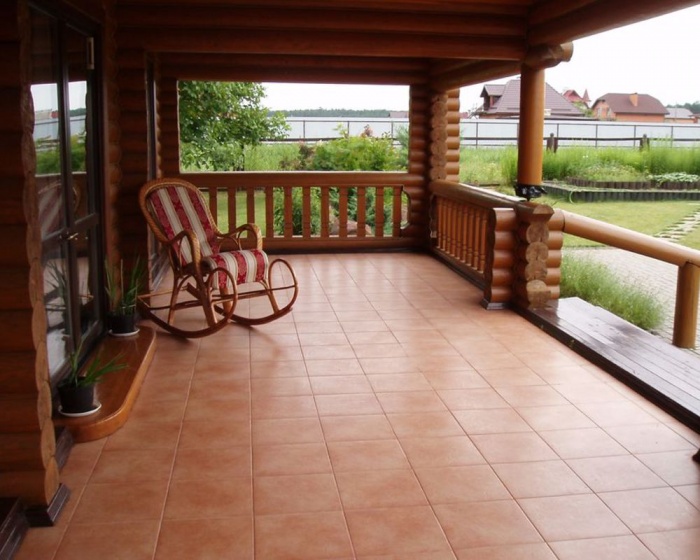
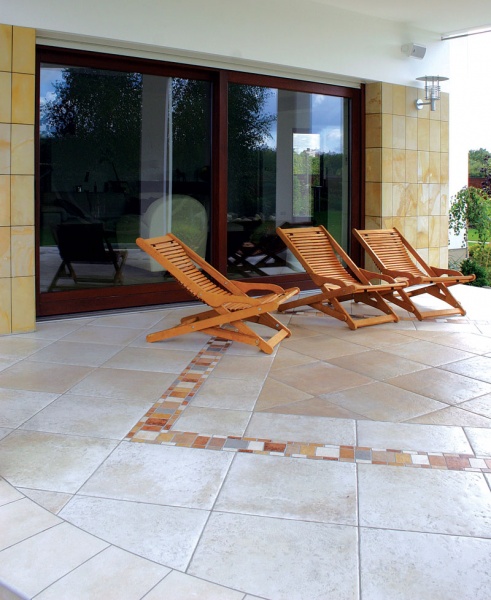
Tiled flooring
Such a covering on a veranda with a strong foundation is almost an ideal solution. You can, of course, lay tiles in rooms standing on stilts, but this will be an unnecessary load on wooden parts beams and joists - for these cases there are more acceptable solutions.
Ceramic tiles are quite suitable for both closed verandas and open spaces or floors. open type. With proper installation and careful grouting of the tile joints with the required composition, it will not be afraid of the ingress of large amounts of water or high humidity. Ceramics withstands all types of mechanical loads very well, especially abrasive effects. She doesn't mind significant temperature changes.
It will be even better if instead of the usual tiles apply porcelain stoneware. Its operational parameters are significantly higher. Created specifically for areas where there is a high risk of slipping, it has an external textured coating that reduces the risk of slipping to a minimum.
The disadvantages of this coating include its coldness - it is not always pleasant to step on it with bare feet. One could argue that in the summer, in the heat, this would most likely be an advantage, but in winter, going out onto the veranda without shoes is extremely unlikely. In addition, ceramic tiles, with their ability to accumulate heat, make an excellent finishing coating for heated floors if desired.
The decorative nature of the tiles allows you to realize the most daring ideas. If the feasibility of using a ceramic coating enters Contrary to the desire to have a floor “like wood”, then for this case there are tiles with a very reliable imitation of the structure of wood.
The main thing when choosing tiles for a veranda is their intended use for rooms with heavy traffic and the rough texture of the surface.
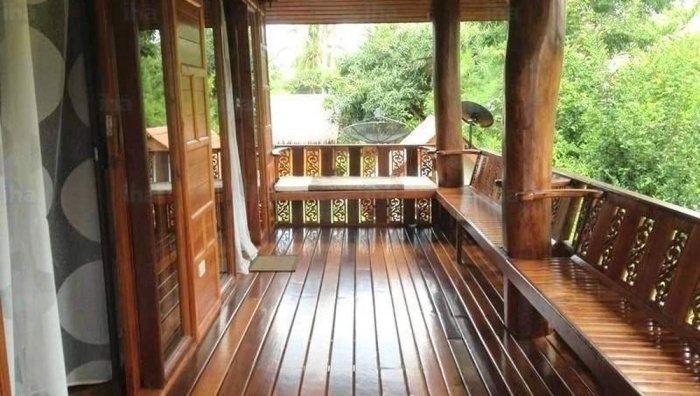
Natural wood floors
In terms of its natural comfort, natural wood simply has no competitors, therefore, sometimes to the detriment of the performance characteristics of the floor, the choice is made on it. There are several options available for veranda flooring:
- A high-quality tongue-and-groove board provides an excellent, even coating that is distinguished by its decorative properties (with appropriate installation and design) and good performance qualities.
The disadvantage of wood is its “dislike” for water in all its manifestations, so such a floor is most often acceptable only in completely enclosed verandas, where direct exposure to precipitation is excluded.
So that the floor is not afraid of high humidity and dirt applied from the street, it must be covered with a layer of special waterproof clear varnish or paint. As a rule, this wooden floor It will require the installation of reliable thermal and waterproofing underneath, otherwise the boards may not last long. Although, modern wood impregnating compounds will help minimize the vulnerability of such a coating to changes in humidity and temperature typical of a veranda.
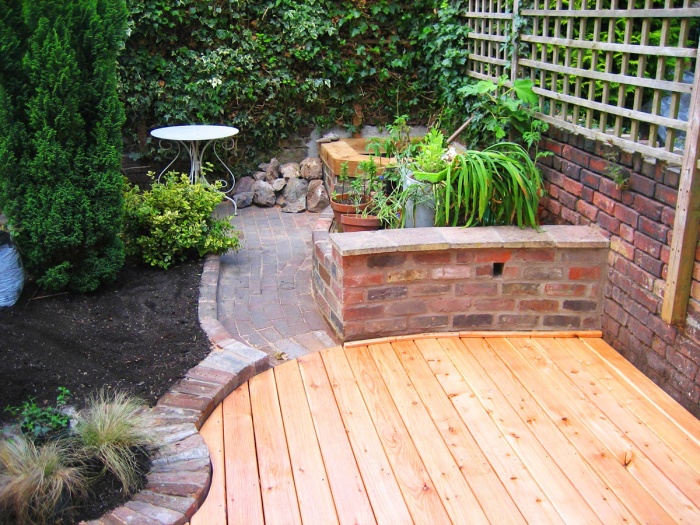
- The second option is much more resistant to all negative influences. This refers to decking, a special deck (terrace) board made from durable wood (most often it is Siberian larch, although exotic species are also used) and treated with special impregnations, which give it additional protection.
Teking - high-quality “deck” board made from special types of wood
This coating is already universal - it can be laid both indoors and on open verandas with a ventilated subfloor. To prevent rain moisture from accumulating on the veranda, the boards are laid at intervals from each other - the water simply flows down. For the same reason, the boards do not need a tongue and groove lock - they are smoothly trimmed on both sides.
When producing such coatings, numerous longitudinal grooves are necessarily milled on the front surface - it is simply impossible to slip on such a floor.
The floor on the veranda, completely laid from such material, has excellent decorative properties - straight lines along with natural colors and the texture of coniferous wood, they give a completely unique effect.
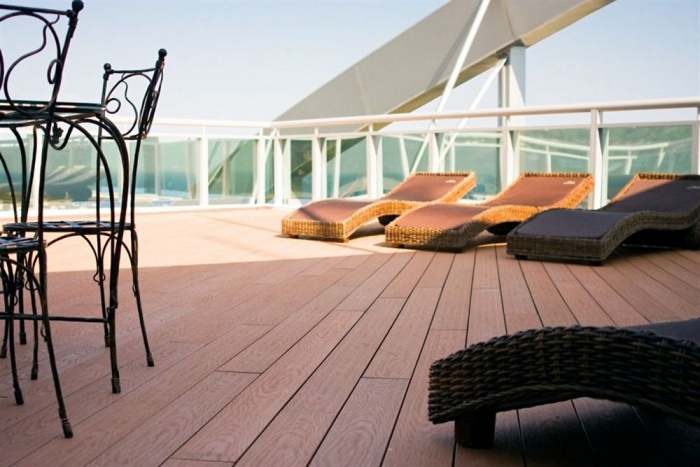
Composite decking board
This is a worthy replacement expensive natural decking, quite comparable to it in terms of performance characteristics, and losing, perhaps, only in matters of environmental friendliness and natural warmth. The material for the production of such “liquid wood” is waste from wood processing industries (shavings, sawdust, dust) mixed with polymer compounds and molded on extrusion lines. The result is panels of a special hollow structure - lightweight, high-strength, not afraid of the negative influences of the external environment, externally repeating the shape and texture of natural deck boards.
This coating is successfully used on all types of terraces, open or semi-closed verandas. It is attached to the joists in a hidden way, using special brackets, which is another advantage of this type of floor.
Video - installation of composite decking boards
A veranda finished with such material will not be visually different from a room with a natural floor covering. From an environmental point of view, wood is certainly preferable, but in open areas this disadvantage of a wood composite practically disappears.
Linoleum on the veranda
Undoubtedly, this is also an acceptable option, especially since it is attractive due to the low cost of the material and the ease of laying the finishing surface. If you purchase linoleum that is resistant to mechanical and temperature changes, it should last a long time.
Linoleum on the veranda - despite its shortcomings, also has a “right to exist”
It would seem to be a very good option in terms of hygiene, ease of cleaning, and water resistance. However, a material with an insulated felt or fabric base is not entirely appropriate for this room - there is no escape from high humidity, and such a base will become damp over time, begin to rot or rot. And one more big minus - no matter how high-quality linoleum is, under the influence of high temperatures ( common occurrence on the veranda in summer time) a peculiar “synthetic” smell may appear.
Self-leveling polymer floors
We can say about these floors on the veranda that they probably have no drawbacks from an operational point of view. Practically not afraid of anything, highly durable, with unlimited possibilities for decorating to suit the most sophisticated taste, they would most likely be ideal solution, if you do not take into account their pronounced “artificiality”. Fans of natural materials do not always like them.
Their second significant drawback is the rather complex and multi-stage pouring process, which requires quite labor-intensive preparation of the base and special skills in work. If we add to this the considerable price of high-quality materials and payment for the work of craftsmen, then their low popularity in such premises becomes quite understandable.
Rubber coating
But such coverage is very often forgotten completely in vain. It is ideally suited for open or semi-closed verandas.
It has excellent anti-slip properties, is harmless from an environmental point of view, is absolutely not afraid of moisture and temperature changes, has a pronounced shock-absorbing effect, is safe from the point of view of injuries - what else is needed for a room where people constantly pass by, where there may be high humidity and pollution?
Rubber coatings can be produced in the form of tiles, modules with a locking connection, or in the form of a conglomerate (crumbs or granules), requiring installation using a special technology.
The installation of such a floor will immediately remove many of the problems inherent in a veranda or terrace. Another advantage is that it can be laid on almost any base.
So, there are many options for covering the floor on the veranda. You should correctly evaluate the features of a particular room, your own vision, advantages and disadvantages possible solutions, your financial capabilities - and make the right choice.
A veranda or terrace in a private house is an excellent place for its inhabitants to relax.
To make it comfortable and create an atmosphere home comfort and peace, his interior design needs to be given the appropriate look.
The most commonly used material for constructing a veranda is wood. And before you start decorating the veranda, you need to wood parts cover with an antiseptic solution.
It must be taken into account that this is a non-residential and unheated room, therefore special requirements are imposed on the materials used for interior decoration. To interior decoration verandas a long period had a good time appearance and didn't demand frequent repairs, it is required to use high-quality, moisture-resistant materials. If you have basic skills in performing repair work finishing the veranda can be done with your own hands.
This work must begin with drawing up an estimate. Plan the order of work, select and purchase in advance required material so that the interior finishing is done quickly and efficiently. List of works for finishing the veranda:
- Selection of materials.
- Ceiling finishing.
- Covering the walls of the veranda.
- Floor covering.
What materials are used to finish the veranda?
If you want to receive beautiful finish verandas, the choice of quality materials is critical. The peculiarity of the selection of materials is that in most cases an unglazed veranda attached to a house is more like an open terrace, which is seriously exposed to the external environment. Therefore, the material must not only correspond to a specific design, but also be resistant to high humidity, temperature changes and sunlight.

The most common material for such work is wood lining. This material can be used to cover both the walls and the ceiling of the veranda. It's environmentally friendly natural material, has a beautiful appearance and a pleasant smell of wood.
Drywall is waterproof. Environmentally friendly, non-flammable material, easy to install, easy to process, allows for a wide variety of finishing.
MDF is a material that imitates wood. Durable material, the surface of which is made with wood imitation. However, when it gets wet, it swells and loses its quality. Can be used for finishing closed verandas.
PVC panels. Inexpensive, moisture-resistant material, has a rich texture, a wide variety of colors and shades. Easy to install, easy to clean. Durable and non-flammable material.
Siding is a practical, inexpensive material. Available in various colors, with imitation wood, house block, lining. Does not rot, is resistant to fire, temperature changes, has a long service life, and is easy to maintain.
Return to contents
Ceiling finishing procedure

The process of making a ceiling begins with its preparation. First of all, it is necessary to treat with an antiseptic and fire retardants. wooden structures veranda ceiling. Then install the frame under the sheathing. The frame is made of bars measuring approximately 30x50 mm. Before installation, the bars are impregnated with an antiseptic.
After it has dried, using self-tapping screws, the bars are attached to the roof rafters in increments of about 50 cm, maintaining horizontality, which is maintained using a level.
If the veranda is closed, the ceiling is insulated, which allows you to use the veranda until late autumn. To insulate the ceiling, first a waterproofing film is installed and attached to the rafters, then insulation is installed between the rafters. Used as insulation mineral wool or polystyrene foam. After completing this work, the ceiling is sheathed with clapboard or other material.
The lining is laid perpendicular to the frame slats and nailed into the end with thin galvanized nails. After installation, the surface of the lining is sanded and varnished.

When covering with PVC panels, a starting profile is installed in the corner of the room on the sheathing; it helps to assemble the panels together. Then a panel sheet is inserted into the profile groove. It is attached with self-tapping screws or special holders. The next panel is placed in the groove, secured, and so on. During installation, a compensation gap of about 2 cm is provided, which is then covered with a plinth.
Similarly, the ceiling of the veranda is covered with siding and MDF.
To install drywall, instead of wooden blocks, it is better to use a special metal profile as lathing. Elements are installed on the profile, to which sheets of plasterboard are attached using self-tapping screws.
After this, the surface of the veranda ceiling is puttied, cleaned, and it is ready for finishing. You can glue it as a decoration vinyl wallpaper, paint or cover with artistic plaster.
Return to contents
Veranda wall cladding
A frame made of wooden blocks is installed on the walls, the verticality of which is checked with a level. If necessary, the walls are insulated. WITH outside A waterproofing film is installed on the wall, which is secured with slats, then insulation is installed and the sheathing is attached. Wooden elements are pre-treated with an antiseptic. Then lining or other finishing material is attached to the frame. And their finishing is carried out.
The terrace floor can be made of various materials. For example, a wooden floor on a terrace is a fairly common option. To protect it from external influences, you will need to use special impregnations. Composite boards do not require processing - innovative material, created specifically for terrace floors. Ceramic tile coating allows you to create uniformity in the flooring of your home and recreation area. If on the floor summer design paving slabs are laid, such a building will be in perfect harmony with the surface of the garden paths.
To choose the most suitable material for covering the terrace, you should get acquainted with the features of each of them separately. You should also understand what requirements apply to the terrace covering, how to lay different materials with your own hands.
Coverage Requirements
What is the best material to make a terrace floor from? Among the main requirements for flooring are the following: optimal price, high strength, ease of installation and subsequent maintenance, attractive appearance. In reality, finding such material is almost impossible. To make the right choice, you should understand the characteristics of the most popular products. To figure out how to cover the floor on the terrace, you should decide on the purpose and design features of the extension.
The main requirement is that the material must be different high quality. If it has serious flaws, the flooring will be short-lived and not practical enough. Also Special attention should be given attention to installation. It should be performed in compliance with technology.
By installing a terrace, you can significantly increase the usable area of your home. If you arrange it correctly, it can be used for many tasks, including small chores.
However, the coating should be as smooth as possible. If it comes and has various defects, moving around the terrace will be quite difficult. If the coating is sufficiently slippery, this circumstance will affect the safety of the residents of the house. If the covering is made from low-quality material, floor repairs will be required regularly.
If a terrace is built near a house without a subfloor, it is usually placed directly on the ground. It is important to consider that the material chosen for finishing the terrace may not be used for every case.
Creating a Project
There are many options for deck flooring. Features of placement, as well as the shape and area of the flooring play an important role in the functionality of the extension. Even while drawing up the project, a specific place should be allocated for the terrace.

The usable area of the veranda will depend on what shape it is made of. Ideally, the extension will be made near the living room and kitchen. The terrace should be arranged in such a way that it overlooks flower beds or a garden.
Advice! It is better to place the terrace on the southwest or south side of the house. In this case, in the evening the building will be illuminated for quite a long time.
In summer, the terrace serves as a kitchen or dining room. That is why it should be made in such a size that it is convenient to move with various dishes. Also, the area should be enough for a large group of friends.

The standard terrace area is 10-12 square meters. m. This size is enough to install furniture for 6 people. Even if the house is planned to be built small, the terrace should have the largest possible dimensions. More practical and affordable option- arrangement of a simple-shaped terrace. Usually this is a rectangle.
Terraces are made open or closed. It is worth considering the main advantages of structures equipped with a roof:
- The terrace can be used at any time, even when it is not sunny outside.
- When arranging the roof, there is no need to clear the snow on the terrace.
- In summer, the extension can be equipped with furniture.
When choosing flooring for your outdoor deck, you need to think about the characteristics flooring, which would have maximum durability.

Paving slabs
When arranging the terrace flooring with paving slabs, it is worth considering that you will not need to construct a concrete base. Also, such a floor will be less susceptible to various weather conditions. Tiles are not afraid high humidity and significant temperature changes. Replacing individual coating elements is quite simple.
Using paving slabs you can implement the most daring designer fantasies. The material is sold in various color solutions. If the cladding of the facade of the house is made of clinker bricks, it is better to lay the floor on the terrace from clinker. The tiles are also selected according to size and texture. It can imitate various types of stone.

If an open structure is being built, the floor surface should be sloping. The angle should be approximately 2-3 degrees. It is important to first prepare the terrace floor and then lay the tiles.
The density of the different layers of bases should be the same. Also, the foundation over the entire area of the terrace must have the same characteristics. Otherwise, the soil may settle under the weight of the structure. When constructing an open terrace, it is better to equip a drainage system.

Ceramic tile
This material is one of the types of popular coatings that are used for arranging terraces. It has a number of advantages and disadvantages. It is optimal to lay ceramic tiles on a concrete base.
Before work, you should decide in advance on the type of tile. It should be non-slippery, as well as frost-resistant and abrasion-resistant. Porcelain stoneware is excellent in this regard. If the floor in the house and terrace is made of tiles, it is worth considering that different models have different thicknesses.
Natural wood
If the terrace is covered natural wood, the deck should be raised above the ground. It is best to install the structure on a pile or columnar foundation. In this case, the boards will be well ventilated from above and below. You can lay wooden floors on a terrace with your own hands quite quickly.
Features of wood flooring:
- Using traditional materials is simple and practical.
- Wooden decking looks great with your garden and home. If the paint is chosen correctly, the coating can be made as attractive as possible.
- The surface, made of natural boards, does not burn your feet even in the most intense heat, but warms up perfectly.
- Even if the work will be carried out over several days, you can safely purchase various lumber separately.

Important! Often the flooring is built from larch - an accessible and inexpensive material.
If you want to get the job done as quickly as possible, you can purchase a special set of decking boards, supplied with joists and fasteners. However, this option will cost much more. The decking board consists of plastic and wood flour.
Today, the most common option is corrugated decking. Such products are equipped with longitudinal grooves. They do not have a slippery surface and also look quite attractive. Among the disadvantages, it is worth noting that dirt and sand get into the grooves.
When arranging a terrace, tongue and groove boards should be used carefully. When the humidity level changes, its linear dimensions. Particularly strong changes occur with boards made of fir, pine, linden, and cedar. To figure out what to paint the floor with, it is worth considering the characteristics of the material. Properly selected paint will protect it from negative influences.
Features of choosing wood
The best choice for an open terrace is oak or larch flooring. Heat-treated ash is also ideal for flooring. Such wood has a fairly high resistance to rotting and low water absorption.
More expensive, but also high-quality materials are classified as exotic:
- Teak. It grows in tropical forests. The hardness of this wood is above average. Teak wood grows in many countries - on plains and in forests.
- Balau. Such trees grow in the forests of Southeast Asia. Some of the plant varieties are in the Red Book. Such wood can have a dark brown or light brown tint.
- Dipteryx fragrant. A tree grows in South America. The material has a rather attractive texture, as well as a rich smell.
- Ipe. This is the name of the Brazil nut. Such wood has a fairly wide color scheme. It can be olive-gray, burgundy, brown. The material has high strength, high weight and density.
The most common type of covering for terraces is pine. batten. It is quite popular due to its low cost and practicality. If you dry it according to a certain technology and then soak it special compounds- the terrace flooring will serve for many years. If the terrace floor is subject to high requirements, it is better to make it from larch.

Important! The choice of paint is of particular importance.
Composite board
Wood-polymer composite (WPC) is increasingly used by owners country houses for arranging a terrace. This product is obtained by mixing wood flour and polymers. Finished goods in appearance they do not differ from natural corrugated boards.
This board not only looks great, but also has high strength, resistance to deformation and fading. This type of flooring does not require special care. It must be cleaned periodically with a jet of water under pressure. Various colors can be chosen for decking boards.
When choosing WPC you should be very careful. Many manufacturers offer low-quality products. The price may be reduced slightly. It is worth purchasing composite boards only from proven brands. Otherwise, it will quickly lose color and crack.

Important! High-quality decking can also be used to create fences.
Rubber coating
One common coating is a material that contains rubber. It can be natural or synthetic. Such coatings have a wide range of advantages:
- rubber products are resistant to various influences environment;
- they have minimal risk of injury;
- walking on such a surface is quite pleasant;
- Laying rubber flooring yourself is quite simple.
In addition, the price of rubber products is not as high as at terrace board or exotic wood. A photo of the rubber terrace floor can be seen below.
The vast majority of country and country houses are built with a mandatory veranda, no matter whether heated or not. What is a dacha without a veranda, a full-fledged living space, and at the same time a place to store all kinds of utensils. After completing the construction of the building, sooner or later you will have to decide how and with what to cover the inside of the veranda so that it is inexpensive and beautiful.
Living in a room that looks like a barn is uncomfortable, and it’s not easy to spend extra money.
Requirements for finishing material
Before looking for material and a way to sheathe the inside of the veranda, you need to look at the conditions of the room, and only then look for a suitable material inexpensively.
Let's focus on the main ones:
- Temperature and humidity indoors. It depends on which side of the house the veranda is located, sunny or shady, whether it is possible to sheathe the walls inside with materials based on cellulose fibers, or you will have to buy plastic, inexpensive and reliable;
- The frequency of people living in the house and using the premises. For a house in which a constant temperature is not maintained, and people live with long breaks in time, the problem of how to line the walls inside turns into a question of dealing with water condensation;
- Age of the veranda and the entire building. There is no point in trying to sheathe the walls indoors until the shrinkage processes of the foundation and building frame have been completed.

In the simplest case, you can sheathe the walls from the inside cement bonded particle board, very inexpensive, practically not afraid of dampness, does not warp even with strong condensation. But from aesthetic and practical point In general, most owners would like the lining inside the veranda to be, first of all, comfortable and safe for health, and only then it would be inexpensive and practical. Therefore, from more than two dozen cladding options, we will leave only those most suitable for the listed requirements.

For your information! For a newly built wooden veranda, it is advisable to make temporary cladding using tongue-and-groove boards.
How to sheathe a veranda with wall shrinkage, inexpensively and efficiently
Instead of the traditional vertical boarding, you can sheathe the walls with horizontal padding on a cross batten. It will turn out inexpensive and practical. To prevent the finishing from being torn off the walls during shrinkage, the board is filled with a maximum gap at the tongue-and-groove joint and mandatory installation of insulation, for example, foamed polyethylene.

After three to four years, the decoration on the veranda can be inexpensively updated:
- Remove the board, insulation and sheathing;
- Treat wood antiseptic impregnation, stain and varnish;
- Lay the sheathing, insulation and sheathe the walls again, but with the correct gaps in the joints between the boards.
In this way, you can inexpensively cover any room in a wooden house, or a bathhouse made of timber. For brick and block buildings, which have significantly less shrinkage, the veranda can be immediately sheathed according to the finishing scheme.

Popular materials for covering verandas
The modern market offers enough big choice materials for decorative wall cladding, including verandas. The list of the most popular finishes usually includes:
- Lining, board, wooden slats;
- MDF or fiberboard, boards and panels;
- Plywood, OSB boards;
- Waterproof plasterboard sheets GKL;
- PVC panels.
All of the listed materials fit well into the interior of the walls of the room, do not swell with moisture and do not create a feeling of discomfort for the owners, therefore, in the question of how to sheathe the inside of the veranda inexpensively, price and personal preferences and desires remain the determining factors.

To sheathe a veranda indoors truly inexpensively, you will have to do a larger amount of work yourself, and spend the bulk of the costs on purchasing high-quality material.
But not all indoor conditions are the same. Often, before sheathing the veranda inside the photo, it makes sense to contact a specialist for advice and clarification.

Material for a cold veranda
It’s quite difficult to choose what to sheathe the inside with. unheated veranda. There are not many finishing options that can be used inside a cold, unheated room. Most often the list is limited to plastic panels, waterproof brands OSB boards and coniferous lining.

The main problem that owners of unheated rooms have to face is condensation that regularly forms on the surface inside the cladding. Therefore, you should not try to cover the walls of a closed veranda with materials made from cellulose fibers, primarily fiberboard and MDF. Even when painted with enamels or varnished, they quickly swell, which leads to warping and breakage of fasteners.

PVC panels are considered the best option. They do not rot, do not absorb moisture, the choice of colors is simply huge, and all this wealth will be relatively inexpensive when compared, for example, with oak or cedar lining.
If desired, the inside of the veranda can be sheathed with plastic with a pattern that imitates valuable types of wood, natural stone, or simply a single-color color that matches the interior of the room.
To finish with polyvinyl chloride, the walls of the veranda will first need to be sheathed with a supporting frame made of galvanized profile. Metal profile strips are nailed to the walls in increments of no more than 60 cm. The easiest way is to sheathe the veranda with vertical PVC strips, in this case the profile is nailed in horizontal rows.

The walls of the veranda facing the street, before being covered with panels, are insulated with isolon or foil polyethylene; this is inexpensive and effective. Domestic warm walls can be sheathed with mineral thermal insulation with a gasket inside a layer of vapor barrier membrane. In this case, it will be necessary to organize additional ventilation of the room, since plastic, like glass, creates an increased level of humidity from the inside.
For dachas, the problem of condensation is especially relevant during the onset of cold weather. After the owners move out with the first frosts, water accumulates through the walls. a large number of water vapor, they must be removed by flowing ventilation before the low air temperature turns into frost on the walls inside the room.

The choice of polyvinyl chloride to sheathe the inside of the veranda of a house cannot be considered particularly successful. Plastic always remains a fire hazard; at low temperatures, an accidental push from a chair or a careless blow can lead to cracking of the material.
Therefore, if you can inexpensively buy lining made of oak or larch, it is better to sheathe the inside of the room with wood, which will last for several decades.

Decorating the veranda with wood
Wood has always been considered the best material for any finishing work inside the veranda. The easiest way is to cover the walls inside the room with clapboard, both in an expensive version and relatively inexpensively, approximately at the level of PVC panels.
Standard lining is divided into four quality classes:
- Extra - the most durable and beautiful material, without a single knot or disturbance in the grain pattern. Such wood is used for expensive finishing inside the living quarters of the house;
- C-class - the cheapest, designed to sheathe a shed or utility room. Despite the fact that in general the work is inexpensive, due to the extremely low quality, it is not recommended to use verandas for interior finishing;
- Classes A and B allow some defects in the form of knots or even cracks, but most of them are located at the end of the plank. It is with this clapboard that it is best to cover the veranda.
Most craftsmen do not trust the information about the class indicated by the manufacturer on the packaging; most often the material turns out to be of lower quality than stated when sold. Therefore, before covering the inside of the veranda with clapboard, do not be too lazy to open and discard some of the planks in order to avoid defects when finishing the walls.

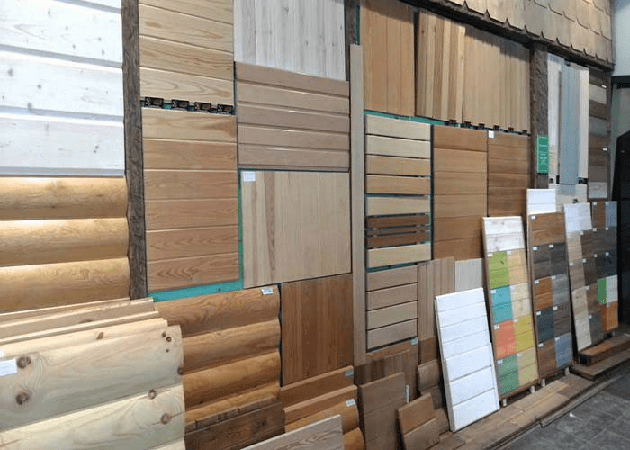
In addition to class, the material may differ in the shape of the front surface. Examples of the most popular profiles are shown in the figure. If you want to create the impression of a log vault and walls, you can sheathe the walls inside the room with one of the types of boards - block house.

The technology of clapboard cladding is practically no different from the technique used for PVC installation. Initially laid starting bar, and then lining boards are laid on the previously filled crate. It is best to sheathe the walls of the veranda using staples, without glue or screws.
Larch is the most difficult to install, but it's worth it. Even for the most comfortable veranda there is no point in purchasing cedar or ash if you need to sheathe the room quickly and inexpensively. The best option There will be high-quality spruce or pine, which can be ordered inexpensively from a private carpentry shop, dried, polished the front part and coated with wax.
Even an open or unheated veranda can be covered with such cladding. A pleasant bonus will be the smell of pine forest that appears when the walls of the veranda are heated sun rays.

Conclusion
The most budget-friendly option for cladding the walls of the veranda will be made from wood-fiber panels or slabs. They are relatively inexpensive, and in terms of comfort, materials made from cellulose fibers are considered one of the best.
If the room needs to be made not only warm and comfortable, but also truly beautiful, then it is best to sheathe the walls MDF boards. It will turn out inexpensive and beautiful, but it is worth remembering that the high decorative qualities of the slab are ensured by the glued polymer film; accordingly, the vapor permeability of the material is much lower than that of fiberboard. All the work will not cost much, but there should be no places in the veranda that fall outside the ventilation zone, otherwise the accumulating condensation will quickly destroy all the work.
One of the most significant advantages of living in a private house is the opportunity to go outside at any time of the day or night. Fresh air and enjoy the aroma of flowers in summer or the enchanting smell of rotten leaves in late autumn. And how pleasant it is to sit with a cup of tea on the open veranda during the first thunderstorm in May, when the air is filled with ozone and tender young greenery rustles under the elastic streams. Enclosed veranda V country house can easily be turned into a dining room where the whole family will gather for Sunday lunch: share impressions, make plans and just chat. Important role In creating the necessary mood, not only the view from the windows plays a role, but also the decoration of the veranda. It is she who will help you create an atmosphere of home comfort and peace.
Selection of materials
The choice of materials for finishing the veranda is not only aesthetic, but also practical. As a rule, the word “veranda” means an unheated room. In some cases, an open veranda is more like a gazebo attached to the house, so there is no question of heating here at all.

This means that the decor should not only be beautiful, but also resistant to high humidity and temperature changes.
Protection of wooden structures and thermal insulation
Most Popular building material For the construction of the veranda, wood is used. Before you start finishing, all wooden structures must be treated with a special antiseptic composition.
In addition, for glazed verandas, proper thermal insulation of the lower part of the walls (under the windows) and the ceiling is of great importance. The interior decoration of the veranda begins with it. If insulation is carried out correctly, the room can be inhabited until late autumn.

You can insulate the veranda ceiling with almost any thermal insulation materials: mineral wool, extruded polystyrene foam (EPS), polystyrene foam or liquid sprayed polyurethane foam. Having chosen polystyrene foam, you must be prepared for the fact that for high-quality thermal insulation you will have to lay a fairly thick layer of this material, which will inevitably lead to a decrease in the ceiling level by 10 -15 cm. Sprayed polyurethane foam is an effective, but expensive insulation material. But EPS and mineral wool at a fairly affordable price can perfectly protect your veranda from the autumn cold.
Insulation is laid on the walls and ceiling according to the same pattern. First of all, it is necessary to ensure waterproofing. To do this, a waterproof film is spread along the entire wall, and the joints between its sheets are hermetically sealed with metallized tape. Then we install vertical wooden blocks at an equal distance from each other, and lay insulation between them.
Important! It should be remembered that mineral wool is very susceptible to dampness. Under the influence of moisture, after just a few years, such insulation turns into dust.
The last layer will be a heat reflector, which is laid with a metallized film inside the room and secured with tape.

We insulate the ceiling in the same way.
Finishing the walls and ceiling of the veranda
When all the preparatory work is completed, it's time to think about the interior of your veranda. You can entrust its development to a professional designer, or you can cope with this task yourself. Finishing options are open and closed terraces enough. Let's look at the most popular of them.
Finishing with PVC panels
Most budget option finishing the veranda walls last years are plastic panels. This material is resistant to high humidity and temperature changes. In addition, it is quite easy to install and clean. Will help you imagine how interesting something made from PVC inner finishing the veranda photo taken in one of the hardware stores.

The only disadvantages of plastic include low environmental friendliness and fragility - it is very easy to break by carelessly moving a chair or accidentally hitting the wall with your knee.
Wooden slats with a cross section of 30*20 or 30*10 mm or a metal profile for mounting drywall can be used as a frame for PVC panels. When using wood, it must be pre-treated with an antiseptic.
Helpful advice! On the walls of the veranda facing the street, it is better to use wooden slats for lathing. Fastenings metal profiles can create “cold bridges”, which will significantly reduce the quality of thermal insulation. But for those who are not too smooth interior walls It is better to use a profile on special hangers.

- The slats must be fastened perpendicular to the direction of laying the panels. So, if the plastic is placed vertically on the wall, then the slats are installed horizontally in increments of no more than 50cm.
Important! The walls of the veranda are decorated with panels with a pattern from left to right. You can start installing plain panels from any side of the wall.
- When the sheathing is ready, a starting profile or mounting angle is attached in the corner of the room using nails or self-tapping screws. The first is used if the adjacent wall will be finished with a different material, and the second will allow PVC panels to be joined together.
- Then the first panel is inserted into the guide profile so that the wide mounting flange is directed towards the installation.
- To fix the panel to the sheathing, you can use metal holders, or you can simply screw it to the batten with a self-tapping screw.
Important! If you are not using holders to mount the panels, do not overtighten the screw. Otherwise the panel will “drive”.
- We insert the next panel so that there is no gap left and fasten it.
Remember that PVC panels are subject to thermal expansion. To compensate for this, it is necessary to leave a gap of 2-3 cm at the top and bottom of the wall and cover it with a plinth.
MDF - cheap imitation wood
Another popular finishing material is MDF panels. They are somewhat stronger than plastic, but less resistant to moisture. You should not use this material on open verandas, but for closed ones it is quite suitable.

MDF panels are installed in the same way as plastic ones.
Wooden lining - a classic of the genre
When listing materials for finishing a veranda, it is impossible not to mention the most traditional of them - wood. Most often this is the so-called lining.
Lining is a cladding board, up to 22mm thick, with special grooves that facilitate installation and joining.
This material is used to cover not only the walls, but also the ceiling of the veranda. After treatment with antiseptics, the lining will serve you for up to 20 years. Talk for a long time about the advantages of wood over artificial materials not necessary. Just look at the delightful woody smell that will be felt on your veranda for many years.
Choosing wooden lining
First of all, it should be said that according to the production method, the lining is divided into jointed and solid. In the first case, the highest quality pieces of wood are joined in a special way. Despite the fact that such material looks excellent - there are no knots, cracks or other putty defects on it - for finishing open veranda he doesn't fit. With high humidity, cracks may form at the splice site, which will greatly spoil the appearance of the finish.

In addition, the lining is divided into 4 classes. The most expensive and high-quality - the “extra” class - is almost always spliced. But class A, B or C material is usually made from solid wood. On such lining there are knots and potholes. Most often they are treated with putty during production.
Important! When purchasing material, be sure to unpack it. Very often, in the middle of the pack there are defective or low-grade planks.
Preparation and installation of lining
Preparing the lining for installation comes down to treating it with an antiseptic and adapting the material. It is necessary to leave the lining in the room being finished for several days, and then cover it with a protective compound.
When using lining, finishing the veranda with wood is done in almost the same way as PVC panels or MDF. The lathing is done according to the same scheme, but there are several methods of fastening:
- Fastening with galvanized nails. This is the easiest way. The nail is simply driven into the center of the board, and then the head is recessed using a hammer.
- Fastening with self-tapping screws. In this case, a hole about 10mm deep is drilled in the board from the tenon side. The diameter of the drill must correspond to the diameter of the screw head. Then we screw the lining to the sheathing, sinking the screw into the hole, close it with a dowel and sand it. As you can see, the method is more labor-intensive, but the fastening is not visible.

Important! Using clamps, only the inside of the veranda can be finished.
When the installation of the lining is completed, you need to cover the corners and joints in the area of doors and windows with a corner and begin finishing. To give wood a tint, colored varnishes or stains are used.
Important! Before you begin, coat the distilled scraps with your chosen varnish and let dry. Sometimes after drying the color becomes completely different from what it was when applied. It will be very difficult to remove varnish you don’t like from the walls. For the same reason, do not buy a large amount of varnish at once: buy a little, try it, and if you like it, buy more.
You need to apply the varnish from top to bottom: first we cover the ceiling, and then the walls.
Exterior finishing
So, we looked at the main options for finishing the veranda from the inside. How to veneer it on the outside? In principle, you can use lining here, but is it worth it? Despite all kinds of impregnations and antiseptics, wood, constantly exposed to negative impact environment, quickly loses its decorative effect. This means that you will have to re-process it annually.
If you still decide to choose wood, remember that you can attach the lining horizontally from the outside only with the tenon facing up. In this case, it must be fixed in two rows - on the tenon side and on the groove side.
Siding
In recent years, finishing the veranda with siding has become especially popular. Even if the house is lined with brick or covered with decorative plaster, you can easily choose a shade of siding that will fit perfectly into the ensemble.

The most commonly used variety of this material is vinyl siding. It owes its popularity to its fairly affordable price, good performance and ease of installation.
For finishing facades, horizontal siding with interlocking joints is most often used. We will consider the technology of its installation in more detail:

Let's start cutting and installing the panels. Cutting vinyl siding is fairly easy. This can be done with metal scissors, a hacksaw or a jigsaw.
Important! Vinyl is highly susceptible to thermal expansion. Therefore, each panel should be 5-7mm shorter than the wall.
- We bend the panel slightly in the center and insert its edges into the grooves of the corner profiles.
- We align the panel and insert its bottom edge into the starting strip.
- We fix the upper edge of the panel with self-tapping screws through the prepared holes.
Important! Do not press the screw tightly against the sheathing. Oval hole for fastening is designed to allow the material to move freely along the screw during temperature fluctuations. The distance between the cap and the sheathing should be 1-1.5mm.
- We also insert the next plank into the corner profiles, snap it into the groove of the previous one and attach it to the sheathing.
- Before installing the last level strip, we mount the finishing profile, cut off the required width of the siding strip, snap it into the previous strip, and simply insert the free edge into the finishing profile.
- Here are detailed video instructions for installing this material:
That's all. From the outside, your veranda looks perfect.
Finishing the veranda - photo selection
To make it easier for you to make the final choice in favor of one or another finishing material, we have prepared small photo selection:


