At self-construction baths, it is necessary to take into account some features. One of them is the optimal parameters of the future design. They depend on the purpose, on overall dimensions bathhouse and its stove and on the number of people who will take part in operation. The user must pre-designate all this.
To correctly determine the value, you should take into account the ratio of the height of the person using the device and the elevation of the entire structure. Although standard parameters does not exist, there are still those recommended for use in the assembly. It is believed that a tier with a half meter high (+- 10 cm) is more convenient. If your distance from floor to ceiling is too large, then you can take into account the size of the shelf no more than two meters.

It is important to understand that seats that are too low will not be comfortable for you, so it is not recommended to install less than 30 centimeters. In addition, it is advisable to place the topmost shelf more than one meter from the ceiling.
What is the width of the shelves in the bath
The indicator most often varies from 30 centimeters to 60. In a situation where the surface seat is intended for lying down, it is worth resorting to parameters greater than 60 - 90 cm, this will guarantee the most suitable pastime. Basically, it is best to rely on the total area. If you make a choice based on the number of people who will be steaming, then you should consider the following recommendations:

Design features
To fully ensure a winning bath room, you should take into account the fact that it is precisely when open shelves With bottom side the ventilation process will take place. To prevent liquid from accumulating, it is advisable to make a slight tilt. From avoidance various damages You need to carefully check the reliability of fastening the products to the walls.

In addition, do not try to coat with varnish, as at elevated temperatures they will emit harmful properties, and the product itself will lose its original shape. Make sure that the structure does not have various corners and sharp spots. To prevent rotting, it is advisable to separate the floor from the shelves with a lining (it is better to choose rubber or plastic).
ATTENTION! An important point is compliance with fire safety. The surface should not be formed too close to open fire or oven. And the walls that come into contact with them must be treated with a special non-flammable substance and fenced with thermal insulation material.
The “furniture” in the bathhouse does not shine with any decorative delights. Its main goal is maximum functionality and providing vacationers with complete comfort. Any benches or shelves in a bathhouse are usually made from natural wood- This perfect material for a steam room, which is highly environmentally friendly, easy to process, traditional and very attractive in appearance.
You can easily make shelves in a bathhouse with your own hands. Thanks to the simple design of such a unique “furniture”, even a non-professional can make it in a short time with high quality and much cheaper than if the shelves were bought in a store or made to order at a factory.


Peculiarities
It is impossible to imagine a traditional village bathhouse without shelves: often multi-tiered, reminiscent of a wide-step staircase. In another way, such shelves are called canopies. They are an integral part of any steam room.


A shelf or canopy is wood flooring - a kind of elongated multi-tiered bench located along one or several walls of the room. So that you can relax in the steam room, such shelves are made in such a way that even a large A tall man will be able to lie on them calmly. In addition, multi-tiered shelves allow vacationers to independently choose the most comfortable temperature for them.


Bath shelves can be divided into three types. The most common option is shelves used as benches; They are suitable for both small steam rooms and spacious large rooms. Loungers are not as popular as benches, but they are also found in the most different baths. And finally, the third type of bath shelves - sun loungers. They are practically no different from beach sun loungers, and they can be used with equal success both as a bed and as a chair, which makes them very functional, although far from the traditional design of a bathhouse.


The design of the shelf is extremely simple. Decorative elements are not welcome, as they can cause injuries, and they simply go against the traditional external design steam rooms The simplicity and small selection of shelf shapes is easily explained: it is customary to allocate space for a bathhouse. small room, which can be easily, quickly and quite economically warmed up without wasting unnecessary resources. That is why the most beloved by craftsmen is the ordinary rectangular shape of the shelves.


Material selection
Before you start making a shelf, you should take a closer look at the materials and wood from which they can be made. Not all tree species are suitable for making “furniture” for a bathhouse. After all, they will have to endure temperature changes and, in principle, very high temperatures. Add to this high air humidity, and it becomes clear that few breeds will be able to withstand such extreme conditions.

Suitable breeds must have three main properties. Firstly, such boards must be resistant to fire (accordingly, the content of various types of resinous compounds in them should be minimal), high temperatures and humidity. Secondly, in order for those relaxing in the bathroom to sit and lie comfortably on them, they should not have high thermal conductivity. And thirdly, in order to avoid chips peeling off and splinters appearing on vacationers, the rocks must be very dense and not layered.


Several tree varieties are most suitable, which can literally be listed on one’s fingers. Most often it is customary to use linden, aspen, and larch when making shelves. But using coniferous wood (unless, of course, the tree has previously undergone special treatment, the quality of which the master is confident) is categorically not recommended. Indeed, due to the resin content, coniferous trees are not only flammable, but also respond to high temperatures by releasing these same resins, which can cause thermal burns.

Linden boards are very easy to process, pleasant to look at, and also resistant to all kinds of stains. They hardly rot or crack, and when heated they begin to emit a pleasant woody smell. In addition, linden lends itself very well to processing, and is inexpensive compared to other types of wood. The only thing that can be considered a drawback is that with prolonged use in rooms with high humidity, the wood begins to darken.

Aspen boards are generally considered one of the most the best materials for the production of bath furniture. This is also a very budget option, characterized by durability. Initially, this tree is not very knotty, so it is not very difficult to process. Unfortunately, main drawback This material is its predisposition to rotting of the fibers inside the timber, imperceptible at first glance. Therefore, you need to carefully select such boards.

The most expensive, but convenient and popular material for baths is African oak - abashi. This material, which is available in both dark and light colors, has amazing strength and poor thermal conductivity: it heats up very slowly, and therefore protects those resting on abashi shelves from any, even the most minor burns, even at very high temperatures. This material, which is important, is also resistant to mechanical damage, and this leads to one of its main disadvantages - the difficulties associated with the initial processing of abasha beams and its high cost.


Sometimes birch boards are also used as a material. This wood is not particularly durable, does not survive high humidity well, and is susceptible to rotting and the formation of fungi. Of course, with proper and consistent processing, the characteristics of birch increase significantly, but in any case, it is not recommended to use it in a bathhouse.

Despite the fact that experts advise avoiding coniferous wood in the interior of bathhouses, good material cedar can be used for shelves. Like all conifers, cedar produces resin, so its boards must be treated in a special way, that is, completely free of any resinous substances. At the same time, the cedar will not lose its pleasant smell natural wood. It is resistant to rotting processes, strong and durable, and its surface has a unique wood pattern.

Preliminary removal of resinous elements will allow you to use any coniferous wood for shelves. If the owner is not afraid of the difficulties of finding properly processed boards, then the furniture can be made from spruce or pine. However, in no case should pre-treatment be neglected, otherwise, under the influence of high temperatures, the minerals and resins contained in coniferous trees will begin to literally flow out of the boards.

Enough profitable solution Often the shelves are made of larch. It produces almost no resin, has a pleasant sweetish smell and a very beautiful wood grain. The only drawback is its high thermal conductivity: in a hot steam room it will not be easy to sit on such a shelf.

The wood pattern itself is an excellent decoration for the steam room, so they don’t use any paint on the shelves. Moreover, when exposed to high temperatures, paint can begin to peel off and release toxic substances. And to protect wooden crafts against the formation of fungus, mold and rotting processes, you can use a variety of water-based impregnations: they are resistant to high temperatures and perfectly protect the wood.
The main requirement that applies to all types of trees, no matter which one is ultimately recognized as the most preferable: there should be no knots on the selected material or they should be removed without the risk of weakening the strength of the structure.

In addition, it is very important to correctly count the selected material. Minimum section the timber that will be used to create the supporting frame of the future shelf should be 50x70 mm. Boards to be used for tying together pieces load-bearing structure, must have a cross-section of 20x80 mm or more. The thicker the beam, the better, because the more weight it can withstand, and this is very important for multi-tiered structures. For flooring, thinner and narrower boards with a thickness of 10 mm or more are selected.


Sizes and shapes
The dimensions of the shelves depend, of course, on the size of the room that it was decided to use as a bathhouse. For a steam room, complex tiered structures in three stages are often chosen, but a traditional Russian steam room should have two rows of shelves. In addition to being traditional, this is the simplest and most convenient option for building it yourself.


In general, the dimensions of the shelf are determined depending on the average height of the bathhouse visitors.

By height
The minimum height of the room in which the steam room is located is 210 cm, otherwise steam formation and heating of the room may not proceed properly. The shelf (or its middle part, if we are talking about a multi-tiered structure), in turn, should be located approximately at the same level as the thumb of the hand lowered down. Consequently, its average height will be about 80 cm. As for the upper tiers, the distance between the topmost shelf and the ceiling should not be less than 120 cm: this will provide the visitor with sufficient space, regardless of whether he will enjoy the bath procedures while sitting or lying down .


In some compositions, the height of the shelves themselves is determined by slightly different values. Thus, the lower tier must be at least 30 cm from the floor in order to provide the furniture with maximum natural ventilation. It is better if the average height of the shelves ranges from 40 to 60 centimeters, although ultimately it depends on the number of shelves.

By length and width
The minimum length of a shelf, which should provide comfort to a person lying on it with legs bent at the knees, according to the standard, is about one and a half meters. If the size of the room allows, then the length of the shelf increases to 1.8 m: this size will allow the vacationer to lie down without bending his legs. But each person has his own height, because optimal length The shelf is considered to be 220 cm.
The minimum width of the shelf is 40 cm. As a rule, the shelves located on the lower tier have these dimensions. It is very rarely used for sitting; its main purpose is to serve as a stand for the feet of a vacationer. But if necessary, the lower shelf can become a place where you can cool off after the heat of the upper tiers.


The most popular size of shelf seats is 60 cm. This width allows you to sit comfortably in the bathhouse, but, unfortunately, it may not be enough for comfortable lying. Therefore, the most comfortable width is considered to be 95 cm. On such seats, a vacationer can sit across the shelf with his legs crossed, or he can lie quietly.
The dimensions listed here are usually sufficient for a tall or large person to comfortably fit on the shelf. If the space of the bath room allows, then the furniture can be large in size - in the end, it all depends on the individual needs and wishes of the owner of the bathhouse. Another thing is that it is strictly not recommended to take sizes smaller than those indicated, because in this case the shelves will simply be inconvenient.


Once the main dimensions of the shelves have been determined, you can proceed to consideration various forms of this design.
Stepped canopies- This is perhaps one of the most popular types of furniture for a steam room. The shelves are located along one of the walls in several tiers - usually two or three tiers, so that the degree of heating increases as the height increases. The topmost tier should be placed above a heating boiler or traditional stove, but the above distance of 120 cm should remain between it and the ceiling to ensure maximum comfort for the occupant.


Corner or L-shaped canopies– this is also a fairly common version of the internal composition of bath furniture. Wooden shelves are located on one side opposite the heating boiler or stove, and the other on one of the free walls. The height of such shelves can be selected individually, therefore this is the most successful option for small rooms in which functionality must be combined with space saving.


Curtains-compartments- This is not the most popular option for decorating the interior space of a bathhouse, but it is very interesting in itself. In addition, such a composition is spatially extremely beneficial for small spaces. The two shelves are located opposite each other - just like in ordinary train compartment cars. Just like in trains, the upper shelves can be made folding, this will also help save space.


Typically, the frame, which subsequently needs to be covered with flooring boards, is constructed from support posts that resemble peculiar bench legs connected by jumper boards. However, shelves can be made without legs - then the main support will be on the walls to which the furniture will be attached.
The flooring itself consists of tightly packed and carefully polished planks, the backrest of the seat is constructed using approximately the same principle. The distance between them should be from 1 to 2 cm. An interesting and beautiful solution, by the way, would be to install multi-colored lighting in the gap between the boards.


Sometimes a special, most often removable, headrest is also made separately from the bed. This wooden fixture gives the vacationer the opportunity to sit on a bed with true comfort, allowing him to relax the muscles of the spine and neck. The design of the headrest itself is simple and does not contain many elements: if desired, it can also be assembled independently along with the shelves.


Multi-stage
At first glance, the arrangement of shelves may raise some questions, for example, why in most cases they are a multi-stage design.
The reason is actually very simple. When heated, water vapor and hot air rise upward, while the temperature near the floor is much lower. Thus, each user will be able to independently choose which temperature conditions It is more convenient for him to be: at the bottom, where it is not so hot, or at the very top of the steam room “pyramid”, where the temperature is as high as possible. Therefore, if the owner of the steam room decided to make shelves with his own hands, then it is absolutely not recommended to deviate from the usual step structure.

It is worth noting that in small steam rooms the lower tier is often located almost at floor level, which allows for natural ventilation and makes it more effective. It is also important to remember that the upper tier will be made wider than the lower ones (so that it can be used as a bed), and the distance to the ceiling from the bed should not be less than 100-120 cm.


Location
Once the dimensions of the future shelf have been determined, you can begin planning the location of the bath furniture. It is worth remembering that, for example, in a traditional Russian bath it is customary to steam while lying down, and the shelves consist of one or two tiers. Another thing is the Finnish sauna, in which visitors, as a rule, steam while sitting. There should be at least three tiers, which means the distance from the bottom tier to the ceiling should be much greater.
Correctly drawn up diagram before starting installation work should make the work of the master much easier and subsequently will allow guests in the sauna or bathhouse to enjoy the steam room with maximum comfort. The diagram should show all the dimensions of the room, and also note where the equipment, door and window openings are located.


It is worth taking into account many nuances, such as the fact that curtains should absolutely not be installed under walls with windows, because due to hot steam and high temperatures, the glass can crack and injure vacationers.
Shelves can have unique frame legs onto which the flooring will be placed. However this is not required condition, but only one of the options. You can make shelves without racks, then the wooden frame will be attached directly to the wall.


It is important to remember that the shelves should never fit tightly against the walls. After all, free air circulation is very important for wooden bath furniture, providing the wood with complete drying and protecting it from rotting processes and the formation of fungus and mold. Therefore, during the installation process, a gap of about 10 cm is left between the flooring and the wall (pieces of timber are first attached to the wall, onto which other frame elements are subsequently attached). The screws used for fastening should be carefully sunk into the wood so that their heads do not remain on the surface.


It cannot be said that the options for shelves are very diverse, but if necessary, depending on the size of the bathhouse room, you can choose the most suitable furniture. For small rooms, for example, you can find space-saving options. Folding shelves, which are made in the manner of shelves in trains, are suitable. Another option is folding or retractable shelves. When assembled, they look like part of the wall and take up almost no space. There are also removable shelves that, if necessary, can be brought into the steam room and put in place, or can be removed.


Step by step guide
As already mentioned, shelves are not at all difficult to make with your own hands. It is enough to look at the approximate drawings, grasp the general principle and draw up your own diagram, taking into account the dimensions of the bathhouse.

In order to process the source material and build the desired structure from it, you will need to stock up on a certain set of tools. It should include a tape measure, a hacksaw, a hammer and mallet, a drill and a screwdriver, and a chisel. It is preferable to use wooden nails to secure the decking. After all, metal nails will inevitably heat up and can ruin all the fun for vacationers. You can, of course, fasten the boards with screws reverse side design, but this is quite complicated, unreliable and also requires very precise calculations, which a professional may not be able to make.


The number of supports required by the frame that can support the finished shelves is determined depending on the final thickness of the wooden planks. So, if it was decided to take a board 22 centimeters thick, then the supports will be placed at a distance of 60 centimeters from each other.


In accordance with the drawing drawn up in advance, a sufficient amount of wood should be prepared, the wood itself must be of high quality, free from cracks, signs of rotting and all kinds of nicks and pods - the boards must be planed and sanded. It is recommended to use wood of the same species for the support posts of the frame and deck.
The thickness of the flooring boards is selected individually depending on their width. The best option This is the case when the thickness of the board is four times less than its width.

The wood itself must first be carefully prepared: the material should not have clearly visible defects or any defects, knots, cracks or chips. In addition, it is customary to take wood of the same species for the frame and flooring.
There are several options for assembling a multi-tiered shelf; they are not very different from each other and follow general principles. Below is just one of them - a traditional rectangular shelf.

Frame making
The frame in the case of a shelf performs the most important supporting function; This is the base on which the decking made of identically treated boards of fixed or removable decking is attached. These supporting bases resemble the legs of an ordinary bench in appearance and purpose.
To make the frame, a large wooden beam is used, the dimensions and cross-section of which are determined in each case individually. However, most often, in order to assemble the frame of the future shelf, it is advised to take a dozen pre-prepared beams with a total cross-section of 5 by 7 cm, as well as (if it was decided to make shelves with legs) 5 boards that will serve as racks.


These support posts must be installed in a vertical position and secured with rows of cross bars. Sometimes the frame can be equipped using the stair stringer method, and a very rare option is to install bath shelves without supports, immediately attaching them to the wall (as a rule, this is typical for Finnish saunas or baths built using similar technologies), and the seats and loungers are This looks like shelves and sun loungers attached to the walls, found in train cars.


Installation
After the base of the frame is prepared for installation, it is time to directly attach the structure to the wall of the bathhouse. The benches must be fixed with a gap of about 11 cm.
First, the frame of the upper tier is assembled. It is not forbidden to use self-tapping screws so that the frame does not fall apart. Then the first of the rows of load-bearing posts is attached to the wall, the distance between them is from 60 to 85 cm. A “step” is formed at the very top of the block so that it can be fastened “into the lock.”


A second row of racks is installed opposite the load-bearing supports, and their tops are united by a transverse beam. For reliability, the structure is assembled using metal corners, and then load-bearing supports“tied” with boards. The following levels are created in a similar way.


Thin narrow boards are usually used for flooring. This will provide them with the opportunity to quickly dry out after using the steam room, which means it will once again protect them from possible rotting.

Installation
Finally, when the frame of the future shelf is assembled, the time comes for its installation in the bathhouse. Previously (to provide the shelf with better stability and additional protection from moisture), special rubber gaskets are placed on the lower parts of the bars.
Then it’s time to install the decking boards on the frame. You should start attaching the base for the seats from the lower tier of the frame, while small gaps of 1 to 2 cm should be left between the boards. This is necessary to drain excess condensed water and ensure free circulation of air inside the wooden shelf, due to which the structure will dry quickly, and the possibility its destruction due to internal rotting processes caused by high humidity will be significantly reduced.


It would be preferable to nail and fix the boards to the frame using wooden nails or pins. If nails or self-tapping screws are nevertheless used, then they should either be located with inside flooring, or they need to be “recessed” into the wood, deepened a few millimeters in order to prevent thermal burns for vacationers, which can ruin all the pleasure of bathing procedures.


Not always, but the vertical space between the floor and the shelf seats can also be lined with rows of boards. However, it is worth considering that although such a design looks attractive, in reality it will only impede air circulation and complicate the cleaning process.

To ensure the most efficient drying of seats, you can give preference to removable structures. This loose flooring serves as both a seat and a bed. It is easy to remove from its designated place and take out to dry. The same principle is used to make backrests for seats, headrests - a kind of bath “pillows”, as well as all sorts of devices that help the bath attendant to take the most relaxed pose, for example, placing his legs at head level, or even higher.


Treatment
The final stage will be the treatment of the resulting regiment with special compounds that will make its use more comfortable and also provide it with more long term services. It is generally accepted that in a traditional steam room the wood should not be processed in principle; it is enough to sand it thoroughly. Indeed, with good ventilation, there may be no need for additional reinforcement of wood fiber, but extra insurance will never hurt, but can guarantee long and high-quality service for the furniture.


The benches, first of all (in fact, many craftsmen recommend doing this procedure with boards at the very first stages of preparing the frame in order to saturate the wood from all sides) must be soaked with powerful antiseptics. After all, constant contact with humid and very hot air will inevitably contribute to the destruction of the tree. In addition to rotting, mold can form on the tree and develop fungi and many harmful organisms.
One of the impregnation options could be natural impregnations, for example, the most budget-friendly and affordable option is simple linseed oil.


Antiseptic agents are often used as impregnations., which give the wood moisture resistance and permeate it through. An unexpected solution at first glance may be the use of bleaches: these special compounds not only protect the wood, but also, in case of darkening, return it to its original color. In addition, there are special compositions intended for direct use in the sauna.


However, under no circumstances should it be used as an impregnation. chemicals and varnishes, it is also forbidden to paint wooden flooring. In conditions high humidity and constant temperature changes, such substances will inevitably begin to decompose and release a variety of toxic substances. Besides unpleasant odor, which can turn the steam room from a place of relaxation into real torture, these substances can cause headaches and allergic reactions.


Naturally, before applying any strengthening composition to the wood, the boards must be thoroughly sanded using sandpaper, clean off any dust and debris remaining after grinding, and only then proceed with impregnation.


The first and most important rule that should be strictly followed is the mandatory drying and ventilation of the room after each session in the steam room. This will help protect wooden furniture from harmful influences. excess humidity. By the way, a sauna stove will help dry the room if you leave it running for some time after completing the water treatments.
When ventilating the room, open all doors and windows., while covering all water containers and tanks with lids.


A bathhouse is a room in which, like a bathroom, it is necessary to maintain cleanliness and carefully monitor internal hygiene. Of course, high temperatures protect the steam room from the appearance of all kinds of microbes and bacteria in it, but they are not able to protect the room from the appearance of dirt. Regular cleaning cannot be avoided. It will be necessary to wash away any remaining dirt remaining on the shelves after the procedures, as well as traces of condensation.


After completing the bath procedures, it would not be superfluous to wipe the surfaces with a dry towel., even if there is a backlight. This will not remove the moisture that has already been absorbed into the wood, but it will make it much easier for the outer surface of the shelves to dry, which means it will speed up the drying inside the wood.
At the same time, taking into account the specifics of the bathhouse, i.e. it is mostly wooden decoration, do not use chemical cleaning agents in the steam room. The best option It turns out to be simple laundry soap. It would be useful to use soft brushes. If there is heavy dirt on the wood that is not easy to remove, you can use sandpaper.

Also, in order to further protect the internal fibers of the boards from the wood, it is necessary to re-impregnate the wood with special compounds, because over time they can evaporate.
The level of comfort in the steam room largely depends on the functional characteristics of the shelf - its height, design features and material of manufacture. You can make a convenient bath shelf yourself if you follow the basic rules.
Choosing the right material
It is recommended to use wood for the manufacture of shelves and benches. hardwood, and here's why: when it is heated, it does not release resin, which can burn and stick to the skin.
It is important to choose wood that is resistant to high temperatures and moisture, in which case the shelves can last long years. But the key criterion is the thermal conductivity of the material:
Wood with low thermal conductivity – the best choice, since such a shelf does not overheat and does not burn the skin, allowing the steamer to lie directly on the boards without using a sheet.
The most popular types wood for making the shelf - aspen, linden and African abash oak.
Aspen is the most affordable material
In addition to its low price, aspen has certain healing properties. Traditionally, aspen is considered a tree that absorbs “negative energy.”
The aspen shelf is quite durable and practical to use. But carefully select aspen - without internal rot.
Linden - the best price/quality ratio
It is ideal for making shelves and benches, and here's why:
- This wood is easy to process, looks aesthetically pleasing, and when heated, emits a light, pleasant aroma, creating a microclimate favorable to health.
- Even at high temperatures, the wood does not burn, and there are no sweat stains left on it.
- Linden bath shelves are quite durable - the material does not crack or rot over time, but it may darken.
Abash (African oak) – good, but expensive
It is highly resistant to temperature and moisture, and resistant to stress. Due to its low thermal conductivity, the abash heats up very slowly, so you can use the shelf without fear at any temperature in the steam room.
You can find light and dark abasha wood on sale. During operation, the material retains its original appearance if it is pre-treated. But the abash oak - expensive material, alas.
The correct dimensions of the bath shelf

Often, many bath attendants make shelves in several tiers because “it’s beautiful” or they saw it in others. But the two- or three-tier shelves with steps came from saunas, where people sit, not lie.
Such options are not suitable in a Russian bath - they disturb the steamer. It is advisable to make shelves on one level.
To make places comfortable for sitting and lying, you should focus on the following proportions:
Shelf height in a Russian bath
The height of the shelf should correspond to the height of the soaring person. To prevent the steamer from having to bend down or, on the contrary, work with his hands at an uncomfortable height, the shelf should be located at the level of the thumb bone of the lowered hand. On average, the height is 70-80 cm.
It is advisable to leave a distance of at least 110 cm between the shelf and the ceiling of the steam room; in this case, you can not only lie on the shelf, but also sit comfortably.
Lenght and width
The shelf should be comfortable for lying on, so the length is at least 220 cm, so as not to rest your head against the wall and prevent your legs from dangling. Width – about 90 cm.
Shelves and benches in the steam room are placed along walls without windows, spanning the entire width of the wall. The number of shelves depends on the size of the steam room. If space allows, the width of the main shelf can be made for two - these will already be chambers.
If space is limited, the “compartment” option is used - the bench and shelves are adjacent to one wall, the shelf folds back and is fixed for the convenience of sitting on the bench. If necessary, the shelves return to their original position. Another option: the lower bench is retractable, and the shelves are attached permanently.
Important shelf design features
- It is preferable to install structures that are open at the bottom so that they are well ventilated from below, do not interfere with the ventilation of the room and make it easy to clean the floor.
- To make water drain faster from the shelf, it is made with a slight slope.
- Between the floor and the vertical posts of the shelf, pads made of plastic or thick rubber should be installed - this will prevent rotting of the wood of the posts and will extend the service life of the structure.
- The bath shelf should look aesthetically pleasing and have smooth surface and rounded corners of the boards. The structural elements must be tightly adjusted to each other so that the shelves do not wobble or creak.
Methods of fastening boards
Particular attention is paid to fastening shelf boards and other external elements– it is important to exclude the possibility of accidental contact of screws or nails with metal while using the steam room.
There are several mounting methods:
- The easiest and fastest way is to embed the heads of the screws deeply into the wood.
- You can attach self-tapping screws to the back of the structures.
- The most labor-intensive, but the safest and most environmentally friendly option is the use of oak wedges, which are driven into pre-made holes.
If desired, a backrest is mounted on the wall to which the shelf is attached - usually these are three boards stacked on vertical racks made of bars. The back allows you to sit comfortably on the shelf without fear of burning your back on the steam room lining. The back is made of the same material as the shelves. Gaps should be left between the boards for ventilation.
To increase comfort, you can place blocks on the end wall to support your legs: it is recommended to raise your legs higher than your head while lying on a shelf so that they warm up faster.
The process of making a shelf with a pull-out bench-lounger
This option is suitable for those who have a small steam room. Steam room height 220 cm, width 180 cm, length 210 cm. This compact system The shelves fit on an area of 110x210x220 cm. The rest of the space is for the stove and for the steamer.

Costs For this shelf with a sunbed, 16 linden boards of 210 cm each, bars for the frame, screws, corners, Tikkurila wood impregnation were used - all together costing about 6,000 rubles. Everything is done by hand.
The top shelf is mounted at a height of 113 cm. Its width is 69 cm, length – 210 cm. The width of the pull-out lounger is 49 cm, and it also takes up space from wall to wall. The distance between the shelf and the lounger is 49 cm, making it convenient to use the lounger as a footrest while sitting on the shelf.
Since the upper stationary shelf is located significantly higher than required by the standards, for the convenience of the soaring, a bench of 3 boards, 36 cm wide, was additionally made. The distance between it and the shelf is 70 cm - this is a quite comfortable value.
The steam room shelf consists of two main elements: supporting structure from timber and flooring. The support is made of two load-bearing beams: they are installed along the width of the shelf and connected to each other by jumpers with a pitch of 50 cm:

One of the beams and the outer ones cross beams attached to the corresponding walls along the entire plane, the second beam - at the ends. To secure the lintels, grooves of the required size are made in the beams.
To support the second beam in this case, special racks resting on the wall are used. To ensure a tight connection, the ends of the racks are filed under required angle. The structure is fastened with screws, two fasteners for each rack.
Thin, well-planed boards with rounded edges are placed on the manufactured frame. Slots 1-2 cm wide should be left between the boards to ensure rapid drainage of water and the necessary ventilation during drying.

The frame was covered with boards, leaving gaps for water to drain (there is also a bench in the photo)
It is important to use boards whose width does not exceed four times their thickness - such material dries well and is not susceptible to cracking during use.
In order to save space in the project under consideration, the width of the lounger is 69 cm, but it is recommended to make shelves at least 90 cm wide, which will require the use of 7 boards.
The principle of manufacturing a retractable lounger is the same as that of a shelf - the frame consists of two longitudinal bars with transverse struts. 5 boards were used for the flooring.
Retractable mechanism device
The design of the retractable “walking” mechanism requires special attention. How to make a folding shelf so that the bottom lounger slides under the top one? TO end walls the steam rooms are mounted with bars. To them, and to the sides of the lounger on the inside, axles are attached, on which wooden planks are placed - levers. The corners of the slats should be filed (at least in the upper part) so that they do not interfere with the operation of the mechanism.
The thickness of the bars fixed to the wall must correspond to the thickness of the end elements of the lounger. To ensure that the slats sit tightly on the axle and move without play, wooden washers are installed.


The mechanism allows you to effortlessly extend the lounger to a strictly defined distance, which in this case is 0.8 of the length of the lever. The lounger rests on its legs in the fully extended or fully retracted position.
Such retractable design Most suitable for steam rooms, in which the length of the shelves and the lounger completely occupy the wall.
Protective wood treatment
Before using the steam room, it is necessary to treat the wood from which the shelves are made. Frequent contact with hot, humid air leads to rapid destruction of the material, deterioration of its appearance. Proper prevention will help avoid the appearance of mold and rot.
Attention! Under no circumstances should the shelf be used for processing. chemicals, including the usual drying oil and varnish. Otherwise, as the temperature in the room increases, substances that have an unpleasant, pungent odor and can cause an allergic reaction will be intensively released into the air.
It is recommended to use impregnation specially designed for bath shelves and benches. It is made on the basis natural oils and allows you to create a protective film on the outer surface wooden structures without worsening natural properties wood. This product is odorless and does not emit harmful fumes when heated.
Cheaper and affordable option– edible flaxseed oil, which can be purchased at the grocery store. Hot oil is applied to the wood with a brush; it is recommended to rub it in well.
It is advisable to process the shelves by heating the stove well in the steam room - the oil polymerizes under the influence of high temperature. With another processing method, cold oil is rubbed in, and then the surface is heated with a hair dryer.
Table of contents:
Do you need to build shelves in a Russian bath? Please note that the design of furniture in a steam room must meet clear rules and regulations, the implementation of which will allow it to withstand the harsh “climate” of the room, be comfortable, safe and easy to use.
We will dwell in detail on how to make shelves in a bathhouse, dividing the entire useful information into several thematic blocks
- Choosing the right building material
- Design of shelves for a bath; types, parameters and installation rules
- How to do convenient shelves to the bathhouse? Additional accessories for them
- Making and installing shelves for a bathhouse with your own hands
- How do you protect shelves from premature “aging”?
After reading the material, you will have sufficient information on the topic and will be able to properly equip a steam room of any size.
Choosing the right type of wood for the bath shelves
Shelves in a Russian bathhouse are made from those types of wood that meet a number of mandatory conditions׃
- Low thermal conductivity
- High fiber density
- Low resin content
- Tolerates extreme heat and moisture
Several “candidates” ideally fit the listed parameters, with whom we will get to know each other better.
This tree is famous for its beneficial properties and is ideal for arranging a steam room, since when heated, the boards release a gentle, unobtrusive and endowed healing powers aroma. Linden is easy to process, does not suffer from flaws (knots), heats up slowly and dries quickly, does not crack, and there are no sweat stains on its surface.
The tree is known for its role " charger»׃ it improves well-being, gives a portion of positive energy and a surge of physical, moral forces. The list of benefits is completed by economic benefits - building materials are sold at a very affordable price.
Among the disadvantages, it can be noted that under the influence of steam and heat, the boards over time lose their original color and noticeably darken.
But alder is devoid of such a drawback. It also has a soft, uniform structure, a beautiful noble color (reddish-pink delicate shade), but is much stronger and more resistant to moisture.
- Aspen
Aspen is also endowed medicinal properties; the tree absorbs all the negativity that has accumulated in a person. After a visit to the steam room, decorated with aspen boards, you feel relief and satisfaction, as you get rid of all the heavy “burden” on your soul. Aspen – affordable and cheap material, therefore, along with linden, it is popular among builders.
The main disadvantage of aspen boards is “invisible” defects; they can rot from the inside, so it is difficult to distinguish high-quality lumber from a tired sample.
- African Abashi tree
This tree is a record holder for a high-quality set of useful characteristics. “Foreigner” is not afraid of heat or moisture and heats up so slowly that even at extremely high temperatures, it is impossible to get burned on a board made of this wood. But the main thing is the durability of the material. The color of abashi products varies from pale yellow to light cream, and does not change at all during use, maintaining its fresh, neat appearance.
The material has one drawback - it is an elite, very expensive product that not everyone can afford.
Installation of a shelf in a bathhouse, optimal parameters and location in the steam room
 There are several standard parameters from which the work of a master making benches for a steam room is based. The similarity of designs is easy to notice when looking at various catalogs with photos of shelves in a bathhouse. A steam room is a small room, where most often only 2-3 sq.m. are allocated for one person. space, so furniture should be placed compactly, not interfere with air circulation in the room and not limit the actions of visitors.
Making a shelf for a bathhouse: components of the structure. A standard shelf in a steam room consists of two elements׃
- Support posts made of thick timber
The stand consists of two vertical beams installed along the width of the shelf and connected to each other by jumpers (at the upper ends of the bars and along their length every 50 cm)
- Seat
Thin boards are placed on the frame, but not end-to-end, but with a mandatory gap of 1-2 cm. The seat is made with an inclination (2°) for better water drainage. In order for the boards to dry quickly, the correct ratio between their thickness and width should be maintained: board width ≤ 4 * board thickness.
All boards and beams must be carefully sanded, and sharp corners smoothed.
Making shelves in a bathhouse is complicated by the fact that special attention should be paid to fastening the products. It is better to carry out installation without nails and screws, since a visitor to the steam room may get burned if they come into contact with hot metal. The components of the structure are connected using oak wedges, which are driven into pre-made holes at the joints of the parts.
Due to the troublesome nature of this method, DIYers still prefer the traditional method of fastening; only self-tapping screws (nails) are sunk deep into the wood (≈ 5-6 mm) or they are screwed into the inside of the shelves.
Scheme of regiments in the bathhouse
There are three options for placing shelves in the steam room׃
- Stepped
The shelves are built against one wall in 2-3 steps, the bottom shelf is “cool”, and the top one is “hot”. The design is suitable for spacious family baths.
- L-shaped
Two shelves (lower and upper) are placed on one wall, and the middle one is on the adjacent one. This orientation of the benches allows you to sit comfortably in a small steam room.
- "Coupe"
There are only two shelves in the room (middle and upper tier), attached to the wall one above the other. For a comfortable position for vacationers, the upper seat rises and is fixed against the wall. This design is used in conditions of strict economy of steam room space.
Method and features of fastening shelves in a steam room
It is most advantageous to install a collapsible structure of shelves in a steam room, which allows you to quickly and easily disassemble it into “spare parts” and thoroughly dry it outside. If there is a window in the bathhouse (and it is advisable not to have one in the steam room), then the benches are installed on the other side of the room.
The two upper tiers are attached to the wall, but not end-to-end, but with a mandatory ventilation gap of 10 cm (a wooden “cube” of appropriate thickness is installed between the shelf and the wall).
It is best to leave the bottom shelf movable (on runners), which will make it easier to care for the steam room floor. All points of contact between the bench frame and flooring should be waterproofed by placing special rubber gaskets between them.
The minimum length of the bench is 1.50-1.80 m.
The width of the shelf in the bathhouse depends on the size of the steam room, but the top step should be the most spacious - at least 90 cm. At other levels they most often adhere to standard size(60 cm), although the owner of the bathhouse has the right to choose from several acceptable options׃
- 40 cm – narrow seat
- 60 cm – standard seat
- 90 cm – you can sit with your legs bent
- 1.50 m – you can lie with your legs bent
The height of the shelves in the bathhouse is determined according to this principle
There should be a distance of 1.10-1.20 cm between the top step and the ceiling. Then the difference between the levels ranges from 40-60 cm. The bottom step is usually located at least 20 cm from the floor line.
Shapes and sizes of shelves in the bathhouse
Often in small narrow paired lower shelves they are made in the shape of a triangle, the sides of which are two adjacent walls of the room. This allows you to compactly place all the benches in a small room, leaving the necessary free “island” for maneuvers.
Regarding the reduction linear dimensions regiments, it is not recommended to fall below such indicators׃
- Bench length -1.50 m
- Bench width – 40 cm
The minimum number of shelves is 2 pieces (translated into “steps”, the upper and middle tier are left).
The shelves are equipped with additional elements that increase the level of comfort of the steam room.
- Foot rests
When a person lies on a shelf, it is advisable to raise his legs above the level of his head, since this part of the body warms up more slowly and requires additional temperature “load” (blood outflow improves).
Removable foot attachment - these are two wide boards, connected to each other at an angle of 30-45°. One of its sides forms a right angle with the bench and serves as a support, and the other is a ribbed “slide” (filled with planks) designed to accommodate the legs.
Stationary supports are bars placed on the wall on which you can rest your feet. Usually, for convenience, 2-3 steps are made.
- Wooden head pillows
The headrest looks similar to the footbox. The “pillow” can also be stationary (the triangle is attached to the bench) or removable (portable).
- Backrests for shelves
The space between the shelf levels can be left open, but it is better to build backrests. To do this, the gap between the steps is clogged with boards, but not tightly, but leaving wide ventilation gaps at the bottom and top.
Two parallel boards are placed on the wall along the top shelf, playing the role of an impromptu backrest for the seat. Often, for these purposes, bars made of coniferous wood are used, which contribute to the creation of a healthy healing atmosphere in the steam room.
Take a steam bath in a real Russian bathhouse or spend an hour or two in a sauna, it would seem, what could be more pleasant? Moreover, for the happy owners of their own piece of land this is more than feasible. But putting up a log house is half the work, organizing it correctly inner space- no less important stage while building a personal piece of heaven.
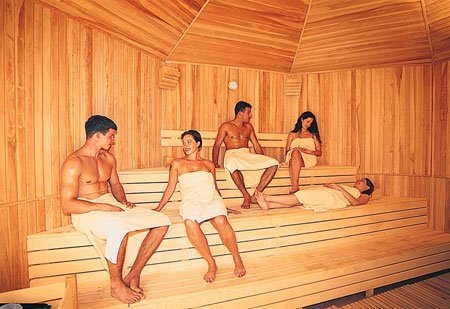
The steam room is the central place in a bathhouse or sauna, and the quality of the procedures performed there depends on how correctly and rationally its space is organized. The location and number of benches in the steam room depends on the size of the steam room and the needs of the owners. The canopies can be either single- or multi-tiered, go in a circle or be opposite.

Types of bench structures for steam rooms
Despite the great diversity, three main groups of designs can be distinguished.


The dimensions of the canopies are determined in each specific case, based on the area of the steam room. We should not forget about comfort during a person’s stay, therefore the length and width of the canopy should allow one to sit on it both sitting and lying down.
As for the shape of the benches, here you can give preference to the classic bench type of canopies, and it is possible to make sun loungers or even wooden sun loungers. The main criterion is the capacity of the steam room and the ability to place certain structures in it. Compactness is the guiding principle in placing canopies; benches should warm up well and not take up extra space.
Materials for production
Most often, the same material is used to make canopies as for cladding. interior spaces and steam rooms. Deciduous wood is preferred over coniferous wood due to the latter’s ability to crack and release resin when overheated, as well as low thermal conductivity and high density.

Shelves for steam rooms can be made from the following types of wood:
birch;
oak;
Linden
cedar;
abash (African oak).
poplar;
The wood of these species has a fairly strong structure and does not deform when exposed to moisture and steam. The most preferred material is aspen, since its wood has good moisture-resistant qualities, but wood not treated with special compounds can rot from the inside.

As in the construction of any other structure, there are a number of rules and principles.
Step 1. Determine the location and make a drawing

- As a rule, curtains are installed along the longest wall in a steam room, free from windows, doors, ventilation holes and vents.
- Measure the dimensions of the steam room as accurately as possible and make a drawing of it in two projections, indicating the stove, heating boiler, windows and vents.
- Schematically but accurately indicate the location of the shelves, following the recommendations of experienced craftsmen.
- The finished sketch should indicate the dimensions and places where the shelves are attached to the walls and floor. Moreover, it is recommended to attach the upper rows to the walls, and the lower rows directly to the floor (this will significantly simplify the process of cleaning the steam room). The overall composition should be as compact as possible.
- Based on the drawing, calculate the approximate amount of wood, adding 5% “in reserve.”
- It is very important to accurately determine the design of the canopy, because nothing can be corrected either during the process or after the completion of the work. And the rework will be costly.
A few important points:

- the width of the bench space ranges from 40 to 60 cm; you should not make the benches too narrow or too wide, but there should be enough space for the visitor to comfortably lie at full height with his arms, if a reclining seat is provided;
- the height between the floor and the bottom row should not be less than 45 cm, the distance between adjacent rows of the canopy is determined by the figure of 55-65 cm;
- approximately 120-130 cm should remain free from the top shelf to the ceiling;
- the height of the second row of shelves from the floor is ideally at least 110 cm;
- It is advisable to place rows of benches not close to the stove in order to avoid heat strokes and thermal burns, even if the stove is fenced with a protective grille;
- Particular attention should be paid to the steam circulation path - placing benches under it is not a very practical or reasonable solution.
Step 2. Preparing the material

- The prepared estimated quantity of timber and boards must meet certain requirements. The wood taken is of high quality, without visible defects or defects, well-planed, smooth, without knots, cracks or nicks.
- For support posts and seats of benches, wood of the same species is used.
- The boards for the seats of the future canopy are installed thin so that they dry faster after using the steam room.
- It is recommended to choose narrow blanks for seats; the optimal width varies between four and five times the thickness of the fabric. This will prevent the material from sagging and cracking.
- It is not recommended to treat wood for seats with varnish or any chemical compounds.
Video - Do-it-yourself bath canopy
Step 3. Assembly and installation of blanks

- Experts advise starting arranging a steam room from the top row. Each row is shaped like the letter “P”
- The support beam is placed on the bench base along the entire length of the rectangular shape, at a distance of 65-85 cm from each other.
- The rack bars are attached to the frame with special screws - two for each. To further strengthen the structure, an additional row of beams can be nailed between the support posts. All frame elements are firmly connected with self-tapping screws and mounting angles.

- After the frame of all rows is completely assembled, they begin to install it directly in the steam room. For better stability and protection from moisture, it is recommended to place rubber gaskets on the lower parts of the bars.

- The next step is attaching the boards. The seat base is filled starting from the lowest row of the frame.
- If you have sufficient skills, it would be best to make the seats at a slight angle for better water drainage.
- When assembling seats, leave a gap of 5-10 mm between adjacent boards to drain water and quickly dry the bench.

- When assembling canopies, it is allowed to use both nails and self-tapping bolts. In any case, the metal caps should be slightly recessed into the wood by a few millimeters to avoid accidental thermal burns. If it is not possible to deepen the caps into the wood, plastic protective caps are put on them. Assembly on special wooden pins or wedges is also allowed.
- The vertical space between the rows of canopy can also be covered with boards. This point should be thought through in advance in order to stock up on enough material. It is better not to sheathe the area between the floor and the bottom row, as this will only complicate air circulation, drying out the steam room and cleaning.

- An interesting solution would be to create a collapsible structure (for example, removable seats). This will make drying and ventilating the steam room much easier.

- If desired, you can make backrests, headrests above the top row, and for common use– footrests or small benches. This will add completeness and will contribute to even more comfortable procedures.

- If necessary, sharp corners are rounded.
- After all work is completed, the surface of the seats is examined and in the right places sanded carefully.

Step 4: Finishing
When the canopy has been assembled and installed, and all irregularities have been smoothed out and polished, the resulting structure needs to be processed special composition for wood steam rooms. As a rule, these are solutions based on oil based, preventing the harmful effects of moisture and steam, premature rotting of boards, and also having fire-fighting properties.
Making a canopy and arranging a steam room on your own is not such a tricky thing - you just need the desire and a little perseverance and hard work.

Video - DIY steam room shelves