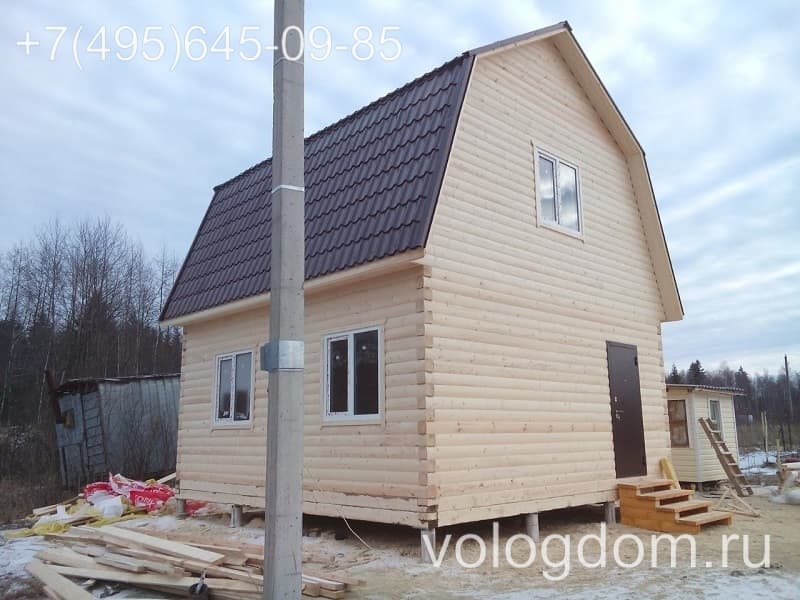
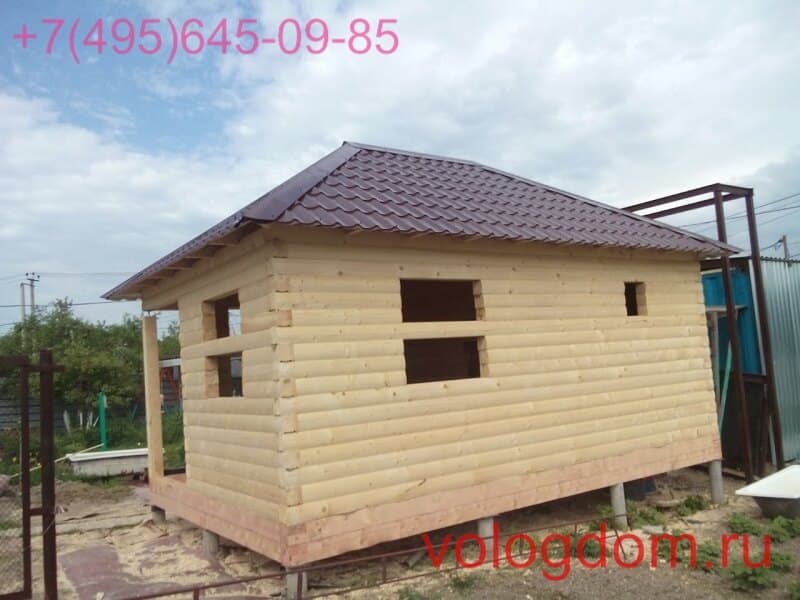
Our country centuries-old traditions in the construction of wooden houses. For a long time there was deep stagnation in this direction, but in last years Interest in wooden houses is showing steady growth. Here we will look at the basic questions about how to build a . It is almost impossible to do this alone, but you can become a leader of a group of enthusiasts from friends, acquaintances and family members.
Preparation for construction
Construction own home is the most important task, so you should not start it without careful preparation. Before making the final decision to build, you must complete the following steps:
- select and prepare a site;
- draw up a project or working sketch with the layout of the building;
- select the material for the walls and calculate its quantity;
- calculate the operating weight of the building, which can be taken as the total weight of wall materials plus 250 kg per square meter floors and 120 kg per square of roof (we wrote a separate article ““ regarding calculations);
- determine the necessary bearing capacity foundation, for which the resulting value of the total mass of the building is multiplied by a safety factor in the range of 1.3–1.5.
To roughly estimate construction costs, the cost of wall materials is taken as a basis. 15–20% is added to it for the costs of assembling the walls. The same percentages, but from the full cost of the log house, are applied to the installation of the roof. The cost of the foundation is added to the amount received.

An approximate amount of expenses will help you soberly assess your capabilities for erecting a building under a roof, when it will be possible to take a break in construction and guarantee its safety. This is especially necessary for houses made of wood, since in most cases they need time to shrink.
To perform all the above work, engineering training is desirable, which will help make more exact calculations. The help of specialists will not hurt here. An alternative may be to purchase a ready-made project - in this case, all of the listed issues have already been resolved. One way or another, you need a result with specific numbers and drawings (sketches), without which you cannot proceed to the construction itself.
The foundation of a house made of timber
DIY timber house They start building from the foundation. Taking into account the fact that buildings made of wood are several times lighter brick houses, this gives you a chance to save a lot on the zero cycle. Due to the relatively low weight wooden building you will be satisfied with a strip foundation of the minimum possible width with the lightest reinforcement. Here you should focus on the thickness of the walls plus 5–7 cm of margin in each direction.
A fundamental issue when installing a strip foundation is the correct choice of laying depth. If you do not want to waste your time finding an exact answer on how to do this, add 10–15 cm to the freezing depth of the soil in your area. This value is designed for the most treacherous swelling soils. However, for the chance to save money, do some testing. For example, on dry sandy soil, the depth of the foundation will be half as much, and so will the costs.
To build wooden house met your expectations, try to follow the basic construction rules, on which the quality of work primarily depends. The installation of a strip foundation is carried out in the following order:
- remove the fertile layer of soil from the cleared area;

DIY foundation
- carry out marking of the foundation according to the project;
- they dig trenches to the required depth of the foundation so that later it will be convenient to waterproof that part of it that will be below ground level;

DIY foundation trenches
- the bottom of the trenches is covered with gravel or sand in 2-3 layers, each of them is spilled with water and compacted;

Foundation trenches with crushed stone
- formwork and reinforcement are installed in the trenches;

DIY foundation formwork
- fill the formwork with concrete;

Pouring formwork with concrete
- it takes four weeks for concrete to fully mature at a temperature of 15–20 °C; the first 5–7 days its surface is moistened;
- Waterproofing of the foundation is carried out after the concrete has fully matured.

Make it cheaper zero cycle will help pile-screw foundation with a grillage. If you do not need basements and basements, this type of foundation is ideal for constructing DIY timber houses. Such a foundation can be built in 2-3 days and you can immediately start building the walls, also saving time.
 Grillage
 Assembling timber walls
The assembly of walls made of timber begins with laying a 50 mm thick wedding board along the entire contour of the foundation. It must be treated with an antiseptic. This board serves as protection against rotting for the lower crown of the log house. If necessary, it can be replaced without compromising the integrity of the building. The width of the first crown should be greater than the diameter of subsequent beams. For example, if the main material of the walls is 150x150 mm timber, then the cross-section of the first crown should be 200x150 mm.
To build, you must have decent woodworking skills and know joining techniques wooden parts, have a sufficient set of tools at your disposal. When assembling walls, you should adhere to following rules and recommendations:
1. Between the crowns of the walls, insulation made of tow or jute must be laid. This rule is valid for all types of timber of any section - planed and profiled, from solid and laminated wood. It is very useful to use moss together with these insulation materials, which has not only thermal insulation, but also antiseptic properties. Moss is an excellent means of preventing mold and rot.
 Assembling the walls of a house from timber
 2. Each subsequent crown of the wall is connected to the previous dowels, which are placed in a checkerboard pattern at a distance of 1–1.5 m from each other, but no closer than 250–300 mm to the edges of the beam joint bowls. Cross section(diameter) of dowels can be 25–30 mm. Their length should be one and a half times the height of the beam. These elements are easy to make yourself: for example, square with pointed ends. The best material for dowels is birch. To build, you will need several hundred of these standard products.

3. The main function of the dowels is to prevent the timber from moving horizontally. They should not interfere with the natural shrinkage of the building, so you need to constantly monitor the vertical when drilling holes for dowels and the walls themselves. Deviations cause the beams to “hang” during shrinkage, which leads to the appearance large cracks, violation of wall geometry and other defects.
4.
 Assembly on wooden dowels
 5. For assembling corners and splicing beams along the length, the most different kinds connections. For corners it can be “half a tree”, “in the paw”, “straight spike”, “warm corner”, “ dovetail" and others. Splicing along the length is carried out using a root tenon, an oblique lock or a “half-tree”.

6. For the selected types of connections, it is necessary to make or purchase templates. They ensure precision during operation and uniformity geometric shapes and dimensions of joints, as well as the depth of cuts. Where the beams meet, there must be internal gaps along all lines 0.5 mm wide. They are designed to compensate for displacements during shrinkage of the house and during recruitment excess humidity. All gaps are also caulked with insulation.

7. Before assembling the walls, the timber is treated with antiseptics and fire retardants, unless you bought already treated material. This procedure is performed using a sprayer. The very next day you can work with the timber.
 Processing a house made of timber
 8. Along with the assembly of the walls, the installation of floor and ceiling joists, as well as load-bearing partitions, is carried out.
 Wooden logs
 DIY timber house can't build it alone. The assembly of walls up to a height of one meter can be done by two people. For further work you will need at least four pairs of hands. Firstly, for security reasons. Secondly, to maintain the pace of work. The most difficult stage in the construction of a log house is the arrangement of window and doorways.
Timbering of a log house
The arrangement of window and door openings in professional slang is called a frame or casing. Jambs serve to maintain the size and geometry of openings during the shrinkage of the building; consist of four parts:
- pairs of sidewalls (left and right) with straight spikes;
- threshold or window sill with grooves for sidewall tenons;
- top trim with similar grooves.

To install jambs on the sides of the openings along the entire length, a straight tenon is made with a height of half the thickness of the sidewalls (risers). A groove is cut out in the sidewalls themselves for this tenon. The clearance rules also apply here, as when connecting timber.
When assembling the frames, the sides are placed first, then they are pushed apart by the threshold (window sill) and completed by installing the top trim. The internal dimensions of the casing must correspond to the standard dimensions of the window and door units, taking into account the use of the same insulation as when assembling the walls. Between top harness and by cutting the opening they leave free space for the building to shrink.

The general rule for working with timber is the antiseptic treatment of all fresh cuts made when assembling walls and other structural elements building. After trimming the openings and laying last crowns the house box is ready for subsequent stages of construction. To switch to them, you need to wait for the natural shrinkage of the log house; the duration of this process depends on the quality characteristics of the timber.
Shrinkage of a wooden house
The downside of the relatively low price wooden beam Usually there is an increased residual moisture content of the material. As it dries, natural shrinkage of the building occurs. Those wishing to build must consider the following factors:
- you will buy solid wood timber with a residual moisture content of 20–30%, which will take 12–18 months to shrink;
- The vertical shrinkage of such material can reach 10 cm, so until the process is completed, no further work impossible;
- during the period of shrinkage, the building frame is protected from precipitation with a temporary roof, window and door openings are covered with film;
- drying of wood with a high level of residual moisture leads to the appearance of cracks, violations of the beam geometry and other defects, the elimination of which will require additional time and money.

Minimal shrinkage (only 1%, or 3 cm vertically) is achieved by walls made of profiled laminated veneer lumber. This material has a residual moisture content in the range of 12–16%, and its shrinkage takes about three months. Such indicators do not interfere with the installation of intra-house utility networks. They are not critical for finishing work, but to get a perfect result it is better to wait a little.
Roof, floors and ceilings, window and door units
Upon completion of the shrinkage stage, you should not hope for uniform settling of all crowns and beams. Therefore, you will inevitably have to caulk the cracks outside and inside the building. When choosing the type of roof, you should remember that the level of complexity of the roof profile affects its cost. Of all the roofing materials, a do-it-yourself timber house will look best with a coating of bituminous (soft) tiles.

Roofing is a separate and very extensive topic, so here we will limit ourselves to just mentioning this process. When the permanent roof is ready, you can begin to re-floor and ceiling, as well as install window and door units. Here are some tips and recommendations for carrying out this work:
floors and ceilings must be insulated, but only with non-flammable materials, which, in addition, provide sound insulation;
floors in a house made of timber should be made of solid wood (expensive) or solid boards (an excellent and relatively inexpensive option is larch);
the ceilings are sheathed with clapboard, but try to leave open the load-bearing beams, which will be an excellent decorative element of the interior.

Installing ready-made window and door units should not create any difficulties. After this, you can begin the final insulation of the openings, including sealing the space above the top trim of the jambs. Decorative design windows and doors consists of installing platbands and does not require additional instructions.
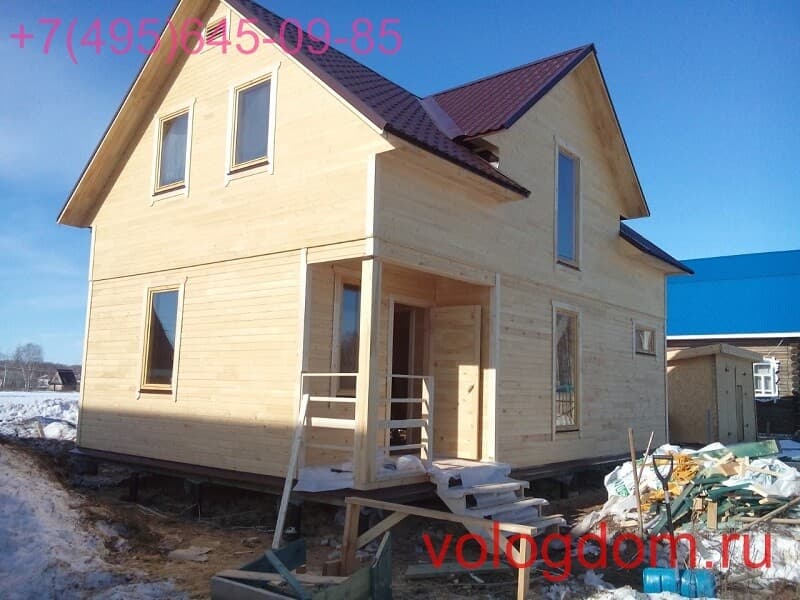
Exterior and interior decoration
External and internal finishing of a house made of timber is carried out taking into account the quality characteristics of the wall material. For example, expensive laminated veneer lumber is beautiful in itself. All it takes is sanding and varnish coating. The surface of planed timber has many more flaws, so a wide variety of materials can be chosen for its finishing, taking into account the actual state of affairs. For example, exterior finishing can be combined with wall insulation.

DIY timber house with a ventilated facade and a block house finish it will be much cheaper to maintain. It is advisable to preserve all wooden surfaces inside the building (otherwise why would you start building a wooden house?). Sanding and varnishing the wooden surfaces of a building, especially considering the volume of work, is a very lengthy process. When building a wooden house, it is very important that rooms with high humidity (kitchen, bathroom, toilet) are located as close to each other as possible. This will save you a lot of potential problems in the near future.

Why do people build their own houses?
The desire to build from a financial point of view cannot be called the most profitable, since our time spent on construction also costs money. In addition, you will need helpers for this in any case. The motivation here is completely different. A house built by yourself increases the level of personal self-esteem and makes you a real man. After all, this is one of the three main deeds for which, according to popular wisdom, we come into this world. The main thing is not to let it happen and it will serve you and your descendants for a good period of time.
Land owners are increasingly choosing to build houses from timber. Additional benefit This solution is that, with a strong desire, each owner can build a house from timber with his own hands. By building such a house with your own hands, you get a high-quality, durable, reliable and comfortable home. The actual technology for constructing such buildings is extremely simple and understandable. The only skills you will need for the job are experience in handling a gasoline or electric saw.
A house made of timber looks very beautiful. But in order for it to be reliable, the timber must be treated with special means at the construction stage.
What kind of wood can be used to build a log house?

Before you start building a house from timber with your own hands, you need to choose the highest quality and suitable material for work.
The main qualities of wood are strength and density. For some breeds, these indicators reach the level of most metals, so quite high demands are placed on houses made of timber with your own hands. The walls of the building must be durable and strong. In addition, they must provide good heat and sound insulation. But wood also has a number of disadvantages. The main ones are low fire resistance and a tendency to sedimentary deformation, which is especially pronounced during the first few years after completion of construction.
Coniferous woods are best choice for building a house from timber. The material is different long term service and resistance to rotting, it does not crack and does not exert a significant load on the foundation. It is important to remember that not only competent construction technology, but also the material chosen according to all the rules allows you to build good house from timber with your own hands. So the wood should be as wear-resistant and dense as possible.
Solid or profiled timber?

The timber can be profiled or solid. To build a house, you can use both the first and second options. To choose a specific type of material, consider the main advantages and disadvantages of each.
Profiled timber for building a house requires the presence of a profile. It may have tenons and crown grooves. Such connections are installed along the entire length of the material, after which the surface is ground. The timber for building a house is supplied ready-made. The owner can only assemble the building from the received elements. Among the advantages of houses built from profiled timber are:
- High resistance to deformation.
- Relatively low construction costs.
- Low complexity construction work.
The material has exact shape, allowing all construction activities to be carried out in the shortest possible time and with the most high quality. Houses made from this material have a more interesting appearance and high thermal insulation characteristics.
The advantages of profiled timber include the smooth surface of the walls. They don’t even need additional sheathing, because... they look great anyway. Walls made of this material are protected from rotting, because... melt will not accumulate in them and rainwater. The profile is calculated so that precipitation does not get into the crown joints.
After shrinking a house built from profiled timber, you will not need to waste time and effort on caulking. This material provides excellent wind protection and high thermal insulation, because... the crowns have connections of sufficient density for this.

A solid timber house has low level thermal insulation.
But profiled timber also has its drawbacks. Firstly, it does not tolerate negative atmospheric influences very well. Secondly, the material supports combustion. In order to increase bio- and fire-retardant properties, wood must be treated with special impregnations.
The natural moisture of the material leads to cracks appearing on the timber during the warm season. Therefore, it is best to immediately look for a material whose moisture content has been reduced to at least 20% by chamber drying. The thickness of the walls of a house made of profiled timber will not be enough for comfortable use. It will be necessary to perform additional external insulation. Once construction is completed, it will not be possible to make any additions or change the layout.
Study the features of solid timber. Despite the fact that it does not have the most presentable appearance, the material is still quite widely used in construction. The main advantage is the relatively low cost. When preparing wood, its natural moisture content is preserved, which eliminates the need for additional measures and reduces the duration of the preparatory stage.
Solid timber can be purchased at any specialized market. You can choose exactly what you need without any problems. On average, it takes a week from order to delivery to the construction site. The simplicity and speed of production of the material allowed us to reduce the time so much. Another big advantage of using solid timber to build a house is that there is no need to use special equipment.

But it also has its drawbacks. These include:
- Higher costs for Finishing work. To obtain a beautiful and complete appearance of the building, it must be covered with siding or clapboard.
- When choosing timber you need to be extremely careful, because... Unscrupulous sellers offer bad timber.
- Fungus may begin to develop on the material. The reason is natural humidity and failure to undergo special drying. You, of course, can treat the timber with special impregnations to destroy and prevent the return of the fungus, but this will require spending additional money and time.
- The inter-crown seams are blown out very strongly. A house made of solid timber is characterized by a lower level of thermal insulation.
- After shrinking, the wood cracks. To prevent such damage, the walls have to be sheathed on both sides.
Preparation of materials, tools and project

Once you have decided on the appropriate type of timber, proceed to purchasing materials, collecting tools and drawing up a project. If you wish, you can purchase the material in ready-made form. All bars will be cut to your size. The material will already have grooves, and all you have to do is lay out the building like a construction set.
If you want to save money, you can prepare it yourself. If you choose this method, pay attention to the following factors:
- The wood must be healthy.
- End-to-end and large cracks are strictly unacceptable.
- The wood should not show any signs of beetle damage.
- Before use, the material must be treated with antiseptic compounds.
The work of building a house from timber will require the use of a whole set of tools, namely:
- Gasoline saw. An electric one will do instead.
- Electric drills.
- Level.
- Measuring tape.
- Hammer.
- Axe.
- Nails, screws, jute.
- Electric screwdriver.
- Hammer.
After preparing the materials and tools, start drawing up a project for a house made of timber. During this process, you need to accurately calculate everything necessary calculations. You can create a project yourself, there is nothing complicated about it. If you wish, you can contact a specialized construction company. The company’s specialist will make the project in compliance with all rules, taking into account seismic resistance and other important factors.
What should be the foundation of a log house?

Construction of a strip foundation.
Having prepared or received a custom project, proceed to arranging the foundation. A house made of timber must be built on the basis of sufficient reliability and strength.
When choosing the type of foundation, consider the following parameters:
- Main characteristics of the soil on the site.
- Estimated load on the foundation.
- Design features.
A log house can be built on a concrete or wooden foundation. Most often filled concrete foundation, a brick plinth is laid on it, and the construction of timber walls begins on top of this structure. If you want to have a completely wooden structure, you can make the base out of wood.
Timber house can be built on:
- Deep foundation.
- Shallow foundation.
- Belt type support.
- Columnar base.
In the vast majority of cases, a shallow or strip foundation is prepared for a house made of timber. A laying depth of about 50-70 cm will be sufficient.
Step-by-step instructions for building walls

After arranging the foundation, proceed to laying the timber. The most important thing is to decide optimal technology assemblies. The timber walls are laid out in rows. Each new layer is laid on top of the previous one until a wall of the required height is obtained.
The bars have special grooves, which ensure a tight fit of the logs to each other. The grooves are insulated with special thermal insulation. In order to increase the strength of the walls, it is imperative to use spikes to connect the beams.
A simplified version involves the use of untreated pine timber. The bars themselves weigh quite little, so you don’t even have to call in special lifting equipment for construction.
In progress self-construction For walls made of timber, it is important to take into account a number of basic requirements. First, all seams must be caulked. This will prevent the wind from blowing through the walls. Secondly, the walls themselves are treated with special impregnations to increase fire resistance and strength.
Roof, floor and finishing installation

Quite often, developers try to save money on building a house from timber. And they do this with the help of a roof, using some cheap materials, for example, ondulin. But saving on material when constructing a roof is categorically not recommended. This part of the house may have various options execution, it all depends on the rafters and roofing systems. It is recommended to equip each area using boards different sizes. For example, rafters are assembled from 150x40 mm boards, and 100x40 mm material is used to install braces and racks.
When arranging the floor and choosing flooring They are also guided primarily by personal preferences. The only mandatory point is waterproofing the ceiling and floor. In particular, you need to carefully approach the issue of waterproofing basements and basements. The floor is waterproofed before screeding or leveling. In a wooden house you can use:
- Roll waterproofing.
- Coating materials.
- Penetrating moisture protection.
- Jellied compositions.

Plinths and basements can be waterproofed with your own hands without any problems. There will be no difficulties when treating the floors of other parts of the house. Choose the material that is most suitable for you and begin installing it in accordance with the technology.
Floor is one of the main components of the interior of a home. Aesthetics directly depend on its design interior design. Therefore, the choice of coating also needs to be approached wisely. Present on the modern market a large assortment floor coverings, namely:
- Wood based coatings. This category includes parquet boards and parquet.
- Cork covering.
- Laminated panels.
- Linoleum.
- Floor tiles.
- Carpets of various types.
Each option has its own advantages and disadvantages.
For wooden floor Wood-based coatings are best suited: parquet and laminate are the most best option, this material is simple and easy to install.
As for more modern materials, then you won’t have any problems with their installation. Focus on your taste preferences and available budget.
Finally, installation work is completed interior doors, partitions and window frames. The subfloor is laid, then the selected insulation, the finishing component of the floor and the finishing coating are installed. The ceiling is being finished. At this stage, it is necessary to equip water supply, heating, sewerage and energy systems.
Exterior decoration is selected by the owner independently. If desired, the house can be left without any external decoration if the appearance and quality source material allow you to do this. If you want to get a different look, you can paint the house, cover it with siding, clapboard, or trim it with other available materials.
It is in this sequence that the construction of a house made of timber is carried out. By following the technology, you can get a reliable, comfortable and durable structure without involving third party specialists. Good luck!
Construction wooden houses becoming more popular every day. This is due to the desire of people to acquire own home and get an environmentally friendly, healthy home. It is difficult to choose any technology for building a wooden house: frame, SIP panels, log house or timber. The most suitable in the ratio of “ease of construction – reliability of the structure and its energy efficiency” is to build a house from timber.
A log house has a number of advantages that are difficult to compete with other materials.
- As we have already noted – environmental friendliness. Wood is an excellent material for construction. Its main advantage is natural breathing. Walls made of timber will perfectly exchange gas and steam with environment. Wood is not only not harmful to human health, but some species are even very useful. Most often used for construction conifers wood It has long been known that coniferous wood releases phytoncides, which have an ionizing and disinfecting effect on ambient air. It should also be noted that the construction of a wooden house, in particular a house made of timber, does not harm the environment.
- Good thermal insulation of the house. In terms of heat loss, a house made of timber without additional insulation is inferior only to a frame structure. But all the technology frame house construction consists of the use of insulation.
- High speed of construction without the use of special equipment. Building a house from timber does not require the use of heavy construction equipment. It also doesn't require a large crew to raise the walls of a house. If we compare the construction of a 6 by 6 house made of timber or aerated concrete, and even more so of brick, the pace of construction can be almost 3 times higher. Even if you hire an experienced team of masons, you can only lay a certain number of rows. Then you need to wait at least one day for the solution to set. Anyone who has ever done masonry knows how a freshly laid wall wobbles. You can work with timber without breaks or stops. The rigidity of the wall is constant throughout the entire height of the wall throughout the entire construction period.
- Relatively low cost. A house made of timber is superior in cost only frame houses. The cost reduction is achieved not only due to the availability of the material itself, but also due to the construction of a simpler foundation due to the low weight of the entire structure. Perhaps many will compare the cost of a cubic meter of foam block and wood, but do not forget the width of the wall of each material for successful thermal insulation. Saving foam blocks or bricks will lead to costs for insulation or, worse, heating.
- The beauty and richness of construction forms. A house made of profiled or laminated timber requires virtually no façade finishing.
No construction technology is absolutely superior to all others. Houses made of timber are also not without their drawbacks. Basically, they are associated with wood defects. Timber is dead wood, unable to independently fight environmental conditions and insects. In addition, the timber is devoid of outer layers of wood, which have the greatest protective properties. Therefore, houses made of timber require careful care and protection from mold and insects.
It is worth mentioning the fire hazard of such a house. There are also shortcomings in the technology itself. In the first place comes significant shrinkage of timber walls and susceptibility to cracking. This is due to the impossibility of starting finishing the house immediately after its construction. You'll have to wait for the log house to settle. Although a solution to this problem has long been found - the use of kiln-dried timber or laminated veneer lumber. It is also possible to purchase a finished log house, which has already been settled on the manufacturer’s site.
As you can see, houses made of timber are not without their drawbacks. Whether the benefits tip the scales is up to you to decide. One has only to remember that our grandfathers and great-grandfathers built such houses without modern technologies and methods of wood protection. How long did these houses cost? At least 50 years, and some people still go to visit their grandfathers in an old house in the village. A properly built house made of timber can rival brick and concrete in terms of durability.
How to build houses from timber?
The construction of such a complex structure as a house involves many important stages. A mistake at any stage of construction will disrupt not only the elegant appearance or comfort of the house, but sometimes can even lead to a complete redo of part of the work.
How to prevent these mistakes? The most universal adviser is experience. It’s good if construction is not just a hobby for you, and you are already familiar with most operations first-hand. But even a “hardened” builder is not immune from mistakes. Therefore, we will try to make an approximate step by step instructions for building a house from timber. This is not a clear technological map, but it will still help you assess your strengths and make a decision to start building a building, and perhaps stop you from taking rash steps, and you will decide that it is better to entrust the construction to specialists.
Project selection
Before starting work, you need to assess the purpose of your future building. It could be country house for a spring-summer stay or a permanent structure for permanent residence. It is possible that your capabilities will allow you to start building an entire residential complex with a bathhouse and a garage.

Now you need to choose a project that can be found on the Internet. But do not forget that in a house made of timber, partitions are rarely made according to frame technology. So it’s worth choosing projects with room layouts.
The situation is simpler in the case of ordering the construction of a turnkey house from timber. You can choose one of the standard projects and adjust it as you wish. At this stage you will be able to estimate how much your new home will cost. Most projects on the Internet are listed with turnkey construction costs. You can easily calculate how much money you need to build a house from timber with your own hands. You only need to deduct approximately 30% from the turnkey project cost.
Selection of material for construction
If almost everything is clear with the type of wood, then with the profile of the timber it is not so simple. Pine and spruce are the most common materials for making construction timber. Often the first crowns can be made from larch or aspen. Don't be surprised by the application hardwood. Aspen, when exposed to environmental conditions without additional protection, becomes much stronger and more durable than pine.
Why aren’t entire log houses made from aspen? It is very difficult to find aspen lumber of proper quality with a seed origin of the trunk and the absence of heart rot (up to 80% of aspen trunks are affected by this defect).

There are several options for timber. Let's look at each of them.
Sawn timber
The cheapest material is ordinary edged timber with natural moisture. Its production does not require high-precision equipment, so there are plenty of suppliers of such material in any region. Typically, timber with a cross section of 150x150 or 100x150 mm is used.
Don't be under any illusions about the final cost of your home. Most likely, it will be only slightly lower than the cost of high-quality profiled timber.
Why does the price rise:
- assembly of a log house from edged timber requires the use of inter-crown seals (profiled or laminated timber does not require them due to the special design of the locks);
- after shrinkage, you will need to caulk the crowns 1 or 2 times;
- Due to natural moisture, timber exhibits significant cracks; such a house will require finishing both inside and outside.
All these materials and work will cost you a pretty penny. It should also be noted that it is difficult to store this material at the construction site. The timber should be folded on pads for ventilation and protected from precipitation. It’s good if the manufacturer took care of impregnation with an antiseptic. If not, then you need to treat the timber with an antiseptic until it turns blue or black to prevent insects from infecting the wood.

Another significant disadvantage of this material is the production of bowls during the assembly process or assembly without bowls at all (the timber overlaps from row to row). Inaccuracy in these works and loose fit leads to the formation of cold bridges.
Profiled timber
This is a specially milled timber of natural humidity or chamber drying, made of massive timber. It has design feature– the presence of a tenon and a groove (or several tenons or grooves - the so-called comb) on the upper and lower plane. Profiled timber can be supplied in two versions:
- moldings - beams are supplied 6 meters long without bowls;
- the timber is cut according to the design with the bowls and window openings cut down.
Of course, the first option is cheaper, but in this case you get the same disadvantage as sawn timber - handmade bowls lead to airing of the house in the corners.
Most manufacturers of profiled timber have special computer programs that calculate and cut the material according to their own needs. standard projects, and as provided by the customer.
The undoubted advantage of chamber-drying timber is its low shrinkage. finished building and no cracks.
Glued laminated timber
The same profiled timber, except that it is made by gluing together several boards. Glued laminated timber is rarely produced as moldings due to the high cost of the material. All elements are manufactured and labeled in accordance with the project.
The main advantage of this material is the absence of shrinkage finished houses. Glued laminated timber best preserves its geometry and has increased strength along its length, which makes it possible to implement the most daring projects.
The turnkey cost is the most expensive in its segment, but this is more than compensated by the quality of the material and its durability.
Expert opinion
Sergey Yurievich
Ask a question to an expertThe walls of a house made of laminated veneer lumber do not need finishing due to the absence of cracks. In addition, the installation of windows and doors and interior decoration can begin immediately after the house is under the roof.

Double beam
Relatively young construction technology. Simply put, construction from double timber involves the construction of strictly parallel walls from a specially milled board with a tongue and groove. The gap between the walls is filled with insulation (ecowool or mineral wool). The material used is chamber drying. The construction of walls is a rather complex process, although it seems similar to construction from profiled timber. It is better to entrust the construction of such a house (at least the walls) to the specialists of the manufacturing company in order to avoid problems during the operation of the house.
Construction of the foundation
This is the most important stage construction. The foundation is the basis for the reliability and durability of any structure. The construction of the foundation must begin with a soil survey. It is also necessary to assess the load on the foundation. For construction one-story houses from timber 6 by 6 or 6 by 8, a columnar foundation is usually used or screw piles. For more massive structures (8 by 8, houses with attics or two-story houses) a shallow strip foundation is installed or. In difficult ground conditions it may be recommended slab foundation(used when there is only one possible option).

Installation of Mauerlat and floor joists
The lower frame is usually the first crown of the frame. The logs are cut into the timber or secured using special steel supports. The installation of beams on the first floor is no different from similar structures in any wooden housing construction. The rough flooring is installed. Floors are insulated with any of the selected materials. Typically, this work is carried out after the house is under roof.
Walling
Profiled or glued do not have any special features. The construction is assembled row by row in accordance with the technological map. No additional sealing between the rims is required. The beam is finally compacted under its own weight.
Working with a mini-beam (double beam) requires compliance with several rules, but in general it is similar to working with profiled timber:
- each subsequent row is tightly packed over the previous one (do not count on compaction under your own weight);
- if the wall length is more than 3.5 meters, special cuts are hammered in;
- the bowl of the subsequent perpendicular row should be exactly in the middle of the height of the previous row;
- The presence of gaps when joining mini-beams along the length is not allowed;
- strict parallelism in height between the inner and outer rows.
Violation of at least one rule leads to significant design problems, so it is better to entrust turnkey assembly to certified specialists.
Expert opinion
Sergey Yurievich
Construction of houses, extensions, terraces and verandas.
Ask a question to an expertAssembling a log house from sawn timber is identical to working with log houses: rows are compacted together special materials, the height of the beam is reinforced with wooden dowels.
Roof installation
Working with different roof shapes and types of finishing roofing materials is no different from building any house. Here we can give you only one piece of advice - follow the roof construction standards. Installation of the roof is the most difficult stage. Refer to specialized literature or specialist help.
Building a house from timber is an excellent choice. Do it yourself or trust a construction company - the decision depends on your experience and the ambition of the chosen project. Assess your strengths and skills if you build a building yourself. Evaluate the developer market in your region and choose the most responsible and trusted one if you have chosen a project from construction company. Remember one rule: there is no such thing as a too low price with the same quality.
A popular phenomenon in suburban areas is the construction of wooden houses. Because the timber house is of high quality and comfortable. Moreover, it looks quite chic from the outside, as you can see by looking at photos of wooden houses. Not only the elite can afford to build such a house. The ability to work with a chainsaw or electric saw makes it possible to build with your own hands safe home from timber.
Log house construction technology
Timber is considered a universal building material, and it is quite easy to use. The huge demand for wood is caused by its efficiency and environmental friendliness. Simple construction technology timber houses does not foretell a large investment of time. You should catch all the nuances of the work presented in video lessons and photos, as well as in articles, and even inexperienced builders will have the chance to build a house from timber with their own hands.
In the construction of a house, everything must be done in stages, then the speed and productivity of construction is guaranteed, and a certain period of time must be maintained between some stages.
Step-by-step instructions for building a house from timber
Material selection
The duration of construction and its technology depend proportionally on the type of timber. It is faster to build a house from dried wood, but given the material costs, construction will cost much more. It is cheaper to construct a building from raw timber, but construction in this case takes longer.
The following types of wood are used for housing construction:
1. Profiled timber.
2. Solid timber.
Advantages of profiled timber:
— resistance to deformation;
— minimum construction costs;
— the risk of rotting is eliminated;
— excellent thermal insulation;
— high-quality armor against airflow;
- no additional wall covering required;
— simple assembly ensures construction speed;
- impressive appearance.

Flaws:
- high flammability;
— requires impregnation with agents to increase biosecurity and fire protection;
— formation of cracks at elevated temperatures;
- need additional insulation walls;
— redevelopment of an erected timber house is impossible;
- dependent on weather conditions.
Advantages of solid timber:
— does not require the use of special equipment;
— there are no problems with purchasing, since such timber is widespread;
— low price, makes timber accessible to everyone.

Flaws:
— finishing costs;
— low protection from airflow;
— decent cracking of timber;
- such construction requires double-sided cladding;
— need careful selection: compliance with GOST, absence of fungus;
- if there is fungus, the timber needs to be treated with antiseptic agents.
When choosing, you should focus on the wear resistance of the wood. Accuracy in choosing timber, as well as adherence to technology, are a guarantee of the quality of the house.
Preparation of materials
All required volume material should be collected before construction begins. The purchase of materials provides for two development options:
— purchase of finished timber. When ordering material, the customer specifies all the necessary measurements and purchases a finished timber with grooves, which can be used immediately;
— purchase of wood that needs to be prepared with your own hands. In this case, you have to cut the beams yourself, after which it should be treated with an antiseptic. Only after this will construction of the house begin.
When purchasing wood, you should pay attention to the following factors:
- quality of wood;
— whether the beetles fed on this timber and whether they live in it;
— are there any through cracks in the wood;
— Is the timber affected by fungus?
Project development
Drawing up a diagram of a log house requires careful and accurate calculations. It is quite possible to draw a project with your own hands.

Creating a plan consists of several steps, which include their own nuances:
1. Determining the size of the house and its immediate diagram.
At this stage, it is important to take into account the specific purpose of the premises and the functions that they will perform, as well as all the necessary systems (ventilation, heating, etc.). It is important that rooms with high humidity (kitchen, toilet, bathroom) are located next to each other.
2. Calculation of the amount of materials.
When calculating material consumption, you need to take into account the thickness of the tree, as well as its length. Regular timber six meters, so if the walls of the house are planned to be longer, it is joined along the length.
A bunch of construction companies create projects for timber houses to order. When drawing up drawings, all rules are followed. A house built according to such schemes will be geometrically correct and earthquake-resistant. You can also find many photos on the Internet with examples of ready-made schemes for log houses.
Laying the foundation
The foundation for a wooden house must be very strong. When choosing the type of foundation, the following circumstances should be considered:
— soil characteristics;
— house design features;
- the magnitude of the load of the structure.
Based on the volume of lumber designed for building a house, it is easy to calculate the load of the future structure.
Foundation options:
1. Shallowly buried tape.
2. Deeply buried tape.
3. Columnar.
4. Pile.
Pile and shallow foundations are considered more economical. But a shallowly buried strip foundation is more popular.

The foundation of such a foundation should be laid to a depth of 50 to 70 cm.
Laying the first crown
To prevent high humidity from damaging the first crown, a buffer element should be created between it and the foundation. Such an element is an antiseptic-impregnated lining board (50 mm thick), which is usually made from larch.

Before laying the board, the side of the base adjacent to it is covered with two layers of roofing material. A layer of waterproofing will ensure moisture exclusion.
Wall installation
Step-by-step laying out rows of timber represents the construction of walls. Dowels are used to prevent displacement. Rows of wood are attached to them. A tight corner connection is ensured by the presence of grooves and tenons.

They should be additionally insulated with tow or other sealant. When laying out the phalanges of the timber, the tenons and grooves alternate.
There are several methods for connecting beams at the corners:
- connection in a warm corner;
- connections to the bowl;
- claw connection.
You can find and watch detailed instructions on the video on the Internet. corner connection timber.
In places where the installation of doors and windows is planned, the size of the beam is calculated, taking into account the size of the opening. All openings are weak points for walls. To make the wall stronger, some beams are laid precisely according to its size. When the assembly of the frame is completed and it settles, the excess material is cut out.

To increase strength and fire resistance, the walls are treated with special substances. To increase protection from wind, all seams should be caulked (caulked). Many builders of their wooden cottages post videos on the Internet in which they present a step-by-step installation of the log house.
Roof construction
The high probability of roof repairs after the construction of the house is guaranteed by its complex geometry. Therefore, the roof construction technology should be simpler. Therefore, it is better to build a gable roof.

After constructing the walls, ceiling joists are placed on them so that they protrude beyond the wall by 50 cm. The gap between them should be equal to the width of the insulation used, 60 cm or 90 cm.
Next comes the assembly rafter system. To strengthen the rafters, crossbars and racks are used. Then the fronts are sewn up. The sheathing is performed with maximum step 400 mm, and is mounted on the rafters.
Finishing work
You can watch the video to see what houses made of timber look like, and how they are finished with all the nuances.
Flooring
During the installation of log houses, a preliminary floor covering is created along the floor beams. The floor itself is installed in two steps:
1. Laying the floorboard.
2. Laying the subfloor.
The floor needs to be insulated; to do this, place between the boards of the subfloor mineral wool or other thermal insulation material.

For flooring, in addition to floorboards, you can use laminate, as well as other materials.
Ceiling arrangement.
To reduce heat loss at home, the ceiling must be insulated with at least 200 cm of insulation. It is placed between ceiling beams and protected with special vapor barrier and moisture protective films. The ceiling of wooden houses is covered with clapboard. Large beams, if desired, can be left unsheathed; they will serve as decorative elements.
Interior and exterior finishing
Sometimes all you need to do is paint the house. This applies to those cases where profiled timber was used.
While a house is being built with one’s own hands, a long time passes, and the quality of the wood surface changes characteristically. Therefore, the timber should be sanded again before painting.
Communication networks are laid inside. In the photo on the Internet you can see the result of finishing work in houses made of wood with a variety of design styles.
Window installation
In places designated for windows, special openings (windows) are created. To do this, grooves are cut and the block is placed in them, preferably not end-to-end. It should be smaller in length so that when the walls shrink, the timber can be lowered. Thanks to this, shrinkage proceeds smoothly, and upon completion, the windows are installed.

No need to install wooden windows, you can also use plastic ones.
Installation of doors and partitions
To install doors, the same technology is used as for installing windows.
Partitions are installed only after the frame has been assembled. If a two-story house with an area greater than 60 m2 is being built, then the first floor, which is not equipped with partitions, makes the building structure dangerous. For safety and strength, at least one partition is required.
In principle, building a house from timber with your own hands is not at all difficult. You can watch video lessons that cover all the nuances of construction step by step. The technology of building a house itself is simple and if you follow it, the built house will be durable for many years.
Video. Detailed film about the construction of timber houses
One of the most interesting, popular and widely used materials for the construction of private houses and cottages today is timber. The construction of a residential building from timber requires much more modest financial investments and time costs than building a house from more conventional materials. Moreover, in the case of timber, you can carry out all construction activities with your own hands.


Before starting any work, you need to draw up a plan for your future home. If you do not have design skills, entrust this work to some third-party organization or select suitable drawings from open sources.

Before you start designing, you need to install optimal sizes future building. When choosing the optimal dimensions, focus primarily on the available space, as well as your personal needs.
If you have small family and some free space, you can give preference to a small timber house measuring 3x4 m. Provided that it is properly arranged, even in such a small building there will be enough usable space. The lack of space can be compensated for by a terrace or attic space.
If there are no special problems with space, but you still don’t want to build a huge building, build a house measuring 5x4 m.

The standard sizes of summer and country log houses are 6x6 m, 6x8 m, etc. Such a house can already be made two-story without any fear.

For the rest, focus on the conditions of your specific situation. The larger your family, the larger the area the house should have. In most cases, everything is limited solely by the size of the plot and the available budget.

Buy timber whose cross-section best matches the dimensions of the future home. The thicker the timber, the less money you will have to spend on thermal insulation material and sound insulation.

Usually for construction load-bearing walls use timber 200x200 mm. For construction small house in a region with a mild climate, you can use material with a cross-section of 150x150 mm or even 100x100 mm.


During the process of assembling the walls, it is necessary to lay a sealant made of flax or jute between the rows. This seal allows you to get rid of all the cracks and additionally insulate the walls.

Before starting construction work, be sure to study the properties of the soil on your site. It is quite difficult to cope with such work on your own - it is better to immediately contact a specialist. Additionally, you need to find out the level of groundwater flow.
Select the length of the beam in accordance with the size of the house. The standard length of the elements is 600 cm. If the walls of your future home will be longer, try to find a company that can produce timber to your dimensions. This will require additional financial investments, but solid timber is superior to prefabricated elements in all respects.

The beam needs mandatory finishing water-repellent composition. Without such impregnation, the material will very soon begin to become moldy and rot, and as a result will be completely destroyed.

If insulation is necessary finished house Thermal insulation materials are best placed from the inside. Mineral wool heat insulators are excellent for insulation, with the obligatory laying of waterproofing material between the thermal insulation and the walls.
If possible, it is better not to do the external cladding of a timber house - such finishing will hide all the aesthetic beauty of the building material.

Pre-calculate required quantity materials in order to avoid problems with the sale of excess timber or the additional purchase of missing elements in the future.

First step. Determine the height of the house and calculate the perimeter of the walls of the building. Choose the height of the ceilings taking into account the thickness of the ceilings and floors. Calculate the area of the internal and external walls, taking into account the thickness of the beam section.
Second step. Calculate the total number of beams. To do this, you need to divide the height of the house wall by the height of one element. This way you will know how many beams will be needed to build each wall. Calculate the length based on the length of the walls. Sum up the number of beams needed to build all the walls of the house.
Third step. Add to the calculated value a 5-15% margin for defects or unexpected damage during the construction process.
Initially, the walls of your house will have a height slightly higher than the design value. This increase will occur due to the use of an insulating gasket between the crowns. Over time, the wood will shrink, and the height of the walls will be restored to the design height.
Guide to building a house

Purchase the required amount of finished timber and begin construction. Start by preparing the site and laying out the foundation.
Foundation
First step. Remove debris and all obstructive objects from the construction site. Mark the area using pegs driven into the ground and a rope stretched between them.
Second step. Dig a trench for the foundation. Log houses are traditionally built on strip foundations depth up to 80-100 cm. Select the specific depth taking into account the conditions of your particular situation.

Third step. Fill the bottom of the trench with a layer of sand and gravel. Compact the backfill thoroughly. For better compaction, spill the backfill with water.
Fourth step. Attach the formwork to the walls of the trench.
Fifth step. Place reinforcing mesh on top of the backfill.
Sixth step. Fill the trench with concrete. Leave the foundation until it has fully gained strength (3-5 weeks).


In warm weather, the foundation will need to be watered for the first few days after pouring to prevent it from cracking. It is better to leave the formwork until the foundation has completely hardened. If necessary, it can be dismantled earlier, but not less than 10 days after the last moistening of the base.
First crown
First step. Coat the frozen foundation with molten bitumen and lay a layer of roofing felt on it for waterproofing.
Second step. Proceed with laying the first crown. Pre-soak all wooden elements with an antiseptic. Traditionally, the first row of timber is laid using the “half-tree” method. To make such a connection, you need to saw off the lower part of one beam, and the upper part of the other.


Third step. Lay out the bottom crown. Adjust the bars as carefully as possible.
At the same stage, prepare wooden dowels. Using these elements you will connect the rows of timber. It is advisable to make pins from the same type of wood that was used for the manufacture of the main building elements. Make holes for the dowels in advance. Optimal step between fasteners – 1.2-1.5 m.


Form the first row of walls and proceed to further work.
Walls
Continue laying the walls in even horizontal rows. Make the cut directly into the lower crown using the dovetail method. Place floor beams in increments of no more than 40 cm, otherwise the floor will sag.

The walls are laid out according to an extremely simple principle: you lay the beams, connect them together in the corners using the “root tenon” method, connect the top row to the underlying row using dowels. Drive the dowels about a third of the depth of the beam of the bottom row, i.e. With the help of one dowel you can connect 2-3 rows at once. Be sure to lay insulation between the rows. You can use jute or moss.


Check each row with a building level. Use a sledgehammer to level the rows.

Lay out the walls of the house at the required height using the same pattern. All rows laid above the lower crown are arranged according to the same principle.

There is no need to secure the top two crowns. You will remove them before you begin installing the roof and installing the ceiling beams.
Start arranging the roof. If you are planning to make a residential attic space, use timber measuring 15x20 cm for the ceiling beams. Fix the beams themselves in increments of about 1-1.1 m.
Proceed with the construction of the roof structure frame. The frame includes the following elements:

Install the Mauerlat, rafters and other listed elements. Attach sheathing boards to the rafters. For lathing, use boards about 150 mm wide and 15-20 mm thick. Characterized by the greatest reliability continuous lathing. For the rest, focus on the features of your situation, taking into account the angle of inclination of the slope, type and weight finishing coating etc.

At the end, all that remains is to lay the finishing roof covering with preliminary installation of steam, heat and moisture insulation layers.
After this, you can, if necessary, insulate the house and perform finishing work. Laying communications, installing doors and window structures, lighting, furniture and other aspects - all this is at your discretion.


In the case of kiln-dried timber, finishing can begin almost immediately after completion of construction work. When using another material, you will have to wait until the wood shrinks. This requires at least 6 months.
Log house built in accordance with all building codes and recommendations, will serve you well for many decades. Follow the instructions, and very soon you will be able to enjoy comfortable living in a reliable home built with your own hands.

Good luck!
Video - DIY timber house