Upon entering any room, the first thing that somehow comes into view is the ceiling. From its design and appearance depends on the overall perception of the interior and the impression it makes. It is for this reason that designers try to pay attention to Special attention ceiling. Thanks to the development of technologies in construction and the emergence plasterboard structures, the possibilities for creating unique suspended ceilings have become almost unlimited. Today, the abundance and availability building materials allows you to create a suspended ceiling with your own hands without any problems, the main thing is to be able to use the tool and know how to make a suspended ceiling. Despite the ease of installation, it is impossible to do it alone, so invite a couple more assistants.
Basic design of a suspended ceiling
The design of suspended ceilings is single-level or multi-level metal carcass, attached to the ceiling and walls of the room, which is lined with sheets of plasterboard with built-in lighting fixtures.
To create the frame, galvanized steel is used metal profiles PP 60/27 and PPN 28/27 (imported analogue of CD and UD), parts of which are connected to each other with metal screws and special single-level (crabs) or two-level connectors. To attach the frame to the ceiling, straight or spring hangers are used, secured to the ceiling with anchors or dowels.
For covering the metal frame, gypsum plasterboard sheet (GKL) with a thickness of 9.5 mm, a width of 600 or 1200 mm and a length of 1500 - 2500 mm is used. Fixing the gypsum board to the metal frame is done with drywall screws. Recommendations for choosing gypsum plasterboards are based on exactly these parameters optimal combination strength and weight of the suspended ceiling. If the technology is followed, the total weight of 1 m2 of the structure will be about 13 kg.
Preparatory work: stages
As with any other construction work, before making a suspended ceiling, you will have to do some preparation. This will concern the surface of the old ceiling, creating a design project and hanging diagram, and calculating the necessary materials.
Let's prepare the floor surface

The ceiling surface must be carefully prepared: remove old finishes, repair
Although the suspended ceiling will hide the surface of the ceiling, a number of preparatory work will have to be carried out. This will make it easier to install the ceiling and provide reliable fastening the entire structure. We begin work by removing the old finish, which we completely remove before puttingty or plaster, and if there were none, then until ceiling. Then we carefully check the surface for cracks, partially or completely peeled putty or plaster.
If everything is in order, then you can prime and putty the surface, and then proceed to further work. Otherwise, you will have to carry out more thorough repairs, perhaps even re-plaster the ceiling. Ideally, you should have a strong and flat surface to which the metal frame will be attached.
Design project and suspended ceiling diagram
The creation of a suspended ceiling begins with the development of its design project. Today, thanks to various architectural programs, creating such a project takes very little time. These programs allow you to examine and select the most attractive future suspended ceiling in volume and color.
Our video review about what types of suspended ceilings there are:
To all other, computer programs will allow you to create and print a diagram of a suspended ceiling with all the necessary materials and their quantity. But those who are used to doing everything the old fashioned way - on paper - will have to work a little more. Creating a diagram and calculating materials manually is carried out as follows:
- the first thing needed for calculations is to measure the room and calculate the perimeter. For example, we have a room measuring 3x5 m. P=(3+5)*2=16 m. This will also be the length of the guide profile PPN 28/27. We transfer the size of the room to scale onto paper;

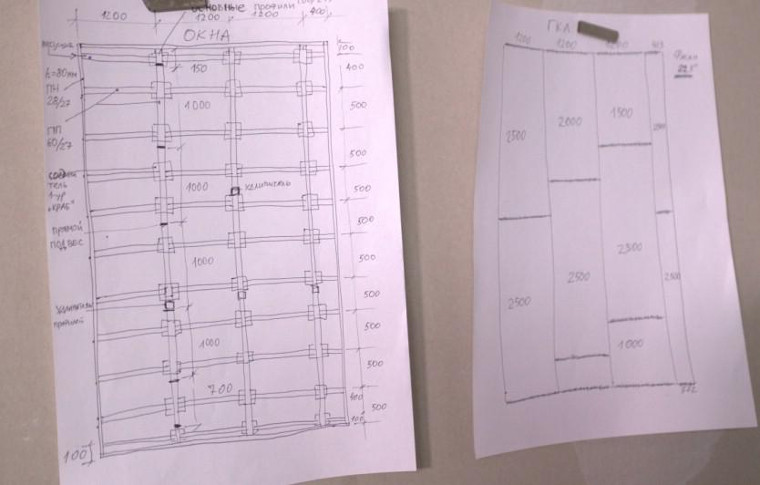
Example of a suspended ceiling diagram
Important! When measuring the room, you can find that opposite walls have different lengths. In this case, we take the largest value for calculations.
- the next step is to calculate the frame profile. The supporting frame will be made of PP 60/27 profile, which is attached to the ceiling in increments of 600 mm. For ease of installation, the length of one profile strip will be equal to the width of the room. We calculate the number of slats as follows: 3000/600 = 8.3 and round to the nearest whole number. To evenly distribute the planks, we place the first and last at a distance of 100 mm from the walls, and all the rest in increments of 600 mm. This step was not chosen by chance. The fact is that gypsum board has standard width 600 mm and 1200 mm, and for reliable fastening it is necessary that the edges of the sheets lie on the profile. We mark the placement of the profile strips on the diagram;
- Now you need to calculate the number of hangers. All hangers are attached to the ceiling in increments of 600 mm. All frame profile strips will require (3000/600)*8=40 hangers. We attach the first and last suspension at a distance of 300 mm from the wall, and all the rest in increments of 600 mm. In the diagram, we mark the place of their attachment with crosses;
Important! Direct hangers can be used in two cases. The first is when the height of the suspended ceiling does not exceed 120 mm, the second is when the surface of the ceiling is absolutely flat. Otherwise, it is recommended to use spring hangers and constantly monitor the horizon using a level.
- To add rigidity to the suspended ceiling structure, you will need to additionally install lintels from the PP 60/27 profile. The jumpers themselves are installed between the main load-bearing planks with a pitch of 600 mm. To fix them, a special connector is used - a crab. The number of connectors is calculated as follows ((3000/600)-1)*8=32 pcs. Why exactly 32 pieces, and not 40. The fact is that the first line of jumpers is installed at a distance of 600 mm from the wall, the second 1200 mm, the third 1800, the fourth 2400. The fifth row is the wall itself. Now we mark on the diagram the place where the crabs are attached and, by connecting them with a solid line, we get the location for installing the jumpers.
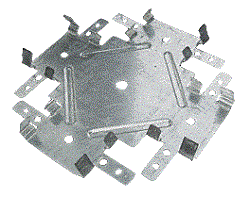
Important! There are two types of connectors: single-level (crab) and two-level. The difference is in the method of fastening and in the height of the final structure. Thus, the crab allows you to place all the profile strips on the same level, and the total height of the profile with gypsum board will be 27 + 9.5 = 36.5 mm. The height of the profile and gypsum board with a two-level connector will be 27+27+9.5=63.5 mm. In addition, the profile consumption in the second case will be greater. But which method to choose is up to the master to decide.
All that remains is to calculate required amount sheets of drywall. Everything here is extremely simple, knowing the area of the room is 5*3=15 m2, and the area of one sheet, for example 2.5*1.2=3 m2, we get 15/3=5 sheets.
Now we calculate the number of screws. This must be done based on the following data:
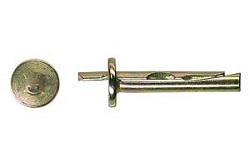
- for fastening to the ceiling and walls, dowels and 6x60 screws are used, the pitch for fastening to walls is 300 mm, for the ceiling 600 mm;
- to fix the profile and hangers, profile and crabs, you will need a self-tapping screw LN 9, LN 11. For the profile and hanger you need 2 screws, for the crab and profile 4 screws;
- MN 30 self-tapping screws are used to fix the gypsum boards. The pitch between the screws is 250 mm.
In the end, all that remains is to mark the location of the lighting fixtures on the diagram and calculate the required amount of wiring.
How to make a suspended ceiling yourself
About how to install a suspended ceiling with listing various options installation, you can write a small scientific report. In this article, we will look at the simplest installation option, which you can do on your own, without having the professional skills of a builder.
Working with a marker and tape measure
Installation of suspended ceilings begins with marking the surface of the ceiling. If the surface of the ceiling is flat, take a tape measure and a marker. We measure the height of the future suspended ceiling without taking into account the sheet of drywall. We put 3 - 4 marks along the entire length of each wall, then take the painting thread and connect the marks in one line. This line will be a guideline for the PPN 28/27 guide profile.
Now we apply markings on the ceiling for the main profile PP 60/27 and suspensions. We retreat the required distance from the walls, put a few marks and beat off a line using paint thread. Repeat the procedure for all other planks load-bearing profile in increments of 600 mm. On the marked lines for the frame profile we mark places for direct hangers, as shown in the diagram.
Ceiling frame installation

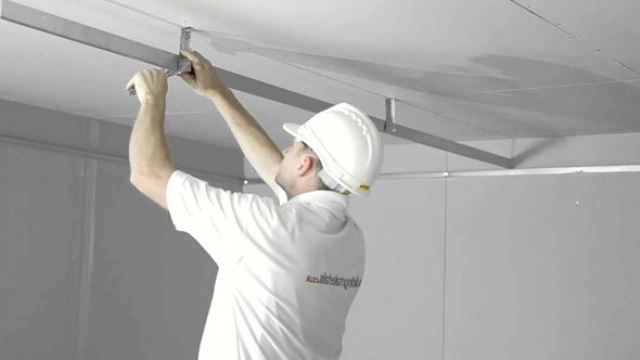
We fix the profiles to the walls and ceiling, forming a frame for plasterboard sheets
Having finished with the main markings, we proceed to the installation of profiles. We start with a guide profile PPN 28/27 along the perimeter of the room. We take a hammer drill or a drill in our hands and, along the previously drawn line, drill holes for 6x60 dowels. We drill the same holes on the profile. For reliable fastening, drill the first and last holes 100 mm from the wall, all subsequent holes 300 mm from the wall. We drive dowels into the resulting holes and screw the PPN profile into place.
Important! During the installation of a suspended ceiling, you will have to screw in a lot of various screws and screws, so use a screwdriver. This will greatly speed up and facilitate all work.
The next step is to fix the hangers. To do this, take the suspension and apply it to the mark on the ceiling. It should be located strictly in the middle of the line and at right angles to it. We mark a place for the dowel and drill a hole. Then we drive the dowel inside and screw the hanger on. We repeat the entire procedure for 40 suspensions.
Important! The hanger can be secured with 1 or 2 dowels, it depends on how reliable design want to receive.
Now we fix the main frame. To do this, we bend the antennae of the suspensions down so that the profile fits freely between them. We set the profile inside and on required height We fix it on the sides with metal screws.

Example: what the frame of a multi-level suspended ceiling might look like
Having secured all the profile strips, take a tape measure and mark the places where the crabs are attached. Then we place them on top of the profile with the tendrils down and press down firmly to snap them inside. Having done this, we proceed to cutting jumpers from the PP 60/27 profile. To do this, we will use a grinder or metal scissors and cut the entire profile into pieces. We take the size on the basis that the jumper will fit tightly between the main planks. Having cut the required amount, we proceed to installation. Place the jumper underneath the crab and press them tightly together so that the crab snaps inside. Having installed all the jumpers in this way, we align them in a straight line according to the drawn diagram. Then we fix all the crabs and profiles together with 4 screws.
Frame installation is complete. You can install heat and sound insulation, as well as lay wiring for lighting.
Rules for covering the surface of gypsum boards

We install gypsum plasterboard sheets to the ceiling frame: plasterboard slabs are attached to the profiles with self-tapping screws
We apply sheets of drywall to the prepared frame and screw it to the profile with self-tapping screws. We make sure that the edges of the plasterboard lie on the profile. For reliability, we fasten all the sheets apart. To do this you will have to trim some, but this is done very easily. First, cardboard is cut under the ruler on one side, the plaster is carefully broken, and then the cardboard is cut through on the other side.

After installation, you first need to treat the butt seams and the places where the screws are installed with putty, then cover the entire ceiling with putty mixture
Video guide: installation of Knauf ceiling
The installation of the suspended ceiling with your own hands is completed, all that remains is finishing. To do this, carefully putty and level all the joints and places where screws are screwed in. We wait until the putty is completely dry, and then apply finishing layer finishing materials. Finally we install lighting. All work on installing a suspended ceiling is quite simple for beginners in the construction business. The main thing is to follow the work technology.
How to level the old one concrete ceiling and hide the rest of his shortcomings? The answer is simple - you can make a suspended ceiling. The design and installation work are quite complex, but provided that you know exactly how to do everything and what such a structure consists of, you will succeed.
What is a suspended ceiling?
Based on the name, you can immediately understand that a suspended ceiling is a special structure that is attached to the ceiling and performs various functions, mainly decorative, of course. This ceiling has good soundproofing and insulating properties, and can also change the appearance of the main ceiling beyond recognition.


When installing a suspended ceiling, use special system suspensions and profiles that are attached to the base ceiling. Then the material is installed on the mounted structure, which will serve as a new ceiling. Repair specialists usually use drywall for these purposes.


On a note! Suspended ceiling in fact it can be different. It can be rack, cassette, lattice. These types of ceilings are also called modular. However, the article will discuss the usual plasterboard coating - this type is also known as continuous. A ceiling that is installed without the use of suspensions is called a suspended ceiling.
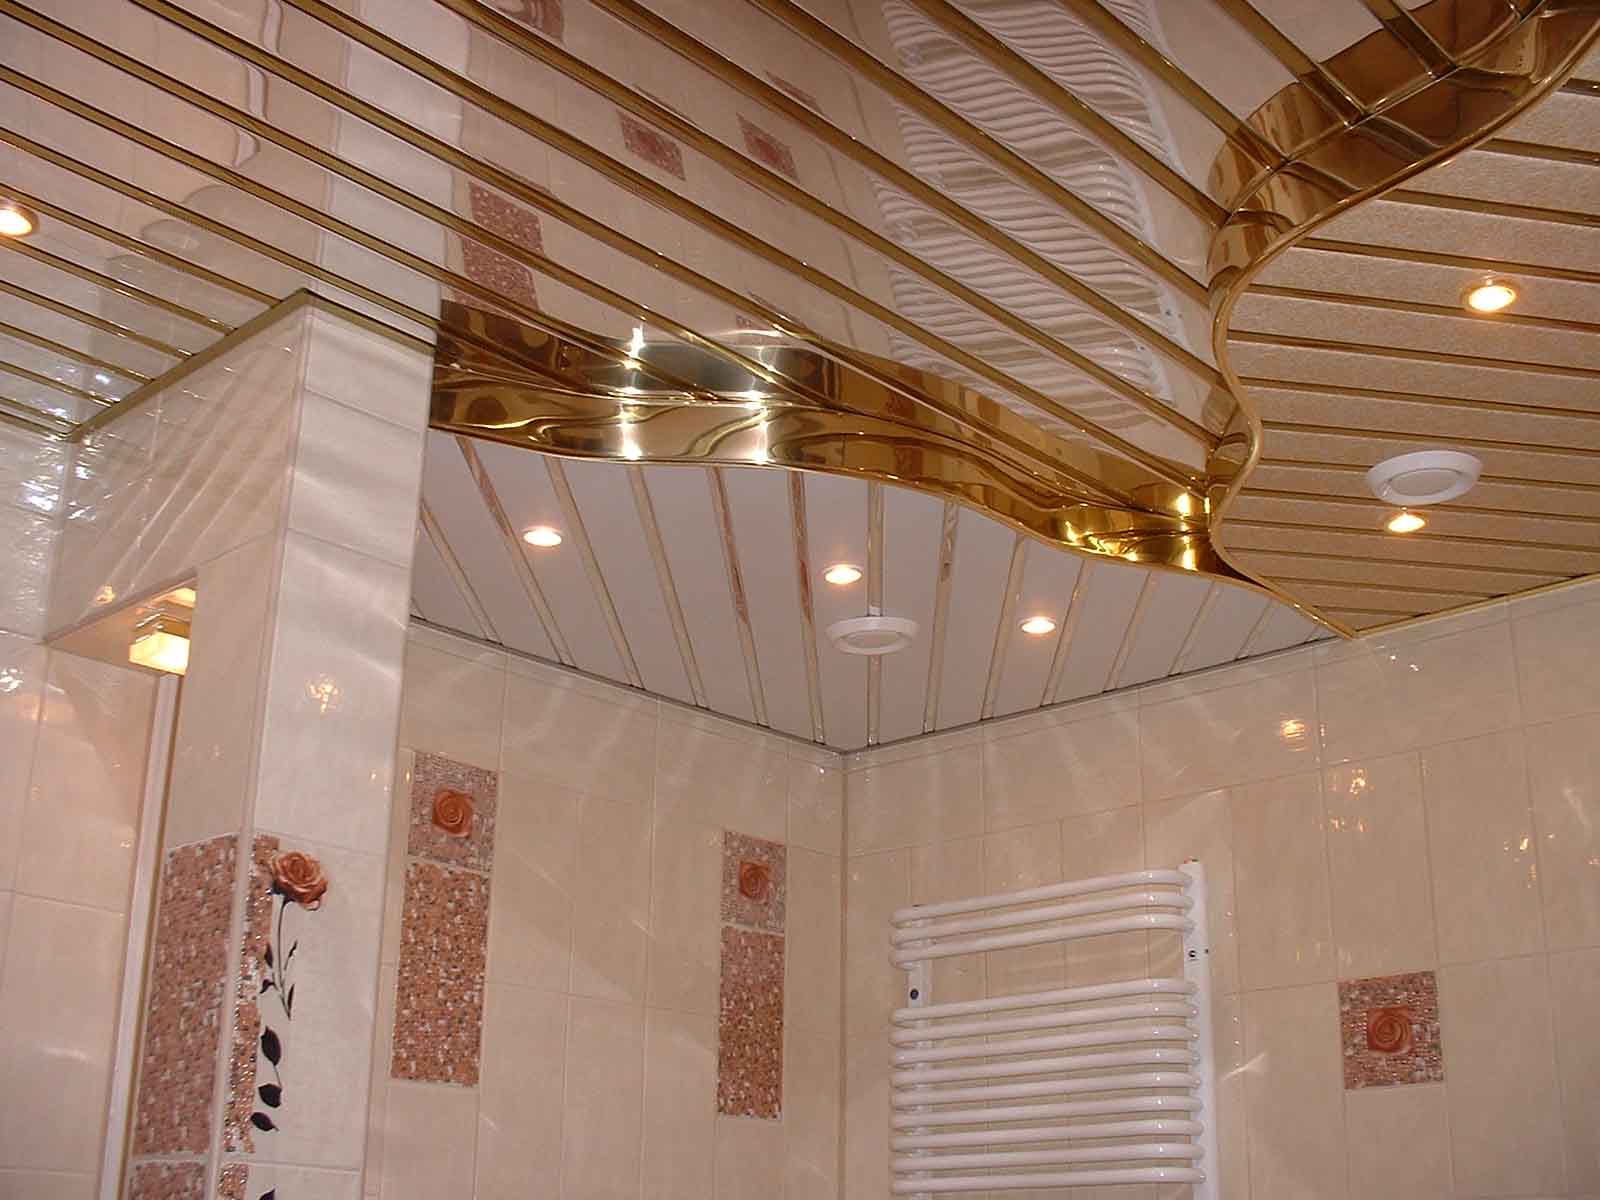
Slatted suspended ceiling in the bathroom

Advantages and disadvantages
A suspended ceiling has a lot of advantages - there are many more of them than disadvantages.
To the advantages of hanging ceiling covering applies:
- the ability to hide the imperfections of the main ceiling (stains, crevices, cracks, steps, etc.);
- beautiful appearance - such a ceiling changes the entire room beyond recognition;
- the opportunity to implement various design ideas up to the installation of complex structures;
- convenient installation of lighting (as well as the ability to install lamps in accordance with the design plan);
- excellent sound and heat insulation characteristics,
- easy to maintain - just wipe off the dust with a dry cloth;
- large selection of options finishing surfaces;
- the ability to hide electrical wiring and other communications inside the ceiling.

But a suspended ceiling also has a few disadvantages that are worth mentioning so that you know what you're dealing with.
These include:
- reducing the ceiling height by installing a suspended structure (minimum 7-8 cm);
- duration of installation (depending on the complexity of the design, installation may take more than one day);
- enough high price finishing;
- the need to create a special hatch so that it is possible to get close to the communications installed in the ceiling (if any);
- low moisture resistance of plasterboard, due to which it is not suitable for finishing rooms with high humidity(such as a bathroom, sauna, swimming pool, bathhouse, etc.).

Calculation of components, tools, materials
To make a suspended ceiling at home, you will need materials for making a frame, drywall and material for finishing coating, which will give a beautiful appearance to the new coating.
Before starting work, you should decide which frame to choose. It comes in two types - metal and wood. To make the second option, you will need bars that will need to be attached to the main ceiling with hangers. In the first option, as you might guess, metal profiles are used.
Prices for suspended ceiling
suspended ceiling


On a note! There are two types of ceiling frame elements - load-bearing and main profiles or bars. If in metal version can only use load-bearing elements, then when working with wooden frame use both main and load-bearing ones. Note that the manufacture of a metal frame is still often carried out using basic profiles.

Metal profiles are made of galvanized steel and have the names PP 60/27 and PNP 28/27. You may also come across profiles called CD and UD - these are their foreign markings.

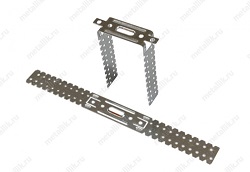
Also, to install the frame you will need fastening elements - special hangers for ceilings, dowel-nails and anchors, “crab” connectors for connecting jumpers, two types of self-tapping screws (“kids” with a gimlet for metal and special ones for drywall).


Drywall prices
drywall

Photo of the “crab” for the frame plasterboard ceiling
The main finishing element is drywall, which comes in several types:
- GKL – standard;
- GVKL - it is able to resist moisture;
- GKLO – fireproof, glass fiber is used in manufacturing;
- GKVLO - combines the properties of resistance to fire and moisture;
- GVLV – plasterboard itself High Quality, it is also called a supersheet.


Generally, due to its price, optimal weight, and also due to the lack of special fire safety requirements in residential premises, standard gypsum plasterboard is usually used for ceiling installation.

They usually take a sheet whose parameters are as follows:
- thickness – 9.5 mm;
- width – 600-1200 mm;
- length – 1500-2500 mm.
To calculate the number of sheets per room, it is best to use online calculators, but you can calculate this number yourself. Knowing the area of the ceiling, as well as the dimensions of the drywall, this is quite simple to do in accordance with detailed diagram the entire ceiling structure.
Armstrong ceiling prices
Armstrong ceiling

Attention! Plasterboard structures have a decent weight. 1 square meter of this structure weighs about 13-15 kg. Therefore, it is better to work together with an assistant.
Another trouble that is associated with the heaviness of a plasterboard structure is cracking in the places where the seams will pass. You will not be able to install the whole structure at once, again, because of its weight. Therefore, during finishing you need to very carefully monitor how the work is progressing.

In addition to materials, the following tools will be needed to install suspended ceilings:
- screwdriver;
- perforator;
- roulette;
- laser level;
- ladder;
- a simple pencil for marking.

You may also need spotlights, a chandelier and other lighting elements. It is worth remembering that the installation of electrical wiring should be carried out before you begin covering the frame.
For exterior finishing suspended ceiling you need to purchase:
- primer;
- putty;
- putty knife;
- sickle tape.

Table. Approximate consumption of materials per 1 square meter suspended ceiling.
| Material | Consumption |
|---|---|
| 1 sq. m. |
| 1 PC. |
| 2.9 m |
| Along the perimeter |
| Along the perimeter |
| 1 piece each |
| 1 PC. |
| 2 pcs. |
| 2 pcs. |
| 0.2-0.5 pcs. |
| 2 pcs. per 1 m of PP 28/27 profile |
| 23 pcs. |
| Along the perimeter |
| 1.2 m |


On a note! Be sure to make detailed plan installation of plasterboard ceiling. It will make it easier to understand the work process, and also help calculate the required number of components and materials for the structure.

Plasterboard ceiling diagram - calculation of materials
Installation of a single-level ceiling: step-by-step instructions
After all have been purchased necessary materials, you can start installation work for installing a suspended ceiling. First, remove from the room all pieces of furniture that may interfere. After this, proceed to preparatory work– marking the ceiling and walls and installing the main elements.

Step 1. Measure the height of each corner in the room using a tape measure. This way you will find the lowest angle in the room. This is where you start working.

Step 2. Make marks on the walls at a distance of 5-8 cm. Remember that the first option should be chosen if you do not have additional lamps. If you decide to install spot ones, then leave more space between the main and future ceilings.
Step 3. Take a level and use it to find points in other corners at the same level. Make the appropriate notes.

Step 4. Apply markings around the entire perimeter of the room, connecting the dots with perfectly straight lines.

Advice! Use painter's cord to mark.


Now proceed to installing the frame.
Step 5. Take PP 28/27 or UD profiles and strengthen them along the drawn line. This is done like this: place the profile above the bottom border to the line, make marks on the walls through the holes in it. Drill holes in the walls.

Attention! Usually the profiles have holes for fasteners along the edges, but if they are missing, drill them yourself at a distance of 10 cm from the end of the product.
Step 6. Cover the profiles with sealing tape and screw them to the wall using dowel nails.


Step 7 The pendants are attached in increments of approximately 40 cm, which is why draw lines on the ceiling at a distance of 40 cm from each other.

Step 8 Approximately every 2.5 m you will make jumpers on the ceiling. Based on this, expect that the step between the hangers will be 50 cm.
Attention! Attach the first row of hangers close to the wall (25 cm) for structural reliability. And the second row is at a distance of 75 cm. Next, maintain a step of 60 cm.
Step 9 To correctly drill holes in the right places, apply hangers at the marked points, make new marks and then prepare places for the anchors. Strengthen the hangers and bend their ends thoroughly so that there is no “free play” left. The hangers should no longer sag, so as not to ruin the rest of the work.
Glass ceiling prices
glass ceiling

Step 10 Start installing the profiles on the ceiling. Depending on the size of the room, they may need to be lengthened or shortened.

The length can be increased by connecting two parts using a special extension. Please note that the joints of the profiles should not subsequently be at the same level and far from the suspension.
And their total length should be 1-2 cm shorter than the length of the ceiling. Start installing each profile from the corners - screw it to the hangers and guides using self-tapping screws. Then secure the middle.

Step 11 Having secured two profiles in a row, go to the other side of the room and do the same work. Then attach the central ones.

Step 12 Install jumpers using “crabs” and self-tapping screws. They are attached every 2.5 m - where the joints of plasterboard sheets will be formed.


Step 13 The most awaited stage is attaching the drywall itself. Cut the edges of the sheets with a knife at a slight angle - this way you will improve the result of the putty. Where the end is covered, there is no need to cut anything.


Step 14 Start attaching the sheet from the corner of the room. In this case, the distance between the sheet and the wall should be 0.5 cm. Attach the drywall to the profiles with self-tapping screws in increments of 20 cm. On adjacent sheets they are screwed “in a spaced pattern.” The caps must be recessed into the drywall, i.e. e. should not stick out. By the way, do not install gypsum board sheets at the same level - they should be attached with offset seams. The joints of the slabs should not be located near the corners.
The self-tapping screw must be recessed inside
Video - How to make a suspended ceiling from plasterboard
Surface finishing
A suspended ceiling is also good because it allows you to use the most different variants finishing. It can be finished, etc. But before that, the remaining seams must be sealed. After treating them with a primer and waiting for it to dry, seal all seams, joints, holes from self-tapping screws with durable putty.

After waiting for the putty to dry, glue all seams and joints with sickle tape, and then coat them again. The widest seams between plasterboard sheets must be filled with putty material and wait for it to dry completely. It is possible that while sealing the plasterboard seams on the ceiling, you will find some damage - for example, a torn paper layer that has exposed the core of the sheet. Such problem areas should be eliminated in advance. You can, for example, apply serpyanka and apply an even layer of putty on top.
For joints it is better to leave rounded edges of the sheets. In principle, the manufacturers have already thought about this point - the edges of the sheets have a rounded shape, thanks to which the putty will fill the seams to the maximum. Serpyanka tape and a layer of putty must be applied at the level of the plasterboard sheet. For what? The fact is that the edges of the drywall have a narrowed thickness so that the tape can be recessed under the surface level of the sheets.
How to properly seal the seams of plasterboard sheets, the edges of which are cut off yourself? First of all, it is necessary to chamfer, that is, plan the cut edge of the sheet with a special plane or knife at an angle of 45°. As a result, a wedge-shaped groove is formed at the junction of the two sheets, in which the sickle tape can easily “drown” and the putty material will reliably grip.

Then, having filled the entire surface with regular putty, apply finishing putty. The ceiling is ready.
Video - Plasterboard ceiling putty
And finally, a few tips that will simplify the installation of a suspended ceiling with your own hands.
- Choose to work only quality materials. Remember that you are creating a ceiling for more than one year, so it should serve you for a very long time.
- Don't forget about the diagram and markings. Take your time: it is better to spend some time making a plan and accurate calculations than constantly stopping work in order to buy or try on something.
- Work with plasterboard only in a dry room.
- Don't forget to use your level all the time.
- For soundproofing use mineral wool. It can be used to fill the frame before the final covering.
- Before starting work, allow the drywall to rest in a horizontal position.

In this way, following the instructions, you can create a suspended ceiling with your own hands. The work at first glance seems extremely complicated, but if you look at it, it’s easy to understand that in fact everything is quite simple.
One of the most important issues that arise in the process of renovating a room is the choice of the type of ceiling finish. That's all for today more people are interested in how suspended ceilings are made. There is nothing complicated in this process, and anyone who knows how to use a drill can easily make the ceiling of their dreams on their own.
Types of suspended ceilings
Before you start work, you need to decide suitable look ceiling. Mounted structures are divided into the following main types:
- Plasterboard ceilings. The most popular and universal type. Its widespread use by builders is associated with a large number of advantages: the ceiling can be given any shape, it is easy to implement multi-level system, drywall is excellent for decorating additional lighting in the form of diodes, halogens and incandescent lamps. However, such installation is accompanied by a lot of dust and dirt, and it will take a lot of time.
- Tension. This is the best option to achieve a perfectly smooth and smooth surface ceiling. The advantages of tension structures include a variety of textures and colors, the ability to place a photograph or drawing on the ceiling, ease of installation, moisture resistance, absence of dirt and dust during operation, and the ability to create original lighting. It should be remembered that tension structure It is easy to damage, so it is better to keep all sharp objects away from it.
- Modular. The plane of these ceilings consists of ready-made modules. These can be tile panels, slats or cassettes. Tiled ceilings are made from mineral fiber, wood and metal; due to their design, they accurately follow the contours of the room. The slatted version is made from rectangular slats with curved edges along the long sides. Externally, the slats look like lining. They are attached to an installed metal frame. The rack structure can be installed in unheated room, since it has good frost resistance. Cassette ceilings are created from metal modules of square or rectangular shape. Quite small elements are placed in mounting frames, and panels are secured using concave edges around the entire perimeter.
- Aluminum. Suspended structures made of this material come in various types: slatted, cassette or Grilyato ceilings. The latter is distinguished by its sophistication and at a high price. Metal surface aluminum ceiling It reflects electric and natural light well, making the room very light and spacious. Besides, suspended structure made of aluminum has good moisture-resistant and fire-resistant properties. Such a ceiling will not harm human health, because aluminum is an environmentally friendly material.
How to make a suspended ceiling with your own hands
Beginning of work
 Let's see how to do it suspended ceiling from plasterboard. First, let's prepare the materials and tools that will be needed during the work process:
- dowel-nails;
- pendants;
- guide profile;
- ceiling profile;
- laser or water level;
- screwdriver;
- galvanized screws;
- jigsaw;
- pencil;
- roulette;
- plasterboard sheets.
It is necessary to clean the surface of the ceiling from the old coating so that the dirt of the plaster or whitewash does not fall off. To avoid the appearance of unnecessary formations, it is better to treat the ceiling with an antifungal agent. Also on preparatory stage we need to take care of the future lighting system. To do this, you need to determine where the corresponding wires will go and fix them to the ceiling.
Installation technology
Next, we will proceed directly to the installation of the suspended structure. The first stage is marking. First, you need to note the distance at which the suspended ceiling will be, it should be 10-20 cm. Here it is taken into account that you need to hide all communications and electrical wiring. Using a level (it is better to use a water level), you need to mark the angles in one of the most horizontal planes. Using the mark with a pencil or painting thread, we draw a line along the entire perimeter of the room; starting guides will be installed along it.

Then we take the profile and apply its lower part along the line. Along the marked line, you need to drill holes at intervals of 50-60 cm for the dowels. For a more stable fixation, it is better to make the first and last holes at a distance of 10-15 cm from the edge. We give the profiles the required width and length using scissors, then fix them with a screwdriver into pre-prepared holes to the wall.
Let's move on to installing the hangers. We make markings every 40 cm on the base of the ceiling along the lines that were drawn along the perpendicular guides. The suspension is fixed strictly in the middle using a dowel.
The next step is to secure the rack profiles. Again, we leave marks along the entire length of the room with an interval of 60 cm. Then, using self-tapping screws, we fix the rack profiles to the installed base strictly according to the marks left. Do-it-yourself installation of the frame ends with securing the structure with cross-shaped connectors and hangers. The antennae of the suspensions are bent, taking into account the passage of the profile. After this, we install the profile and attach it with self-tapping screws.
Fastening sheets of drywall to the installed frame
After the main frame is ready, it is necessary to attach sheets of drywall to it. Before installation, to improve waterproofing, each sheet must be coated with a special primer, first from the ceiling side, and after installation, from the back side. In order to provide the drywall with “breathing,” you need to step back a few millimeters from the edges. You need to fasten the sheets to the frame in a staggered manner, keeping a step of 15-20 mm. If necessary, trim the sheets.
When using self-tapping screws, you need to make sure that their heads do not go inward too much, but they also should not stick out above the surface of the drywall. Using a special screwdriver with a rigidity limiter will make the task much easier. In addition, there should be a gap of a couple of millimeters between the sheets of drywall; it is needed, firstly, for possible expansion of the surface under the influence of temperatures, and secondly, for covering the seams with a mixture of gypsum.
The final
 The final stage is sealing the joints formed between the sheets. For best result it is better to use gypsum or special mixture. Before puttying, the surface must be treated with a primer. The ceiling is completely plastered, and if necessary, the protruding screws are tightened.
After applying the mixture, a reinforcing mesh made of fiberglass is applied. To ensure that the mesh does not stick out, you need to level it with a spatula. Next, you should let the structure dry. When everything has dried thoroughly, it is necessary to sand all the areas where the putty was applied and the gaps formed between the drywall and the wall with fine sandpaper.
This concludes the installation of a suspended ceiling with your own hands. Then you can paint it, wallpaper it, whitewash it, in general, you can do whatever you want. At correct installation the hinged structure will last for many years.
To date, a lot has been achieved constructive solutions for finishing the ceiling. They allow you to use many different finishing materials, create unique interiors. The most popular are suspended (suspended) ceilings, this is greatly facilitated by the relative ease of installation of the structure, which can be handled even by a person with minimal construction skills. So, let's try to figure out how to make a suspended ceiling with your own hands.
Advantages of hanging structures
In addition to their excellent appearance, hinged structures also have engineering advantages.
- The suspended ceiling structure can play the role of a sound insulator; these qualities are enhanced when laying special materials into the system frame. The same method is used to insulate the room, so it is possible to kill two birds with one stone, because as a bonus you get a method for improving sound and heat insulation (see).

- Many Decoration Materials, used for suspended ceilings, increase the fire safety of the room (plasterboard (see), different kinds metals, glass).
- As strange as it may sound, certain models can even reduce energy consumption for lighting. The reflective properties of polished metals and mirrors make it possible to create a more even distribution of light, which reduces the number of lamps required for a room.
- Due to the distance to the ceiling, there is the possibility of hidden wiring of various communications.
Types of suspended ceilings
All main types of ceiling finishing, depending on the installation method, can be divided into the following conditional groups.
Plasterboard ceilings

This group also includes structures whose cladding uses PVC panels (see) and other similar materials. They are united by the same design of the supporting frame.
Before you make such a ceiling yourself, you need to draw up a clear layout of the frame elements, this will simplify further work.
A similar system is assembled from wooden beam with a cross section of 25x30 mm, or a special metal profile:
- The starting profile UD, has dimensions of 27x28 mm, is mounted on the wall, forming the outline of the future ceiling. Fastening is carried out using dowel nails “quick installation” or simple self-tapping screws, for example, to wooden surfaces.
- The CD profile is the main element of the frame. With its edges it is inserted into the starting profile, and attached to the ceiling using ordinary direct hangers.
The installation step of the supporting profiles is usually 40 or 60 cm, depending on the location of the gypsum board sheet. Beginners, when deciding how to install a suspended ceiling, sometimes try to save on the number of points for attaching the profile to the ceiling; this approach is fundamentally wrong.
The manufacturer clearly indicates the fastening step, no more than 400 mm. Otherwise, such savings can lead to deformation of the entire structure after some time.
The supporting profiles are connected to each other by special jumpers made of the same material. It is better to fasten them together using special connectors, crabs.
Advice! If you have some experience, you can do without them; the profile is simply cut in a certain way and secured with self-tapping screws.

Modular hanging systems
Another great option solving this issue. Particularly suitable for offices, premises with large area, but, when non-standard approach can become a decoration for a residential apartment.
Cassette suspended ceilings
Cassette models are distinguished by the ease of installation of the frame and the variety of materials used.
Unified frame elements simplify the installation process. Basically, in structures of this type, wall (L-shaped) and load-bearing (T-shaped) profiles are used. To simplify fastening, the supporting shelf of the profile is perforated, that is, it is possible to fasten it with adjustable butterfly hangers. The principles of height adjustment are standard; leveling it is not difficult.
The cell size is usually 600x600 or 600x1200 mm, it all depends on the material of the slab and your design desires. Original design create the use of stained glass or metal modules.

Slatted suspended ceilings
Their difference lies in the use decorative elements, the length of which is significantly greater than the width. In principle, this is clear from the name. The slats, which have a slightly rounded cross-section, are fastened to special supporting profiles called stringers.
The advantage of this type of design is the absence of additional fasteners; you will be surprised to learn how to make a ceiling of this design yourself. The decorative strip is installed on the stringer installed according to the technology by lightly pressing, the shaped base of the supporting profile will reliably fix the element of the future ceiling.
Advice! The length of the strip should be several smaller size rooms, literally by 5-10 mm, then it will be easier to install the rail.
Materials used for similar designs, allow you to create ceilings of various configurations, and the bending of the coating allows you to create smooth transition between different levels ceiling.

Lattice suspended ceiling
This is the clearest example of how high-tech ceilings are made. The lattice structure of such a ceiling, covered on the back side with the material you like, will quite pass for a design spaceship or the room of a representative of an extraterrestrial civilization.
Considering that the cell size is relatively small (from 50x50 to 200x200 mm), the result is a rather rich and original structure. The material used is usually decorative polished metals.

Stretch ceilings - modern classics of the genre
One of the most expensive, but also one of the most decent options. Does not require additional load-bearing structures, it is enough to install a special profile along the contour of the ceiling. Special PVC membrane, which is most often used as source material, stretches under the influence of a flow of warm air.
After installation, during the cooling process, the true size of the workpiece is restored, resulting in a perfectly flat surface, the color and texture of which will depend only on your taste.

As a conclusion, I would like to say the following. Today, the use of such ceiling finishing structures is the most acceptable option even for small apartments. Comparing how to make suspended ceilings and how to level out differences between floor slabs that reach 10 cm or more, you understand that the first option is simpler.
And if you have any other questions or lack visual information on the topic, just watch the video below. If in this case a lot of questions arise, entrust this work to a professional.
Considering that you will already be thoroughly savvy, it will not be difficult to control the quality of any stage of work. And a real professional, whose services, we hope, you will resort to, will never allow himself any hack work.
A suspended ceiling is perfect solution for repairs, especially in the case of curved, uneven surfaces. How to make a suspended ceiling with your own hands? This question interests many people. Everyone is wondering how realistically this can be accomplished without a team of professionals. You can still cope if you follow the instructions compiled by specialists. Before starting work, you must plan everything correctly so that it doesn’t turn out that something is missing, or something needs to be done differently.
Suspended ceilings, installation
Tools and materials:
Fasteners are chosen according to your taste and discretion. In this case, they must be stainless.
Preparation
Most First stage in all endeavors it is preparation. You should always do everything conscientiously, so that there are no misunderstandings later. The thing is that previous whitewashing or painting may contain pathogens and fungus. What does the preparation include? This is the removal of all previous layers on the ceiling. If the ceiling is concrete or brick, it is advisable to get to it. To prevent microorganisms and fungus from appearing, antiseptic is applied to the cleaned surface. Before you start installing a suspended ceiling, you need to think about how future electrical wiring and other communications will be routed. If you forget about this, you will still have to remove everything and redo it again.
Marking

Next, after preparation comes marking. It is advisable to draw a drawing in advance where it will be separate place under communications and outline a rough plan for the future ceiling. It is necessary to determine the distance from the floor to the future ceiling. Places for lamps must also be determined. In this case, you will need a level so that the ceiling is not crooked. It is advisable to take a water level. Using a level, mark the corners of the ceiling.
 When the corners are marked according to the level, you can then use painter's thread to outline the entire room around the perimeter. The ceiling profile is placed along the outlined lines. It must be installed with the bottom along the drawn line. Holes for dowels are drilled along the drawn line. In this case, you should walk about half a meter. Dowels are used for concrete or brick walls, if this soft materials, such as drywall, then self-tapping screws of the required length will do. The final holes are made 10-15 cm from the edges to make it more reliable.
Metal scissors will be needed to cut the profiles to the required size. The bars and profiles are attached using a screwdriver. If the walls are uneven, horizontal bending of the horizontal profiles is allowed. Everything along the bottom of the profiles should be level.
Fixing hangers
 Now it's a matter of fixing the suspensions. Suspensions are required to ensure the central part of the ceiling is even. If they are not installed, the center will sag and become uneven. The suspensions are distributed 40 cm from each other. To fix the hangers, you need to make the correct markings using a tape measure or a construction ruler. The marking is done along the future guides, which will be perpendicular.
Installation and installation of rack profiles
When the guides are mounted, rack profiles are installed. Walk strictly at 60 cm. To ensure the appropriate size, the profiles are cut with metal scissors. The size should correspond to the width of the room and remove 1 cm to ensure that no bending occurs. Rack profiles mounted with metal screws. Decide for yourself whether to do it with a screwdriver or a screwdriver.
The resulting structure must be secured with cross-shaped joints and hangers. To ensure that the hangers are installed securely, the antennae are bent. After this, the profile is inserted and secured with metal screws. To prevent the profile from bending, it is necessary to stretch the cord and only after that the frame of the building is finally tightened. After the final installation of the frame, electricity and other necessary cords are installed.
Features of a plasterboard suspended ceiling

If the material for the suspended ceiling is plasterboard, then the sheets are attached to metal screws in a staggered manner. It is definitely recommended to make gaps between the sheets and near the walls. For gaps 2 or 3 mm is enough. This is done primarily so that the ceiling can breathe. Before you start decorating the ceiling, it is treated with putty. First, the putty is applied to the seams and screw heads, and then to the entire ceiling.
Good strength can be given to the ceiling using reinforced mesh. It can also be gypsum or any other mixture. Sometimes it is necessary to shape the drywall. Of course, dry drywall is more difficult to adapt to this, so you can use a wet sponge and a needle roller.
Drywall: pros and cons
pros:
- Environmental friendliness.
- Soundproofing.
- Fire resistance.
- Practicality of the material.
- Variety of design ideas.
- Easy to install.
Minuses:
- Poor moisture resistance.
Do-it-yourself PVC suspended ceiling

In this case, everything also begins with theoretical thinking through the design down to the smallest details, then markings and only then the lathing begins. For the lathing you will need bars measuring 20 by 40 mm. The bars must be fastened to self-tapping screws using a screwdriver or screwdriver. Who has what? There is a main caveat - sensitivity to moisture. If this is a room with high humidity, That wooden blocks possible on metal ones.
 The slats of the future frame must be installed perpendicularly to make it easier to insert PVC panels. Make the distance between the bars about 40 cm. A fastening strip is fixed around the perimeter of the room. The mounting strip is a 90 degree angle made of plastic. It will be very easy to insert a ceiling plinth into such a mounting strip.
When the plank and baseboard are installed, a special recess appears for the panel. Self-tapping screws are screwed into the middle of the plank in increments of 25 cm. The first PVC panels are inserted into the resulting recess. They are also attached with self-tapping screws. When the very first panel is inserted, it will not be difficult to insert the rest. All subsequent panels are attached in the same way with self-tapping screws to a wooden block. In the case of panels, there should be no gaps.
 In places intended for conducting electricity, the frame is reinforced. To do this, you just need to add one additional block. IN in the right place a hole is drilled for the wire. Once the hole is drilled, the panel needs to be removed, wired through, and put back in.
When the time comes to install the last panel, some difficulties sometimes occur. This is primarily due to the fact that the size between the penultimate panel and ceiling plinth does not match standard sizes panels. It's not as scary as it might seem. To do this, it is enough to first cut off the required piece from the panel so that the size matches and it fits in easily.
PVC panels advantages:
- Good resistance to humidity.
- It is not exposed to fungal and other unnecessary formations.
- Durability.
- Easy to install.
- Environmental friendliness.
- Cheapness.
Minuses:
- Flammable When burned, it releases toxic gases.
- There is a possibility of breakdown.
- Panels are often used in non-residential premises, which makes some people feel uncomfortable.
Conclusion
Suspended ceiling - this may sound much scarier than it actually is. Decide for yourself what suits you best. Deciding what material you will work with is also up to you. These will be metal profiles or wooden blocks. The suspended ceiling can be made of plasterboard or PVC panels. Besides this a good option give the apartment a nice fresh look.
One main disadvantage is financial opportunity and time. If you have enough of both, then any dreams will come true.
Advice! If you decide not to use the services of specialized workers, there may be someone you can invite to help. All because it can be very difficult to cope with the task alone. Someone must hand the same panels or drywall to the person at the top and hold it while fastening takes place.
Photos of suspended ceilings


Video - do-it-yourself installation of suspended ceilings
From plasterboard