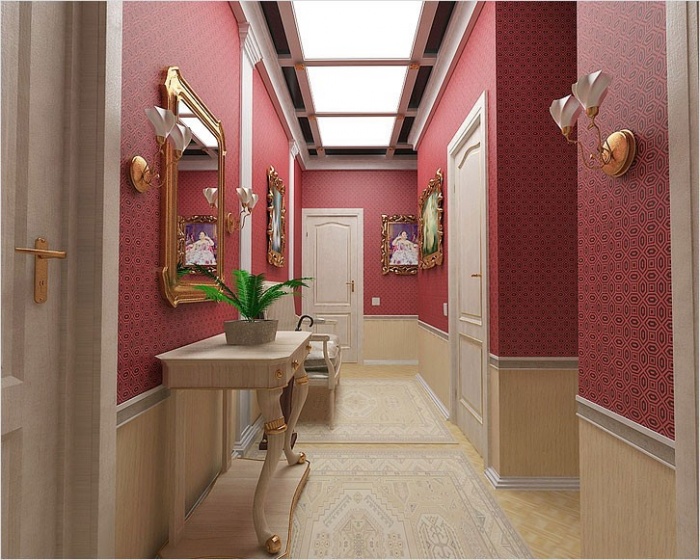
Sometimes the assortment in stores is striking in its monotony. Many apartment owners know that choosing furniture for the hallway is very difficult. If the room is small, then the cabinets simply do not fit into it or fill all the free space. But owners of spacious hallways also find themselves in difficult situation- the presented models do not always meet the needs of the owners and often look big room ridiculous.
If you cannot choose a suitable cabinet, then do not be upset and think about creating perfect furniture for the hallway with your own hands. This approach will help you save money and also get a model that suits you in all respects.
Can a beginner cope with such a task? House master"? Yes, the desire and presence of everyone necessary tools and materials will lead you to a positive result. Of course, it is better for inexperienced craftsmen to stick to the most simple models. But those who have made furniture more than once can create a real work of art.
To make it easier for you to deal with difficult work, we have prepared special instructions, drawings and diagrams.

How to make a hallway with your own hands?
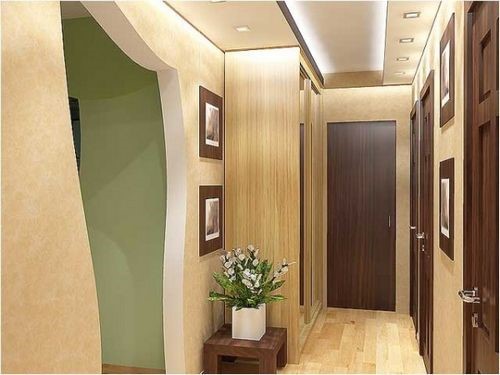
First, you should decide on the model and dimensions. If we are talking about a tiny room, then you should not overload it with furniture - use a standard hallway with a small compartment for outerwear, shoes and necessary things.
In the spacious hallway you can place a spacious wardrobe. If the space allows, then such a closet can easily turn into a real one - the dream of every woman. The costs of such a complex project increase in proportion to the size and content of the cabinet.

You may also want to consider an option that is a compromise between capacity and appearance. So, corner hallways visually look much smaller. But at the same time, the greater depth allows you to place a lot of things inside.
By selecting suitable model, you can start taking measurements and preparing calculations. Also be sure that you have all the tools that professionals use.

Required materials and tools
Prepare in advance:
- saw or jigsaw,
- screwdriver,
- sandpaper,
- construction knife,
- furniture screws,
- roulette,
- corners,
- loops.

You will also need material for making a hallway. We recommend giving you preference to furniture board because it is made from natural ingredients without the use of synthetic resins. Such a shield is completely safe for the health of people living in the house. However, this material has a high cost.
More popular common laminated chipboard. It contains bonding resins, which can negatively affect the occupants of the house if the edges laminated board will not be covered with edging. But at the same time, the material has relatively low price and excellent characteristics (easy to work with).

Do-it-yourself standard hallway: instructions, diagrams and drawings
To make such simple hallway, you will need the following materials:
- loops - 12 pcs.
- furniture panels- 7 pcs (dimensions 1600x400x18 mm),
- piece of plywood 6 mm,
- tongue and groove boards - 2 pcs (dimensions 2000x240x18 mm),
- furniture handles - 6 pcs.,
- three-dimensional rail - 1 piece (dimensions 3000x40x12).

We recommend you start with a pencil case. Its dimensions are 2000x400x400 mm. The corresponding strips are cut out of the furniture sheet, as well as the top cover in an “overlapping” manner. Also you will need two shelves. Assembly is quite simple. The slats are arranged parallel and fastened into the lid using self-tapping screws; shelves are also installed. For strength in the corners, the frame is fixed with corners cut from plywood.
Since two doors located one below the other are much lighter than one, this option is preferable. From the shield you need to cut two identical doors and several internal shelves (optional). Secure the doors on their hinges. You can get by with two for each door, but for reliability and proper weight distribution, we recommend using three.
The dimensions of one cabinet are 400x400x820, and the other - 820x400x490 mm. You can refuse any of them without damaging the design as a whole.

To assemble the first cabinet you will need 2 identical side panels and an internal shelf that will hold the structure together from below. The upper part of the future cabinet narrows greatly, so the lid should be noticeably smaller than the main part. All elements are fastened with self-tapping screws. If desired, you can use furniture dowels. Don't forget to pre-drill the holes and use glue.
A door for the bedside table is cut out of the shield; it needs to be secured on two hinges. But for the drawer you need runners. We recommend that you purchase necessary elements in a specialty store. You can make them yourself from plywood, but in this case the box will be pulled out rather than rolled out, which will make it much more difficult to use.

Making a second cabinet is very easy. You only need two sides and 2 internal shelves that form the frame. Internal filling This cabinet can be absolutely anything. All parts are attached with self-tapping screws or dowels.
After this, the hallway needs to be assembled. Fasten all the elements together, and then prepare the boards. They should be beautifully located from the edge of the pencil case to the edge of the cabinet, creating the basis for the hanger. Maintain the same spacing when attaching the boards to the underside of the nightstands. To ensure that the upper part of the structure is also strong, fasten the boards with a lath. Place it at such a height that you can later attach coat hooks to the rail. If you wish, you can complement the design with a shelf for hats.
Don't forget to varnish the hallway and attach handles and hooks.

DIY wardrobe: instructions, diagrams and drawings
It's much easier to do than it might seem. But first you need to decide exact value this term. “Sliding wardrobe” involves a special design of doors that move on runners along the cabinet body. It can be either built-in or free-standing.
If you wish, you you can make the cabinet body from plasterboard and thus hide it in a false wall. But we'll consider classic scheme manufacturing a wardrobe with side walls.

This model with dimensions 2020x625x2320 consists of several main parts.
- The side racks should be 2288x625 mm high (in these calculations, the thickness of the sheets of the upper and lower strips is taken into account - 32mm).
- Also large parts are the lower and upper strips: 2020x625 mm.
- Middle vertical racks inextricably linked with the clothes rail. As a rule, it is mounted at a height of 1900 mm, so standard size for them - height 1900 mm, width 525 mm. The remaining 100 mm is a margin for the normal functioning of sliding doors.

The filling of the cabinet can be anything. It all depends on your desires and preferences, but remember that there should be some reserve inside to accommodate mounting systems.
It is best to order all parts from a carpentry workshop. Cut out elements the desired shape even an experienced master cannot always do it at home.
After this you can start assembling the cabinet. For installation, we recommend using not only screws and dowels, but also furniture corners. The rails are installed inside the cabinet in a specially designated area (those 100mm that we left when preparing the parts). After this, you can put the door back in place and use the cabinet.

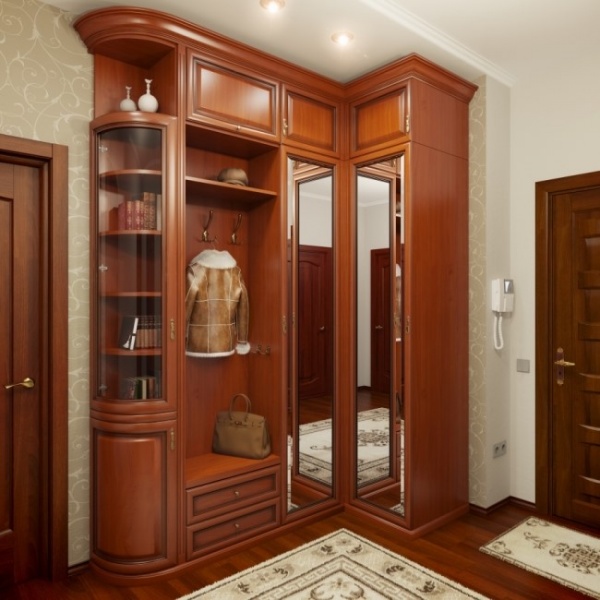
DIY corner hallway: instructions, diagrams and drawings
Problem encountered when creating corner hallway, is that careful calculations are required, the slightest mistake can cost a whole sheet of material. First you need to take measurements and check the walls. If the surface of the walls is curved, then you cannot do without a common frame. Otherwise, the walls themselves can serve as a base to which you can screw shelves. The second option is more economical and simpler, but we will consider a separate cabinet, since it is ideal smooth walls- that's great rarity.

Select suitable drawing , based on the size of the room, the length of the walls and the proximity of doorways. Consider the interior of the cabinet. According to the chosen dimensions, make six main body elements:
- lower and upper bars,
- back walls (2 pcs),
- side walls (you can do without them, but the functionality of the cabinet will decrease).
Once you have the frame assembled, you can begin installing interior shelves, baskets and drawers, as well as hooks and rods.
The corner hallway can be equipped with doors on rollers, turning the structure into corner cupboard-coupe. But budget swing doors will also look good.

How to make a hallway with your own hands: video
The hallway will be incomplete if it does not have good quality spacious closet. There is no need to buy it at all, since the manufacturing process is quite simple.
Spacious closet in the hallway niche
The advantages of this option:
- you can choose any project that best suits the hallway in style and parameters;
- designers will not have to pay for developing an individual project;
- Material costs are minimal.
The main thing is that the furniture in the hallway is roomy, compact, neat, and not pretentious.
Details that need to be thought through when designing.
- must be exact dimensions;
- the presence of a crossbar to place hangers;
- hooks for clothes for every day;
- one or more shelves for hats;
- cabinet for storing shoes.
- mirror;
- small drawers for small items (gloves, scarves, etc.).

Furniture fittings for a closet in the hallway
To assemble a hallway cabinet with your own hands, prepare the following tools and accessories in advance:
- guides for installing drawers;
- tires, if a “coupe” is planned with sliding system;
- hinges and handles for doors;
- clothes hooks;
- the number of nails, screws, self-tapping screws calculated in accordance with the project;
- necessary and wooden fastener: confirmations, dowels for furniture assembly;
- furniture corners (metal, plastic) and plugs;
- can't do without standard set tools (screwdriver, drill, electric jigsaw, saws for wood, key for furniture confirmations, mallet, clamp, square and building level).

DIY cabinet assembly tool
It is better to take inexpensive materials that are easy to process. For example, even experienced manufacturers will not undertake to make furniture from solid wood.
- Chipboard is the most acceptable option for a future DIY product. This material is simply cut and processed. The building material weighs little, so it does not require reinforced fasteners or fittings. An important fact is low cost.

Chipboard cabinet with mirror door
- Plywood is a lightweight, durable and denser material that can be used to create shaped parts, as well as slotted patterns.

Spacious eco-friendly plywood cabinet
- MDF can be subjected to various types of processing (painting, tinting, staining, etc.). It is less durable than plywood.

Sliding wardrobe and cabinet made of MDF in the hallway
- Fibreboard must be purchased for the back walls of the elements.

Fiberboard for the back wall of the closet in the hallway
- Wooden beams for frame construction.

Wooden beam for the frame of a homemade cabinet
- Edged boards (usually pine).

Edged board (pine)
- Drywall for equipment internal space built-in niches.

Homemade plasterboard cabinet in the hallway
You need to take the most responsible approach to taking measurements. If a miscalculation is made, all subsequent work will be difficult or nothing will work out at all. There are various ready-made options with suitable sizes. If the finished drawings are not suitable, and your drawing skills are weak, you need to hire a specialist for this stage who will think through the project with the right sizes. It is better to cut materials and make edging of end parts in the store where it is sold construction material. The store's services are inexpensive, but it saves a lot of time.
Assembling a wardrobe
This model is built-in; it is easier to manufacture, since the parts do not need to be calculated and cut out. The complexity of this option is that it is necessary to take into account the features of the walls and floors.
The ideal solution for such furniture would be a niche with a sliding system, equipped with several shelves and a crossbar for hangers. The installation of the shutters in this case is the same as for interior doors (the wall and floor are involved).
Very often a wardrobe is made in the corner of a room. This model does not have one side or back wall (and in some cases, no floor or ceiling).
The base consists of wooden frame, which consists of a pair of frames (front and side), assembled with screws or nails. If the project provides for the arrangement of shelves and partitions, transverse slats must be secured to the frames in the designated places.
Instructions
Mark the walls, floor, and ceiling in the places where the frame will be installed, drill holes for fasteners. It is recommended to also mark the locations of the paper clips.

We make markings for the shelves and install corners
Secure the front frame to the wall and ceiling using dowels. Check its verticality using a level.

We lay and fasten the shelves on the corners, install a vertical panel to the shelves inside the cabinet
Install the side frame.
In the resulting niche, wooden slats intended for shelves are attached to the walls (cut the shelves from plywood or chipboard). You don’t have to fasten the shelves by laying them on slats or fixing them with nails.

We lay a horizontal shelf on top of our structure.
The side is sheathed with plasterboard or laminated chipboard. Drywall is pasted over or painted. Side part, in which the crossbar with hangers will be located, must be durable (chipboard, plywood, but not drywall).

We prepare panels for front side cabinet

Attach the bottom and top panels
The final stage is the installation of sliding doors. The upper and lower guides are mounted on the ceiling and floor, respectively.

Installing door guides
It is very important to keep the dimensions exactly. First they try to install a mock-up of the future door. Take any part whose height is the same as that of the door and install it inside the top rail. Check the verticality value and mark the area where the lower guide will be attached. The door must first be inserted, slightly pressing on the upper rollers, and then into the lower tire. To correct the position door leaf adjusting screws are used. Right installed door moves smoothly, unhindered.

We insert the doors into the guides, snap the latches and adjust the mechanisms in the roller systems
The above example is suitable for a simple design small sizes, consisting of two halves. With a good hallway area, it is possible to manufacture a more spacious model. Then a frame made of bars will not work. It is better to make a base from chipboard, and “fasten” its elements using a common floor and ceiling. This method will allow you to place in a niche, in addition to shelves and a hanging rod, also boxes for small items and other parts.
Such a product will be assembled as a construction set for dowels and confirmations. For this fitting, you must first drill holes. All this must be done especially carefully and patiently. All fastenings for corners are kept in a clamp for 24 hours.

Built-in two-door wardrobe in the hallway
Assembling a corner cabinet
It will not be difficult to make a corner module with your own hands. For stability, modules are often made of durable solid materials (chipboard, plywood). Such products come in several forms:
- triangle;
- L-shaped;
- trapezoid;
- five-walled.

Basic configurations of corner cabinets
The most suitable for a hallway is a five-wall one.

Built-in five-wall corner wardrobe

Detailed diagram of the corner cabinet assembly


Instructions for self-assembly of a corner cabinet
Assembling a shoe cabinet

Convenient DIY shoe cabinet
This is the simplest process, because everything that is needed for the work is sold at the building materials store.

The design includes: an outer frame, several shelves with partitions. The width of the structure depends on maximum size shoes, and the height depends on the number of shelves.

Addition of facades and gaps of shoe cabinets
A good solution would be to connect shoe cabinet with elements of a chest of drawers. Or place it in a closet or corner closet that has open fronts.
There is a lot of different information on the Internet about how to make a cabinet in the hallway with your own hands. Therefore, by examining all available data, the most appropriate model can be successfully constructed.
Video: DIY wardrobe in the hallway
For the hallway, you can assemble different furniture yourself. It will not only be functional, but also attractive. Cabinets and cabinets will fully correspond to the style of the room and its parameters. You can put together a stylish set yourself. for the hallway it is usually made of solid wood or special furniture panels, which can be ordered at any factory according to the provided project. The surface of the shields will be laminated required color. All that remains is to assemble the furniture according to the diagram and install it in the intended place. The hallway will be updated, and you will have comfortable furniture.
Furniture in the hallway is a mandatory attribute, because it is where shoes, clothes and other accessories are stored.
Materials for work
To assemble furniture for the corridor with your own hands, you will first have to choose an assembly scheme. Today there are many such schemes, so it will not be difficult to choose a set not only for a spacious hallway, but also for a small corridor in a city apartment.
The following materials are used for assembly:
- boards for furniture walls, for internal partitions;
- back walls made of laminated plywood;
- boards for shelves;
- doors;
- for a wall with hooks you need to take metal pipes under the frame, cladding boards, hooks;
- accessories (hinges, handles, slides);
- fastening elements (screws, nails, dowels).
Tools for work:

Figure 1. Drawing of a double-leaf cabinet for the hallway.
- saw, jigsaw, hacksaw for slicing individual elements for cabinets, cabinets;
- plane;
- chisel;
- drill with a set of drills for wood, a crown cutter;
- screwdriver;
- welding machine, if it is necessary to assemble a frame for the wall;
- hammer.
The assembly process depends entirely on which project is selected. The simplest, designed for small room, is a set consisting of a small wall with hooks, a “pencil case” type cabinet, and a double-leaf cabinet above which a mirror can be mounted. This set will look great even in a small room.
Return to contents
Assembling a double-leaf cabinet
A double-leaf cabinet for the hallway is also necessary; it usually holds most of the things, shoes, bags. Any scheme can be used for assembly. One of them is shown in Fig. 1. It is important that the piece of furniture is as comfortable as possible.
You can assemble a cabinet with two doors:
- height – 400 mm;
- depth – 490 mm;
- length – 820 mm.
You need to start by assembling the frame. First, the side walls, a partition in the middle of the cabinet and the top lid are attached to the bottom. If for two individual parts If more partitions will be used, then it is necessary to immediately put boards under them, since this will be problematic later. A plywood sheet with a laminated surface is nailed to the back. For fastening, screws and wooden dowels are used. If necessary, drawers are installed for the cabinet. The doors are installed last, but for them you must first provide hinges of the selected type.
Return to contents
Installation of a cabinet model "pencil case"

Figure 2. Drawing of a wall with hangers for the hallway.
One of the main pieces of furniture that is ideal for a hallway is a pencil case. This is a tall wardrobe, quite narrow, it can only include horizontal shelves for storing things. The second option is a design that has a top shelf and drawers, and the main space is given to a hanging bar.
Usually cabinets are placed near large cabinets. Ideal sizes:
- height – 2000 mm;
- width – 400 mm;
- depth – 400 mm.
The cabinet can be divided into 2 compartments, with a partition in the center. In one part of it there is usually a row of horizontal shelves, and in the other there are hangers for clothes. First you need to assemble the body for the future cabinet. To do this, connect the bottom, 2 walls and the lid with furniture screws. A partition is installed immediately, as this will be problematic later. For additional fastening, wooden dowels are used; they are coated with glue.
The next step is to attach the back wall; furniture nails are used for installation. Next, markings are made for the shelves, holes are drilled for special fasteners, the shelves themselves are installed, and a bar is hung under the hangers. If necessary, installation is carried out drawers. When the cabinet is completely assembled, fix door hinges. To install them, holes are made with a milling cutter about half the size of the wood. When the cabinet is ready, handles, locks and other decorative fittings are attached.
Return to contents
Installing a wall with hangers

Next, a wall is placed and hangers will be attached to it. It is mounted next to the front door. An example can be seen in Fig. 2. It is best to place low cabinets for shoes under the wall. For the manufacture of walls they are used regular boards, their number depends on the width future design, required quantity hooks Usually one hook is attached to 1 board of small width. The boards are connected to each other by a metal frame.
The first to gather metal carcass. On top bar A wall mounting system is provided. Loops are usually used for this. The structure will be fixed to the wall with anchors. If necessary, a frame for a horizontal shelf is mounted above the wall. After assembling the frame, you can begin finishing it. Typically, pipes are painted with anti-corrosion paint, the color of which matches the main shade of the entire kit.
The boards for the wall are selected to be the same size; the top ones should have a length equal to the width of the wall itself. The boards are processed and sanded if necessary. After this, holes are made in them for fastening to the frame. The boards are designed in full accordance with the appearance of the rest of the furnishings. The coat hooks are attached last. They can be different, but it is better to choose those that will fit the handles and hinges.
The situation is different with the hallway, because it is what everyone sees first when they come to the apartment. And that’s why you can try to do what you want with your own hands. Just remember about designers - they often make exclusive things themselves. It turns out no worse, and moreover, absolutely unique. So why not try furnishing the hallway yourself?
When it comes to talking about a homemade hallway, you should understand that we are not just talking about wallpapering without the help of specialists.

You can create a lot with your own hands:
- Furniture;
- Multi-level ceiling;
- Decor and accessories.
First of all, do the finishing yourself - it’s the easiest thing. To the very simple options finishing can include painting and wallpapering. Can choose interesting option: wallpaper with photo printing. There is no need for huge drawings in the hallway, but an original abstract pattern would be very appropriate.
Since the hallway, as a rule, is not too large, the current color scheme is light. This also applies to furniture.
You can use warm, contrasting shades to highlight individual parts of the room or the pieces of furniture themselves. You can also make the decor yourself. Original upholstery of the banquettes, painted or dressed in knitted covers pots of flowers, a mirror that is decorated with shells or artificial flowers, and, of course, woven rugs at the door - all this is very easy to make, does not require large investments and brings pleasure in the process of making.
How to make a corridor in a house if you mess with self-assembly Don’t want furniture at all, especially if there is already furniture in the hallway? It’s not for nothing that they say that changes can completely change the perception of a room. This also applies to the hallway - it is not necessary to purchase new furniture, if you can apply some techniques.

For example:
- Rearrangement;
- Accessories;
- Change of color.
The main technique is rearranging furniture. For example, you can abandon the closet completely and replace it with vintage hooks for the wall and an original hat. Will take a place at the door big plant in a pot, and you can put a shoe rack next to it. If it is strong enough, then you can place a seat on top, then you can sit on it and put on your shoes comfortably.
For a hallway, a mirror is absolutely necessary, and preferably a large one. You can spice up your mirror by decorating the frame. And if it is built into the closet, then you can use various stickers. Among the most popular - floral patterns and window imitation.
The furniture itself can be repainted in a color that suits the style. A wooden furniture can be coated with colored varnish to highlight the texture of the wood, or artificially aged.
Ideas on how to make an original hallway with your own hands
Modern apartments or private houses most often have more spacious dimensions, which can accommodate an acceptable set of furniture. You can even put small sofa with leather upholstery - such furniture is easy to wash and clean.

But, if the hallway is still small, then you can pay attention to other techniques:
- Modular furniture;
- Narrow designs;
- Using walls instead of cabinets.
Modular furniture makes it easy to rearrange and combine all items at your discretion. A corner closet with mezzanines will be very helpful - a lot of things can fit there.
There are also narrow options set of furniture. If this is not critical for a cabinet or hangers, then for storing shoes or a closet, this design will not work - there is too little space.
And finally, the walls themselves. You can place hooks and fabric organizers for shoes and accessories on them.
Examples of how to furnish a hallway in an apartment: photos
Since the hallway is the place where inevitably there is the most dirt and dust, the materials must be chosen so that it can be easily washed. Some people light shades do not seem too interesting, and therefore designers advise diluting them with bright shades.

Namely:
- In accessories;
- In furniture upholstery;
- In highlighting some parts of the interior.
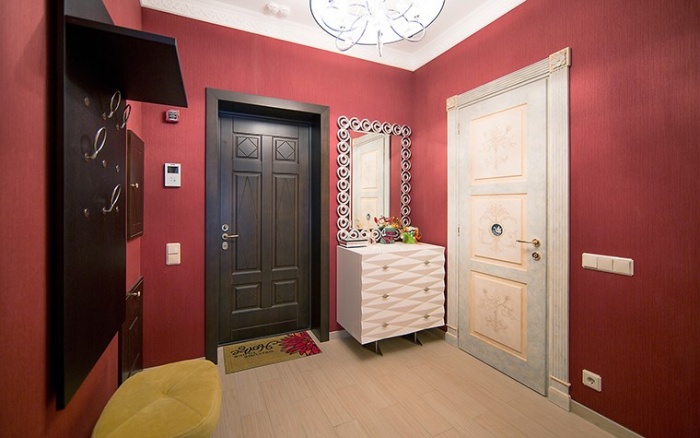
Very often the front door is painted in a bright color - then the interior looks bright and lively. But the main accents are in the accessories - bright vases, textiles, figurines, watches. This list can be continued for a very long time, the main thing is not to overload the hallway with these details.
Very important role furniture upholstery plays a role when it comes to a pair of chairs and a shoe rack. You can choose absolutely any material. The only thing that the hallway does not tolerate are carpets and carpeted surfaces.
How to arrange a hallway in an apartment: photos and examples
It's worth returning to the furniture. Correct arrangement plays a very important role.
To do this you need to know a few rules:
- Do not clutter the space near the door;
- It is better to move the closet deeper into the room;
- Instead of a cabinet, you can use a closed shoe rack;
- Corner furniture saves space.

Most pieces of furniture for the hallway are easy to make with your own hands. To begin with, you need to decide on the materials.
The championship is held, of course, by wooden configurations. They are quite durable, do not deteriorate, look aesthetically pleasing, and can be easily repainted and decorated.
Wooden furniture is not so easy to purchase, as it is very, very expensive. Another thing is specialized furniture panels, as well as chipboard sheets. The former are also not very cheap, and they are not easy to find, but the latter are common and are reasonably priced.
From additional tools you will need:
- Loops and corners.
- Tape measure and pencil.
- Furniture screws.
- Sharp knife.
- Sandpaper.
- Jigsaw or saw.
- Screwdriver or screwdriver.
- Finishing materials, if needed.
Custom hallway with your own hands: drawings and diagrams
You need to start the work yourself with a simple cabinet. It is necessary to determine the height, and cut out 2 identical sidewalls from the shield at this height. If there is a plinth, then a small corner is cut off on one side. You need to do the same on top so that the lid is narrower. Then fasten the sidewalls with two bases, and the lower one should not be near the floor, but higher, then the gap can be masked with a dowel. The back panel can be made of plywood.

The door should be such that the box fits above it. Make holes and attach the door with hinges. Make runners for the box from plywood. Make the bottom part out of plywood, and the front should be a little larger. Cut out the lid and place it on glue. Secure the box with self-tapping screws.
Making furniture will require:
- Reiki;
- Plywood;
- Pens;
- Dowels made of wood.
A cabinet with two doors is made differently. You need to assemble a box of four bases, no lower than a one-door cabinet. Fasten with self-tapping screws. Inside, make runners for drawers and mounts for shelves if desired. The back panel should be made of plywood. Cut out the doors and attach them with hinges. Secure both lids with dowels.
The cabinet needs 2 large sides. Cut out the bottom, base (top) and central shelf for them. Cut out 2 identical doors. Attach to the cabinet. The back wall is also made of plywood. Arrange drawers and shelves inside as desired.
DIY hallway renovation (video)
Cut several identical boards for the hanger and fasten them with a horizontal strip. Attach a shelf for hats on top along the entire width. Attach the hooks and hang them on the wall with self-tapping screws. Cover everything with varnish and decorate as desired. Go for it!
It’s rare to see a large, regular-shaped hallway in a city apartment. Most often this is a small room or long corridor, where no more than two people can fit. But the hallway is the first thing people see when entering the house. In addition, it should also be functional, since outerwear and shoes for all seasons are stored here.
When starting to renovate the hallway, it is worth remembering that there are few rooms in the apartment with an equally aggressive environment. It is the hallway that takes on all possible hardships associated with the constant dirt that is brought in from the street.
Design secrets for visual expansion

But even the smallest room can be made stylish and comfortable with the help of some design solutions. They will help to realize almost any fantasy, turning the disadvantages of the room into advantages. Let's look at a few secrets for visually enlarging a room:

Advice ! If you direct the light to the ceiling, this will give the effect of height, directing the light onto narrow walls will expand the room.
Types of hallways

- Square.
- Corridor.
- Coupe.
- Corner.
- With branches.
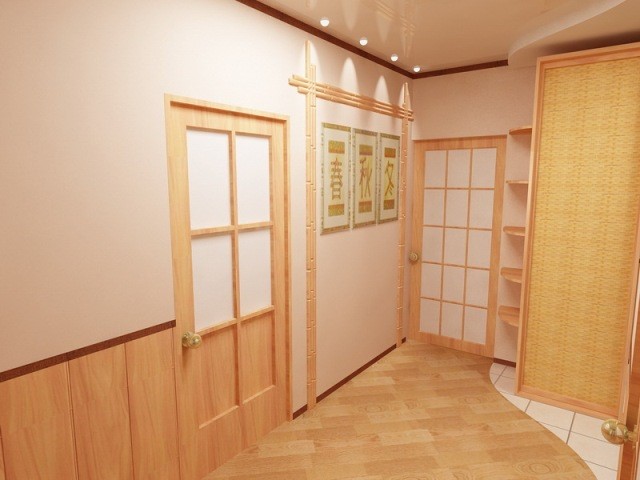
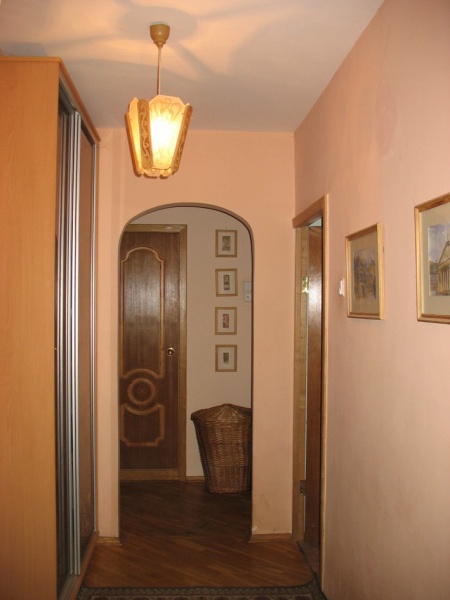
Hallway square It is a small room, most often with one solid wall, while the rest have doors to other rooms and a bathroom. In such a room there are no other options for arranging furniture, only along a solid wall. Light colors, playing with light and installing doors and arches will help to expand such a hallway. For example, the doors to the bathroom should not be highlighted; let them be the same color as the walls. You can install doors with colored stained glass, mirrors, or even transparent doors in the rooms. Arched openings can be made into rooms such as a kitchen or living room.
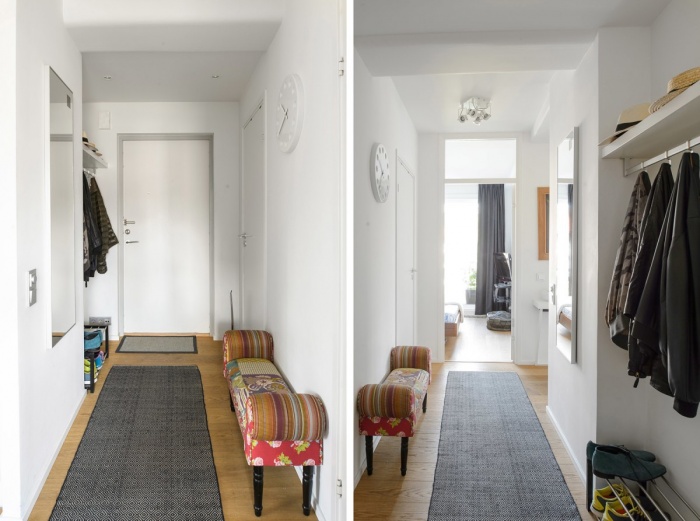
Hallway-corridor usually very narrow. Furniture can only be installed along one wall. It is advisable to always divide a narrow and usually long hallway into certain zones, using arches or color palette. Separately allocate space for hangers for outerwear, separate the front door, and organize an area for mirrors. Thanks to such techniques, you can optimize the hallway space. Near front door ideal option There will be a tiled floor, and then you can cover it with another material, for example, linoleum or laminate, laying it across the room. Longitudinal walls are worth making light colors, and the end ones are darker. And most importantly, mirrors; they will help expand a narrow room if hung on long walls.
Hallway-compartment, this is either square room with a corridor extending from it, either in the form of a winding corridor, or several square corridors diverging into different rooms. In such a room it is not easy to place the necessary furniture; it is worth dividing the hallway into zones.

Corner hallway consists mainly of one corner and goes straight into another room. It can be separated by zoning the floor and ceiling or light. You can also install a partition, preferably from light translucent materials.
Hallway with branches, usually a square room with several corridors extending from it in different directions or a branching corridor. The main furniture is installed near the front door, decorating the branches to your taste.

Advice ! A floor covering, the same as, for example, in the kitchen with a separated arch, will help to visually enlarge the hallway.
Decorating a small hallway

It’s not difficult to design a small hallway with your own hands. The main thing is that you initially need to decide how much the repair will cost. But don't save too much if you want to original premises, revealing the character of the owner. Considering the design secrets, according to visual increase hallway, you can start choosing finishing materials for the room.
Wall decoration

When choosing a finishing material for the walls in the hallway, you need to take into account that this is not only the dirtiest room in the house, but also a place where bulky items are sometimes stored. For example, a stroller or a bicycle. When getting ready in the morning, household members often bump into each other and wipe down the walls. This makes the hallway the most frequently cleaned room.
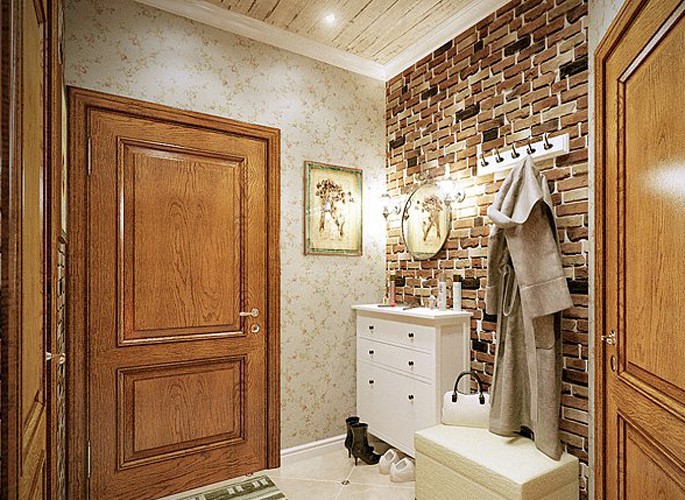
Wallpaper for the hallway should be washable or moisture resistant. In the presence of large selection in the market, this will not be a big problem. When choosing wallpaper, you should think about their colors. For small rooms, choose light shades with a small pattern. It must be remembered that a vertical pattern will make the room taller, and a horizontal pattern will expand it. Wallpaper can be combined with other materials such as wooden panels or . If the ceilings are high, you can separate the trim, mount panels from below, and paste wallpaper on top. Correct inserts made of stone or mirrors will help not only decorate the hallway, but also visually expand it.
Plastic panels are very easy to clean, they are not afraid of moisture and tolerate temperature changes well. The choice of texture and color is very large and can be chosen to suit every taste. But accidentally hitting them with a sharp heel or corner can damage them.

Wood panels are more durable and considering modern technologies, there will be no problems with their choice. The main thing is to purchase ones that are resistant to moisture, otherwise you will need to spend money on special impregnation or varnish to process them.
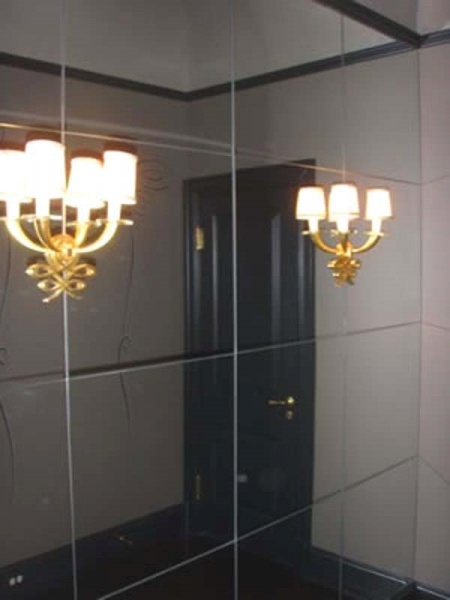
Tiles of large and small sizes will look cold in the hallway, but it’s worth diluting it with others finishing materials and it will help visually expand the room. If this mirror tiles, then it will match the theme on the wide walls, making the room much larger.
Stone, both natural and decorative, should not completely cover the walls. It could be original finish doorways or angles, at high ceilings You can cover the lower half of the walls with stone.
Plastering or painting the walls in the hallway is the most cheap way finishing. A variety of plaster and paint, them, will help you create your own unique design.
Choosing flooring
The floor in the hallway should also be treated more carefully, due to constant dirt and lovers of stiletto heels.
Advice ! Floor coverings in the hallway can be combined. It looks very impressive and stylish, and will also visually expand the room.

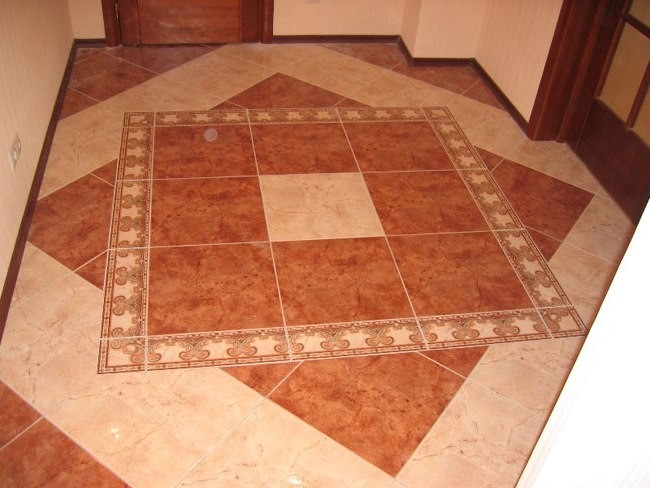
Tiles or porcelain tiles are considered the most durable floor covering. They are easy to wash and can withstand heavy loads. It is better to choose tiles with roughness to prevent slipping.
Linoleum has a wide choice of colors, is easy to care for, and is not afraid of moisture. When choosing linoleum, you need to make sure that it is for high-traffic areas.

Wooden flooring is rare for a hallway because it quickly absorbs moisture and is easy to scratch. If desired, you can further process it, but it will take more time.

Laminate is a good substitute for wood, it is moisture resistant and difficult to damage. Laminate is considered the most popular flooring for hallways.
Ceiling in the hallway
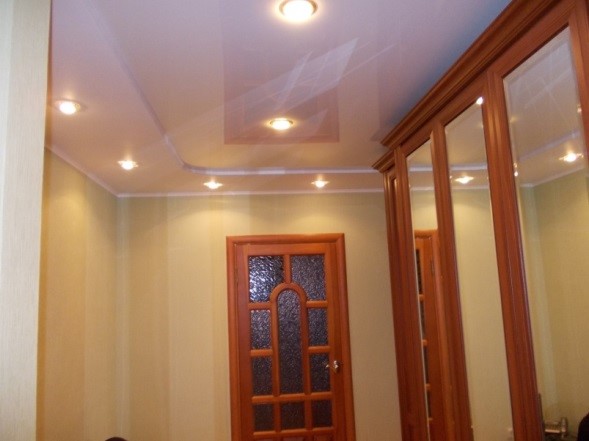
The main thing for the ceiling in a small hallway is not to be too voluminous. Won't fit here multi-level ceilings. It would be good if they had a reflective effect. Also, you should not hang a chandelier in the hallway, Spotlights and flat lampshades are more suitable here.

- Stretch ceiling a good option for the hallway. It can be equipped with a backlight and is easy to use.
- Painting or whitewashing is the most profitable option in terms of finances. The ceiling does not require any maintenance and is easy to update or repaint if you want a different color.
- Panels are a good choice for a hallway ceiling, but do not forget that if the ceilings are low, the panels will steal a few centimeters and the ceiling will be even lower.
Conclusion
Even if the hallway is small in size, this is not a reason to be upset. Knowing the secrets of visually expanding space, it’s quite easy to create individual design a small hallway with your own hands that will delight long years both the owners and their guests.