A lot depends on the quality of the floor subfloor. These are both the service life of the finishing coating and overall quality floor. Modern construction technologies allow you to create unique floors, but the traditional subfloor on joists is still popular. This technology has already been tested by time.
Everything you need to know about lags
Lags are called blocks of wood or polymer materials. They can have different sizes and different shapes. The logs are located under the subfloor covering. Among the advantages of this solution are:
- High heat and sound insulation properties;
- Uniform load distribution;
- Wide range of possibilities for leveling surfaces;
- A ventilated subfloor, in the cavity of which various communications can be located;
- Strength – the subfloor on joists can withstand static and dynamic loads of up to 5 tons per 1 sq/m;
- Ease of installation;
- Affordable price.
Logs can be installed directly on the ground, wooden or concrete floors of buildings.

Classic flooring schemes
Floors can be either with or without underground space. Those structures where there is no underground floor are called cold, but there are technologies that allow such floors to be insulated.
Subfloors with crawl space come in more varieties. So, there are cold and heat-insulated ones. The insulated floor is equipped with a layer thermal insulation material between joists or between supports.
Installation of a simple cold floor on the ground
This scheme provides that the logs will be mounted on a dry soil foundation. The first step is to remove all the fertile soil layer. Then the surface must be compacted with special care. Next, the surface is covered with sifted sand. If there is no sand, then you can use crushed stone or even construction waste filled with sand.

The resulting pillow must also be compacted. To do this, it is recommended to use a vibrating plate, but you can also make hand tool from scrap materials. It is a fairly weighty deck, which is equipped with handles.
Then another layer of backfill is made. Here they already use calcined sand, slag, or dense clay. This layer will become the main one in the construction of subfloors. Already on this basis the logs will be installed. Therefore, such a base should not create conditions for wood rotting. As for the thickness of the pillow, it should be 3 times greater than the thickness of the selected block.

If slag, rather than sand, is used for the cushion, it should be delivered to the site about a year before the start of work on the construction of the base. This material needs to rest.
IN last layer install wooden logs. The top line of the block should be flush with the plane of the base. Before installing wood in the ground, it is recommended to treat it with antiseptic materials.
The logs are laid at some distance from each other. This distance depends on the width of the boards with which the subfloor will subsequently be covered. So, for installing a subfloor in wooden buildings, where work is completed with flooring based on tongue and groove boards, the optimal distance is 60 cm.

Insulated floors
The design of an insulated subfloor on joists is slightly different from the design of a cold base.
So, the bottom of the pit, which resulted from the removal of the fertile layer of soil, is carefully compacted and then covered with waterproofing material. Next, add a multi-layer pillow. First of all, crushed stone is poured. Its thickness should be no more than 8 cm. This layer is also compacted, and then filled with lime milk.

Afterwards, this layer is covered with roofing felt, and then fiberboard sheets 30 mm thick are laid on top. Then expanded clay with a small or medium fraction is poured. The layer should also be at least 8 cm.
The insulating base is filled with “lean” concrete, where the sand content is increased. After the solution has hardened, the area is additionally covered with sand, and then a scheme for arranging a conventional cold floor is used.
Installation of logs for different types of floors
If the floor is wooden, usually the beams are not perfectly even. The installation of a subfloor can be difficult, because when installing joists on such floors, it is not possible to obtain the most even horizontal surface. The joists should be strengthened on the sides of the beams.

The main advantage of this method is that there is no need for spacers that adjust the height. Fastening is carried out using partial screws, where the length of the screw is less than the length of the log. The diameter of the screw must be at least 6 mm.
When the beams are located too far from each other, a second syllable is laid perpendicular to the first syllable, but closer.
If the floors are concrete, then it should be taken into account that in this case it is necessary to take care of good waterproofing, otherwise the entire structure will be constantly damp. In this case, a different subfloor device is used.

When laying floors Special attention is given to waterproofing, as well as heat and sound insulation. also in mandatory A wet or dry screed is required. And only after all this, the logs are laid and the finished floor is laid.
For logs, you should not choose short beams. If the length is not enough, then the parts are joined to each other end-to-end. The bars are laid directly on the screed.

On soft insulation Installation of logs is not recommended. In such a situation, the bars will “float”, which can lead to destruction of the finish coating. If it's warm and soundproofing materials allow, then the logs must be positioned so that the insulating materials are located between the two bars.
Laying the joists correctly
Before starting work, the base must be thoroughly cleaned and treated with primers. Wooden parts dried and treated with an antiseptic. It could be bitumen. The soundproofing layer can be made of slag or sand.
 Wood before and after treatment with an antiseptic.
 It is better to install the logs from the window. The gap between the wall is made up to 40 cm. After the logs are laid, the plane must be checked against the rule. If you don’t see any gaps, it means everything was done efficiently.
Promising technology - adjustable logs
Gradually, new construction technologies reached these traditional floors. Thus, the installation of a subfloor using this method involves ready-made beams with threaded holes. They add reliability to the design.

In addition, such logs have an adjustment function. This can be done by rotating special bolts, which allows you to easily change the height of the bar at any time. When the adjustment is completed, the excess part of the bolt can simply be cut off.
Wooden floor with joists
Wood is one of the best materials for arranging subfloors. A floor laid in accordance with all requirements has a long service life and does not require special care. Subfloor made of wood or plywood - an easy opportunity to level a crooked base, high thermal insulation characteristics, quick installation, cost-effectiveness and availability.
Plywood, OSB boards or chipboard sheets are best suited for constructing subfloors. Ideally, the slabs will have a tongue-and-groove end, and the thickness of the slab will be about 20 mm. It is also allowed that sheet materials will be laid in two layers.

Laying the sheets begins from the corner of the room. The first row should be positioned with the tongue against the wall. This leaves a gap between the board and the wall. It must be at least 10 mm. This is the so-called compensation gap. The next row is laid offset by two joists. If the boards do not fit tightly together, you need to adjust them by lightly tapping them with a hammer on the end of the board or sheet.
For fastening, lathing is used using transverse bars. The flooring is secured with self-tapping screws. Joints sheet materials must be located on the central axis of the beam.
Finishing
When installing subfloors, it is important to get rid of small differences in heights and various defects boards or plywood. To do this, the surface is ground or scraped.
Then the floors need to be soaked oil impregnation, parquet varnish or cover with wax mastic.
That's all there is to say about subfloors. It's simple and affordable way, which will last for many years. You can watch the video to see how the subfloor is installed on joists. The video clearly shows all stages of work on different types foundations and ceilings.
Subfloors in wooden buildings have their own design nuances and can be laid in several ways, depending on the architectural characteristics of the buildings.
| Type of subfloors | Technical features and brief characteristics |
|---|---|
| More often used as bases for finishing coatings: glued boards, piece natural parquet, different kinds laminate, linoleum, soft coverings. The main requirements for such structures are a flat and solid base that can withstand maximum design loads. For production, OSB boards, plywood, and planed boards are used. To protect the structure from the harmful effects of moisture, traditional or modern materials are used. Such floors are recommended for use during the construction of interfloor ceilings. |
| The floors are installed under the joists on special cranial blocks. There is a space between the joists and the finished floor into which insulation can be installed. Small pieces and waste are used for production, which makes it possible to reduce financial losses. |
| The most economical and reliable method construction of rough floors. Taking into account the mounting location, the bases can be insulated or under finishing flooring. Distance between load-bearing beams selected depending on the performance characteristics of the finishing coating. |


When choosing a specific option, you need to take into account the purpose of the building, number of storeys, materials and technologies used.
General requirements for subfloors
Regardless of the type of structure, building codes require the following activities.
Fire protection. All fire-retardant materials are divided into two groups according to their resistance to fire. The first group is used for wooden houses with stove heating. Available in implementation a large assortment solutions, impregnation is done pneumatic spray gun or paint brushes. Required condition– lumber must be dry. The number of layers is determined taking into account the purpose of the wood.

Protection from putrefactive processes and biological damage to wood. It is recommended to carry out work using effective antiseptics; all of them reliably protect lumber from premature destruction due to high humidity. The disadvantage of such materials is the release of chemical compounds into the air. True, the concentration is considered safe for residents. For those who do not want to risk their health, there is completely safe way lumber protection – impregnation with natural technical oils.

Important. All impregnations and treatments must be carried out before laying the lumber, and not after. One more nuance - great attention should be paid to the ends, they are most susceptible to moisture. Fresh dust and ends are subject to additional impregnation.
Mandatory presence of vents to ensure natural ventilation wooden structures. No impregnation will save the wood if it is not constantly ventilated. The parameters of the vents are specified in SNiP 01/31/2003; the diameter and location of the holes depends on the area and height of the underground. Protection of the underground from penetration of rodents into the openings is done with metal gratings; the geometry of the vents is not regulated.

Practical advice. Be sure to check the effectiveness of natural ventilation; if it is not there, the subfloors will not last the expected amount of time. To check, you can use smoke or open fire. If there is no visible air flow, measures should be taken immediately to improve the performance of natural ventilation.
Fulfillment of requirements building codes guarantees long-term and safe operation of floor coverings. As an example, we will look at two methods for arranging subfloors.
Subfloors on load-bearing wooden beams
The beams are laid on the foundation strip or strapping beam. There is no fundamental difference between the two methods; it all depends on the chosen method of building a house. A prerequisite is that between wooden structures and concrete elements there must be reliable waterproofing, most often two layers of roofing material are used. This is the most cheap material, providing reliable water protection. In addition, the timber must be treated with any antiseptics.

The beam must lie strictly in one plane; installation is done using a level. On both sides round logs needs to be chopped off with an axe.
Advice. If you have no experience working with an ax, it is better to purchase ready material. But keep in mind that in terms of strength it will be inferior to hewn round timber, but in cost it is significantly higher. The subfloor is attached to the lower base of the beams; the flooring will be made of OSB. But if you wish, you can use any available materials, and not just wooden ones.
Step 1. Unscrew the beam fastenings. The beams are screwed to the frame using metal corners and long self-tapping screws. The subfloor is installed only on pre-exposed beams; therefore, their dismantling is required.

Step 2. Carefully remove the beam from the mounting slot and turn it face down.


Step 3. Attach the OSB strip to the bottom of the beam with self-tapping screws or ordinary nails. The width of the strip should be 10–15 cm greater than the width of the flat area of the beam.

Important. The length of the screws should be ≈ 70% greater than the thickness of the slab, otherwise the fixation will not be reliable. This rule applies to all cases of fixing structures to each other.
When tightening the screws, press the drill with great force; the plate should not lift. When screwing in, inexperienced builders do not press the screws with sufficient force; the screw rotates slightly in the slab, causing a gap to appear between it and the beam. This greatly worsens the parameters of the subfloor.

Using the same technology, attach the sheets to all beams. If you do not have OSB, then you can use low-grade boards, including unedged ones. The main condition is that the bark must be removed. The thickness of the boards is ≈ 10–20 mm, the width does not matter. The subfloor has no noticeable loads; its task is to serve as a basis for laying insulation materials, and they are light in weight.
Step 4. Place all dismantled beams in place, secure them with metal squares and self-tapping screws. Check the position again and, if necessary, adjust them with shims of different thicknesses. Never use lumber for underlays; they will certainly sag over time, which will disrupt the horizontality of the final floor covering. For linings, use durable, moisture-resistant ones. Construction Materials. Another important condition– the dimensions must be equal to or larger than the beam areas, which will allow the loads to be evenly distributed.

Step 5. Place the pieces of OSB in the prepared areas. When preparing sheets, there is no need to take exact measurements; small gaps not only simplify the installation process, but also improve the natural ventilation of the subfloor. In this way, by the way, you can save lumber.


Practical advice. Never walk on subfloor, it is not designed to carry that much weight. During installation last row you should walk on the beams. If you wish, you can foam the joints of sheets and beams, but this operation is not considered mandatory. We have already mentioned that wood must be ventilated. As for the increase in heat losses, it is insignificant.

Step 6. Lay a vapor barrier, never use ordinary polyethylene film for this purpose high pressure. The fact is that it does not allow steam to pass through, and as a result, water will always accumulate in the heat insulator; it is in the insulation layer that the condensation point is located. High humidity significantly reduces the heat-saving properties of mineral wool and has a very negative effect on wooden structures. Moisture must be constantly removed from the insulating layer, and only modern membranes can provide this.

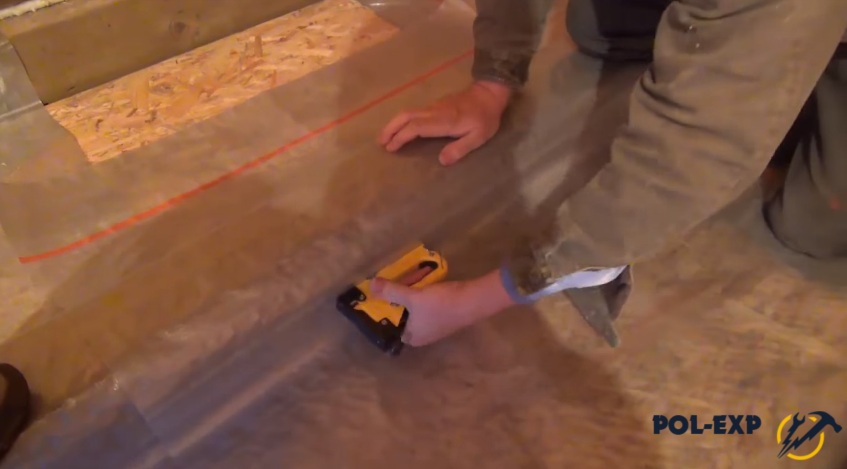
Fix the vapor barrier to the beams with a stapler, the overlap of the layers is at least 10 cm, the joints should be carefully sealed with tape.
Step 7 Lay a layer of thermal insulation. For these purposes, you can use rolled and pressed mineral wool or polystyrene foam. It is advisable to use mineral wool. Why?
- Mineral wool does not burn. Due to these fire resistance characteristics, it is also used as a fire barrier.
- The material is completely safe. Mineral wool is made from basalt, which is a natural glass of volcanic origin.
- Basalt wool is not afraid of rodents, which is very important for wooden houses.

Pressed and rolled wool is available in standard sizes, it is recommended to take them into account when installing beams. The width of the wool is 60 cm, the distance between the beams is recommended ≈ 55–58 cm. Due to these dimensions, a tight fit of the insulation to the structures is ensured, reducing heat losses, the indoor microclimate improves. In addition, there is no need to cut the sheets, which speeds up work and reduces waste.
The thickness of the insulation is at least 10 cm. Make the second layer offset to cover the joints. If a wooden house is built in a cold climate zone, then the insulation layer must be at least 15 cm thick.


Step 8 Cover the thermal insulation with a waterproof membrane. The technology for installing it is no different from the algorithm for installing a vapor barrier membrane.

Step 9 Nail slats approximately 2 cm thick to the beams; they will serve as joists.

Practical advice. Professional builders strongly do not recommend laying the floor directly over the beams. The bars ensure ventilation of the finishing coating, and this is necessary regardless of the type of floor.
Further work depends on the technology you choose and the finishing materials for the floor covering.
Installation of subfloors along joists
These options are used in wooden buildings, being built according to the most modern technologies. The floor will be made of glued moisture-resistant plywood 2 cm thick, the flooring method will be on joists.
Step 1. Measure 120 cm on one side of the floor, this is the length standard sheets. If the plywood is tenoned, then the measurements must be taken very carefully, otherwise the tenons will not fit into the groove in one line. The use of tenon plywood eliminates the appearance of drafts, which is very important for high-quality installation of the finishing surface. For correct installation sheets, use coated thread.

Using a nail with thread (left) and coated thread (right) to mark
If the house is very large and the length of the thread is not enough, then you should first use a rope. Drive nails into the outer joists, taking into account the dimensions of the plywood, and stretch the rope between them. Taking into account the length of the coated rope, drive an additional one or more nails into the joists along the line of the stretched rope. Now the marks can be applied without fear, they will all be exactly on the same line.
Step 2. Lay out the first row of plywood on the joists, while first marking the excess width.
Important. The thickness of the plywood is selected taking into account the distance between the joists and the maximum load on the floor. This means that the sheets can be not only two centimeters thick.
Step 3. Apply liquid nails to the joists. They have several advantages: they significantly speed up the construction process, the subfloor will never creak, and they guarantee sufficient fixation strength. In addition, liquid nails allow you to easily correct small errors. The glue should be applied in the middle of the joist. If the edge of the sheet lies in the middle of the joist, then the glue, accordingly, is applied only to a narrow section of the element.

Step 4. Turn over the sheet of plywood and attach it with ordinary nails. According to existing rules the distance between them should be within ten centimeters around the perimeter of the building, and the length should be 6–7 cm. The distance between hardware along the joists is 15 cm, inside the building ≈30 cm.

Important. Plywood can expand due to increased humidity; leave a gap of a few millimeters between the sheets. It is convenient to use nails as a template; insert them between the sheets, and remove them after fixing. There are situations when the edges of the sheet do not fall in the middle of the joist. In these cases, the material must be carefully trimmed taking into account the requirements described above.
If sheets fall on ventilation openings or other utility lines, measure their dimensions and exact location, then use a hand-held electric circular saw, cut off the excess.

It is much easier and faster to hammer nails with a pneumatic hammer. How to quickly do this manually?
- Put in left hand several nails, they are all mixed, the heads and points are located on different sides.
- With your right hand, grab the nails by the heads, carefully pull them out, turn them over into the desired position and place them with the rest. Now all the caps are located on top.
- Use your thumb to pry up the nails one at a time, grab them with your index and middle fingers and place them with the tip on a sheet of plywood. Do not forget that you need to drive the nails in at a slight angle to the plywood veneer, otherwise it may crack.
- Hit the nail with the first light blow of the hammer, and with the second strong blow, drive it in until it stops.


You can be sure that after a few minutes of training, the speed of driving nails will not differ from that of a machine, and the quality will not suffer.
Step 5. Cut to size last page and secure it to the joists.
The rows of joints should be staggered; for this, the next one must be started with half a sheet or the remaining segment. Joining tongue and groove plywood requires considerable effort. To do this, use a piece of wood, apply it to the edge and connect the tenon and groove with strong blows of a hammer. Apply blows alternately on each side, do not allow the sheets to distort, remember the damper gaps.


Step 6. Mark the edges of the sheets protruding beyond the contour of the joists. It is better to use coated thread; carefully cut off the excess along the line.
Important. Be very careful when working with electric woodworking tools. Injuries from them are complex and can cause disability. Tools must be in good working order and adjusted, and cutting devices must be sharp. Never remove factory guards.

Step 7 Proceed to seal the opposite edge of the floor. The work will go faster if you do not take the dimensions of each sheet, but attach whole ones. Then you should measure the width of the protruding pieces and transfer the lines to the front surface. By tags electric saw trim off excess.
For the final covering of the subfloor, you can use most of the previously obtained sections, due to this the estimated cost will be reduced wooden house.

How to avoid mistakes during subfloor construction
The main advice is don’t try to simplify it yourself. existing technologies. Only an amateur thinks that he is smarter than everyone else and can do the work faster and cheaper. All rules were developed taking into account many years of construction experience; each technological operation has its own specific purpose. An incorrectly laid subfloor causes sagging and squeaking.
- Before starting work, check the position of the joists. The distance between the lags should not exceed 58 cm, this will allow the insulation to be tightly laid.

- There is no need to skimp on the size of the beams. During the operation of the house, it becomes necessary to install heavy furniture; the likelihood of increased loads should be foreseen in advance.

- In the place of masonry brick oven always reduce the distance between joists or beams. During construction, use only healthy lumber without natural diseases or defects.
- Boards for making subfloors must have low performance relative humidity. If the subfloor is laid before the roof of the house is erected, then the work should only be done in good weather. Overmoistened boards not only quickly lose their original load-bearing characteristics, but also decrease in size during drying. As a result, the fastening is weakened, and the floor bends and creaks when walking. It is very difficult to fix the problems; often you have to completely dismantle the coating.

- If the subfloor is located between the floors of a wooden house, then the cranial bars should be placed along the beams. Packed across, they reduce the height of the room.

- When installing membrane vapor or waterproofing, carefully read the instructions. The material indicates which side it should face towards the insulation. The fact is that steam can only escape in one direction; if the fabric is laid incorrectly, then there will be no positive effect. As a result, the subfloor will be constantly wet, and the effectiveness of thermal insulation will noticeably deteriorate.

- Do not skimp on the vapor barrier, cover the joists as well; attempts to cut the roll into small pieces always give a negative result. In terms of footage, the savings are negligible, and Negative consequences noticeable.

- Always leave a ventilation gap between the rough and finished flooring. At the same time, consider the location of the air outlets.

- All hidden wooden structures must be treated with antiseptics. We have already mentioned that the simplest, cheapest and safest antiseptic is ordinary oil or drying oil. The boards to be treated must be dry. If the antiseptic is quickly absorbed, the treatment should be repeated.

- Practitioners recommend covering the ground under the floor of the first floor plastic film or roofing felt. Due to this, the amount of evaporated moisture is reduced, and the operating conditions of the building are significantly improved.
- It is recommended to install a warm subfloor only under the living quarters of the first floor. There is nothing to save in unheated ones; an expensive complex cake is not needed.
Unconditional compliance with building standards guarantees that no unpleasant situations will arise during the operation of wooden houses. In all cases, eliminating the consequences of technology violations is much more expensive than complying with the rules for constructing subfloors.
Let's start with the fact that the structure of any floor consists of a finishing and a rough covering and lies on a supporting base. For example, between floors its function is performed by the ceiling. The finishing surface can be tiled, parquet, concrete, plank, etc. The subfloor, located under the finishing floor, is a multi-layer “pie”. Its structure is determined by the type of finishing coating, General requirements and base design.
The subfloor has the following components:
- Underlying layer. It serves to accept and evenly distribute the load from the coating along the base, as well as transfer it to the walls. The underlying layer can be soil that has been prepared according to the relevant requirements, or a floor slab.
- Leveling layer. It is needed to eliminate unevenness of the previous layer and is quite dense. When installing it, you can slope the surface using a screed, if one is planned.
- Intermediate layer. Acts as a link between outer covering and the underlying floor structure.
- Insulating layers. They provide protection from moisture and noise, and also serve as insulation. Their locations depend on the method of construction and the functional load of the floor system.
Installation technology for rough wooden floors
For installation of rough wooden floors soil can be used as a base or concrete preparation. The flooring is laid on wooden logs or directly on the base. We will consider both of these cases below.
Subfloor on wooden joists

This flooring has been used by many for a very long time and has become quite popular. Its production does not require special skills. However, the subfloor on wooden joists has a significant drawback: since all its elements have rigid connections, impact noises in this case they are not sufficiently insulated. In addition, this option is not recommended for use in baths and bathrooms, since the boards are sensitive to high humidity.
Logs are beams that support the frame of a wooden floor. They can be made from solid wood or from boards of the second and third grades, connected in a special way to each other. As for a private house, it is better to use logs as logs, which are much stronger and more reliable.
They must be prepared before installation. Since logs usually have an uneven surface, it is recommended to cut off their upper part with an ax until a plane is obtained on which the finished floor elements will be attached.
The ends of the logs should be located in pre-prepared grooves, which are cut into the crown of the log house or made in stone walls. The distance between the wall and the end of the log is taken to be 2-3 mm. This will prevent the floor from creaking under your feet. To preserve the edge of the log, before installation it is necessary to treat it with an antiseptic or ordinary bitumen.
In addition to the grooves, the logs must have intermediate supports, which can be made of brick in the form of columns. The distance between the supports should be 0.8-1 m. Their location is determined using cords stretched across the entire area of the room.
Under each column you need to make a foundation. If the base is earthen, you should dig holes measuring 40x40x40 cm, compact their bottom, fill in 10 cm layers of sand and crushed stone, install a small formwork on top and pour concrete. The top of the resulting foundation should be located 5-10 cm above the ground level. If the columns have a height of up to 25 cm, they are laid with one and a half bricks, if more, then two. The top of the finished supports should be covered with roofing felt in 2-3 layers.
The logs are installed on supports in increments of up to 1 m, depending on the material they are made of. After their installation, you can perform the next stage of work. It consists of installing a skull beam on the joists, which will serve as a support for the rough flooring and insulation.
The beam must have a cross-section of 50x50 mm. Its fastening is carried out using wood screws on each side of the joists in their lower part. The bars must be fixed securely, otherwise the flooring may collapse along with the insulation. In order to save money, the timber can be made from 150x40 mm boards.
To do this, it is enough to dissolve it lengthwise into three equal parts. From one board you will get three 50x40 mm beams, which are quite suitable for laying rough flooring on them. The timber must be fastened taking into account the thickness of the heat-insulating material. If, for example, it is 10 cm, and the thickness of the rough flooring is 25 mm, then the distance from the skull block to the top of the log should be 12.5 cm.
After installing the joists and support beams, it is necessary to waterproof the rough wooden floor. For this, polyethylene film 0.2 mm thick is used. It must be secured with staplers to the bottom surface of the joist and its edges placed on the walls. The film sheets are stretched overlapping, their joints are sealed with metallized tape.
On next stage it is necessary to install the rough flooring on the cranial bars. This is quite a painstaking job, since you will have to cut a lot of boards with a length equal to the distances between the joists. If the logs are made of logs, the task is complicated by the fact that, due to their usual curvature, the rough flooring boards will need to be prepared of different lengths.
For timber, everything is simple: if the logs are installed at equal distances from each other, the rough flooring boards can be prepared according to a template. The cut boards must be methodically laid on the skull blocks located on the sides of the joists and secured with nails or screws.
You can walk on the finished rough flooring, but it is not advisable - it has a different purpose. To move around the room while working, you can lay thick boards on top of the logs and carry out all further operations from them.
After installing waterproofing and laying the rough flooring, you can begin installing the insulation. Choice heat-insulating materials is quite wide, so buying the right products that are suitable in size and price is not difficult. These can be slabs of mineral wool, polystyrene foam or rolled material.
They all cut perfectly and are easily adjusted to fit right size. The insulation should be tightly laid between the joists on the rough flooring, avoiding gaps and “cold bridges” in the form of protruding parts. His outside surface should be slightly below the level of the top of the joists to ensure a ventilation gap of 3-5 mm.
The laid heat insulator should be covered with a vapor barrier membrane, fixing it with staples or wooden planks on the joists. This completes the installation of the subfloor structure. In the future, on the logs you can perform fine coating made of tongue and groove solid board or fix on them an intermediate layer of moisture-resistant plywood 12 mm thick for laying parquet, laminate, linoleum or tiles.
Rough wooden floor on dry screed

The above method of installing a subfloor is convenient to use at the stage of building a house. When purchasing it already in finished form old floors can be made not on the basis of a wooden floor, but monolithic concrete. In this case, their alignment must be done in a different way. Of course, you can perform a simple screed on top of such a floor using beacons, or use the “wet” method - fill the floor with a self-leveling mixture. However, dry screed will be much cheaper.
To lay a rough wooden floor on a dry screed, you first need to prepare necessary tools and materials: chipboard or moisture resistant plywood, electric jigsaw, PVA glue, expanded clay, damper tape, wood screws, tape measure, marker and ruler.
The work is carried out in stages:
- The concrete base must be covered with waterproofing polyethylene film. Laying its canvases should be done with an overlap of 20 cm, and their ends 10-15 cm long should be placed on the walls. To ensure that the joints of the canvases do not diverge and are airtight, they should be glued with metallized tape.
- The next stage is covering the bottom of the walls around the perimeter of the room with damper tape. The height of the pasting should be greater than the thickness of the layer bulk insulation, which will serve as the basis for the subfloor.
- After sticking the tape, you need to install the beacons using a water level. Their height can be adjusted using small bars: by removing and placing them, you can get an even horizontal plane of the future base.
- You can choose expanded clay as insulation. It needs to be poured onto a concrete base and leveled using a rule, moving it along the beacons. It is not recommended to fill the entire area with expanded clay at once; it is better to lay it in the amount required for the installation of the first chipboard sheet or plywood. This is more convenient, since it is much easier to walk on a flat floor than on a shifting layer of insulation. Minimum thickness The expanded clay layer is taken to be 20 mm. It is not worth making it thinner, since in this case the subfloor can “play” under your feet.
- After laying the first sheet of plywood on expanded clay, many people immediately doubt whether everything has been done correctly. After all, if you stand on it and walk a little, you can feel how the laid sheet begins to gradually sink into the insulation layer. However, you should not be afraid of this: after layer-by-layer laying of the following sheets, you can make sure that the dry screed works normally, and all the sheets lie flat without any displacement. Installation of plywood must be done carefully, trying not to move the sheets too much, since the movement of 15-kilogram slabs can deform the surface of an even layer of insulation.
- The sheets are connected to each other using ordinary wood screws. Optimal step fastening is 100-120 mm. For greater reliability, the joints of the sheets can be lubricated with PVA glue before installation. It needs to be applied in a small layer “snake”, since the structural elements will be additionally connected with screws.
- After completing the installation of the rough flooring sheets, their joints must be sealed with wood putty, wait for it to dry and sand sandpaper or abrasive fine mesh No. 80-100.
- If dry screed is carried out in a bathroom or other damp room, the surface of the flooring must be treated with any coating waterproofing material, for example, bitumen mastic. After this, tiles or other suitable finishing material can be laid on it.
Every developer at some stage construction work you will have to deal with the concept of a subfloor, which serves as the basis for laying decorative finishing coatings. Regardless of whether it is a subfloor on joists or a simple flooring arranged according to concrete base, soil, and in some cases on concrete or metal beams, a high-quality subfloor provides the necessary strength of the structure and its maximum durability. This fact imposes certain requirements to the choice of building materials and work technology.
What is hidden under the name “Subfloor”?

Subfloor is a fairly broad concept that combines a set of measures for installing thermal and waterproofing, ensuring the necessary load-bearing capacity and soundproofing characteristics. Such a floor can be made from the most various materials using a variety of technological techniques.
Most often in individual buildings a subfloor is used wooden joists, providing excellent bearing capacity, high environmental performance and acceptable durability, subject to the rules of wood processing and the conditions for combining wooden structures with other building materials. On the support logs, in addition to the boardwalk, it is attached layered cake made of insulation and insulating materials laid on a solid base and providing the necessary microclimate indoors.
Wooden subfloors are used in permanent and temporary homes, withstanding changes in temperature and humidity, and can be used in bathhouses and utility rooms.
Construction of a wooden subfloor

The installation of a wooden subfloor can be divided into several technological operations, the precise execution of which will ensure the necessary performance characteristics and durability:
- Preparation of wood, processing of logs and additional elements designs;
- Laying lags on a solid monolithic base or manufacturing suspended structure on posts;
- Installation of cranial bars and installation of flooring intended for laying insulating materials;
- Production of continuous flooring for laying the finished floor.
As an example, consider the construction of a subfloor in small sauna, as the most difficult room from an operational point of view.
Selection of materials and additional processing

The installation of floors in the bathhouse begins with correct selection material. In order to make durable logs, it is necessary to use well-dried larch, which has excellent moisture resistance. The temperature of the floor in the bathhouse does not rise above 35-40 degrees, so you should not be afraid of the smell of resin released by larch when heated strongly. The only thing that limits the use of larch is its high price.
If durability decreases, logs can be made from pine or certain species deciduous trees, reducing the cost of purchasing logs by about 2-3 times. Alder or birch are best suited, but oak can be used with extreme caution. The wood itself is excellent, but improperly dried oak will certainly behave when humidity changes, which will affect appearance floor, and after a short period of time.
For the manufacture of slabs and fence boards, it is necessary to use dry wood with no more than 12% moisture content to avoid warping and swelling of the floor. You can make the flooring from glued slab materials that have sufficient rigidity.

All wooden structures used for bathhouse floors must be treated protective equipment, preventing rotting and fire of wood.
Attention! Frequent heating of wood to a temperature of 130 ° C or higher over time can lead to spontaneous combustion.
To protect against frequent exposure to water, you can treat the wood with bituminous waterproofing materials, soak the logs and boards with hot natural drying oil, but it is best to use modern materials with an impregnating or film-forming base, most suitable for the specific operating conditions of the room, despite the fact that the price of such impregnations is much higher.
The installation of a subfloor in complex rooms requires the mandatory use of specialized film materials as an insulating membrane that allow moisture to pass through only in one direction, which provides the necessary conditions for wooden structures and prevents the accumulation of moisture in the insulation.
Any insulating materials can be used as insulation, but in a bathhouse it is necessary to give preference to materials that can not be destroyed by water and, after drying, restore their heat-insulating properties.
Installation of subfloor

There are several types of subfloors, the design of which differs in some nuances. The general principles of installing wooden structures are similar, so we will consider installing an insulated floor filled with mineral wool.
The first thing that needs to be done is to correctly lay the logs on special pads isolated from the wall and foundation, making sure that the upper part of each log is in the same plane. This will allow you to get a smooth surface of the finished floor made from almost any materials. When laying a solid floor in a bathhouse, it is necessary to make a slope of the subfloor of approximately 1-2 cm/m to freely move spilled water to the collection and disposal points.
The ends of the logs resting on the foundation elements must be treated with waterproofing mastic and provide a gap between the logs and the wall of about 1-2 cm, to level out changes in linear dimensions under the influence of moisture and temperature. Installation of logs can be done on a special beam, which provides a flat floor surface, and for which the logs are fastened with special metal elements.

At the next stage of installation, a cranial block measuring 40x50 mm is fixed to the lower part of the log, which serves as the basis for laying the subfloor. The block must be secured with self-tapping screws or nails in increments of no more than 600 mm to ensure the required load-bearing capacity. After installing the beam, the flooring is installed, laid between the joists with a gap of about 5 mm on each side. The process of installing the flooring is, in principle, simple and can be done independently with a simple set of hand tools.
A layer is laid over the finished flooring, cleared of shavings and dust. roll insulation. Roll materials it is necessary to roll out on the floor surface and leave for 24-36 hours for the so-called acclimatization, when under the influence of temperature and humidity of the surrounding air the material will straighten out and its linear dimensions will correspond to the surrounding conditions. To make high-quality waterproofing of the floor, you need to carefully straighten the membrane, lay adjacent panels with an overlap of at least 100 mm and carefully glue it with special tape, despite the fact that its price is much higher than its office counterparts. The edges of the membrane must extend onto the walls at the level of the finished floor.

Thermal insulation material is placed in the membrane-covered space between the joists and covered with a second insulating membrane, installed according to the same rules. After this, the subfloor is ready for installation of finishing coatings.
In some cases, the floor in the bathhouse is made permeable when water flows into special gaps between the boards. In such structures, the subfloor is practically absent and consists only of a set of joists intended for laying finished floor boards, which must be secured using wooden dowels. The installation of such floors is justified only in the southern regions and when using a bathhouse in the warm season.

Using a variety of building materials for the manufacture of floors, every developer asks the question of how to reduce costs as much as possible so that the price of materials does not bite and the quality is at its best.
Every person knows that it is not possible to live fully in an apartment or house without a furnished floor. It is simply necessary. Is it worth doing it in wooden house- this question worries many. Their logic boils down to the fact that why spend money on an additional subfloor, it might be easier to just lay a finished floor right away. Everything is ambiguous here.
You can, of course, get by with a clean one, but get a reliable and beautiful coating in this case it won't work. But the main thing that a floor should stand out for is reliability, strength, a flat surface, as well as some other parameters, which are extremely difficult to achieve without a subfloor. Changing the finished floor every year if there is no rough floor is an unaffordable luxury.
Photo: subfloor in a wooden house
Subfloor - what is it?
A subfloor is a special base for a finished floor, which forms a flat horizontal plane for it. The subfloor ensures the distribution of the load that acts on the floor covering.
In a wooden house, the subfloor can be made in several ways:
- wooden on joists;
- plywood flooring;
- pouring concrete.
Wooden subfloor on joists
In a wooden house, installing a subfloor on joists is practically no different from installing it in monolithic or brick houses. The main difference is in the fastening of the lags.

General scheme devices
Attaching the log
Floor joists should not be attached to a wooden wall, and there is no need to crash into it. It is advisable to fasten the logs to the base or grillage of the foundation, retreating from the wall a few centimeters. At the same time, the distance of the support that falls on the foundation must be maintained at least 10 cm on either side of the log.
The logs are attached to the base
Before laying logs on the foundation, they must be laid bottom trim, made of long thin boards, to which logs will be attached using metal anchors (corners).
The logs should not be rigidly attached to the frame - they only need to be fixed so that they do not move while laying other layers of the subfloor. The created structure will have a distance of several cm from each wall, where thin insulation can be installed.
Waterproofing of logs is required
If the distance to the foundation is less than 10 cm, then it is better to crash into the walls, but you will need to first lay the logs on the foundation, and then attach a log or timber to them. Measure the contour of the cutout and then cut out the necessary grooves in the wood with the dimensions required for the support distance (for subsequent expansion of the lag, approximately 2 cm should be added).
We must not forget that the laying of beams and joists is carried out on the plinth or grillage only after laying the waterproofing layer.

The logs are attached to the foundation grillage
The standard step between the lags is 40-60 cm. However, its choice depends on the width of the insulation, as well as the direct load. The lag section is also selected from effective load. For a light section, choose 15×10 cm, for a medium one – 15×15 cm, for a heavy one – 15×20 cm.
If the beam has a small cross-section and the load is significant, then it should be placed at a distance of 30-40 cm - this is a fairly optimal option.
Installation of subfloor on joists
Once the installation of the joists is completed, the standard installation of the floor on the joists is carried out. It looks like this:


A ventilation gap must be left between the insulation and the floorboard.
Important! Boards, bars and joists should be treated with an antiseptic to prevent them from exposure to various fungi and insects.
Plywood subfloor
A plywood floor will serve reliably for a long time. It has high strength. Plywood can even be used for the final floor covering, since if it is carefully sanded and varnished, it will look quite noble. However, it is more often used as a base for covering laminate, parquet and linoleum.

Laying plywood on an old floor
Plywood can be laid:
- On a cement base, but it is necessary to ensure that the base is even and horizontal, or to use adjusting posts.
- Fastening on logs. Here the difficulty is in placing the joists to ensure that the joints of the sheets fall on them. The logs must be positioned so that their upper surface provides one horizontal plane. Utility lines are hidden in the joists, insulation and sound insulation are installed.

Laying plywood on joists
Important! When laying plywood in one layer, it is necessary that its thickness be at least 15 mm; if in two layers, then you need to choose at least 9 mm for the layer.
Before final installation of plywood, all dust and debris must be removed from the base. It is also advisable to perform priming, that is, treat with a special primer.