During summer work at summer cottage there is a desire to freshen up under the pressure of warm water. Not everyone has country house convenience, so a summer structure in the form of a shower can be made in the yard.
Summer showers for dachas are the most different forms and layouts of varying complexity. Today, many manufacturers offer simple shower stalls easy installation, in which the frame is made of aluminum profile, and the covering is made of polycarbonate plates. A 100 liter plastic container is installed at the top. Such a shower can be put away in the utility room for the winter. You can buy a summer shower for a dacha of this type either in supermarkets or order it in online stores, of which there are a lot on the Internet. You just need to choose the appropriate configuration, height and internal volume of the structure itself.
There are also more complex stationary buildings that are used not only in summer, but also in winter. They are usually created from a capital foundation and building material(foam block, gas block, brick, concrete block). An intermediate and one of the most commonly used materials for a classic summer shower is wood. In any case, building a summer shower for your dacha with your own hands (see photo) will not be much of a hassle, as long as you plan and prepare everything carefully. In modern conditions there are many opportunities and means (materials, equipment, tools) for quick solution any dacha task. How to build a summer shower at the dacha with your own hands and which option to choose? 
Types of summer showers and principles of their structure
Depending on the complexity of the future structure, several types of these useful structures are distinguished.
Simple summer shower.
At the dacha it can be installed in a hidden part personal plot. Making such a structure will not be particularly difficult. To do this, it will be enough to prepare four supports made of wood, metal or durable plastic. They go 80 cm into the ground. To do this, holes are dug to fit the diameter of the material. Then the supports are installed in the holes and filled with concrete. 
As side walls, you can use a simple opaque fabric, sheet, tablecloth, plastic film blue or white. A watering can with a special device in the form of a pedal is installed on one of the supports, which can be bought at a plumbing store.
The shower tank can be made from a 15 liter bucket. (for one person this is quite enough), but you can install plastic container special purpose. One end of the hose is connected to the water supply, and the other is inserted into the tank. There is a hole at the bottom where the watering can is connected. The pedal and the faucet of the watering can are connected with a rope. The simplest shower for the cottage is ready.
Ready shower for the cottage.
You can buy an inexpensive summer shower in disassembled form. He's at the dacha  assembled at a pre-selected location, according to the included instructions. Its price depends on the internal volume of the cabin, the quality of the polycarbonate panels, plumbing fixtures (mixer, watering can, shower stand, the presence of a shelf with hooks), the capacity of the water tank, as well as the availability additional system heating However, you can experiment with the configuration according to your taste and financial capabilities.
The main thing you need to pay attention to when buying such a shower is the presence of a hygiene passport, instructions for assembly and operation, as well as a certificate for the construction.
An undeniable advantage such a summer shower in the country (see photo) is its transportability and the ability to be stored disassembled in the winter utility room country house. This is one of the most budget and low-cost projects for installing a shower stall in the country in the summer.
Wooden summer shower.
How to make a shower with your own hands from wood? A question of this nature can often be heard from summer residents who are just beginning to settle in their dacha. 
Tree - universal material. You can easily create any shower stall design from it. Working with wood is very easy and interesting. What will you need to create a wooden shower stall? A drawing is drawn up in advance and the quantity is determined required material. As fastening fittings take metal corners(for the frame), screws, nails.
Having a screwdriver makes the task much easier. When everything is ready to begin work, you can safely begin to assemble the frame. It must be made of durable timber with a diameter of at least 80 cm to support the weight of the planned container. Then it is covered with boards. You can choose a wide variety of cladding, because it not only performs a decorative and covering function, but also strengthens the entire frame. You can also cover the roof with any material. You can use porous polycarbonate, profiled metal sheet, slate.
It should be noted that the cost of such a structure, if you have your own materials, will be much cheaper than a ready-made booth purchased.
Capital structures of a summer shower. You can build a summer shower at your dacha with your own hands from bricks, concrete blocks, stone, and gas blocks. This method requires from the owner not only design thinking, but also special skills. Anyone can build walls, but here the question of the reliability of the structure often arises. What needs to be taken into account when constructing a capital building?
- Foundation. One of the most important, basic elements of any capital structure. The foundation walls must be at least 30 cm wide. They are made from concrete and stones. For country houses Pile pit foundation is best suited. If it is not possible to install piles, use concrete, columnar foundation with the arrangement of pillows. Asbestos or metal pipes are used as piles. They are installed in pre-drilled openings using a drill. Then they are concreted. The depth of the openings should not be less than 1 m.
- Septic tank. It can be designed so that a septic tank is installed under the foundation for waste water. It is required if you plan to install sanitary unit with toilet. As a septic tank, you can take a container (barrel, cube, concrete walls with cover). For a shower stall it will be quite well equipped drainage system in the form of routing plastic pipes.
- When the foundation is ready, you can proceed to the construction of walls. The only rule for installing walls is level. The guideline for this is a stretched thread and plumb lines at the corners.
- Wall installation field country shower You can also make a roof with your own hands. To do this, you will need help or advice from a specialist. There are many roof installation options available online. The best one will be gable roof. A container of water fits well under it. For convenience, hoses are inserted into it for supplying and draining water (if the shower will not be used in winter).
- The next step is the installation of doors and windows (if provided).
 Interior decoration and installation of plumbing equipment is carried out according to the individual wishes of the owner.
Water supply and installation of a tank for a summer shower for a summer cottage
Immediately before lifting the container onto the roof of the house, it is necessary to install a faucet with a spray nozzle. Ready-made tanks for summer showers have a built-in valve system to prevent the tank from overflowing. If it is not possible to purchase a tank, you will need to monitor the level each time you fill the water. To do this, a hole is drilled under the top of the tank and a tap with a hose is installed. When it overflows, use the hose water will flow. Such a signal will indicate that the water supply needs to be turned off.
After installing all the necessary components, the container is placed on the roof or next to it. If it is made of polycarbonate, it can be used under the roof. In principle, many summer residents place the container immediately under the cover. In this case, the water will take longer to heat up. The tank is attached to the base using metal ties. 
Building a summer shower in your country house is not difficult. If the cottage is used only in the summer, it will be enough to make a simple shower. If it will be visited in winter, it is necessary to construct a permanent structure and install optional equipment for heating water and space.
Ideas for a summer shower in the country, video
In hot weather, a summer shower for a dacha is not a luxury, but a necessary one outbuilding. A shower gives you the opportunity to freshen up and wash off the dirt after gardening work. The presence of a shower on the site ensures a comfortable stay at the dacha, especially if there is no body of water suitable for swimming nearby. When designing a country shower, take into account its size, the materials used and the place where you plan to build it. The cabin should be quite spacious so that you can comfortably place everything you need and move freely. Comfortable height shower - 2.5 m, the most common cabins are 190/140 mm and 160/100 mm. Want more details?!
For a garden summer shower it is better to choose sunny place away from other buildings. In the sun, the water heats up quickly, which is convenient if you plan to build a shower without heating. If the tank is painted black, the water will heat up faster. Also consider making the water supply to the shower convenient, preferably automated. Climbing up a ladder with a bucket of water to fill the tank is not the best way.
So, the place for the shower has been chosen. Now you need to prepare the base - remove upper layer soil, level the area and fill it with sand. For creating the right basis Markings are made using pegs driven into the corners and a rope stretched across them.
The shower can be lightweight design, or maybe a capital building. The type of foundation depends on the materials used. If the shower is brick, use concrete foundation, the depth of which must be at least 30 cm. Before you start pouring, prepare a place for the pipes - you need to lay a log wrapped in roofing felt. Pouring the base with concrete is carried out using guides and a level so that it is level. When the base is ready, laying can be done. A brick shower will be more hygienic and aesthetically pleasing if tiled. But this is an expensive, time-consuming option.
Option #1 - budget frame summer shower made of tarpaulin
This option will allow you to build a summer country shower without resorting to high costs. After all, if you come to your dacha only in the summer, you can get by with a simplified option. For example, build a canvas shower using a metal frame.
A metal frame will be required highest costs, but it will still cost much less than brick. For construction frame shower you will need: tarpaulin (3/5 m), metallic profile(18 m, 40/25 mm), a plastic shower tank, preferably black (volume 50-100 l), a shower head, a ½ drain and a tap with the same thread. Parts such as a watering can, nuts, brackets, taps, gaskets and washers are very popular materials, which is why they are often sold in one set, which is especially convenient.
It is not difficult to build a canvas shower, it is convenient and functional, for the winter the canvas can be removed, the frame can be covered with cellophane so as not to rust
A design similar to this is a shower for a summer house made of flat slate. It has exactly the same frame, but in this case the profile replaces the square (40/40 mm).
Water from the base of the shower should flow towards the drain pipe, and a shield (usually made of wood) is placed on top, on which a person stands and performs hygiene procedures.
If you don’t want to build a shower yourself, you can buy a ready-made one - for example, with a polycarbonate cabin, or a completely open one, and enjoy water treatments right in the garden
Advice. It is better to drain the water with a waterproof layer - lay PVC film, hydroglass insulation or roofing felt on an inclined embankment. The slope is made in such a way that the flow from the shower is directed towards the trench or drainage tank. Well, if the drain is ventilated, it will dispel unpleasant odors.
The problem of water drainage today can be successfully solved using a septic tank. When installing a septic tank, you should not place it directly under the shower stall. In the summer, when large volumes of water are consumed, the septic tank may flood, and the drainage may not work well, resulting in unpleasant odors. It is better to arrange the drain at a distance of several meters from the shower, and place a septic tank nearby.
Advice. Plants that grow well in moist soil will be appropriate near the shower - they will perform a drainage function.
Option #2 - solid construction on a pile foundation
If the height is quite high, the shower structure should have stable base. To build a summer shower of a strong structure, you can make pile foundation from pipes The pipes must be 2 meters high (diameter 100 mm), and holes one and a half meters deep must be drilled in the ground for them. The pipe should rise approximately 30 cm above the soil level. The dimensions of the timber for the frame are 100/100 mm.
In order to drill holes for supports, you can call a fence installation team; the work will take about half an hour
A rectangle is measured on the ground according to the size of the shower, and foundation supports are installed at the corners. The next stage is installing the timber and tying the pillars. It is convenient to assemble the frame on the ground and fasten the structure with long bolts. Then the dressing is done inside frame structure- these will be the floor joists in the shower. Rigid elements are placed between adjacent pillars in the thickness of the wall.
The floor can be made with gaps between the boards to allow water to drain. But sometimes you have to take a shower in cool weather, and air blowing into the cracks will not add comfort. You can also install a tray from which water will be drained through a hose. A shower consisting of a dressing room and a bathing compartment, which can be separated by a bath curtain, will be more convenient. In this case, the locker room should be separated by a threshold to avoid water leakage.
Linings and sheets are most often used as external upholstery. moisture resistant plywood, fiberboard. If all the buildings on the site are made in the same style, the shower should not be too different from them.
If you expect to use the shower for more than just summer heat, it needs to be insulated. It is most convenient to use polystyrene foam for this. As interior decoration Waterproof materials should be used - plastic, PVC film, linoleum. Wood paneling needs to be sanded and painted.
A water tank is installed on the roof of the structure. It can be connected to a water supply or filled using a pump. It is good to equip the barrel with a plumbing valve that will shut off the water when the container is full
In order for the water in the tank to heat up better, you can make a frame for the tank that acts as a greenhouse. It is made according to the dimensions of the timber container and covered with film. In such a frame, the water in the barrel will remain warm, even if the sun hides. The wind will also not cause its temperature to decrease.
As they say, it’s better to see once:
A selection of diagrams and examples of shower installations
The summer shower drawings below will help you choose right size, pick up suitable material, visualize exactly what kind of shower you want to see on your site.
Shower trim options different materials: boards, lining, moisture resistant wood panels, various types of tanks
There are simple devices that allow you to use the shower more comfortably: a - a float intake will take warm water from the top layer; b – a tap driven by a foot pedal (a line from the pedal is thrown through the block, it is attached to a pull-out spring and to a tap that opens at a right angle, which will allow you to use water economically); c – an improved scheme for connecting the heater to the water tank will allow the water to warm up and circulate evenly
Summer shower heated: 1 - tank, 2 - pipe, 3 - tap for supplying water from the tank, 4, 5 - blowtorch, 6 - watering can, 7 - tap for supplying water from the watering can
The choice of design, materials, work on the drawing are important points that should be paid attention to so that the process of creating a shower is continuous and error-free.
A dacha is the dream of almost every metropolis resident. Many city dwellers enjoy spending part of their vacations and weekends at their dacha. They enjoy working in the garden, gardening, and arranging the dacha itself: this way they are distracted from the noisy bustle of the city. After the roast working day at the dacha I want to receive water treatments. It’s good if the site is located near rivers and reservoirs. The rest have to build their own shower stall on the site, equipping it with heating and a changing room. We will discuss how to do this with your own hands in this material.
Choosing materials for a country shower
A country shower with heating and a changing room is not so difficult to build. But how great it is to take a swim after a hard day in comfortable conditions. E it’s worth spending a little time and effort, and for your own convenience. At the same time, it is absolutely not necessary to spend a large amount of money on the construction and equipment of the structure.
For a summer shower, you can choose practical and not the most expensive materials. Firstly, you will definitely need cement mortar. It is better to install more massive structures on a poured foundation; for lightweight models, you can choose a pile option.
When choosing materials, you should be guided by the characteristics of the work. For a small pit for pouring the foundation, a shovel, available in every house, is sufficient. Pile structures will require narrow but deep holes, which are dug using special electric or pneumatic tools.
When choosing a suitable material, take into account not only its cost, but also the characteristics and requirements for preparation and care (impregnation with protective agents, the need for timely ventilation, etc.).
What material to build a summer shower from:
- brickwork- this is not the most cheap option, however, the most durable of all. If you have brick left over from building a house, then choose this option. Such a shower with a dressing room and heating will last a long time;
Brick building
- You can often find wooden shower buildings in the country. Natural wood It is environmentally friendly, looks impressive against the backdrop of nature and has quite acceptable strength. But here it is important to remember: d To ensure the durability of the building, it is necessary to provide high-quality ventilation for the shower stall. For this purpose, during construction, wide gaps are specially left in the floor and walls. The disadvantage of this option is that in windy weather or when it gets cold, it will blow from these cracks. In addition, it is necessary to treat the wood with a fire retardant ( fire retardant composition) for protection from fire, because the building is equipped with heating devices (electric or fuel);
- a modern option is a garden shower with a changing room and heating made of polycarbonate. This material has a lot of advantages: while the sheets are light in weight, their cellular structure provides high strength. In addition, polycarbonate does not change its properties when exposed to natural factors. The ease of cutting and installation are also convincing arguments in favor of this material. Thanks to a lot of advantages, it is quite convenient to work with polycarbonate even for those who have picked up this material for the first time;
- outdoor showers are often built from plywood. This material inferior in strength to boards, but also costs much less. Plywood also requires treatment to resist fire, moisture and rot;
- Slate with a straight surface can also be used to build a country shower. It is more difficult to work with when cutting material, but it has strength and durability, is not afraid of moisture, so it is quite suitable for building a shower cabin;
- sheet plastic– a moisture-resistant material that allows you to build a summer country shower with heating and a changing room yourself in the shortest possible time. Varieties with different characteristics. When choosing, you should pay attention to strength, possible temperature range, lack of toxicity, including the release of harmful substances when heated;

Plastic shower
- It is also possible to use corrugated board or siding.
All sheet materials used as frame cladding. The frame itself can be made of wooden beams, metal pipes or profile. The top flooring on which the water tank will be placed deserves special attention. It must rest securely on the vertical parts of the frame and be strong enough to support the weight to the brim of the filled tank.
Types of heated tanks
The tank, that is, a container for water, is selected based on how many people will use the shower. If few people come to the dacha, then there is no need for a large tank. The compact container is easy to install, weighs little, so it heats the water faster. This is quite enough for washing 1-2 people.
There are several types of tanks for summer cottages, depending on the material they are made of:
- carbon metal. This material quickly becomes covered with rust, so its surface must be enameled. Its disadvantage is that with the slightest damage, corrosion develops over time and leaks form. Such a tank is not the best choice at all;

Carbon steel tank
- stainless steel. This material is not afraid of moisture and temperature changes, but it has another disadvantage - it is heavy, which is why it is necessary to build a more durable frame.
- Cink Steel. The coating lasts longer than black steel, but is also short-lived.
- plastic. Nowadays, country showers are increasingly made of plastic. Its basis is food grade polyethylene. Light weight, different colors, quick heating - all these are the advantages of plastic tanks for country showers.
Heating
There are two ways to equip your shower with heating:
- use solar energy;
- apply a heating element- Heater.
For a dacha that is visited mainly in hot weather, a naturally heated option is suitable. To increase the sun's effectiveness on the water tank, choose a black container.
Artificial heating is carried out by a device such as a heating element. This device is sold separately, so you can equip your shower with it yourself. At the same time, you can purchase a ready-made container with an already installed heating element. Its advantage is the high-quality installation, as well as the ability to purchase a tank with a thermostat.
Tank with heating element
You set the temperature to which the water will warm up. Attach two containers to the roof, one of which will be with a heating element, and the second without a heating device. So when mixing water, you can use your wooden or polycarbonate shower in any season.
Construction project
First you need to choose the place where the shower will be installed. It is best to place it on the edge of the site in a well-lit place on a small hill. The optimal height is 2–3 meters.

Construction project
The space that the cabin itself will occupy must be at least 100x100 cm. Along with her dressing room standard sizes can be 160x100 cm or a little more.
Having decided on the location, you can begin developing the project. Despite the simplicity of the design, it is better to first transfer your idea to paper. This makes it easier to identify bottlenecks and calculate the amount of materials needed.
Construction Features
The process of building a summer shower begins with preparing the frame parts. It is better to construct it from pine boards. You will need:
- 4 horizontal frame parts (20x90x664 mm);
- Vertical jumper (20x90-664 mm);
- 2 lattice boards (15x90x700 mm);
- 7 planks (15x90x700mm);
- 4 vertical parts (20x40x1820 mm);
- 4 connections (transverse) (20x40x1820 mm);
- hose support (20x40x160 mm);
- 8 fixing strips (20x40x660 mm).
It is also necessary to prepare the following parts for the construction of the shower:
- shower head (with external thread) with a plate for fastening;
- connecting element with internal thread;
- couplings for connecting the shower to watering hose(4 things.);
- coupling shut-off valve;
- clamps (6 pcs.);
- hinges 25x180 mm (4 pcs.);
- wood glue;
- long bolts, nuts, screws.
Construction must begin with installation support pillars. Then the frame is assembled separately and attached to supports. It is recommended to use long bolts for frame fastenings, since the structure must withstand the load from a filled water tank.
Floor installation
The floor can be made of boards, fitting them together not very tightly so that water leaves the cabin through the cracks. But the disadvantage of this option is that cold air will come from under the floor. It is better to use a ready-made shower tray. A hose is connected to the drain hole, through which the water will be discharged to the place intended for drainage.

Laying the foundation
Space delimitation
The shower half can be separated from the dressing room with a plastic curtain. The second option is to install a partition made of moisture-resistant plywood or polycarbonate between these rooms.
Wall cladding and door installation
It is not necessary to install a door from the locker room to the shower - it is enough to hang a curtain made of waterproof material. However, if you have laid wooden floor, then it is better to build a high threshold between the shower and the locker room.
The outer door must close tightly. ABOUT However, a well-fitted door can swell from moisture and then jam. To prevent this from happening, you need to provide a gap between the door frame and the door, which will be covered by a seal attached along the contour door leaf or frames.
The frame can be covered with polycarbonate. The shower stall will be quite bright. You can also cover the walls with siding or cover them with clapboard, but then you will have to install artificial lighting.
Electricity supply
To connect heating elements to the electrical network, it is better to call an electrician who will select required section wires and will do everything necessary to ensure safe operation device. It is better for an inexperienced person not to undertake this part of the work.

Electricity supply
As you can see, building a summer shower with a changing room and heating is not that difficult task, if you have the desire and opportunity to make such a shower with your own hands. To do this you need:
- Decide on a shower model;
- Choose a water heating method and materials;
- Find a suitable place for installation on the site;
- Build a shower taking into account all the rules listed above in the article.
Video
Creation example warm shower for the dacha, watch the video
Conclusion
Using this shower is easy and convenient. It can be used in the off-season, and, if desired, in the winter, you just need to insulate it. All in your hands.
I already told you earlier. You can get acquainted with the materials using the links I provided. Today we will consider the moments finishing works with a thorough country shower.
It is advisable to design the shower house in uniform style with the rest of the buildings. If you have wooden shower, then any material is suitable for upholstering the walls outside: OSB, plastic or wooden lining, moisture resistant plywood...
The picture above shows a simple option. wooden cabin, without insulation. Just a summer shower. If you want to insulate the walls, then you can use polystyrene foam - it fills all the cavities of the frame. Next, the polystyrene foam pad is covered with plastic film using construction stapler. It is necessary to perform interior finishing on top of the film.

Can be finished interior spaces country shower plastic panels, which are quite easy to use. They will reliably protect wooden frame from rotting. Modern materials have excellent water-repellent properties.
Example of an open summer shower

This shower was photographed by me in one of the spa resorts in Thailand. As you can see, it is made quite simply - concrete plinth, which is fenced with bamboo tubes.
In the absence of free-growing bamboo in our latitudes, you can make walls from branches or thin trunks of wild trees - willow, willow, etc.
The floor is decorated with a mosaic of glass balls and multi-colored stones. The only thing missing from all this is a colorful curtain.
It is better not to paint the inside of the tree

How to glue tiles in the shower
In a thorough soul with brick walls the booth can be laid out tiles. Working with tiles requires certain skills. The tiles must be placed above the level of human height. It is then that the upper boundary between the tile and the wall will be less susceptible to the destructive effects of moisture.
The tiles are glued to the wall using a special tile adhesive; you can lay the tiles on cement mortar. Before laying, tile adhesive is diluted with water in the proportion indicated on the label. It is not recommended to dilute the entire volume of glue at once; it is better to do this as the tiles are glued.
Start laying tiles from the bottom of the wall. To prepare the solution, mix one part of M 500 cement and four parts of clean sifted sand. Add enough water to get the consistency of thick sour cream.
The work steps when using mortar and glue are the same. Using a notched trowel, apply adhesive to the tiles and then press the tiles firmly against the wall surface.
A soft cloth should be at hand at all times to immediately remove excess mortar or glue that will protrude from under the tiles. If you work carefully, the tiles will lie in even rows.
The remaining tiles can be used to lay out the concrete or brick floor of the shower stall. When laying out the floor, you should make a high threshold between the washing compartment and the locker room to prevent water from entering there.
When you tiled the walls, you can hang shelves for shower accessories in the stall, and also install a rod for a waterproof curtain, which will separate the washing compartment from the locker room. Clothes hooks and a mirror should be strengthened in the locker room.
Results

Of course, not everyone will decide to make a full-fledged tiled shower in the country, so these recommendations can be applied in the apartment. But for the dacha, I still need to build something simpler. After all, you can rinse off in the simplest structures with four walls and a tank on top.
Nothing relaxes you more after a hard day at work at the dacha than a summer shower. Water not only calms, but also refreshes, distracts from unpleasant thoughts and relieves stress. But what to do if there is no shower on site? If you don’t want to splash around in a trough or basin, you need to take care of comfort in field conditions and design a refreshing summer shower for your favorite summer house with your own hands, using finished photos and drawings.
How to build a summer shower with your own hands
Summer shower takes one of the first places among all country houses. Sometimes this is not just a way to wash yourself after a day of cultivating the land has come to an end, but also the only way to cool down in the heat.

To build a summer shower, choose a place well lit by the sun
First you need to choose a place to install the shower structure. To do this, you should examine your site for secluded places.
On the other hand, this place should not be far from the main building, so that you do not have to freeze on the way to a warm house if you decide to take a shower on a cool day.
Advice! If a solar heated tank is provided, ensure that nothing obscures the water tank.
After you have found appropriate place, pick up optimal sizes for your cabin. Please note that for ease of movement a person needs a room of at least 1 m 2. If a dressing room is planned for changing clothes and storing dry things while swimming, the building increases by another 60-70 cm. The height of the shower stall is approximately 2.5 m. So, the estimated dimensions of the shower for the dacha are 170x100x250 cm.

Scheme: construction of a summer shower stall made of polycarbonate
If the structure is supposed to be wooden, then next step construction will involve the construction of a frame made of wooden beams or a metal corner.
Next are the walls. Please note that for better ventilation, the walls should be no less than 20-30 cm away from the ceiling and pallet. The walls are constructed mainly from those materials that were left over during the construction of the main dacha building.
Water supply in a country shower
When installing a shower for a summer house with your own hands, it is necessary to provide for the water supply and drainage in advance. The drainage system is laid at the stage of building the foundation, and is organized during the installation of the tank.
Carried out from a remote source. In order to ensure water supply, it is necessary to connect the water source to the receiver.

Diagram: example of water supply for a summer shower
The water supply pipeline is installed as follows:
- threads are applied to 2 sections of pipe (30-35 cm each);
- screw a clamping nut onto one end of each tube;
- a hole is made in the upper part of the water container corresponding to the diameter of the pipe;
- a clamping nut is used to secure the pipe into the opening of the tank;
- a similar hole is made at the bottom of the tank;
- the second pipe is inserted into the tank and secured with a clamping nut.
Advice! To avoid loss of water supplies, Special attention pay attention to tightness. All areas where connecting work is carried out should be sealed with rubber gaskets or silicone sealant.
Draining dirty water
Water flow is organized in different ways. Some summer residents do not care about it at all. The most civilized way of all to dispose of used water is to connect to a central sewer system, but not every summer resident has this opportunity.
So, draining water from a shower for a summer residence can be done in several ways:
- to the central sewer;
- into a drainage hole;
- into a septic tank or sewage pit;
- to the garden.
When building a shower for a summer house with your own hands optimal options are drainage and sewage pit. In conditions drainage pit water goes into the deep layers of the soil. Its construction will not require major expenses. It's convenient and reliable way drainage of used water in dacha conditions.
The drainage can be located either under the shower itself or not far from it, if the area allows. To begin with, a hole is dug with a side more than a meter and depth from 50 cm.

Water drainage equipment
When the top layer of soil is removed, the preparation of the hole begins. First, you need to compact the visible layer of earth, then half the hole is filled with coarse gravel, also suitable broken brick, pieces of concrete, etc., crushed stone is laid on top and compacted again. A wooden, plastic or steel pallet and shower frame.
Some gardeners are sure that soap and water does not harm plants. If, when building a shower for your dacha with your own hands, you decide to drain wastewater directly into the garden, you should choose a plot of land for this that is well lit by the sun, otherwise you will end up with a dirty swamp with croaking frogs at your dacha.
Advice! When building a summer shower, it is better not to save energy on water drainage. Reset large quantity drainage directly into the garden can cause an increased number of mosquitoes, flies, as well as the appearance of fungus and mold.
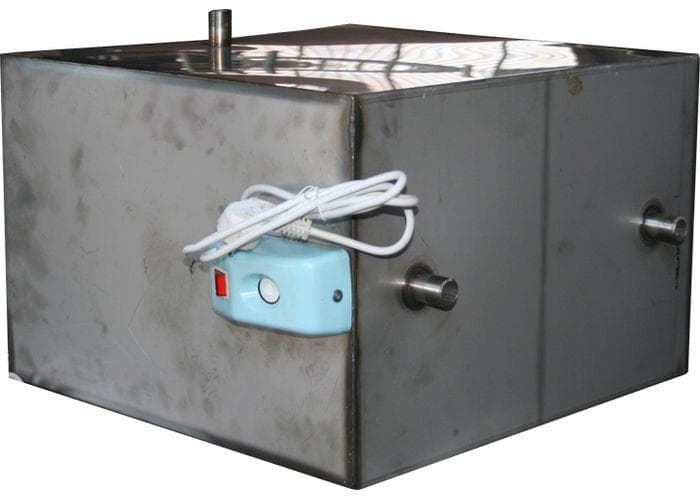
Summer shower tank
When choosing a tank for a summer shower, be sure to take into account the number of people in the summer cottage at the same time. A tank is selected for 30-40 liters per person per day. The container is painted black so that maximum efficiency use Sun rays. If water supply is used metal structure, then the inside on the north side must be pasted with a reflector so as not to lose the heat received during the day.

The tank for a summer shower should be dark - this way it will heat up faster from the sun
Important! When choosing a container, you should take into account that a tank with a volume of more than 300 liters may not have time to warm up.
It is best to choose a flat container, then the sun's rays will be evenly distributed over the entire surface of the water, and the weight of the tank will be distributed over the roof. In order for the water to heat up as quickly as possible, a so-called “greenhouse” is installed above the tank. A plastic film is stretched over a wooden frame, which creates a greenhouse effect and prevents heat from escaping.

A round tank warms up better and faster in the sun than a rectangular one
If you are planning country trips in the cold season, then it is imperative to consider the design of the tank with electrically heated water. When the air temperature is below 18°C, the water in the tank will not warm up properly and swimming will not be very comfortable. In this case, a heating element or instantaneous water heater is installed in the tank.
Important! The heating element can only be installed in a metal container.
To make bathing in the shower as comfortable and enjoyable as possible, a shower head is embedded into the tank. She shouldn't be too large diameter: The larger the watering can, the stronger the water pressure must be to activate each nozzle in it. Therefore, if a shower with a large shower head is provided, it is necessary to install an additional booster pump, which will create pressure.

Electric water heating tank for summer shower
An economical option for building a country shower
People often think about how to build a summer shower for their garden with their own hands, using a minimum amount of funds. Such a shower will provide a minimum number of people and provide maximum savings.
The simplest shower design is installed near the blank wall of the main building. A water container is attached to the same wall and a shower head is attached. The gender of such a soul is wooden pallet or a concrete area covered with a rubber mat for convenience. The walls of such a cabin are made of cellophane curtains or tarpaulin wrapped around a wooden frame.

Shower of simple design with plastic curtain
Any available means can serve as shelves for soap and shampoo. Even plastic bottle, cut in half and nailed to the wall. You can put shampoo in the lower part of the bottle, and soap or a washcloth in the upper part, with the neck, so that the water can flow freely and not stagnate.
Of course, this kind of construction does not look as aesthetically pleasing as a capital one, but it has a right to exist.
Capital construction of a garden shower
In order to produce, you need to create a project, find drawings and photos of the planned building and prepare the materials from which it will be built.

To create a capital building, a foundation is required
Building a permanent garden shower with your own hands is more difficult and expensive. But the durability of such a building justifies all the costs. To build a major summer shower you will need:
- sand-lime brick;
- cement;
- sand;
- broken bricks or large crushed stone for the foundation;
- slate or other roofing material;
- polyurethane foam;
- waterproof varnish or paint;
- finishing materials (plaster);
- sealing and waterproofing.
The first thing you need to do is prepare the drainage hole and pour the foundation. There are several foundation options.
Pile foundation. In each of the corners of the future soul, a hole is drilled with a depth of not less than a meter and drive there metal poles or pipes with a diameter of 90 mm. Each of the pipes rises 20 cm above the ground. The pillars are concreted in the ground, and a pin is welded to the top of the pipe.

Pile foundation for a country summer shower
Next they do bottom trim soul. Used for strapping wooden beam 10x10 cm, which is laid on concrete pillars and secured with a nut to the stud. The beams are attached to each other by connecting them into a lock and tightened with self-tapping screws. This type of foundation is suitable for wooden buildings.
Columnar foundation. For this type of foundation, it is necessary to dig 6 holes 20x20 cm and up to 50 cm deep. In each of the holes, formwork is made in the middle of the depth. To ensure the strength of the foundation, each pillar is reinforced (3 metal rods connected with wire are inserted). Cover the bottom of the pit with roofing felt and fill it with cement. To save money, crushed stone and sand are added to the solution. A 20-25 cm metal pin is placed in the center of the column, most of which is immersed in the solution.

Columnar foundation for a country shower
If you plan to make brick walls, then a trench 30-40 cm deep is dug around the perimeter, on which formwork is also made and filled with a solution of cement, sand and crushed stone.
Important! Be sure to treat the bars protective agent. Even used machine oil will do.
Next, you can make the frame of the shower cabin or remove the brick walls and install a shower tray. You should definitely use a vertical level; it will ensure the walls are level and will prevent your building from falling to one side over time. Be sure to design windows and ventilation holes in your garden shower, so the cabin will be well ventilated and will not get damp.

Summer shower on a columnar foundation