In order for the food to be tasty, and the process of preparing it not to be tedious, you need it. If in an apartment or private house there is a specially designed room for cooking, then in a dacha, which is usually small building, you have to resort to various tricks. Can be dropped off at the lodge small area under the kitchen, but in the heat it’s quite uncomfortable to cook anything in a cramped room. That is why many people prefer to set up summer kitchens in their dachas, projects and photos of which we will consider in this review. We will also talk about some of the nuances of independent construction, design and materials used.

Read in the article
What is a summer kitchen and its types
Summer cuisine on summer cottage- This is a free-standing or intended for cooking and relaxation. Depending on the type of construction, it can be used only during the warm period or all year round. An outdoor kitchen can be open or closed.

Outdoor summer kitchens
Country kitchens open type, or, as they are simply called, summer ones, are a structure of 1-3 walls with a canopy and look very similar. This type of kitchen has its advantages:
- simplicity of design, which allows you to build it within 1-2 days;
- low cost;
- absence of stuffiness, odors and burning, typical for kitchens located in the house.
The disadvantages include:
- use only in the warm season;
- equipment and furnishings have to be removed during cold weather;
- You can’t leave food out for a long time.


Combining a summer kitchen with a veranda or terrace of the house
The simplest option at the dacha is to equip it on. It is ideal if the extension already exists, otherwise you will have to build it first and only then arrange a place for cooking, eating and relaxing. Ideally, the veranda and the main building will have a single glazed wall.


Open structure attached to a building
You can arrange a kitchen on a site adjacent to the “blank” wall of the building. To do this, you first need to level the soil, lay it and install an awning. Having prepared the place, you can place a grill or barbecue on the site.
You can protect yourself from drafts by installing removable or sliding ones, as well as using roller blinds or tarpaulins. Also, large decorative pots are often installed in the openings, which provide additional coolness on a hot day. This kitchen option is much simpler and cheaper than the others, but if the soil subsides, the kitchen may tilt.

Open kitchen-gazebo for a summer residence
A good option open kitchen, especially if installation is planned, or for a pleasant pastime with family and friends. This design is also convenient for processing the harvested crop.
Because this stationary design, then you will need arrangement - columnar or strip. The type of base depends on the material from which the gazebo will be constructed. Basic structure can be made of metal profiles, stone or brick, and the roof can be made of ondulin or ondulin. One wall must be closed, preferably on the side of the prevailing winds. Openings can be closed with roller blinds, curtains or lattice panels.


Closed summer kitchen in the country: projects and photos
An enclosed kitchen is a permanent structure, built separately, attached to a house or any building located on. In such a building you can cook, eat or relax with friends at any time of the year, regardless of the weather outside. Closed summer kitchens have, and. They can have regular fireplaces, barbecues or barbecues. Also, pavilions with kitchens are equipped with utility rooms. In principle, this is a full-fledged house in which guests can even stay overnight.


Where to start building a kitchen in the country
Before building a summer kitchen on your site, you need to decide on a number of issues. In particular, you need to decide for yourself:
- How often will the building be used: only in summer or all year round(the type of construction depends on this).
- Dimensions. This parameter depends on whether the room will be used only for cooking, family dinners, harvest processing or for evening gatherings with a large group.
- Will it be installed, grill or barbecue?
- What kind of exterior and interior design is expected?
- Kitchen location. Will it be a free-standing structure or attached to the main building? How far will it be from communications and the roadway?
- Budget.
Choosing a kitchen design in the country: photos of projects
Basically, the design of a country kitchen is determined not by some standards, but by a personal idea of its appearance and functionality. However, few people can clearly imagine whether the chosen project will be comfortable and successful. That's why we've put together a collection of the most good options summer kitchens, photos of which are presented at the very end of our review. Like any room in the house, the summer kitchen has its own functional areas: a working and dining room. In accordance with this, the design is developed.

Summer kitchen design: dining area
When arranging the dining area in the summer kitchen, you must first take into account maximum amount people that can accommodate for , and not on weekdays, but on holidays. Minimum dimensions dining area should be 3 × 3 m 2. Standard set furniture includes, benches or. For an open-type kitchen in the dining area, it is better not to use it, since dampness will quickly ruin the upholstery. Ideal option There will also be sofas.


Summer kitchen with barbecue: work area
Since the work area is designed for comfortable cooking, it should include required elements:
- or gas stove;
- cabinet for cutting food and cooking;
- cabinets for kitchen utensils.
This set can be supplemented with either a barbecue or a fireplace in the dining area.


Do-it-yourself summer kitchen in the country: deciding on the material
Depending on the design and type of summer kitchen, the material is selected. If this is a simple open building, then you can make a frame from a metal profile and an awning. If the kitchen is located in a pavilion, you will need brick, stone or wood. For capital structures, you will need to build a foundation, which means you will have to fork out money for pouring. Let's consider several options for summer kitchens from different materials.

Brick summer kitchen
During the construction of a summer kitchen, it can be used for the construction of support pillars, a protective partition (open type), walls, a stove, a fireplace, a barbecue, fences, etc. (semi-closed and closed type). For the main structure, ordinary or is used, and for fireplaces - fireproof. In some cases, the material is specially coated with a transparent protective layer.


Wooden summer kitchen made of timber
Just like brick, it is used for the construction of open, semi-closed or closed type. This material is mainly used to make support posts and trim. Sometimes summer kitchens are made entirely of timber, but this option is good if other buildings in the country house are made of the same material. Such structures look massive and are not cheap.


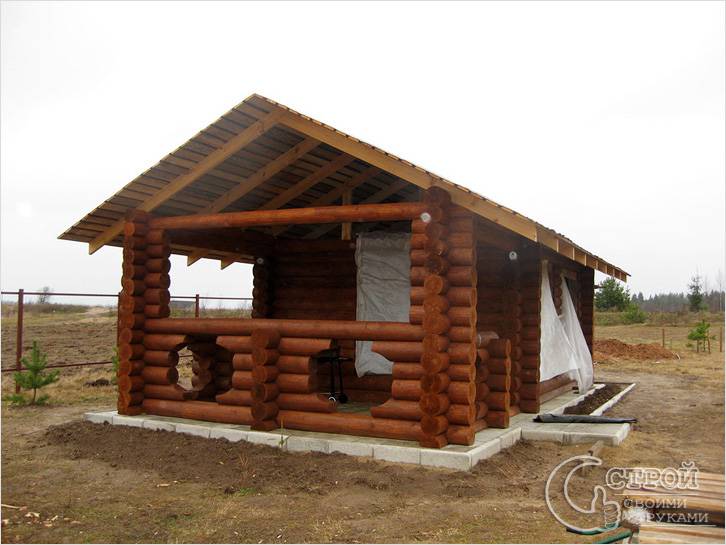
 Kitchen attached to the bathhouse
 Nuances of using other materials for construction
For walls, in addition to brick and timber, it can be used a natural stone, polycarbonate, glass, corrugated sheets, metal-plastic panels, etc. As finishing material use or lining. When arranging the floor, paving slabs, wood or stone are used. It all depends on the interior design and budget.


 Combination of glass, metal, polycarbonate, wood and plywood
 How to build an indoor summer kitchen with your own hands: main steps
To build a kitchen without problems, you need to break the work into several stages and follow the recommendations given. First of all, a place is selected and clearing is carried out. Next you need to create . Once the base is ready, you can begin building walls and installing Final stage- performance interior decoration.
 Summer kitchen plan
 Choosing a site for construction
In order for the kitchen to look harmonious in the territory of the dacha, you need to choose the location wisely. The building must meet the following requirements:
- optimal distance from the main entrance to the house;
- maximum distance from the street, cesspools, places of detention, etc.;
- the distance from the kitchen to the roadway should be such that noise and exhaust gases reach it;
- accessibility for water supply, and.


A comment
Head of the repair team construction company"House Premium"
Ask a Question« When building a country kitchen, you need to take into account the proximity groundwater to the surface of the earth, the relief, the presence of trees nearby and the wind prevailing in the area.”
Site clearance and foundation installation
Once the construction site and the design of the dacha have been chosen, you can proceed to clearing the site and constructing it. It depends on the design what kind of foundation will have to be made. It is possible to build a country kitchen without a foundation, for example, if it consists of four supports with an awning installed on a concreted area. For closed type kitchens made of stone or, as a rule, a strip foundation is installed, and light or wooden structures erected on a columnar foundation. We will consider for a closed kitchen:
- First, we clear the selected area of grass and bushes, carefully removing all roots.
- We make markings according to the size of the future kitchen (drive pegs in the corners and stretch twine between them).
- Dig holes around the perimeter with dimensions of 300×300×700 mm or a trench 300 mm wide and 700 mm deep.
- Creation of sand and crushed stone 200 mm thick.
- Preparation of concrete solution and pouring of pillars and platforms (hardening of concrete can last from a week to one month). If you decide to build a strip foundation, then you need to make it from boards or OBS slabs, place it on both sides of the trench, and fill it with concrete.


For your information! When constructing a light open kitchen, it is recommended to raise the floor level above the ground to a height of at least 70 mm so that during rain there is no flooding of the room.
Walling
Regardless of whether there are walls or not, support pillars they will still have to be erected, since the roof of the summer kitchen will be installed on them. For supports, use metal profiles, bricks, stones, or rounded logs. You can build solid walls with doorways, and it will be a full-fledged house in which you can spend time even in winter, especially if you make it. The summer kitchen also looks beautiful, in which metal-plastic frames with double-glazed windows are placed between the supports. You can make frames and sheathing from clapboard (wooden or plastic), corrugated sheets or siding.


Installation of a summer kitchen roof
The lid is very important element any structure, since it protects from wind and various precipitation. For a country summer kitchen, you can choose a flat or lean-to kitchen, which is an inexpensive and easy-to-install option. Gable roof more durable and reliable. There is another option - hip roof.


For your information! A long roof overhang will well protect the walls and base of the building from the destructive effects of precipitation.
Interior decoration and decor
After the box or frame is made and the roof is installed, you can begin to decorate the interior of the room. Wooden walls and the ceiling must be impregnated with a special antiseptic and moisture-repellent composition, after which it can be coated with varnish or The comfort of staying in the room largely depends on the interior decoration Cushioned furniture comfortable, but not the best option for open summer kitchens
Don't forget about the surrounding area. Along the perimeter of the kitchen you can place tall or climbing plants, arrange paths made of sand or stone, and also install garden lanterns ( good idea– lighting fixtures for solar powered).

Construction of a very simple summer kitchen design with your own hands
Let's look at how to independently build a simple but functional closed summer kitchen at your dacha. First you need to draw up a drawing indicating all dimensions, prepare the material and the appropriate tools.
| Illustration | Description of action | |
 | First of all, we clear the area for construction, make markings using pegs and string, and determine where the foundation piles will be located. In our case, there are 12 of them. With the help of a gardener or homemade drill we make holes for the piles. | |
 | Next, we make “glasses” (galvanizing waste, old plastic buckets, etc. will do) and a reinforcing lattice or mesh. We insert them into the drilled hole and fill them with concrete. The depth of the pit for the pile is made in the range of 700-800 mm, and the diameter is 300 mm. For the base to last a long time, it must harden from a week to a month. | |
 | Lay a layer of roofing felt waterproofing on the finished pillars. Next, we make the bottom frame of timber on the piles. | |
 | We install vertical supports and fasten them together cross beams and make the top trim of the pillars. Next on finished frame We install a gable roof. | We install door and window frames. We make the windows semi-hinged. |
 | In order for the building to last for a long time, it is necessary to treat it with antiseptic and water-repellent compounds. Give a beautiful appearance and internal view construction can be done by covering it with stain and varnish for exterior use. | .So, our summer kitchen is ready. We install a bench nearby, lay out paths and you can decorate it with plants. |
As you can see, it is quite possible to build a kitchen in your dacha. If you have little experience in construction, then it is better to choose a pitched roof option.
The cost of a summer kitchen for a turnkey cottage
After reading this article, many people will have a question: a summer kitchen in the country is good, but what is the price of the issue? The cost of construction depends on which option you prefer - to do everything yourself with your own hands or order a ready-made collapsible structure from a construction company. If the choice is made in favor of the latter option, then the simplest summer kitchen made of timber and measuring 3x3 m costs at least 45,000 rubles. To determine the cost of a structure built independently, you just need to calculate the cost necessary materials, delivery and time costs.
A few words in conclusion
Every dacha should have a summer kitchen, since you can not only comfortably cook food in it on a hot day and dine with the whole family, but also gather in the evenings close company friends. We told you what types of summer kitchens there are, what can be used for construction and how you can build them yourself. We hope our article will help you when you decide to start building a kitchen in your dacha. If you still have any questions, ask our experts and they will be happy to answer them. We invite you to look at photos of kitchens in the country, made with your own hands, perhaps you will find something interesting for yourself and want to implement it on your site.
On many private farmsteads old building you can find a small house, which the owners call a summer kitchen. In winter it is hardly used, but in the warm season it is full of life. Does it make sense to build it in the yard of a new house?

Despite the fact that modern houses are much more spacious than buildings from the middle of the last century and are often equipped with powerful climate control technology, summer kitchens have not lost their relevance. This is due to several factors. The main one is the desire to spend as much time as possible on fresh air, and not in an air-conditioned room. The gentle blows of the breeze and the rustling of leaves are much more pleasant than the monotonous hum of the air conditioner and the flow of cold air that threatens to catch a cold.
Abundance of modern building materials and technology allows you to equip a summer kitchen no worse than an “all-season” one. With electric stoves and gas grills, you can cook even those dishes that are not available in the main room.
Advantages and disadvantages
Spending a lot of time in the kitchen is a peculiar tradition in our country. Here we not only cook and eat, but also receive guests, sit with the whole family all evening long over tea and conversation. So why not do this outside during the warm season?

There are many advantages to this solution:
- The modern rhythm of life is such that we spend most of our time indoors. And this is not the most in the best possible way affects health. Evenings spent in the garden will strengthen it.
- Cooking outside - great way maintain a constant temperature in the house, turning on the air conditioners less often. The steam from the pots and the heat from the burners will simply be carried away by the summer breeze. This is especially true for those who prepare canned fruits and vegetables for the winter.
- All odors remain outside. Agree, the smell fried fish or a cutlet spreading throughout the house and eating into furniture is not the best flavoring.
- For families with small children, such a kitchen is a great way to combine walking with the kids and cooking. It’s enough just to look at the little ones frolicking in the garden, minding their own business.
The building has only one drawback - seasonal use.
Types: open and closed, examples of successful layouts (photos)
Structurally, all buildings of this type are divided into two types: open and closed. The choice of one of them depends on the planned method of operation, the amount you are willing to spend on construction, the area of the free site and many other factors.
Outdoor summer kitchens
This building is more reminiscent of a well-equipped gazebo or terrace.

It is open on 2-4 sides, and protected from the sun and precipitation by a canopy. The advantages of open summer kitchens include:
- maximum light and air;
- low construction cost;
- no need for capital design;
- speed of construction.
But it also has disadvantages:
- ubiquitous dust, which will constantly have to be wiped off from surfaces before preparing food;
- insects that will definitely flock to the light;
- neighborhood cats who will come at night in search of something tasty that was carelessly forgotten on the table;
- short service life - only in summer.
Closed summer kitchens
Such structures are a full-fledged house with a foundation, walls, roof, windows and doors.

Most often this is a light, poorly insulated building. The advantages of this type of structure include:
- long service life - from mid-spring to mid-autumn, especially if a stove is installed inside;
- absence of insects and uninvited four-legged guests;
- the ability to lock the room, which means leaving not only food, but also valuables in it;
- In winter you can store garden furniture here.
Among the disadvantages:
- high cost and complexity of construction;
- limited amount of light and air - after all, this is a closed building.
With a large glazing area, the room can easily be transformed into an open kitchen by simply opening or completely removing the windows (if provided for in the project).
Combined summer kitchens
This is a kind of symbiosis of open and closed design. It provides a small closed part equipped for functional area, and a large open seating area with a table, chairs and possibly a barbecue.

The dining area may be under open air, representing a patio. Or it can be protected by a canopy or pergola. A platform covered on all sides with ivy or other vines also looks great. In such a green gazebo it is fresh and cool even in extreme heat.
This option combines the advantages of open and closed kitchens, while having virtually no disadvantages.
Project options
There are a lot of options for building open and closed summer kitchens. It all depends on the imagination and financial capabilities of the owner.
Most inexpensive option- regular wooden gazebo with hard floor covering. Any roof can be used available material. It can be decorated climbing plants. This creates shade, comfort and prevents drafts.
Properly used textiles can achieve the same effect. In addition, curtains drawn in the evening will protect from prying eyes and insects.

If necessary, you can make the summer kitchen closed on one or more sides. To do this, it is enough to cover the spans with light material that does not create a large load on the base - wood or plastic. Often one of the “walls” is formed by the chimney of a grill or oven complex.
One of the most successful options in our climatic conditions is a closed gazebo with large area glazing - French windows. In warm weather, they can be opened, creating a space blown by the breeze, and in cold weather, they can be closed, keeping the heat inside. This type of building can be used from early spring to late autumn, especially if there is a stove inside.
Where is the best place to place a summer kitchen?
When choosing a location for a summer kitchen, you need to consider several factors:
- Possibility of supplying communications. To ensure full use of the building, it is necessary to supply water, sewerage and electricity. Gas is not necessary; it is much easier to install an electric stove or use cylinders.
- Remoteness outbuildings. The kitchen should be as far as possible from outdoor toilet, septic tank, dog kennel and sheds for livestock and birds. This will eliminate the possibility of an unpleasant odor appearing in any wind direction.
An open summer kitchen can be adjacent to the house. This greatly facilitates and reduces the cost of construction and installation of communications. And it’s more pleasant to move between the house and the extension, especially in the rain. It is advisable that there be an adjacent wall without windows. Then smoke, odors and noise will not penetrate into the house.

It can be especially cozy in a space formed internal corner Houses. Then the kitchen seems to have two walls. Its construction requires minimal financial and time costs.
Adjacent to only one wall gives greater planning freedom. You can vary the size, arrangement of furniture and decoration methods. The main thing is that the kitchen is decorated in uniform style with the facade of the house.
A very popular option for placing a closed summer kitchen is above the cellar. In this case it monolithic walls serve as the foundation, which significantly reduces costs. In turn, the building serves additional insulation. This can be either an inexpensive panel house or a full-fledged timber structure. In the latter case, care must be taken to ensure that the foundation can support the weight of the structure.

More interesting options designing and decorating a summer kitchen on video:
DIY summer kitchen: video
Building a simple summer kitchen, closed or open, is not difficult. The most common type of wood used for this is beams. different sections, board, lining. To protect the material from moisture and insects, it must be coated special compounds. It is also advisable to use fire retardants, which reduce the flammability of wood.
Let's consider an inexpensive and easy-to-execute construction option.
- Laying the foundation. For a light panel building or an open summer kitchen, in most cases a columnar foundation is sufficient. Work begins with marking and removing soil. Then a cushion of crushed stone and sand is poured, formwork and a reinforcing frame are installed. All this is filled with concrete. After it has completely hardened, you can continue working.

- Lower crown. For waterproofing, an insulating material - roofing felt - is laid on each of the pillars. Then the lower trim is assembled from the processed protective composition logs It is attached to the concrete with anchor bolts.
- Construction of vertical supports and installation of horizontal lintels. All this is also made of wood and connected using metal corners, dowels or cuttings. The installation of jibs in this design is not necessary; a few horizontal jumpers are sufficient.

- Top frame and rafters. Mounted on top of vertical bars top harness and the rafter system and roof sheathing are assembled. The method of its installation depends on the chosen type of roof.
- Supply of water supply and sewerage. It is necessary to bring the main communications to the future structure before installing the floor. This will hide the pipes and make installation of the coating easier. Since the system will only be used in summer, it is advisable to introduce pipes from below, between the foundation pillars.
- Flooring. The most budget-friendly and easy-to-use flooring option for such a kitchen is edged board. At correct processing it will last for many years. There is no need for a subfloor in a summer building; we lay it straight away.

- Installation roofing material. The technology for laying the roof depends on the type of material. It can be laid directly on the sheathing or on a special substrate. It is desirable that these be materials with little resonating ability - slate, roll roofing or ondulin. Then the room will not be too noisy when it rains.

At this stage, the open summer kitchen can be considered ready. All that remains is to finish, install furniture and decor. If you plan to have a closed kitchen, construction works need to continue.
- External cladding. The outside of the structure is sheathed with boards, siding or any other facade material. Preferably the same as the house is decorated, or similar to it.
- Installation of windows and doors. There is no point in installing expensive double-glazed windows and doors in a poorly insulated building. Regular wooden frames will suffice.
- The inside of the wall can be lined with clapboard, plastic or moisture-resistant plasterboard followed by painting.

After finishing work is completed, the room can be used for its intended purpose.
What type and size of kitchen to choose, whether to build it yourself or hire specialists for this - everyone decides for themselves. But this building will undoubtedly make the site much more comfortable and will allow you to spend many unique days and evenings. As you can see, you can build a summer kitchen yourself without any special skills or significant material costs.

Summer kitchen, be it simple gazebo with a barbecue or a solid structure with a stove and communications - this is an essential building on any site. After all country life unimaginable without barbecues, gatherings at outdoors, as well as without seasonal preservation of products. In this material, we presented 11 tips, 70 photo ideas and several videos that will help you create your ideal summer kitchen.
What types of summer kitchens are there?
They can be divided into three types:
- Outdoor (for example, barbecue gazebo, terrace or patio)- a simple frame building without insulation, often without walls (entirely/partially) or even a roof. Essentially, an open summer kitchen is a canopy or gazebo with a barbecue/stove and a dining area that can only be used in summer. It is good because it is comfortable to cook, eat, and communicate with guests on fine summer days. An open kitchen is easier, faster and more economical to build than a closed one. in winter summer construction with a canopy can be used as a warehouse for storing household goods. The disadvantages of an open kitchen include the limited period of use of the structure, as well as the lack of protection of furniture, appliances and kitchen inhabitants from insects, rain, wind and sun. For the winter, all furniture and equipment will have to be stored in a dry room.
Classic summer kitchen with barbecue and oven in the yard country house in the Moscow region
- Closed (for example, grill house or veranda)– a permanent covered building/annex with insulation and glazing, sometimes even heated all year round. In fact, this is a real house, consisting of a kitchen and a dining room. A closed summer kitchen is good because you can cook and eat in it even in bad weather with rain and winds. Thanks to the walls and roof, such a house can be equipped with a full kitchen with a refrigerator, microwave, gas /electric stove , dishwasher, TV and other equipment. True, on warm days, cook in closed kitchen it will be as hot as in the main house. Also keep in mind that its construction will cost you more than an open-air structure.


- Combined– this type of building combines open and indoor space under one roof. Also included in this category is a summer kitchen combined with a bathhouse. This kitchen is good for everyone and has only a couple of disadvantages - doubly complex design and an increased budget.
Now let's look at the characteristics of free-standing and attached kitchens:
- Freestanding- are good because they allow you to place the fireplace away from the house so that odors, smoke and noise do not penetrate the house. Building a separate summer kitchen makes sense if you have enough space on your site, if it has, say, beautiful garden or a pond if you want to spruce up the area with a nice new structure.
- Adjacent to the house– a terrace or veranda can become an excellent summer kitchen, because it is much easier and cheaper to build (one wall has already been erected) or refurbish, and it is very convenient to move between the house and the outbuilding. True, the disadvantage of a summer kitchen on the veranda/terrace is that smoke, heat, smell and fumes from the stove will enter the living spaces, and part of the kitchen will remain a walk-through area.


11 tips for building, arranging and designing a summer kitchen
No matter how thoughtful and beautiful your summer kitchen is, its poor location on the site can complicate both construction and further operation. Therefore, the location is the first thing you should think carefully about.
- WITH practical point view, it is more convenient when the summer kitchen is located near the house. This makes it easier for the inhabitants of the dacha to move between objects, and engineering communications cheaper, faster and easier. However, from an aesthetic point of view, would be better suited a place near the “attractions” of the site that can be admired (for example, near a pond or garden). The following factors are also bonuses: protection from the wind, privacy from the eyes of neighbors and proximity to trees that can shade the building and keep it cool on hot days.

Summer kitchen at the dacha by the pond
- Inappropriate places for a summer kitchen: near the road, garage, toilet, cesspools/compost pits, chicken coop and other places where your rest may be interfered with unpleasant odors, noise, exhaust gases, etc.
Tip 2. Grill, barbecue, oven or oven complex? Solve this issue before developing/selecting a summer kitchen project
- If the stove is the heart of the city kitchen, then the grill, barbecue or oven can be called the heart of the country kitchen. Before you start designing, think about what kind of fireplace you need: a grill, barbecue, oven or even a stove complex? Should the grill be stationary or portable? Coal or gas? With or without chimney? What size and location will the fire source be located? A lot depends on your choice - from the type of foundation to the shape of the roof. So, for example, to build a stove you will have to take care not only of the foundation, chimney and cladding, but also provide a place for storing firewood in the project.
Understand the features different types the street hearth will help you.

Stationary gas grill built into a brick structure
Tip 3. Do you want to build a summer kitchen with your own hands quickly and on a budget? Build an open gazebo made of wood, with a light roof, without main walls and a stove
In this case, instead of a monolithic or pile-strip foundation you can get by with a columnar foundation. The building itself will consist of 4 (or more) supports and a single-/double-slope roof with a light roof, for example, polycarbonate. This is very simple design, which you can actually build with your own hands in just a couple of days and with a minimal budget.
The following selection of photos presents design options for simple summer kitchens.

A simple summer kitchen at a dacha in the Moscow region

The easiest way to build a summer kitchen with your own hands is to use wood. True, larch or teak should be preferred over pine, as they are stronger and, moreover, age beautifully

Simple summer kitchen made of timber with a pitched roof
However, there is a way to make a summer kitchen with your own hands even faster and cheaper. Fold the platform from paving slabs, set up one or two large garden umbrellas, arrange the furniture, install the sink and portable grill and start cooking!
On the one hand, a cellar in a summer kitchen is very useful, because it is as convenient to store food supplies in it as in a refrigerator. On the other hand, its creation significantly increases the cost and complexity of construction. Especially if we are talking about an open building, because then the cellar will have to be insulated and protected from leaks. Even in the main house you can do without a cellar and basement, let alone a summer kitchen.
Tip 5. The summer kitchen, the facade of the house and the landscape should be designed in a single manner
When choosing or developing a summer kitchen project, thinking through options for its finishing, keep in mind that it should be combined with the facade of the house and other buildings on the site. This way you will create a real dacha complex and achieve a feeling of orderliness. It doesn't have to be a 100% match color scheme, decoration, architecture and style, but objects must have something in common. The photo below shows an example of a modern summer kitchen on the terrace wooden house from timber.


- The closer the summer kitchen is to the house, the more similar both buildings should be.
- If there is an object on the site that stands out from the “overall picture,” say, a hastily built bathhouse, then the design of the summer kitchen can be planned in such a way that it combines the features of both the bathhouse and the house. This way, some of the chaotic nature of the development will be corrected.
In an open kitchen, the floor can be covered with:
- A wooden board coated with oil or wax for exterior use (varnish is worse, as over time it will begin to crack and require re-coating).

Outdoor kitchen in the country with a floor made of larch deck boards coated with matte azure based on alkyd resins
- Terrace board (made of wood-polymer composite).

- Stone or special street tiles. True, such a floor requires strong foundation and a big budget.

- By the way, we recommend avoiding too dark a floor, as crumbs, dirt and puddles of water will be especially noticeable on it.
- If the floor of the open kitchen has a slight slope (1-2 cm), rainwater will drain on its own.
Tip 7. Follow the “working triangle” rule when planning your kitchen
In arranging kitchens, there is a so-called rule. “work triangle”, which means that three work areas (sink, stove and refrigerator) should be in reasonable proximity to each other, forming a triangle. Ideally it should be equilateral. Thanks to this layout of zones, the kitchen is as convenient as possible.
- In a summer kitchen, this rule is not always applicable. pure form, because she can be too small , narrow, elongated, irregular in shape, instead of a stove, it most often uses a stove, grill or barbecue, and there may not be a refrigerator at all. However, try to get as close to the ideal as possible and do not line up your work areas in one line.
So, for example, if in your summer kitchen the source of fire is a barbecue and it is moved outside, then the sink and food preparation area should be installed as close to the exit as possible.
- If the kitchen is small, then you can build the kitchen in an L-shape. For narrow kitchen(for example, on a veranda) a two-row layout may be suitable. IN square shaped kitchen The U-shaped layout will fit most well.

If only a single-row layout is possible in your summer kitchen, then a compact mobile island/peninsula will help make it more convenient.
Tip 8. The dining area should be at least 2 m from the grill/stove
Ideally the distance between dining table and the barbecue/stove/grill should be approximately 3 m. In this case, smoke, heat and odors will not disturb vacationers, and wood chips, ash and sparks will not spoil the appearance of the dining area.
Tip 9: Use furniture that can withstand outdoor conditions
The kitchen set and dining furniture in the summer kitchen must withstand high humidity and temperature changes, so from luxurious wooden furniture, furniture made of laminated chipboard/MDF, as well as furniture upholstered in fabric or leather should be discarded.
But the following options are suitable for a summer kitchen:
- Veneered MDF furniture;
- Wooden garden furniture(folding structures are especially suitable, which at the end summer season can be easily moved to the pantry);
- Wrought iron outdoor furniture;
- Furniture from of stainless steel(if you don't want to clean it up) kitchen set on winter period, choose stainless steel furniture);
- Wicker furniture made of natural wicker, rattan or plastic;
- Plastic furniture (eg, polycarbonate).
The photo below shows an example of the design. summer kitchen-terrace with all-season stainless steel fittings.

In this selection of photos you can see ideas for furnishing a summer dining room.

Summer residents often forget to pay enough attention to the lighting of the summer kitchen. But it is with its help that you can create real coziness and comfort.
- Ideally, artificial light in the evening should be soft, uniform and at different levels. To do this, the room should be illuminated not with one chandelier, but with several lamps: floor/pendant lamps, wall sconces, spotlights, pendants, table lamps, floor lamps and/or garlands of light bulbs.
- With the help of light, you can divide the space into zones, for example, the kitchen and dining room. This way, during evening meals, you will have the opportunity to hide the work area in the dark and illuminate only a beautiful table.

- To make it comfortable for you to cook in the evenings, install the light directly above work area. If you limit yourself to a lamp installed behind it, your back will block the light while cooking.
- Metal, plastic, wooden and wicker lamps with additional protection from water are suitable for lighting an open summer kitchen. Ideally, these should be garden lamps.

- Around the summer kitchen and along the path you can install lanterns that run on solar batteries. They accumulate energy during the day and turn on automatically in the evening. True, they provide little light, and on cloudy days they don’t charge at all.
- With the help of hedges, pergolas or screens with climbing plants, you can make the summer kitchen more secluded and block the view of unsightly areas of the site.
- Decorative plantings, flower beds and bushes can mark the boundaries of zones, hide the foundation and simply decorate the summer kitchen and general form territories.
For relaxation and the like. If you don’t know how to build a summer kitchen with your own hands, then you should pay attention to studying next material, which will introduce you step by step to this difficult process. Before starting construction, let's highlight the advantages of a summer kitchen.
What is the purpose of the summer kitchen?
A summer kitchen is an ideal assistant for every housewife in spring, summer and autumn time of the year. You can prepare food in it, make twists, fry, boil. All couples will be outside your living space, and this is a huge plus, for example, in the heat. A summer kitchen is a suitable area for relaxing, eating, and installing some furniture, including a stove and shelving. Of course, this is an optional building; it does not have to be present at absolutely every dacha. But if you strive to create coziness and comfort, then its presence will be quite logical.
Types of outdoor kitchens and where is its best place
Depending on the material used, summer kitchens are divided into several types:
- Wooden summer kitchens. They are made from laminated veneer lumber, rounded logs and the like.
- Summer kitchens made of metal. In this case, simple frame structures, which are very easy to assemble. Their advantage is the ability to move from one place to another.
- Budget summer kitchens. In this case, available materials are used, for example, wood or metal.
- Brick summer kitchens. They can also be combined with metal and wood.

Such a structure can be open or closed. If you plan to use it in winter time years, then glazing and insulation will be required. If not, then it will be enough to carry out a simple construction without performing finishing work.
When it comes to choosing the location of the summer kitchen, it is important to take into account some factors. For example, you should decide how much space it will take up. What shape will the building be: square, round, oval, rectangular or have irregular shape. Based on this, you select appropriate place, while taking into account the following points:
- Distance from utility yard, house, garden and other buildings.
- Warmability of the selected area. For example, a summer kitchen can be in the shade of a garden or, conversely, in an open space.
- Presence of drafts. This is important, since it is undesirable for a draft to constantly flow along the legs and back in the chosen place; resting in such conditions can provoke some diseases.

Equally important will be the study of the terrain. For example, it is necessary to determine the presence of groundwater, namely how high it lies. The nature of the soil. Surrounding plants. It’s very good if you transfer your entire idea onto a piece of paper, thereby making a project for your future summer kitchen.
Construction of a summer kitchen made of bricks
A summer kitchen built of brick will represent reliable construction, which can be used during cold periods. But for it to last for a long time year, the first thing you should do is make a reliable foundation.

Making the foundation. You should not assume that the foundation for a summer kitchen should be as strong as for a house. If the building consists of brick walls, wooden roof, then you should not drive piles and deepen the foundation too much. Such a building will not exert much pressure on the ground, so a combined foundation can be made. If you have chosen rectangular shape building, then six pillars will be enough, three on each side. If the pillars are chosen wooden post and brick, then the trench will be made as follows:
- Following the markings of the wall, a trench is dug under the masonry. Its depth will be 0.5 m and width 0.4 m. As for the length, it must correspond to the dimensions of the future building.
- In the places where the support will be installed, a hole 0.7 m deep is dug. The size of the hole can be 0.4 × 0.4 m.
At the next stage, the pillars are mounted in the dug hole. They should be aligned with strip foundation, which must be connected to the pillars. When the pillars and tape are ready, you can begin making the platform.

Production of the site. As for the site, it must be level, since furniture, accessories, equipment, etc. will be installed on it. For example, it can be made from paving slabs. To do this, remove the soil from inside the foundation to a depth of 0.2 m. But this must be done only after the foundation has completely dried. Next, sand is poured evenly into the pit, which should preferably be compacted well. The backfill layer should be 70 mm. During the compaction process, the sand can be slightly moistened so that it settles as best as possible. When all preparatory work You are done, you can start laying paving slabs.
Note! To speed up the process of laying tiles and not wait for the foundation to dry completely, you can build a blind area around the perimeter that will hold the entire structure in a stationary and strong state.
After laying the paving slabs, the top edge should rise above ground level by an average of 50 mm.
Making a blind area. Thanks to the blind area, the structure can become somewhat decorative. Moreover, it will protect the foundation from excess moisture. To do this, along the perimeter of the summer kitchen you should retreat 0.5-0.7 m from the wall. This distance is enough to make a blind area. Next, you make wooden formwork. In this case, the blind area should have a slight slope from the foundation, such that water falling on it flows freely and does not stagnate. The blind area is poured with concrete and leveled using the rule.

Laying the walls of the summer kitchen. When building a summer kitchen, half a brick will be enough. Before starting work, you first need to prepare mortar and brick, which can be laid directly on an already made site. During work, the masonry must be regularly checked for level. If you plan to install a door frame or windows, then during the brick laying process you will need to install beams or lintels in specially designated areas. Once the walls are laid out, you can begin next stage. From wooden beam a Mauerlat is made, it will connect the entire structure into a single whole and will serve as an excellent basis for installing the roof.

Roof installation. It is not recommended to choose heavy and fragile material as a coating. You can, for example, use a corrugated sheet of metal. In any case, you must first make the roof frame and sheathing. As for the type of roof, it can be, for example, single-pitch or gable. However, there are no restrictions. The most important thing is to maintain the appropriate angle of inclination. To make the sheathing you should use wooden beams and bars. The design features of the roof directly depend on the roofing material you choose.
Interior decoration of the summer kitchen. When all the major work on installing the walls and roof has been completed, you can begin finishing works from the inside. There is also no strict rules. For example, brickwork can be made for jointing. If you wish, the walls can be plastered and then puttied. Check the condition of the paving slabs. Each seam must be filled with grout.
Conducting communications

Special attention must be paid to such an important process as carrying out utility networks. Their number will directly depend on how you want to use the summer kitchen. You may need to install gas, electricity, sewerage, and water supply.
Note! Communications must be connected not at the end, but as the summer kitchen is being built. Some communications will be carried out under the foundation, others will not. For this reason, it is important to take this stage of work into account and plan its sequence during the manufacturing process of the project.
So, we found out in what sequence the process of building a summer kitchen takes place. Of course, there are many other options for its construction technology. You should adhere to your own taste and wishes, and most importantly, financial capabilities.
Video
Construction of a frame summer kitchen:
Photo