Colors. At the moment, there are about 500 species of violets, each of which has its own unique color and shape of petals. Almost every fan of this can do leaf propagation at home. Let's take a closer look at how to grow at home without spending money.
A little about violet propagation
There are four methods of growing a flower. at home - the process is simple if you know about the sequence of methods: leaf, peduncle, stepson.
Each method is good in its own way, but propagating violets with a fragment of a leaf - the best option for growing plants at home. Why is this method better? It is the most optimal and easiest.
Having mastered this reproduction technique, you can move on to more complex ones. In addition, almost all types of violets can be propagated using this method - except for the Saintpaulia chimera variety. 
Important! "Saintpaulia chimera" can only be propagated by peduncles or stepsons.
Selecting and preparing leaves for planting
Depends on the selected sheet future life flower, so take this issue seriously. Let's look at propagating violets by leaf step by step.
Violet leaves grow in rows. Counting from the bottom, it is not recommended to take propagation material from the first row, as it is old. You should not take the material from the middle of the socket - it is small. It is best to take from the third row - the leaves are young, strong and quickly produce offspring.
When choosing a material, you need to pay attention to the following conditions:
- the cut leaf must be healthy, bright in color, corresponding to the plant variety;
- must be absent yellow spots, creases, marks from and other damage;
- the material must be elastic and keep its shape.
If the material was taken at an exhibition and has withered, put the leaf in warm water with potassium permanganate for a couple of hours. 
Then the sheet should dry. Once the leaf has been selected, the next step is to trim and prepare for planting.
How to choose a leaf for propagation
How to prune correctly? There are several ways:
- the first option is to break it off with your hands
- second - take advantage sharp knife, blade or garden pruner.
Most gardeners prefer pruning shears, since this option is more harmless to the plant. 
Did you know? For the ancient Greeks, violets were an indispensable attribute of holidays, decorating homes and statues of gods. The Gauls considered violets a symbol of innocence, modesty and virginity and sprinkled them on the newlyweds' bed. The French competed in Toulouse poetry tournaments, where one of the highest awards was a golden violet.
Rules for preparing the sheet
How to act so as not to harm the plant? It is recommended to make an oblique cut at an angle of 45°. Having previously disinfected the tool, cut off the material, leaving a small stump on the trunk - 5 mm. The cut should be sprinkled with crushed activated carbon. 
If the cutting on the leaf has a threshold exceeding 4 cm, you need to shorten it; if less, cut it diagonally to 6 mm.
Features of rooting
Propagating a flower using this method is quite easy. The whole procedure is to root the cut piece of the plant. There are several methods to do this, and each of them has its pros and cons.
Did you know? By the way, violet has also found itself in medicine. The flower is fragrant and tricolor violet used to treat kidneys, bronchitis, polyarthritis, purulent and itchy skin lesions.
In order for the planting part to take root, the method of propagation in water and in soil is used.
In water. Propagating violets by leaf in water is a more popular method. In this case, you need a dark glass container into which cool boiled water is poured in which the tablet must be dissolved activated carbon. The stem is immersed in water at a level of 1 cm. 
The fluid level should be constantly monitored and replenished with water if necessary. The rapid appearance of roots on cuts depends on the type of flower and the temperature in the room. Transplantation into the ground is carried out when the length of the roots is 1 cm. The danger of performing this technique is that the cut may turn black. In this case, the damaged part is removed and the sheet is transferred to a new container with water.
- Plus the method- the root system is always visible, so you can easily control the process.
- Disadvantage of the method- during transplantation, the root system may be damaged and it will take time to adapt to the conditions.
In the soil mixture. For this method, plastic cups are used, with drainage holes made at the bottom so that water does not accumulate in the soil and the plant does not begin to rot. The bottom of the glass is filled with pebbles and crushed polystyrene foam.
This layer covers the bottom of the glass by 2 cm, and soil is poured on top, leaving space for the leaf so that it is placed at an angle of 45°. For planting, a depression is created in the ground; after planting, the soil is compacted to stabilize the plant. To prevent the plate of material from coming into contact with the ground, it is supported with a toothpick. 
Violets (Saintpaulias) are delicate and tremulous flowers that leave no one indifferent. There are several ways to reproduce data indoor flowers, but the most accessible is rooting the leaf in the ground and in water. If you patiently follow simple rules and advice, then living conditions from a tiny leaf you can nurture a new plant.
Saintpaulias can be propagated by grains, leaves, leaf segments, side rosettes, flower stalks and even in vitro. Under artificial light, Saintpaulias are grown and bred all year round. The best time to produce offspring is spring and summer, because plants have more heat and light.
 Selecting and cutting cuttings
 The success of violet leaf propagation at home depends on the choice of planting material. If a leaf is sickly, it is difficult and sometimes unrealistic to have generous and healthy offspring from it.
It is better not to use the leaves of the bottom row for propagation. They are old and weakened; colonies of microorganisms and fungal spores are possible on such sheets. Cut the cuttings from the second or third row, where the leaves have formed, reached adult dimensions and have pronounced turgor.
Before planting, a drooping leaf that has lost its elasticity is completely placed in warm boiled water with several crystals of potassium permanganate. This will return the leaf to its former state and disinfect it. The stalk of the dried leaf is cut with a sharp knife 3–4 cm from the beginning of the leaf blade straight or at an angle of 45 degrees.
Cutting a leaf cutting for rooting.
If you just pick a leaf and plant it, nothing will happen. The cutting must be properly prepared in order to root. They do this in different ways:
- The first method is to trim the cuttings with a sharp knife or blade. They must be wiped with alcohol. The sheet is laid on a hard surface and in one movement a curved cut is made at an angle of 45 degrees. Keep the stem 3–5 cm long, then allow it to dry or sprinkle the cut with activated charcoal or charcoal.
- Another method is when the edge of the stem is broken off at the required distance from the leaf blade. Similar method used if there is no knife or there is nothing to disinfect it with.
Rooting methods
To root planting material, two methods are used to root a leaf for propagation: in water and in soil.

The sooner the leaf is in the water, the faster the process of root formation will proceed. It is easier to root a leaf in boiled or settled liquid. This will allow:
- Accurately track the condition of the leaf.
- Timely prevent rotting of the cuttings.
- Notice the formation of the root system and buds of rosettes.
Before lowering the sheet into water, the container is thoroughly washed and sterilized. Take small glasses made of opaque glass to prevent the formation green algae and water pollution. Sequence of the rooting process:
- The leaf is deepened by 1.5–2 cm.
- To prevent the cutting from touching the vessel, it is secured with a sheet of paper.
- To prevent microorganisms and miniature algae, an activated carbon tablet is placed in the water.
- As the liquid dries, add it again; Use settled water; the sheet is not soaked and the initial amount of water is not changed.
The appearance of roots is detected between 14 and 28 days after the start of the procedure.
If it is not the roots that appear on the cut, but the leaves, the leaf is taken out of the water, dried and trimmed, removing damaged matter. Coal, crushed into powder, will help - sprinkle it on the cut and immerse the sheet in water again. The water is changed and the containers are disinfected. When healthy, numerous roots from 1 to 2 cm in length are formed, the leaf is moved into the soil.
Sometimes the cuttings are not removed from the water until tiny rosettes have formed. To move a leaf that has given roots, take plastic glasses or pots with holes to drain the water. 1/3 is filled with small drainage, then filled to the top with earth.
 Leaves planted in the soil take root well, and the process of growing violets from leaf cuttings goes faster. This method is used for a leaf taken from a young, immature plant or, on the contrary, a leaf acquired in a limp form. The leaf is prepared as in the first method, but the stalk is made 1–1.5 cm.
For planting, take glasses or pots with a size of 100 ml and a circumference of 5 cm. They are filled 1/3 with calcined drainage to minimize the risk of the spread of fungal and mold infections.
Then add soil and make a hole for the cutting. This hole is filled with heterogeneous soil for looseness with perlite, better formation of a rosette and access required quantity air. Sometimes violets are grown on the purest perlite. However, this can lead to the death of a fragile flower, because perlite does not retain moisture well and dries out quickly. The soil for violets contains perlite, which retains water and has an antibacterial effect.
When planting, slightly moisten the soil. The cuttings are deepened into the ground by 1/2 cm for mini species and for type species to a depth of 1 cm to 1.5 cm. To prevent mold and rot, seedlings are ventilated, protected from drafts. A good result comes from planting leaves in. Due to the loose and nutritious substrate, roots and young rosettes quickly form.
Reproduction by leaf fragment
 A similar method of propagation is used for extremely unique ones or if the leaf has begun to rot. To prevent the rot from spreading, the stem is broken off at the very base of the leaf blade, and the leaf itself is cut into several fragments using a sharpened blade. The main thing is that the piece of leaf contains one vein. Quite often, violets are propagated using a third of the upper lobe of a leaf with a horizontal cut.
Such a fragment is left for some time so that the film envelops the new section, after which it is sprinkled with charcoal or activated carbon. Later, the plate is placed in a container with soil so that the cut is tightly adjacent to the soil. To create a greenhouse effect in domestic conditions, polyethylene is used. This method of propagating violets from leaf lobes subsequently brings many more children, since they are born from every available vein.
Planting new leaves.
When young baby leaves of 4 to 5 cm in size appear at the base of the petiole, they are transplanted into individual cups or small pots. To do this, remove the leaf with the children from the container, discard a portion of the soil from it and carefully disconnect the children so that each has roots.
If not all children are ready for transplantation, the healthiest ones are selected for transplantation. Children of variegated violets need to be replanted only when the green tone begins to dominate in their color. The abundance of green pigment indicates a sufficient amount of chlorophyll necessary for the successful rooting and maturation of a young plant.
The children are planted like cuttings. It is better not to remove the soil from their roots. Children with strong roots should be immediately transplanted into soil with weak roots - into a hole with moss and perlite. For better survival of flowers, they need to be placed for 14 days under a greenhouse made of a plastic bag.
At the next stage, the young rosettes are moved to larger pots. At the time of moving, the soil is not removed from the roots.
Features of cultivation
In order for the flower from the leaf to quickly take root and in the future acquire durability and strength, adhere to the following recommendations:

Soil composition
As a basis you can take ready soil, But best result give mixtures made independently. One of the options for the composition of soil for violets:
- 1 share of leaf humus,
- 3 shares of peeled cover peat,
- 1 share of sand,
- 2 shares of green moss,
- 1 share of sphagnum,
- 1 share of garden land.
For soil mixtures for propagating violets, substances such as perlite and vermiculite are used, which ensure looseness of the soil. To disinfect the soil and its quality, ground charcoal and sphagnum are added. If sphagnum is used as part of the soil for violets, it is crushed. In its entirety, this moss is used as drainage in small pots. Propagating violets at home from leaves is a troublesome task. The main thing is to find necessary method and follow the necessary advice.
Uzambara violets are attractive for home keeping due to their long flowering, variety of varieties, unpretentiousness and the possibility of easy propagation. These flowers do not need much space on the windowsill; sometimes they are even kept on racks next to the window, illuminated by lamps daylight. Saintpaulia is considered a symbol home comfort, they are in almost every apartment. Let's talk about how you can propagate these tender plants with just one sheet.
Description of Uzambara violet (photo)
Violet belongs to the Gesneriaceae family. This plant was first discovered in East Africa. Saintpaulia is classified as herbaceous plant with a very short stem and a lush leaf rosette. The leaves are most often heart-shaped, they can be rounded and more elongated. The upper side of the leaf is pubescent and its color can be different shades of green. The lower part of the leaves is lighter, greenish or purple. The leaves look quilted due to the pronounced veins.
From 3 to 7 medium-sized flowers are formed on one peduncle. When an adult rosette is in full bloom, up to 100 flowers can be present on a violet at the same time. At good conditions Saintpaulias bloom continuously for 8-9 months a year. Currently, almost 1,200 new hybrid varieties are registered. Their difference can be seen both in the size of the leaf rosette and in the shape and color of the flowers.
Violets with simple, semi-double and double inflorescences have been bred. Chimera violets are becoming increasingly popular. Their gene structure is changed in such a way that the synthesis of pigments occurs differently in different parts of the petals and the color turns out to be very unusual. Unfortunately, varietal characteristics of such plants are lost during leaf propagation, being preserved only in stepchildren.

The ability to root is greatly influenced by the quality of planting material. If you decide to propagate a violet with a leaf, choose it from the middle layers of the leaf rosette. The lower old leaves are already weaker and have less reserve vitality. Their proximity to the ground increases the risk of pathogenic microflora and fungal spores being found on them. And if you cut a leaf from the crown of the rosette, it is easy to damage the growing point, in which case the plant will stop developing.
On a note! The leaf selected for propagation must be fully formed, have good turgor and sufficient size.
If you received a leaf received by mail or brought by your friends, which has become slightly limp, soaking it in warm water will help. boiled water with the addition of several crystals of potassium permanganate. It is advisable to keep it in the solution for about 2 hours, this will restore elasticity and at the same time kill pathogenic flora.
After this, the sheet must be blotted with a napkin and the edge of the cutting must be cut with a sharp knife so that its length is 3-4 cm. The cut can be made either straight or at an angle of 45 degrees. Next, they begin the rooting process, which can be done in two ways: in water and in the substrate.

The “water” method is more suitable for inexperienced gardeners, since with this rooting method it is easy to observe the process of root growth and the condition of the cutting. It is advisable to use boiled or filtered water so that it does not spoil quickly. It is better to use dishes made of dark glass. To root in water you need:
- Thoroughly wash and rinse the glass for the leaf cuttings with boiling water and fill it with water.
- Place the leaf in a container so that the lower part of the petiole is immersed in water by 1-2 cm. You can hold it in the required position using a lid or a piece of thick paper with a hole. The stem should not touch the walls of the glass.
- Throw an activated carbon tablet or small charcoal into the water to prevent rotting processes.
- After this, monitor the water level, constantly adding it to the original level.
- When the roots reach a length of 1-2 cm, plant the violet leaf in the substrate.
If the process goes as it should, the appearance of roots can be seen in 2-4 weeks. Sometimes it happens that the end of the leaf petiole still rots. In this case, you need to immediately cut off the affected tissue to a healthy place and put the leaf back in the cup for rooting. In this case, the dishes are treated with an antiseptic, and then fresh water is poured in.
Attention! Some violet lovers, using the “water” rooting method, leave the leaf in water until a young rosette appears. We do not recommend doing this, as in this case the shoots may be weakened, which will impair their further development.
When planting a leaf with roots in the soil, keep in mind that you cannot deepen it too much, otherwise it will be more difficult for the rosette to break through to the top. The pot for planting is filled 1/3 with expanded clay, on top of which loose soil is laid. soil mixture. The planted leaf is covered glass jar, having previously moistened the substrate. The jar is raised daily for 5-10 minutes for ventilation, this is necessary. Remove the cover after 2-3 weeks when a young rosette appears.
How to propagate violet leaves in water: video

If the leaf cuttings are planted directly into the ground, rooting will occur even faster than in water. It is better to resort to this method if the leaf is not quite mature or, on the contrary, is old and has lost its turgor. When planting in the ground, the leaf petiole is cut a little shorter, to 1.5 centimeters. It is enough to take a very small pot, 5 cm in diameter. It must have a drainage hole. A drainage layer is poured onto the bottom, and then soil consisting of fertile soil and perlite. Perlite will help retain moisture in a small volume of soil and at the same time facilitate air access to the roots.
Helpful advice! For an antibacterial effect, you can add sphagnum to the substrate.
- Before planting, the substrate should be slightly moistened.
- Leaf cuttings of miniature hybrids are buried to a depth of 0.5 cm, while standard cuttings are planted to a depth of 1-1.5 cm.
- If you have a lot of planting material, you can plant several leaves at once in one cup.
- In order not to get confused in the varieties, markings are stuck on the outside.
- After planting, cover the leaf with film or a jar, creating a greenhouse. This will provide inside high humidity air and protect the seedling from drafts. Periodically moisten the soil and ventilate.
Some gardeners share their experience of planting leaf cuttings in peat tablets. They claim that, due to the availability of nutrients, with this method of planting, roots and young rosettes are formed very quickly. For successful rooting in the substrate, warmth and light are important. Daylight should be at least 12 hours, and the room temperature should be 22-26 degrees.
Rooting a violet leaf cutting in a substrate: video
Caring for violets
In order for violets to remain healthy and bloom for a long time, they need to create comfortable conditions, providing required temperature, lighting, humidity, timely fertilizing and replanting. Let's dwell on these important points.

Violets are thermophilic. The minimum temperature of their maintenance should not fall below 18 degrees, the optimal indicators are 20-24 degrees Celsius. Plants must be protected from drafts. If the window sills are too cold in winter, place the pots of violets on insulated stands to prevent the roots from getting too cold.
Saintpaulias need bright and diffused lighting, without direct sunlight. sun rays. In summer, it is better to place them on northern and eastern windows, and in winter, move them to southern and western window sills. On very sunny days, it is necessary to organize shading on the windows; in winter, the plants, on the contrary, receive additional light. To prevent the socket from bending, it is periodically turned to the light with the other side. You can grow violets when completely artificial lighting, this does not affect their growth in any way. Fluorescent lamps are quite suitable for this.

Violets do not like dry air. Flowers especially suffer from it during the period when it is turned on central heating. However, you cannot spray the leaves because they are pubescent. The villi can retain water, and as a result, rot will develop on the leaves. To humidify the air, it is advisable to use special humidifiers or place containers of water on the windowsill.
You can water violets from above using a syringe or watering can with a narrow spout; this type of watering is called drip watering. In this case, you need to be careful with the amount of water and make sure that it does not fall on the leaves. If it is difficult for you to regulate watering in this way, water the Saintpaulia through a tray.
Clean, settled water is poured there, the soil is allowed to soak in moisture, after which the remaining water is drained. This method is considered safer in terms of waterlogging. Some people use wick irrigation, but it is not suitable for all varieties and has a number of disadvantages. This method is best used when necessary, for example, while going on vacation or a business trip.

For feeding, you can use superphosphate granules, which are placed in the soil when transplanting. This supply will last the violets for some time. After 1-2 months, you can begin to apply weekly complex and organic fertilizers, alternating them with each other. Only adult and healthy specimens assimilate organic matter well. The complex fertilizer is diluted in water according to the instructions and the solution is watered onto the moistened soil.
You should not plant violets in large pots, otherwise you may not wait for flowering. The new pot should be 2 cm larger in diameter than the old one. It would be better if it was made of plastic. You can plant the violet in the same container. In this case, they take it out of the pot, cut off the old and dead roots, shake off the old soil, and then plant the flower in place, adding a little fresh soil. It is better to rinse the inside of the pot well with a brush to disinfect it and remove fungal spores.
As a soil, you can take special soil for Saintpaulias, adding a little perlite and vermiculite to it.
Before planting, it is necessary to place a drainage layer of expanded clay on the bottom. The soil should be moist, but not soggy. Plant the plant so that the leaf rosette does not touch the ground. The first watering is carried out two days after transplantation.
Flower growers advise starting violet breeding with more simple varieties, capricious hybrids require experience in maintenance. If you provide the plant ideal conditions, it will not create any special problems for you. As you gain experience, you will make fewer and fewer mistakes and learn to “understand” your flower. After this, it will be possible to begin to contain and propagate more exotic varieties.
There are 4 types of growing violets: leaf, peduncle, stepson and cuttings. Each of them is good in its own way, but we offer the simplest, but somewhat time-consuming method of propagating violets with leaves.
Violets can be propagated by leaf cuttings when creating certain home conditions. all year round. If there is not enough heat and light for this, then it is better to postpone the reproduction process to the spring. summer period.
It is not recommended to take planting material for rooting from the bottom row of the rosette, since the leaves there are old, they may not produce babies, and the violet leaf will disappear. It is preferable to choose 2-3 mature and mature leaves closer to the topmost tier of the rosette. It is very important that there are no damages, scratches, bends, and that the leaf itself is green and elastic.
A leaf is cut from the mother plant at an angle of 45 degrees, leaving a small stump, which is then sprinkled with activated carbon. The length of the stem should not be more than 4 cm; a little time is given for the cut to dry.

If the period of time between immersion in water and pruning is long, for example, a violet leaf cutting was taken at an exhibition or from friends. At home, before immersing in water, you need to make a fresh cut again and allow it to dry for about 3-5 minutes. Only then can leaf cuttings be placed in water or rooted directly in the ground.
Rooting violet leaves in water
At this stage, you need to pour boiled water into a clean glass. room temperature, and for disinfection add an activated carbon tablet. After drying, the violet leaf is placed in a container of water. The edge of the cutting should be immersed in water to a depth of no more than 1 cm.

Periodically, as it decreases, boiled water is added to the glass. Depending on conditions, violet leaf may produce roots within 1-2 weeks after being immersed in water. If the stem begins to rot, you need to make a new cut and start the rooting procedure again.
You can use small bottles where the leaf will be securely fixed at the neck and will not fall into the water.
Planting a leaf with roots in the ground
When roots approximately 1-1.5 cm long appear on the leaf, it can be planted in soil selected specifically for violets with an acidity of pH 5.5-6.5. IN plastic cup several holes are made for escape excess moisture, pour drainage or polystyrene foam onto the bottom and fill it evenly with soil. For a leaf with roots, make a depression in the moist soil, preferably at the edge, and plant it.
Place the sheet in a warm place, but not sunny place, periodically water, create greenhouse conditions, covering plastic bag. Glass with drainage holes can be installed in another similar cup, but without holes. Thus, the pot will be double - convenient for watering from below.
Depending on the conditions of detention, in one and a half to two months the leaf will have babies. Be very careful with watering so that the stem does not rot.
You can root a violet leaf directly in the ground.
From my experience I know that to propagate violets it is more convenient to plant leaf cuttings directly into the ground, there is less loss and time. We place a leaf without roots in the soil, cut side down, at an angle of 45 degrees or almost horizontally, placing the edge of the leaf on the side of the cup. Lightly press the cutting with your finger and sprinkle with soil. The shallower the depth of planting of the cuttings, the faster the leaf will produce new rosettes.

Photo: growing violets from leaves with children...
Leaves planted without roots sometimes lose turgor, but there is no need to worry. As soon as roots appear, turgor will be restored. After some time, babies emerge from the ground.
If violet cuttings are planted in the summer, you do not need to cover them. But if the apartment is cool, then it is better to cover the cuttings or young rosettes with a transparent bag. Watering is careful so that the petiole does not rot; keep in a warm and bright place, out of the sun, to avoid getting burned.

Separating and planting rosettes in separate pots.
You can separate the violet babies after the leaves are sufficiently grown and deep green in color. Transplant into a small pot or into separate cups. At the bottom you need to put drainage in the form of expanded clay or foam. Everything is covered with soil, a depression of about 1 cm is made and a rosette of violets is planted.

Children should receive light, warmth, moderate watering. When the rosettes grow, it will be possible to “transfer” them to a pot, which should correspond in size to the plant. By following these simple requirements for propagating violets with leaves, you will get a beautiful plant with beautiful and long flowering.
There is a method of cuttings, when the violet leaf is propagated directly in a transparent plastic bag.
How to propagate violets, when a rooting substrate is poured into a small bag, a cut of the cutting is inserted into the soil, the bag is tightly closed and simply hung on the rack. At the same time, make sure that the leaf blade does not rot from excess moisture, so it is often ventilated.
From cutting to violet blossom...
Bringing home a piece of paper unique variety, we always want to quickly see the result of its flowering, but, alas... In best case scenario, propagated violet leaves produce babies in a period of one month, sometimes you need to wait longer.

Approximate time from the moment the leaf separates from an adult violet:
- after 3 weeks roots appear,
- in 5-6 weeks - violet babies,
- after 12 weeks - plant violet babies from the mother leaf,
- after 5 months - transplant into an “adult” pot,
- after 6-9 months the violet blooms.
Why do these deadlines depend?! Some factors should be taken into account when propagating and growing violets at home..
First of all, it depends on the conditions of keeping the rooted leaf (lighting, presence of a greenhouse, air temperature); from the nutrition of the mother plant (just do not need to feed young violet rosettes during cultivation).
In the spring, the plant will produce babies faster than in the fall. Also depends on varietal characteristics violets. There are varieties that germinate quickly, and there are slow-witted varieties with long petioles that have taken root and live happily ever after, but they are in no hurry to produce violets.

If you plant leaf cuttings in October-November, you will receive new rosettes in February. They are replanted and, with proper home maintenance, the violets bloom in full bloom in the summer. It is not advisable to propagate violets during flowering; it is better to wait until indoor plant will bloom.
22.01.2016
26 192
How to propagate violets by leaves, shoots, seeds and peduncles?

Many people probably know how to properly propagate a violet leaf at home. The method of propagation by leaf plates is not labor-intensive and uncomplicated. Is it possible to cross several species? There are also many other effective ways, by resorting to which you will get the result no worse, with the exception of violet propagation by seeds, which requires patience and attention. Let's figure out how to breed a crop, whether it can be crossed, find out the timing when babies appear from a leaf, and much more. You can also watch a video of the process and a visual step-by-step photo.
Propagation of culture by leaves
Propagation by leaves (cuttings) is the easiest way. Pinch off a leaf with a petiole from the plant or carefully cut it with a sharp blade. Disinfect the cutting tool first. Choose a leaf from the middle of the rosette, neither old nor young, preferably large in size. The petiole of the leaf should not be short, three to five centimeters, remove the excess.  On front side Make several transverse cuts into the leaf using a blade or sharp knife.
Place soil for violets in a small container (top moss is best) and moisten well. Carefully move the cut leaf onto the earthen surface and press slightly along the central vein. Cover the planted leaf with film. Co next day open daily for ventilation (5-7 minutes). From one leaf, it is thus possible to obtain up to seven rosettes.
 in the photo - violet propagation by leaf
The following method is suitable for most varieties, except for chimeras. Fill a glass container with water and place a leaf in it. Roots will appear in seven to eight days. Now the leaf is ready for transplanting into the ground. Do not deepen the bottom too much, since the sprouts will come from the place where you cut them; fifteen millimeters is enough.
Propagation of violets by petiole can be done in another way. Leave the leaf in water until roots and young shoots develop. This option is the most effective because the plant takes root faster.
Reproduction by stepsons
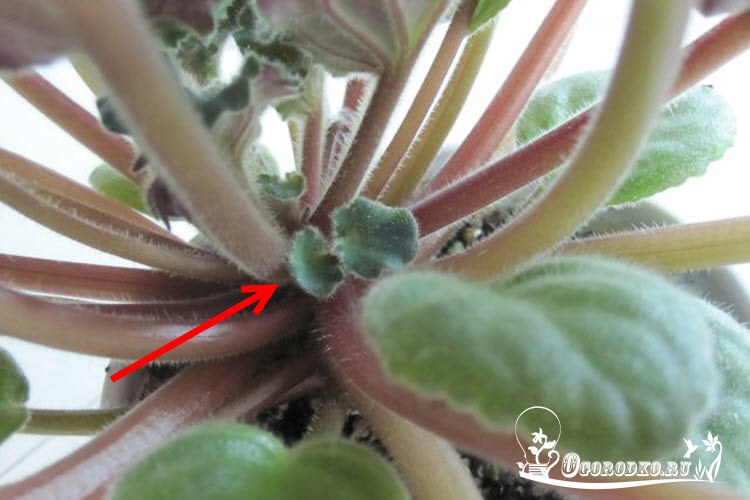
It is not uncommon for adult Saintpaulia plants to form external rosettes - stepsons growing from buds located between the leaves. Stepchildren need to be removed so that the plant does not spend additional nutrients. But, if you love violets, propagation by stepsons is one of the suitable options.
Allow the stepson to grow to form several pairs of leaves. Separate the stepson from the mother plant with a sharp blade. The result will be a rosette without a root system. Dip its lower part (to the growing point) in water to form roots. Roots will appear in seven to ten days. Instead of water, you can use a special loose substrate, the composition of which is identical to that in which the violet reproduces with leaves.
 in the photo - stepsons of violets for propagation
When reproducing by stepchildren, observe the following conditions:
- air temperature - not lower than twenty-two degrees;
- high humidity;
- planting in the ground occurs when root system will be well developed.
Reproduction by peduncles and seeds
Another way is with flower stalks. It is labor-intensive and is used for propagating rare species and in cases where the varietal characteristics of Saintpaulia are not preserved.
We use a blossoming or already faded flower with small leaves for rooting. The main thing is that it is not a bud! We cut the peduncle under the leaves, retreating one and a half to two centimeters down. We root the cut part in a container with water. But, it is better to use sphagnum moss, which has strong antibacterial properties, instead of water. This way you will increase your chances of success.
 in the photo - propagation of violets by peduncles
There are also varieties of violets for which propagation by seeds is the only option. Prepare a small container with drainage holes, sphagnum moss, sand, light nutritious soil with a neutral acidity level. Place drainage at the bottom of the container (several pieces charcoal), it is also an antiseptic. Then thin layer sand, sphagnum and nutritious soil. Level the surface of the substrate and water it warm water. Make small grooves on its surface.
Mix the seeds with sand and sow in the furrows. Cover the containers with glass and place in a warm place, away from sunlight. If dew collects on the glass, it must be removed and wiped periodically. When the soil dries out, water with warm, settled water. Do this carefully, along the edges of the container.
Picking is carried out after the appearance of the second pair of true leaves. Do this carefully, using wooden stick or forks. Plant seedlings in shallow holes made with your finger or pencil.
Breeding chimera violets
This variety of violets is not as common as its other representatives. But, once you see it, you will have a desire to decorate your window sill with this representative of the Saintpaulia species. How to breed chimera violets? A commonly used method of propagation is “head cutting”. It is applicable only for adult plants, since the “head” of Saintpaulia is cut off with the leaves. So young plant takes root faster and grows. You need to cut off the top very carefully without damaging the mother plant.
 in the photo - breeding chimera violet
Another way to propagate rare species of Saintpaulia is through a peduncle. The reproduction of chimeras is completely identical. Using a sharp blade, cut off the wilted flower above the stipules. Now, using a needle treated with a paste containing cytokinin, apply a scratch near the axils of the leaves of the Saintpaulia peduncle, thus provoking the appearance of stepsons.
And, most the hard way— in vitro. It is applicable only in laboratory conditions. Its advantages are that crops grow much faster than representatives grown by traditional methods.