A wide variety of flowers are grown at home, including those belonging to exotic varieties that are not capable of independently supporting life in our latitudes. However, working with them is very difficult, not to mention initial stage, including obtaining the first shoots. Germination is especially difficult to deal with. But pelargonium from seeds is grown quite easily and does not require special effort during subsequent care.
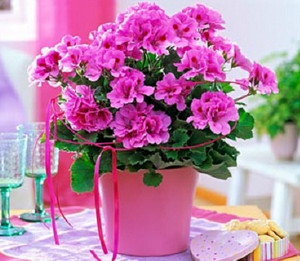
This plant belongs to the geranium family, which has firmly established itself on the windowsills and tables of our country - most often, when we talk about pelargonium, we mean the zonal variety of the flower. There is also ivy-leaved pelargonium and a special ampelous form of the plant, but the principles of working with them are practically the same.
Seeds
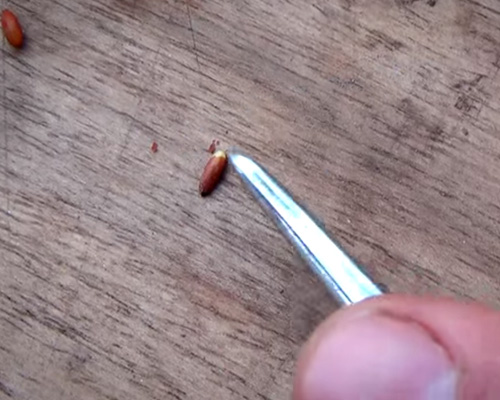
 To grow pelargonium quickly and without certain problems, you first need to select the seeds that will participate in the process. They should be quite large, with a dense leathery shell, oblong in shape with small depressions on the sides. The color of the seeds should be brown, with a moderate tint and a slight matte sheen.
If you come across seeds covered with multi-colored spots that differ from the normal tone, as well as deformed, small, flattened ones, they must be immediately put aside, since their cultivation will not give the required result.
Some types of pelargonium, especially ivy-leaved ones, can sprout approximately 2-3 months after planting, causing concern for the novice gardener, and even disappointment, followed by cessation of care.
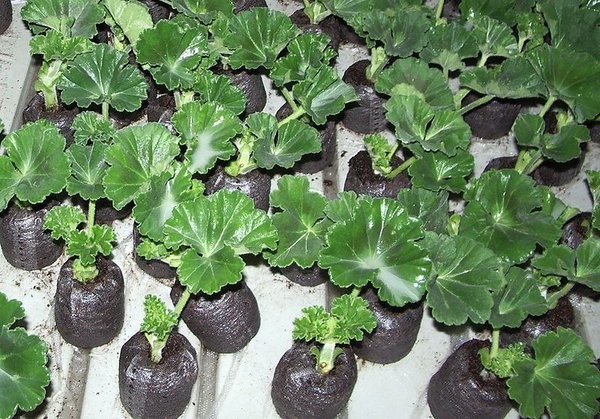
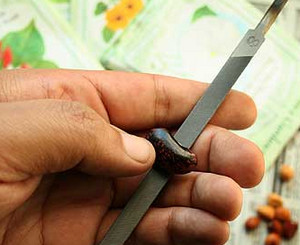 To reduce germination time as much as possible, it is worth performing a scarification procedure, that is, removing part of the leathery shell and ensuring free access of nutrients inside. At home, it is best to do this with small or medium sandpaper, allowing you to remove upper layer, but do not create gaps that are detrimental to pelargonium.
If you want to quickly grow a flower, gently rub the seeds on a sandpaper, gradually turning them and exposing the other sides. 2-3 slow movements will be enough to significantly speed up the process.
The soil
Having finished with the seeds, proceed to forming the substrate. It can be purchased in a store, but then there is a very high probability of encountering soil oversaturation minerals. Pelargonium does not tolerate such conditions quite well - the seeds germinate 2-3 times slower, and the resulting bushes become short, with thick stems and very sparse flowering.
The composition of a self-made substrate should include:
- two parts of turf land;
- one part river sand;
- one part high quality peat.
 To prevent cultivation from being associated with the treatment of various diseases, to which ampelous pelargonium is especially susceptible, the soil should be calcined in the oven for 2-3 minutes. Don't be afraid to destroy nutrients and organic compounds found in the soil - the flower feels great in poor soil and does not require special conditions maintenance, as well as the use of fertilizers.
An alternative to this treatment method may be the use of a high-quality fungicide. After applying it, you should wait about 3-6 hours so that the soil is ready to receive the plant. In addition to all of the above, growing pelargonium will require you to use shallow trays and compact pots for constant use.
Planting process
At home, it is better to use trays 3 centimeters deep, which can be purchased at a specialized store or made from scrap materials. After filling them with substrate, lightly sprinkle the surface of the soil warm water and put it in a warm place for a day so that the earth has time to warm up to desired temperature(20-22 degrees). After this, make small holes at a distance of about 2 centimeters from each other, plunging your finger into the substrate. Place the pelargonium seeds inside and sprinkle them with a layer of soil about 1 centimeter.
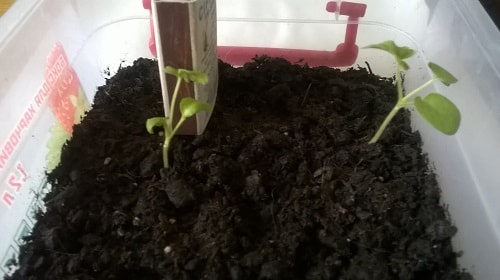
 To grow healthy bushes, you need to lightly moisten the soil again and cover it with a film in which you should make holes for air access. At home, seeds should be kept in a warm place corresponding to the above temperature conditions, in normal lighting, but do not place trays on window sills. As soon as you see the first shoots of a soft green hue, immediately remove the film so as not to create excess moisture for them.
Now the trays with seeds need to be placed on the windowsill so that the pelargonium receives maximum sunlight. If you ignore this requirement, growing an adult plant will take 2-3 times longer. The soil must be constantly loosened so that the root system of the flower is strengthened and the stems become strong enough and capable of holding thick, heavy leaves.
When you manage to grow pelargonium, which already has 2 true leaves, you should pick it up and transplant each resulting bush into a separate narrow and high pot. In this state, cultivation lasts until the fifth leaf is formed - the seedlings are pinched above it to get the most branched bush, and not a thin tall stem.
Further care
Temperature
 After you have dealt with the pelargonium seeds and got healthy large plants, you need to keep them in this condition. To do this, maintain a constant temperature within 20-24 degrees. A short-term decrease in the indicator to 17-18 degrees is allowed, however, if kept in such conditions for a long time, the flower may begin to rot and lose leaves.
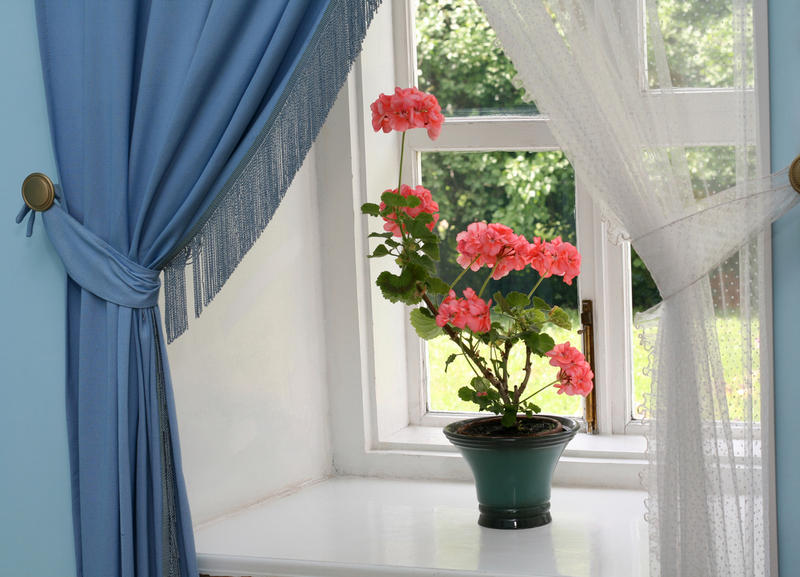
The lighting must be very good. The plant feels best on southern windowsills, as well as in places where direct sunlight falls.
Hydration
Most difficult moment caring for pelargonium - watering. It is worth remembering that this flower is in many ways similar to succulents, which include cacti, aloe and other similar organisms.
Presence large quantity water will be disastrous for him - therefore it is better to ensure a slight shortage of it than an excess.
Pelargonium easily tolerates lack of watering for 5-10 days due to the accumulation of fluid reserves in thick soft stems and fleshy leaves. A sign that you have overdone it and allowed the plant to lose a lot of moisture will be thinning of the stems, as well as the appearance of small brown or yellowish dots on the leaves.
Lighting
 In summer, it is better to set pelargonium about a meter away from the windowsill to prevent it from getting sunburn in extreme heat. In addition, you can use a diffuse filter that is glued to window glass. In winter, pelargonium enters a state of active hibernation, which is characterized by a lack of flowering and an increase in internal water reserves.
The plant can be placed in a room with a temperature of 15-17 degrees and watering can be reduced to once a week. Under any circumstances, drops should not be allowed to fall on the leaves, as they cause rotting - if this does happen, you should use a soft cloth to remove excess moisture.
Collecting seeds for the next planting
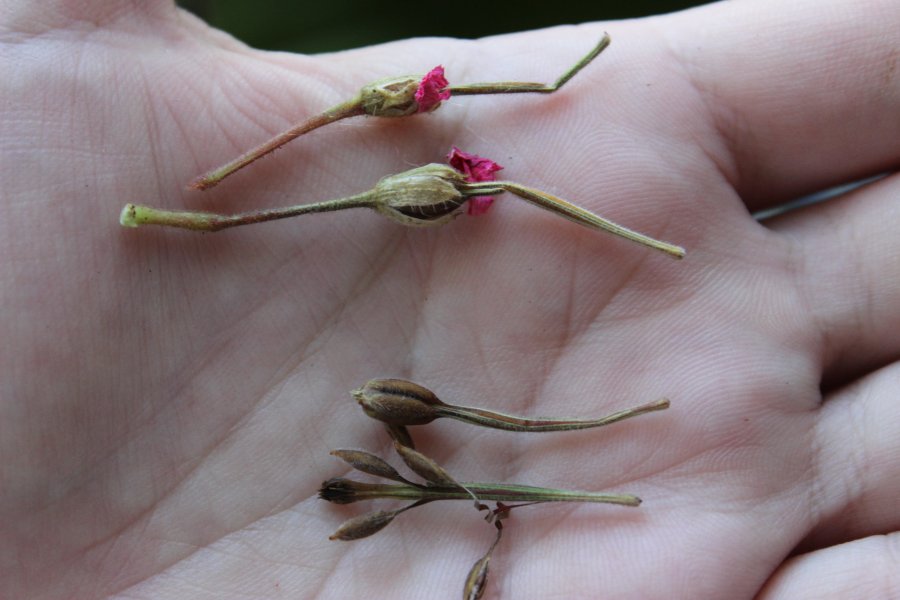
If you want to grow pelargonium by receiving seeds from your bushes, you should collect them immediately after ripening. The main sign that a plant has achieved this life stage– acquisition of seed pods that are brown with a slight yellowish tint. You should not let the seeds fall into the ground - they may begin to germinate, which will not allow you to store them.
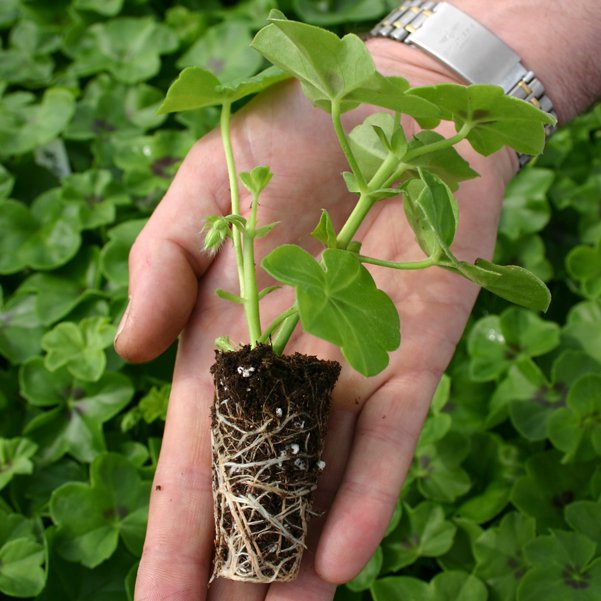
It is interesting that hybrid pelargonium in the second or third generation produces splitting of the varieties used for crossing - therefore, to preserve the resulting shade, it is better to use the method of transplanting cuttings during propagation.
What you need to know for successful cultivation geraniums from seeds? When germinating geranium seeds at home, you need to create favorable conditions: temperature within +23 degrees, high humidity. After germination, the plant needs plenty of sunlight. With proper care, geranium or pelargonium begins to bloom within 3 months after planting the seeds. So, when and how to plant geranium seeds? How do they look? Step by step photo instructions from professionals.
How to plant geranium seeds?
When to sow geranium seeds to wait for flowering this year? Usually, geranium seedlings from the moment of germination with proper care (as described below) begin to bloom in the 3rd month. Consequently, geranium seeds planted in mid-February will bloom in mid-late May.
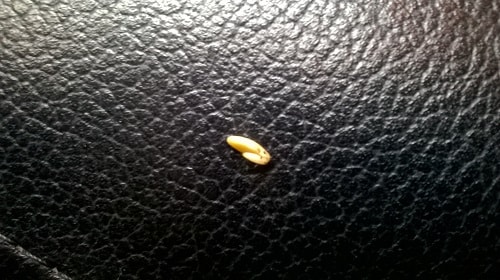
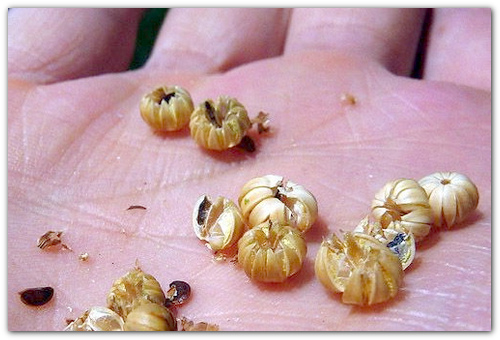
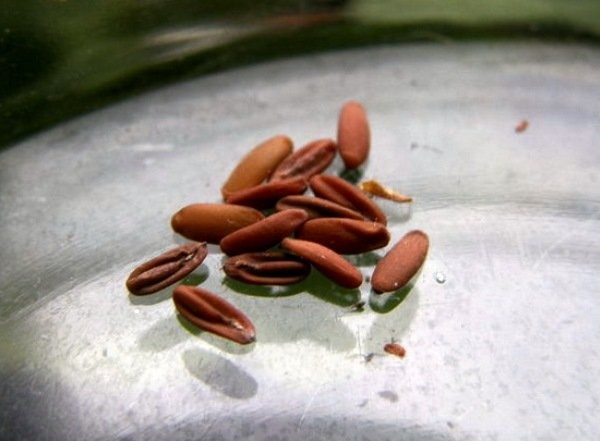
What do geranium seeds look like? Geranium seeds are similar in shape and structure to coffee beans. One side of the seeds has a convex shape, the other is flat with a pronounced dividing line of the cotyledons. Typically, geranium seeds have a distinct brown color. Today on sale you can find geranium seeds of various colors and double varieties. There are flowers with different smells, for example, with the smell of apple.
If the seed is collected at home, it is located on the plant in a seed pod. The ripe seed capsule has Brown color. The seeds themselves are surrounded by a dense shell with a small umbrella of fluff. This covering shell must be removed before sowing grains in the ground.
How to sow geranium seeds? To plant seeds and successfully grow seedlings you will need:
- Greenhouse. This can be an ordinary seedling box that is covered plastic bag, food tray with transparent lid or regular plastic bottle, cut in the middle.
- Priming. Be sure to be light and loose, without humus. A regular one will do. soil mixture for seedlings. You can make the mixture yourself. To do this, take turf soil, sand and peat, mix everything in a 1:1:1 ratio.
Sowing geranium seeds in most cases is carried out superficially, that is, the seed material is not covered with soil, sand or vermiculite. Some experts still sprinkle the grains with a layer of soil, the thickness of which does not exceed 0.5 cm. The explanation is simple - future seedlings need air, and it simply will not penetrate into a thick layer of soil.
So, planting geranium seeds at home is carried out from early to mid-February in the presence of sunlight during the day and additional lighting in the evening. Sowing is carried out according to the following scheme:
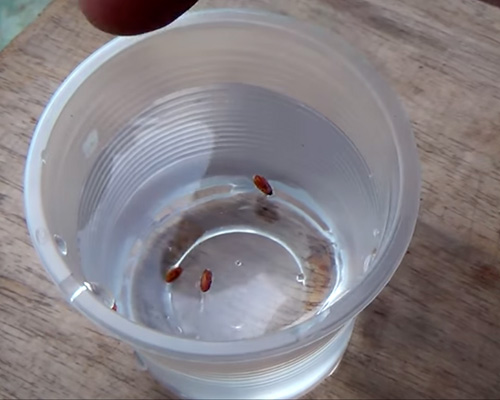
1 step. Previously prepared room temperature the soil is poured into the greenhouse in a layer of 5-7 cm. The soil should not contain lumps or debris. It compacts slightly. The soil is wetted and left for 5 minutes. This time is enough for the soil to be completely wetted. Watering is carried out only with warm water.
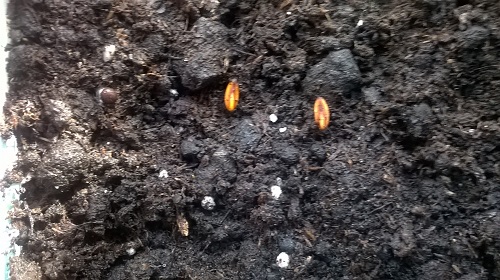
Step 2. Seeds of geranium flowers are laid out on the surface of the soil with the rounded side up. The flat side of the seeds should be in close contact with the soil. The grains are lightly buried in the soil.
Step 3. The seeds are watered again using a spray bottle.
Step 4 The greenhouse is being covered.
Favorable conditions for growing geranium from seeds:
1. Temperature. It should lie within +18...+24 degrees. Moreover, temperature fluctuations have a beneficial effect on germination. So, during the day it should stay within +23...+24 degrees. At night it should not fall below +18 degrees. At a temperature of +27 degrees, geranium does not germinate.
2. Humidity. High level humidity accelerates the process of seed germination, and therefore the grains and seedlings themselves are kept in a greenhouse until the first pair of true leaves appear. It is ventilated 2 times a day.
3. Backlight. It is important for seedlings. Grains can be germinated in the dark, but when sprouts appear, the greenhouse is exposed to bright, diffused light. The length of daylight hours is at least 12 hours. You can use a fluorescent lamp for artificial lighting.

When do geranium seeds germinate? Geranium seeds germinate within 2-14 days from planting. Regular varieties (ampelic, garden geraniums) germinate the fastest. terry varieties Germination may be delayed for up to 1 month.
Geranium seedlings definitely need sunlight. This can be either natural or artificial lighting. Without sunlight, geranium seedlings stretch out.
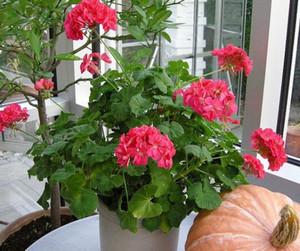
Pelargonium, or simply geranium, is one of the most popular among home and garden lovers. garden plants. And this is not at all surprising, because growing it is a pleasure: it has excellent decorative properties and very easy to care for. Knowing some rules and features of geranium, even an inexperienced gardener can cope with its propagation.
History and interesting facts
Geranium - perennial or annual plant, belonging to the geranium family, which has more than 400 species and forms. Its homeland is hot South Africa, but pelargonium grows almost throughout the Northern Hemisphere, in regions with temperate climate and mountainous subtropical regions. It appeared in Europe in the 15-16th century, and immediately appealed to flower lovers. The name "geranium" comes from Greek word"geranos", which means crane.
It should be noted that this beautiful plant grown not only in decorative purposes. It has many useful properties: capable of neutralizing toxins and harmful substances, removing headache, as well as stop bleeding and heal wounds. It is recommended to keep geranium in rooms where hypertensive patients live, as well as people suffering from disorders nervous system and insomnia.
In the old days, pelargonium was endowed not only with healing properties, but also mystical properties. It was believed that this plant repels snakes, so it was planted around houses in places where reptiles were found in large numbers. In addition, fragrant sachets are often made from pink geranium flowers and placed next to personal items in order to protect oneself from evil eye, and at the same time repel moths. But cat lovers should be careful with this plant. As you know, cats love to eat house flowers, and pelargonium leaves contain toxic substances that are extremely dangerous for animals.
Description
Geranium represents a low herbaceous plant or a subshrub with a branched root system (except for species that grow in the mountains - their root has the form of a rod). The structure and color of the leaves different types also differs from each other - they can be green, grayish, bluish or even red, whole, with small or pronounced cuts, and in many varieties the leaves are covered with hairs.
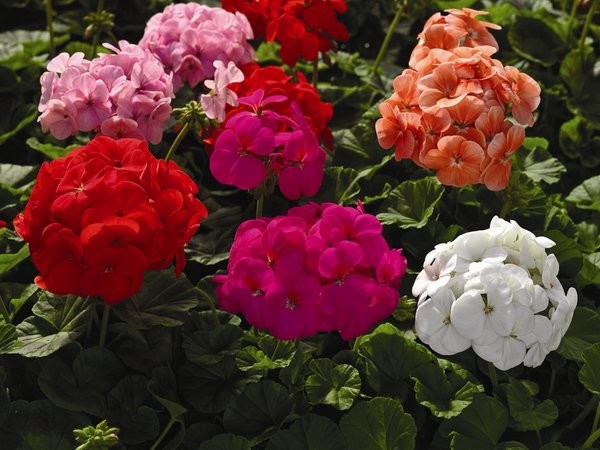
Pelargonium flowers are quite large, have a blue, white, purple or lilac hue, collected in inflorescences that look like a brush. The fruits in which the seeds ripen (this happens in late summer-early autumn) are box-shaped, with long valves - after ripening they curl, scattering the seeds.
Propagation of indoor geranium
Before growing indoor geraniums, you should know a few important rules:
- the best place for the pot is a well-lit windowsill, as the plant loves sunlight;
- V winter time It is better to keep the flower in a cool room, but the temperature should not be below 10°C;
- in order to increase the number of shoots and inflorescences, the plant should be pinched and dried flowers removed;
- almost all types of pelargonium need to be pruned regularly;
- With sufficient nutrition and lighting, the flower can bloom throughout the year.
Growing from seeds

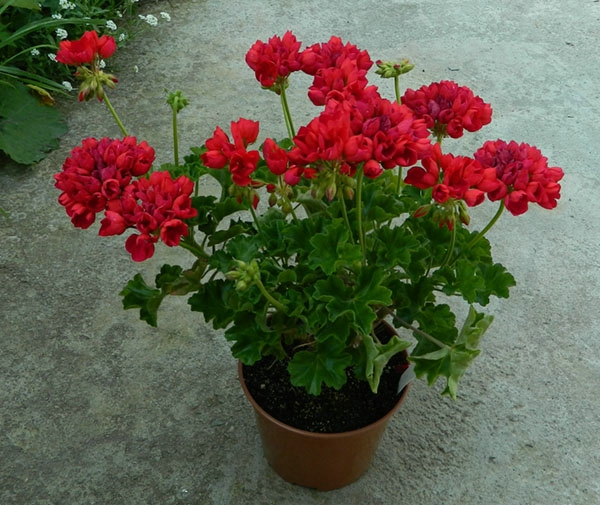
Best in room conditions red, white, fragrant, and also ampelous pelargonium grow. Before planting, you should make sure that the seeds are cleared of their hard, leathery shell. Otherwise, they will need to be well sanded. Experienced gardeners do not give an exact time for planting, since with sufficient lighting, seedlings can grow in both autumn and winter, but optimal time The period is considered to be from November to April.
Caring for indoor geraniums
Despite the fact that geranium loves moisture, it should not be in standing water, therefore, a layer of expanded clay should be poured onto the bottom of the pot. Water the plants using a watering can with a narrow spout. As soon as 6-7 leaves appear on the plant, it needs to be pinched to stop its growth and “awaken” the side buds. On cloudy days, pelargonium needs to be provided with additional lighting. In summer it is better to take it outside and place it in a place protected from direct contact ultraviolet rays(the plant loves warm, dry air).
You need to fertilize the flower once every two weeks, starting from the end of March until November, using liquid fertilizers. In addition, you can prepare the fertilizer yourself: for this, take a liter of water to which a drop of iodine is added. You need to take 50 ml of this solution and carefully water the plant with it so that the liquid does not fall on the roots, but on the walls of the pot. Geranium does not need spraying.
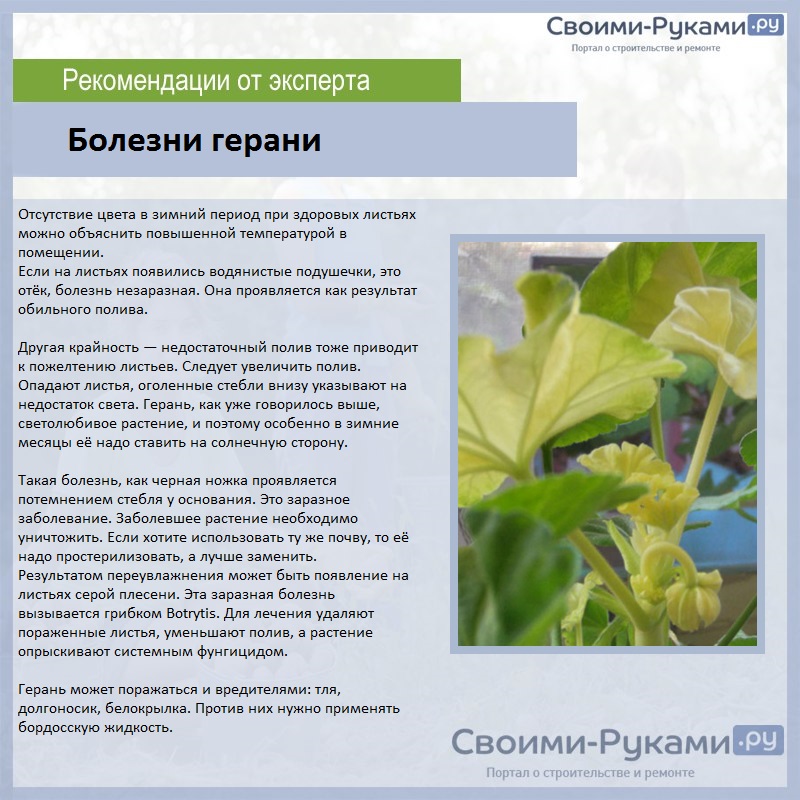
Pelargonium is susceptible to a number of diseases, so plants should be regularly inspected for characteristic features. This could be yellowed leaves, reddened leaves, mold gray or falling leaves. Usually the cause of such phenomena is too low temperature indoors or excess moisture. The most dangerous disease for geraniums (especially for young shoots) is called “black leg”. In this case, the base of the plant’s stem begins to darken - unfortunately, radical methods there is no fight against this phenomenon, so infected specimens will have to be destroyed.
Propagation of garden geraniums
When choosing a place to grow garden geraniums, it is very important to take into account the characteristics of the variety. Most plants prefer sunny or semi-shaded places, but there are some that can only grow near bodies of water. Yes, on dry sunny places Red-brown, Georgian and large-flowered species grow well, Balkan pelargonium grows well in the shade, and Himalayan, marsh and meadow pelargonium grows well in damp and shaded areas. The soil should be slightly acidic or neutral and fairly fertile.
Garden geranium can be propagated both by seeds and vegetative way. The first one is quite labor intensive; in addition, in this case it is not always preserved varietal characteristics plants. In addition, collecting seeds is quite difficult, and some species do not produce them at all. To prevent seeds from scattering throughout the area, experienced gardeners proceed as follows: make small canvas bags into which the unripe fruits of the plant are placed, and secure them well - if the fruit bursts, the seeds will be in a kind of trap. It should also be taken into account that plants that are propagated using seeds bloom only the next year.
To plant geraniums, you can grow seedlings from seeds in the same way as in the case of indoor geranium, and then transplant them into open ground, or simply sow them in soil fertilized with peat.
It is important that the planting area is large enough, since geraniums tend to grow strongly. It is also worth considering that heat-loving varieties plants don't like straight lines sun rays(they can severely burn the leaves), so lacy shade is best for them - for example, under the canopy of trees. It is best to plant sprouts or sow seeds in spring or late summer.
Caring for garden geraniums
The rules for caring for garden pelargonium are quite simple and are as follows:
Diseases and pests
Pelargonium is practically not damaged by pests, since strong aroma its leaves repel insects. The only exception is spider mite, which can be eliminated with a soap solution or insecticide. As for diseases, they most often appear if geranium grows in cold, too cold conditions. damp places. The most common plant diseases include:
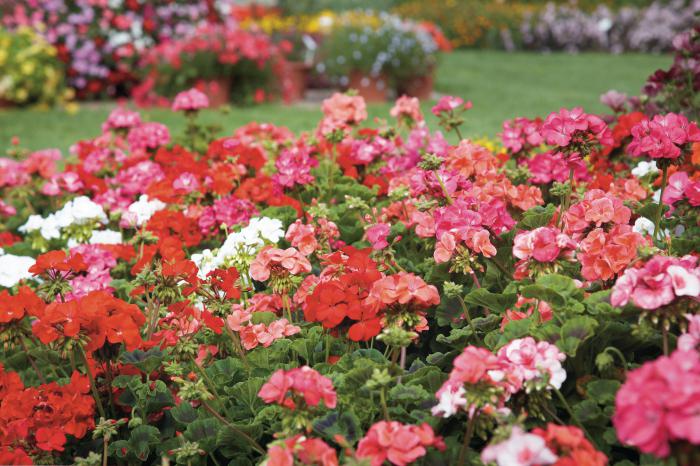
Beautiful geranium - easy to care for, unpretentious plant, which will appeal to both beginners and experienced florist. It can be planted on the balcony, in the garden, in flower beds or at home - in any case, it bright flowers and the thick leaves will become a real decoration.
Video - Caring for geraniums at home
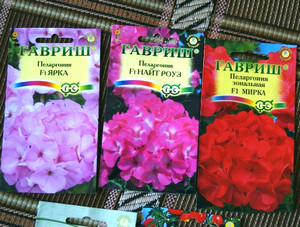
Buying seeds
- Scarified, that is, already cleared of the hard shell for accelerated germination
- in an artificial shell made from a mixture of nutrients and antifungal substances, which ensures the presence of elements necessary for germination and protection from harmful microorganisms
- Natural, which have not undergone any processing after collection
Untreated seeds, although they are significantly cheaper, show less good results– often there are no more than a quarter of the possible healthy sprouts, and sometimes they do not appear at all. They are usually sold by amateur flower growers.
- If the edges of the leaves turn red, then the plant is at a temperature too low for it. Therefore, it should be immediately moved to a warmer place.
- If the greenery of pelargonium has acquired a yellowish tint, then it does not have enough moisture and watering should be increased.
- If the leaves have darkened, then earthen lump, on the contrary, it is excessively waterlogged and such geranium is unlikely to be returned to its normal state.
- Gray mold also appears when there is severe waterlogging.
- The appearance of water “pads” on the leaves is another sure sign overflow.
- If the lower leaves of a geranium begin to fall off, it means that it is standing in a very dark place for it. Move to a place where there will be enough sunlight.
By regularly inspecting plants, you can notice signs of trouble in time and eliminate shortcomings in care. In most cases, the plant can be saved by creating suitable conditions for it.
The undoubted advantage of this is that it is easy to care for and reproduce. Typically, geranium blooms 4 months after planting the seeds, pleasing the eye with lush and bright umbrellas of inflorescences. They can be observed until frost, if outside.
Beloved by most gardeners, geranium was brought to Europe in the 17th century. And over the years, she has become “her own” on our windowsills! It's no secret that this unpretentious beauty easily propagated by cuttings.
But in last years seeds are now on sale. Geraniums grown from seeds have huge advantage- very abundant flowering.
In contact with
What do the seeds look like?
The geranium seed is large (3-4 mm long and 1.5 mm wide), smooth, oblong in shape, brown in color. Seeds purchased in the store are already scarified, that is, they are cleared of the hard shell and are ready for sowing.
But those obtained at home (purchased at the market or received from friends) are covered with a hard shell, they must first be “stripped.”
It is important to know that when using seeds, assembled at home, the result may be unpredictable. With such propagation, the characteristics of the mother plant are lost.
On sale you can find seeds in a special shell containing antifungal and nutrients. They can be sown immediately, without soaking or pre-treatment.
Sowing dates
There are no restrictions on sowing dates. This can be done at any time of the year. But it is worth considering the following points:
- The most favorable time will be the period from January to March. Daylight hours increase, the plant develops naturally and quickly. In summer, these seedlings will be ready to bloom.
- Sowing in the summer months less desirable. Daylight hours are already waning. The shoots will stretch out rather than form compact bushes. Flowering can be expected no earlier than spring.
- From October Under natural conditions, geranium begins a dormant period. Accordingly, this is the most unfavorable time for sowing. You will have to wait longer for seedlings using artificial lighting.
Preparing for sowing
- We sterilize the soil mixture and containers in which the babies will grow with any in an accessible way, for example, potassium permanganate.
- You can use any containers for seedlings. No drainage is needed and drainage holes are also not required yet, since this “house” is temporary.
- The seeds are pre-treated with a biostimulant. This will speed up germination and give energy and immunity to future plants.
Landing
- Pour into container soil mixture, pour water thoroughly, but not to the point of a “swamp” if there are no drainage holes.
- Place the seeds on the surface at a distance of approximately five centimeters from each other and lightly press them into the ground. Sprinkle a small layer of earth on top.
- Cover with a transparent lid or film and leave in a warm and bright place.
- Germination time: one to two weeks. It is advisable to maintain the temperature within 20-24 °C.
- As soon as the seedlings appear, regular ventilation of the seedling bed is necessary. Excess moisture no need for sprouts. But we make sure that the soil does not dry out.
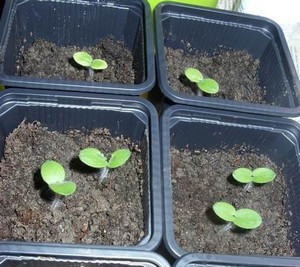
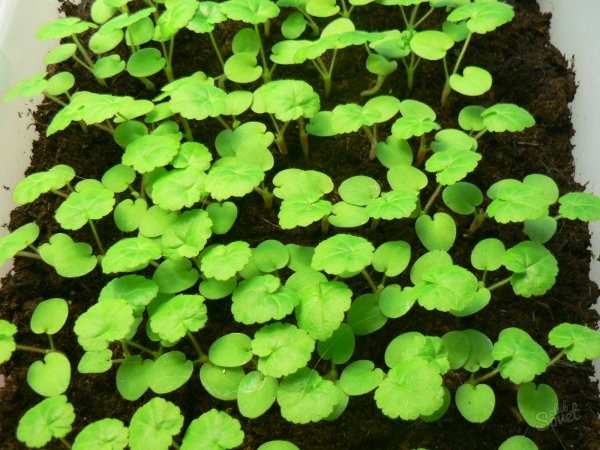
- On the fourth or fifth day, the cotyledons fully open. By the tenth day, the first true leaf appears. After the second leaf appears (around the twentieth day), it’s time to pick.
- Place the kids in small cups in which they can build up good root system. To prevent stem rot, when planting, we bury the seedlings at the same level at which they grew before. Drainage in cups is desirable, but not required. Water as it dries.
Can be used for sowing peat tablets. Each tablet contains one seed. And then you won’t have to pick the seedlings.
We keep the babies under the lamp. Supplemental lighting is preferable to direct sunlight, since delicate leaves can easily get burned. Optimal temperature air 16-18 °C.
After the fifth and sixth leaves appear, the babies need to be pinched. It's time for the plants to start bushing. If the goal is to get a tall specimen, pinching is done later.
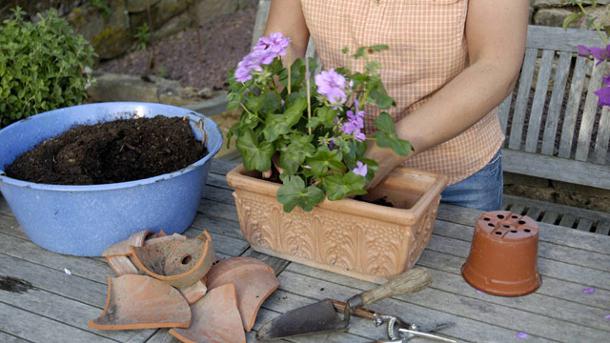
At the age of 6-8 weeks, stronger babies are ready to be transplanted into a permanent potty.
Choosing the “right” pot
For geraniums the pot can be clay or plastic. IN plastic pots the soil dries more slowly. This means there is a possibility of root rotting. But clay pots perfectly allow both air and moisture to pass through.
For geraniums grown from seeds, the rule is especially relevant: the smaller the pot, the more compact the bush. Also, the smaller the capacity, the more abundant flowering. This fact has long been noticed by flower growers.
But, despite the fact that geranium is not picky about space, it needs enough space for development and care. Therefore, you need to take the choice of planting container seriously. Optimal sizes"house" for young geraniums - about 10 cm in diameter and about the same in height. This pot has enough space to grow a beautiful bush.
If you choose a larger pot for the plant, flowering will be delayed indefinitely until the roots have taken over all the free space. But the flower will grow foliage very actively. It will be difficult to control the growth of the bush and shape it. In a large flowerpot there is a risk of flooding the flower. This will lead to rotting of the roots, to dangerous disease- “black leg” and a lot of other troubles. Also in big pot the soil may become acidic.
If the pot is too small, the roots will be too crowded. This can cause problems with the leaves: they will begin to turn yellow, dry out and fall off. Also in a pot small size The “ward” will droop between waterings.
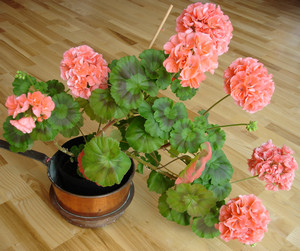
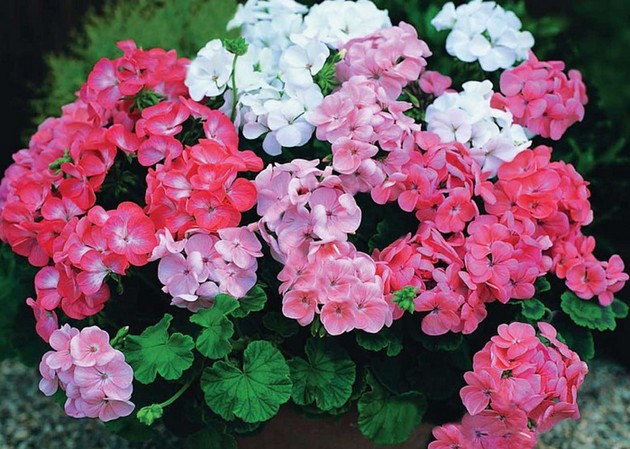
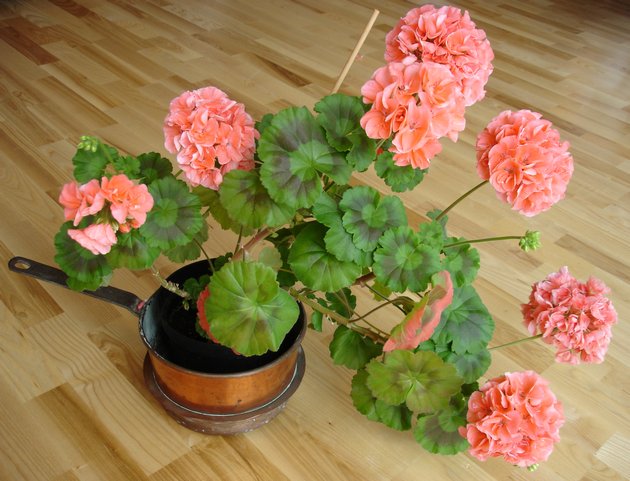
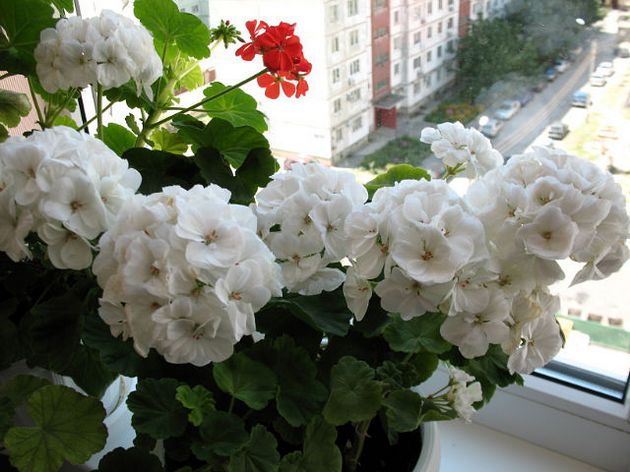
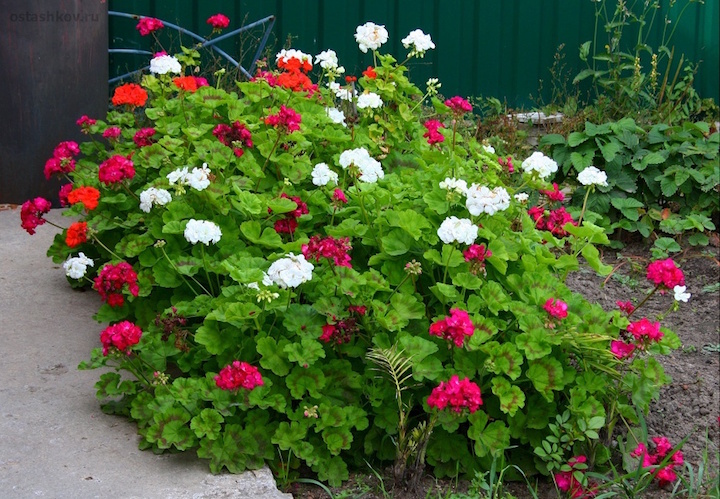
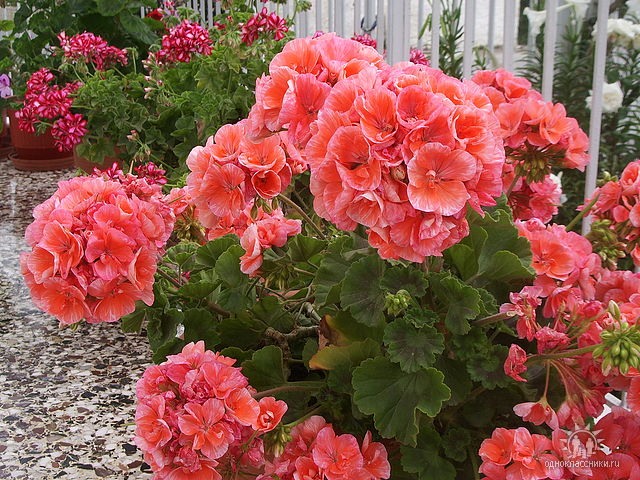
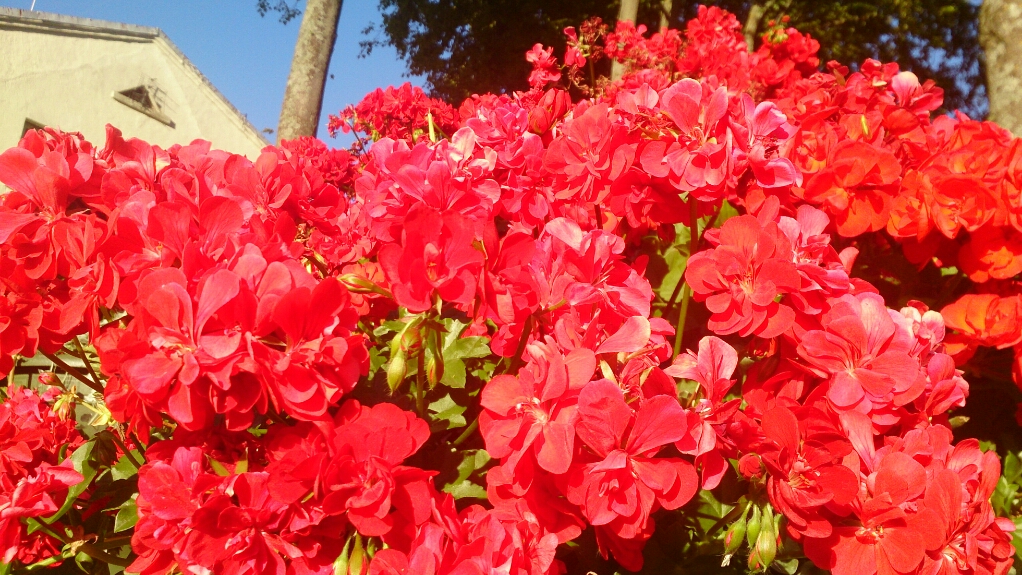
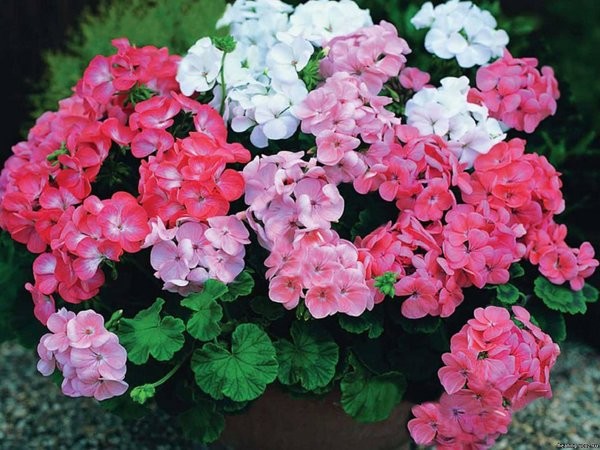
If you want to get a ready-made decorative composition and save space on the windowsill, you can plant several different geraniums as shoots in one container. Then in one flowerpot, perhaps at the same time, white, red, pink, salmon flowers will bloom!
Potty neighbors should be the same age and have approximately the same height for greater decorativeness. Of course, in this case, it is necessary to take into account the number of “tenants” in one pot and select a more spacious “living space”: 20-25 cm in diameter and 10-15 cm in height for three or four plants. The photo below shows how beautiful flower arrangements can be.
And, most importantly, no matter the size of the pot, ensure a good drainage layer at the bottom!
Soil selection
Of course, for the health and excellent development of baby geraniums, you need to plant them in good land. The soil must be nutritious and well-drained. And some flower growers believe that the soil for geraniums should be scarce enough so that the plant does not “get fat” and blooms more readily.
The soil for geraniums should be slightly acidic. With low acidity, the nutrients in the soil will be unavailable to the green pet.
So, what soil composition is preferable? There are several options here:
- garden soil, peat, river sand(in a ratio of 1:1:1);
- peat, perlite (1:1);
- peat, river sand (1:1);
- compost, clay, river sand (3:1:1);
- turf, humus, peat, river sand (1:1:1:1).
We water correctly
Growing healthy plant impossible without proper watering. Geranium is able to accumulate water, so it is not as afraid of drought as it is of overwatering. If there is a lack of moisture, the flower will begin to turn yellow, but will not die, and if there is too much moisture, it may rot or get sick.
Basic Rules:
- The water should be settled and at room temperature.
- In the spring, during the growing season, we water the plants abundantly as the earthen clod dries out.
- In the heat of summer, you will most likely need daily heavy watering.
- In autumn, the plant prepares to rest. We water geraniums infrequently, but make sure that the soil does not dry out.
- From November, during the dormant period, water the flower little by little and rarely, once a week. If the plant is resting - once every 10 days. Extremely moderate watering It will help to restrain growth when there is a lack of light, prevent the plant from stretching, and protect the roots from rotting during weak vegetation and low ambient temperatures.
- After the watering procedure (after 30 minutes), drain the excess water from the pan.
- Moisture should not get on the leaves. Geranium doesn't like this.
- Because of high humidity and frequent watering, geranium can dry out and drop its buds, its leaves can turn yellow, and its roots can rot. A flooded flower is defenseless against fungal diseases.
How to water young shoots?
- After sowing, geranium seedlings are watered carefully around the perimeter of the container as the soil dries. To build up the root system, fertilizer with a predominance of nitrogen should be applied once every two weeks.
- The picked seedlings are watered from a watering can with a narrow spout at the root.